
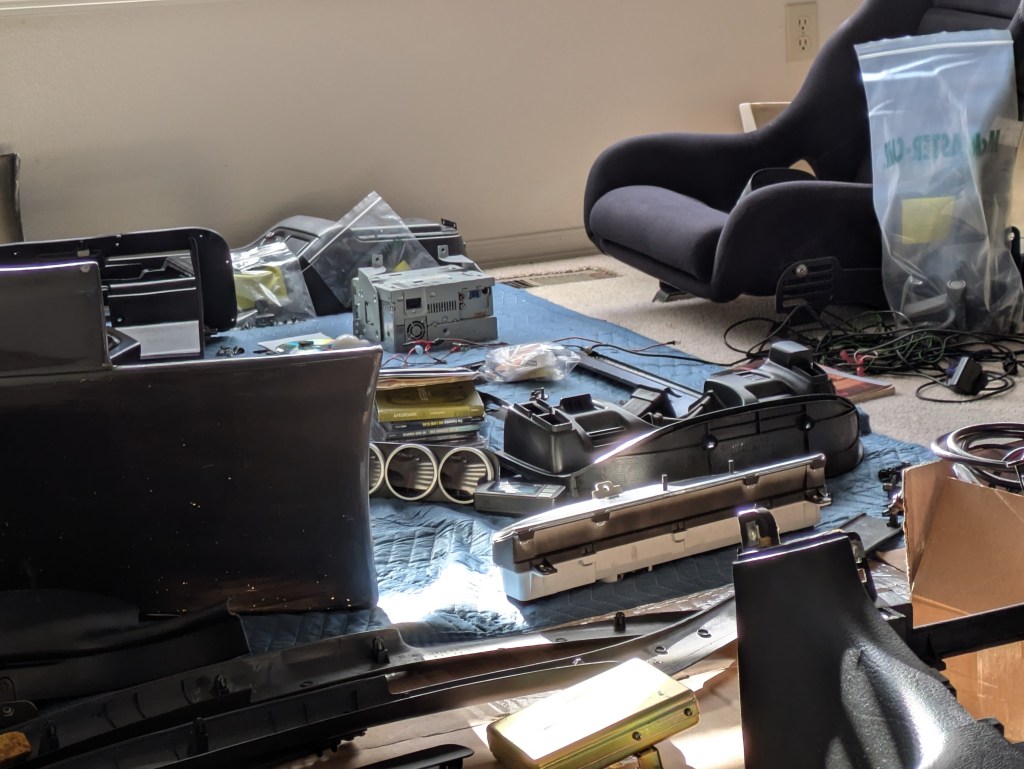
Regardless of scale, projects usually have a mandated sequential progression if you want to be at all efficient with your time/energy. While this forced cadence often results in a “while you’re in there” mindset for me, it can also manifest in the “hurry up and wait” situation.
The rear half of the interior was a completely independent project from the rest of the car; there was nothing that needed to be done elsewhere before the half cage and interior could be reinstalled. The front half did not share this trait as I knew that there were going to be some wiring routing questions that I wanted to solve before putting the dash back in, which meant the engine install paced the interior projects. This is not to say that progress was impossible, as I had been planning the build sequence extensively for months, I knew what projects I could tackle independent of the state of the vehicle.
The first one was a holder for my Defi Link Controller for my Defi 60mm boost/coolant temp/oil pressure gauges, as well as my Defi Link OLED Display. For those unfamiliar with the technology, one of the reasons people complain so much about non CAN bus/standalone aftermarket gauges is the wiring bulk associated with running such setups. If you have to run power, ground, and signal to every single gauge, it quickly becomes impractical. Defi figured this out a long time ago, and via newer, CAN-like communication standards, significantly cut down on what was required to run the gauges. Instead of the sensors directly inputting to their readout, they run to this central box that not only receives and exports the data in a daisy chain-able 4 wire bundle, it also can be used to configure alarms, record and replay data logs, and record and display peak values. While pretty old school compared to the CANBUS stuff we have now, it came with the car and it all works, and I want to keep it around because you never see it anymore.
Up until this point, the Link Controller had been velcro-ed to the underside of the dash. While it is a quick, easy, cheap, and shockingly resilient solution (it only fell twice during my ownership up until this point), I was unsatisfied it by it for the long term.

I settled on 3D printing a cage for it, that would house the unit while still providing clear access to the wiring, while being able to be bolted to the dash with some countersunk hardware. The goal was to be minimal while still structural enough that the odd knee bash wouldn’t easily break it.
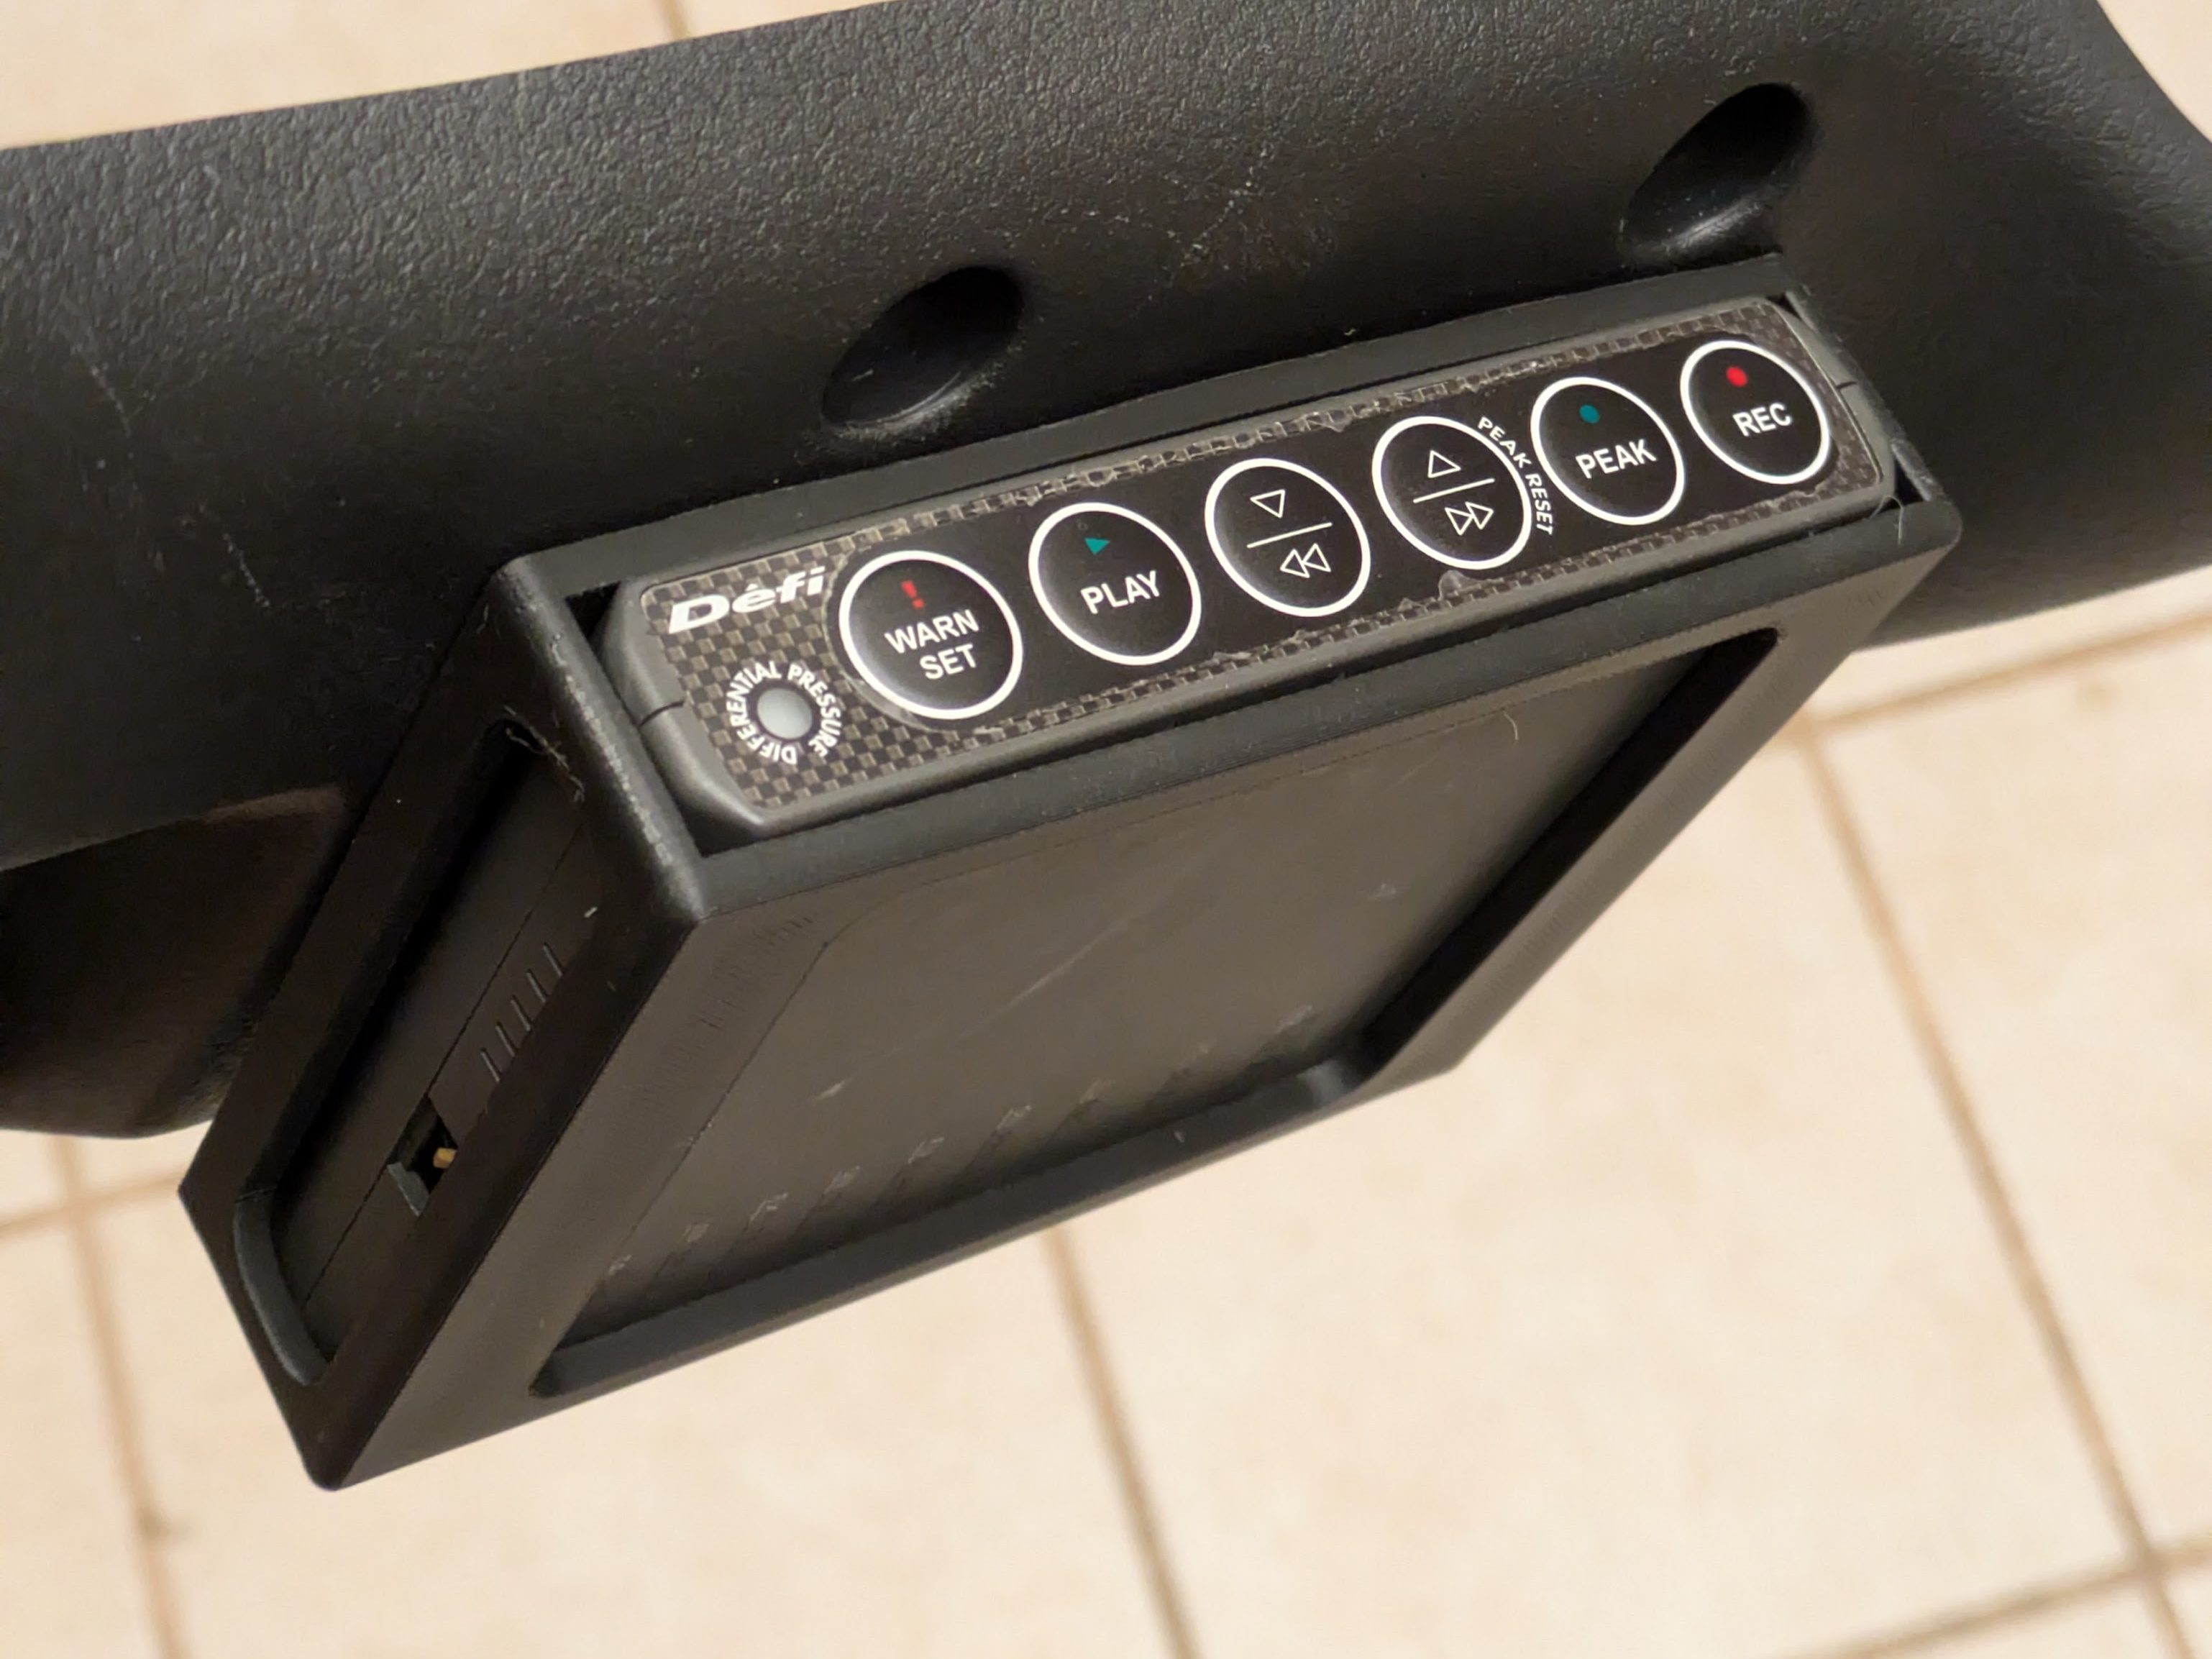
My first print ended up being the last, as the fit was perfect on the first try. The Defi unit had a friction fit that perfectly straddled retention and removal if needed. The rest of the dimensions lined up great on the controller and interior. This is printed out of Bambu Labs PLA Matte, as it is the material I have the most experience with by far. It has sagged a bit after some hot days in the car, so I intend to reprint it out of a more resilient material. It is still plenty functional.
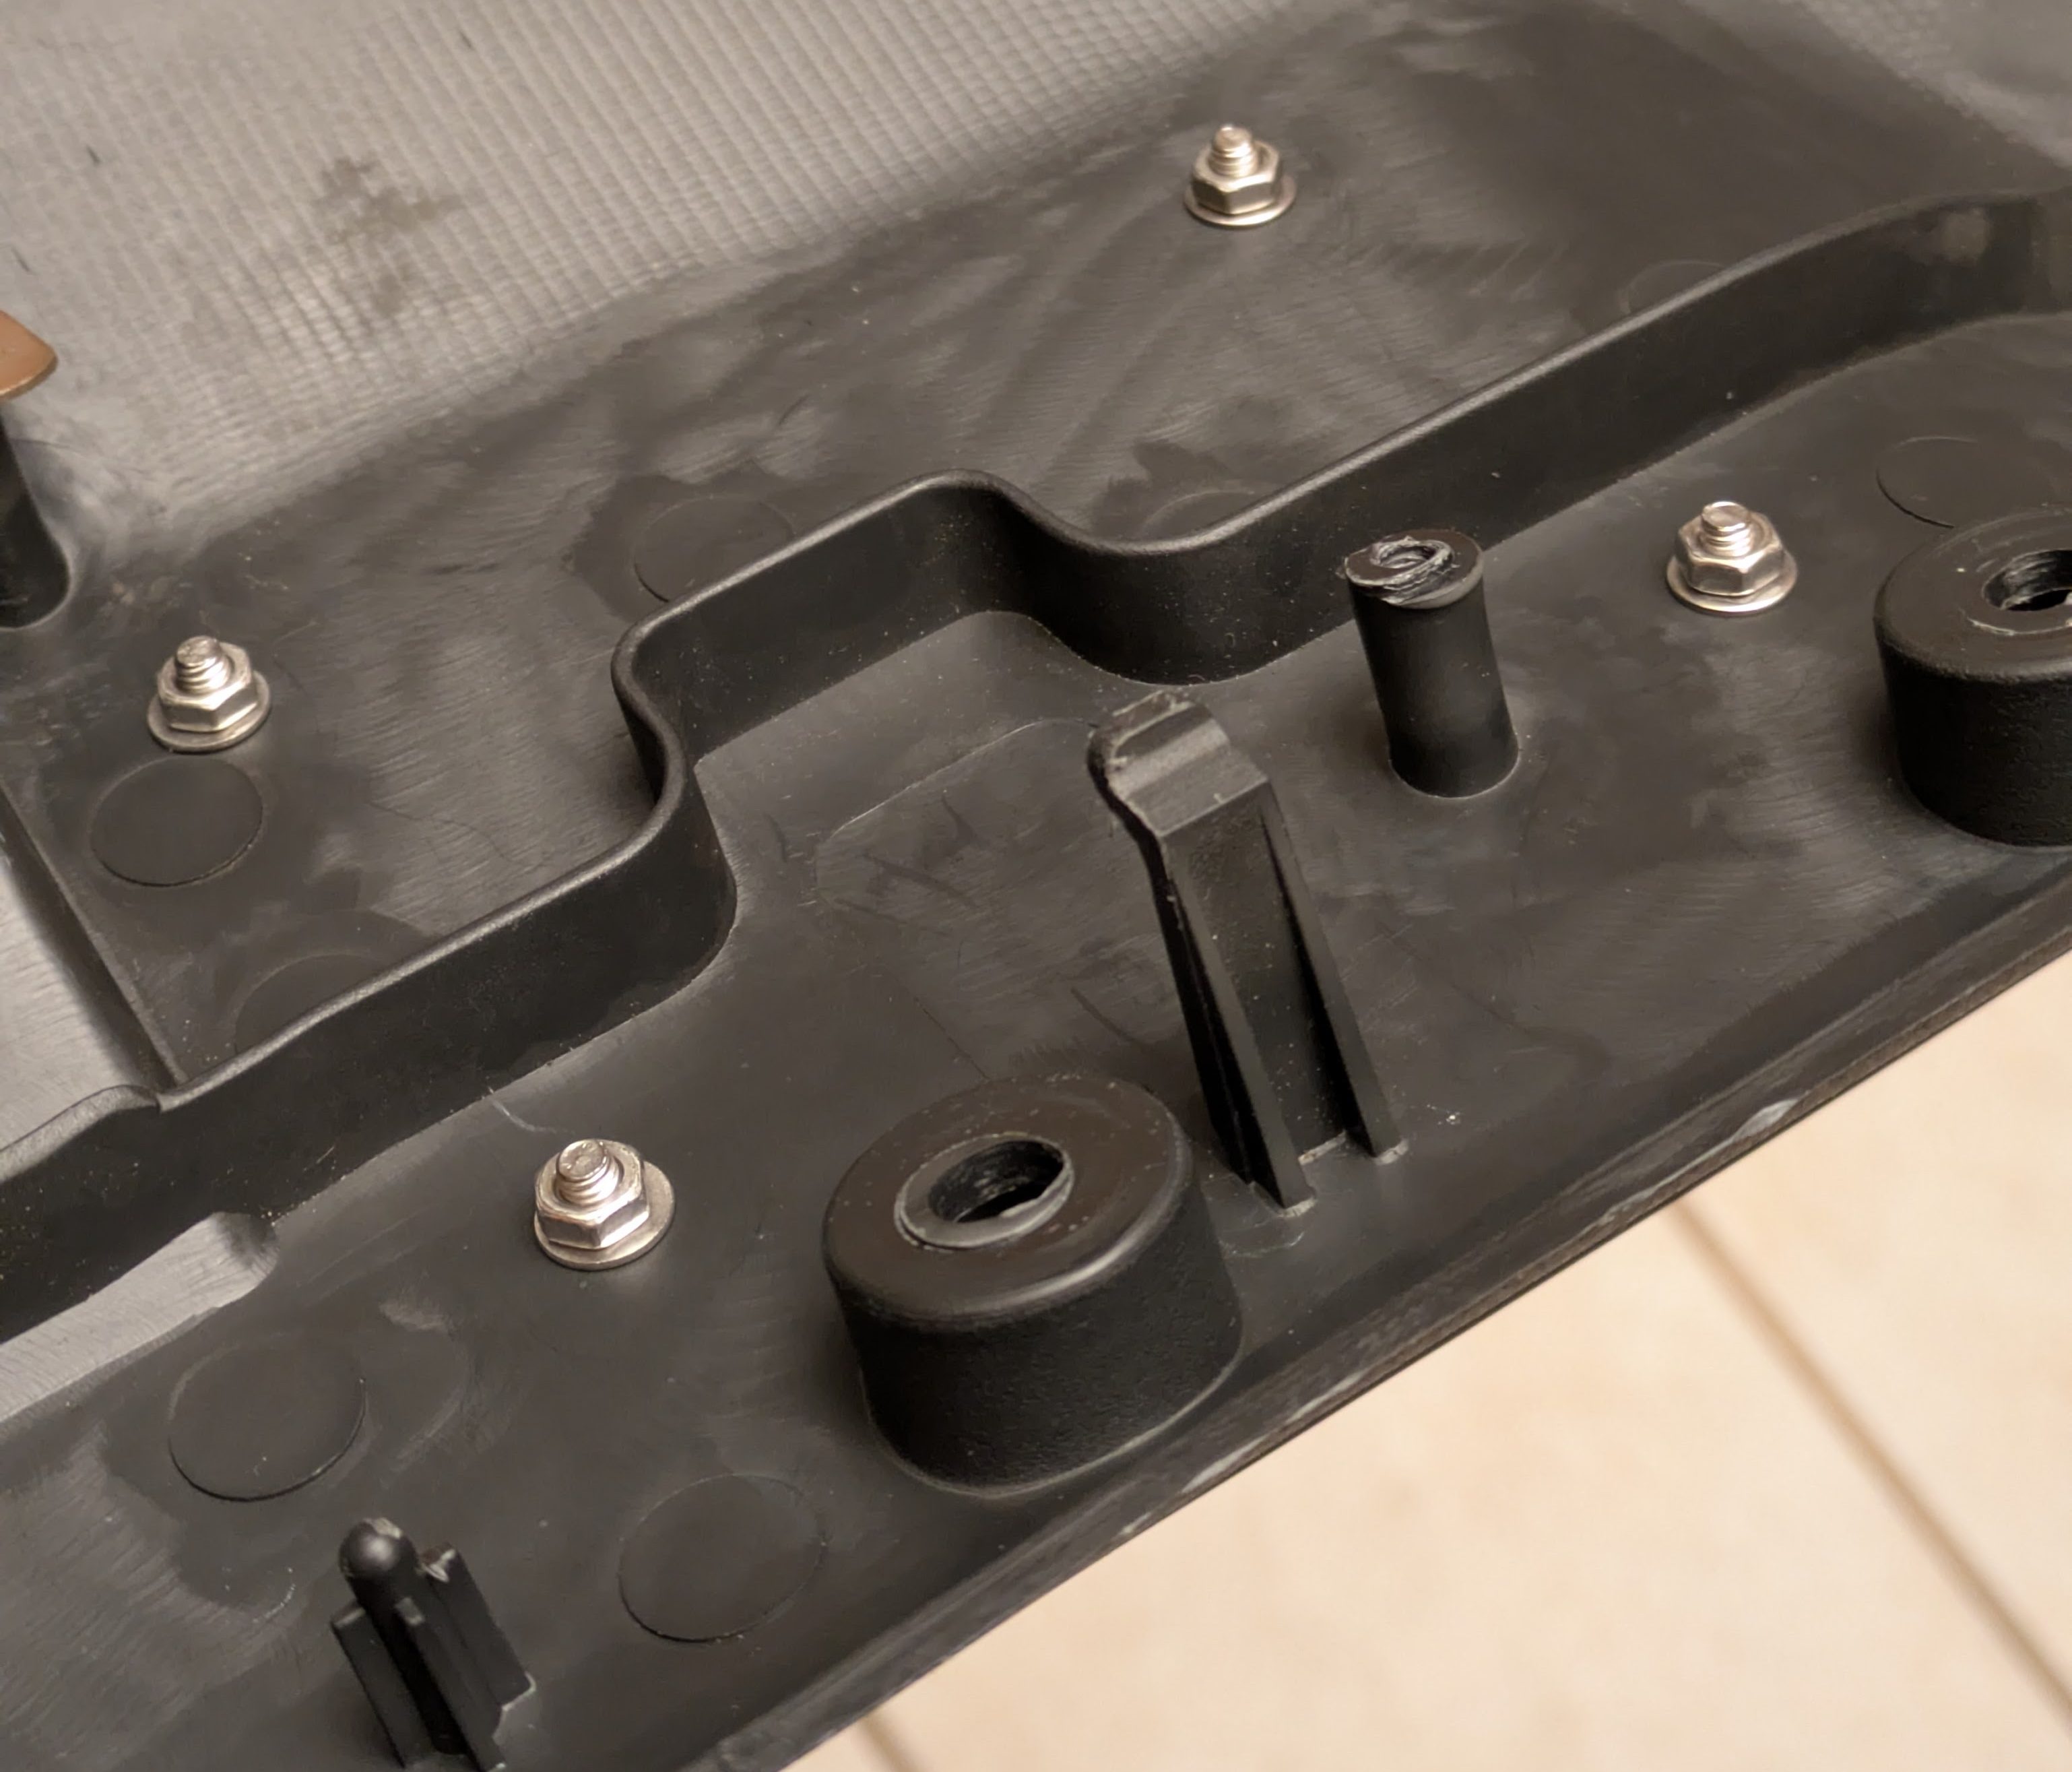
I ordered one of those Chinese variety packs of small metric countersunk hardware to bolt it on to the kick panel. I opted to relocate it from it’s previous location on the kick panel (above the driver’s right knee) to above the driver’s left knee as there was more flat landing area for the unit to rest on. Luckily the kit came with plenty long screws as well as washers for shimming, and with some creative placement of the unit, I was able to dodge all the internal metal reinforcement with the hardware while retaining access to the hardware for the kick panel itself. It turned out great.
Another one of those “get done anytime” projects was related to the pedals. Nissan offered stamped metal Nismo pedal covers as a dealer accessory for S and R chassis in the 90s and early 00s. They’ve commanded a premium for a long time, but these ones are even cooler (in my opinion)
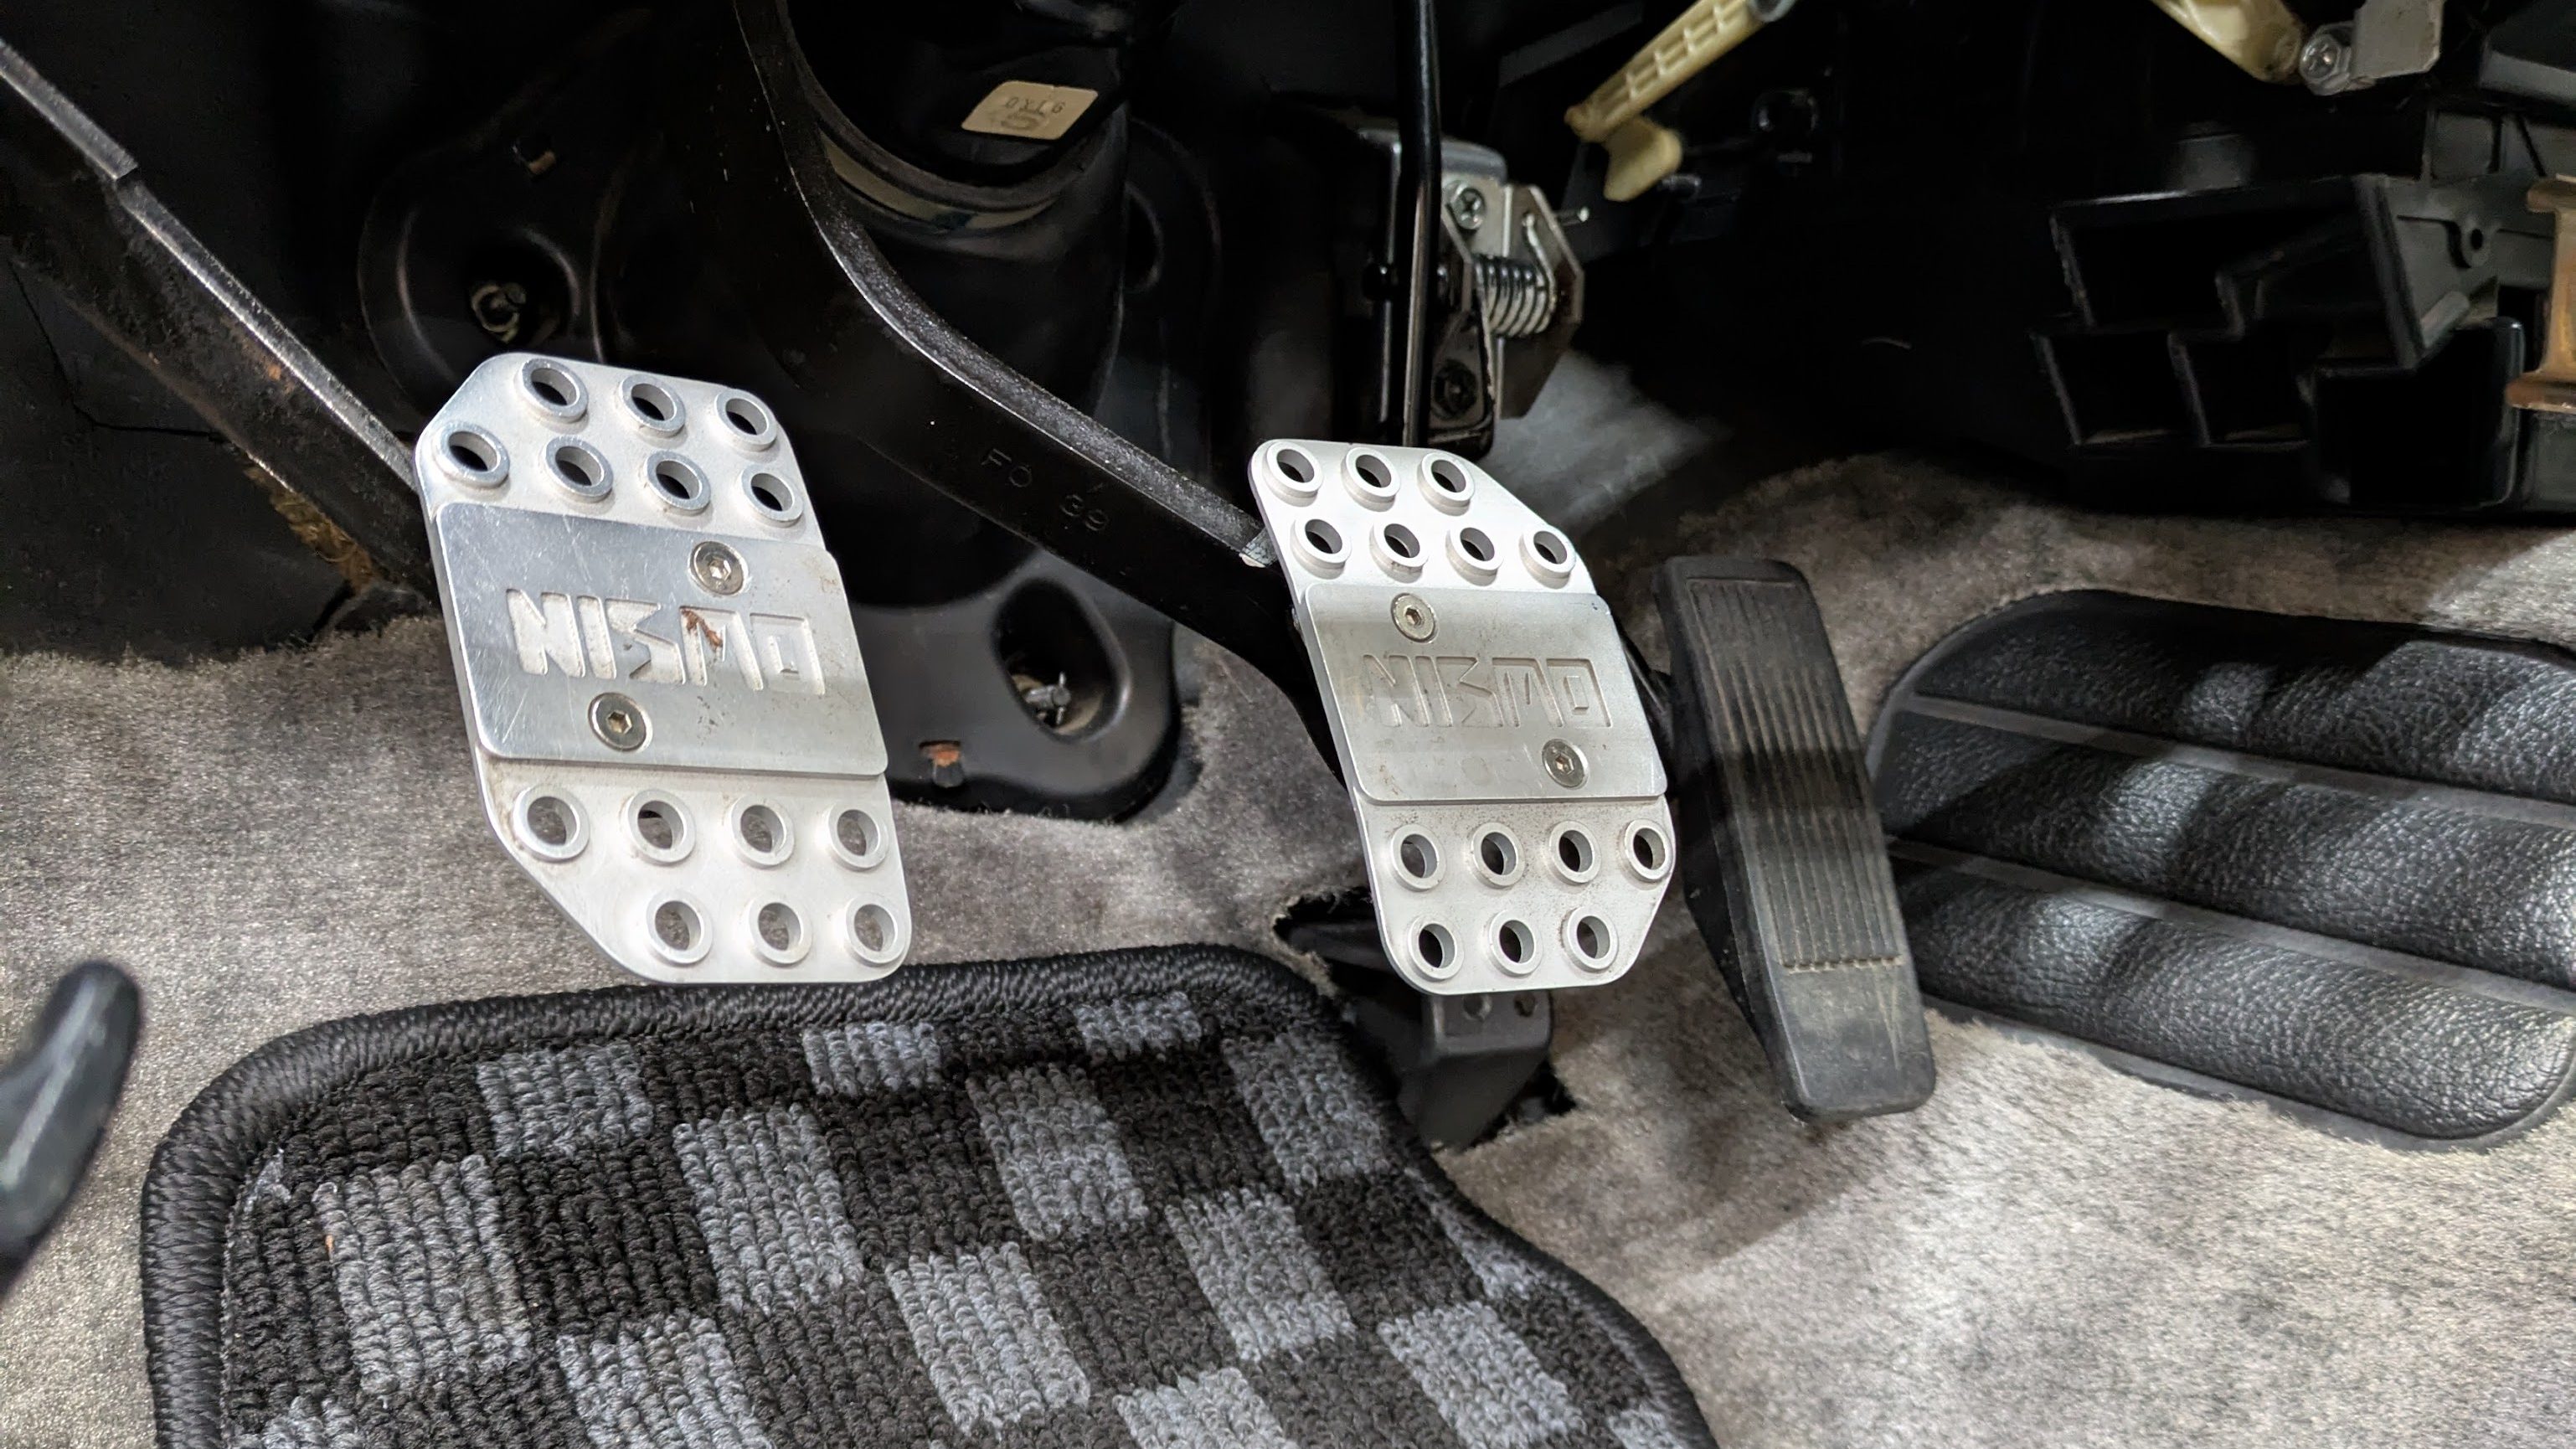
The previous owner of my car wanted a set (because they are cool), so with the help of his father who is a machinist, they set up and manufactured a 1-off set of replica pedal covers. While shameless replicas, the fact that these are machined from a billet is pretty awesome.

The car came to me with the clutch and brake covers installed, but the gas pedal cover was in a box of parts in the back of the car. He had mentioned something about it being difficult to mount, so he never ended up putting it on. I pulled the pedal in anticipation of this modification, and after looking at it, while inconvenient, it is not impossible.

With some marking and drilling, and some very creative assembly techniques, I was able to nestle the hardware into workable homes that positioned the pedal cover in an optimal location for footwork without risk of locking the throttle against this floor. This was once again accomplished with small countersunk hardware that were included with the car, this time in the 8-32 variety.
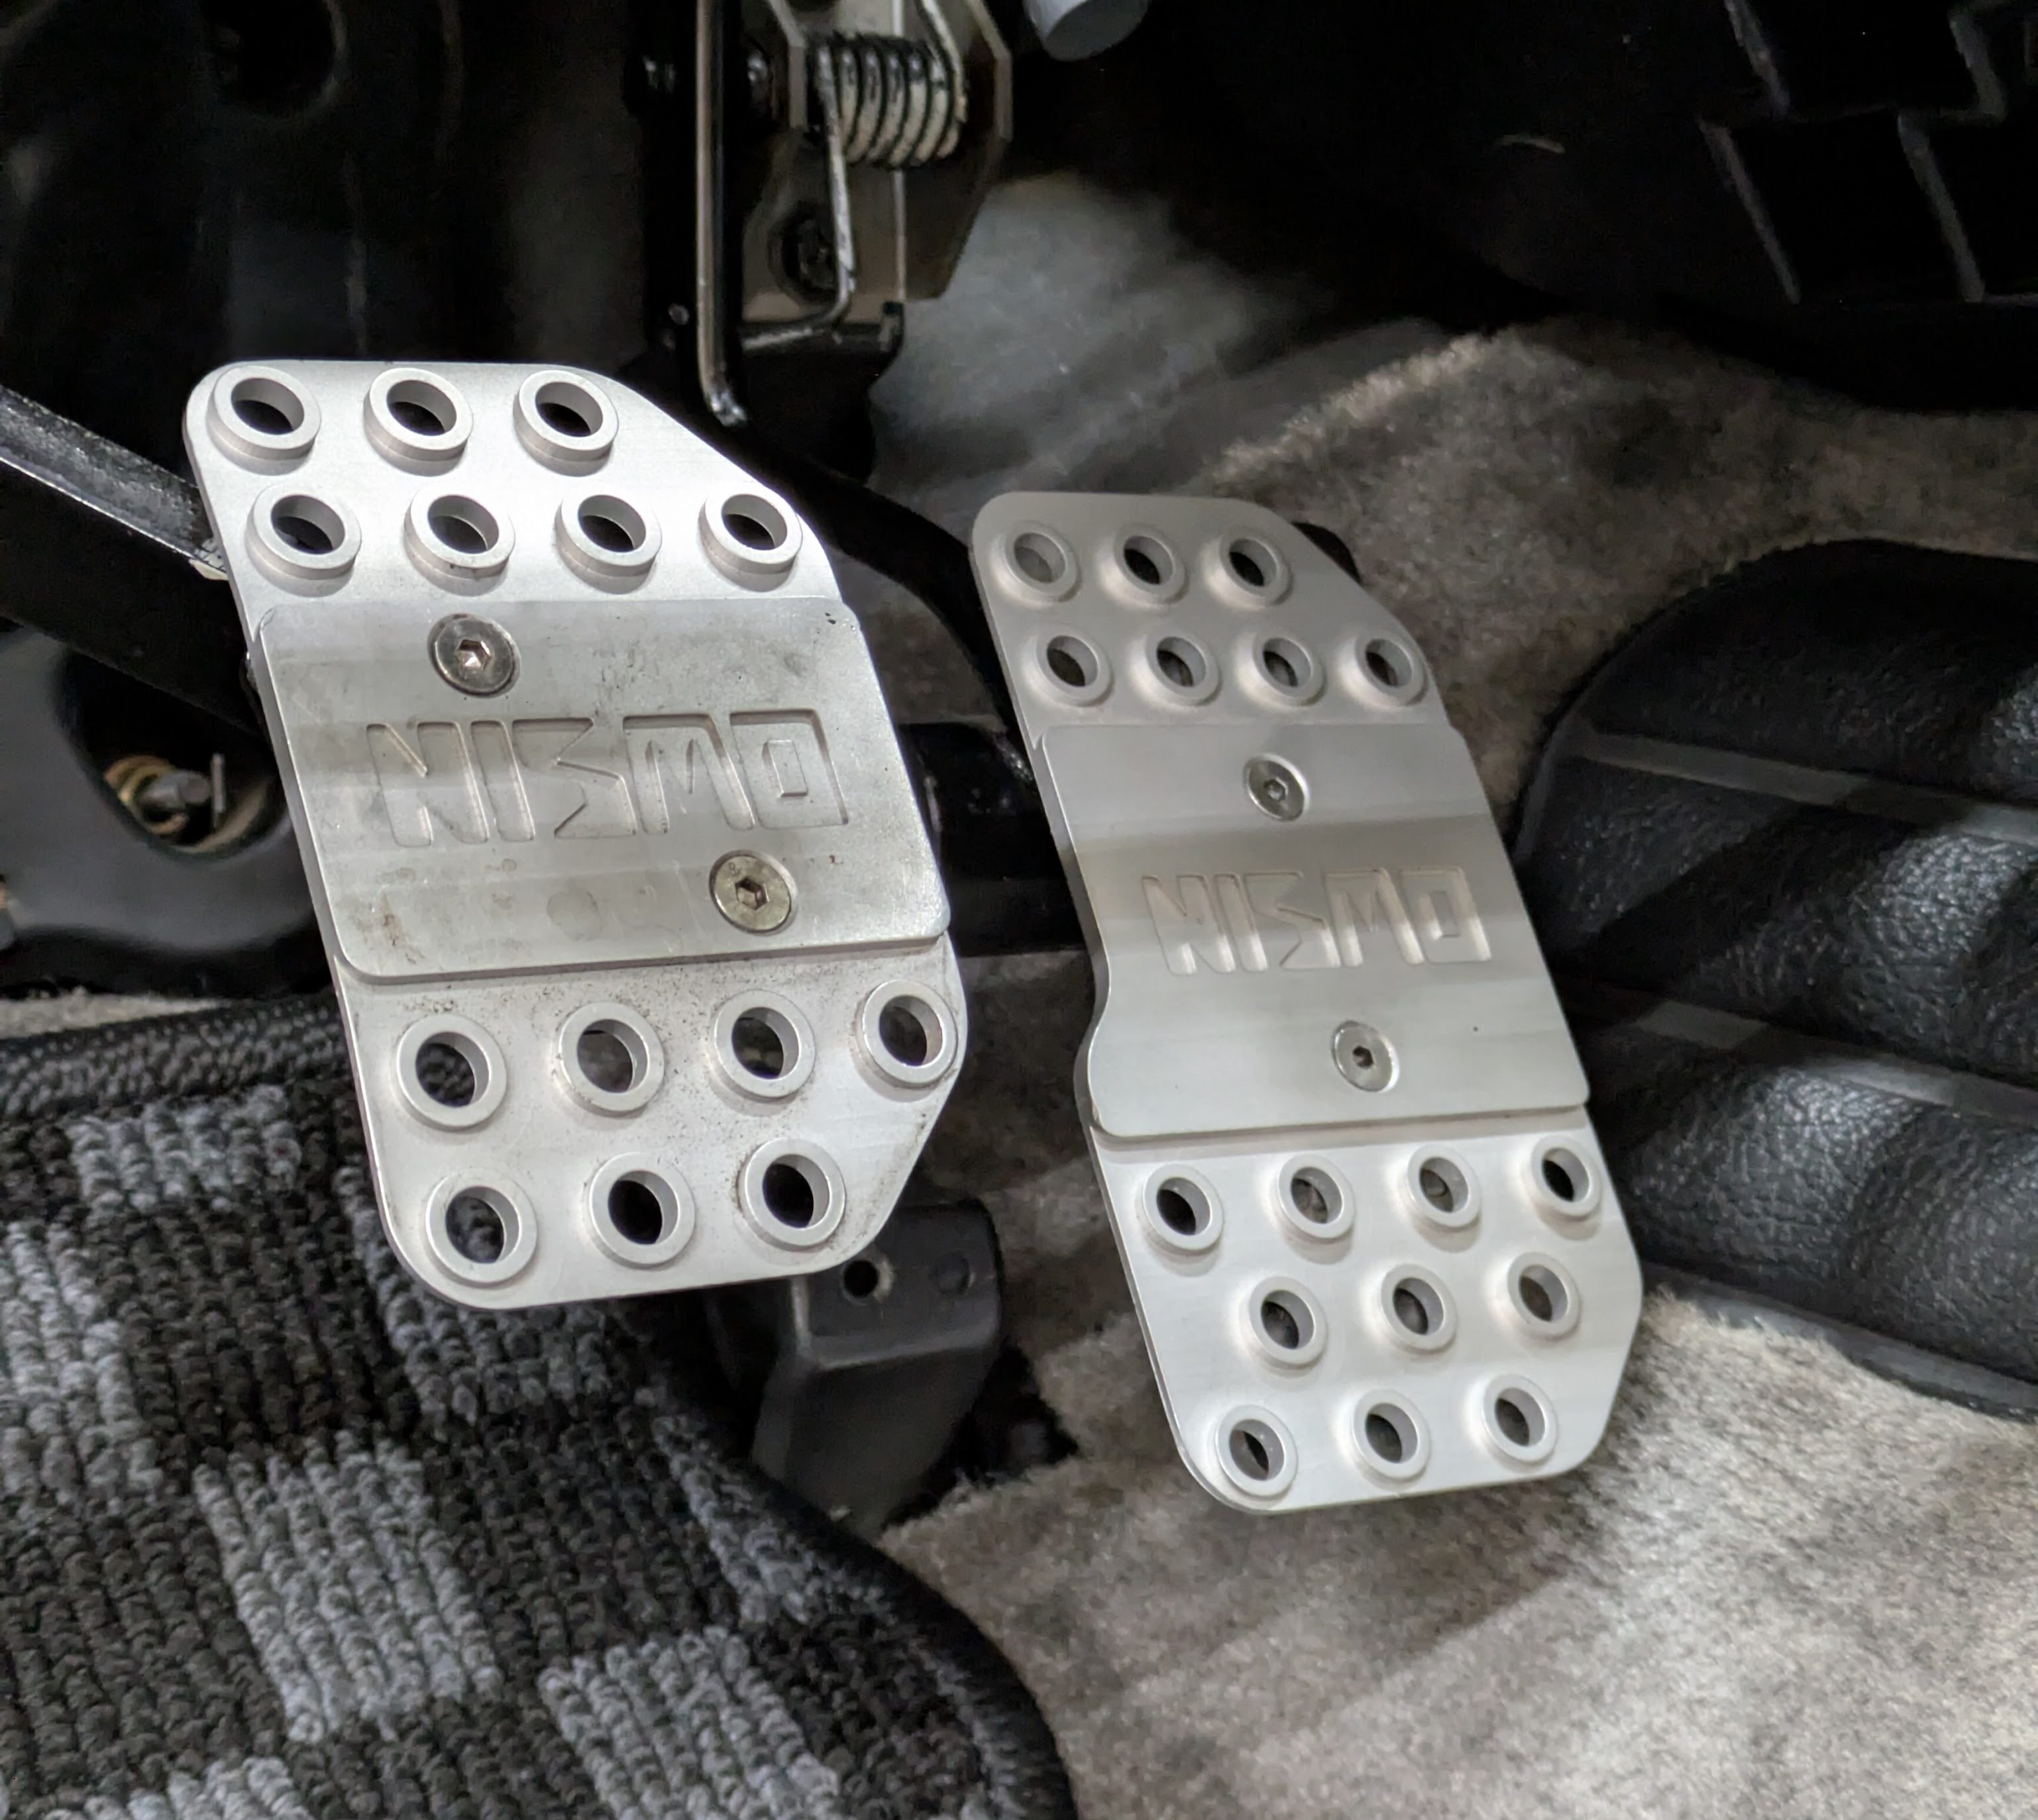
With the gas pedal squared away, it was time to move on to the other two. While already having their respective covers, the kinematics could use some work, primarily the clutch pedal. Like everything else on this car, these were engineered for mass scale and low cost, and the engineers could have never anticipated what people would be doing to these innocuous sporty-ish economy cars 30 years later.
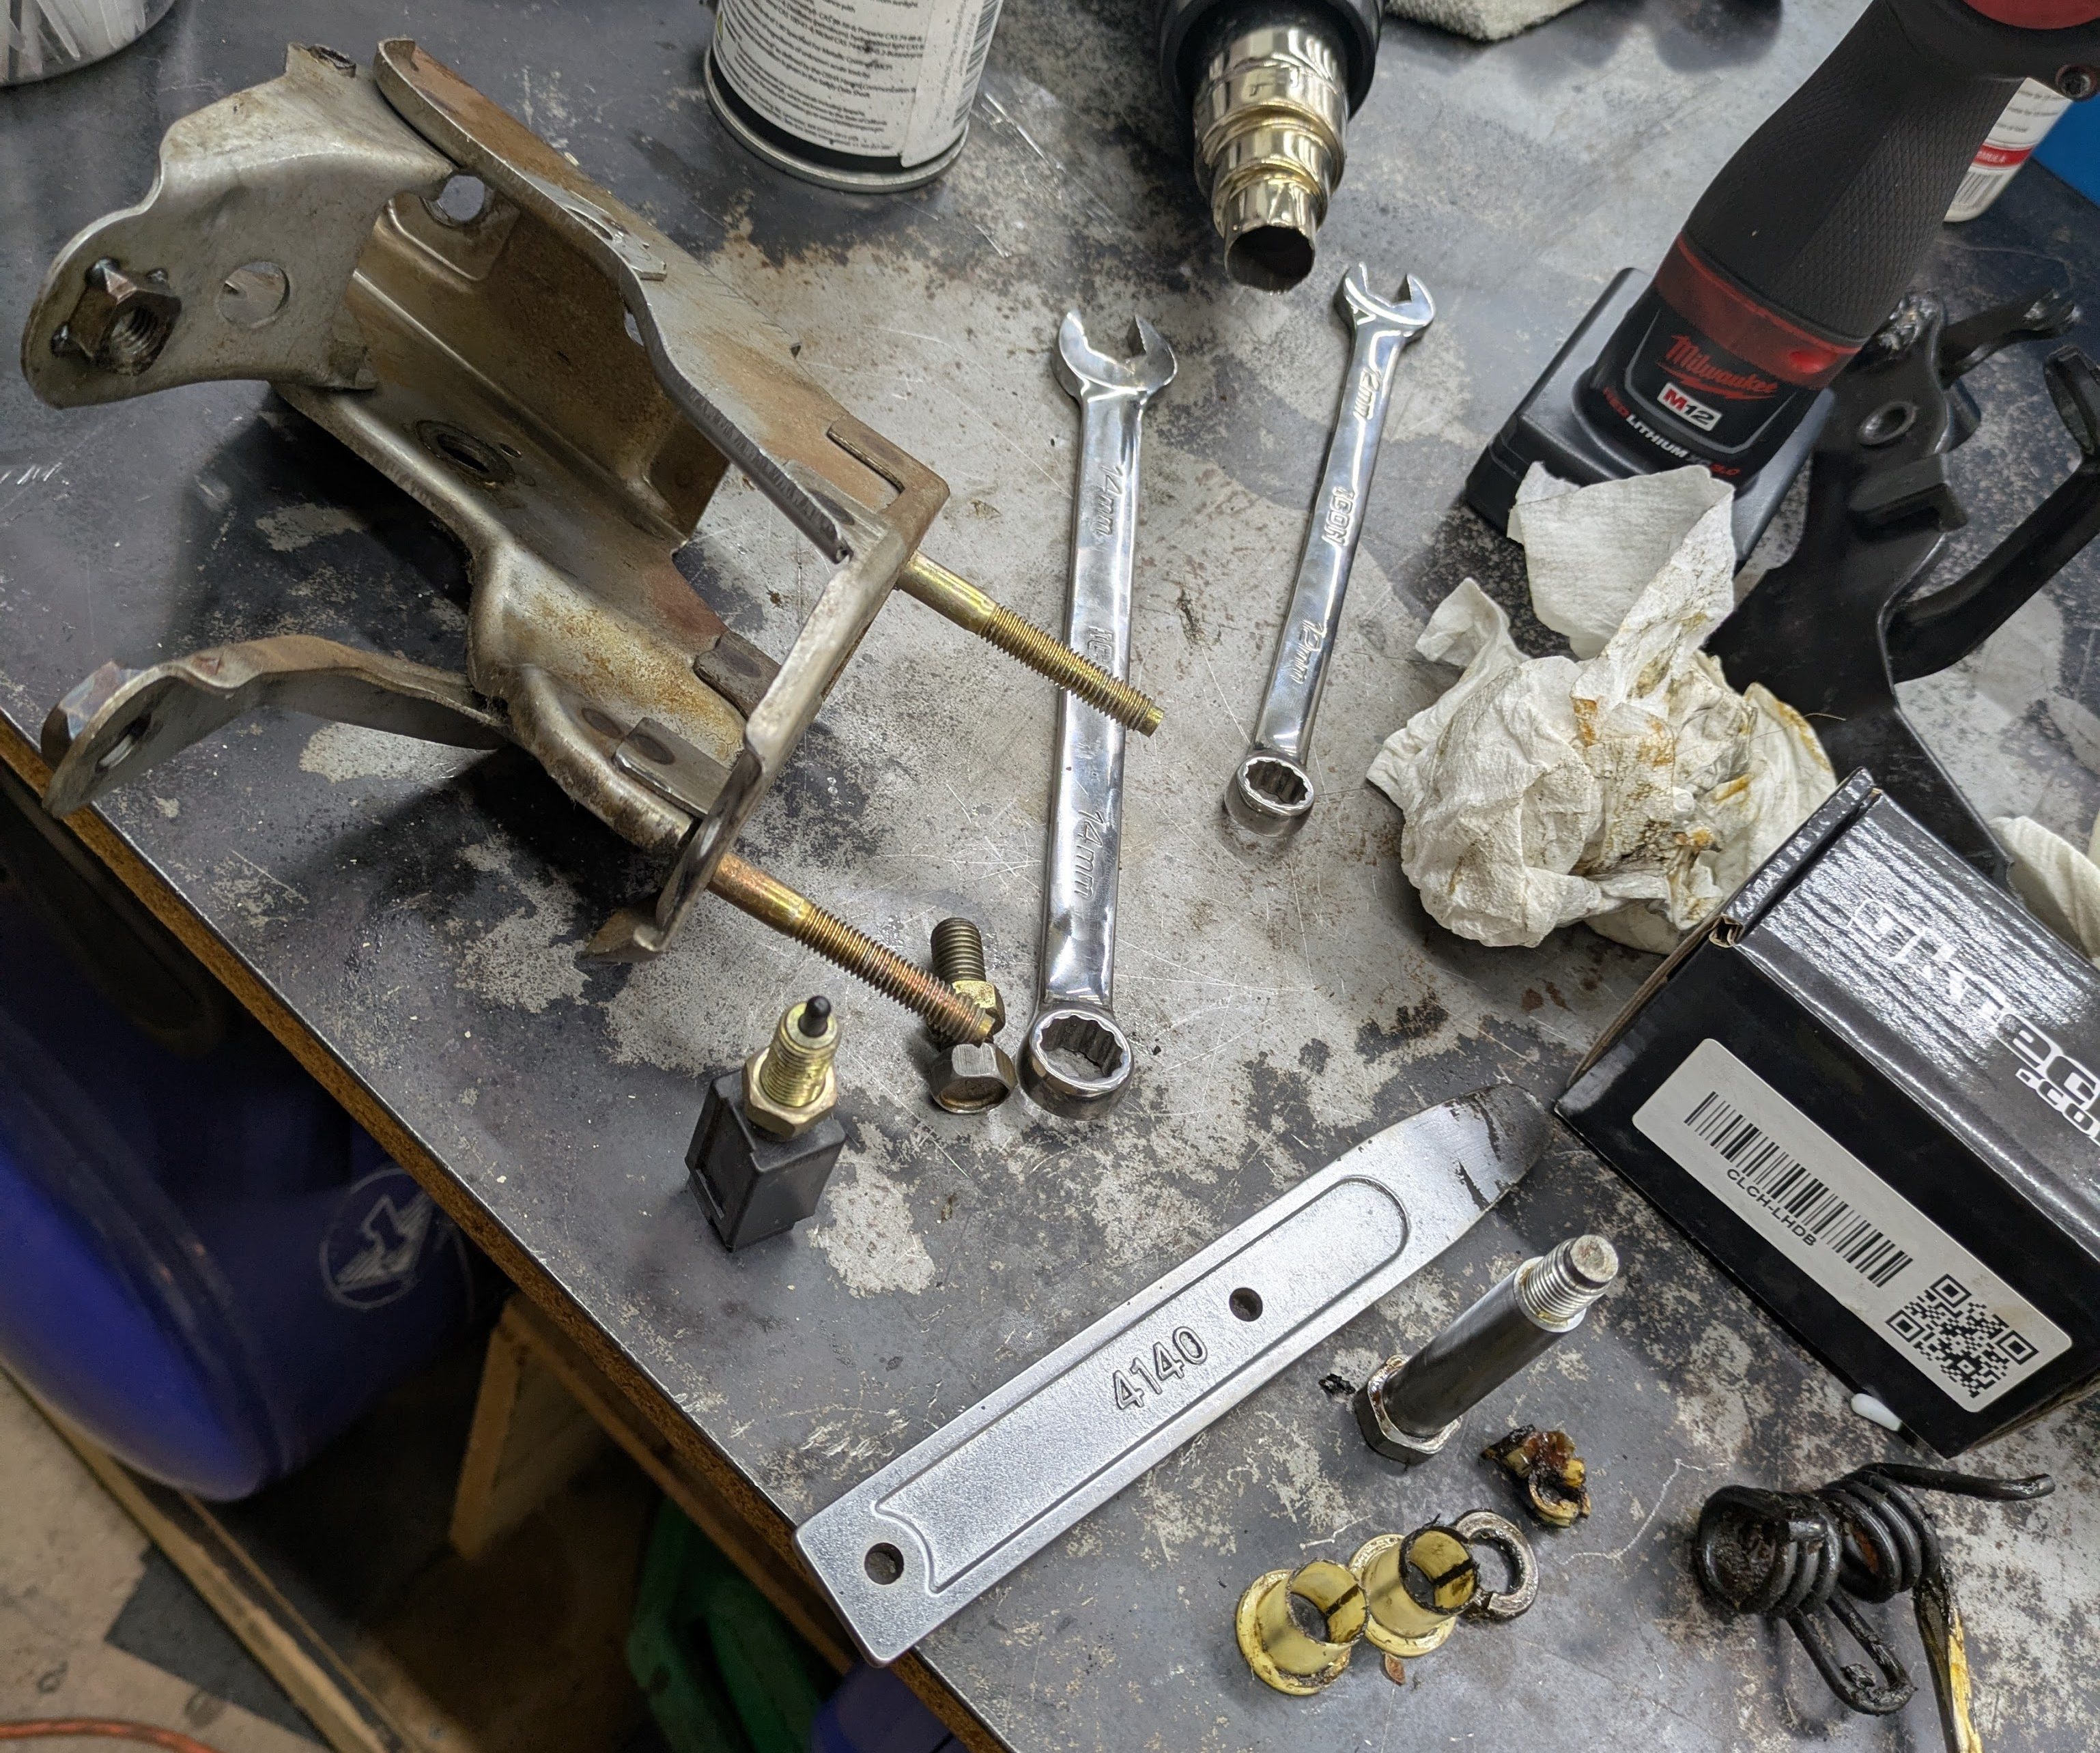
This meant that with age and the upgraded clutch this car had for many years, the clutch pedal was well worn out. Most of the plastic bushings were totally smoked, and I had already had the most critical pedal pad (the one that hits the clutch switch) fail last summer in a parking lot. I had removed the pedal initially to weld in the GKTech Clutch pedal brace to stop the increased pedal pressure tearing the spot welds apart, however knowing how absolutely smoked the rest of the pedal assembly was, the reinforcement on the metal bracket would be a bit of a waste if the rest of the wear items were falling apart.

The reinforcement bracket welded on nicely after I sandblasted the bracket. I gave it a few coats of Steel-It. Definitely one of those “I cannot believe I am rebuilding this shit” moments, but I’m glad I took care of it.
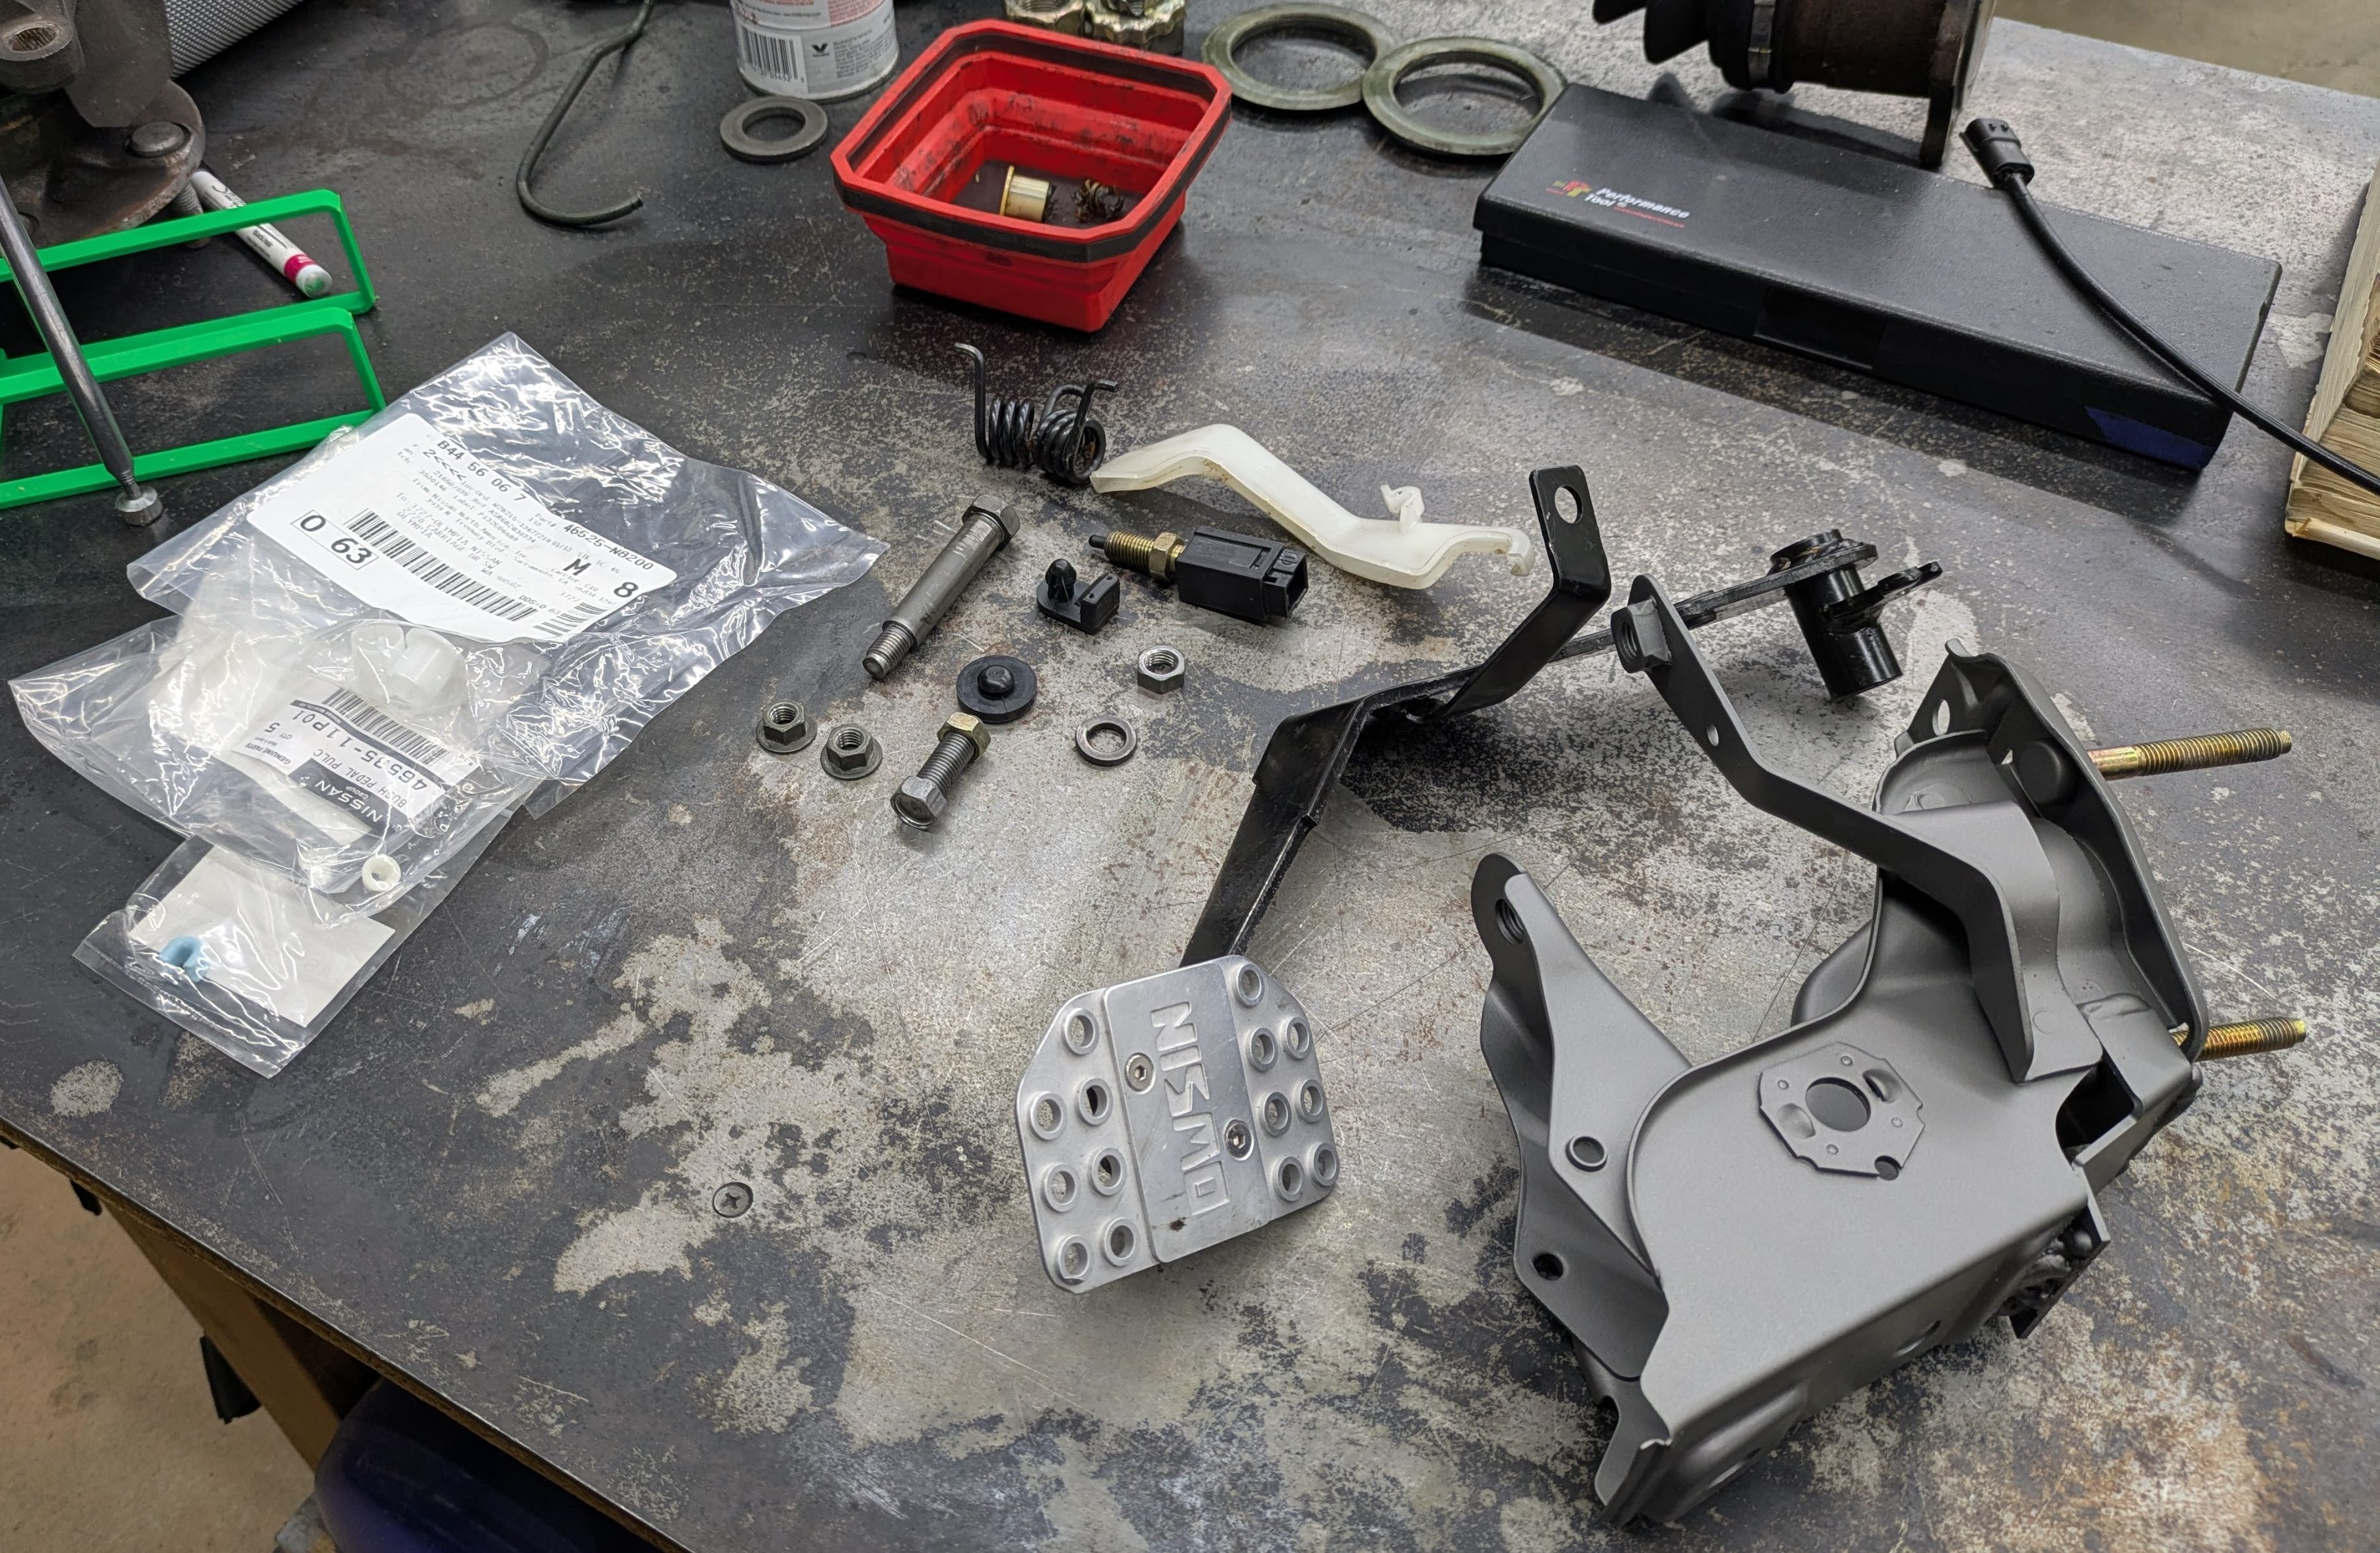
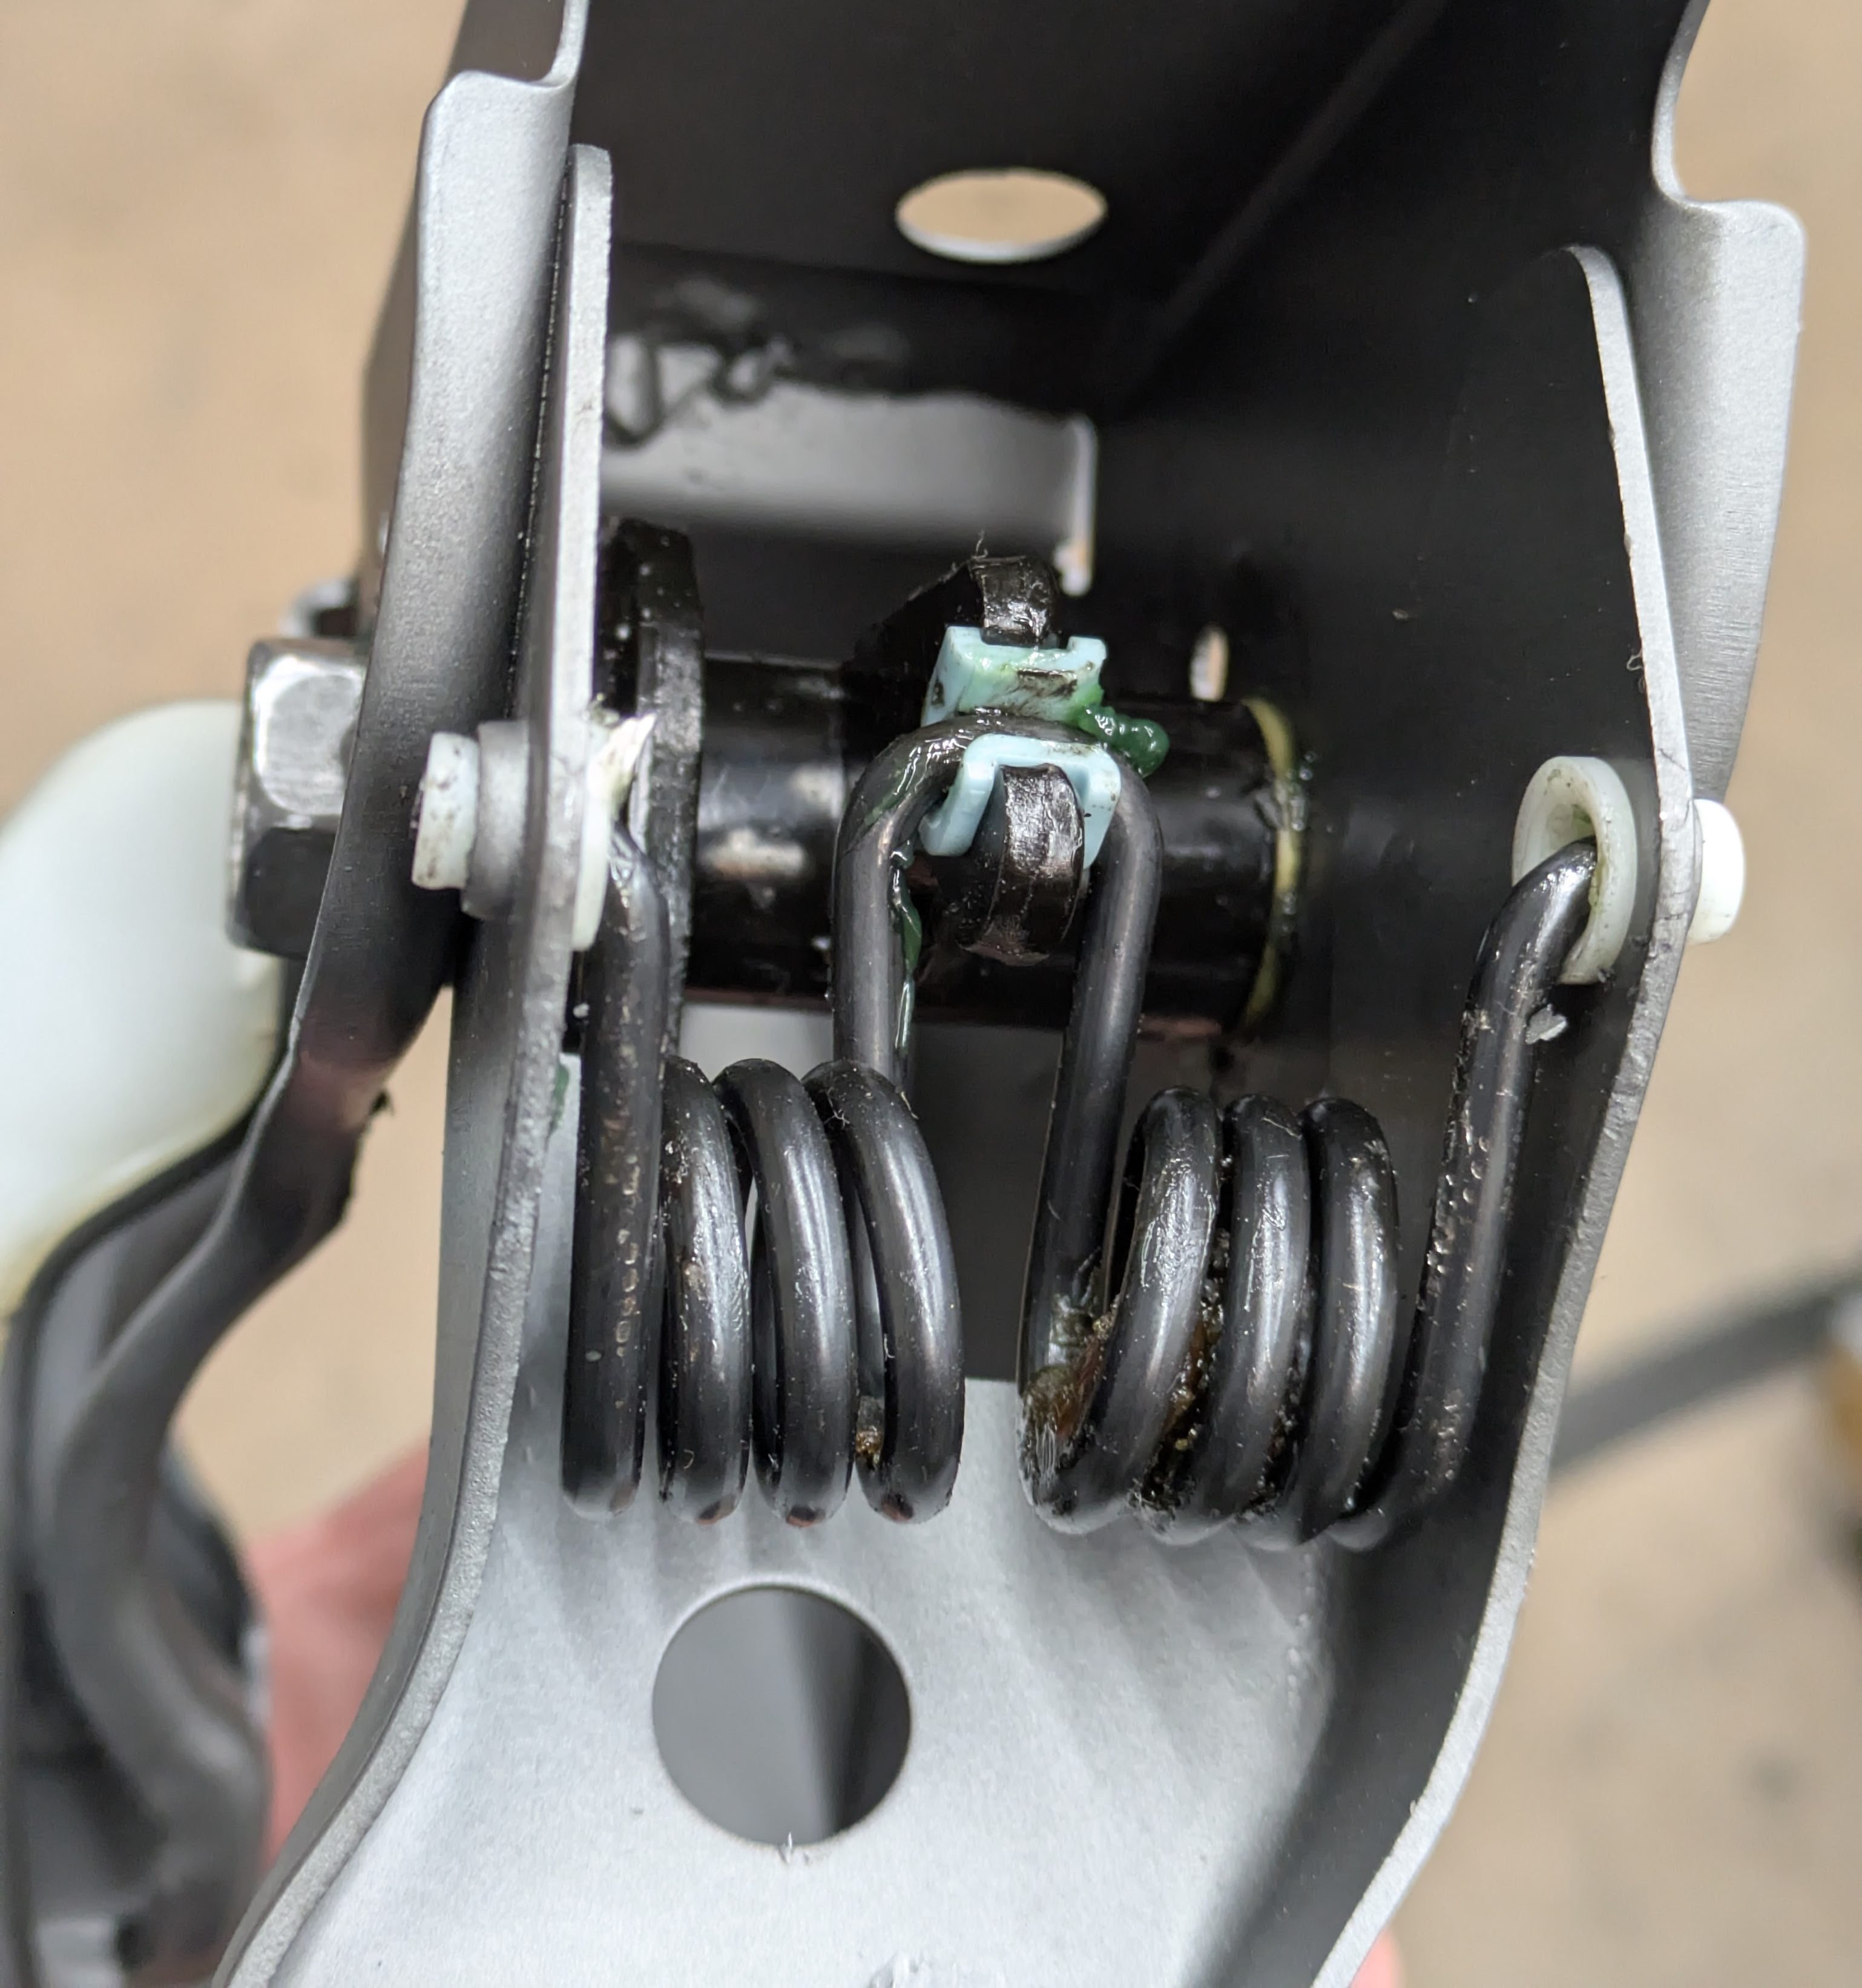
I decided it was either now or when the car was all back together, so I just bucked up and ordered all of the parts to rebuild it. The age and (understandable) neglect had resulted in some wear on some of the hard parts. The return spring interface bushing to the pedal arm had split and failed, allowing the spring to cut a divot into the arm itself. I ended up filing the arm down to allow the new bushing to fit, and after weighing the options on welding and reshaping, JB welding and filing, or just leaving it, I decided to leave it. This is a pretty small gap overall, and if the space causes the bushing to split prematurely due to lack of support, so be it. It wasn’t bugging me before.

The other damage that had been done was when the lower pedal pad, the one that stops the pedal at the bottom of the stroke, had failed, allowing the pedal to overtravel and twist as it ran into the firewall. I had noted this with the 3 pedals in the car, and figured it was factory variance or normal wear. When it was all apart, I took the time to straighten the pedal back out. This did not take a tremendous amount of effort, because as previously stated, these cars are made out of cheese.

While few and far between on this project, there were some days where I just wasn’t into the idea of working on the car. I’ll usually go through acute periods of intense demotivation, but when given the day, I usually force myself to do at least something productive. This was one of those times where I waved the carrot in front of myself with an indoor project that can be accomplished with little mess and incredibly simple tools.
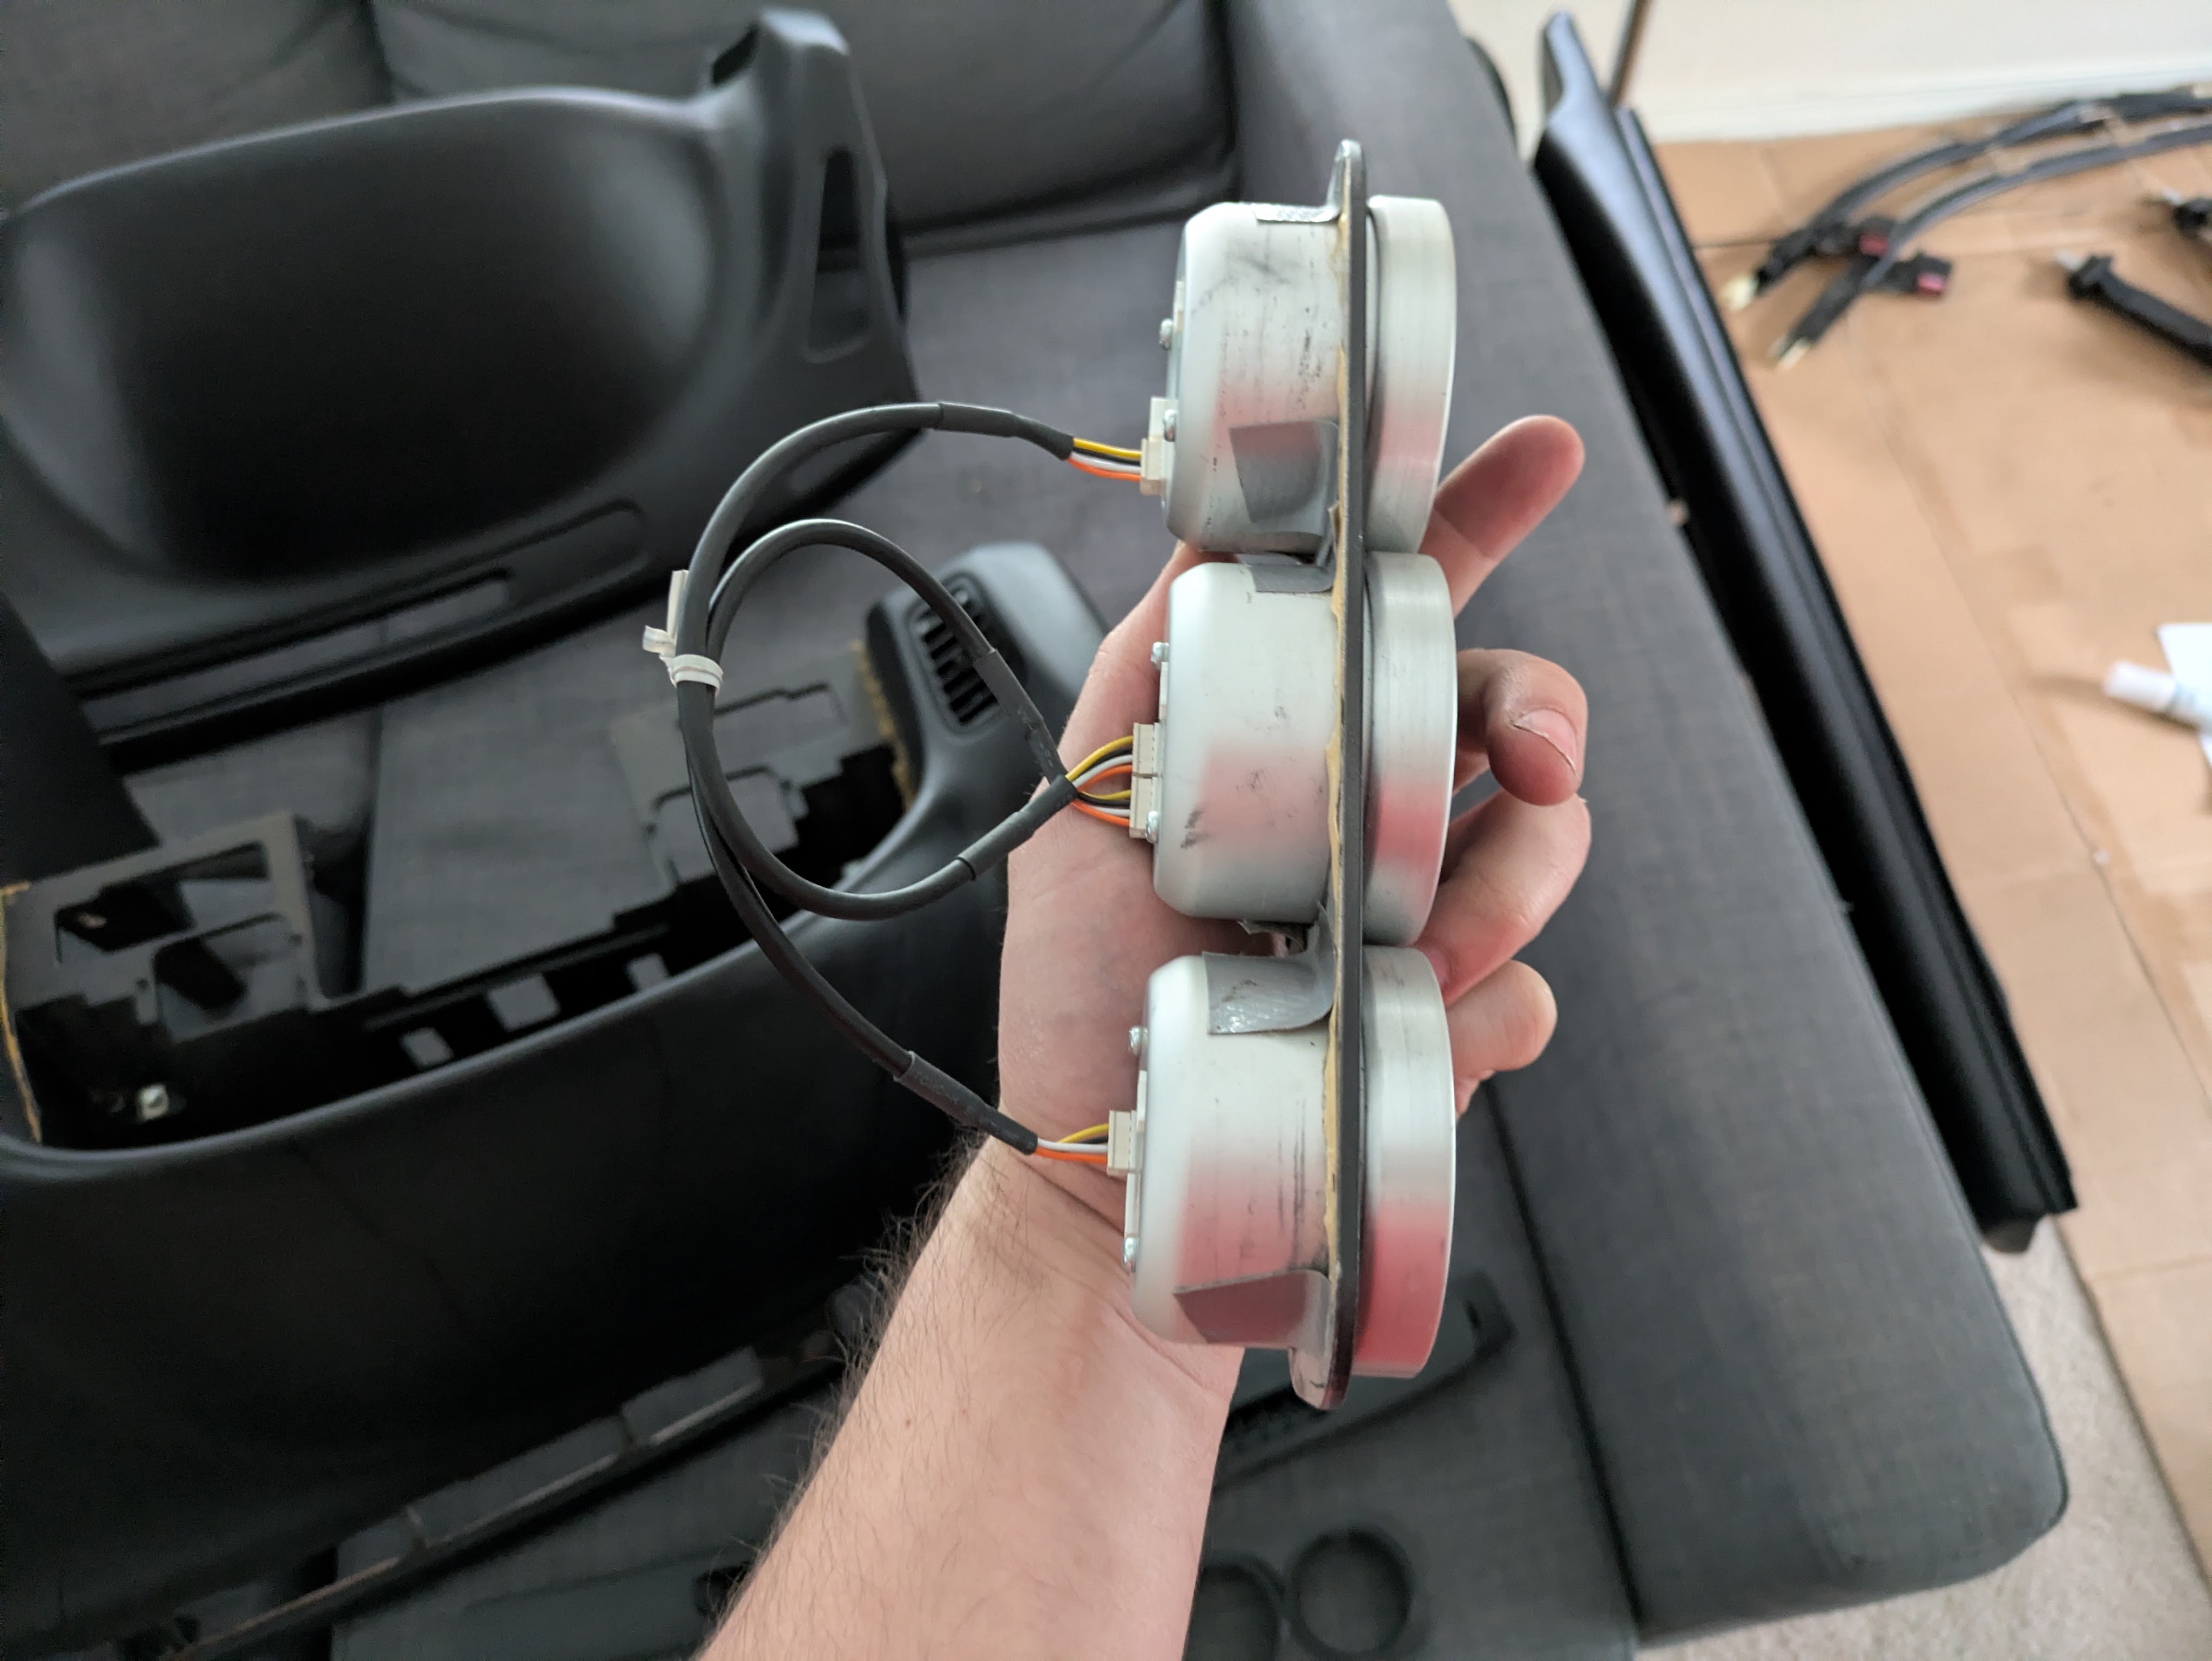
My car when it came to me had a flat aluminum plate holding the 3 Defi gauges in the vent hole. The solution was acceptable, but similar to the Defi Link Controller, it had failed on me twice, causing the gauges to fly out of the dash. Rather than just accepting it, a quick search found a 3D printed, angled gauge holder for the center vent for 60mm Defis. A quick cost analysis made me realize it was cheaper to buy it than make it, so it showed up on my doorstep a few days later.
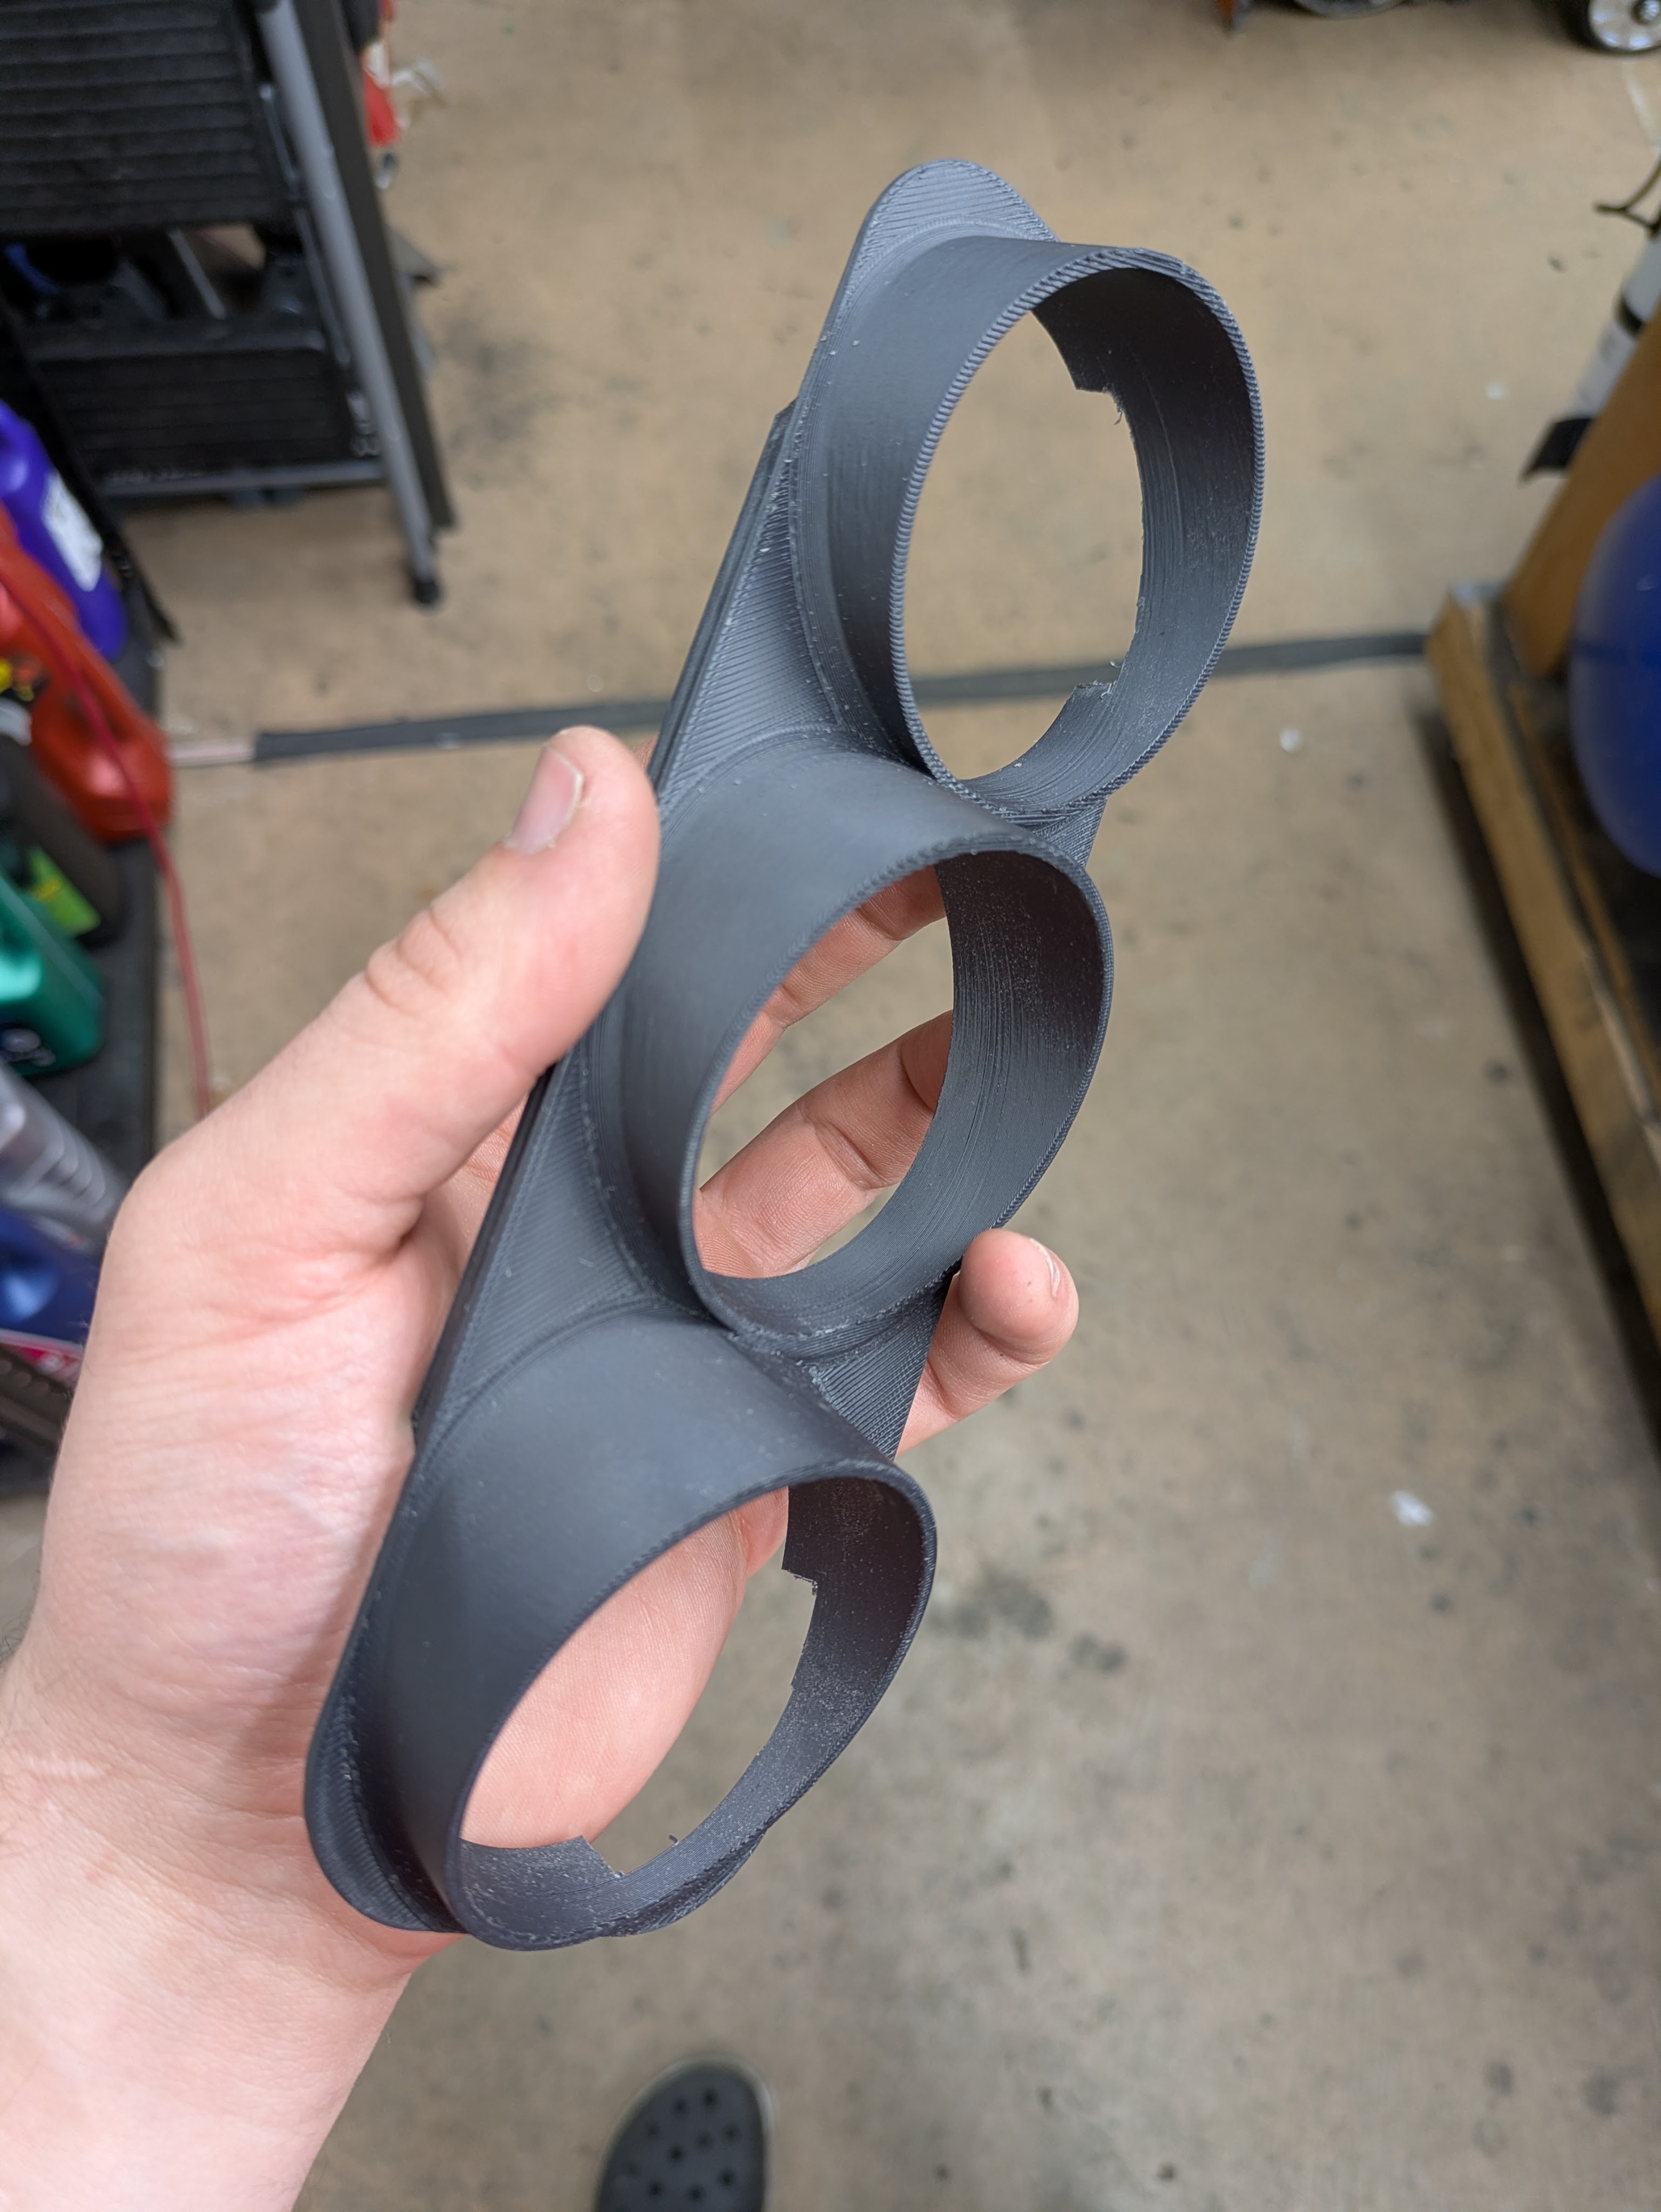
While it fit good intially, it didnt snap into place with the fitment I was quite looking for. I spent the afternoon trimming and sanding it slowly until it snapped in positively. While still easily removable, it fits in much better than it previously did, so it should never come out on it’s own. The exterior finish on it was good, so I just decided to leave it.
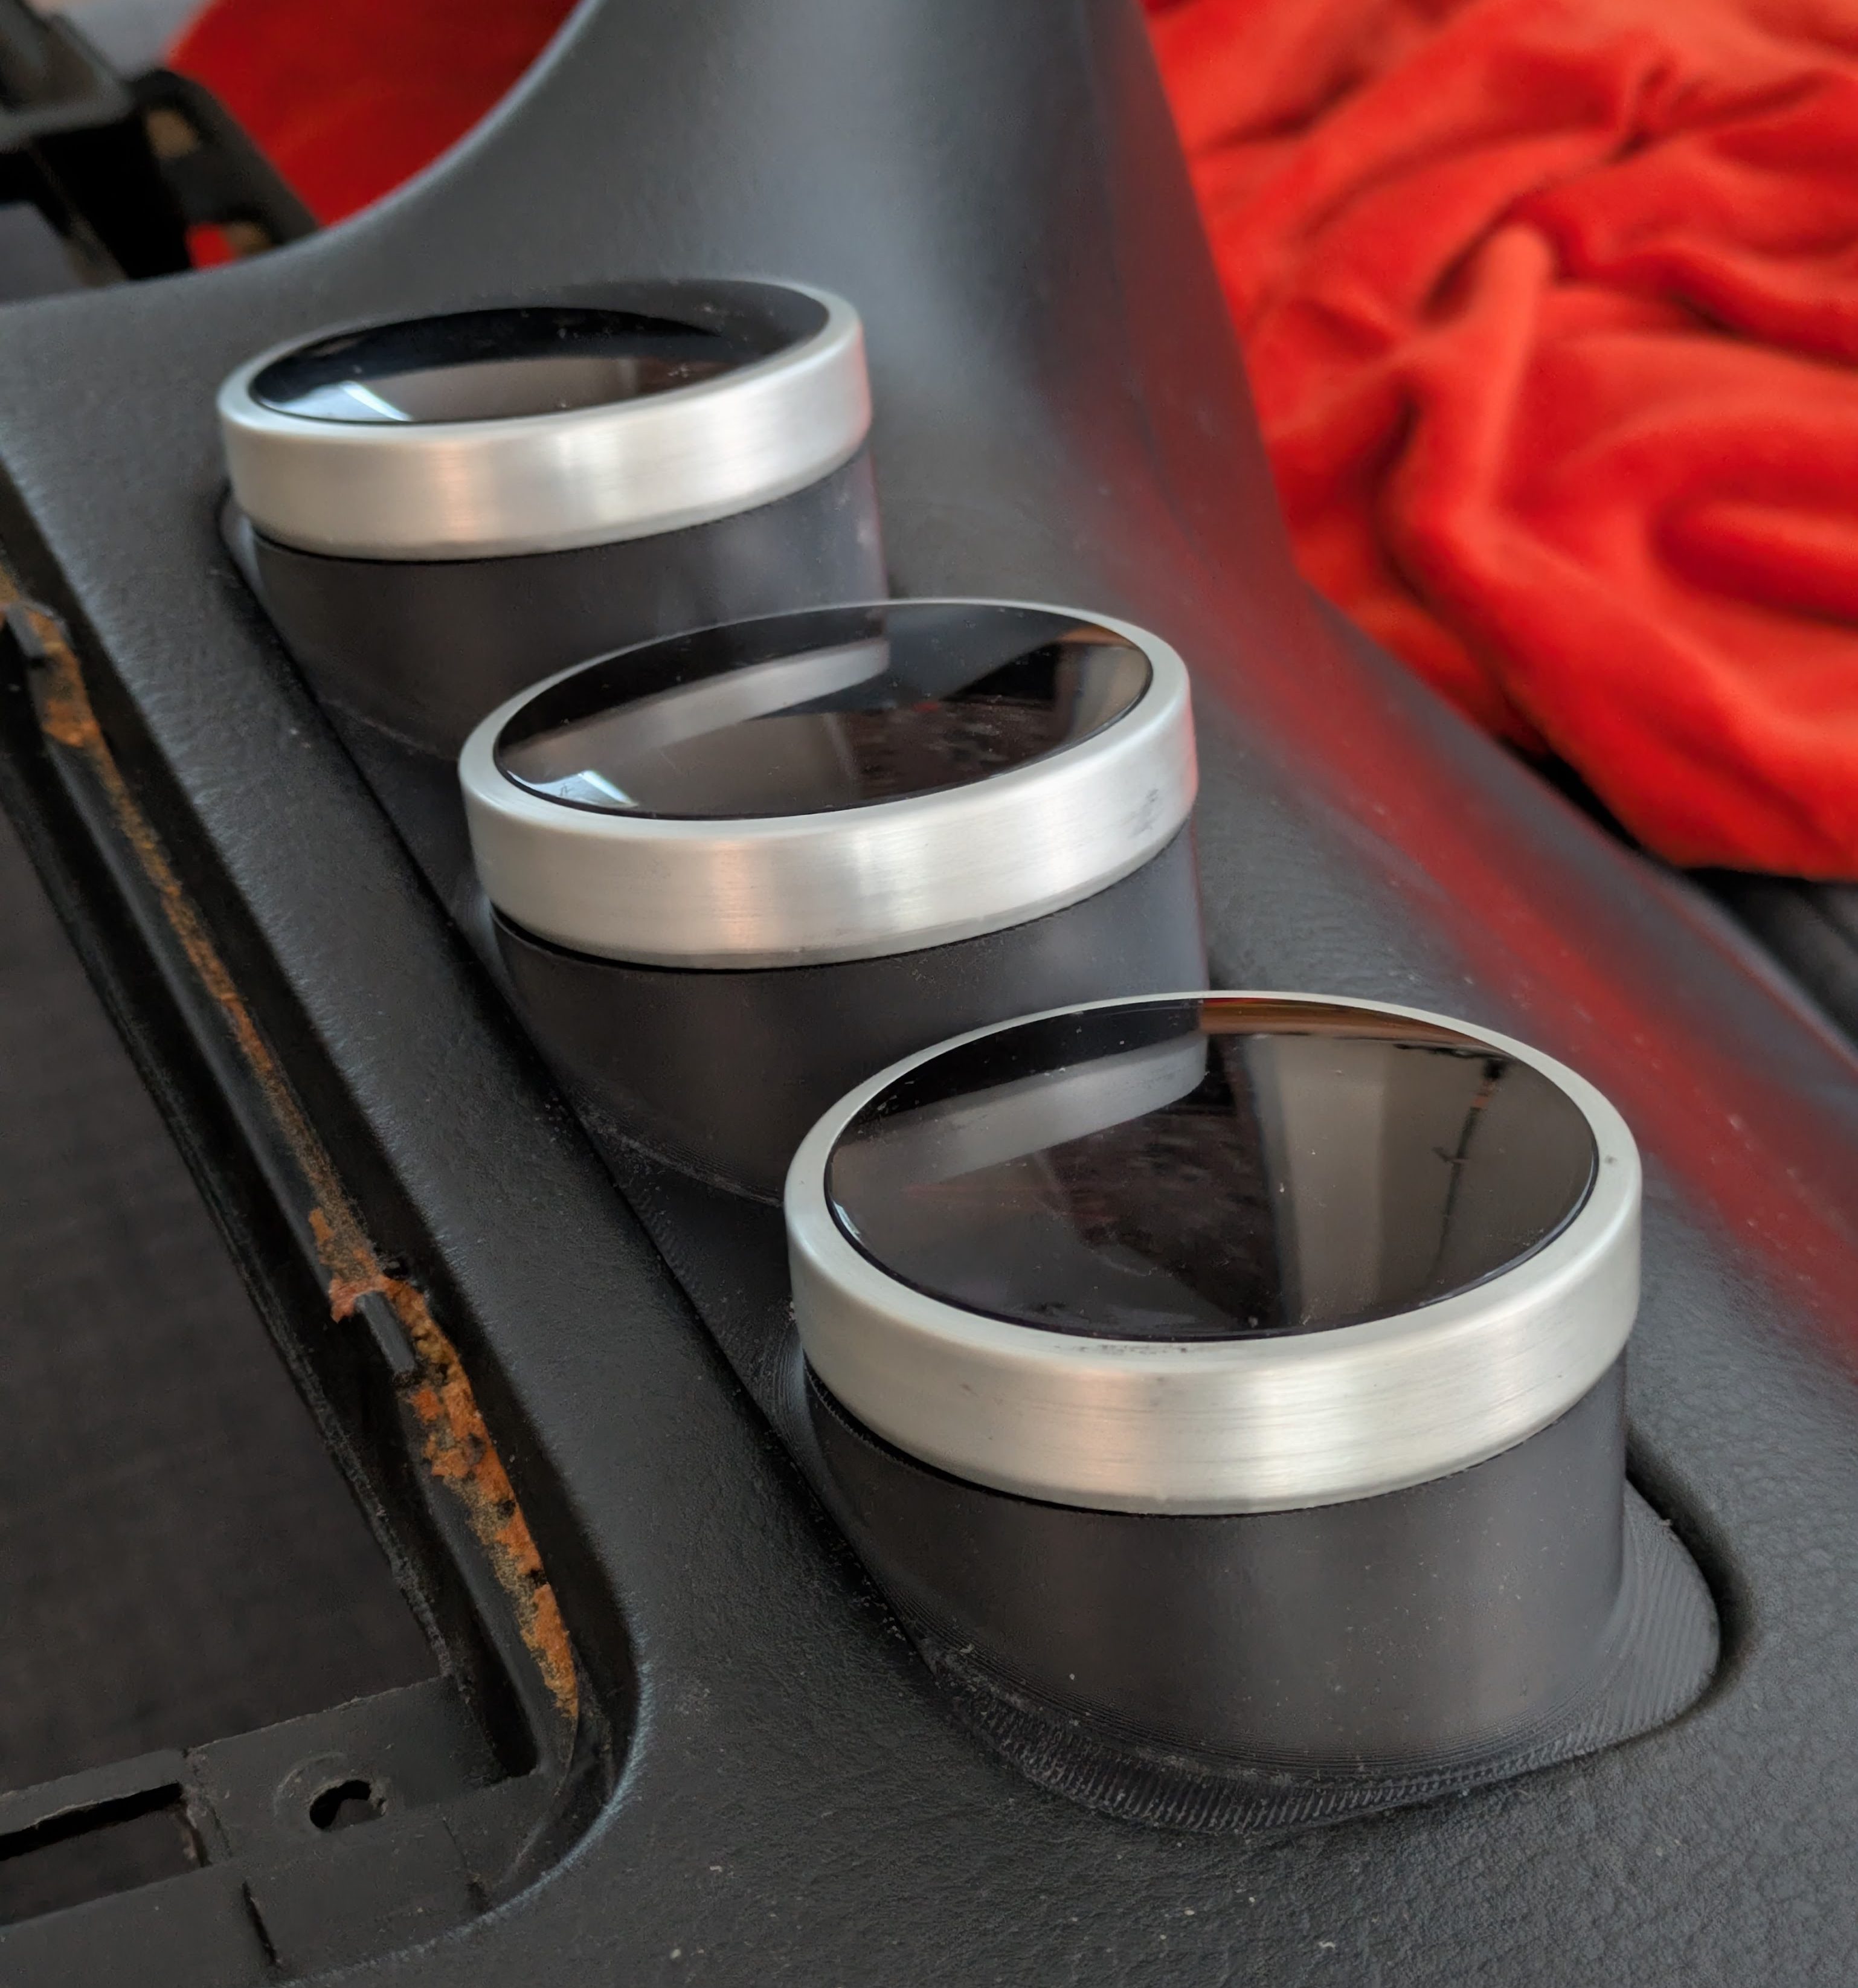
While successful, this is another teachable moment about order of operations. Once again, these cars are so soft that even the dashboard takes a slightly different shape bolted into the car than it is sitting on my couch. While it still snaps in great, it wasn’t as good as it was, and potentially might involve less trimming if the modifications were performed with the dash in. I may redo this in the future with a new piece (for a wallet obliterating $15) but for now it can stay. I’ve since lined it with fabric interior tape for a nice interference fit with the dash.
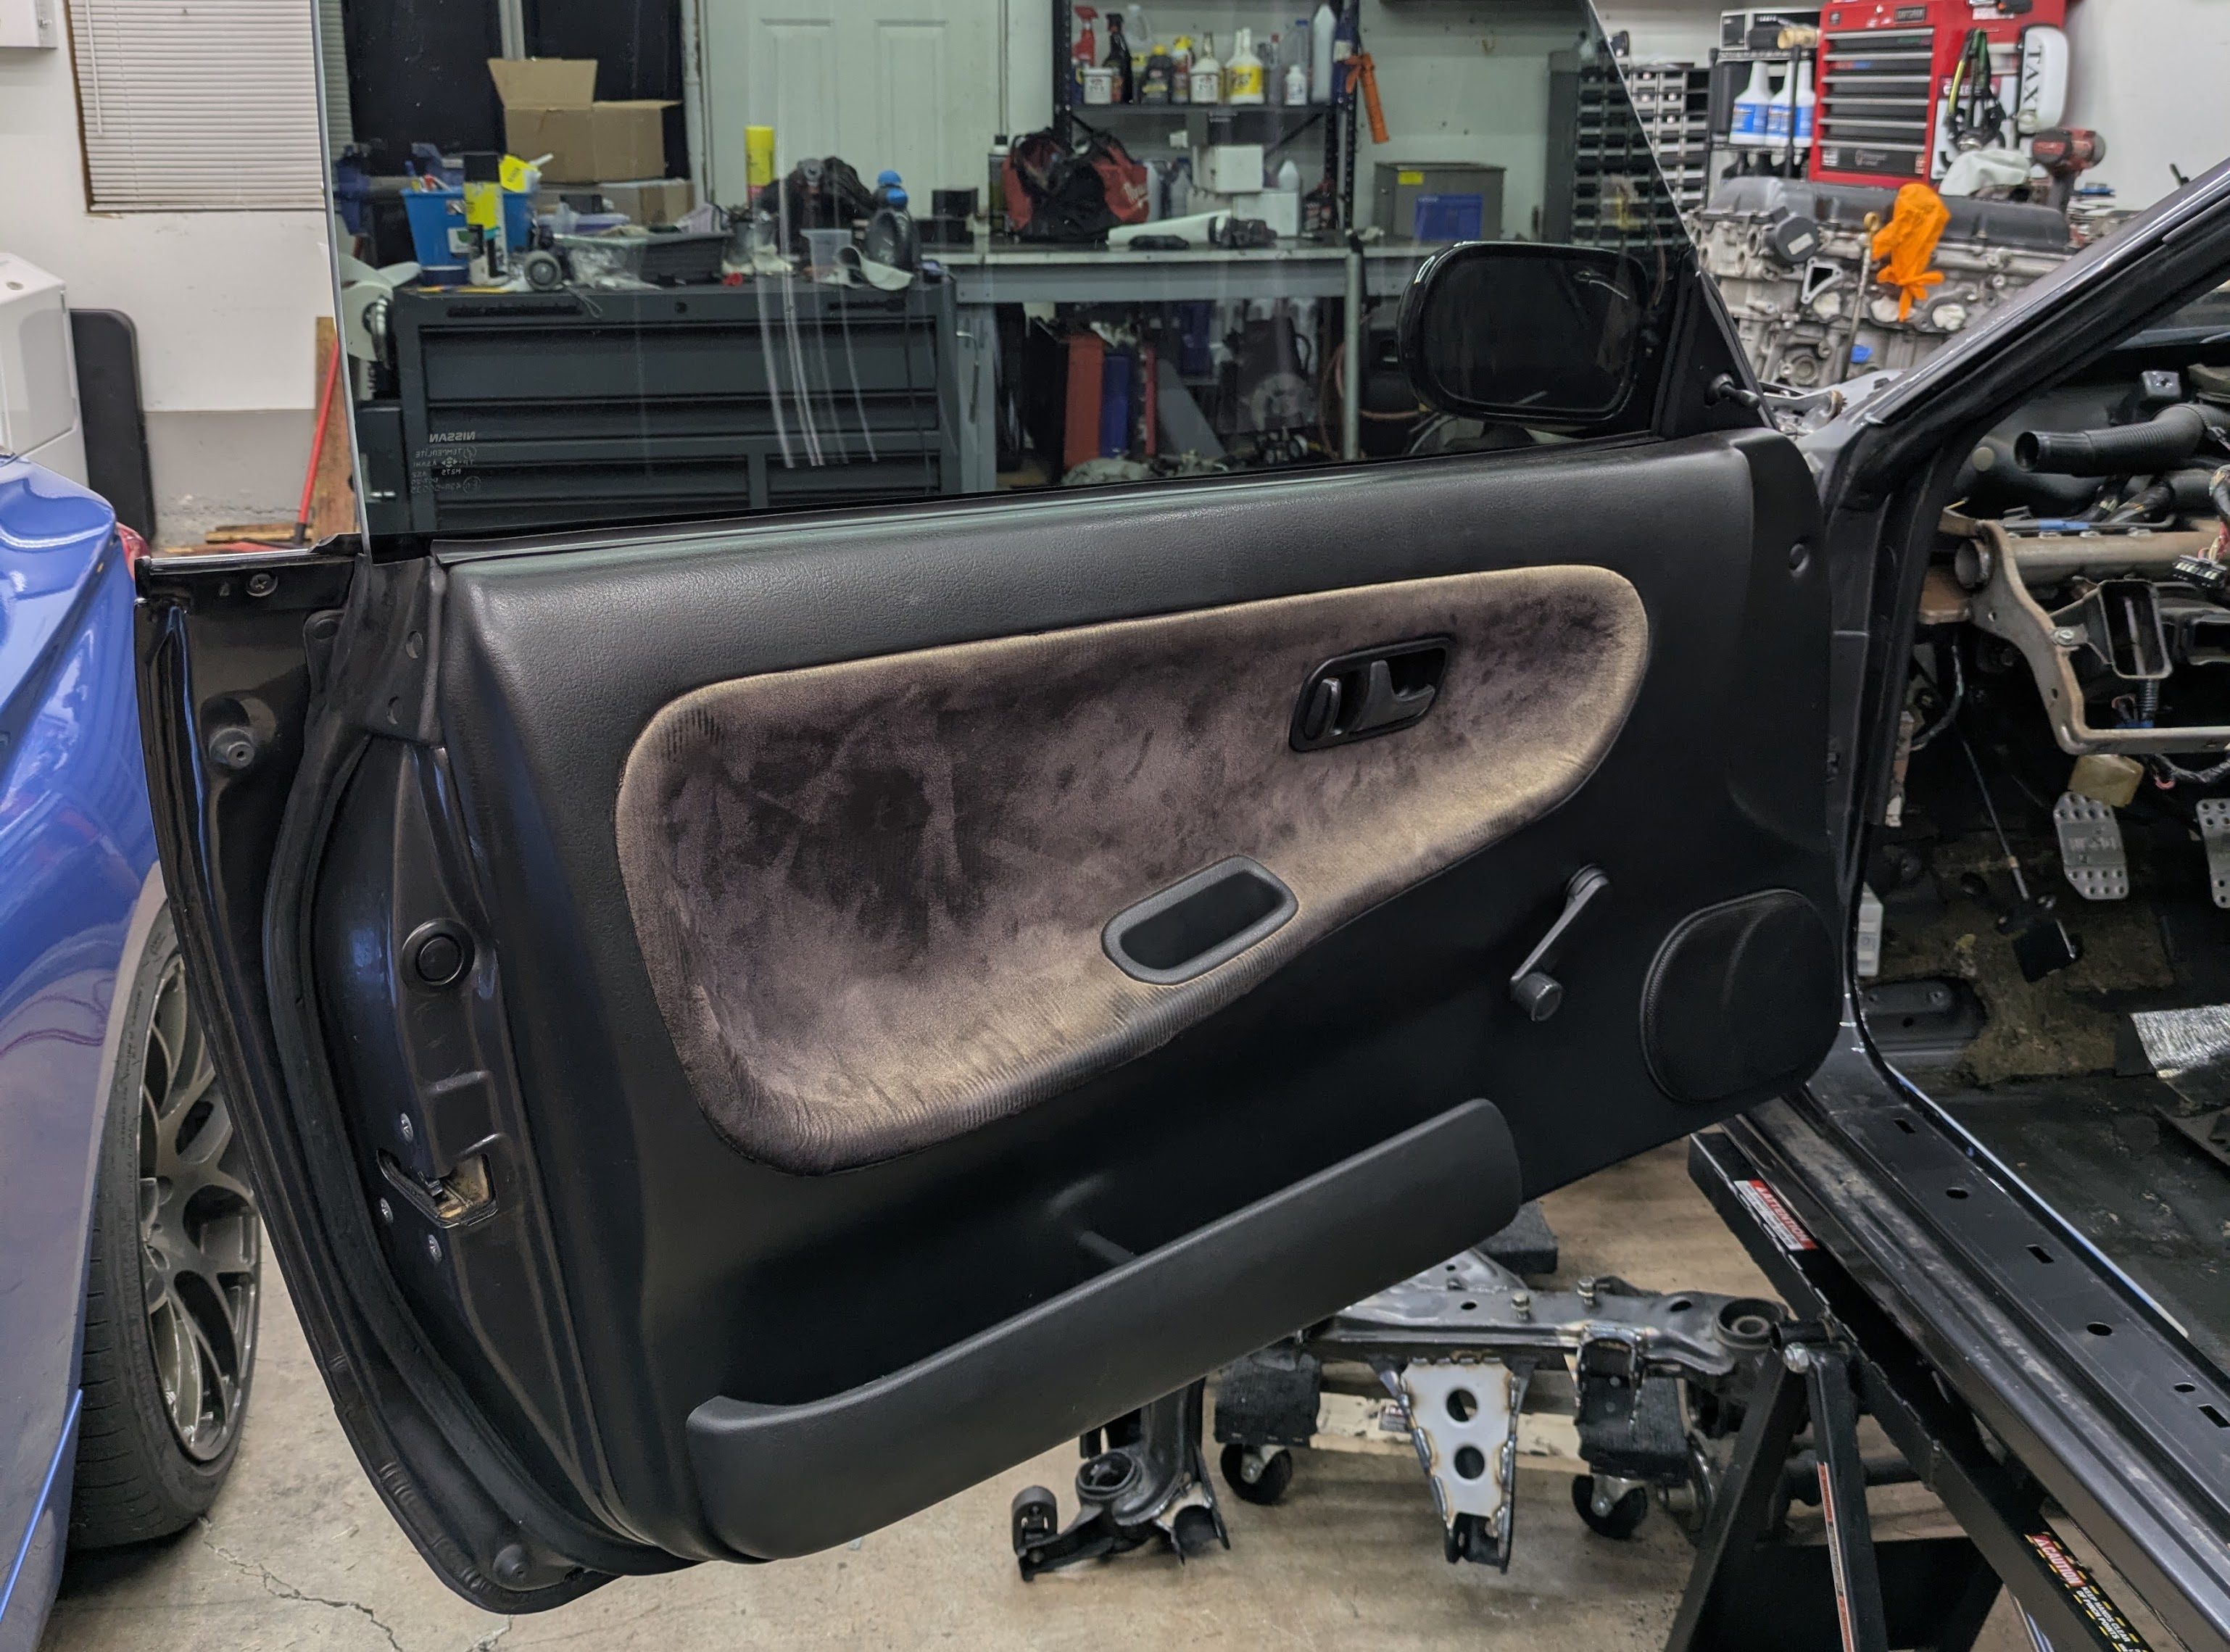
When I bought the car, the suede that had been glued on to the door panels, center console, and glovebox had seen better days. This was likely an old Katzkin kit that has been in the car for a very long time. While I am not quite sure the direction that I want to go in the future with the upholstery, I knew that for now, the failing, faded suede had to go.
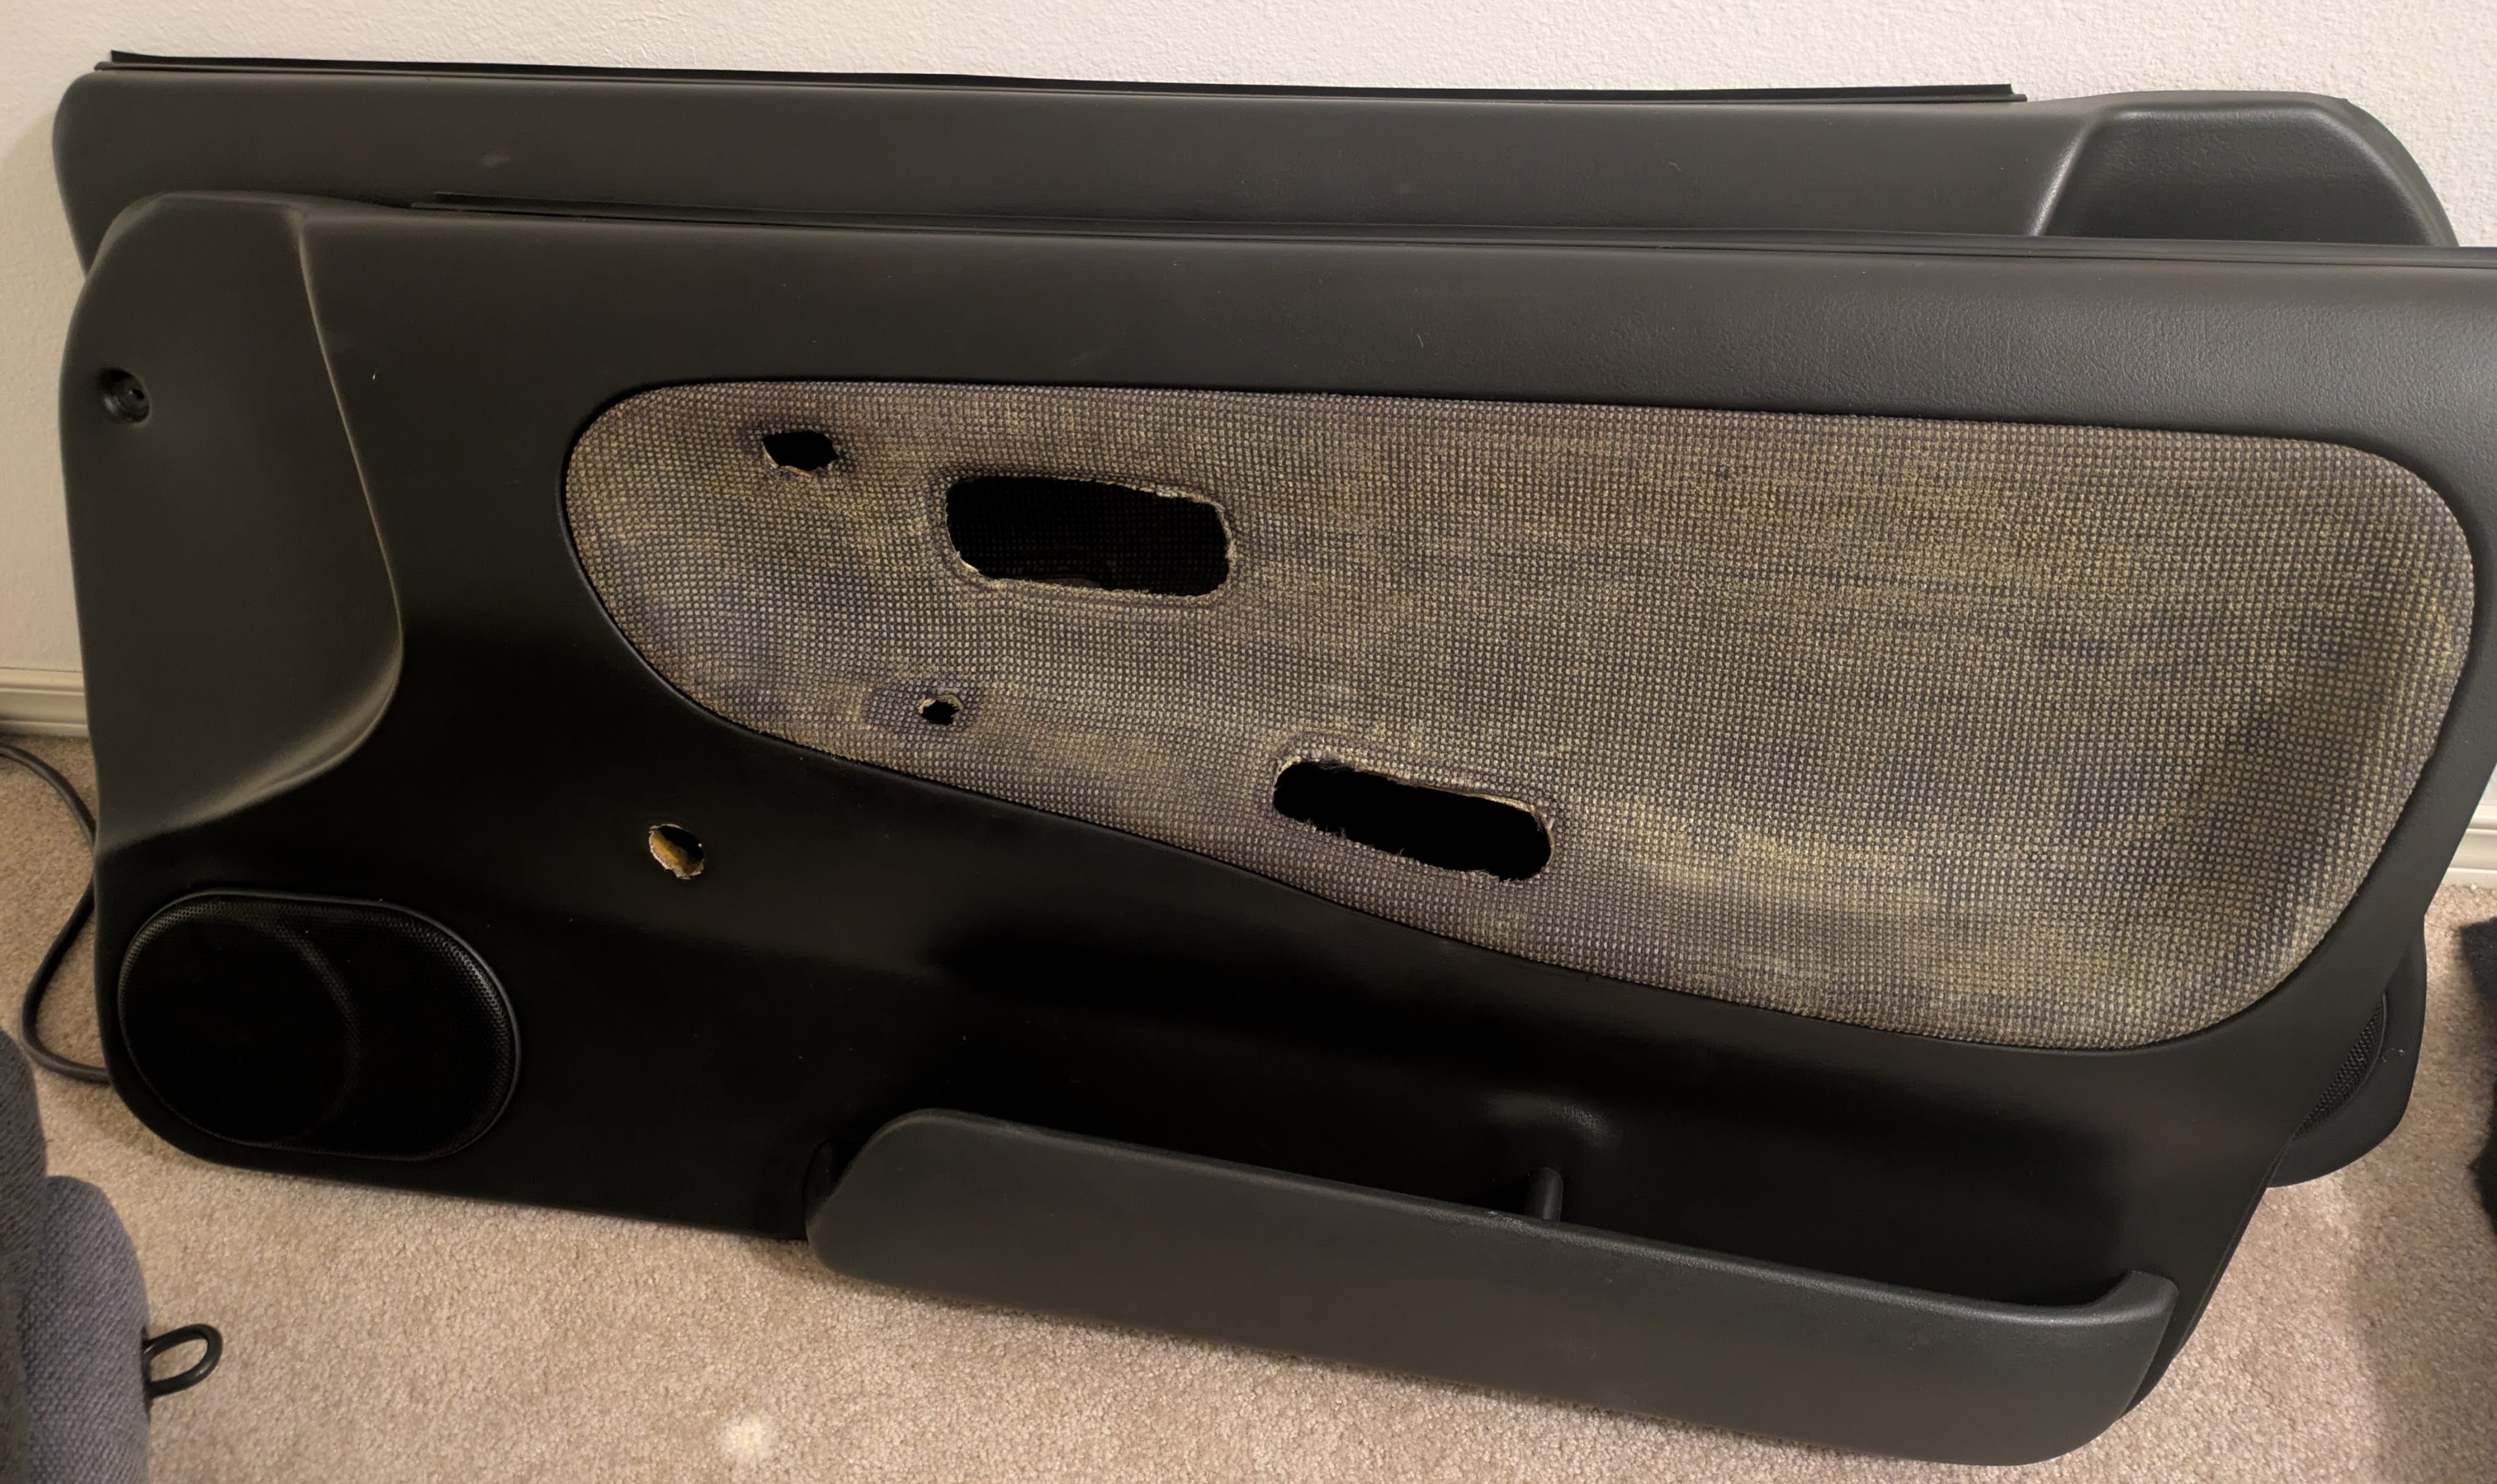
Luckily, it pulled right off in seconds, but it left behind pretty much all of it’s glue.
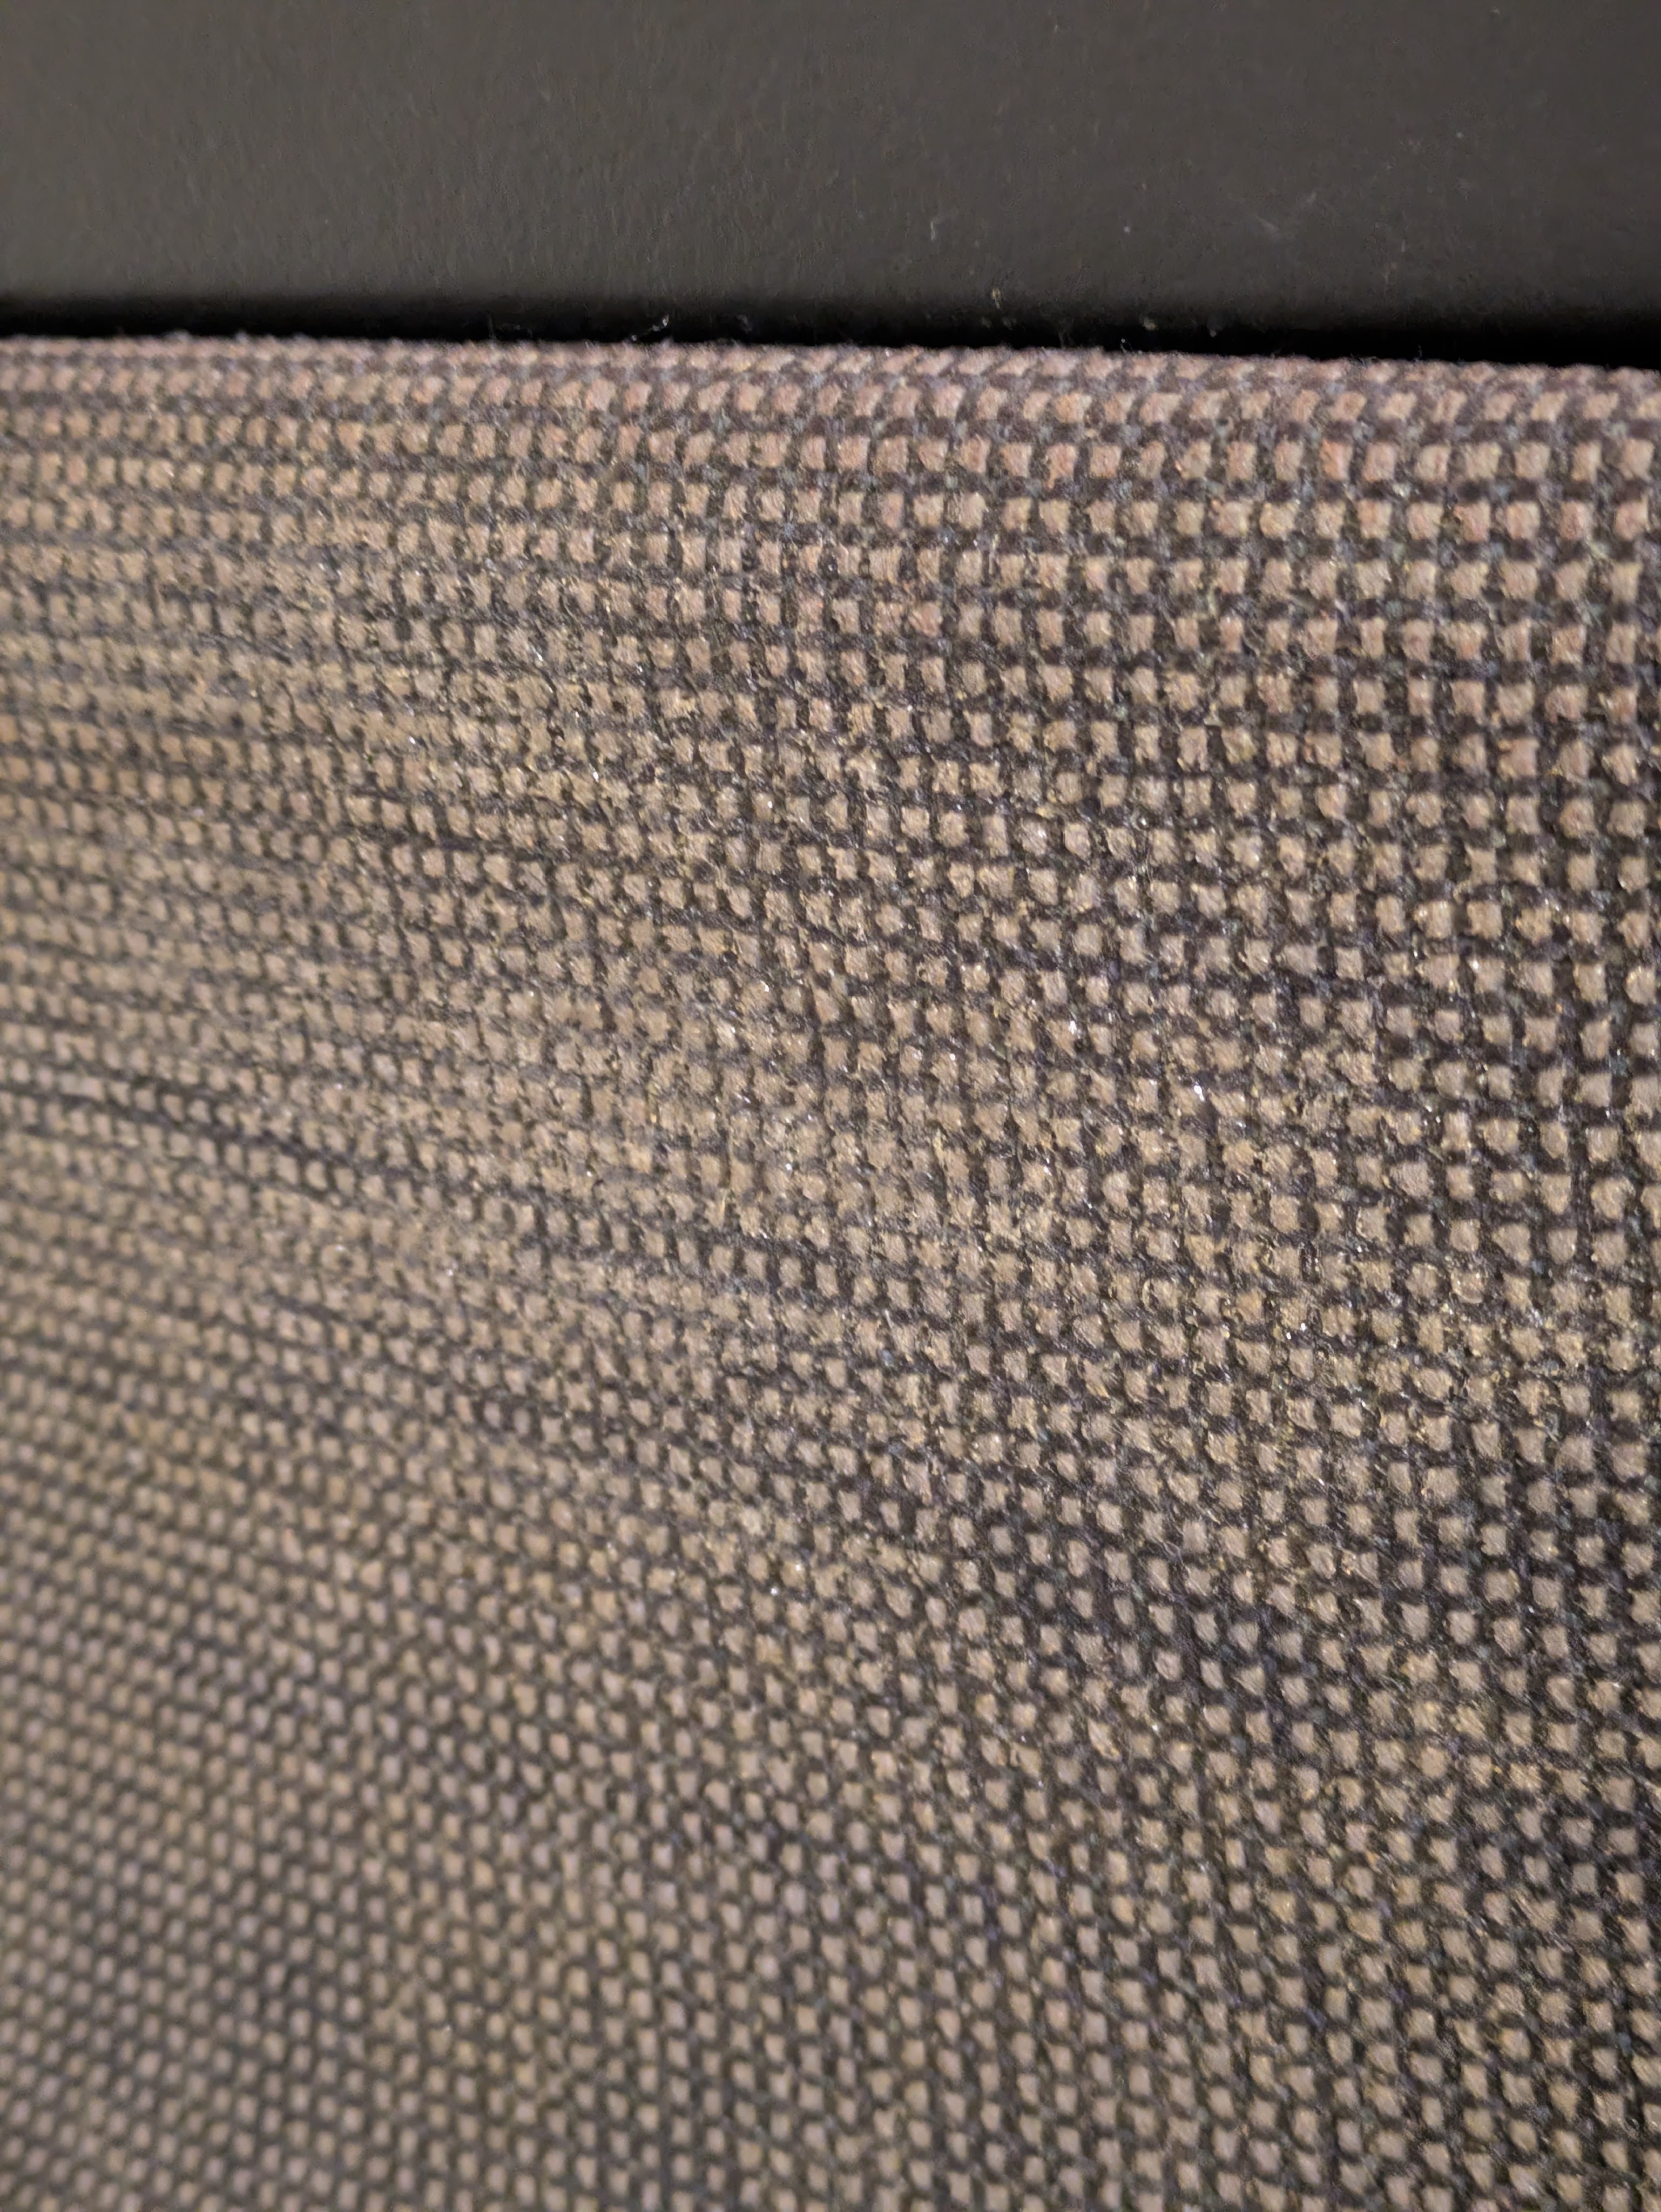
While the tweed did a good job of concealing all of the glue crystals, it felt rough to the touch and looked very patchy.
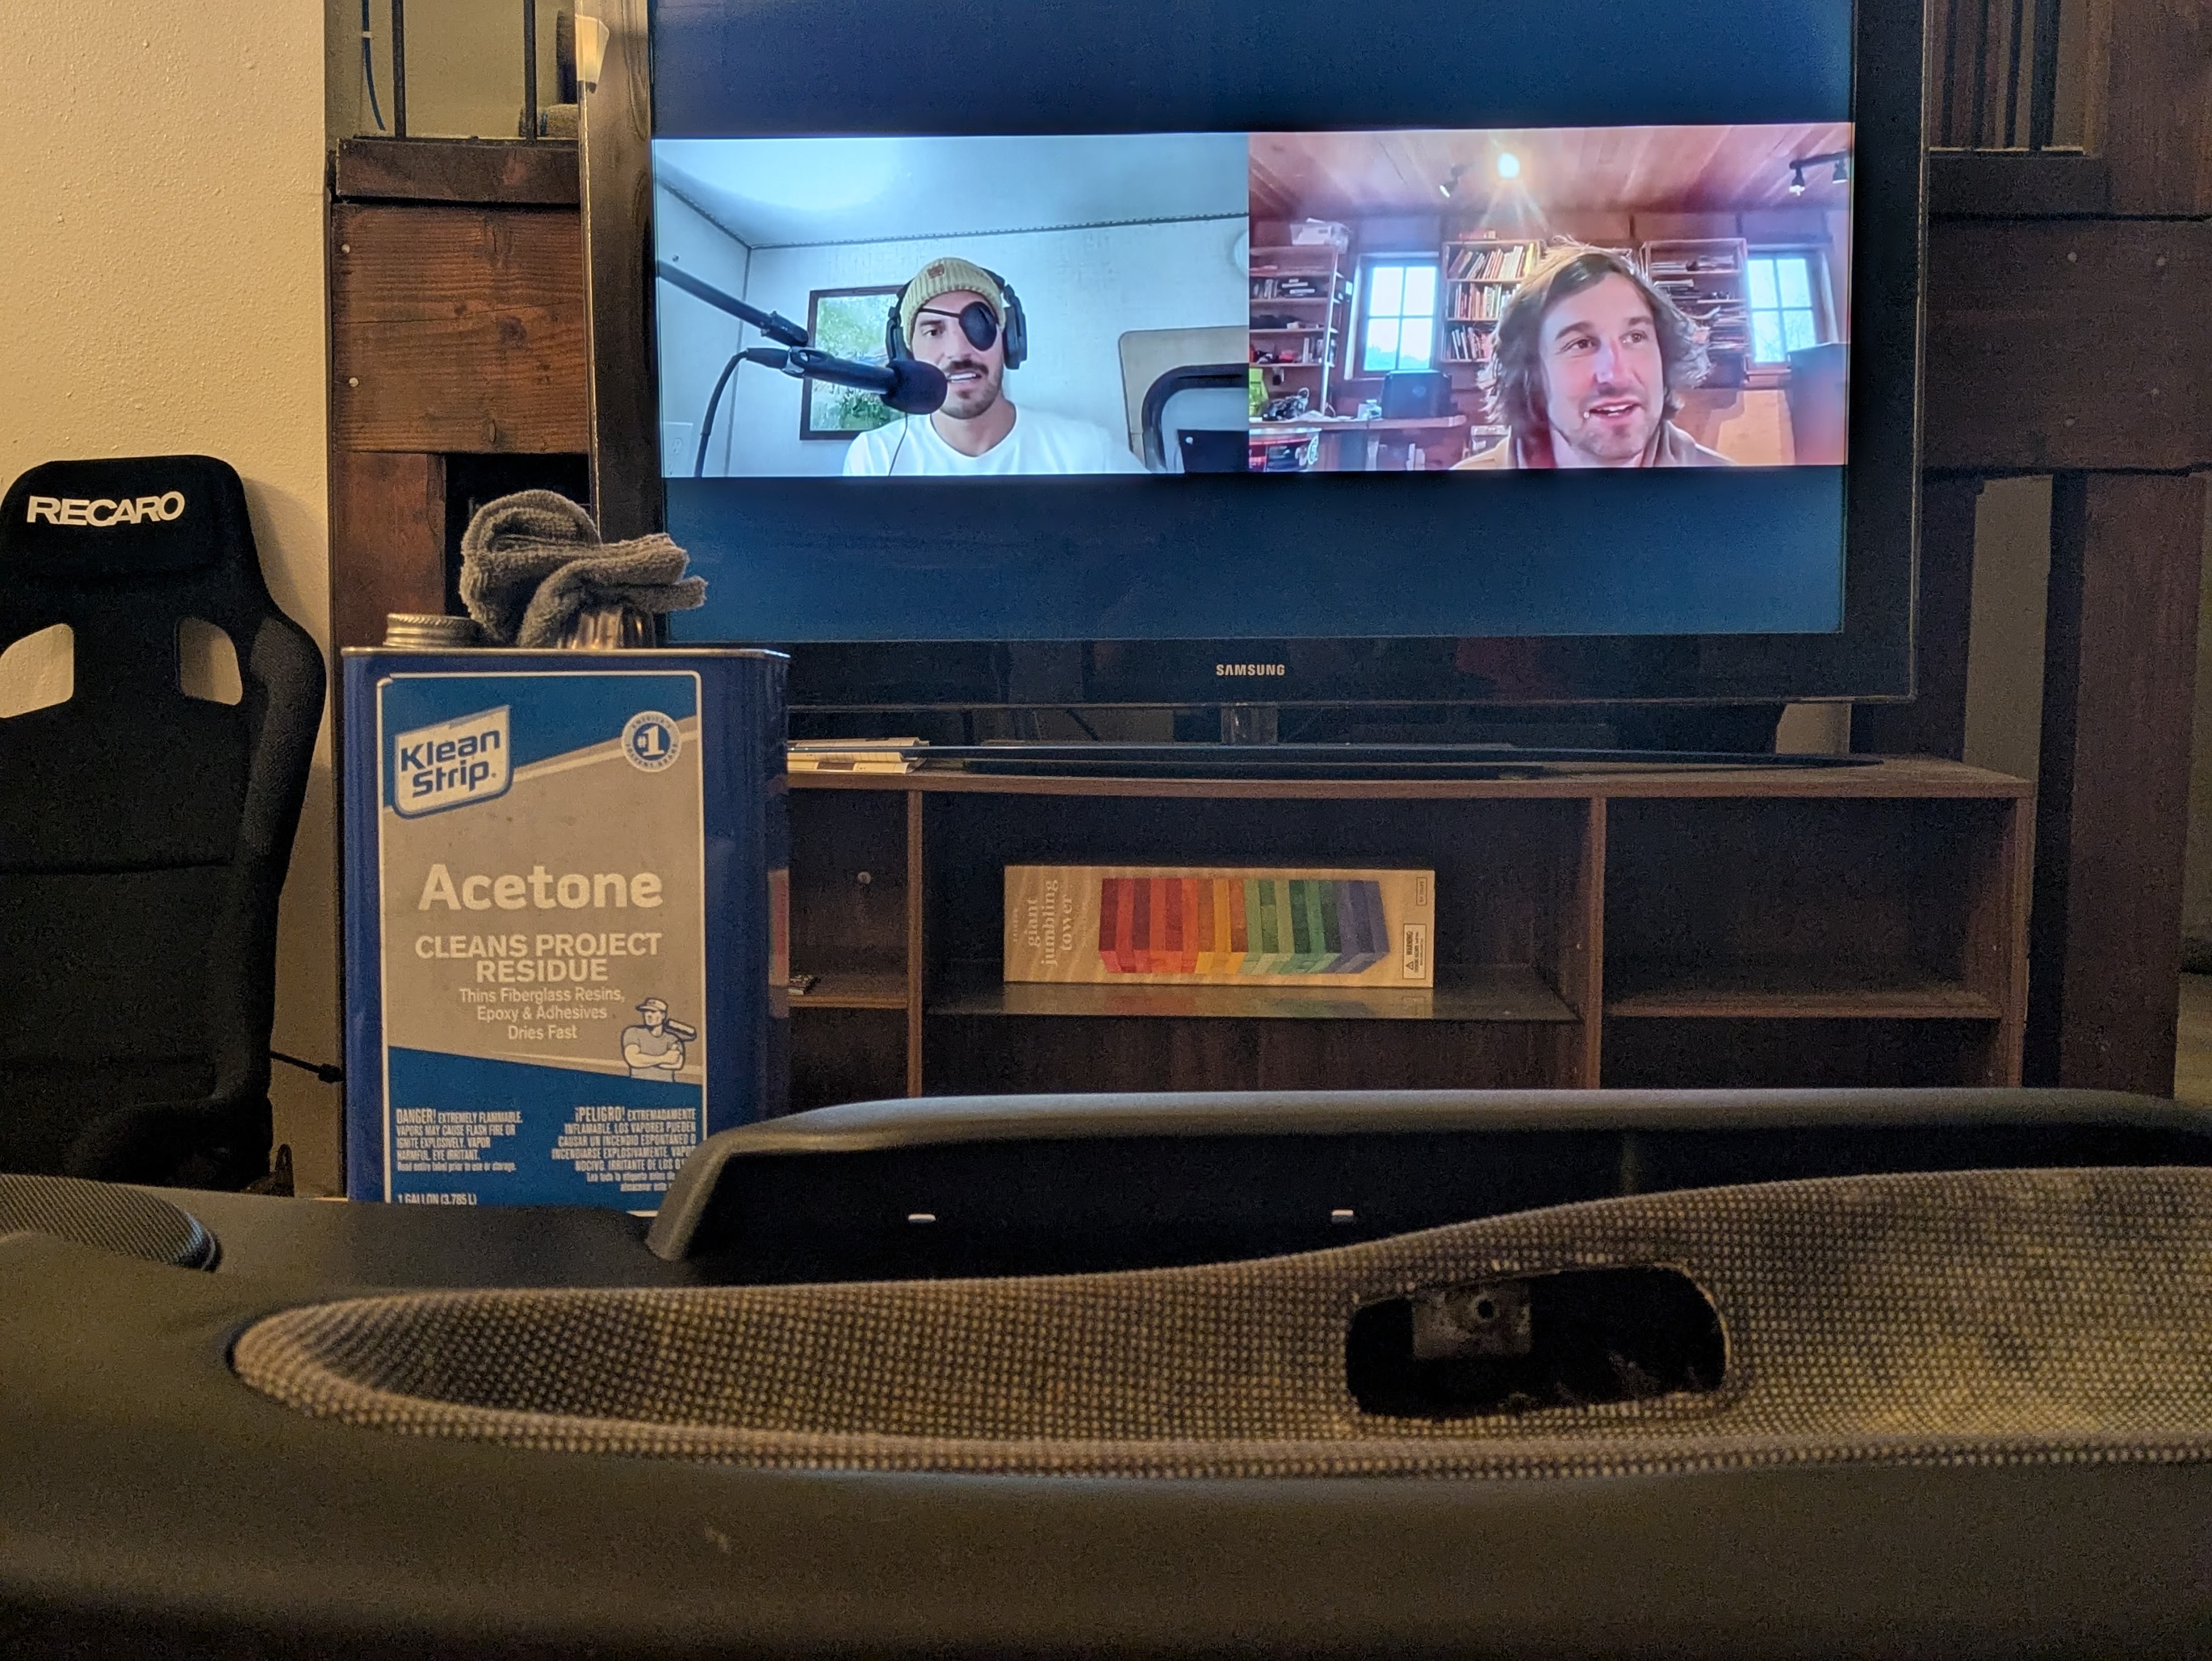
I elected to remove the glue for now with acetone, and have medium condition panels for now. It was a long night of fumes and incredibly cold hands from the solvent, but the panels are now serviceable.

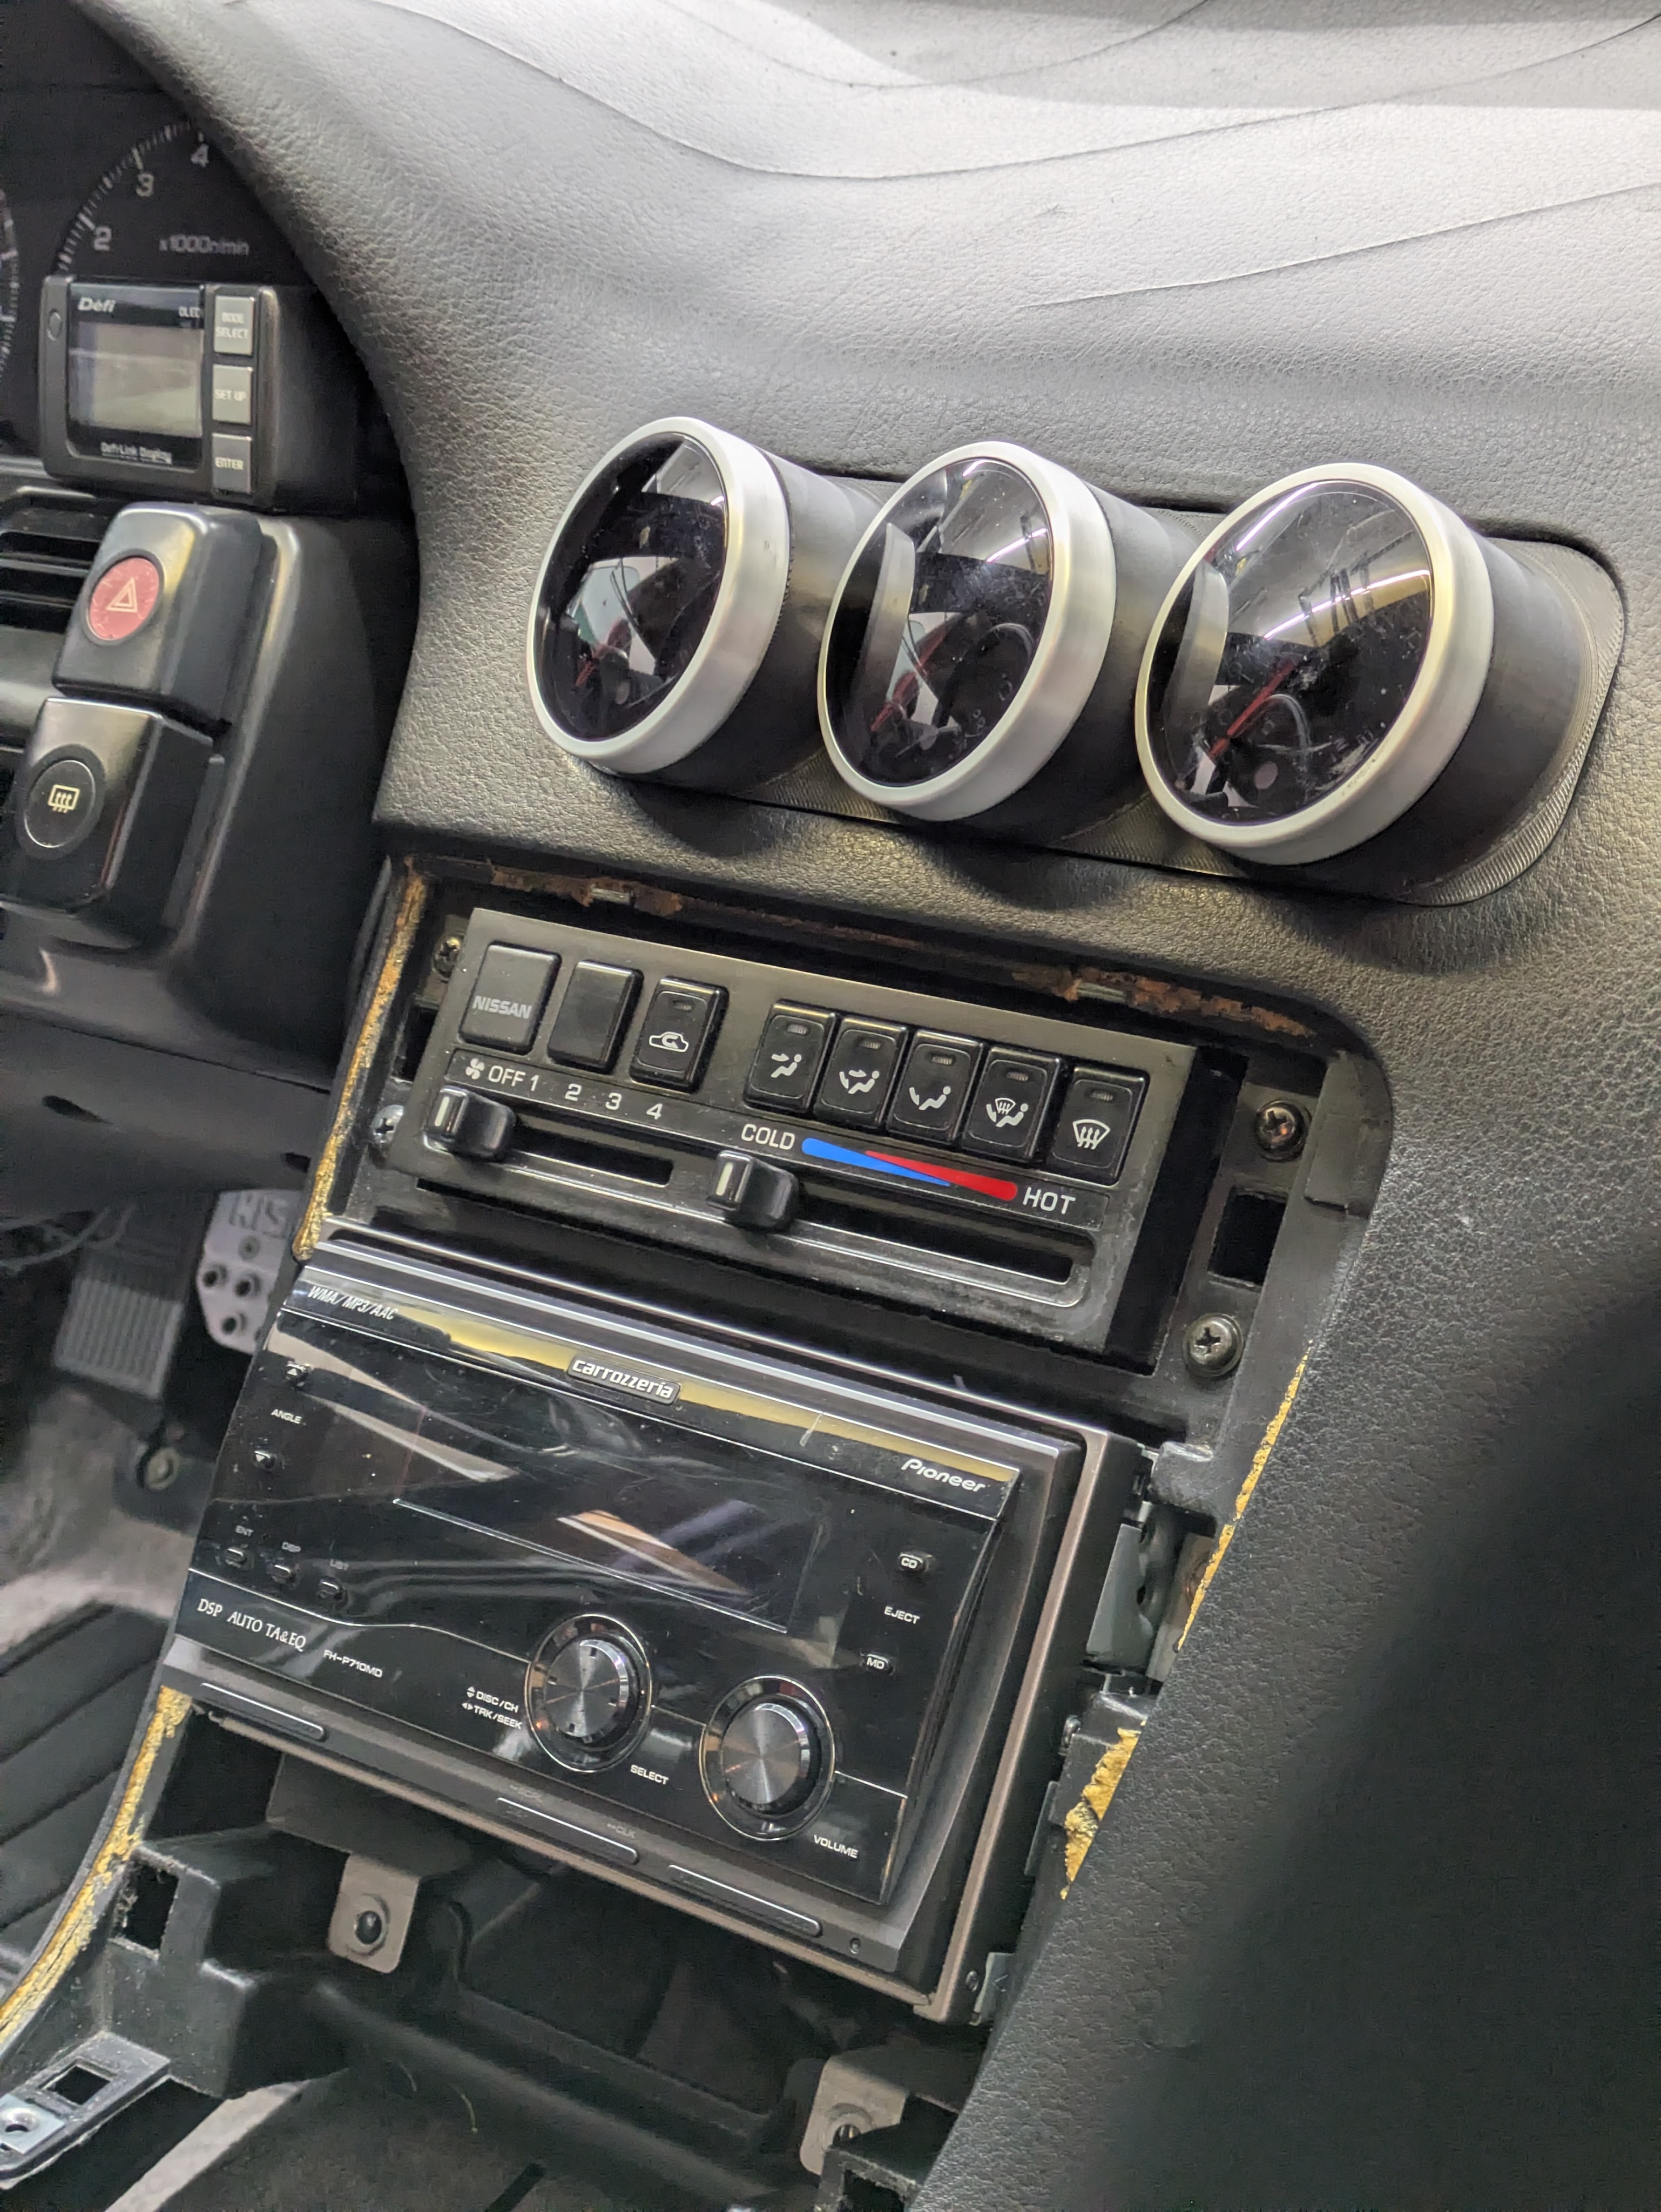
While I had gone over the Pioneer Carrozzeria FH-P710MD extensively in an old article, and while I was still incredibly satisfied with it, there was one flaw that continued to highlight itself throughout the summer of driving. This radio, being from 2006, didn’t have Bluetooth. While I am a massive fan of physical media, partially CDs, there are times where I would like to stream something else. I had been using these very cheap Pioneer IP-BUS to Bluetooth modules, and they were so alarming cheap that I ordered 2 just to be safe. Sure enough, I killed both of them during the summer likely due to heat, vibration, and voltage variation. While $11 doesn’t kill the pocket book, the annoyance of replacing these is enough for me to seek out a permanent solution.
I had initially reached out to SmartKrew about modifying the radio internally, as he had done many retrofits to all sorts of radios in the past. Unfortunately he was pretty busy and also had some tactile issues with his hands preventing him from doing some of that work. He did forward me on some great recommendations for products that he had used, namely running a IP-BUS to 3.5mm cable to a Bluetooth module that was actually durable. While 3.5mm is not a standard meant for the vibration of automotive applications, they work fine, and I can re-pin it easily into a 2 pin connector if needed.
The Bluetooth module he recommended was a NVX VUBT2, which is intended mainly for marine use, making it perfectly acceptable for my automotive interior application. It is on the large side for what it needs to be, but I will happily take that if it means it is dead reliable, and I have a great place to put it. It connects fast, sounds good, has mounting provisions, and is super simple to set up. Power, ground, 3.5mm in, and has an output for an amplifier switch if you have one.

As I had converted my car to manual seatbelts in the previous post Backseat Driver, I had some dead space under the center console and mounting locations to the chassis. I 3D printed a bracket to go from the 3 airbag computer holes and elevate the platform with heatset inserts for the module to screw in to. Would double sided tape have worked? Probably. Would a bolt with a nut work? Sure. But the S in this S13 stands for swanky, and I have the tools and time, so why not?
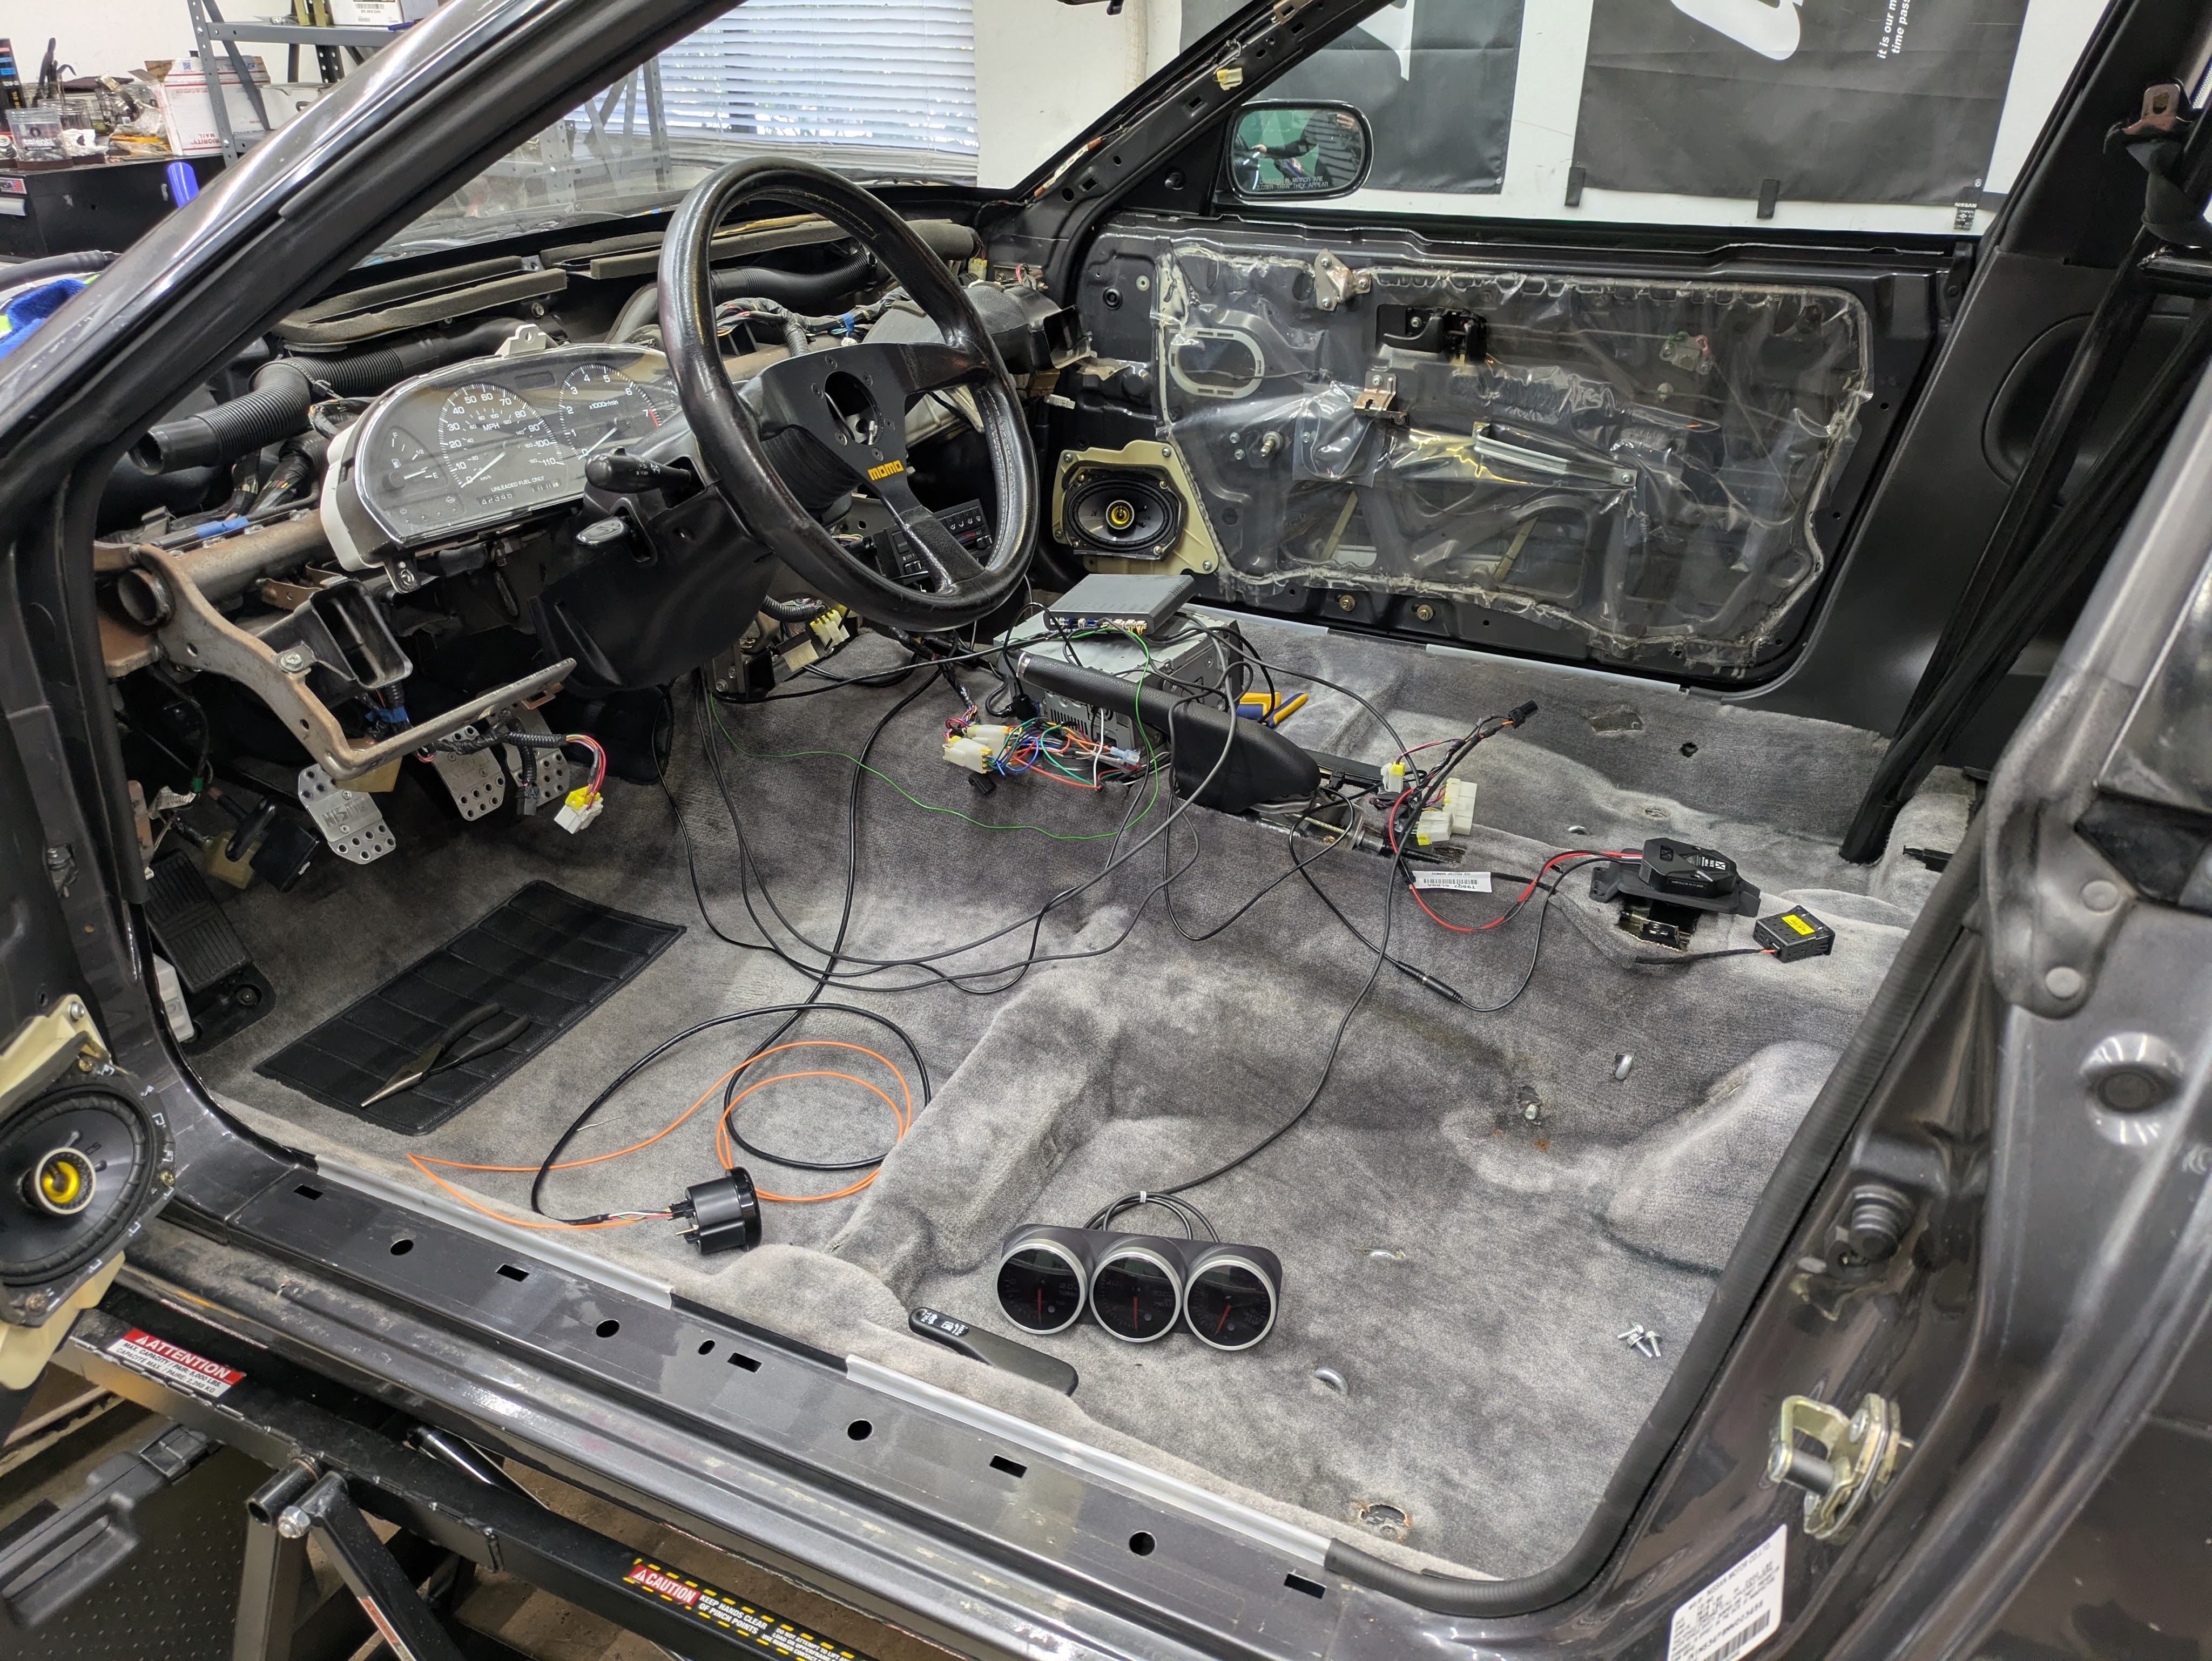
With that mounted, I installed the clean OEM carpet I’ve had stashed for months, and I turned my attention to the pile of aftermarket wiring to contend with.
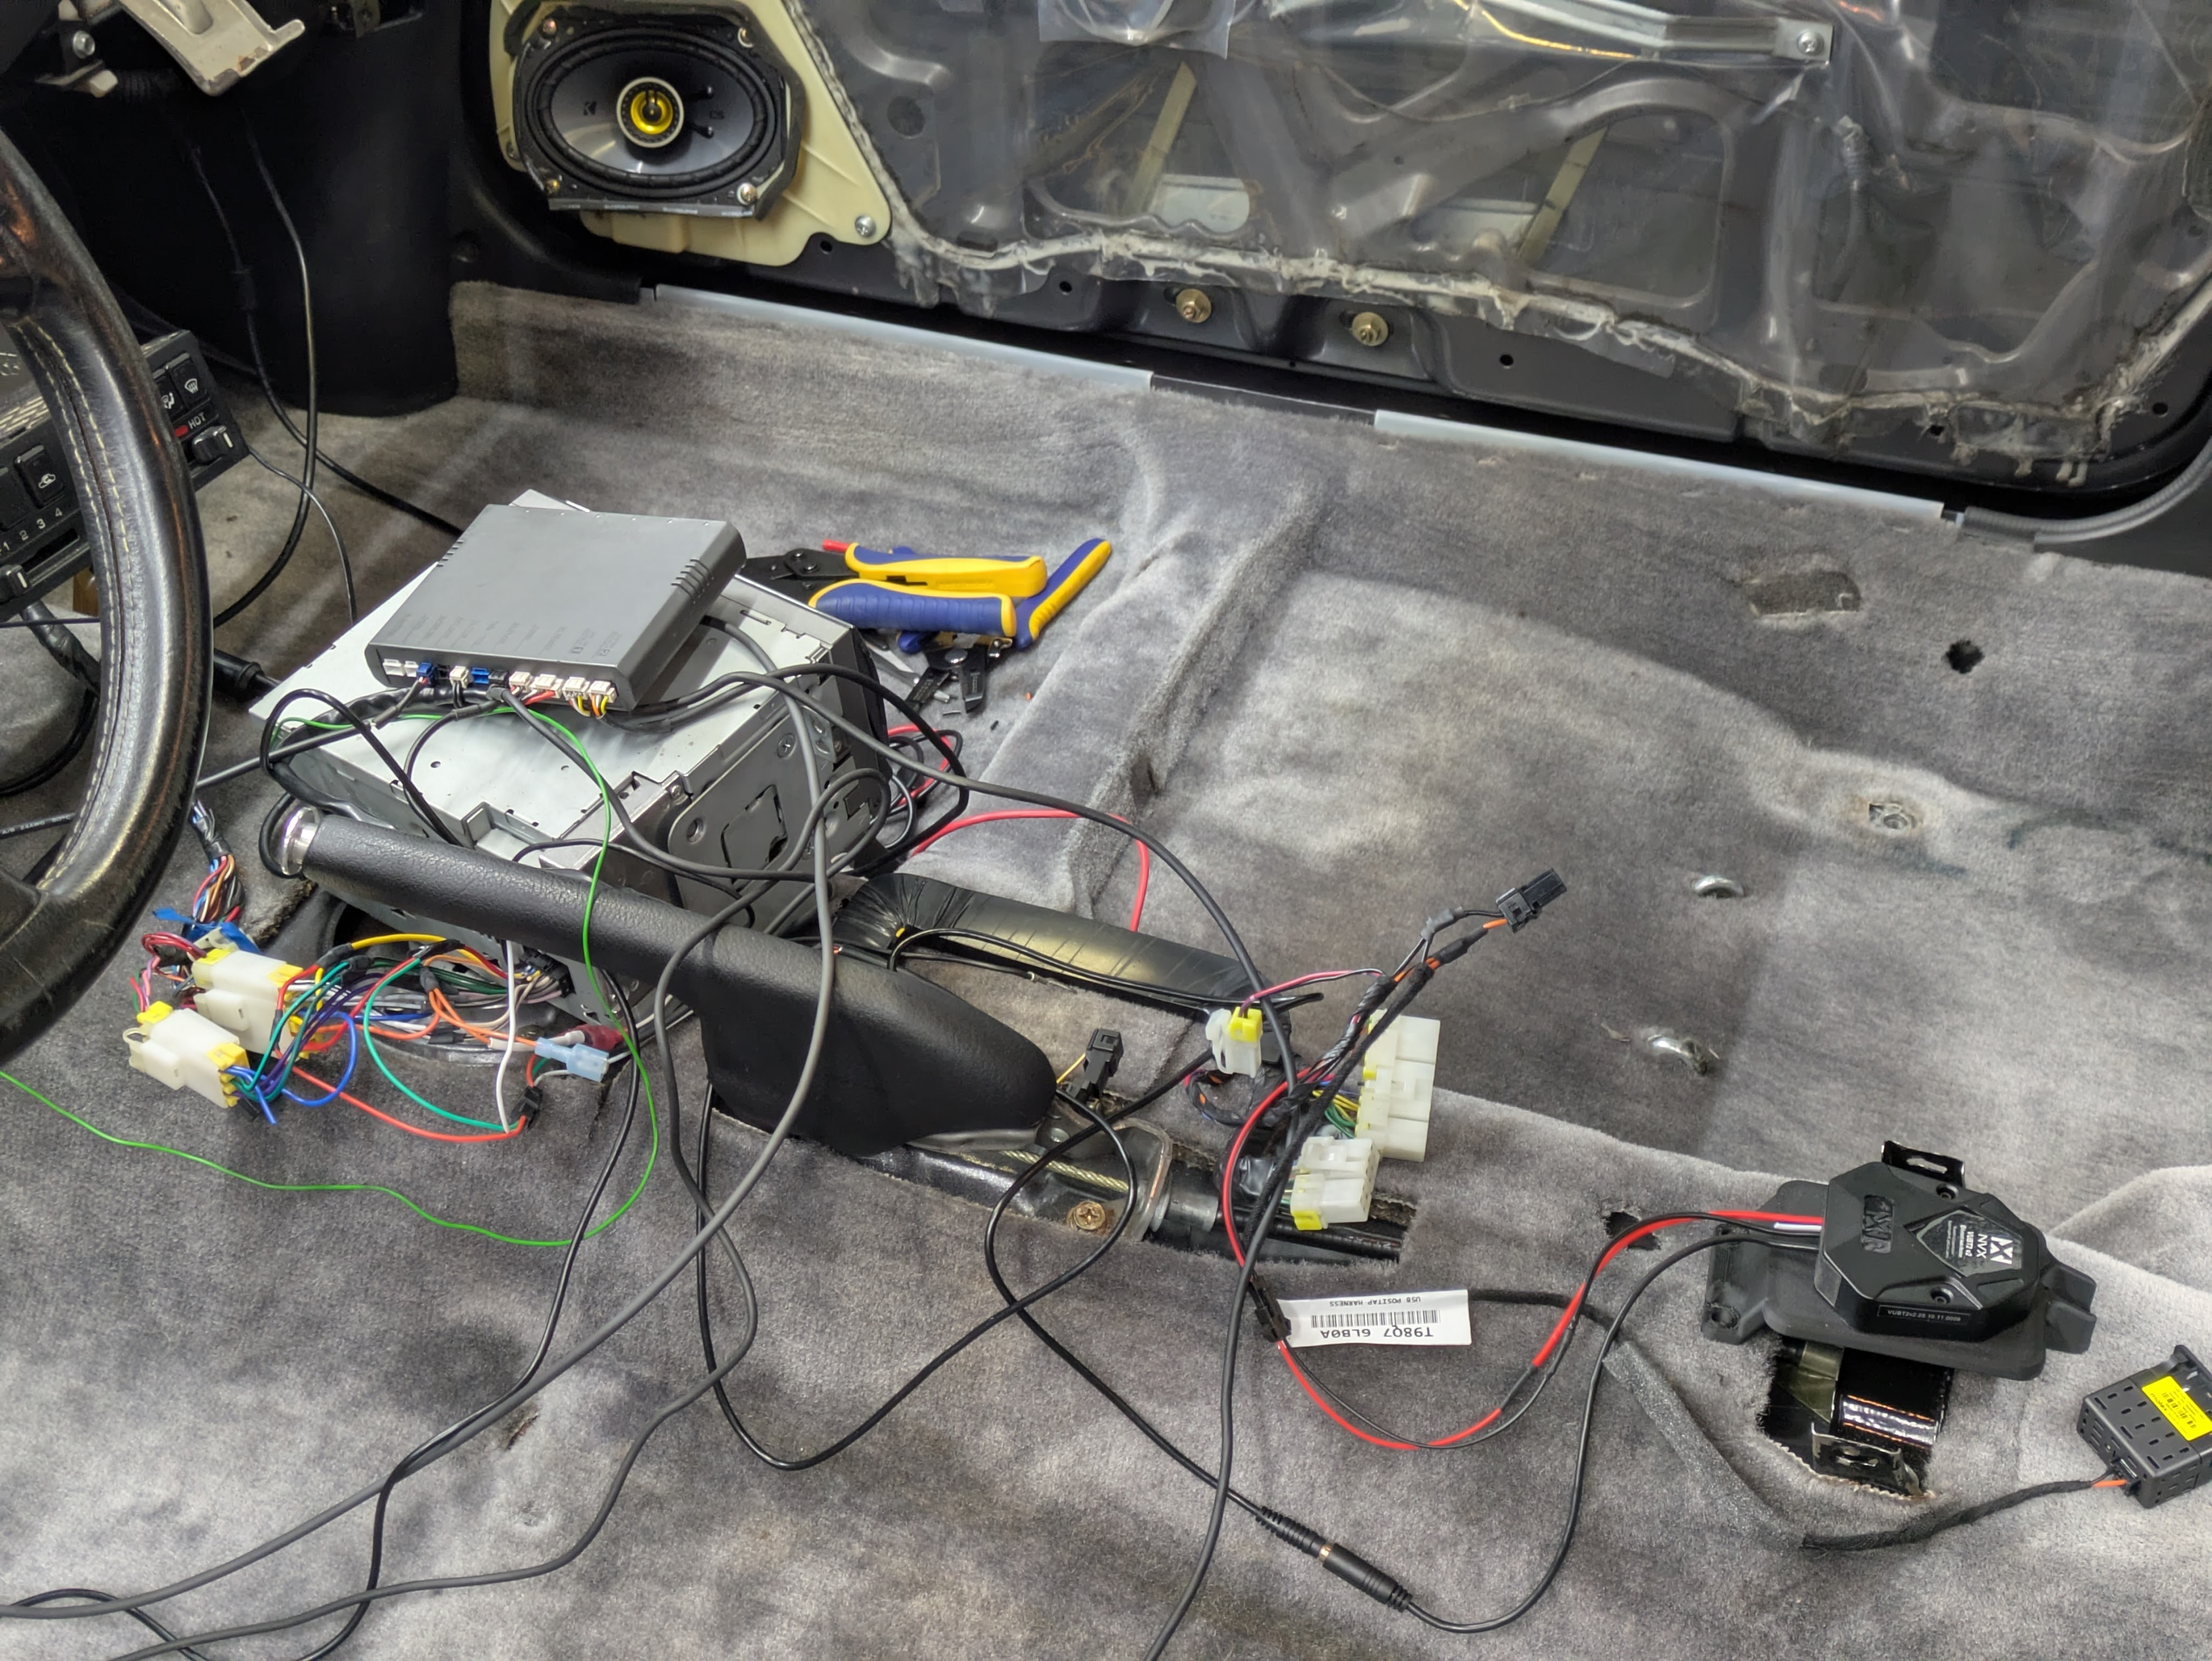
I had previously cleaned up a significant amount of the Defi wiring when I installed the radio, but I knew this day was coming. I had left myself expansion provisions to add extra pieces in that were involved in this rebuild, but I also wanted everything to be as clean as possible.
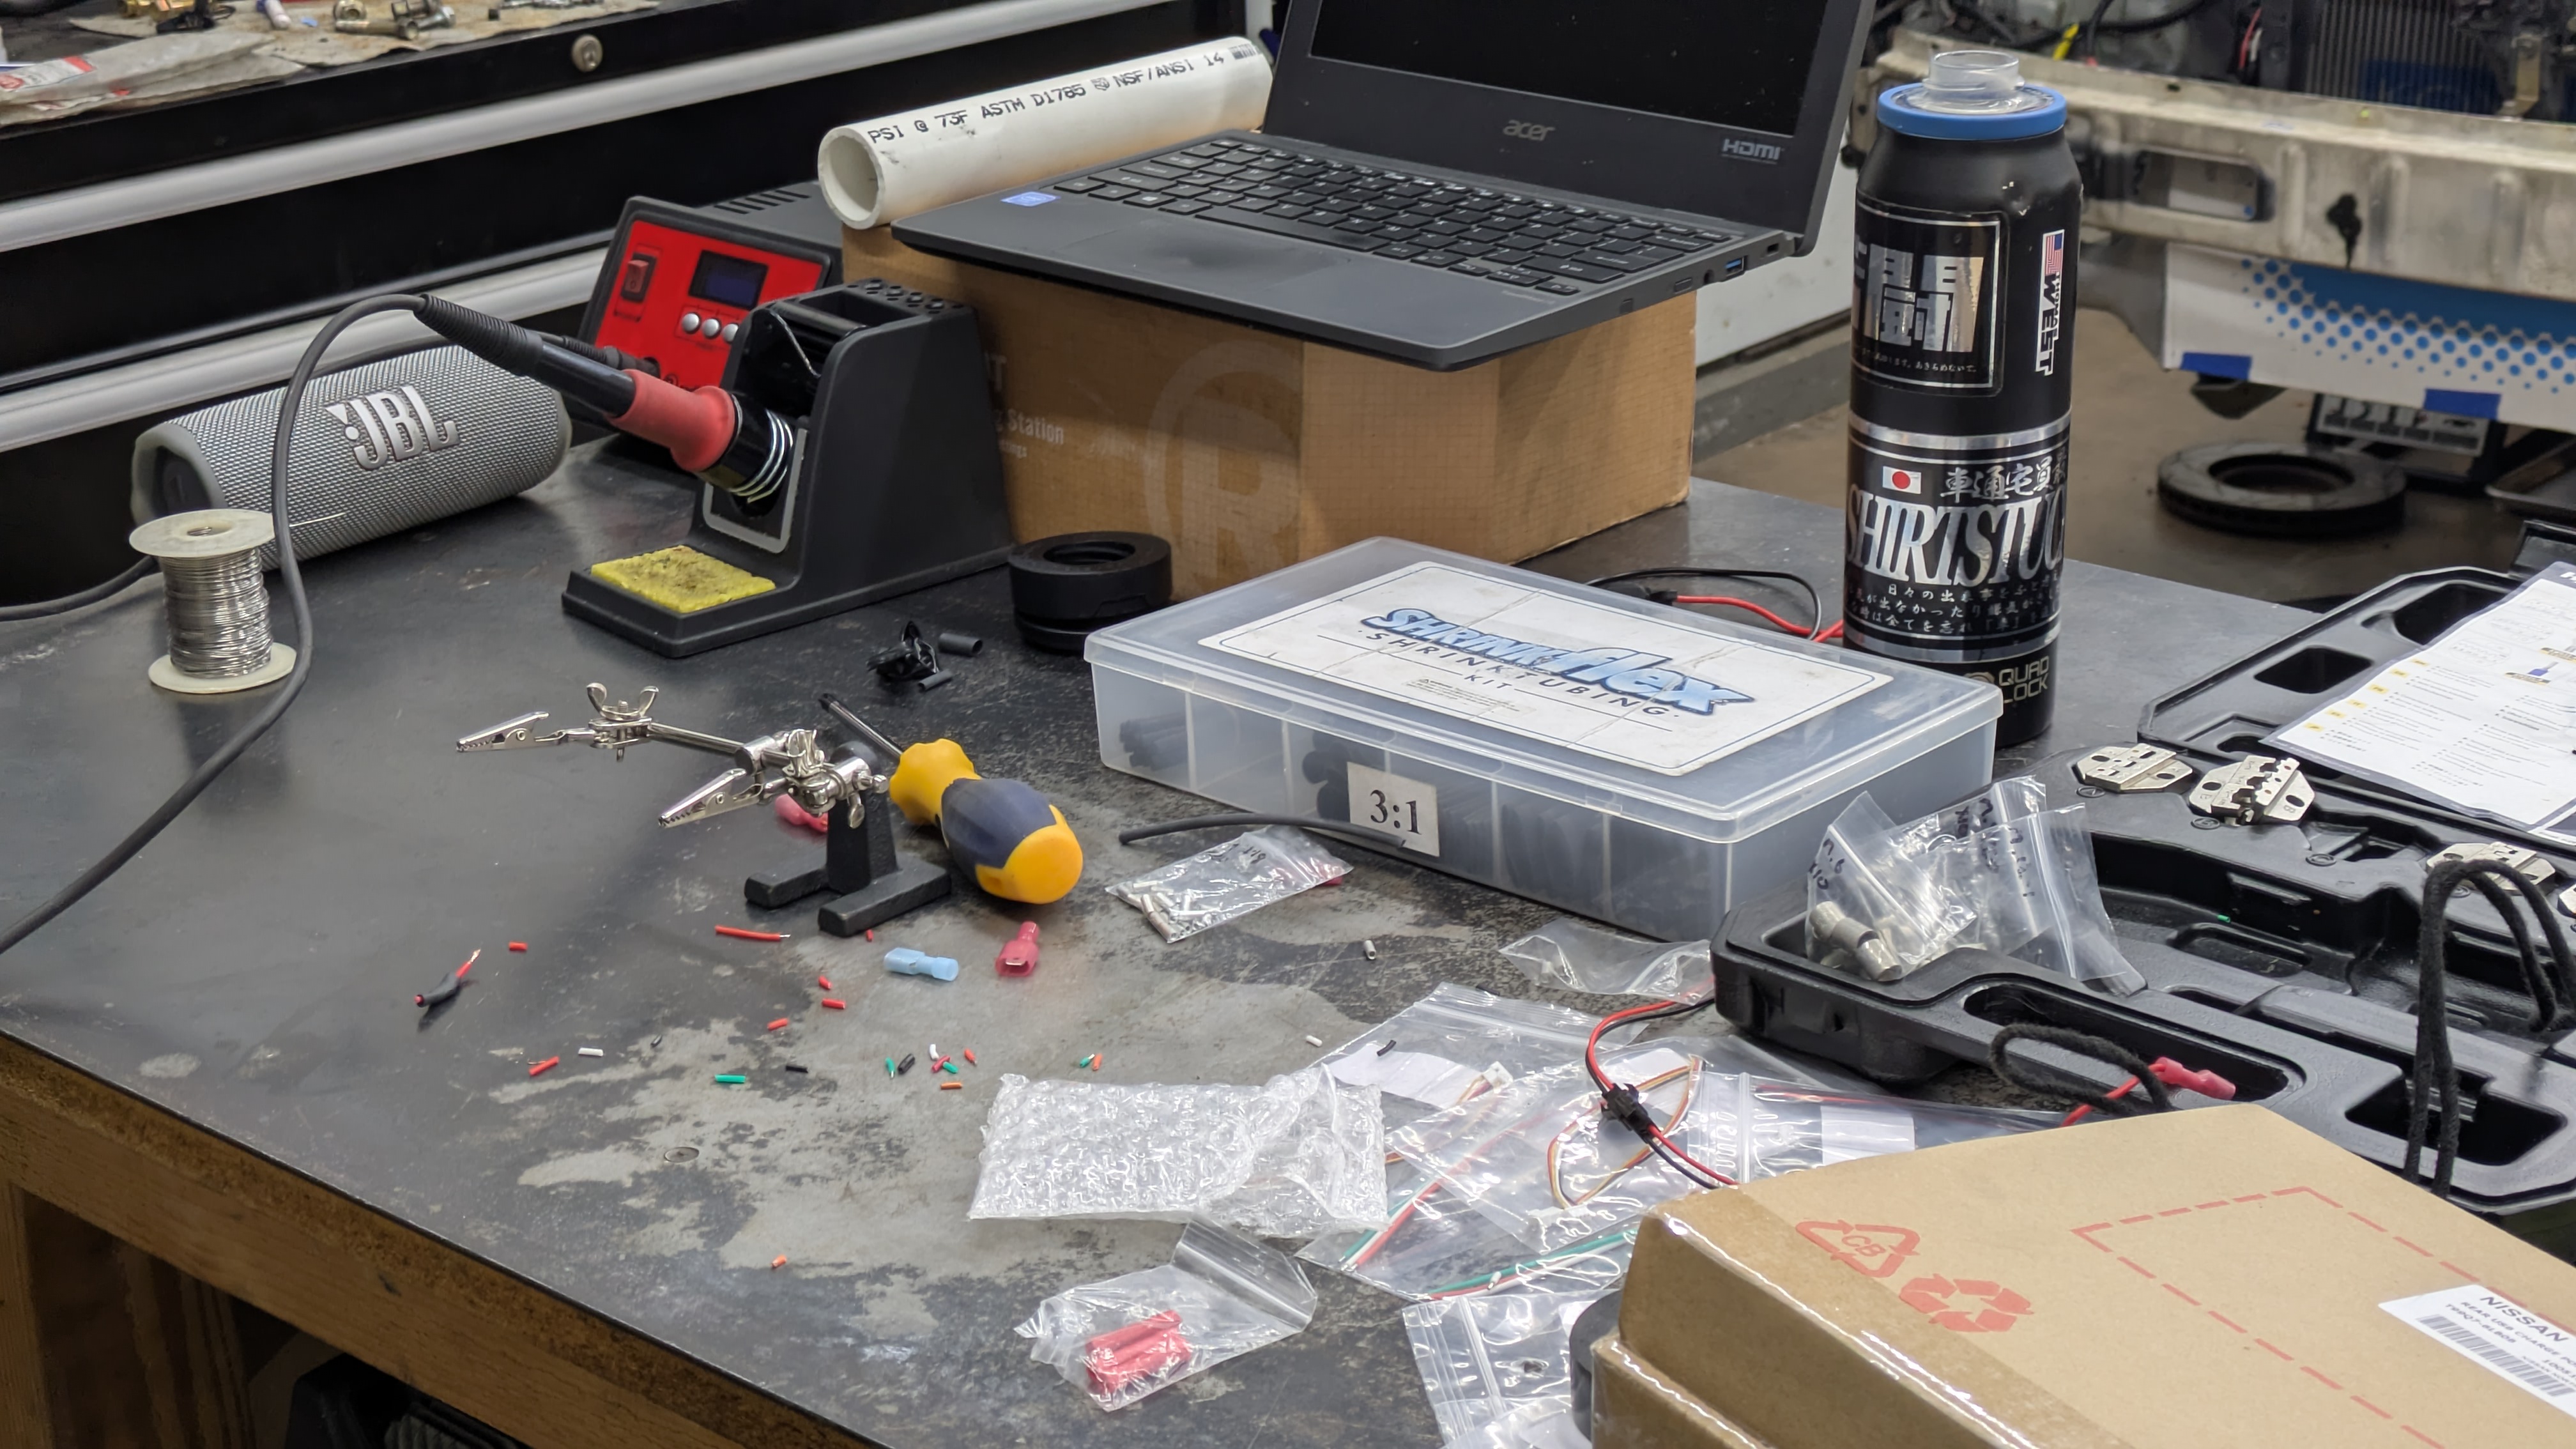
This found me turning to universal pigtails from VetCo to make all the connections solid and quick disconnect-able. While not a pretty and baller motorsport harness, it is more than effective and resulted in a significant reduction in wiring bulk underneath the radio. Before it was somewhat of a push->shove->pray install for the radio, but with all of the gauge wiring properly managed, it was much easier to install without having to crush anything. This was also the reason I moved the Bluetooth module away from that area so I could have more space. It is shocking how simple these cars are, and with this cleanup, I was able to make it even more effortless to assemble.
While most of these projects had been done when I had time, this began the day of actually reinstalling the majority of the interior. There was one final thing that was eating at me, which is the speed and sound that the climate blend door actuator servo was making. I knew it was probably short on lubrication, but it also sounded somewhat broken. It made a low groaning noise and moved quite slowly whenever I had to make a vent change.
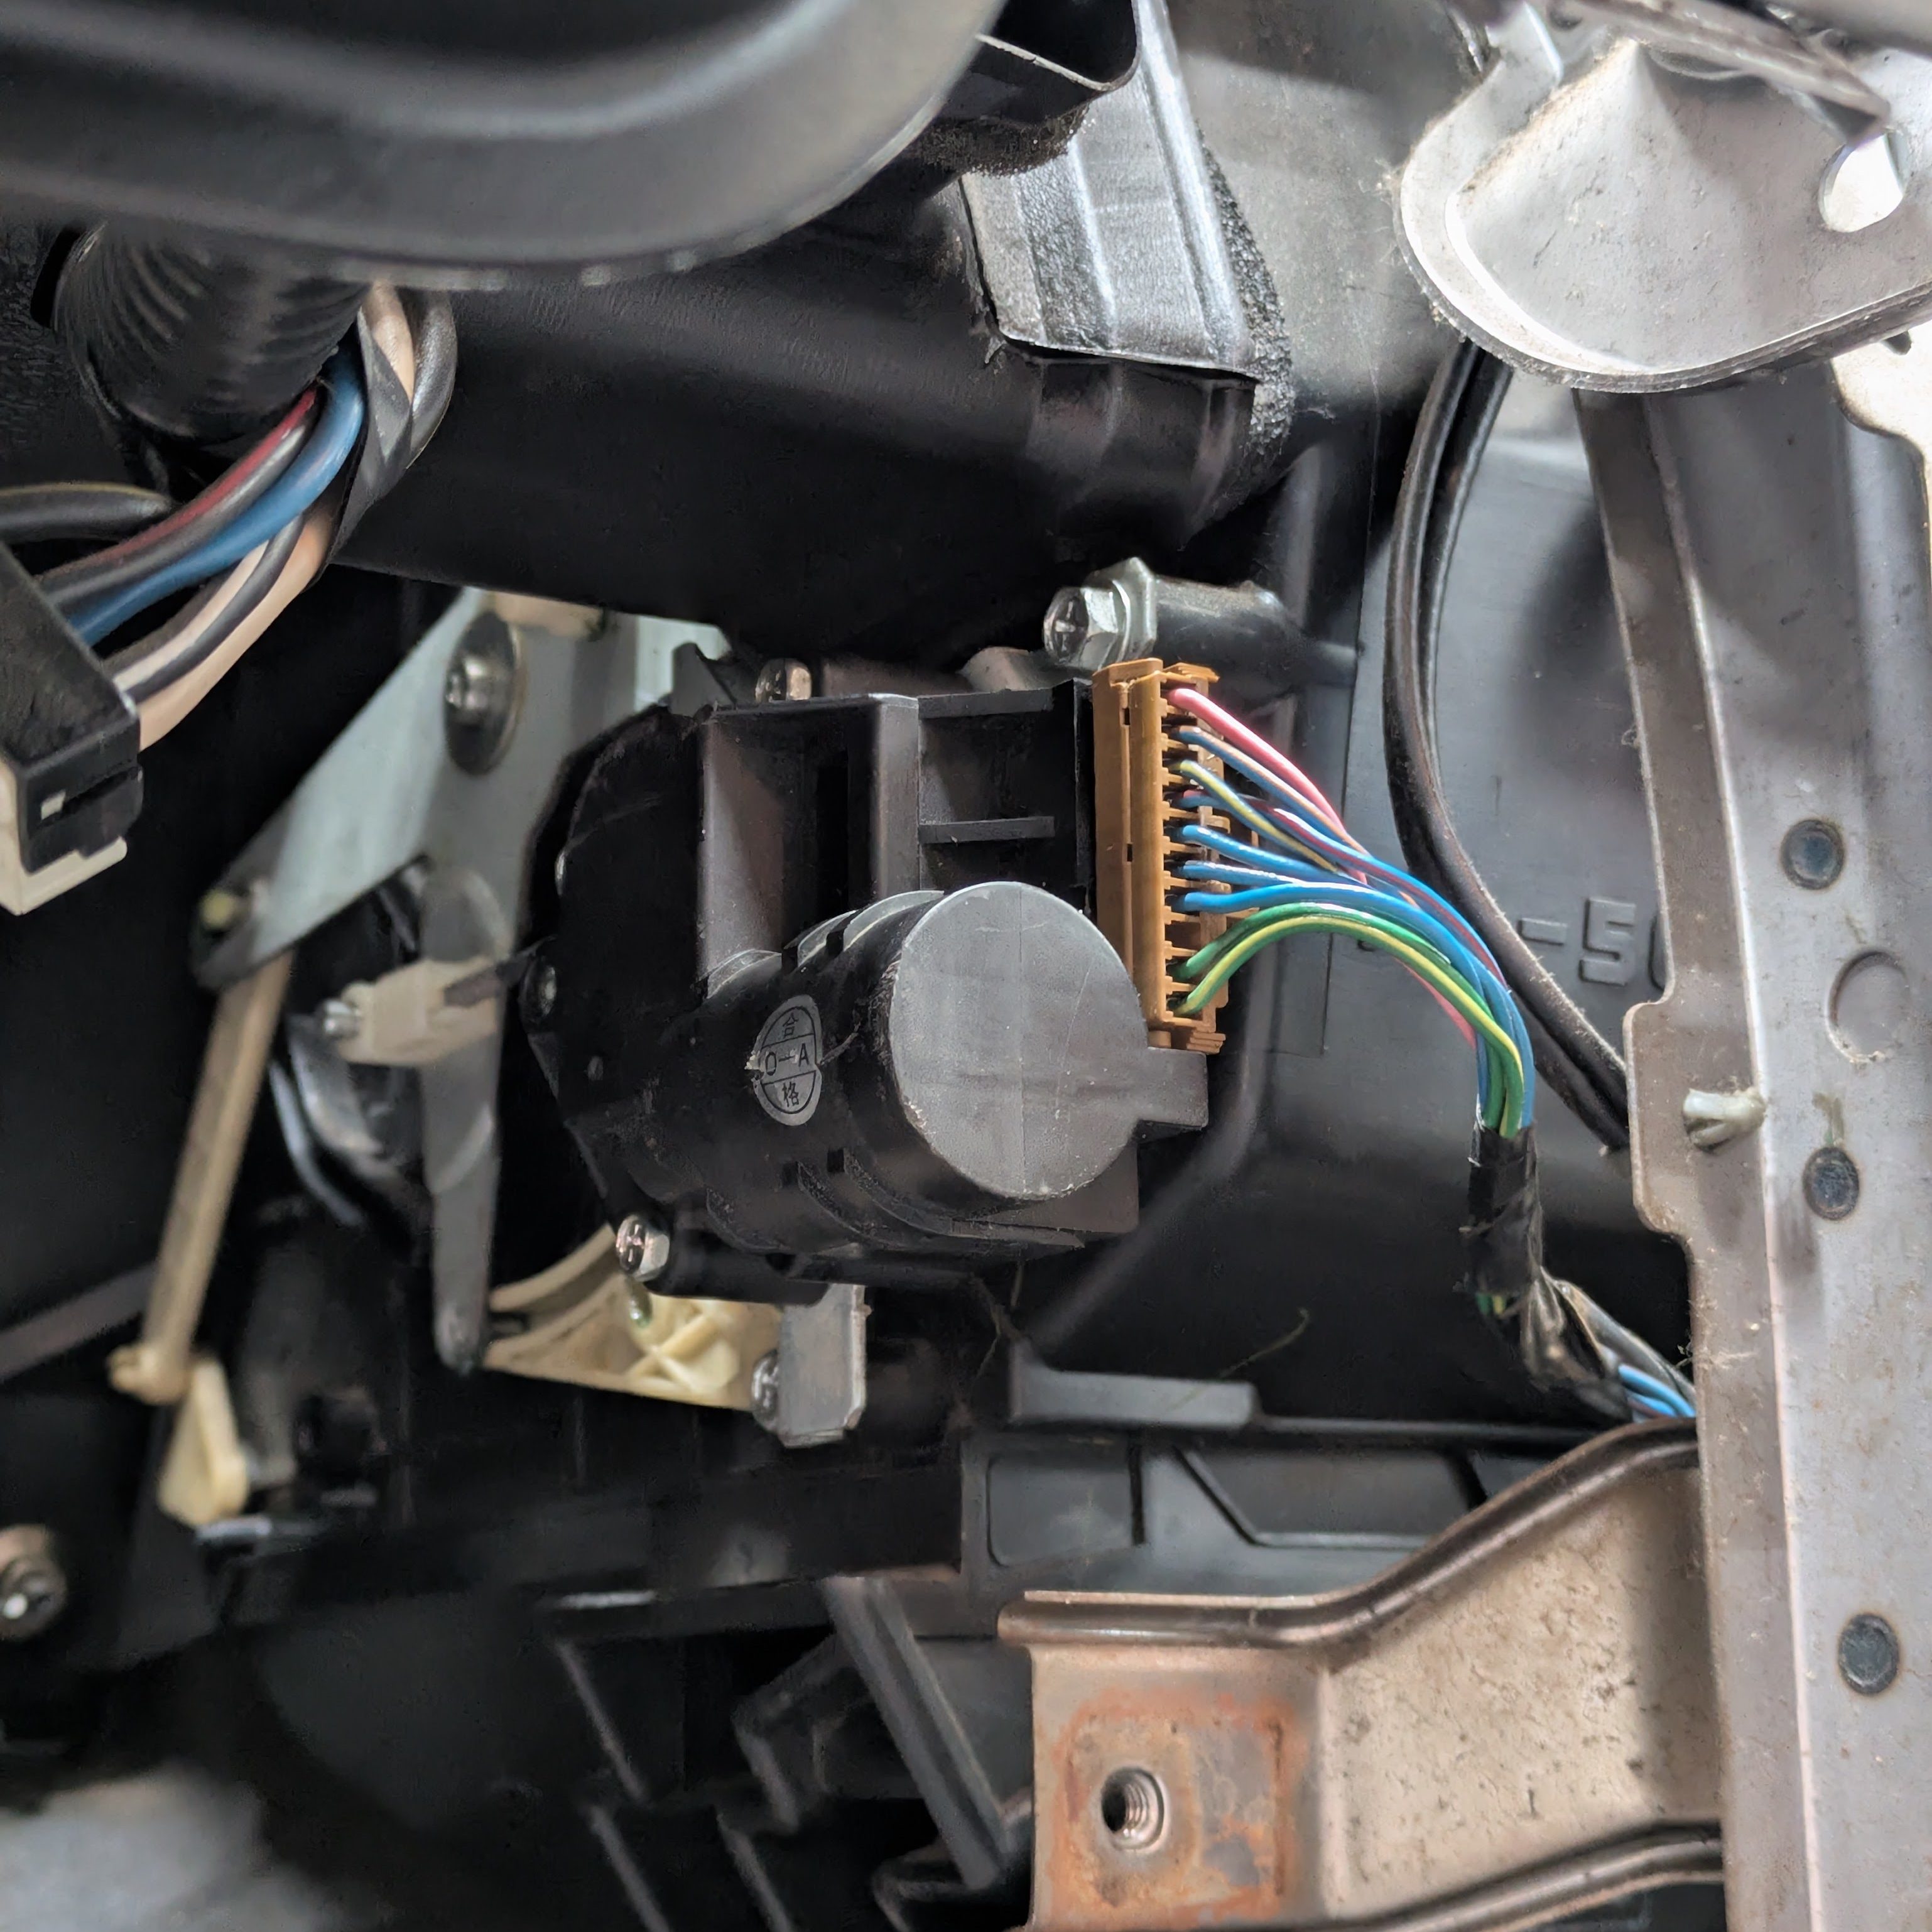
I removed the servo and first tackled lubricating the channels. If you’ve never seen how the tracks on a single linear servo that actuate climate control zones, it is a thing of geometric beauty. I threw some Honda Super Urea in the channels with a Qtip and racked it back and forth until the grease was distributed and it felt smooth. Actuation effort reduced significantly, so I moved on to the servo.
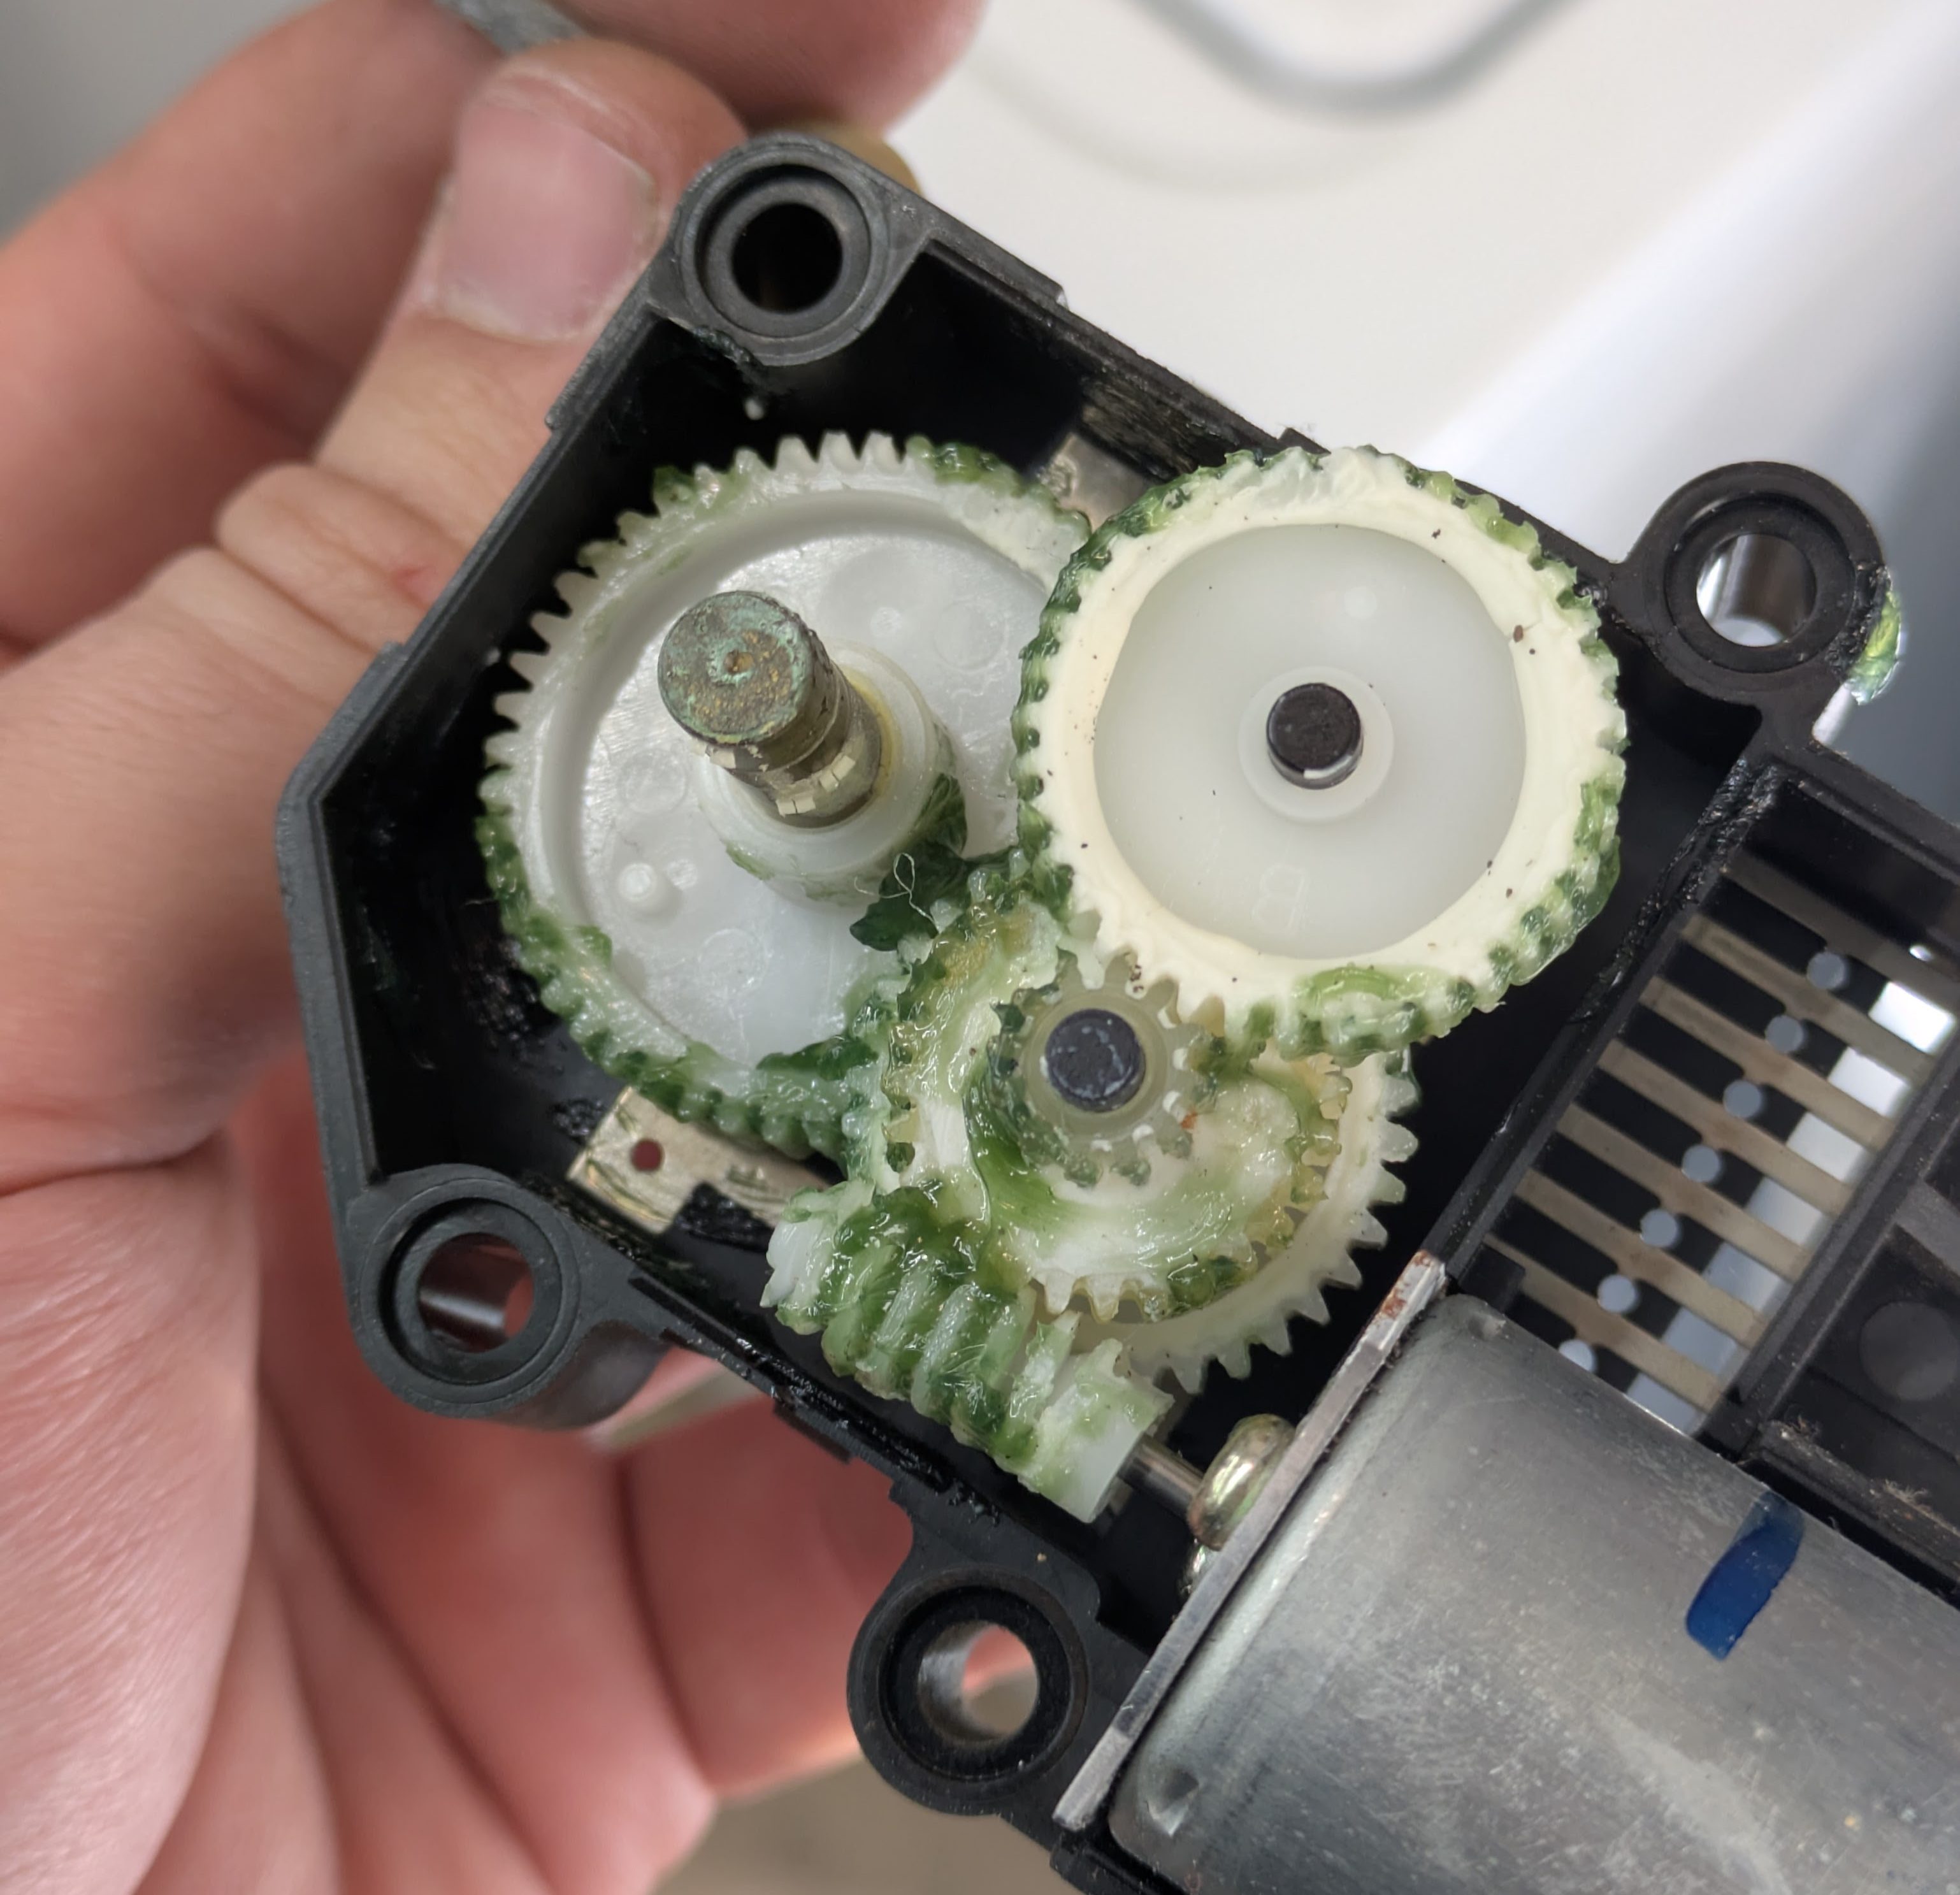
Knowing that my servo was close to retirement, I was fortunate enough to acquire a spare heater core box from Alex, and thus a spare servo. While the insides of mine looked fine, I figured the motor wasn’t too stoked with all the extra drag it had been contending with, so I elected to swap the servo from the other box over. Before the new one went in, I gave it a good inspection to make sure it was worth installing and packed it full of new grease. With it installed and actuating, it is SIGNIFICANTLY happier to do the job, and was definitely worth the time and effort spent to have smooth and quiet(er) climate control actuation.
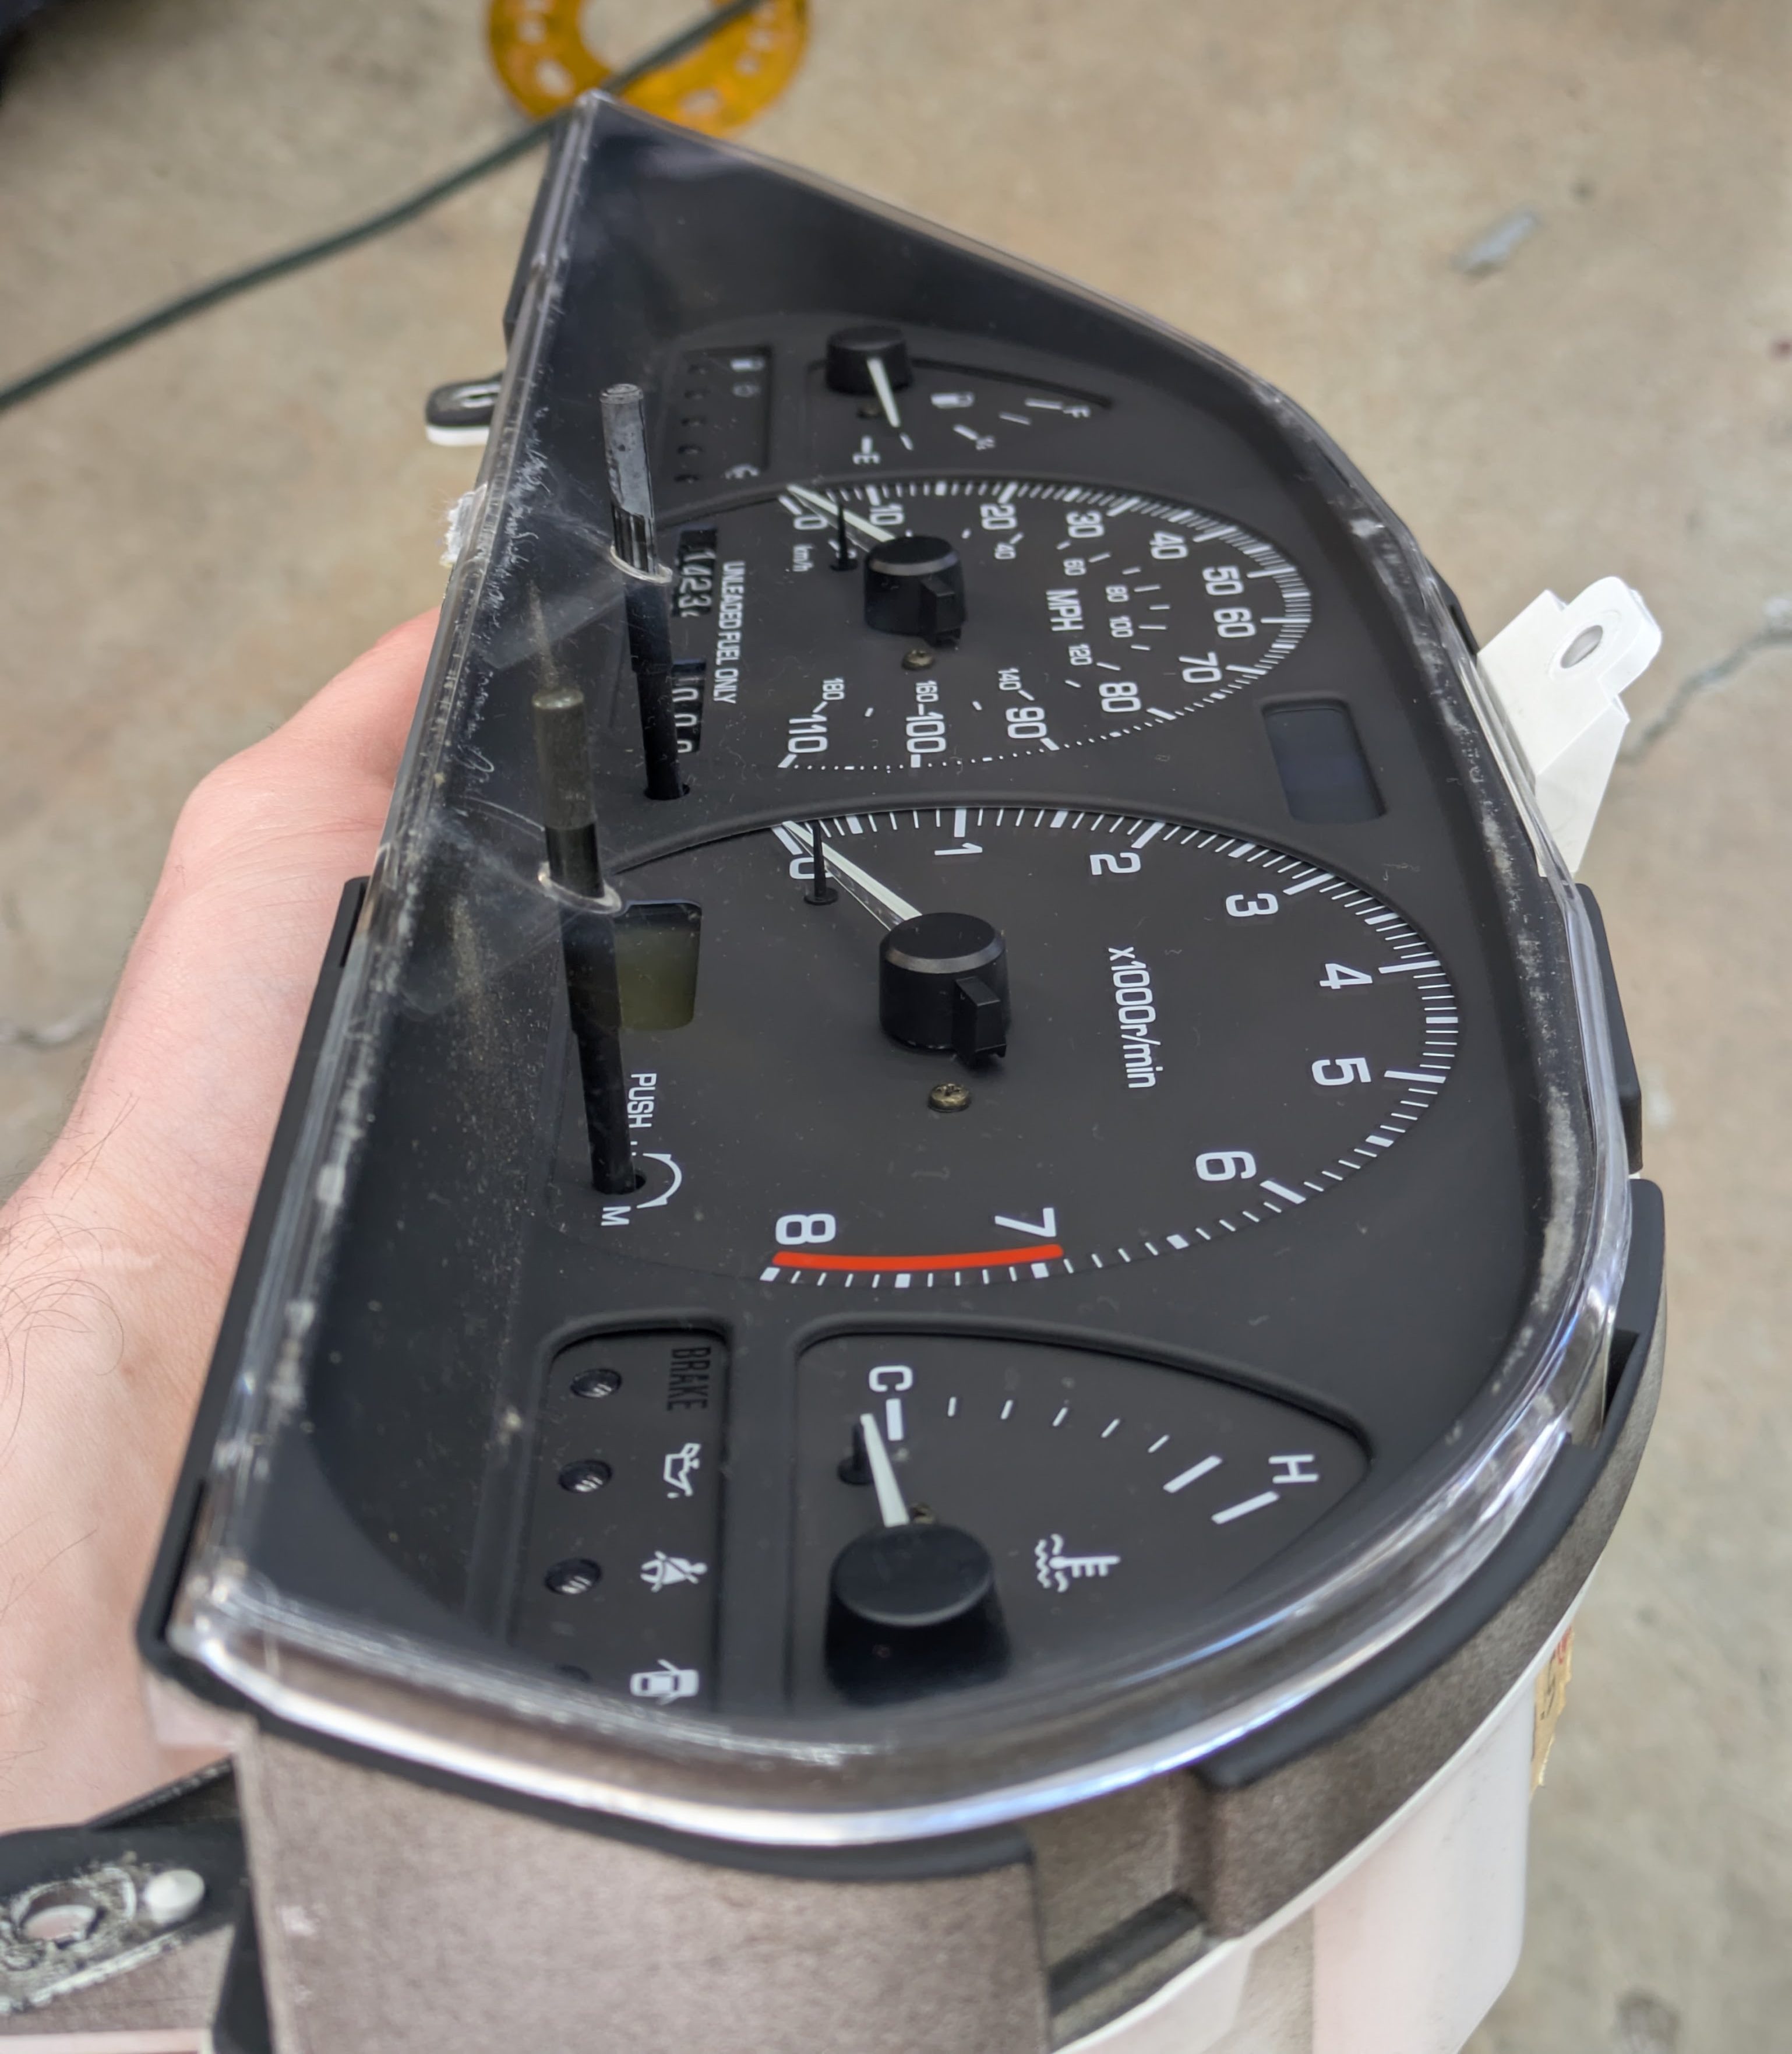
With the dash install mounting, I took the time to give the gauge cluster a quick polish, as it had many scratches from years of dry wiping. A few minutes with a microfiber pad and Griot’s Fast Correcting Cream brought it back to showroom.
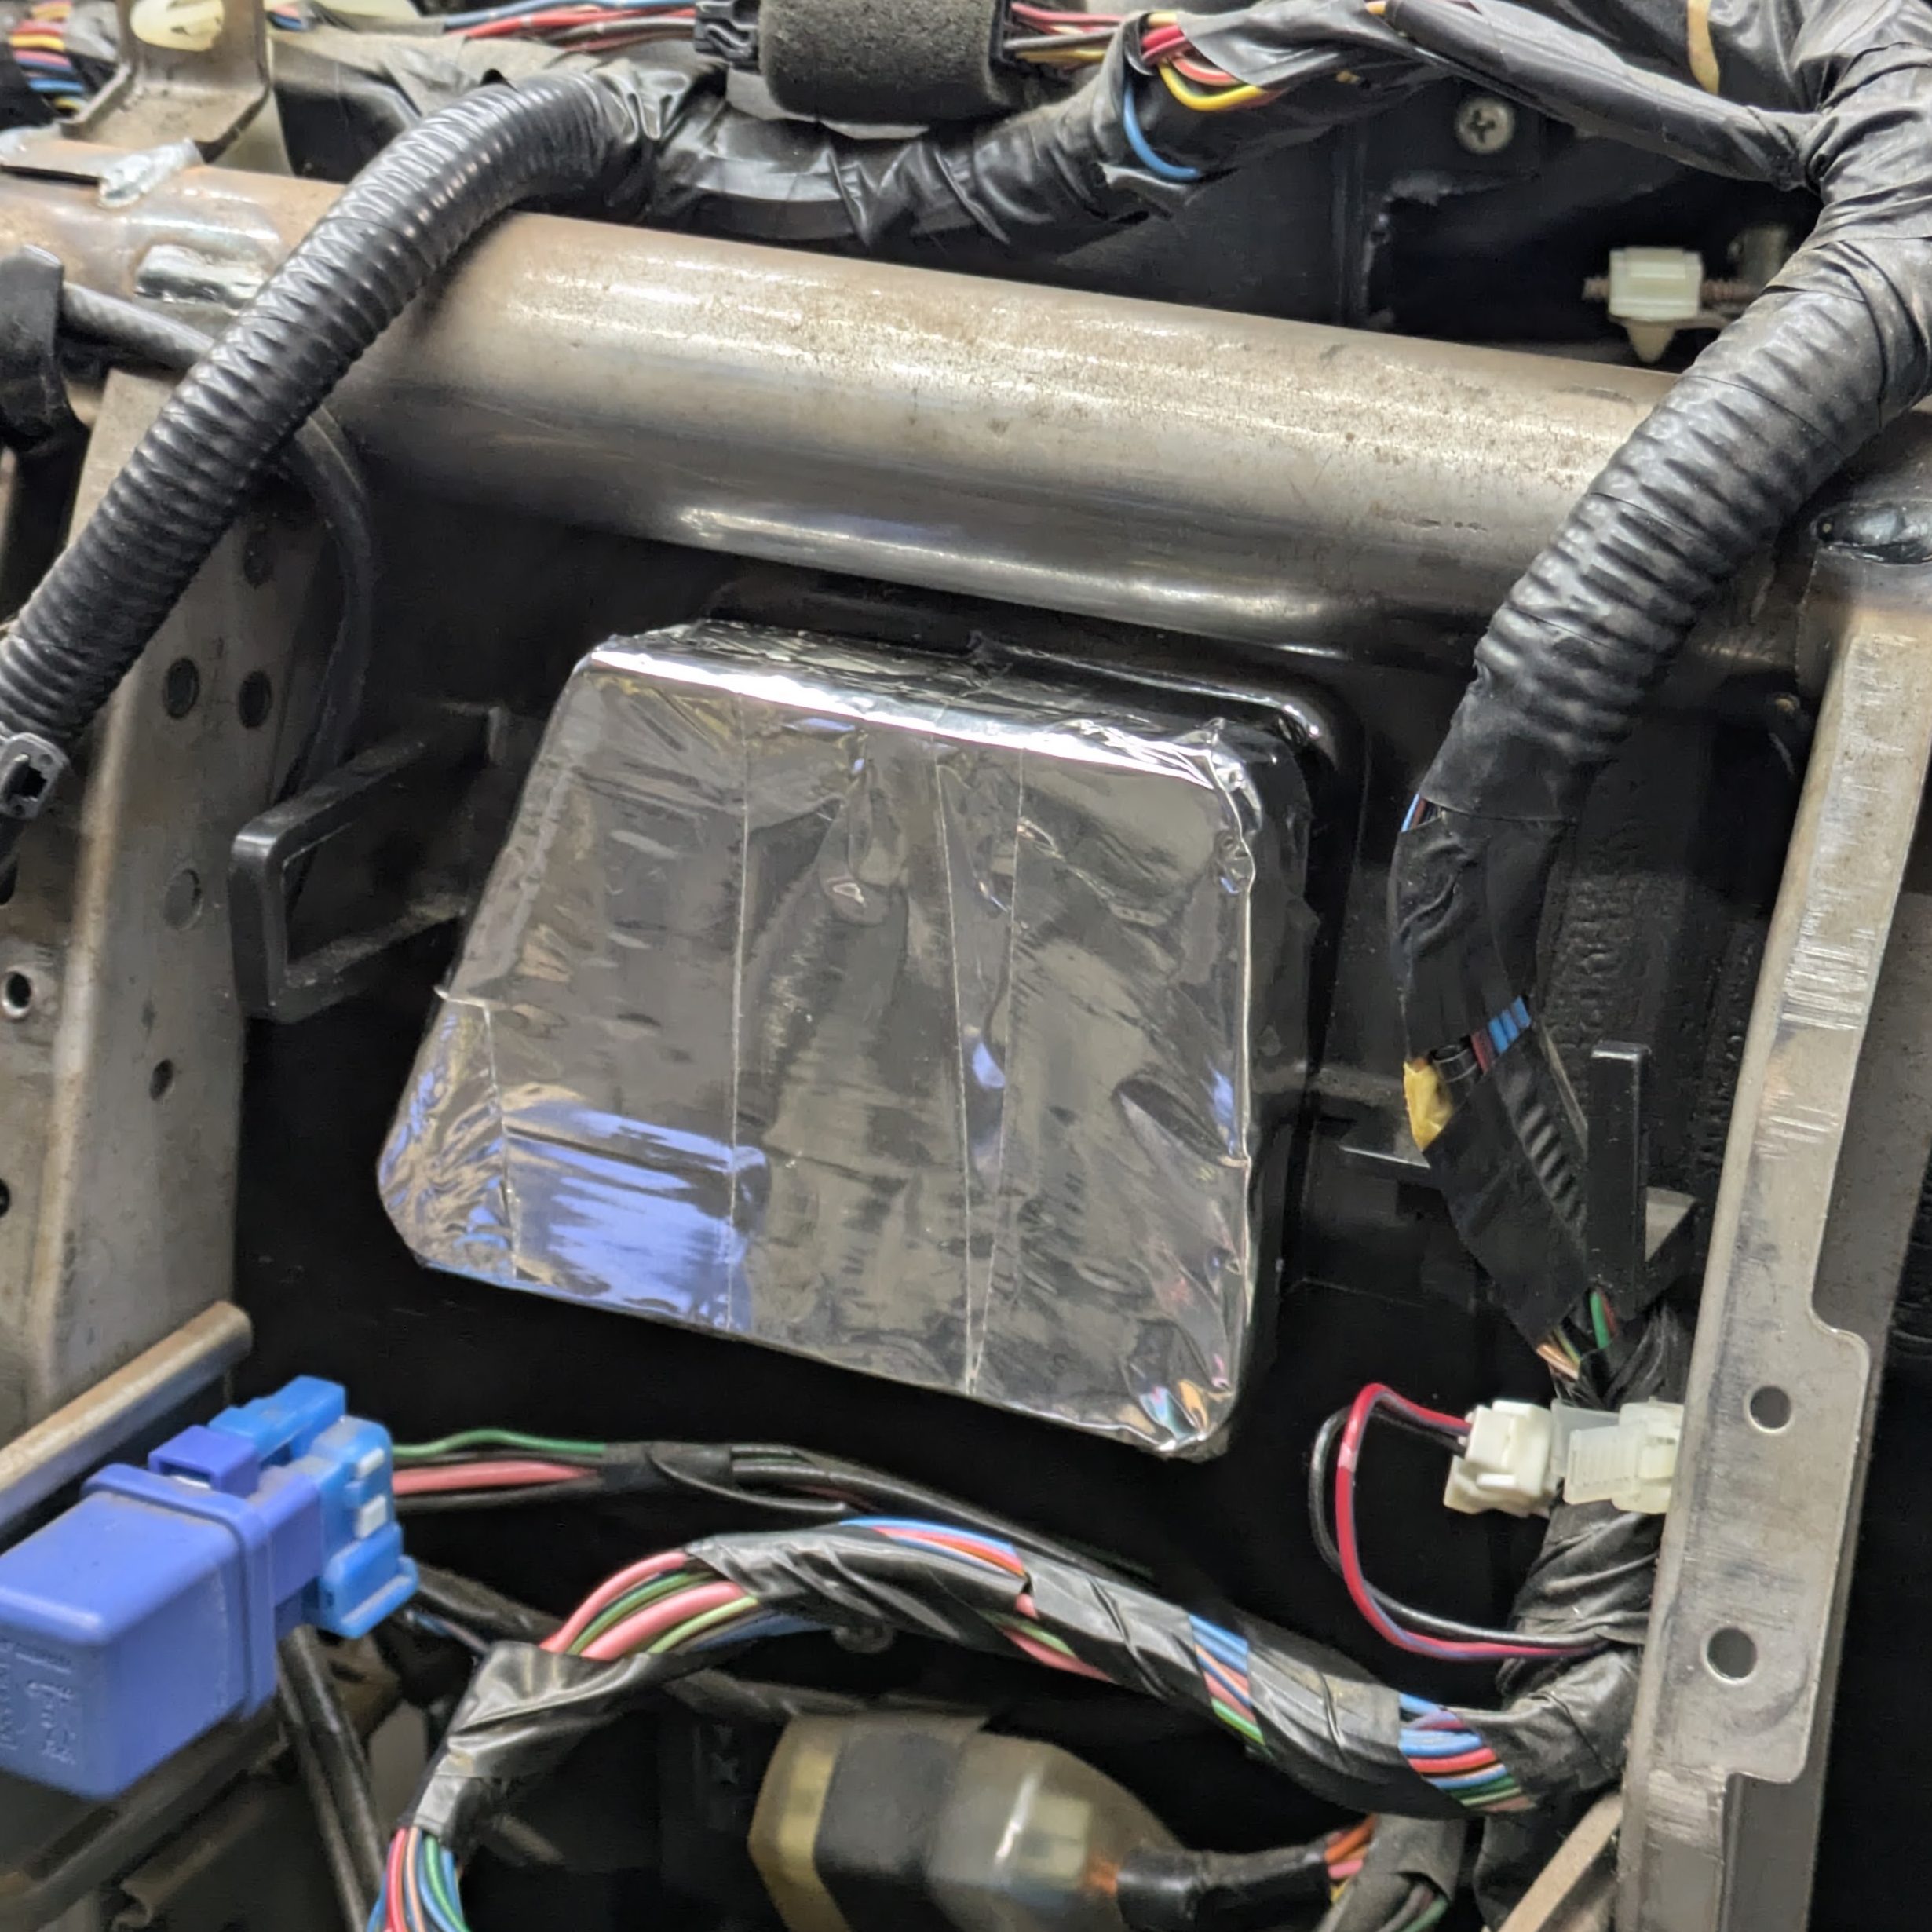
The very last thing was to make some air pressure improvements. As I had the center vents occupied by my Defi gauges, the large outlet from the blower motor was just blasting the back of my climate control panel and radio. I elected to tape it off with some aluminum tape to divert air pressure to all of the other vents while I had good access. I really tried to overcomplicate this in my head, either diverting or capping the outlet with a 3D print, but sometimes the simple answer is the best.
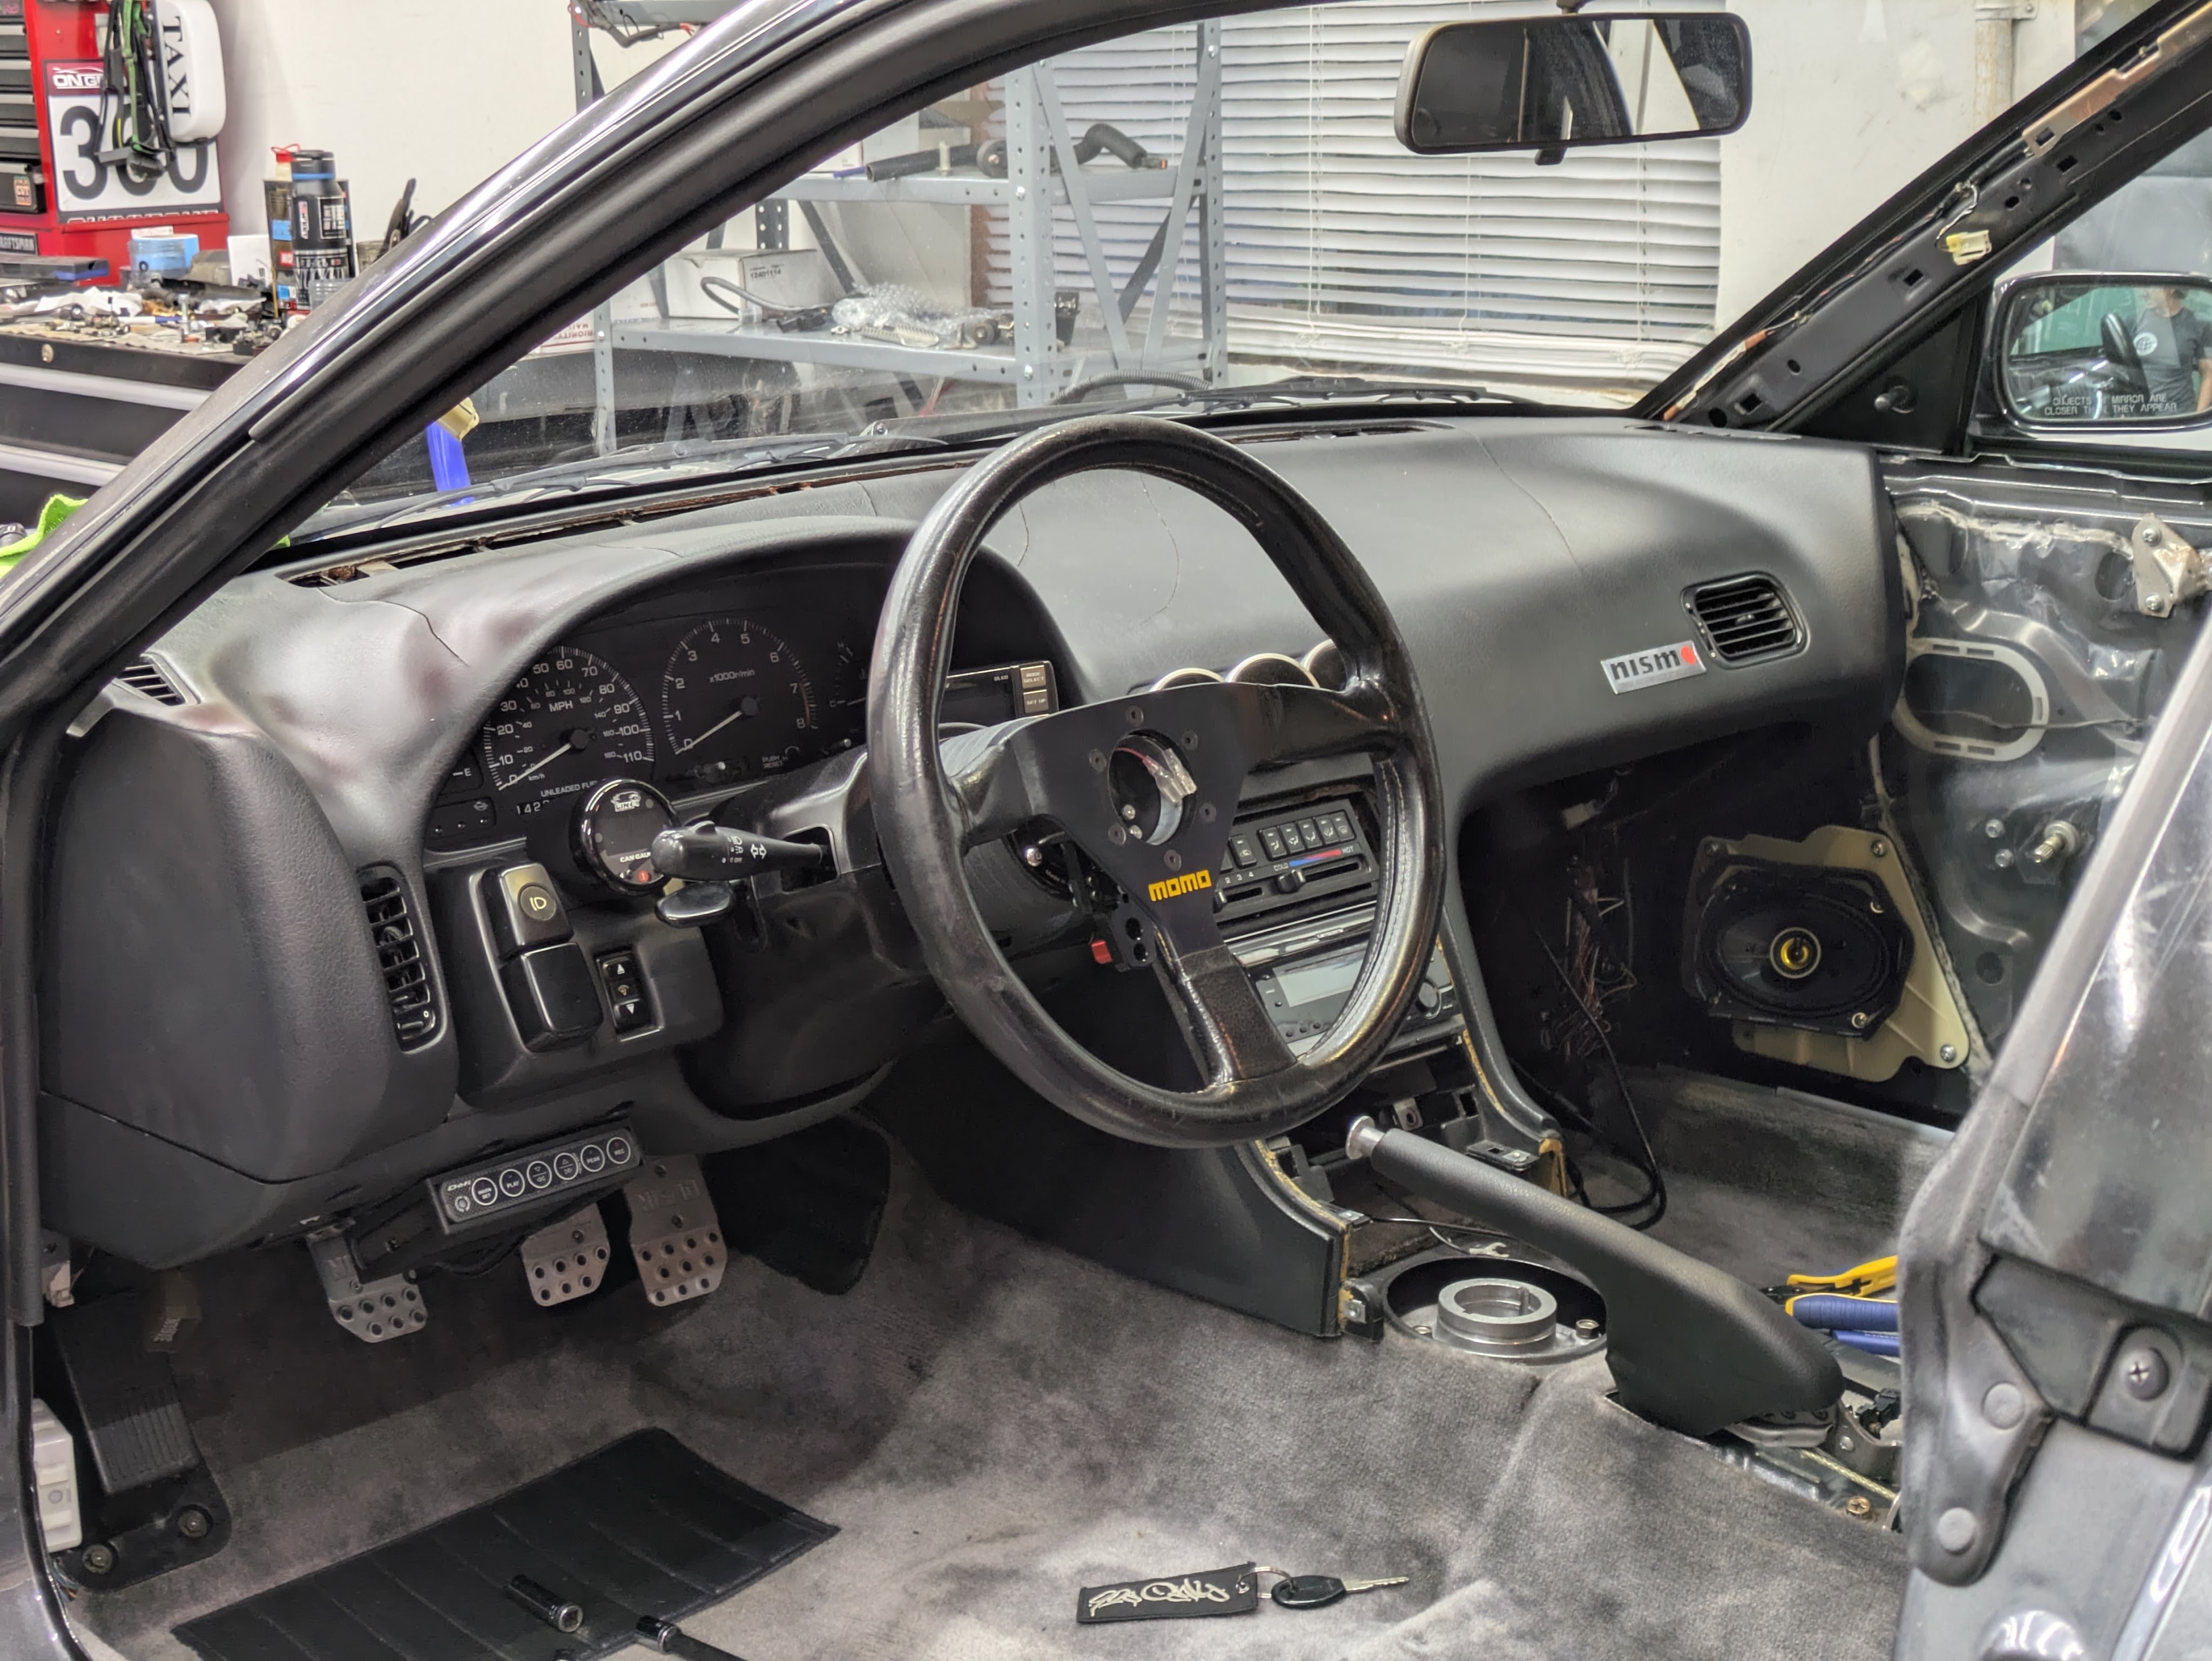
With all of the small projects completed and no excuses left, I put my dash back in. You may ask yourself, after all this crazy effort to make everything so nice, why put a cracked dash back in? I totally get it, and I can’t say that on multiple occasions I didn’t consider (and actually go view) a crack-free dash. I decided to leave this one until later. I’ll find one at some point, sit on it, and when the time comes to tear the car down for engine bay and exterior paint, it’ll get the crack free dash it deserves.
I did buy the Coverlay cover for it, and while very, very good, it wasn’t for me. I think if this was more of a track/racecar, I would have been totally content to throw it in, however it would have required some trimming around the center vent due to the Defis and some other tweaks. On top of that, I was unsure of its behavior with temperature and if it would grow or bubble in the areas it wasn’t glued down. I am sure it will be fine, but I elected to not fake the funk. This car wears it’s patina well.
Once again, further reiterating that these cars are SO easy to work on. Simplest dash pull/install in my life. Once all in and torqued, I threw my new defrost vents in from Tom’s Nissan Parts. Known quantity injection molded ABS that fit fine. I wish they were perfect, but its better than broken, which mine did on the way out despite having practice at it and being careful.
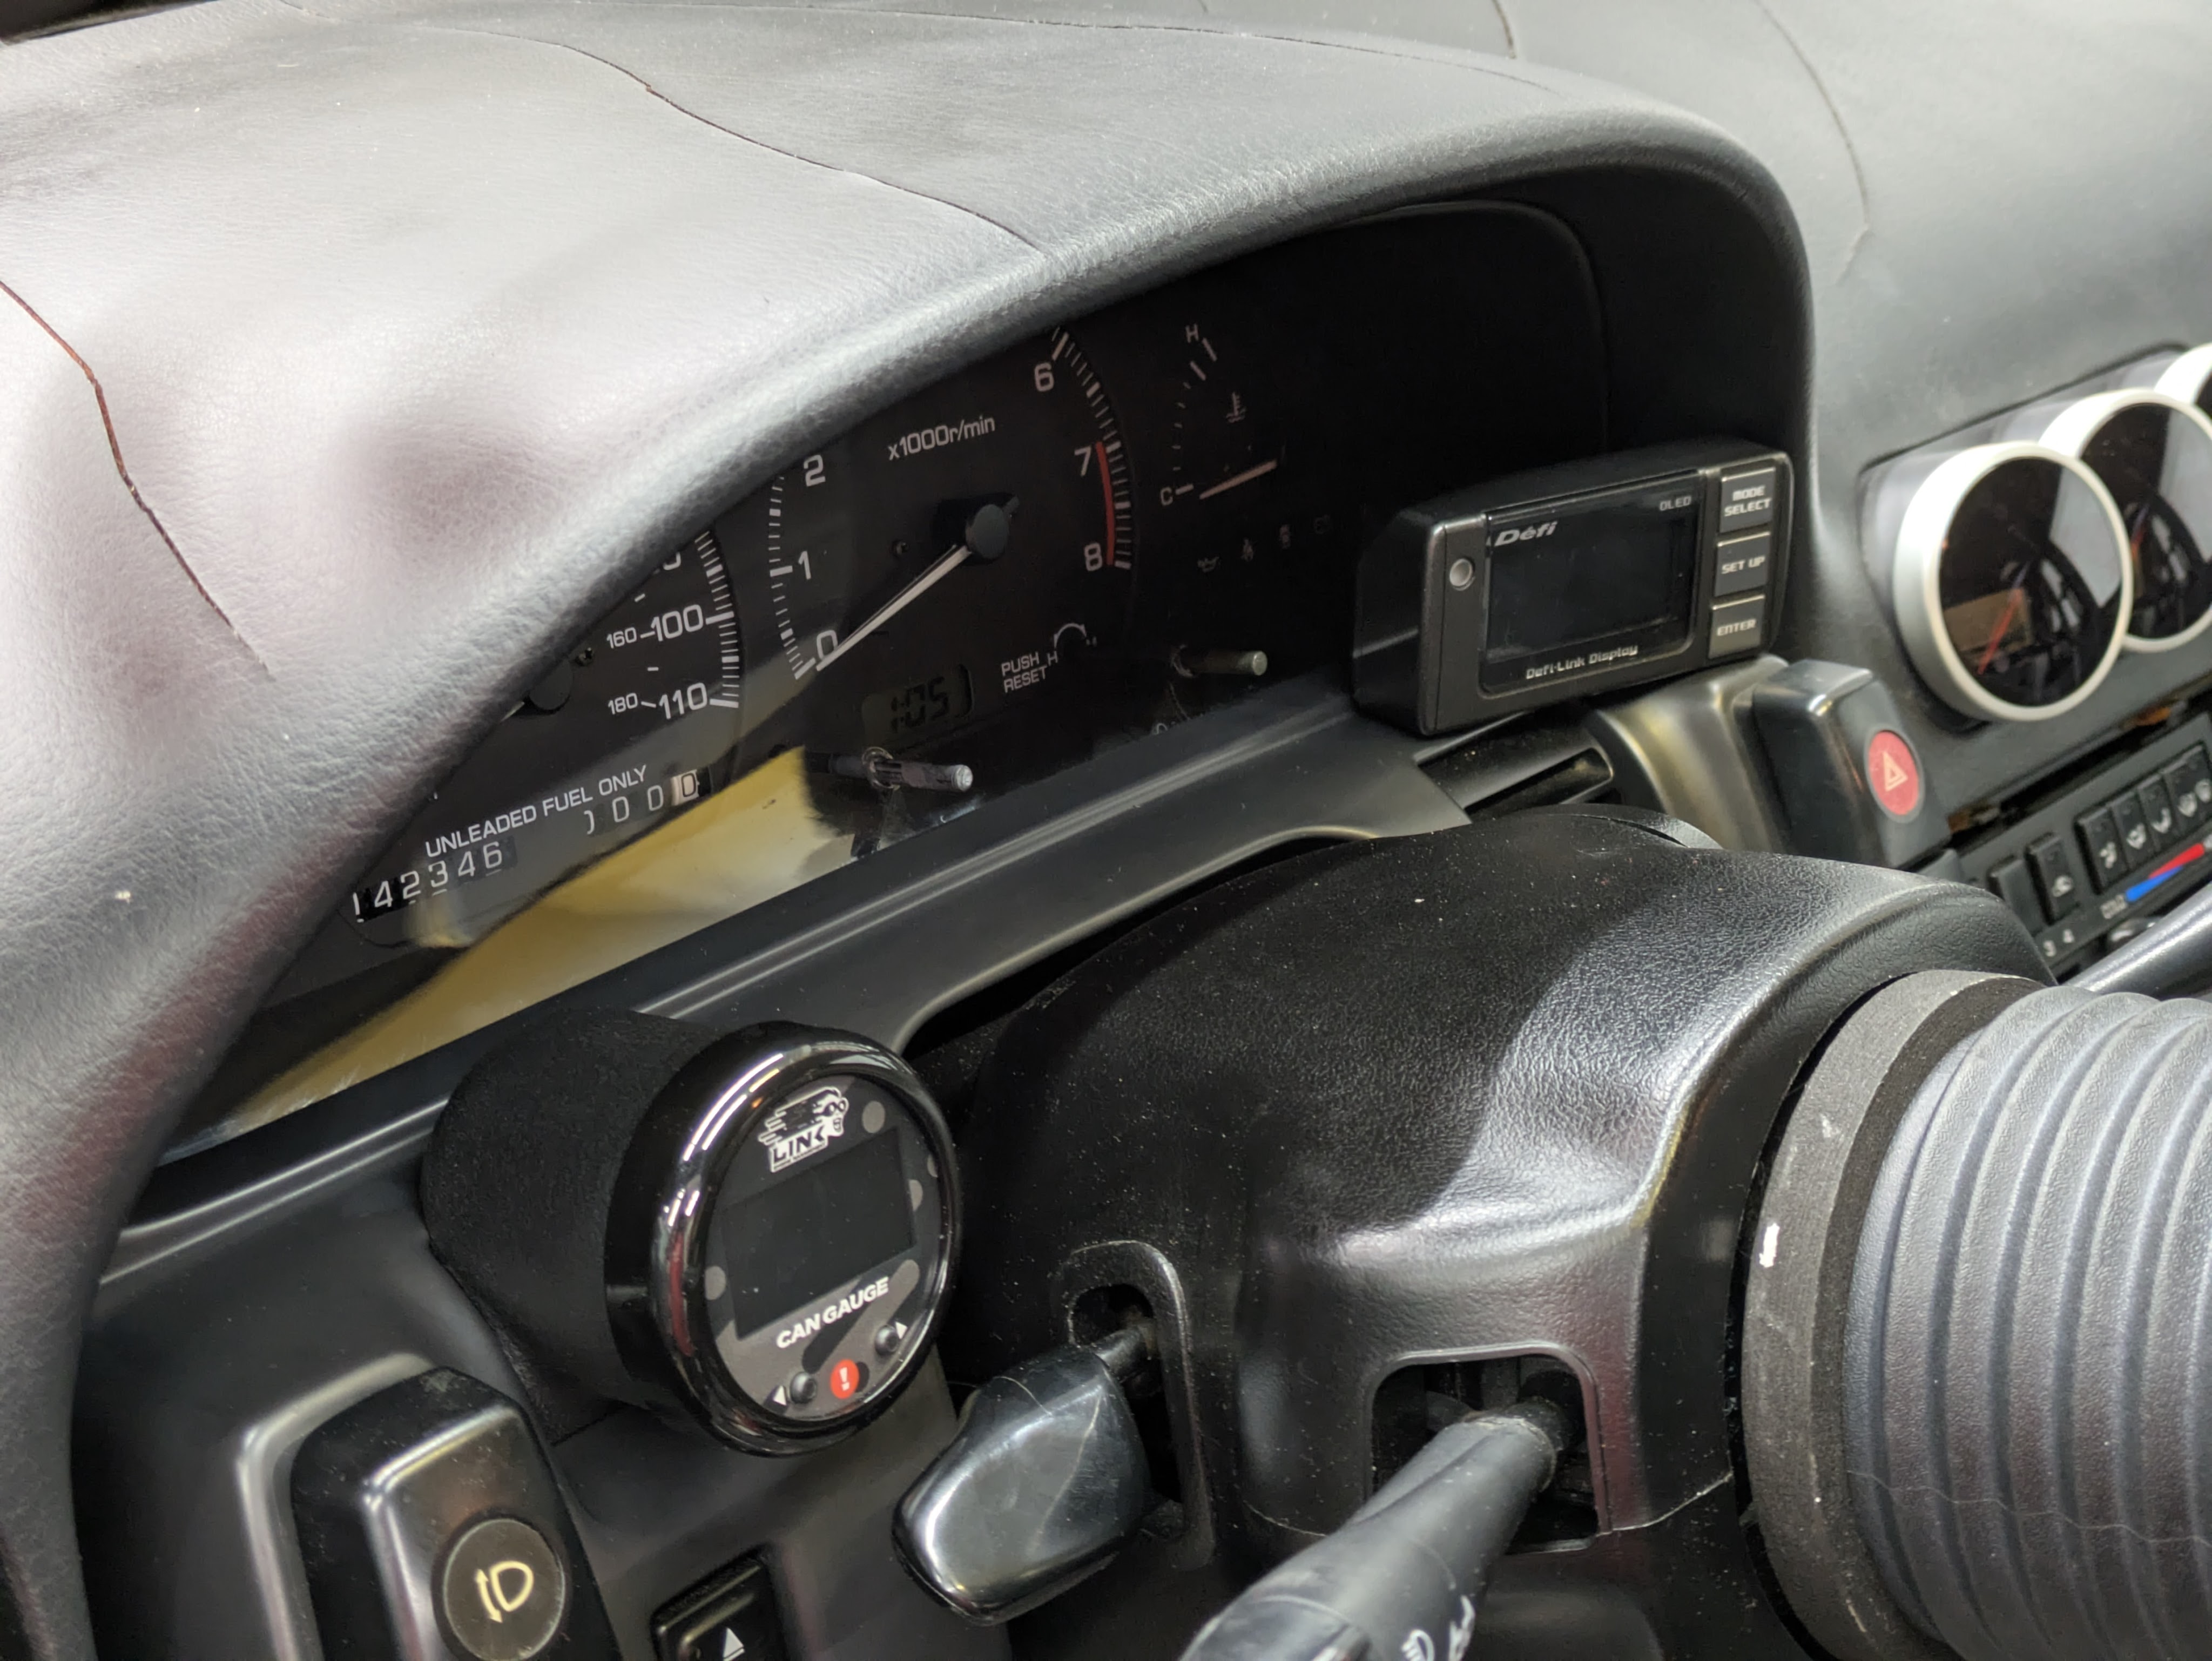
With the dash frame in, I started quickly throwing all of these finished mini projects back in. The Defis, climate control and radio went in without any troubles. Once the gauge cluster and surrounding trim was back in, I put in my Link CANGauge in a Breakbeat hand vent holder. The gauge pod was incredibly well done, not only fit and finish wise, but they include a plug for the vent that you are taking out so it isn’t just blowing air underneath the dash. 10/10. Now with two vents blocked off properly, the cabin vent pressure in this car is pretty radical.
The CanGauge had already been mocked up, and so it dropped right in. It mostly wires through a 4 pin DTC connector from the ECU, but it does have a separate dimmer circuit that I had integrated in my radio wiring clean up. Little details.
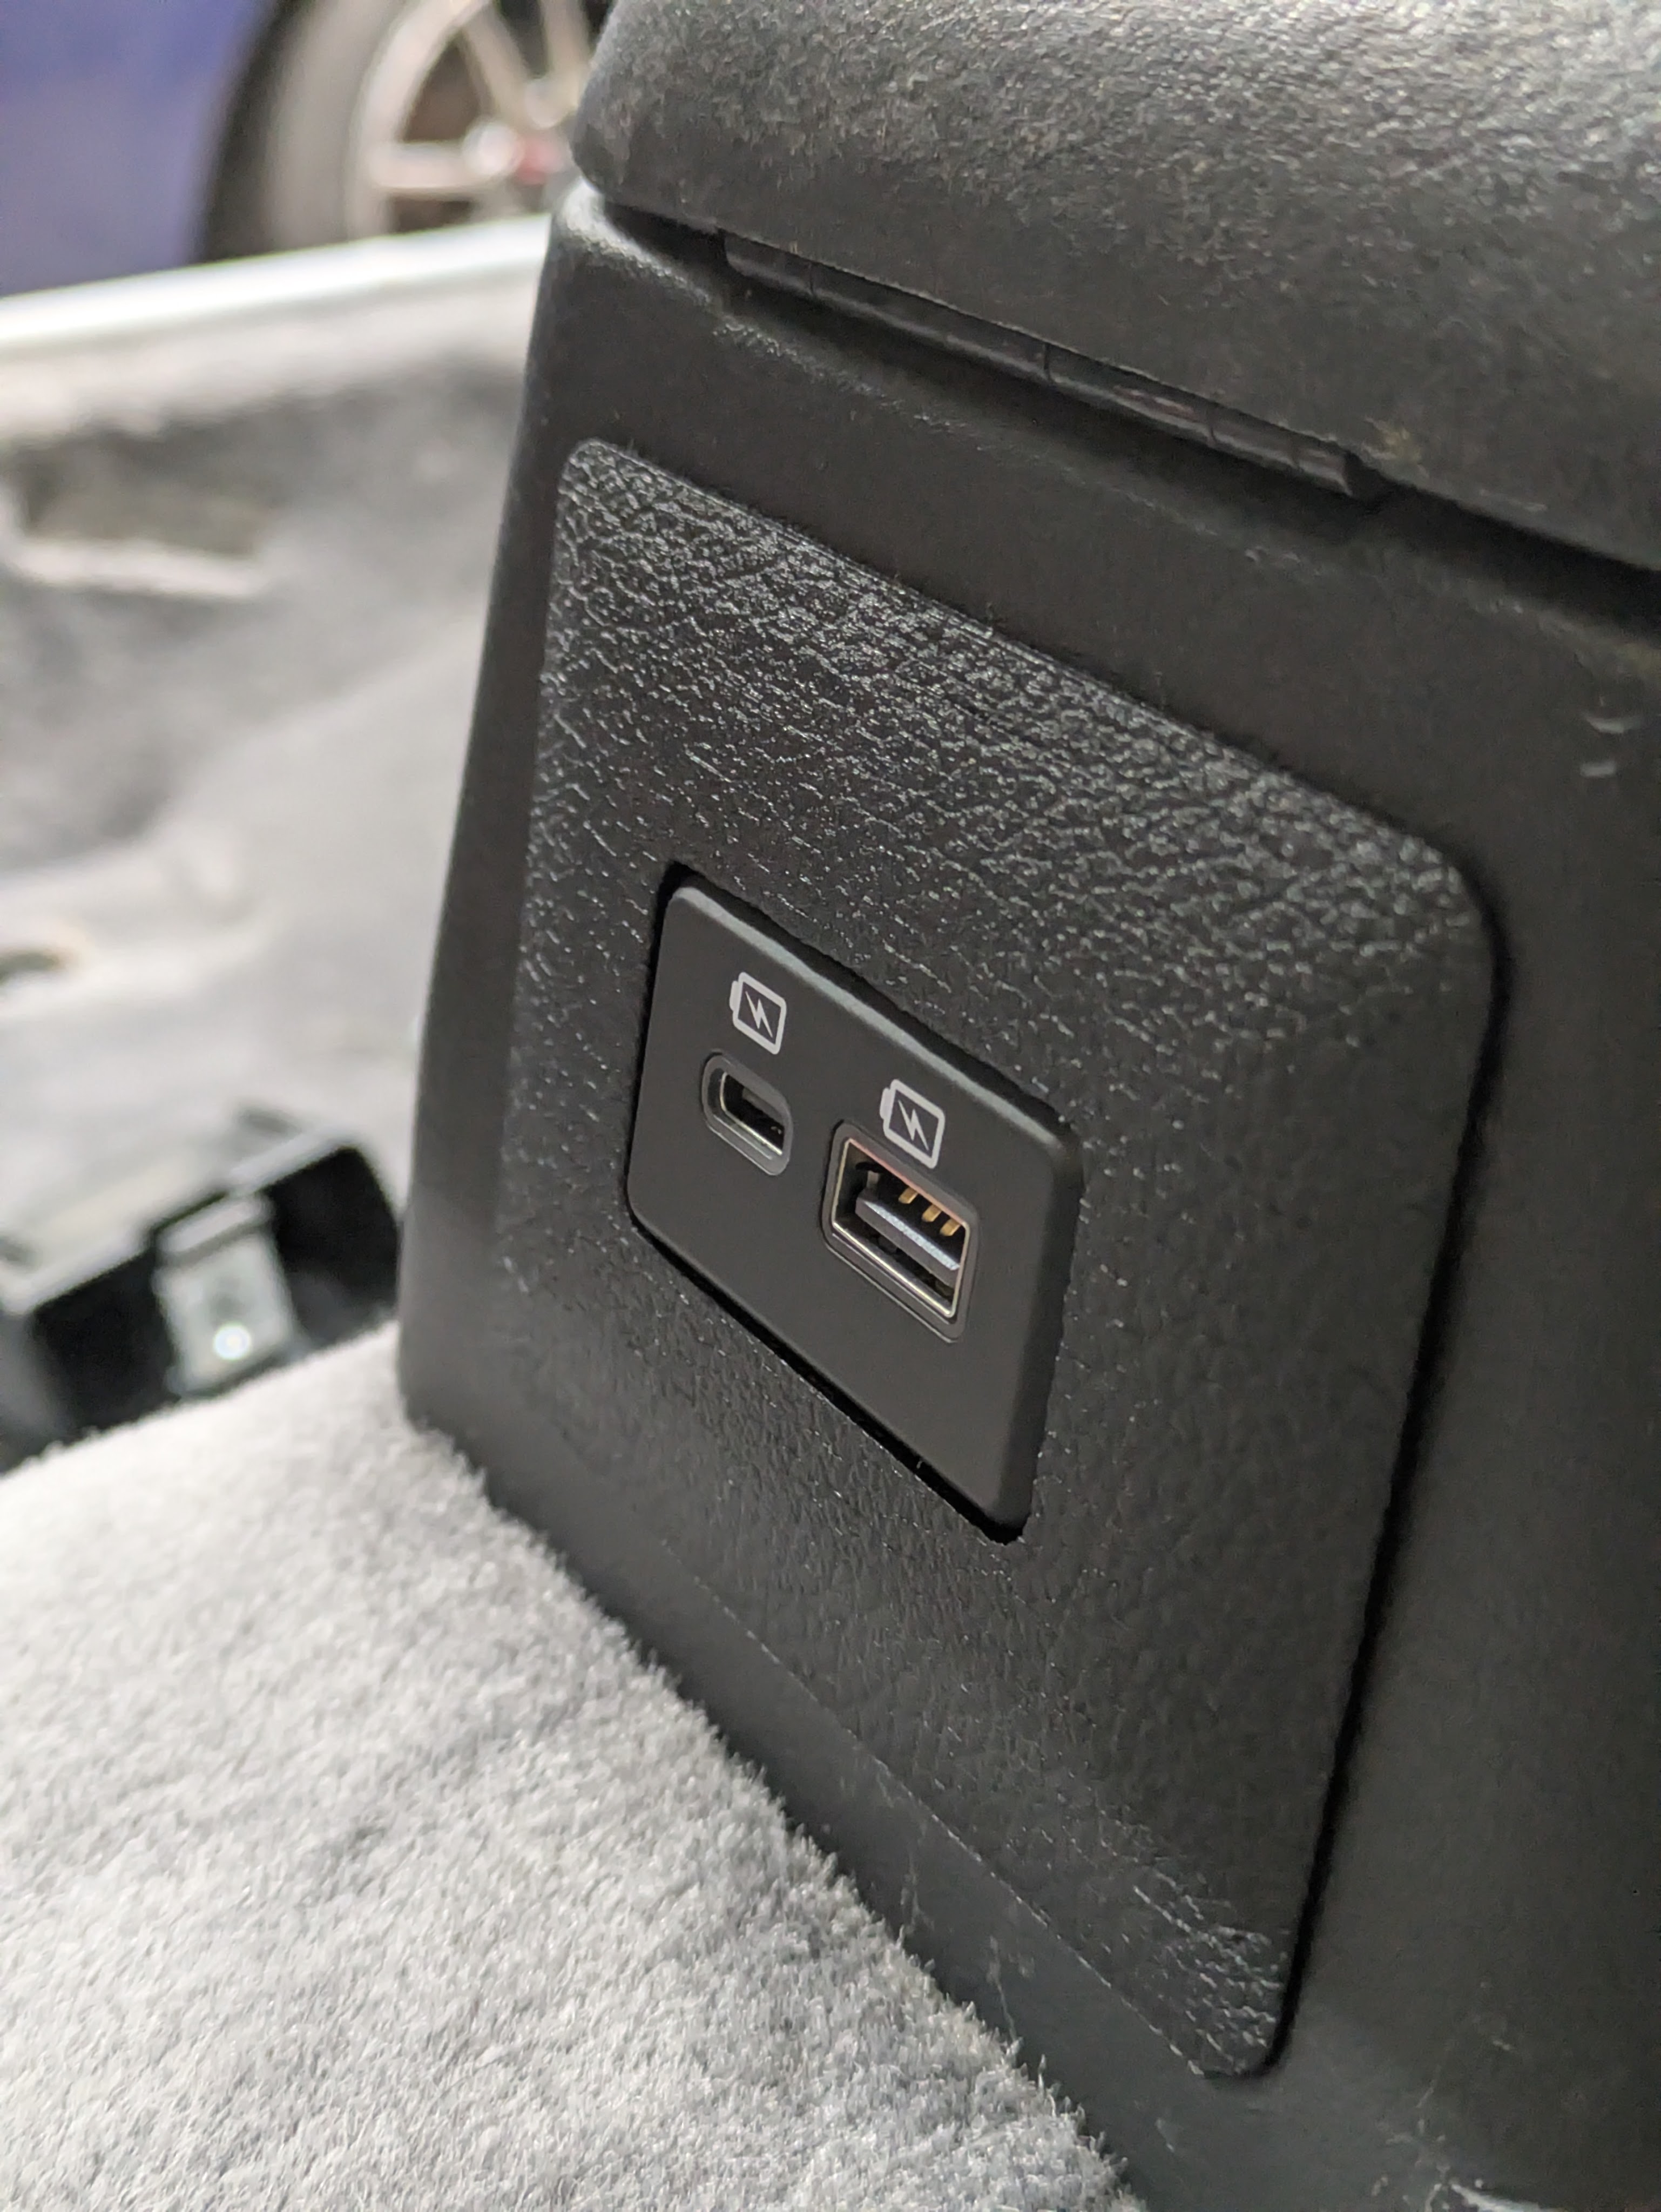
With the dash coming together, and the center console ready to go back in, I popped the rear ashtray out to install the RestoJDM USB bulkhead. It uses an OEM Nissan USB-A/C combo unit out of some newer model, and includes the trim piece, wiring pigtails, and a great instructional video. While pricy, I think it is 100% worth it to have easy modern amenities hidden away in an older car and it looks really nice.
I ended up setting both this unit and the Bluetooth module up on the old seatbelt computer power to keep the wirings runs short and the circuit segregated. While none of this stuff draws a large amount of power, I didn’t want all my gauges + charger + Bluetooth all on the same circuit in case I have to diagnose it in the future. Its also just way cleaner this way.
These next two can be totally described as trinket-y bullshit and pretty unnecessary. Sometimes you have to treat yourself to stuff you just want, not “need” (I use that term loosely).
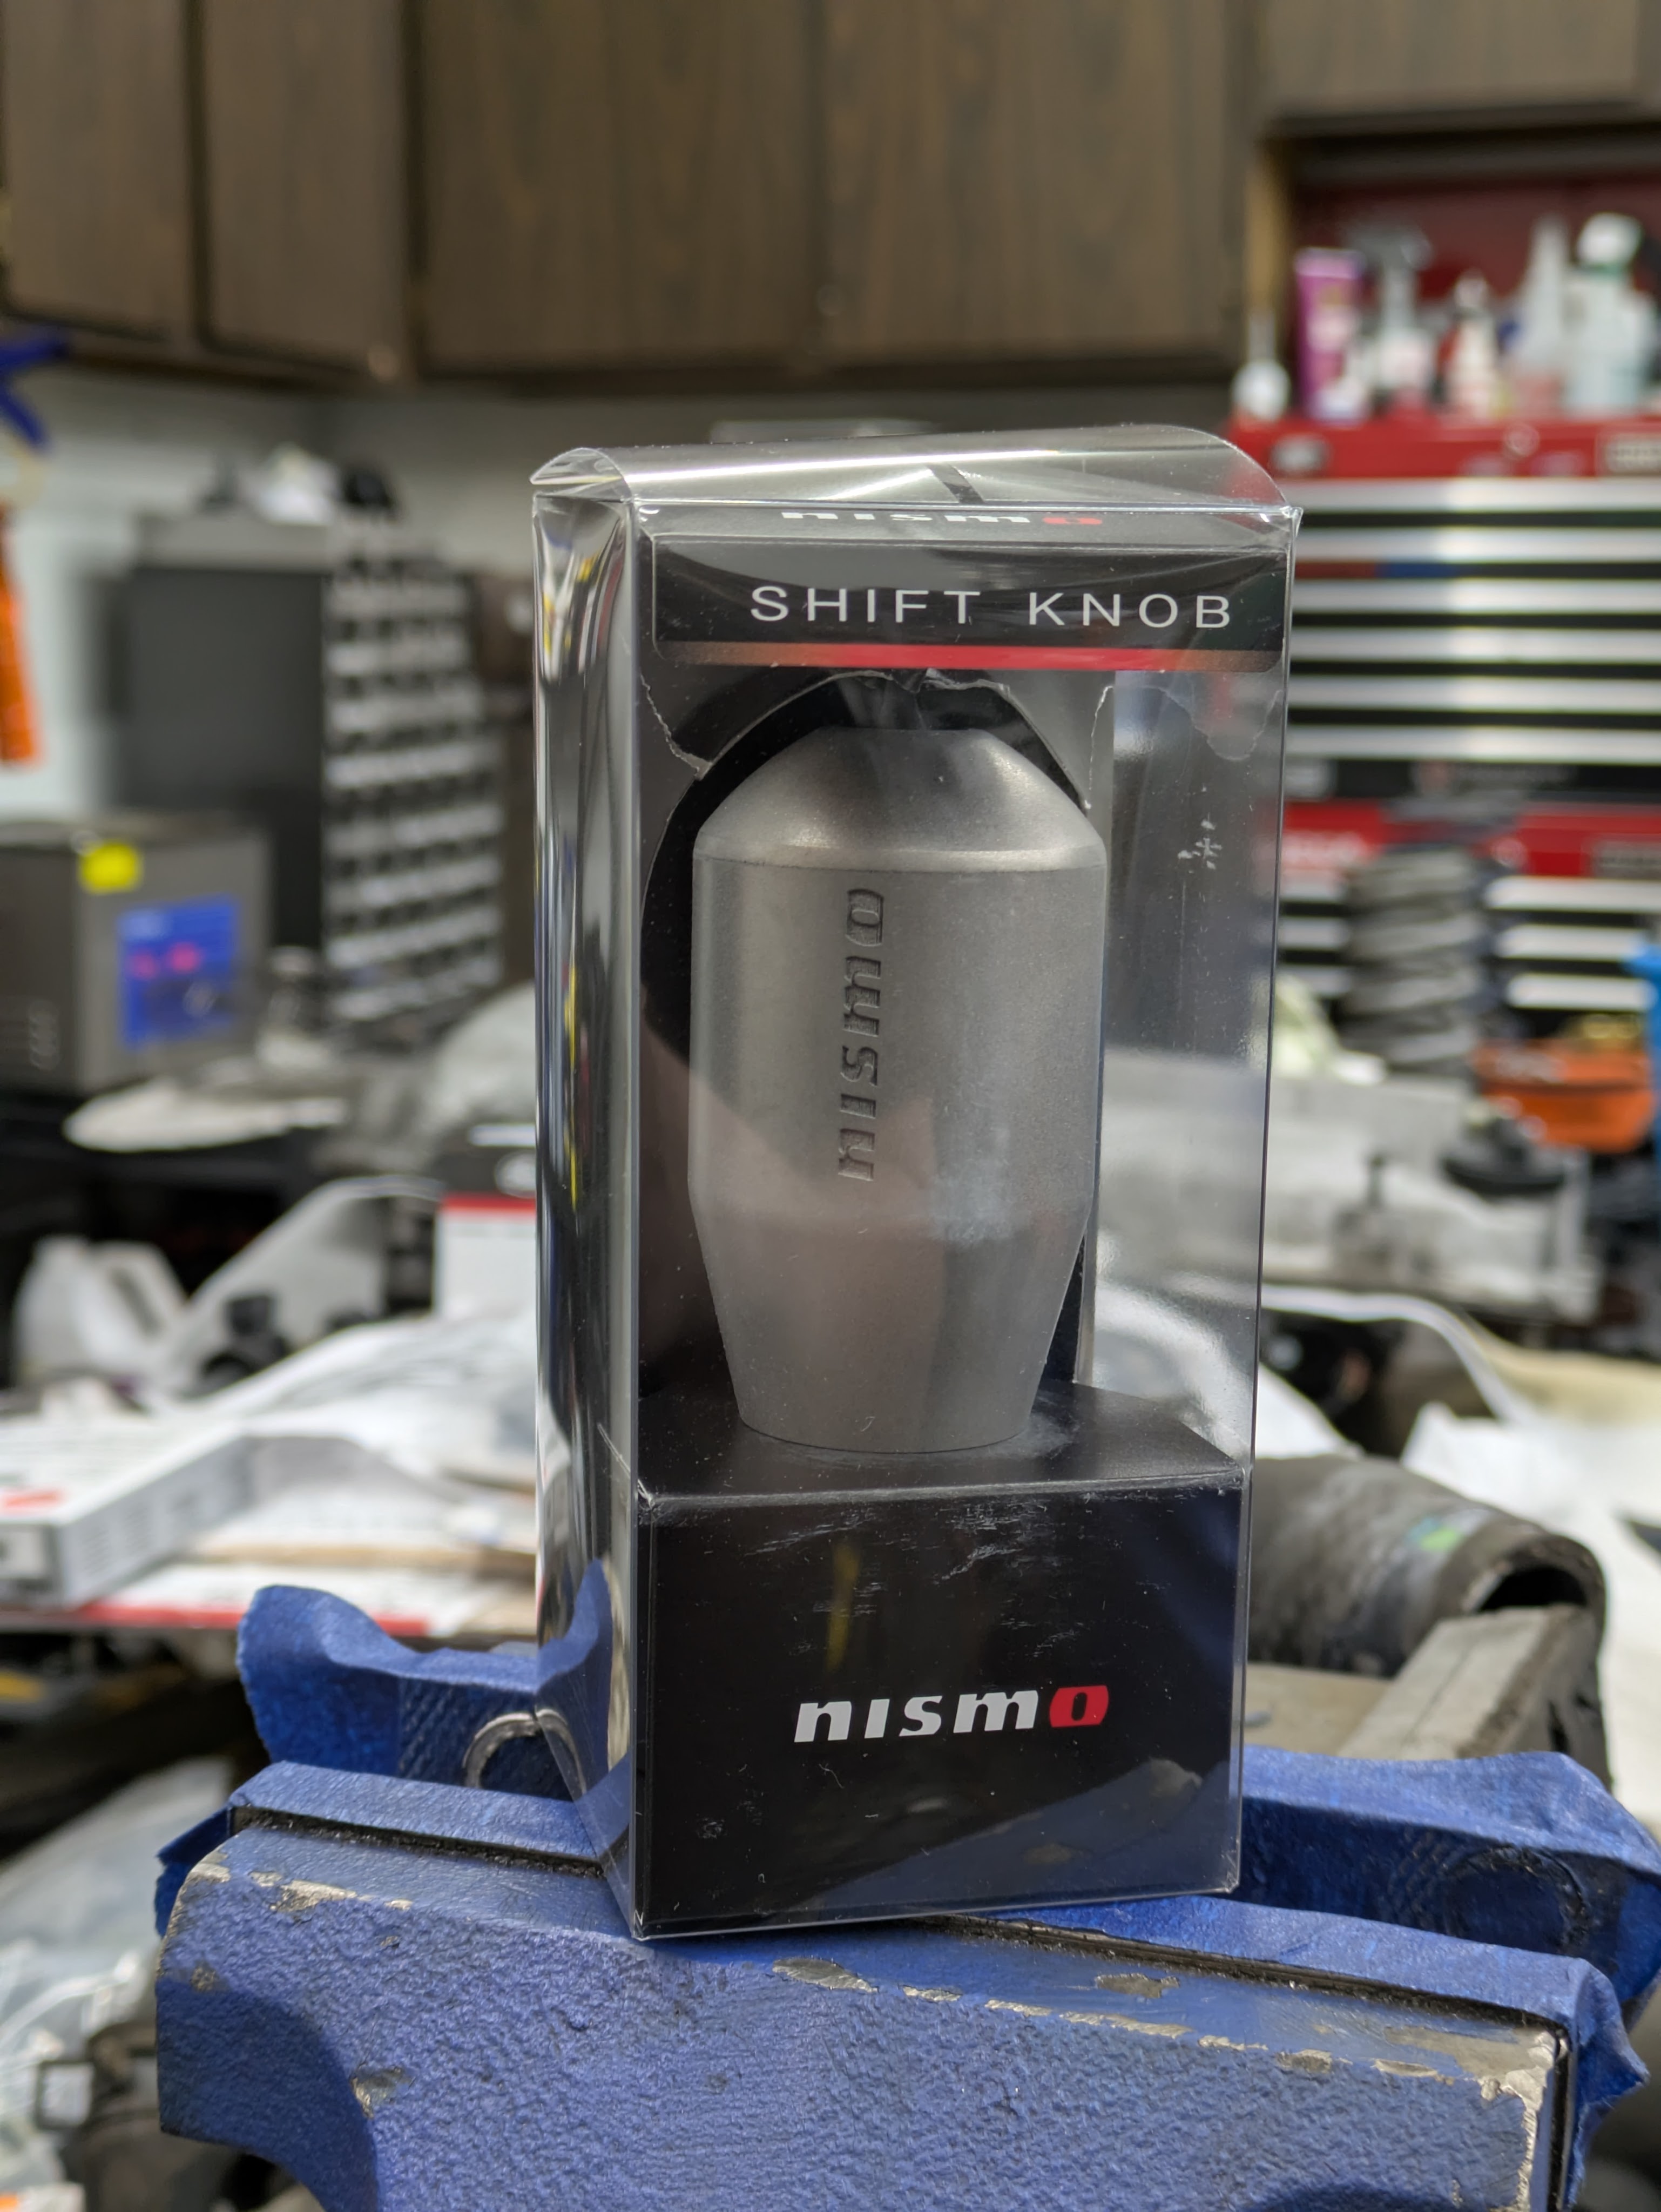
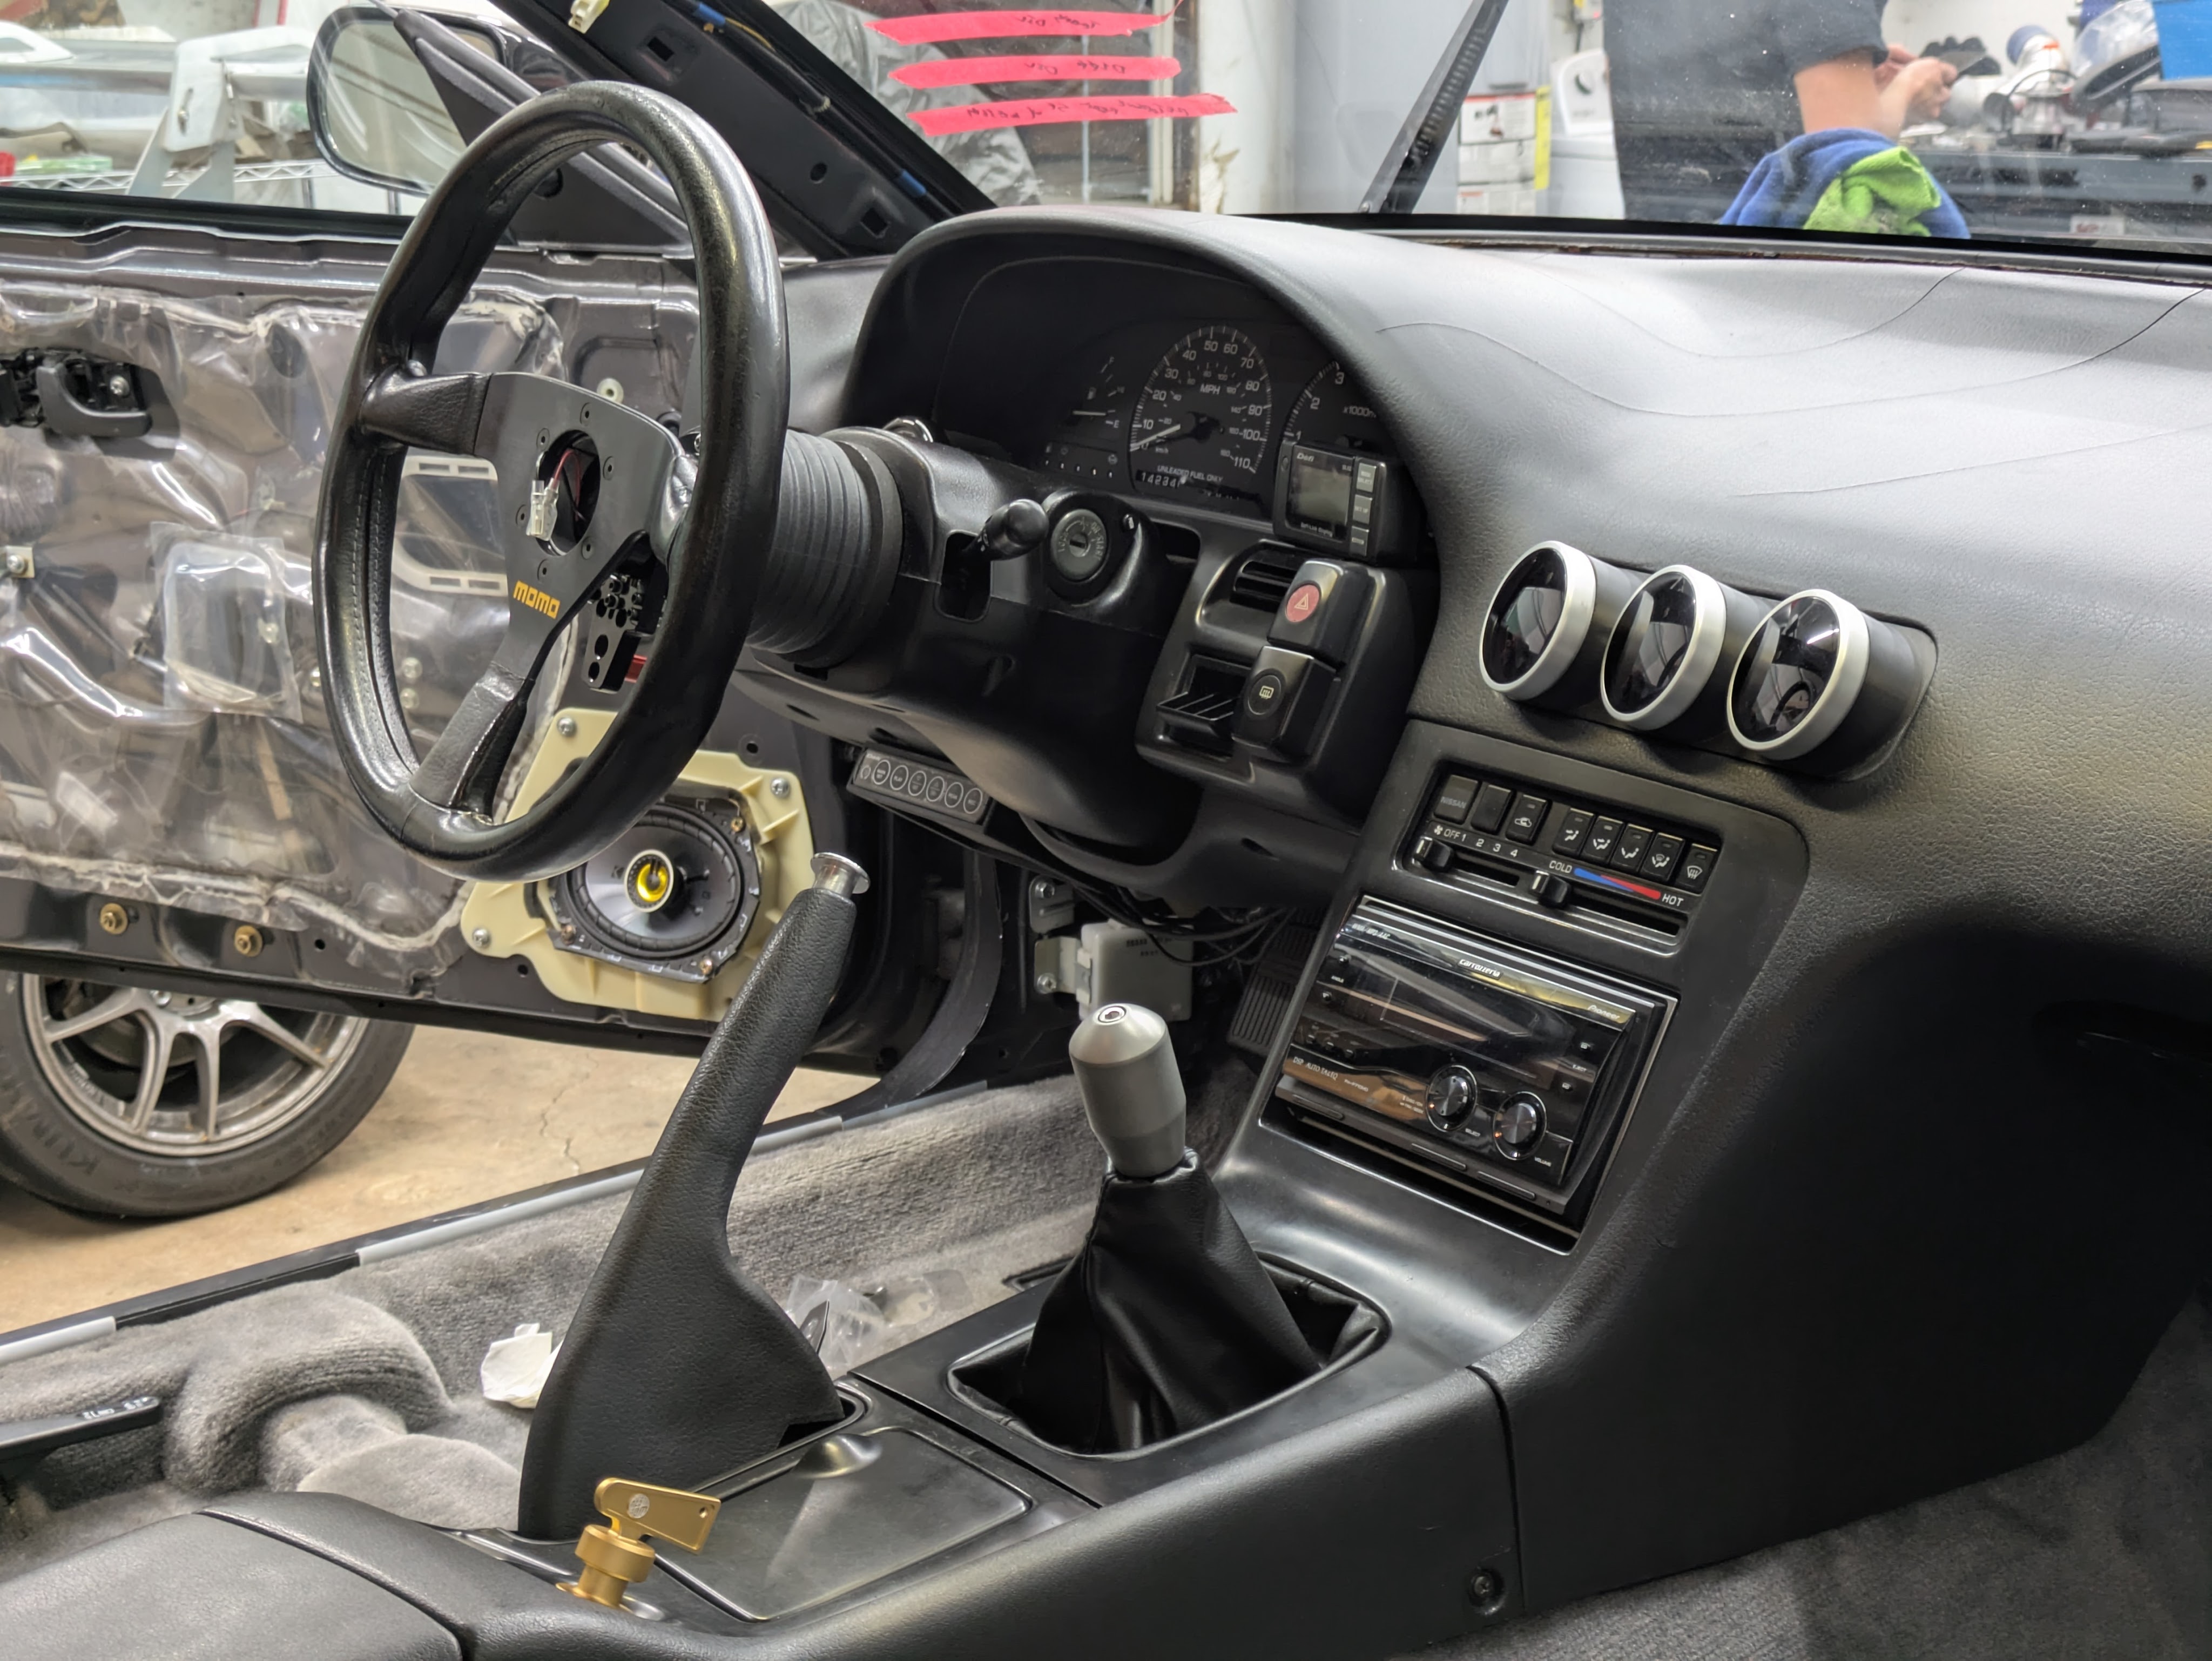
With my move back to a stock style (snap ringed) Nismo Shifter, I knew that my previous and highly beloved Hybrid Racing 130R shift knob would be too tall to feel right. It was perfect on the C’s style short throw that the car used to have, but I would much prefer a stock shifter for assembly (the C’s sucks balls to install) and longevity purposes. If Nissan stamps it off, I know it won’t do long-term damage to the transmission.
This is a Nismo GT N1 anniversary shift knob, a style I have lusted over in a Nissan since I saw it on a R34 6 speed Getrag box many years ago. It draws inspiration from Super GT and the knobs that Nissan ran in the race program, and I think it just looks great. They have made many materials over the years, mainly Delrin, but at one point a straight up rubber one. This one, being the anniversary and needing to be special, is titanium. Although I have never been a metal shift knob guy, OEM titanium (Zanardi NSX comes to mind) has been and will always be cool.
While it is the most expensive shift knob I have ever purchased by a factor of 3, it was my little birthday present to myself when I made a huge Nengun order. For whatever reason, I have a habit of buying myself titanium birthday gifts for the last 4 years.
Just ignore the fact that one of them was a titanium plate on my collarbone for my 25th birthday.
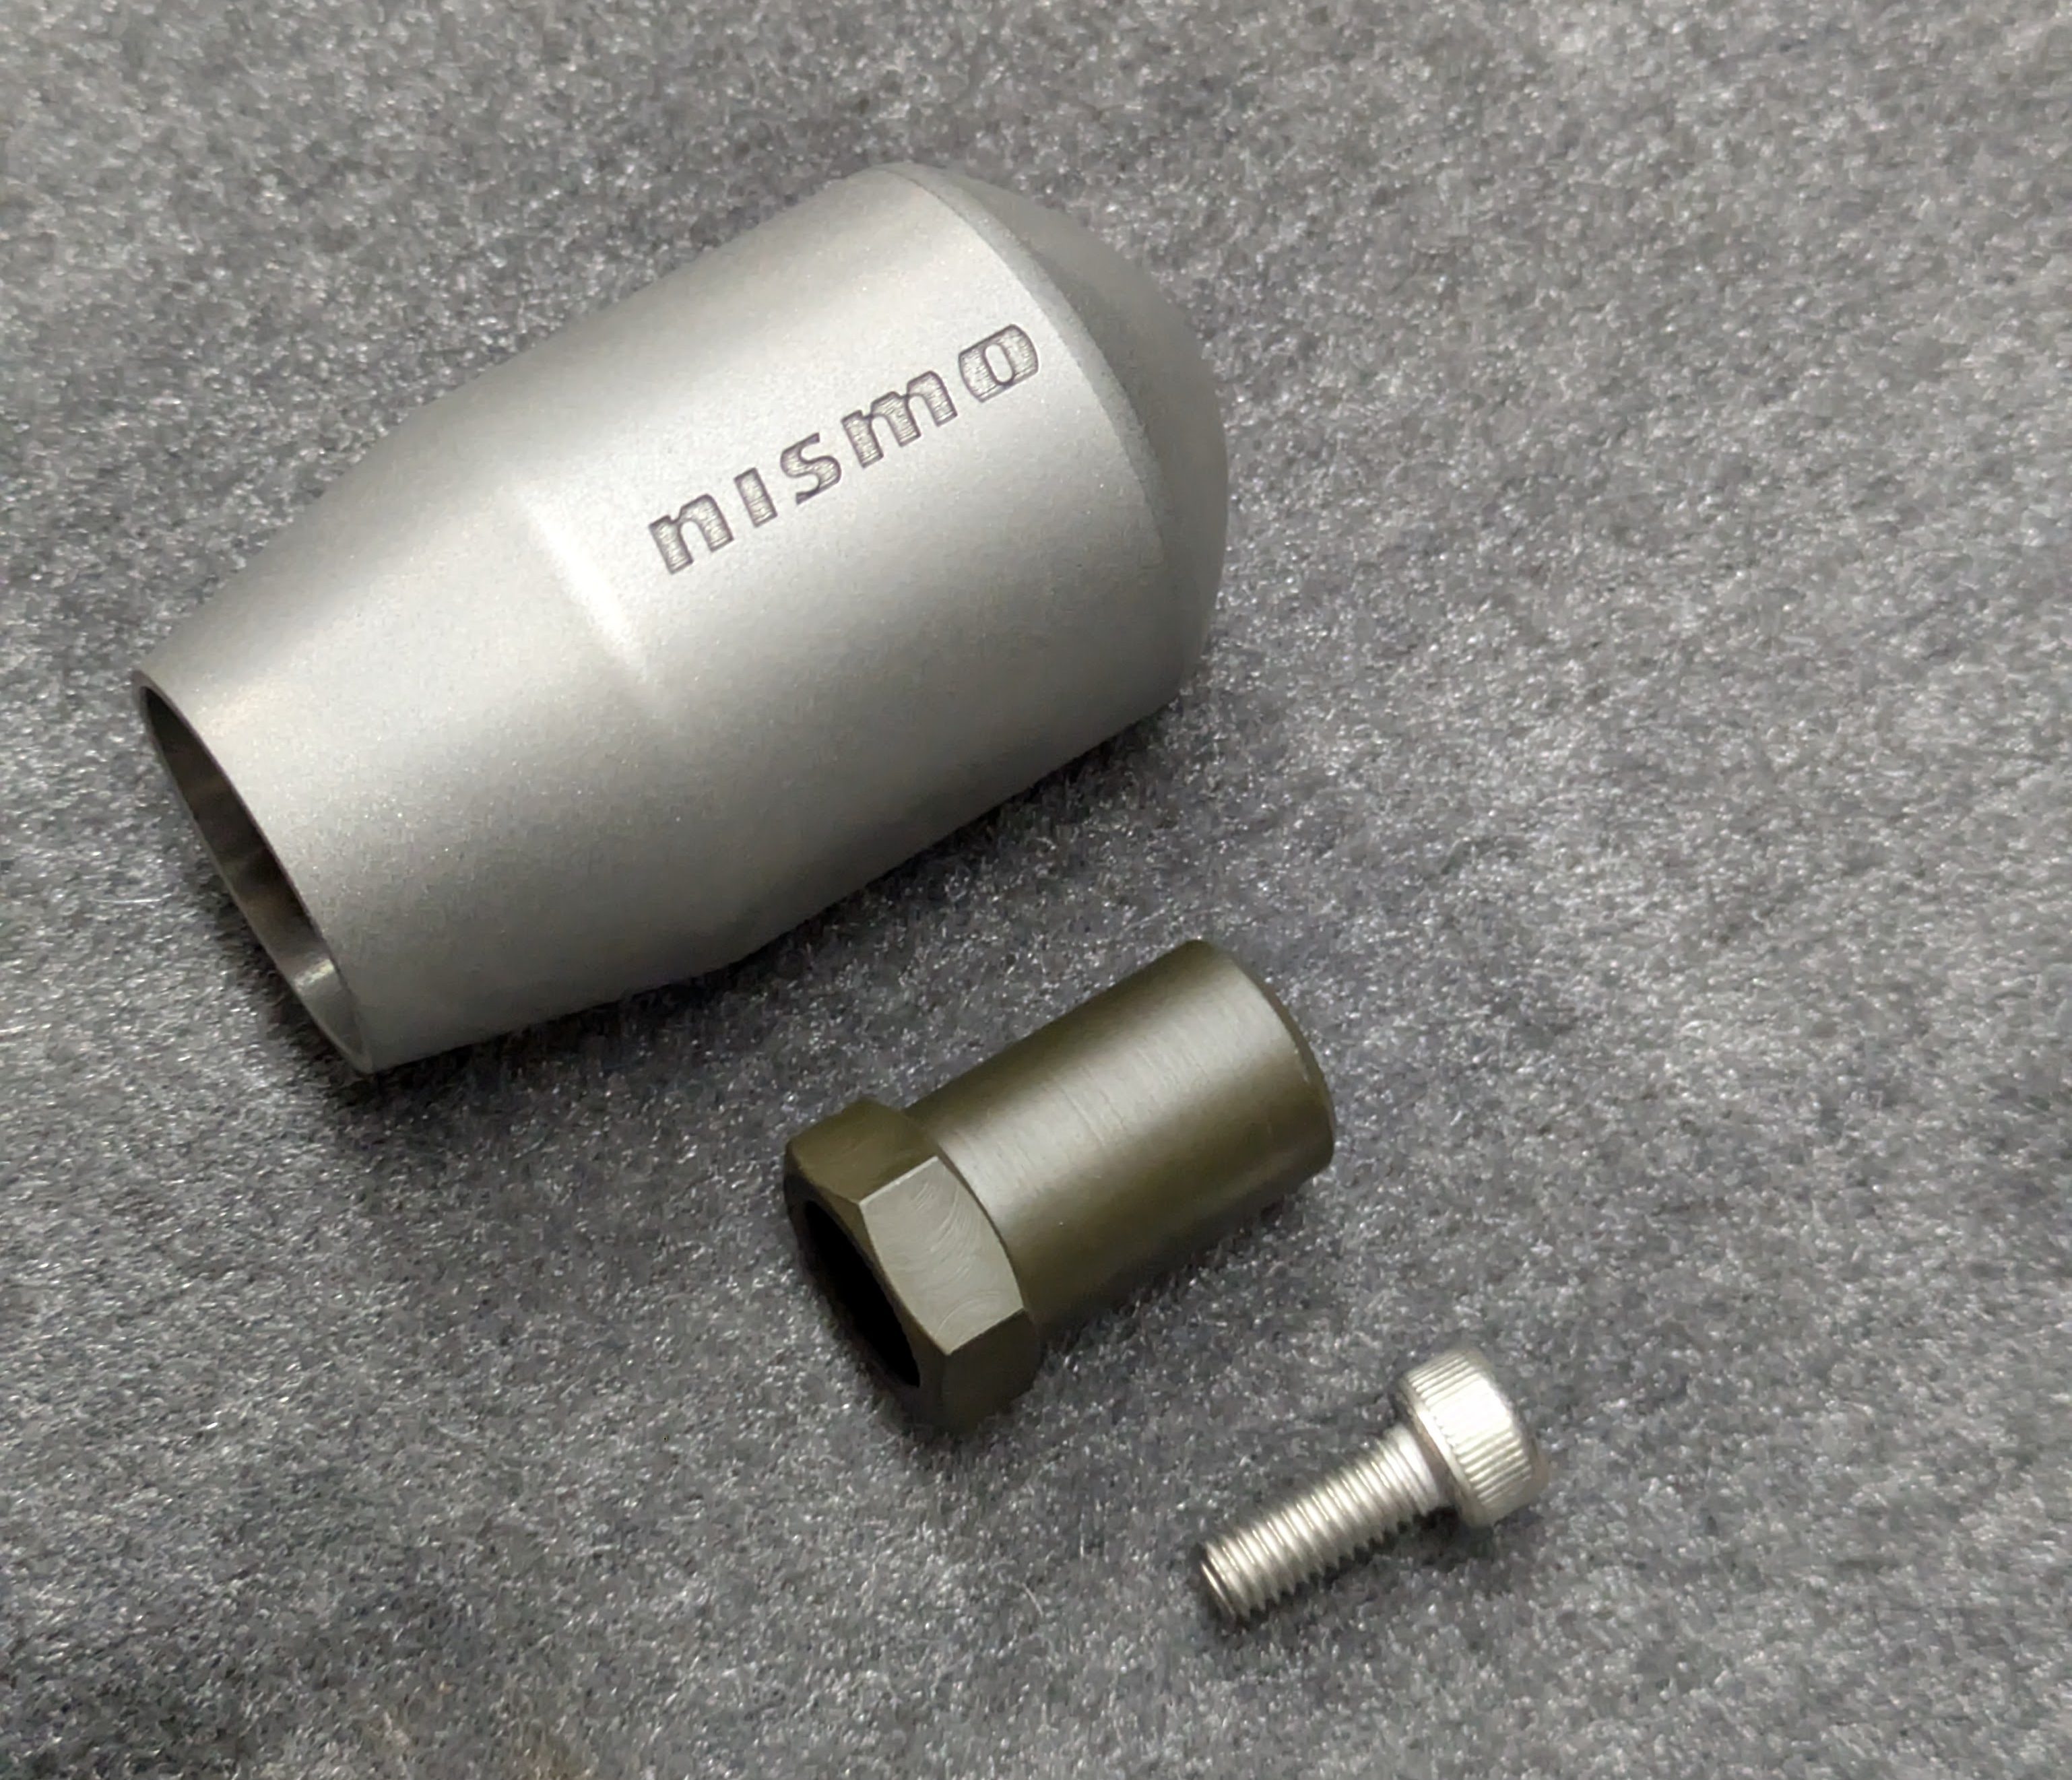
Until I took it out of the box, I had never known the purpose of the socket head cap screw in the top. It is so you can put the base on separately, and orient the knob independent of the threads. Neat design, REALLY nice materials and finishes. Looks amazing in the car and feels even better. Really curious to see how it wears in as it is much rougher than the OEM NSX knobs are.
This other trinket is arguably more insane. Nissan offered these little cigarette lighter kill switch caps that now command a premium on the used market. While serving no purpose, they are just: cool. I wasn’t willing to pay the $250-$500 depending on color and condition for a 30 year old piece of plastic that I could break with my elbow.
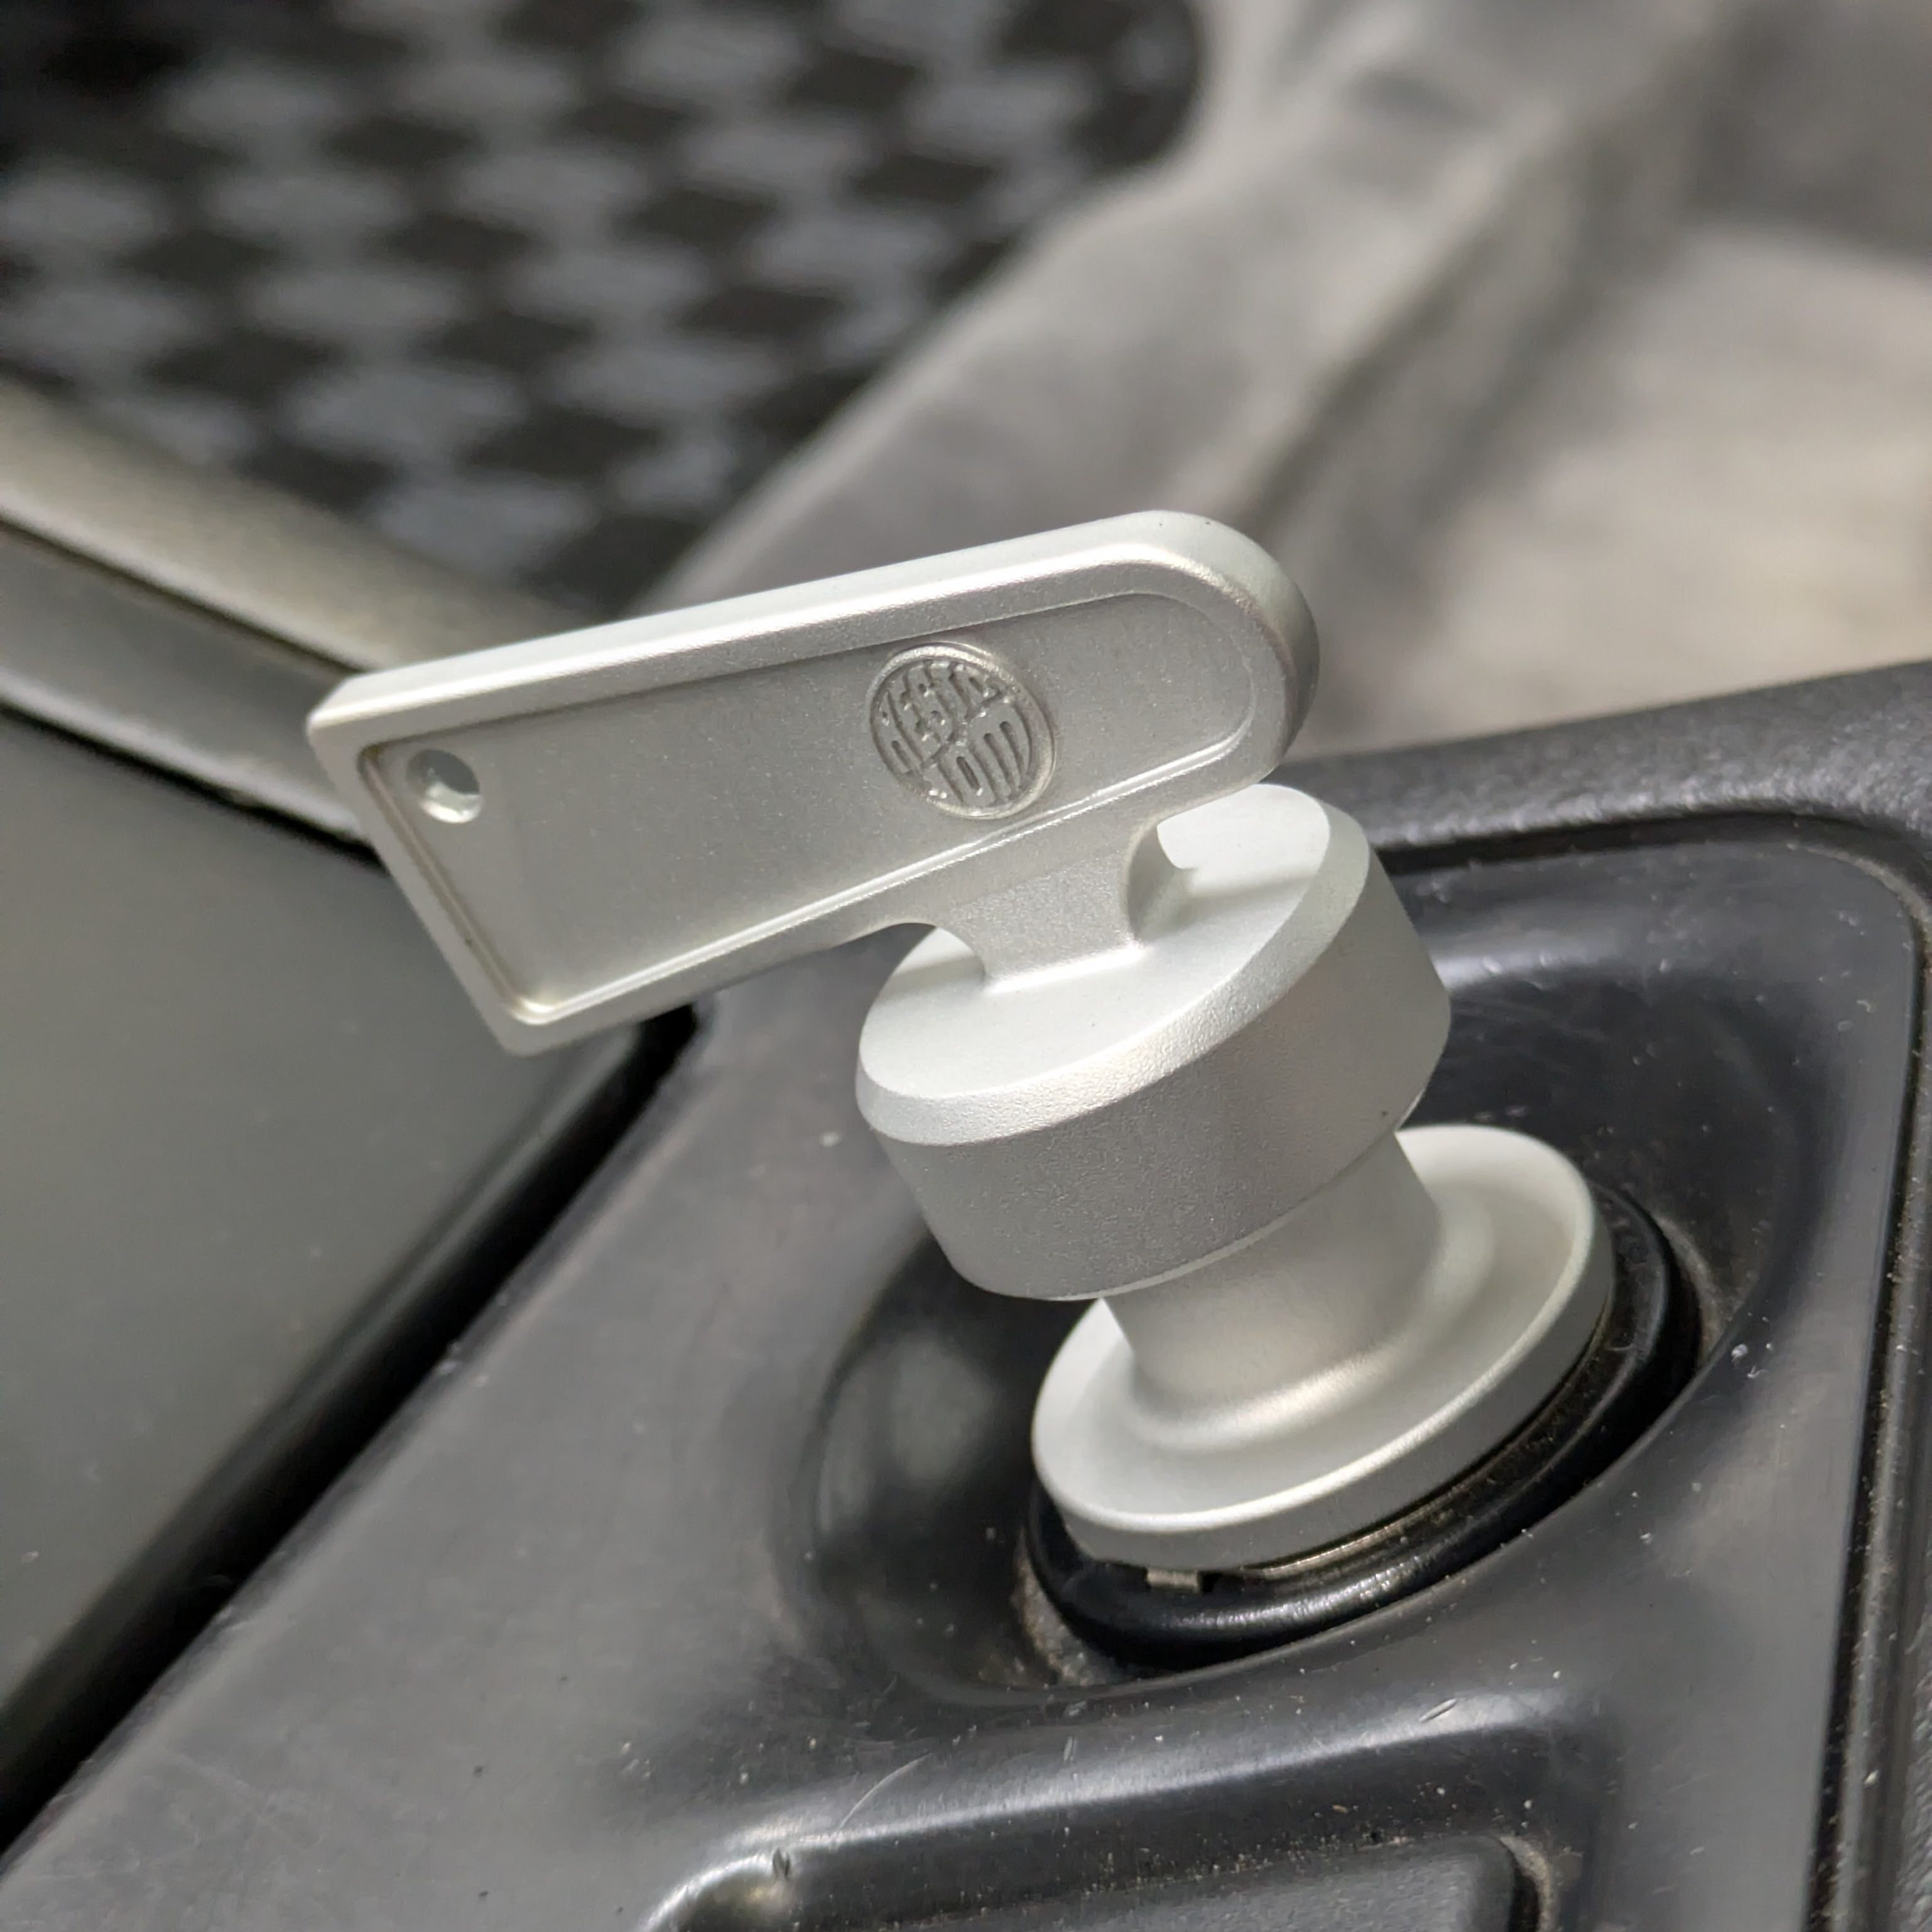
Plenty of companies offer them as 3D printed ( FDM or Resin) reproductions, but none of them looked right. However, when making my RestoJDM order for the rear USB bulkhead, I saw he offers these billet recreations. I figured fuck it, I like it, lets do it. He only had gold left in stock (red was sold out), and nothing else in my interior is gold, so I elected to strip it of the gold anodizing and redo it in clear/raw finish while we were anodizing a whole bunch of other things. It turned out great, and now fits right in with my monotone interior theme.
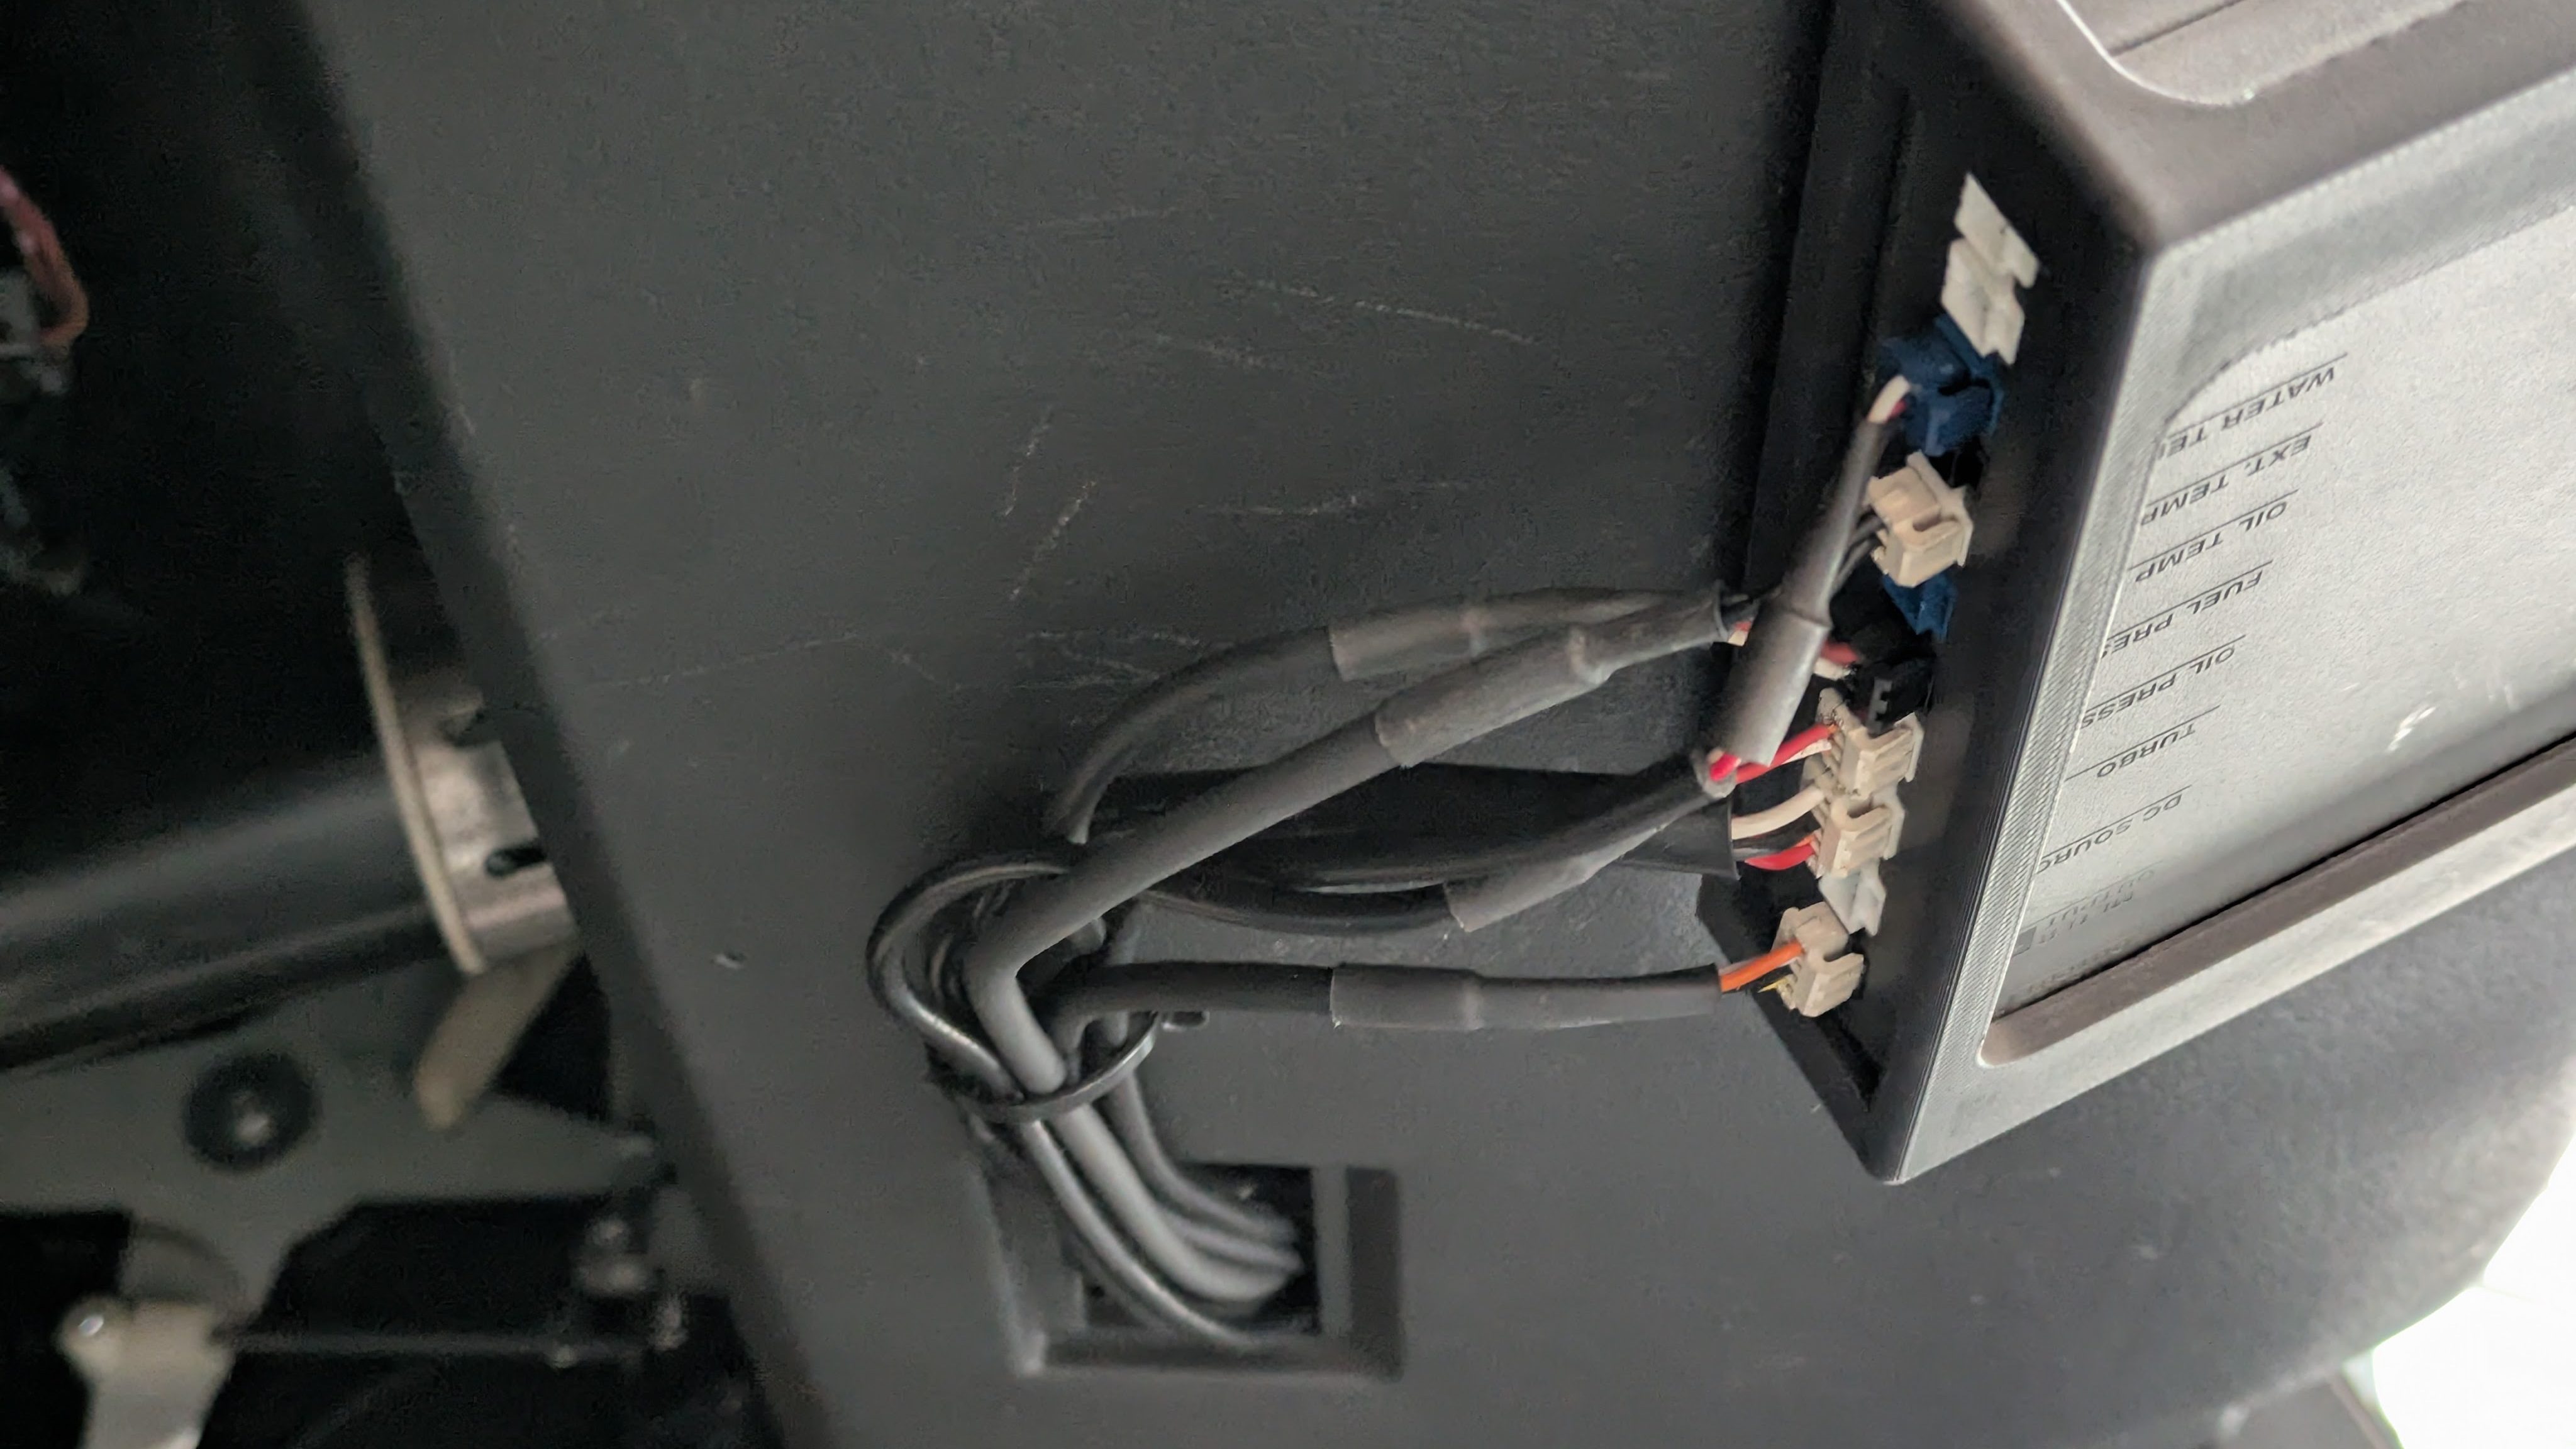
With the kick panel going back in, it was time to route the wiring to my freshly mounted Defi Link Controller. Since this coupe is a super base model with none of the comfort amenities, I was able to run the wires through the hole that would be for the footwell light. I used a plastic reamer to put two more holes in the panel(it already has holes, cry me a river) to allow a zip tie to manage where the bundle converges.
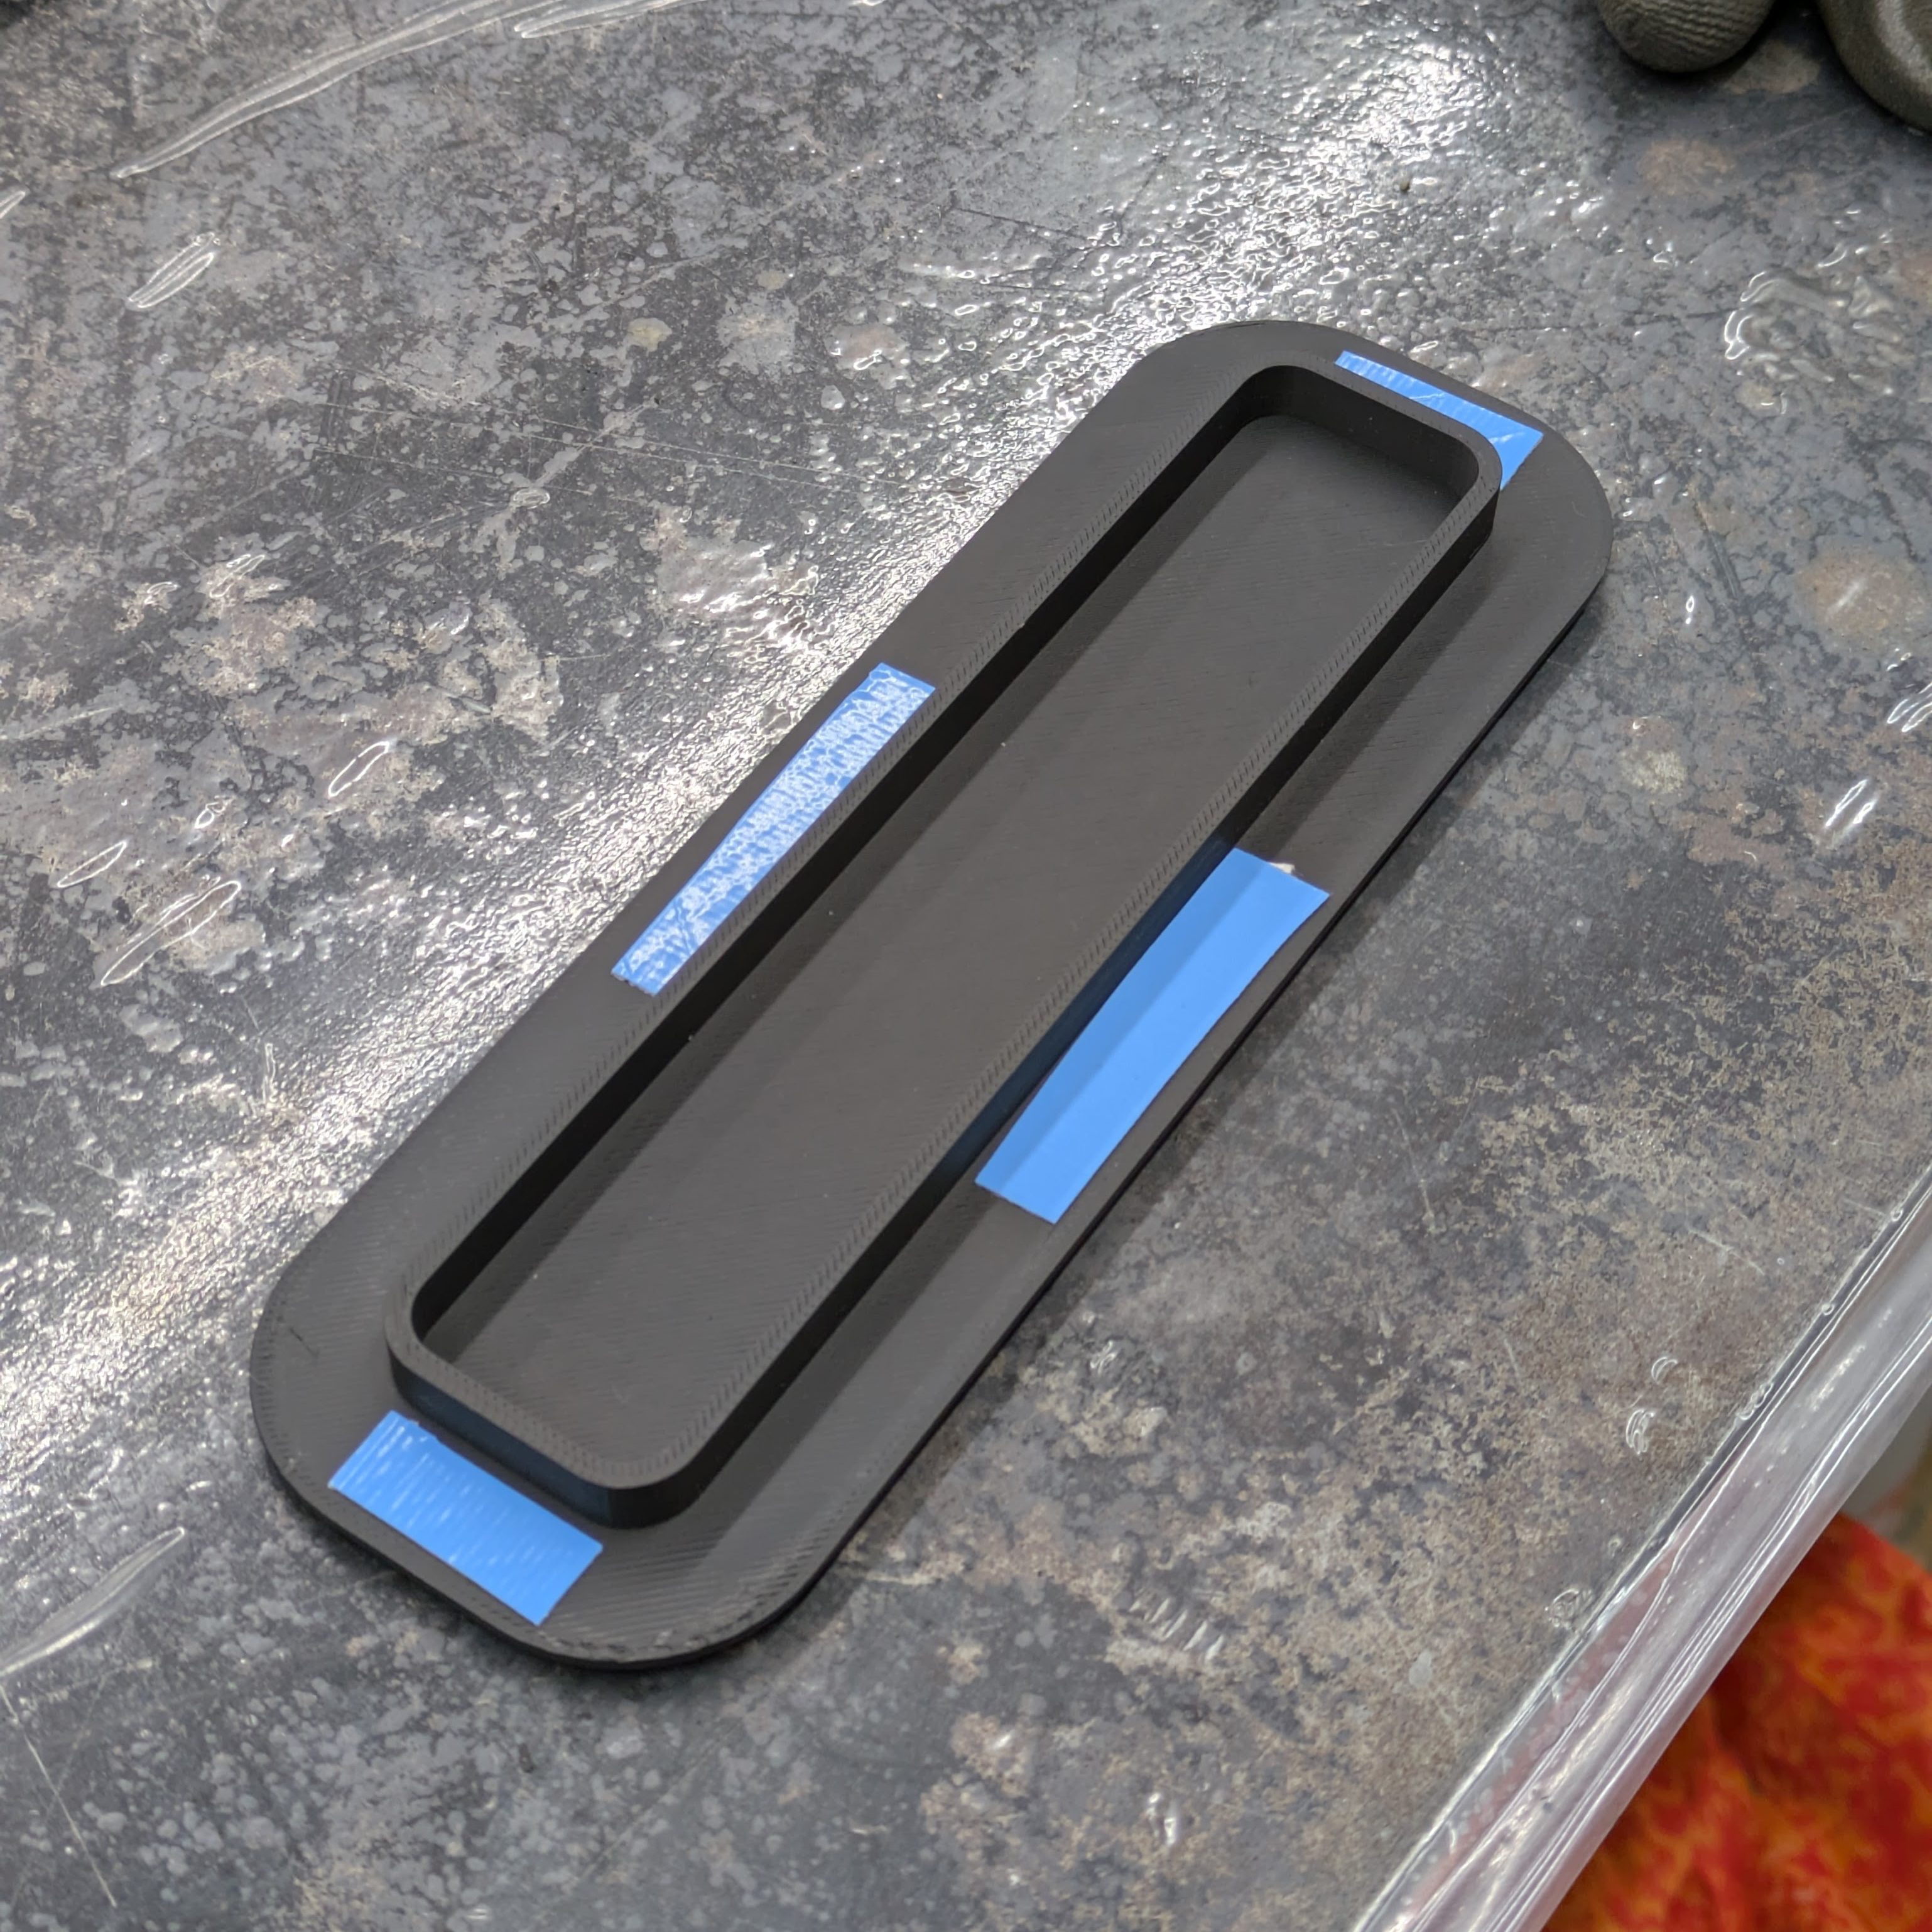
Before the front seats went back in for good, I cleaned the rear glass for the final time, threw in the back seats, and installed a 3rd brake light plug I had 3D printed to fill the hole. There’s nothing stopping me from running the factory whale tail 3rd brake light other than the harness being cut up (it previously had an FD style LED strip along the top of the rear glass), legality is not exactly my primary concern, and the deck looks way cleaner without it. I may revise this plug in the future to not only clean up the shape (maybe to match the original as there is a dent in the carpet), but also the finish and material. I’ve never really liked ASA but I may have to figure it out as it is the right material for this application.
Moving on to some of the final large pieces: In a previous post Backseat Driver, I opted to convert the car from power/automatic seatbelts to manual, pillar mounted seatbelts from an S14. I completed all of the chassis side aspects of that conversion, but there was still the question of how and where to mount the receptacle.
My purchase of S14 belts included the rear belts as well. While the car will never have rear seatbelts again, the rear receptacles are of use to me. These have a soft leash to snake through the rear seat cushion, and happen to be the exact length required to mount to the Defworx seat brackets and snake through the lower harness hole.
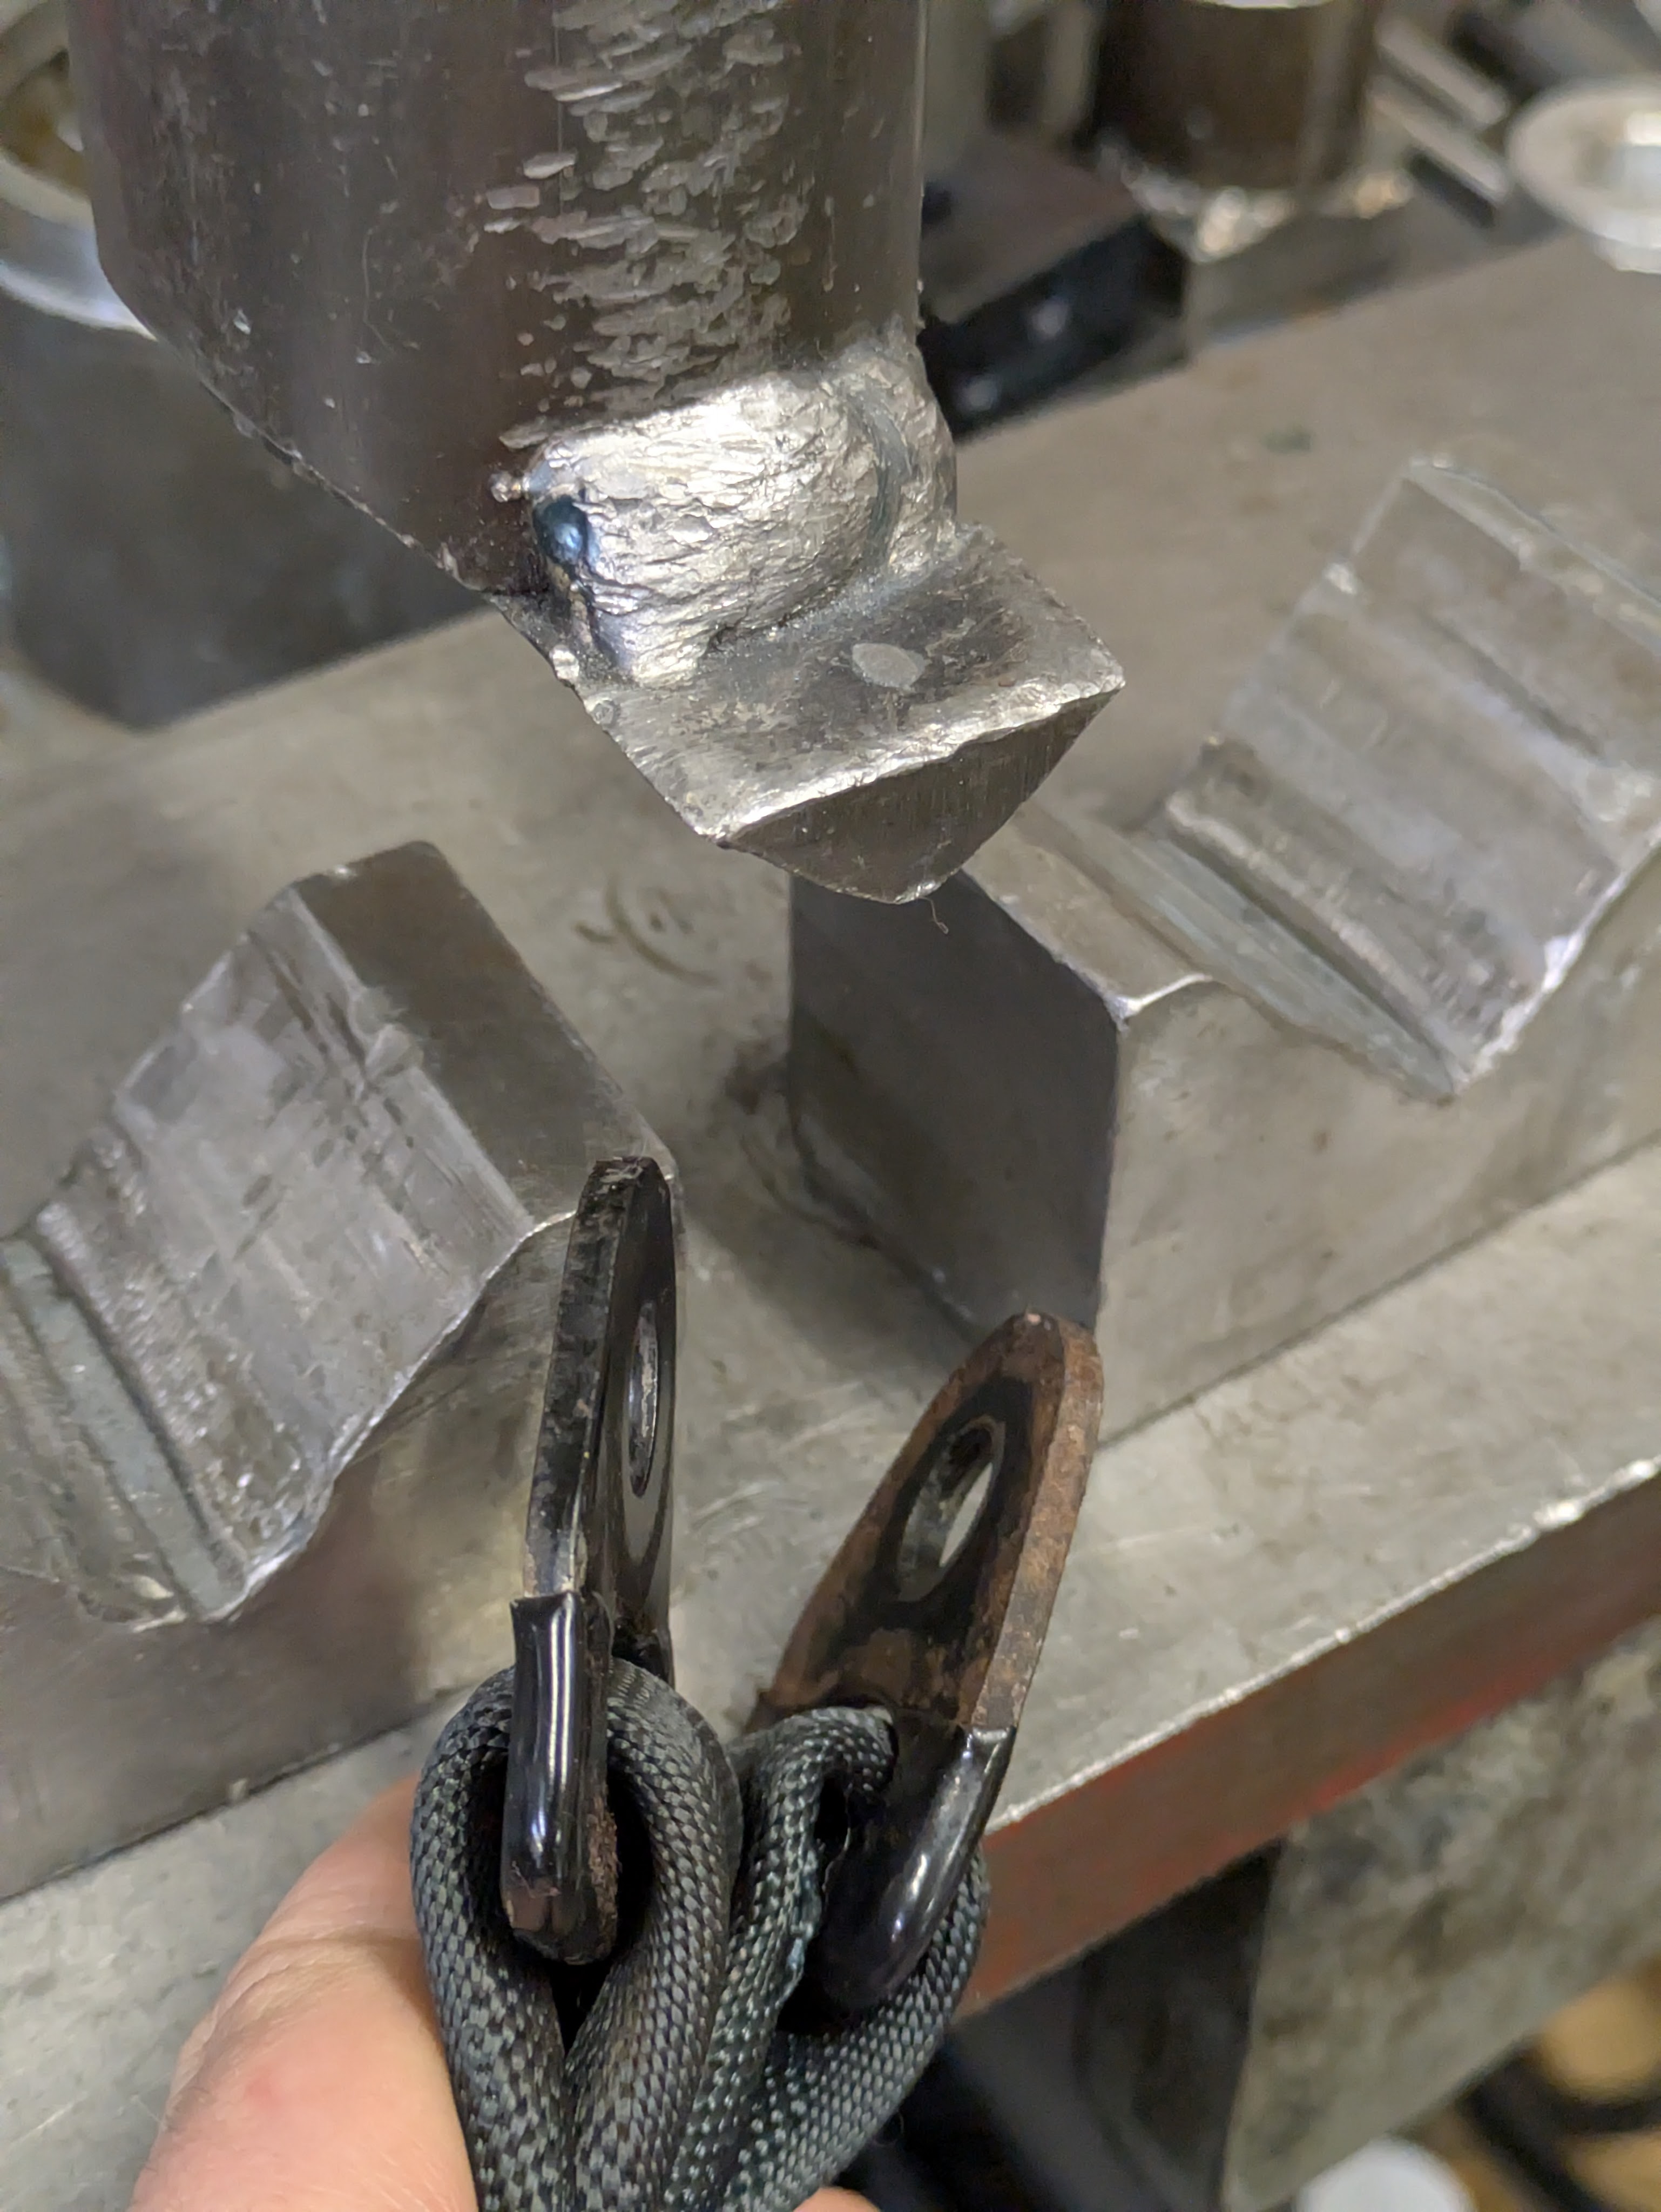
To make this happen, I first had to flatten the mounting brackets out. These had a slight bend in them that was counterproductive to my setup, so a quick trip to work to use the arbor press flattened those out quickly.

All of the hardware for this particular project came out of my seatbelt hardware drawer, which I keep very separated because of the way that safety regulations have been set. Not only are seatbelt bolts specifically engineered for their task in terms of expected load (both impulse and direction), they are also mandated by US DOT to be 7/16-20 UNF in anchor locations. This leaves me with a bunch of weird bolts with metric heads and imperial threads, and for that I do not like to mix them with normal hardware.
In keeping with the objective, I was able to find some matching seat belt bolts from the bin, as well as the combination of spacers above that stand the seatbelt off the bracket enough to be at a comfortable angle while still being able to rotate at the base like factory. I did have to cut the bolts down to not collide with the seat, but after about 10 minutes of effort, I had functional, fixed seatbelts that were safe and easy to deal with. I’d prefer to not have to run so much spacer to work correctly as this now creates a lever arm to apply a torque to, but the bracket is thick and well constrained by surrounding hardware, so a lot has to go wrong to make that an issue.
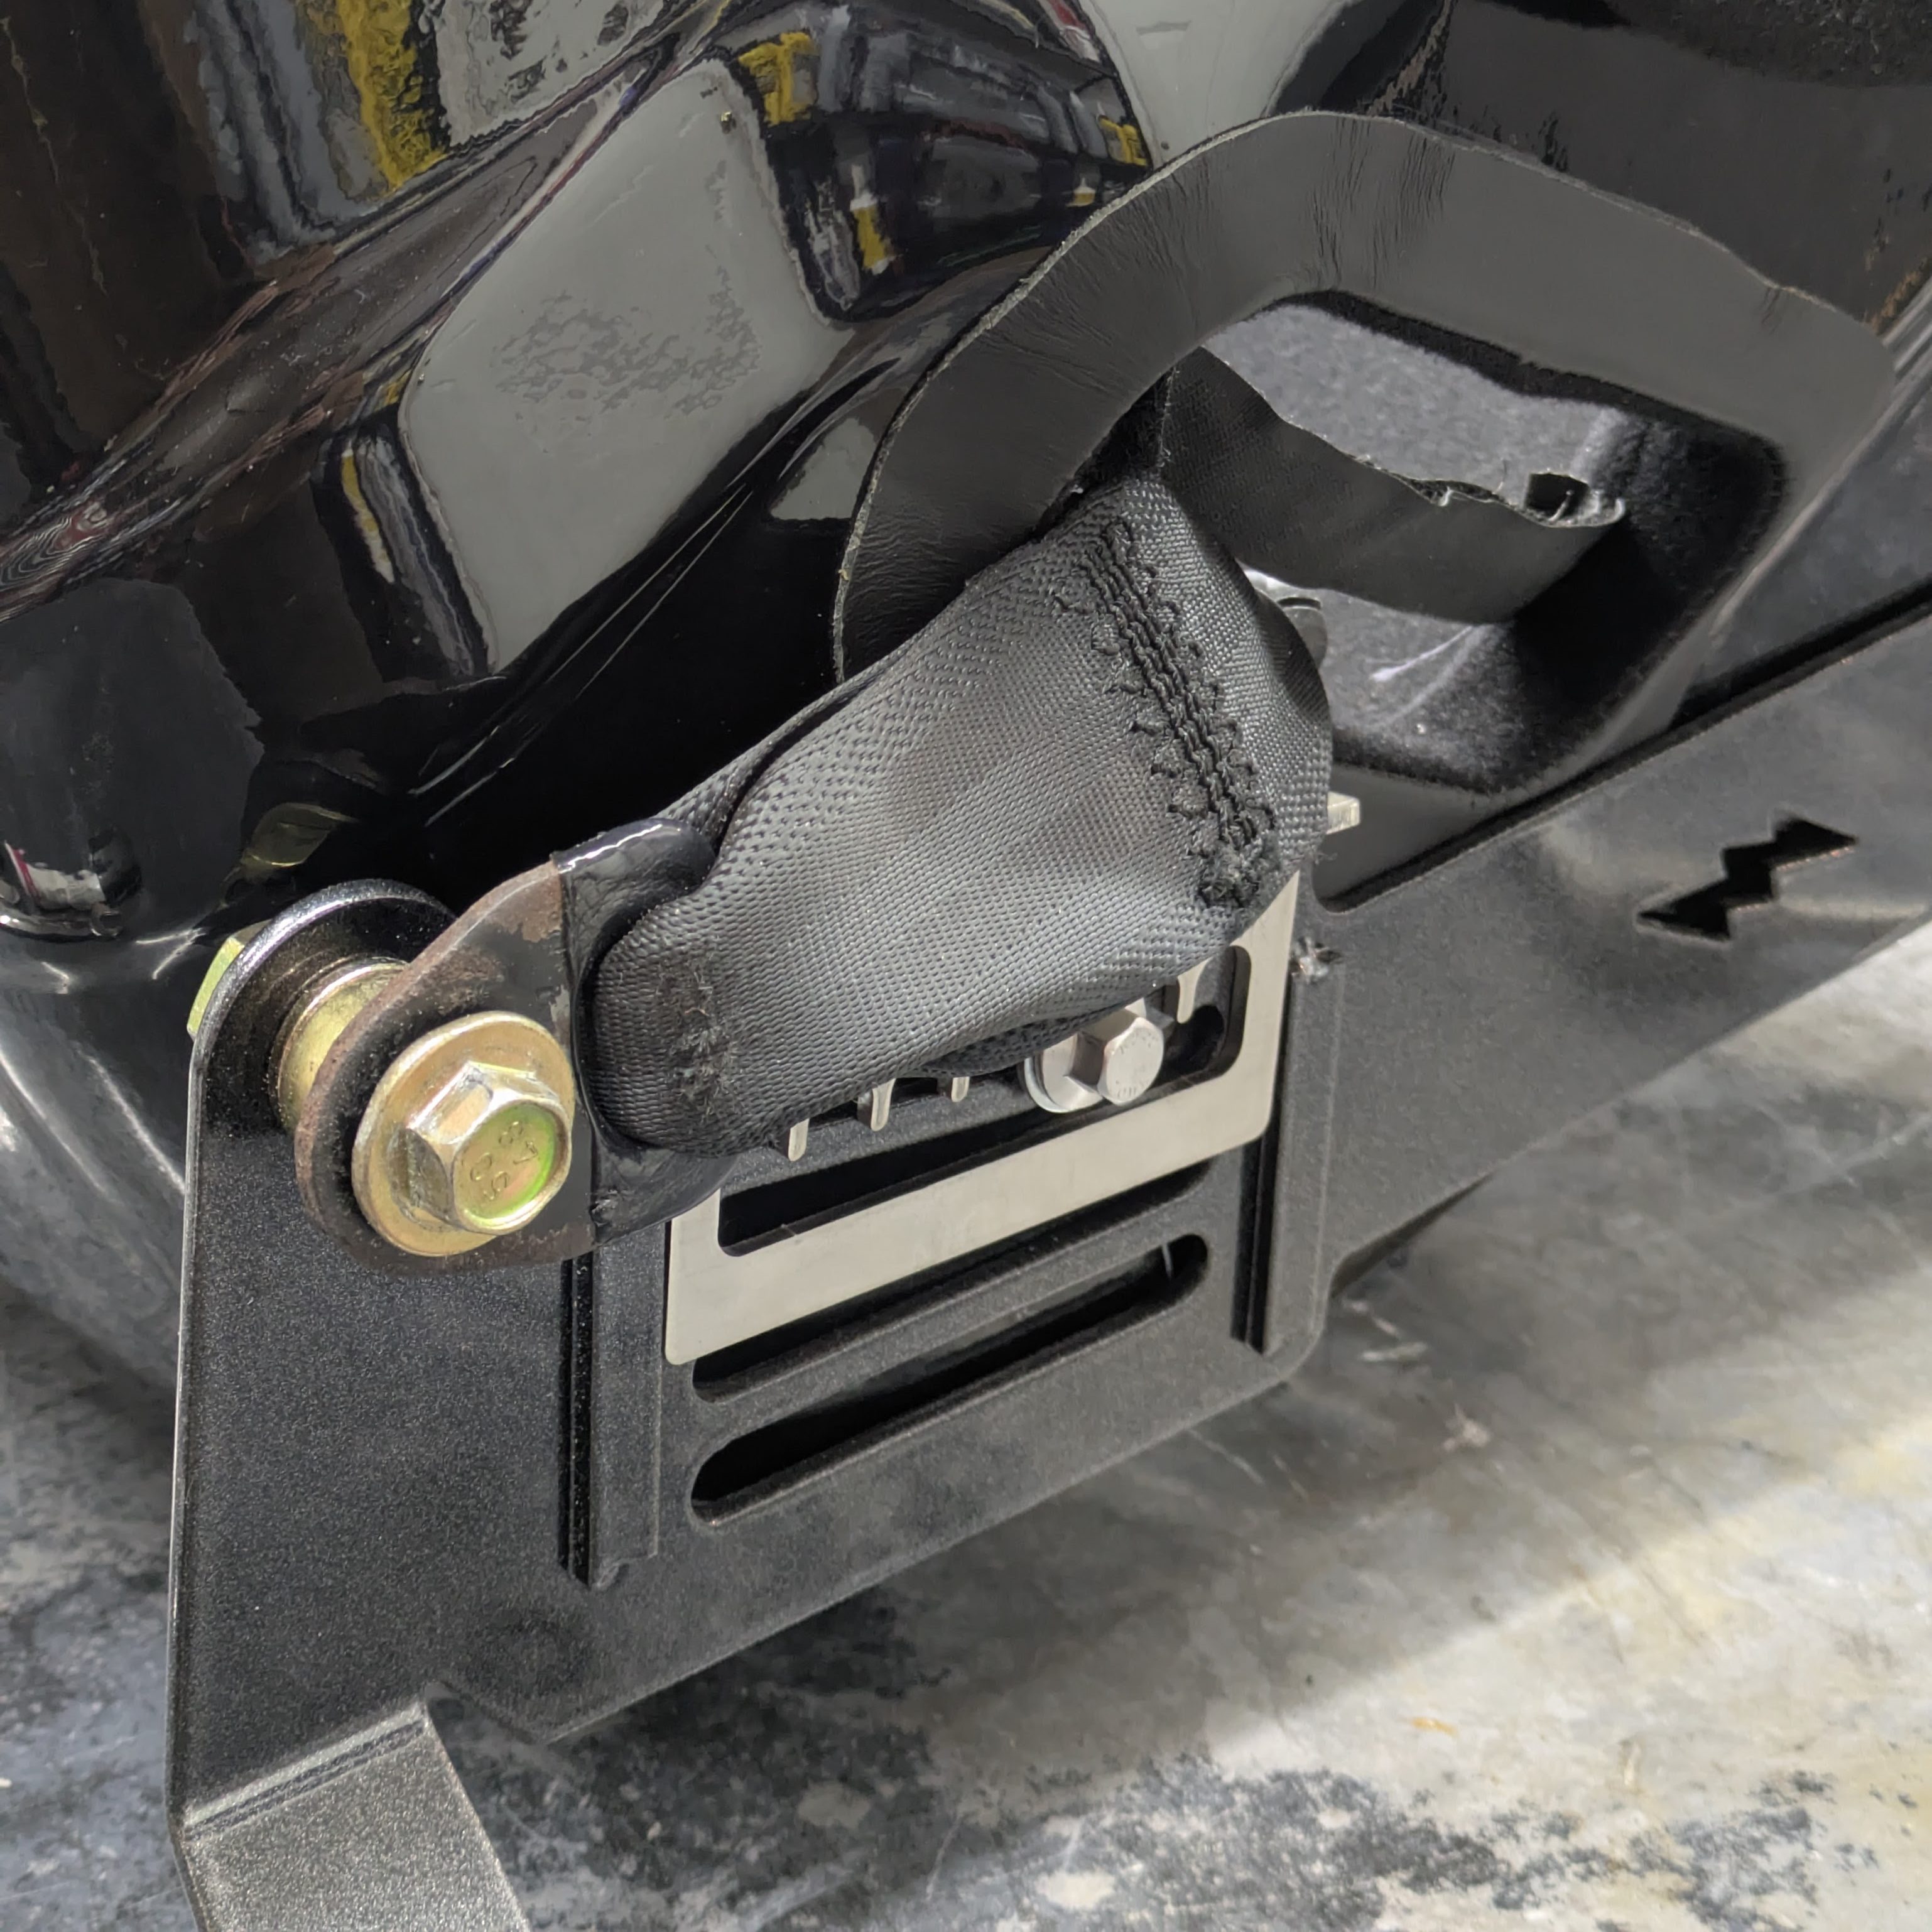
With the seatbelts torqued down to “tight as fuck”, I was able to throw the mounts back on. I do regret not cleaning up the seatbelt mounting points with a light coat of rust remover and paint, but you literally never see them as they are normally buried against the trans tunnel, and that can be a project for later me.
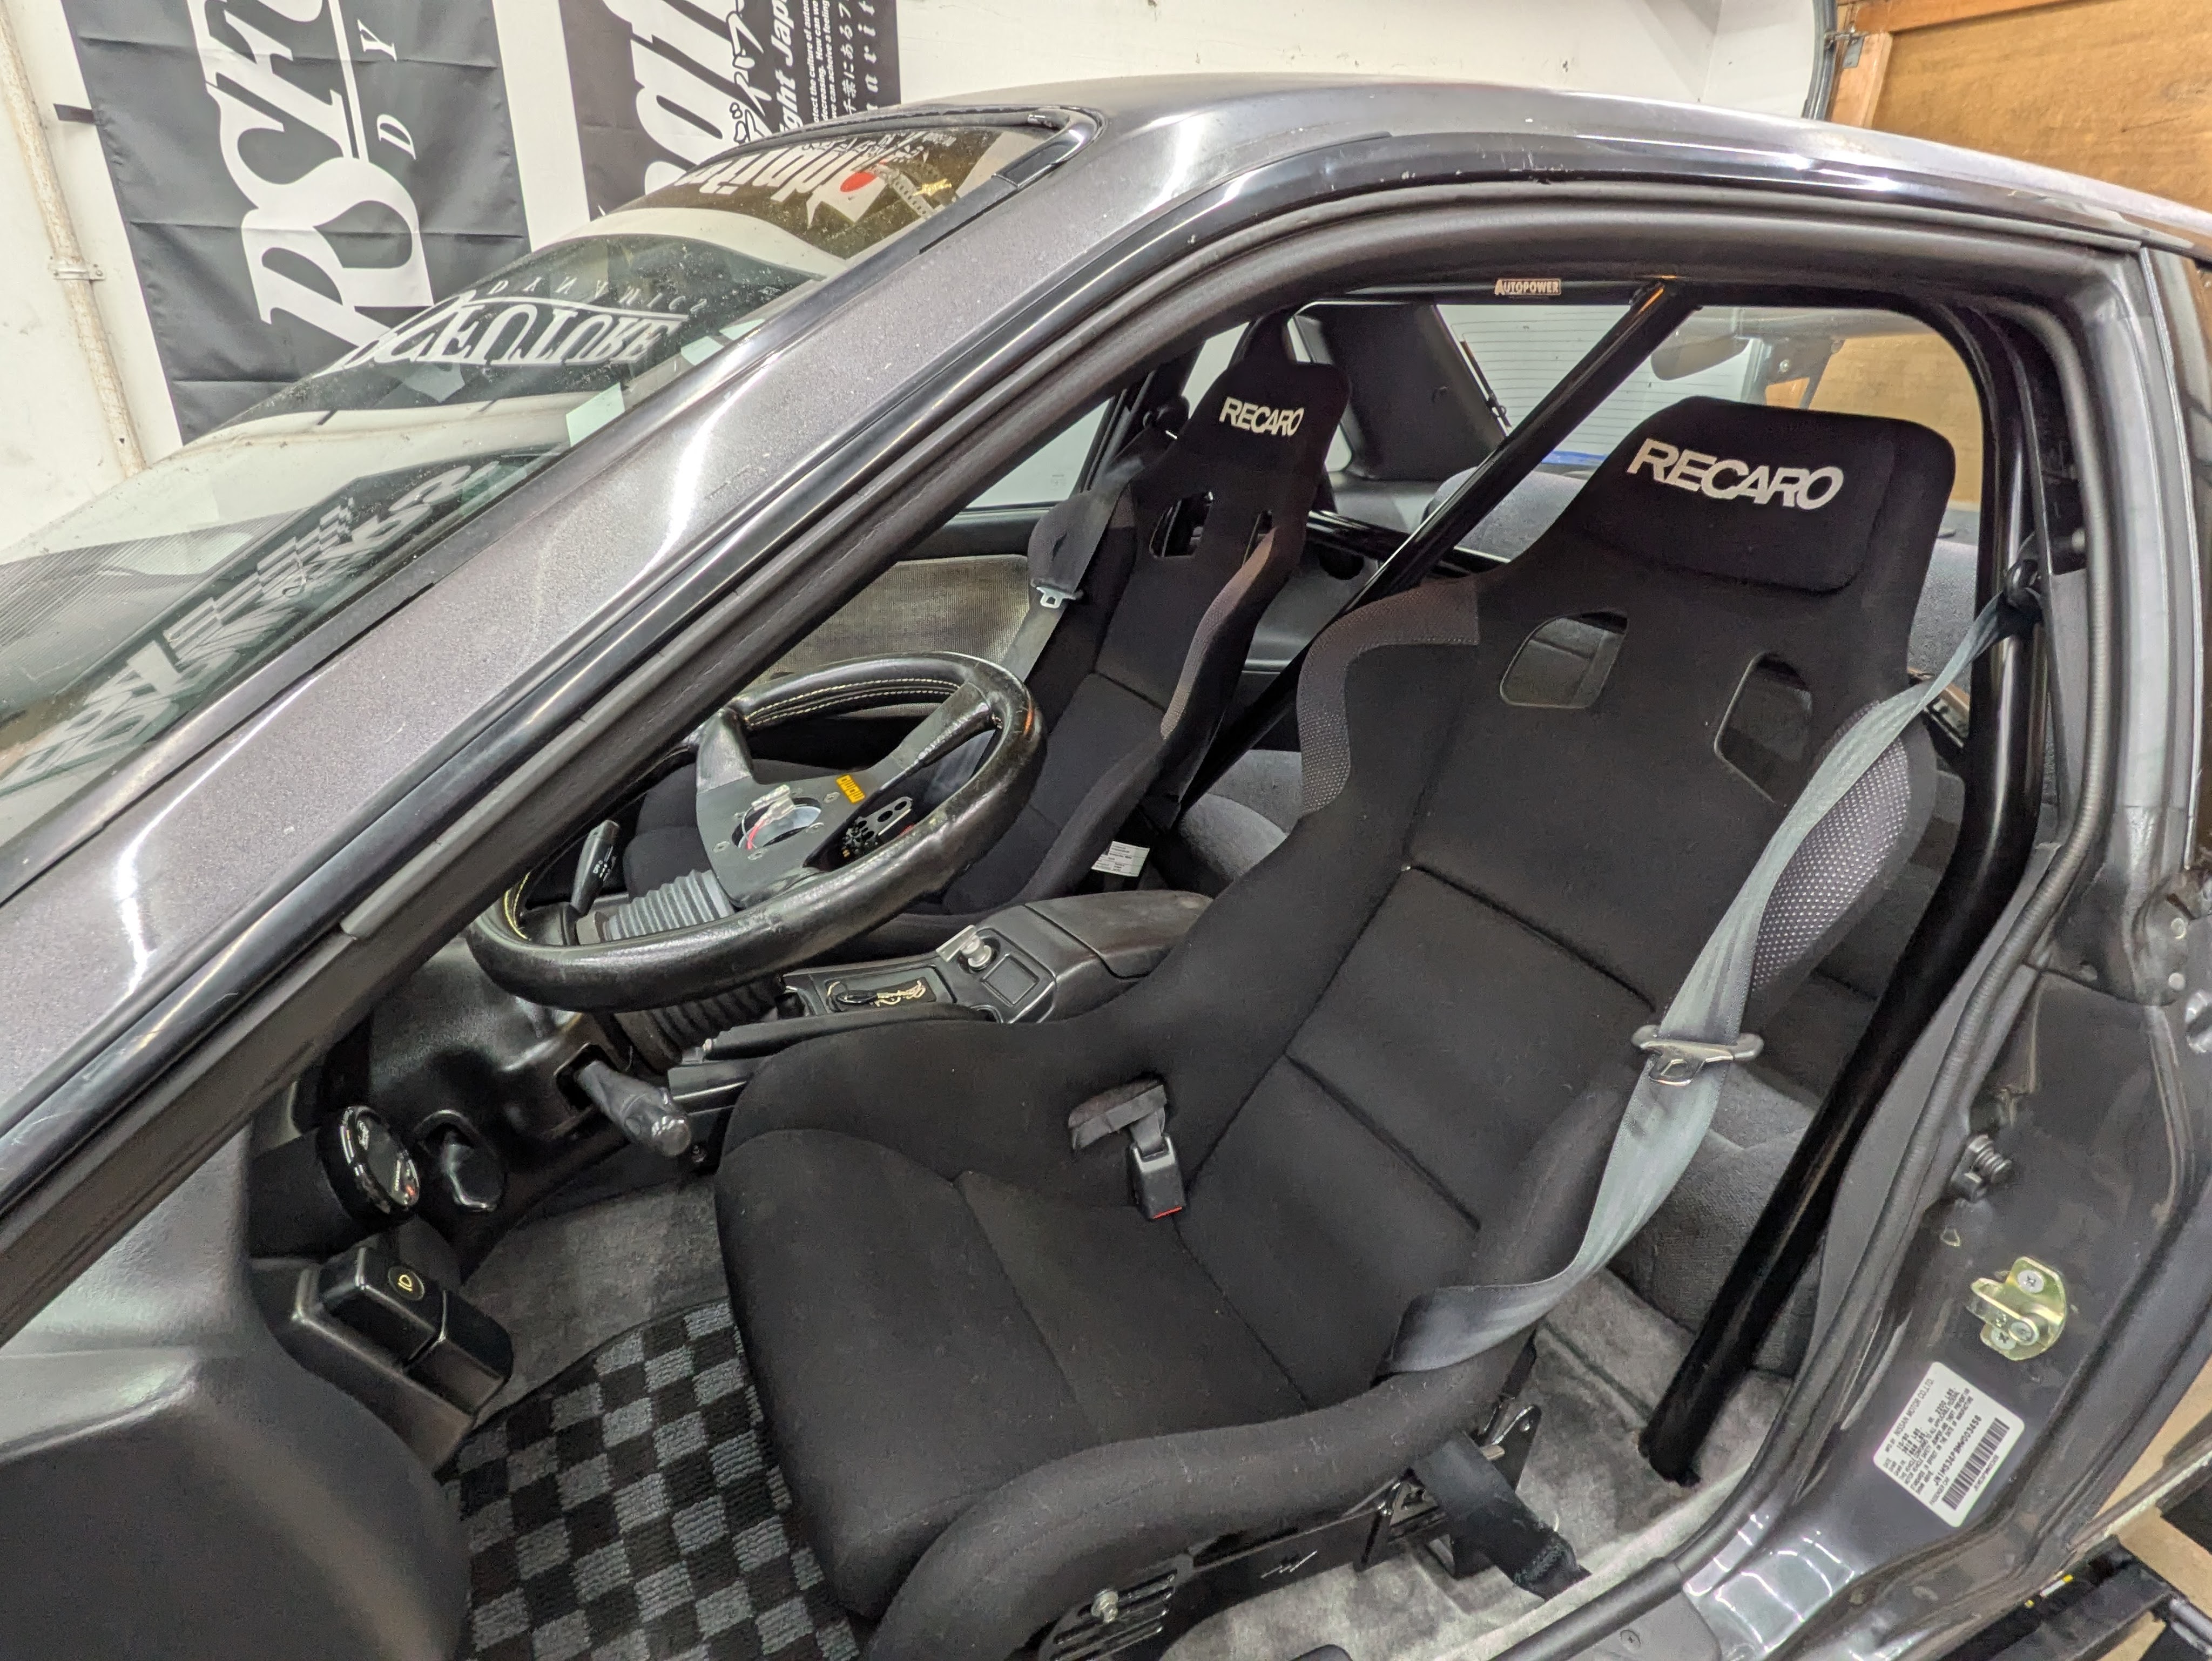
With the back wrapped up I threw the Recaro Profi XLs back in. No better seat for the office. Still absolutely in love with these. Although I did recently notice that the generations that they span are not identical. One has the Recaro logo stitched on the back of the headrest and the other doesn’t. Kind of annoying, but we’re really splitting hairs here.
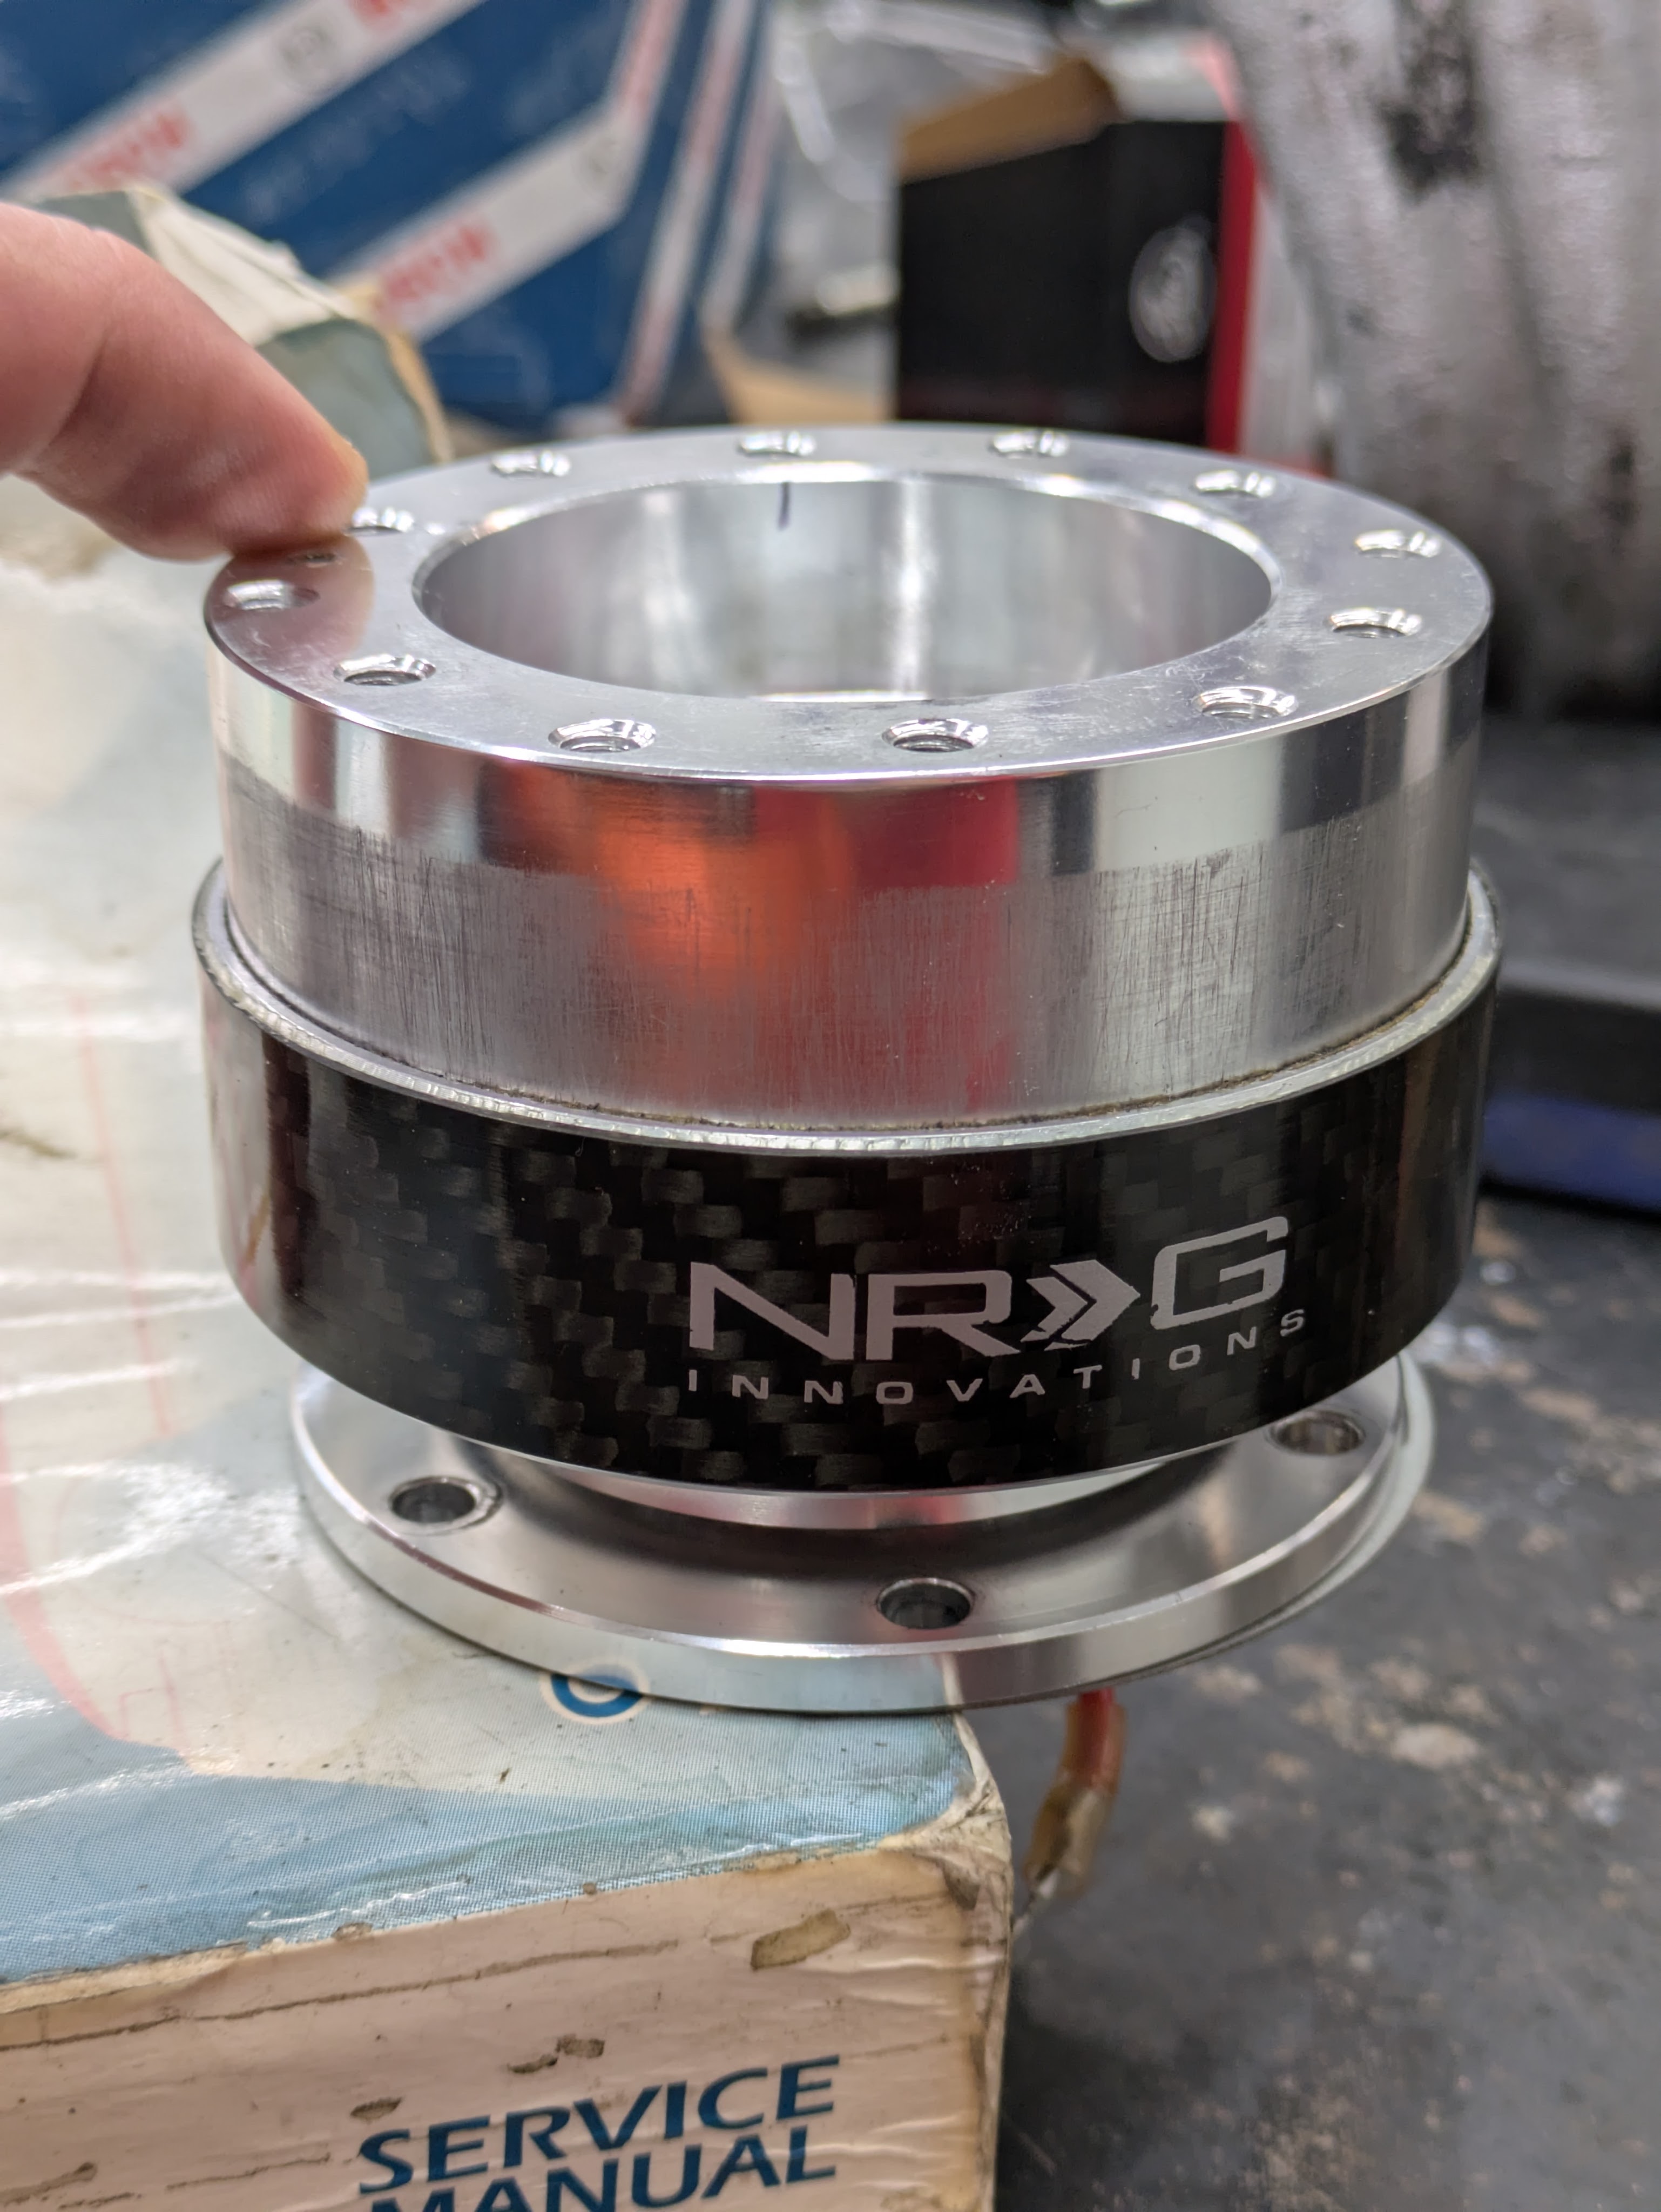
Now it is time for an evidently missing object, but arguably the most important ergonomic one. This car previously had a VERY old pre SFI NRG quick release. It worked just fine, and had clearly been safe enough, but would not have been my first choice if I was given the option, In my big Nengun order in the fall, I knew I wanted a Works Bell, and I made the decision to put in a RAPFIX GTC flipper hub rather than the normal 2 piece quick release. This stems from the necessity to move the wheel for ingress and egress, as I don’t want a fixed wheel where I have to move the column all the time. The full quick release is fine, except that unlike my old Miata, the S13 has no good place to set a steering wheel, especially a flatter faced wheel. If I had a Nardi Deep Corn, it would probably sit happily atop the cluster binnacle as was the case in my Miata. The flipper accomplished the necessity of moving the wheel with the security of the wheel not falling off the dash and smashing my turn signal stalks. I debated stripping the anodize off the red release handle to better match the monotone interior, but as this is a safety related item, and a visual flag if other people drive the car, I decided to leave it.
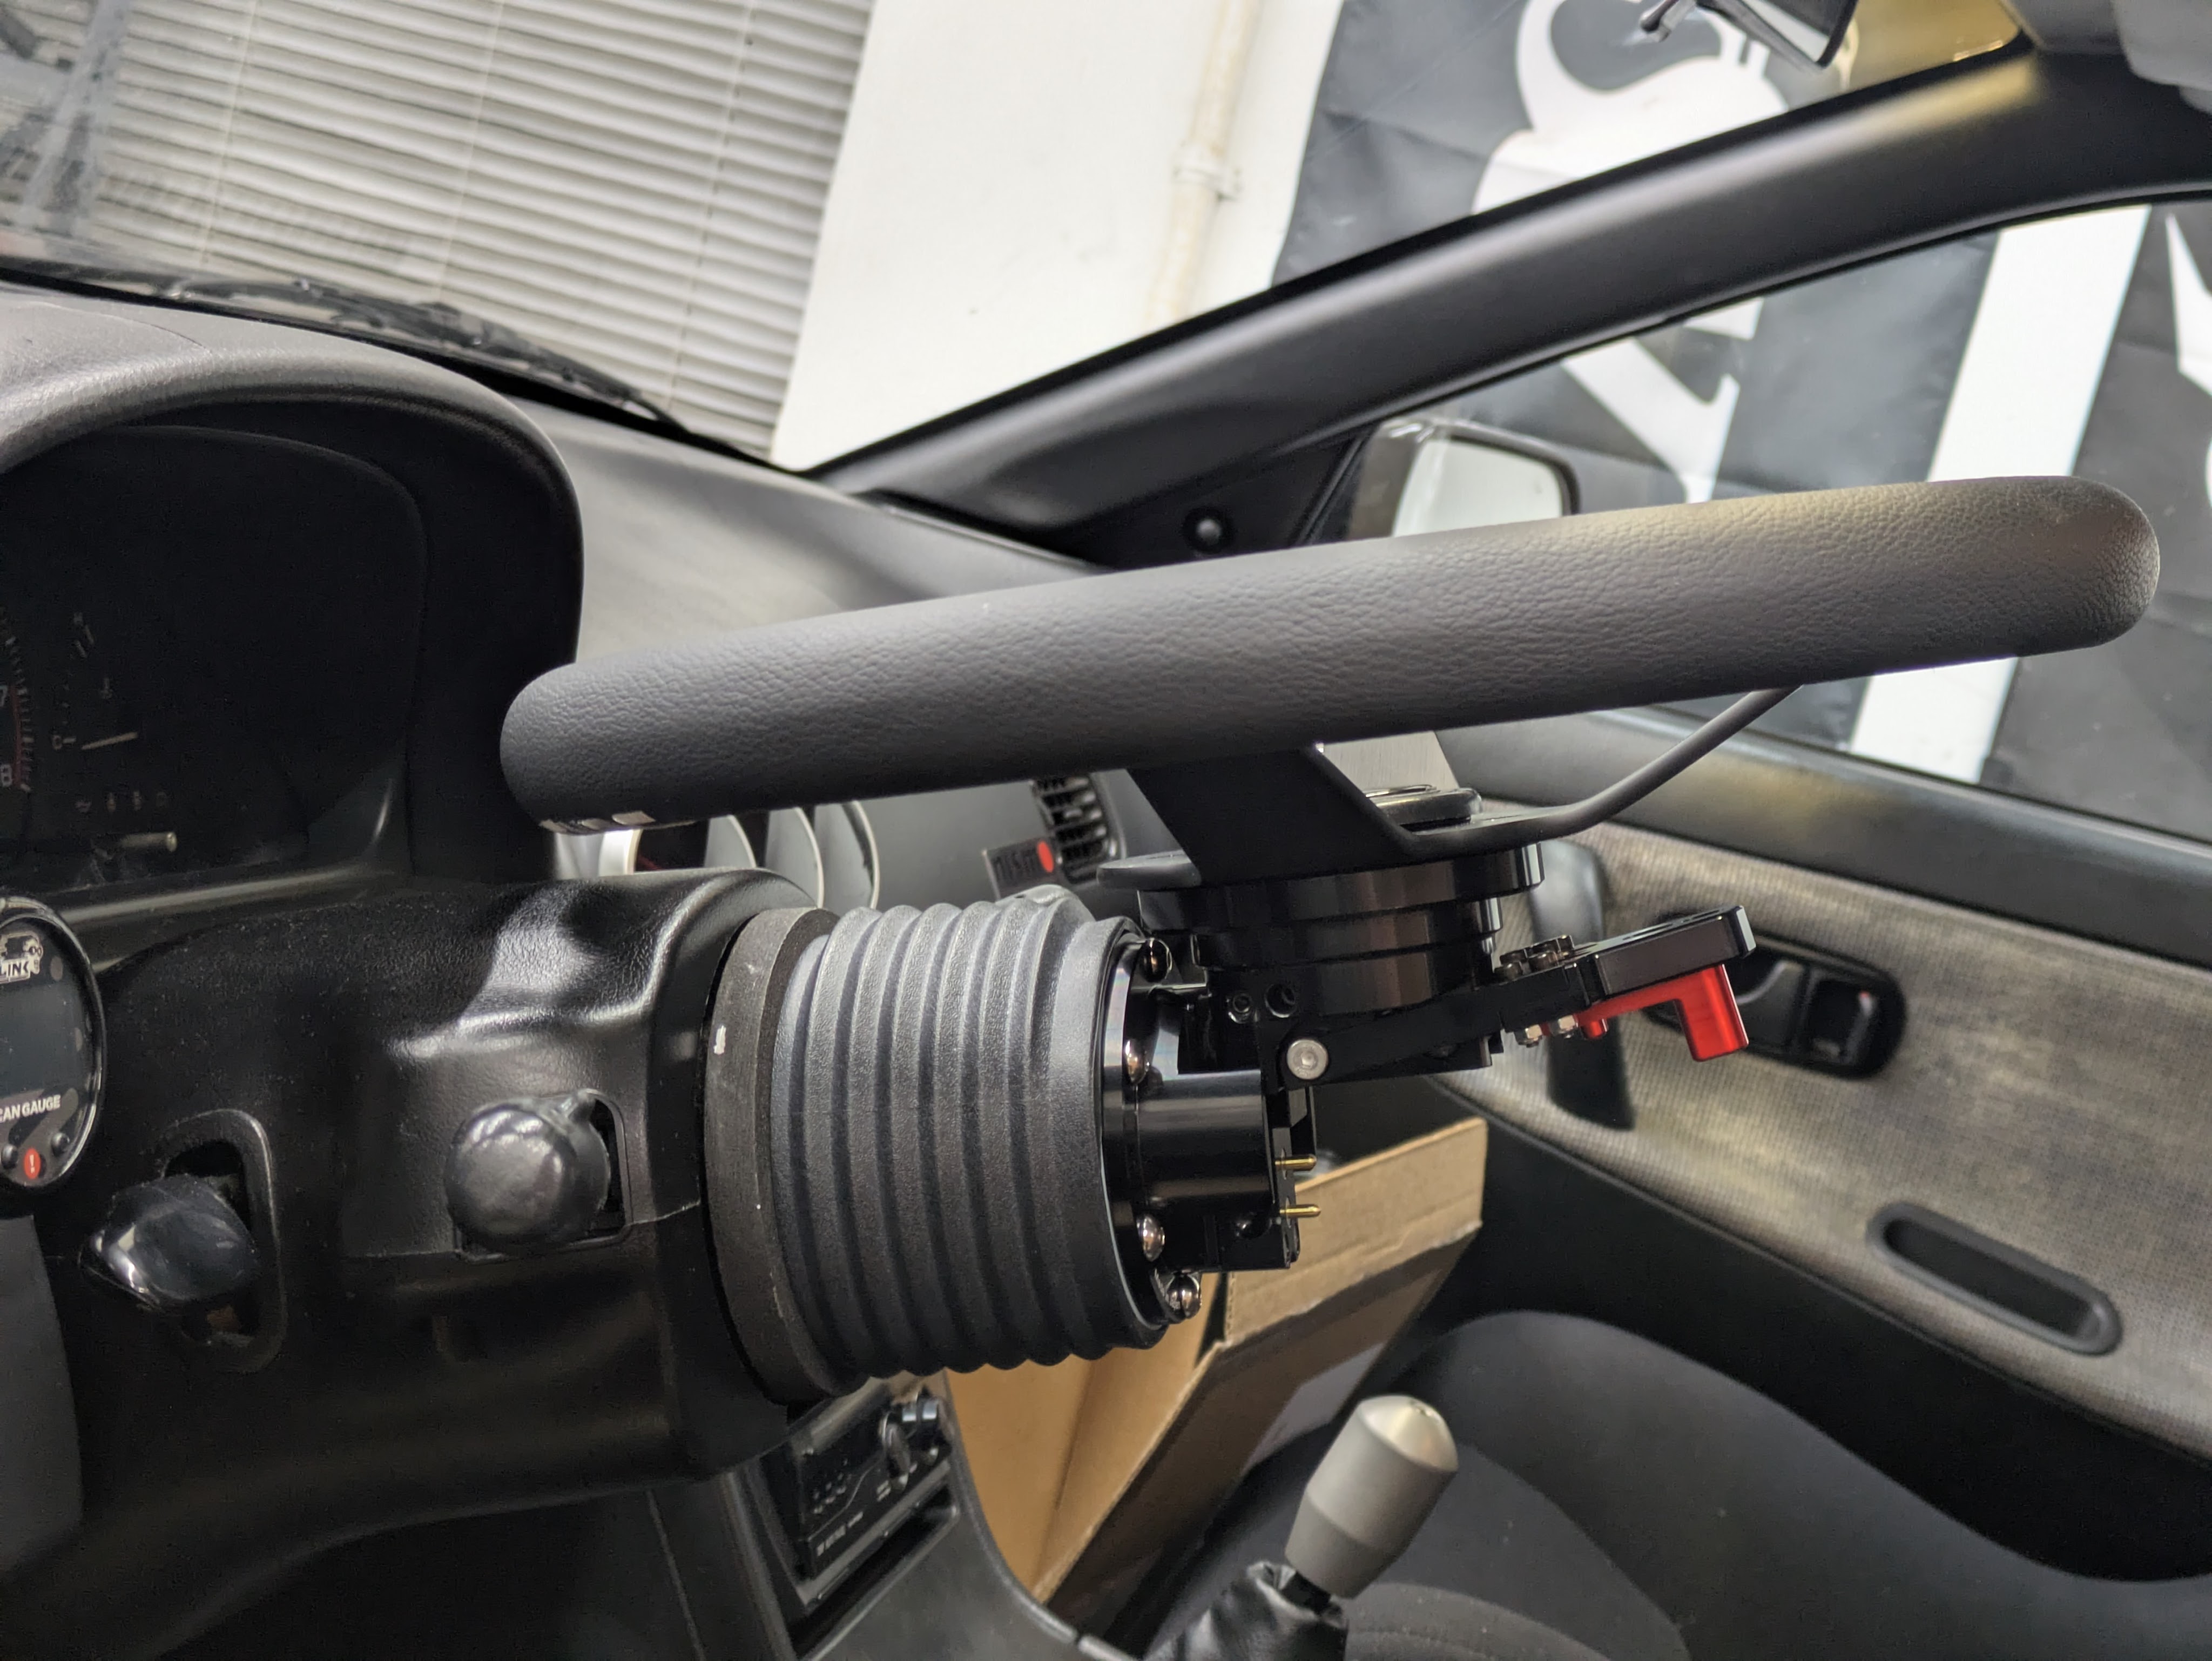
Now on to the steering wheel.
This car, for me, needs to have a 350mm wheel. It is the goldilocks size for me given my dimensions, the interior dimensions, and the steering ratio. I visually love Nardis in these cars, especially a Classic or a Deep Corn with a silver center. Its just so right. There are a couple of issue though.
Nardi doesn’t make a Classic in 350. They make a 330, which is too small in my opinion. They make a Deep Corn in 350, but the issue then is the offset. The 80mm dish is too aggressive for the existing Momo steering wheel boss plus the Rapfix GTC, so that would place the wheel too close for my arm length and height. Most importantly to me for whatever reason, the problem with Nardi in this application is it would leave an awkward amount of distance, as well as not being parallel, between the steering wheel and the Rapfix release handle. This means there are pretty much no Nardis that meet my autistic criteria, at least modern/easily available ones.
Ok, lets go looking. I happened to also be on the quest for a horn button. While custom horn buttons are nothing new, I always go back to revlimiter.com as Adam is a super cool dude and has been around for a long time making nice stuff. While on his site, there was an article on his blog about a Renown x Speedhunter Final collaboration wheel. After reading through his little unboxing and review of it, I was like “damn this was from a few months ago, bet they are sold out”.
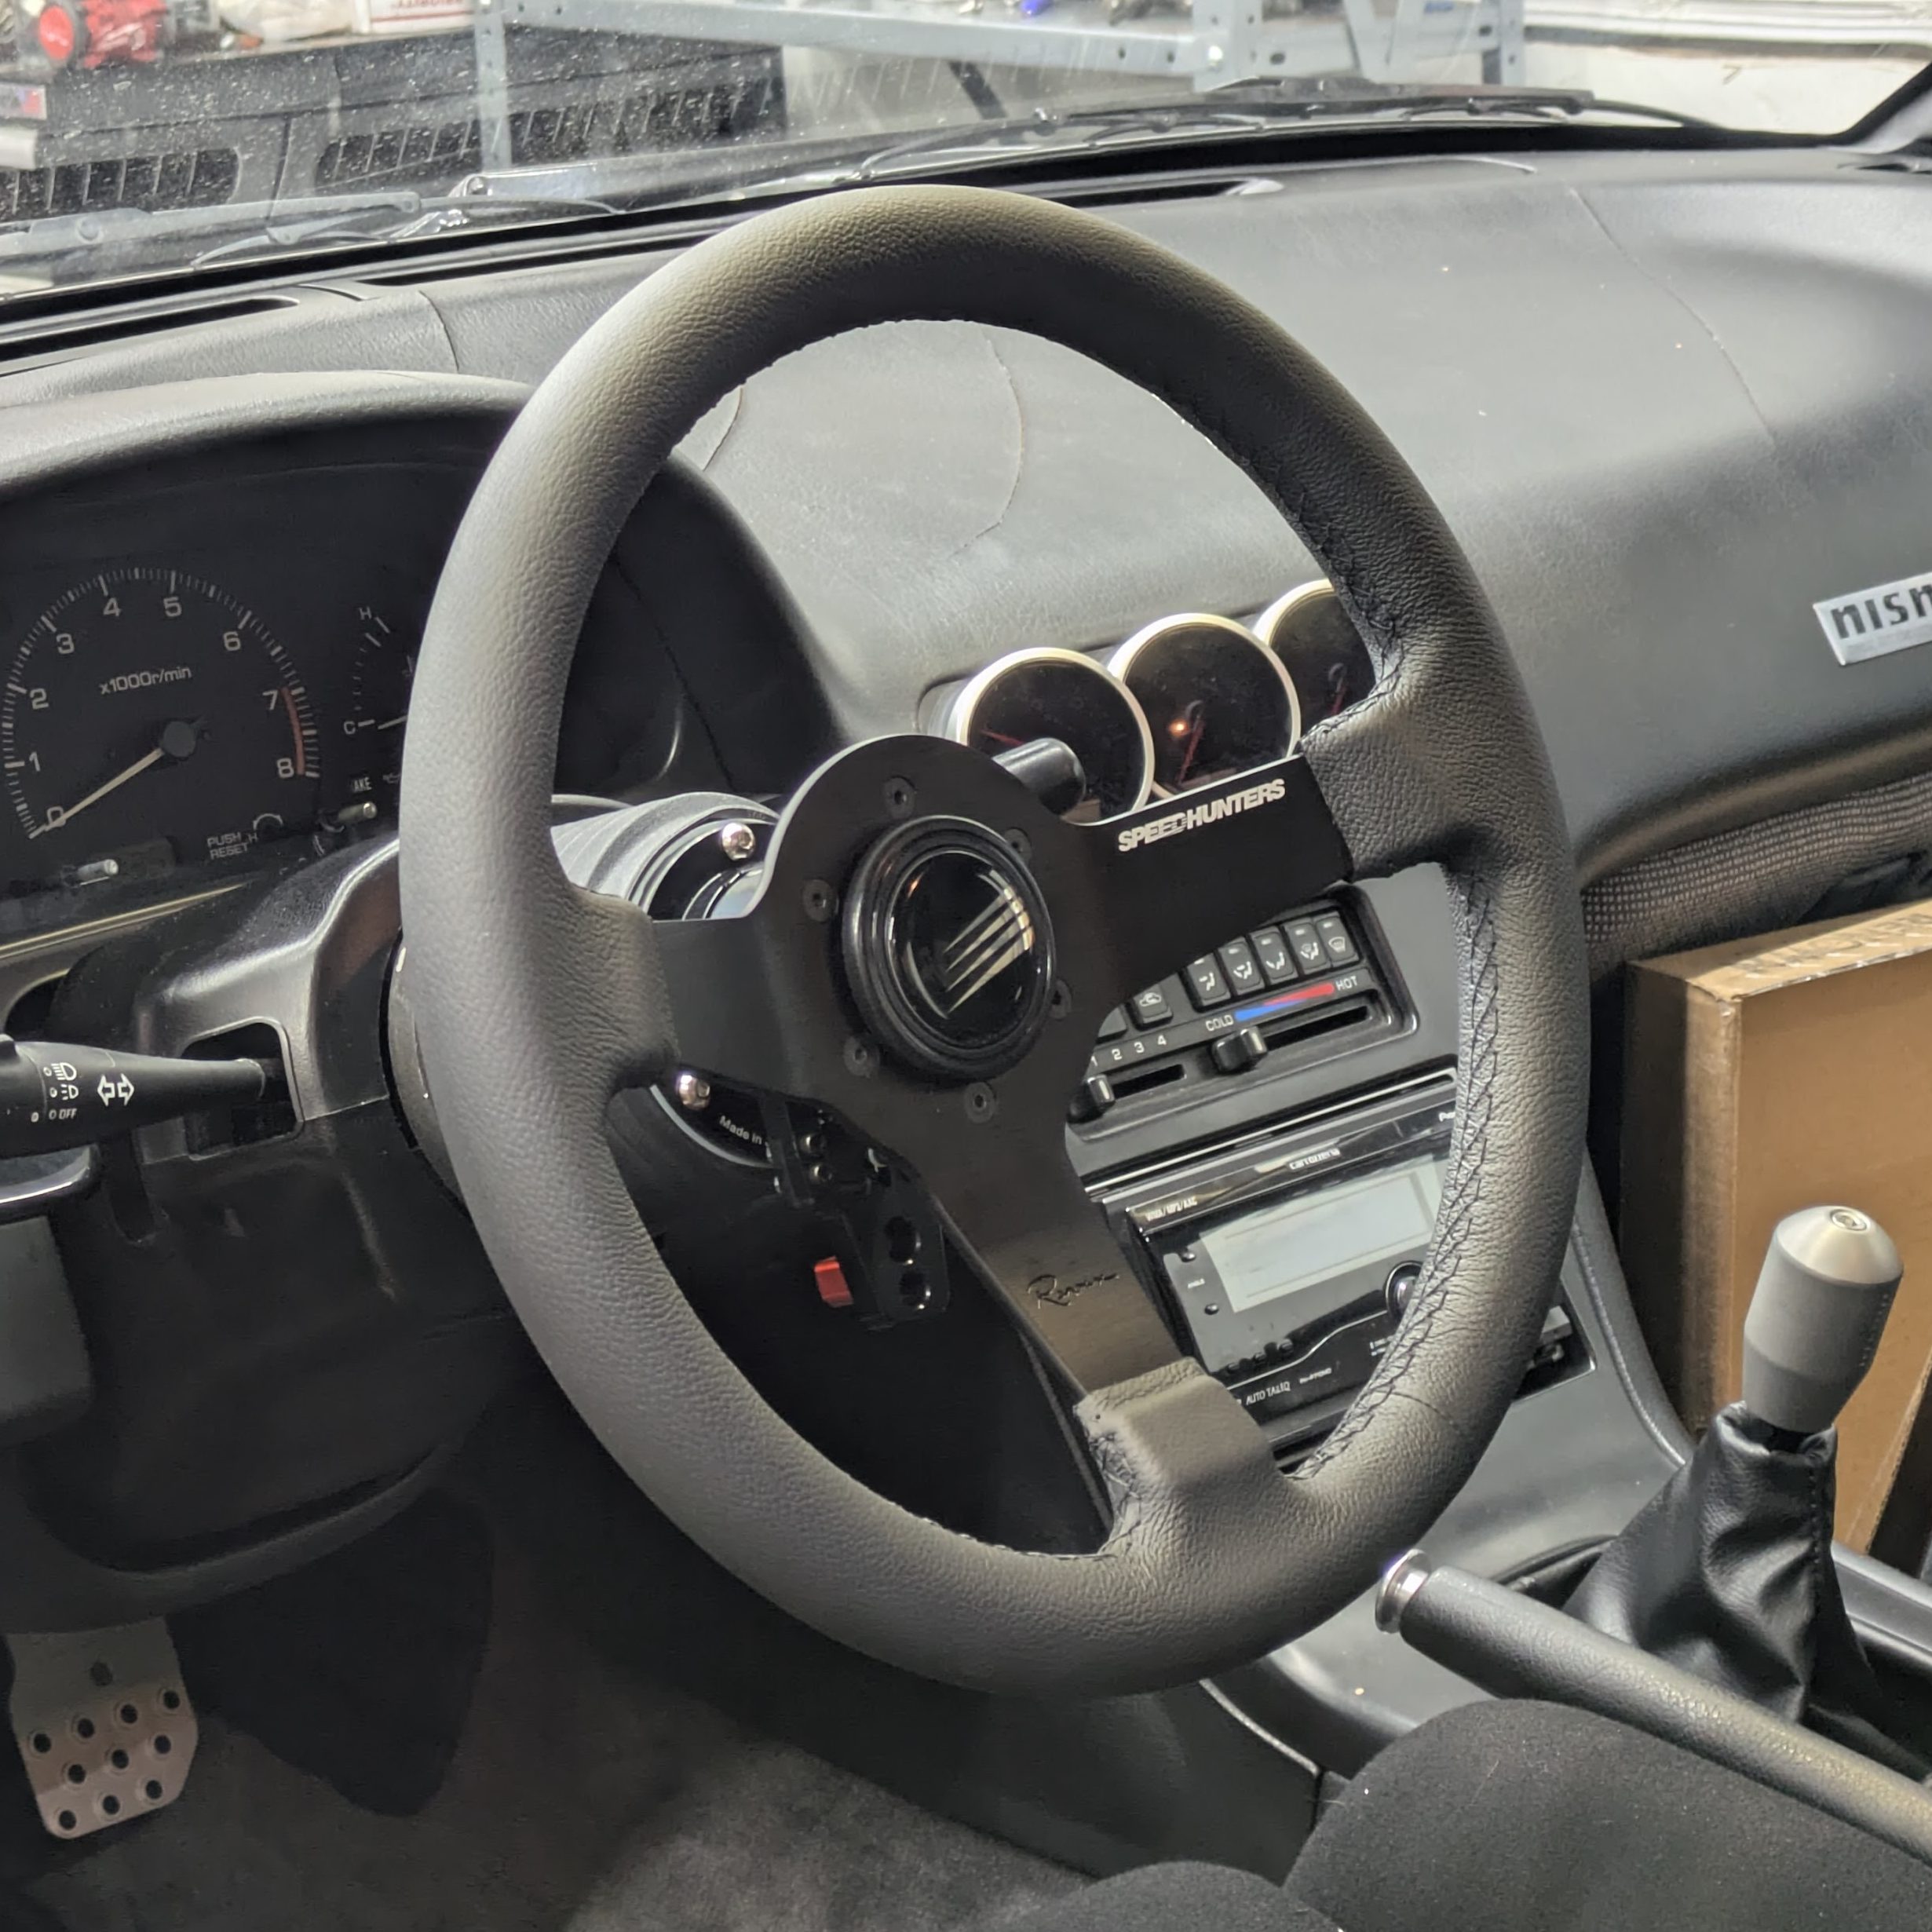
Sure enough, they weren’t. So I kind of just impulse bought one, almost just for the horn buttons alone. In a way, Adam posting about it on his blog literally worked himself out of a sale. The Speedhunters connection was one of the reasons I grew fond of this car initially, and as the site is now dead, I wanted a little homage to it in the car somewhere. Scott at Renown is a nice dude and we had a little chat over email about the wheel and the car and all that. However, I was kind of taking a gamble on the wheel as I don’t really love most modern wheels.
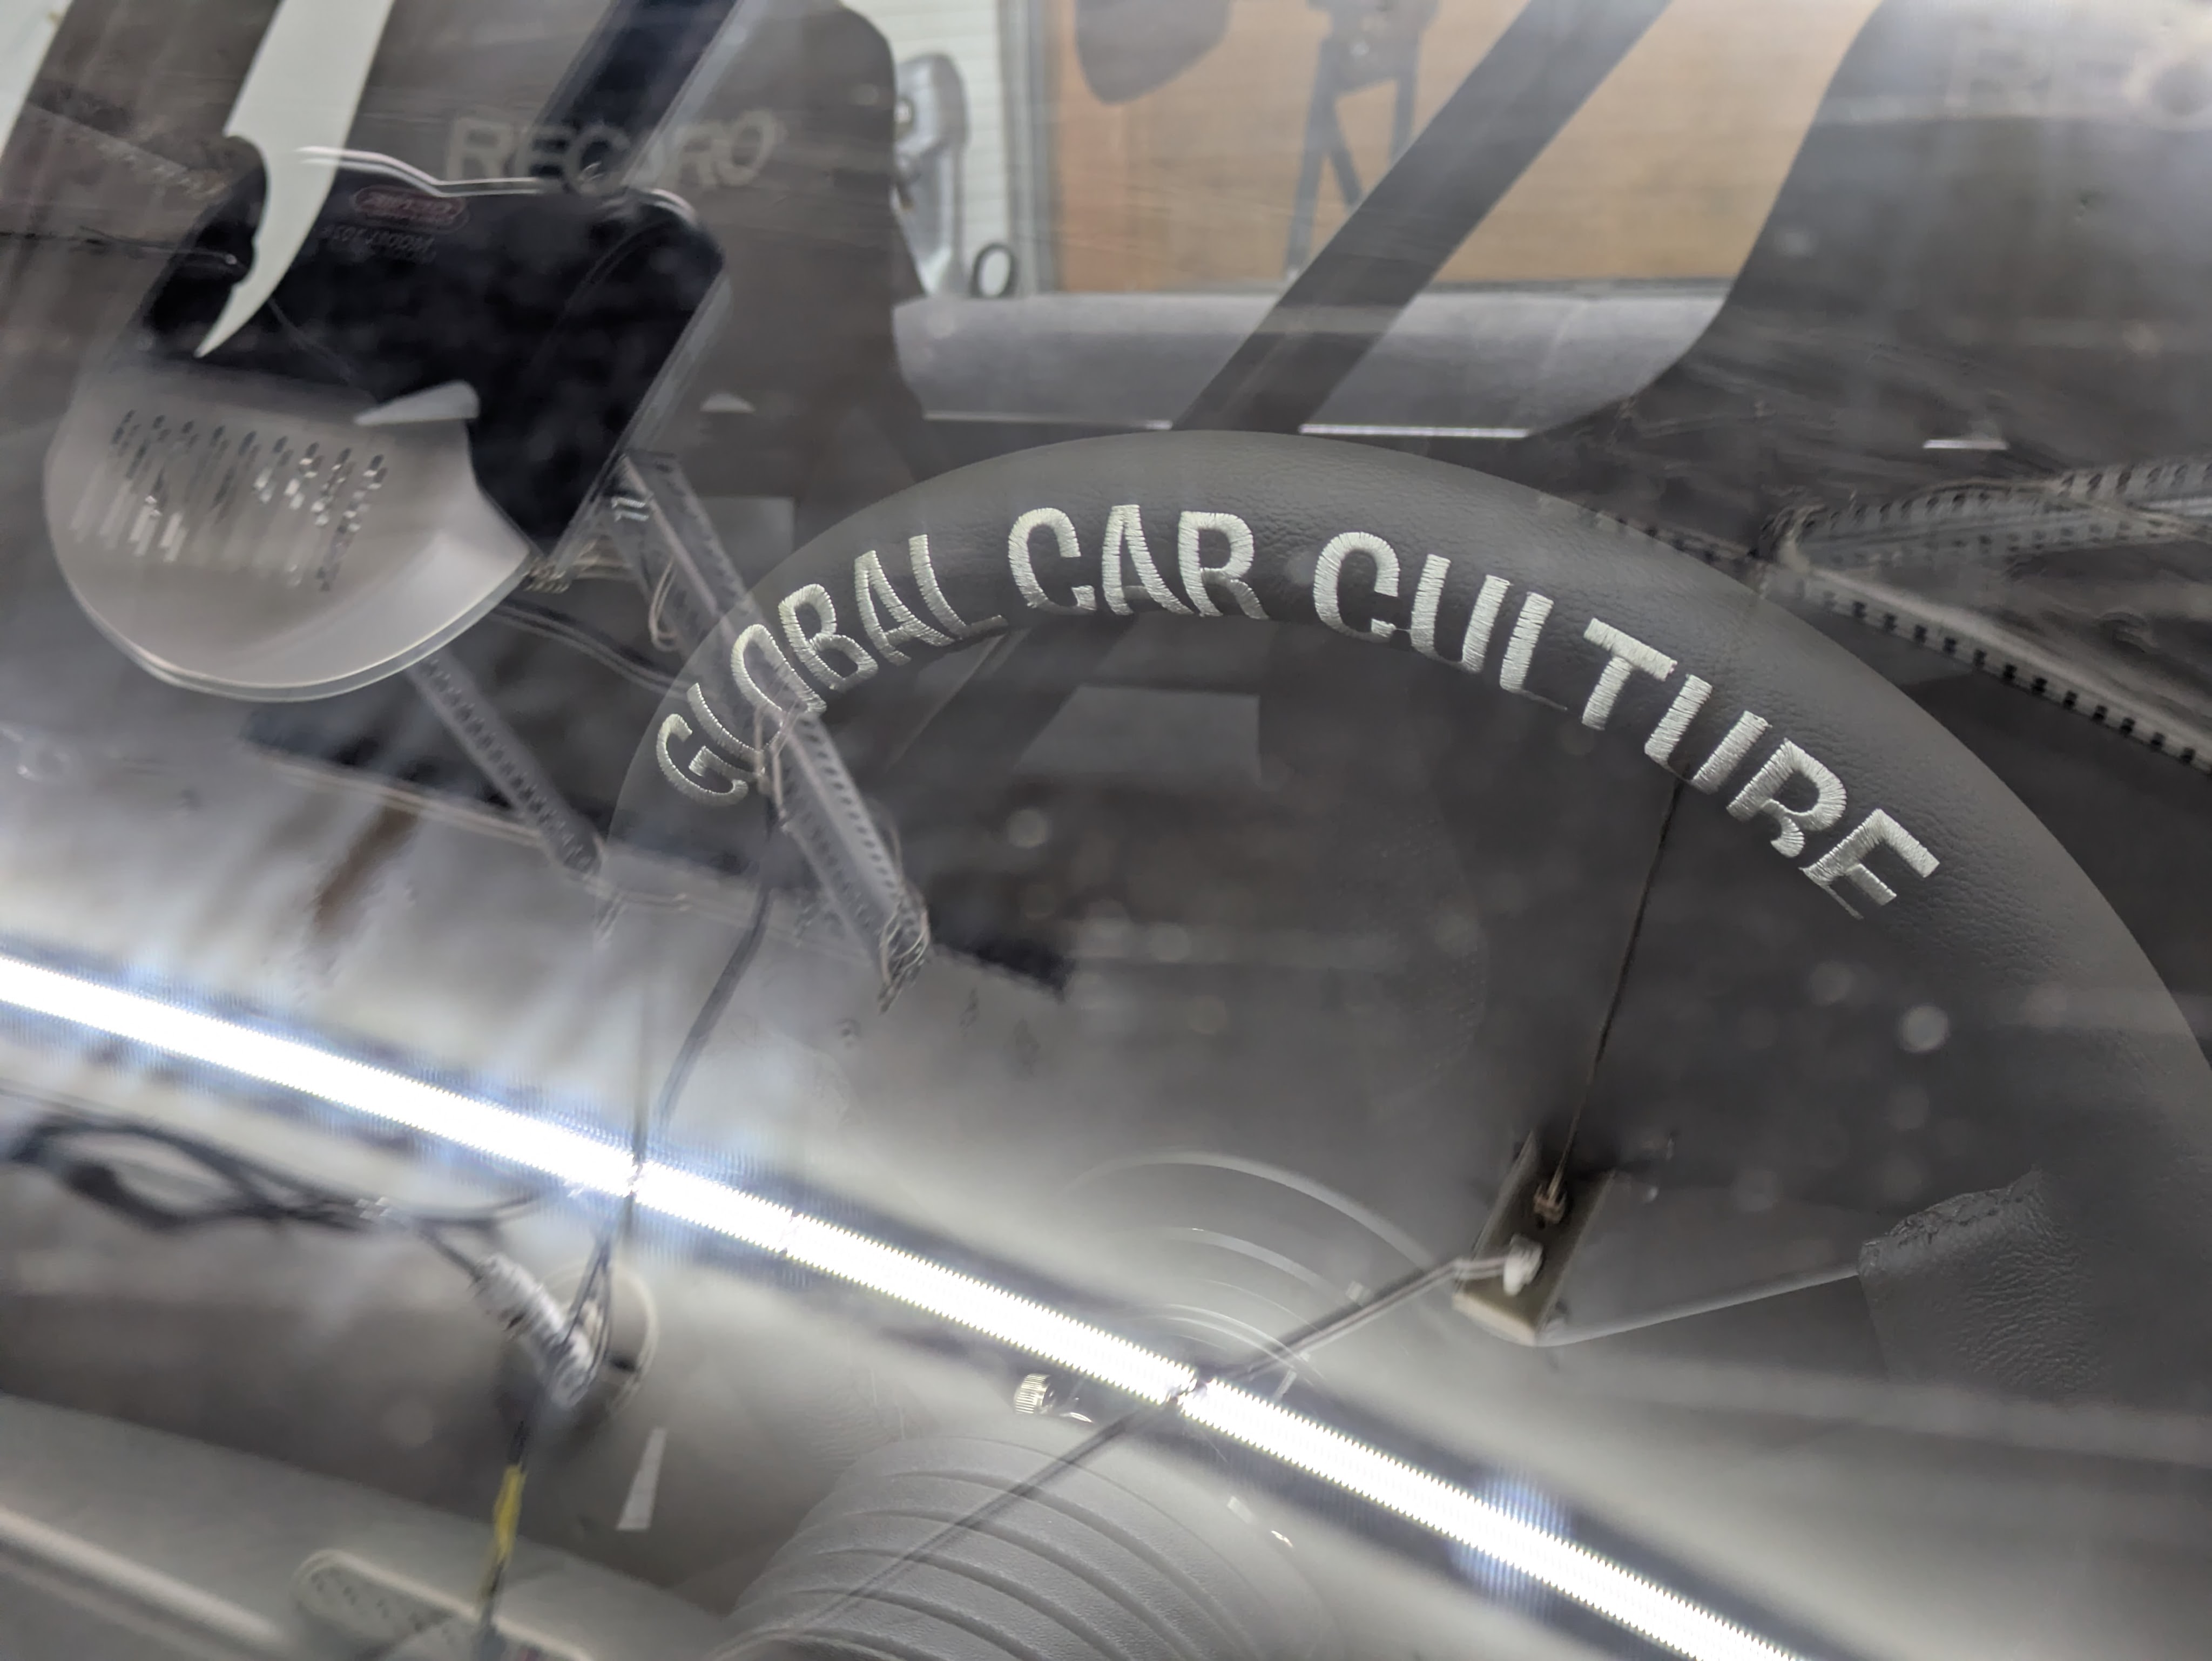
Unfortunately, it showed up and my gut feeling was correct. While well made, nicely finished, and a cool piece of history, the 340mm size didn’t feel or sit right in the car to my hand, the embroidery on the back isn’t my favorite, and something about the spoke style is a little too modern for the car. It’ll look nice hanging on my wall I suppose.

The answer all along has been the one sitting right in front of me. The 1991 Momo Type V35 that had previously been in the car has been something I’ve had since my first Miata when I was 19, and has found itself in many of my cars since. Its not perfect, but its well worn in and feels great in the hand. It has a minimal spoke offset that can be spaced to perfection, it’s flat face matches the angles of the GTC release handle, its 350mm, and fits right in in the interior. So I guess it has found it’s forever home.
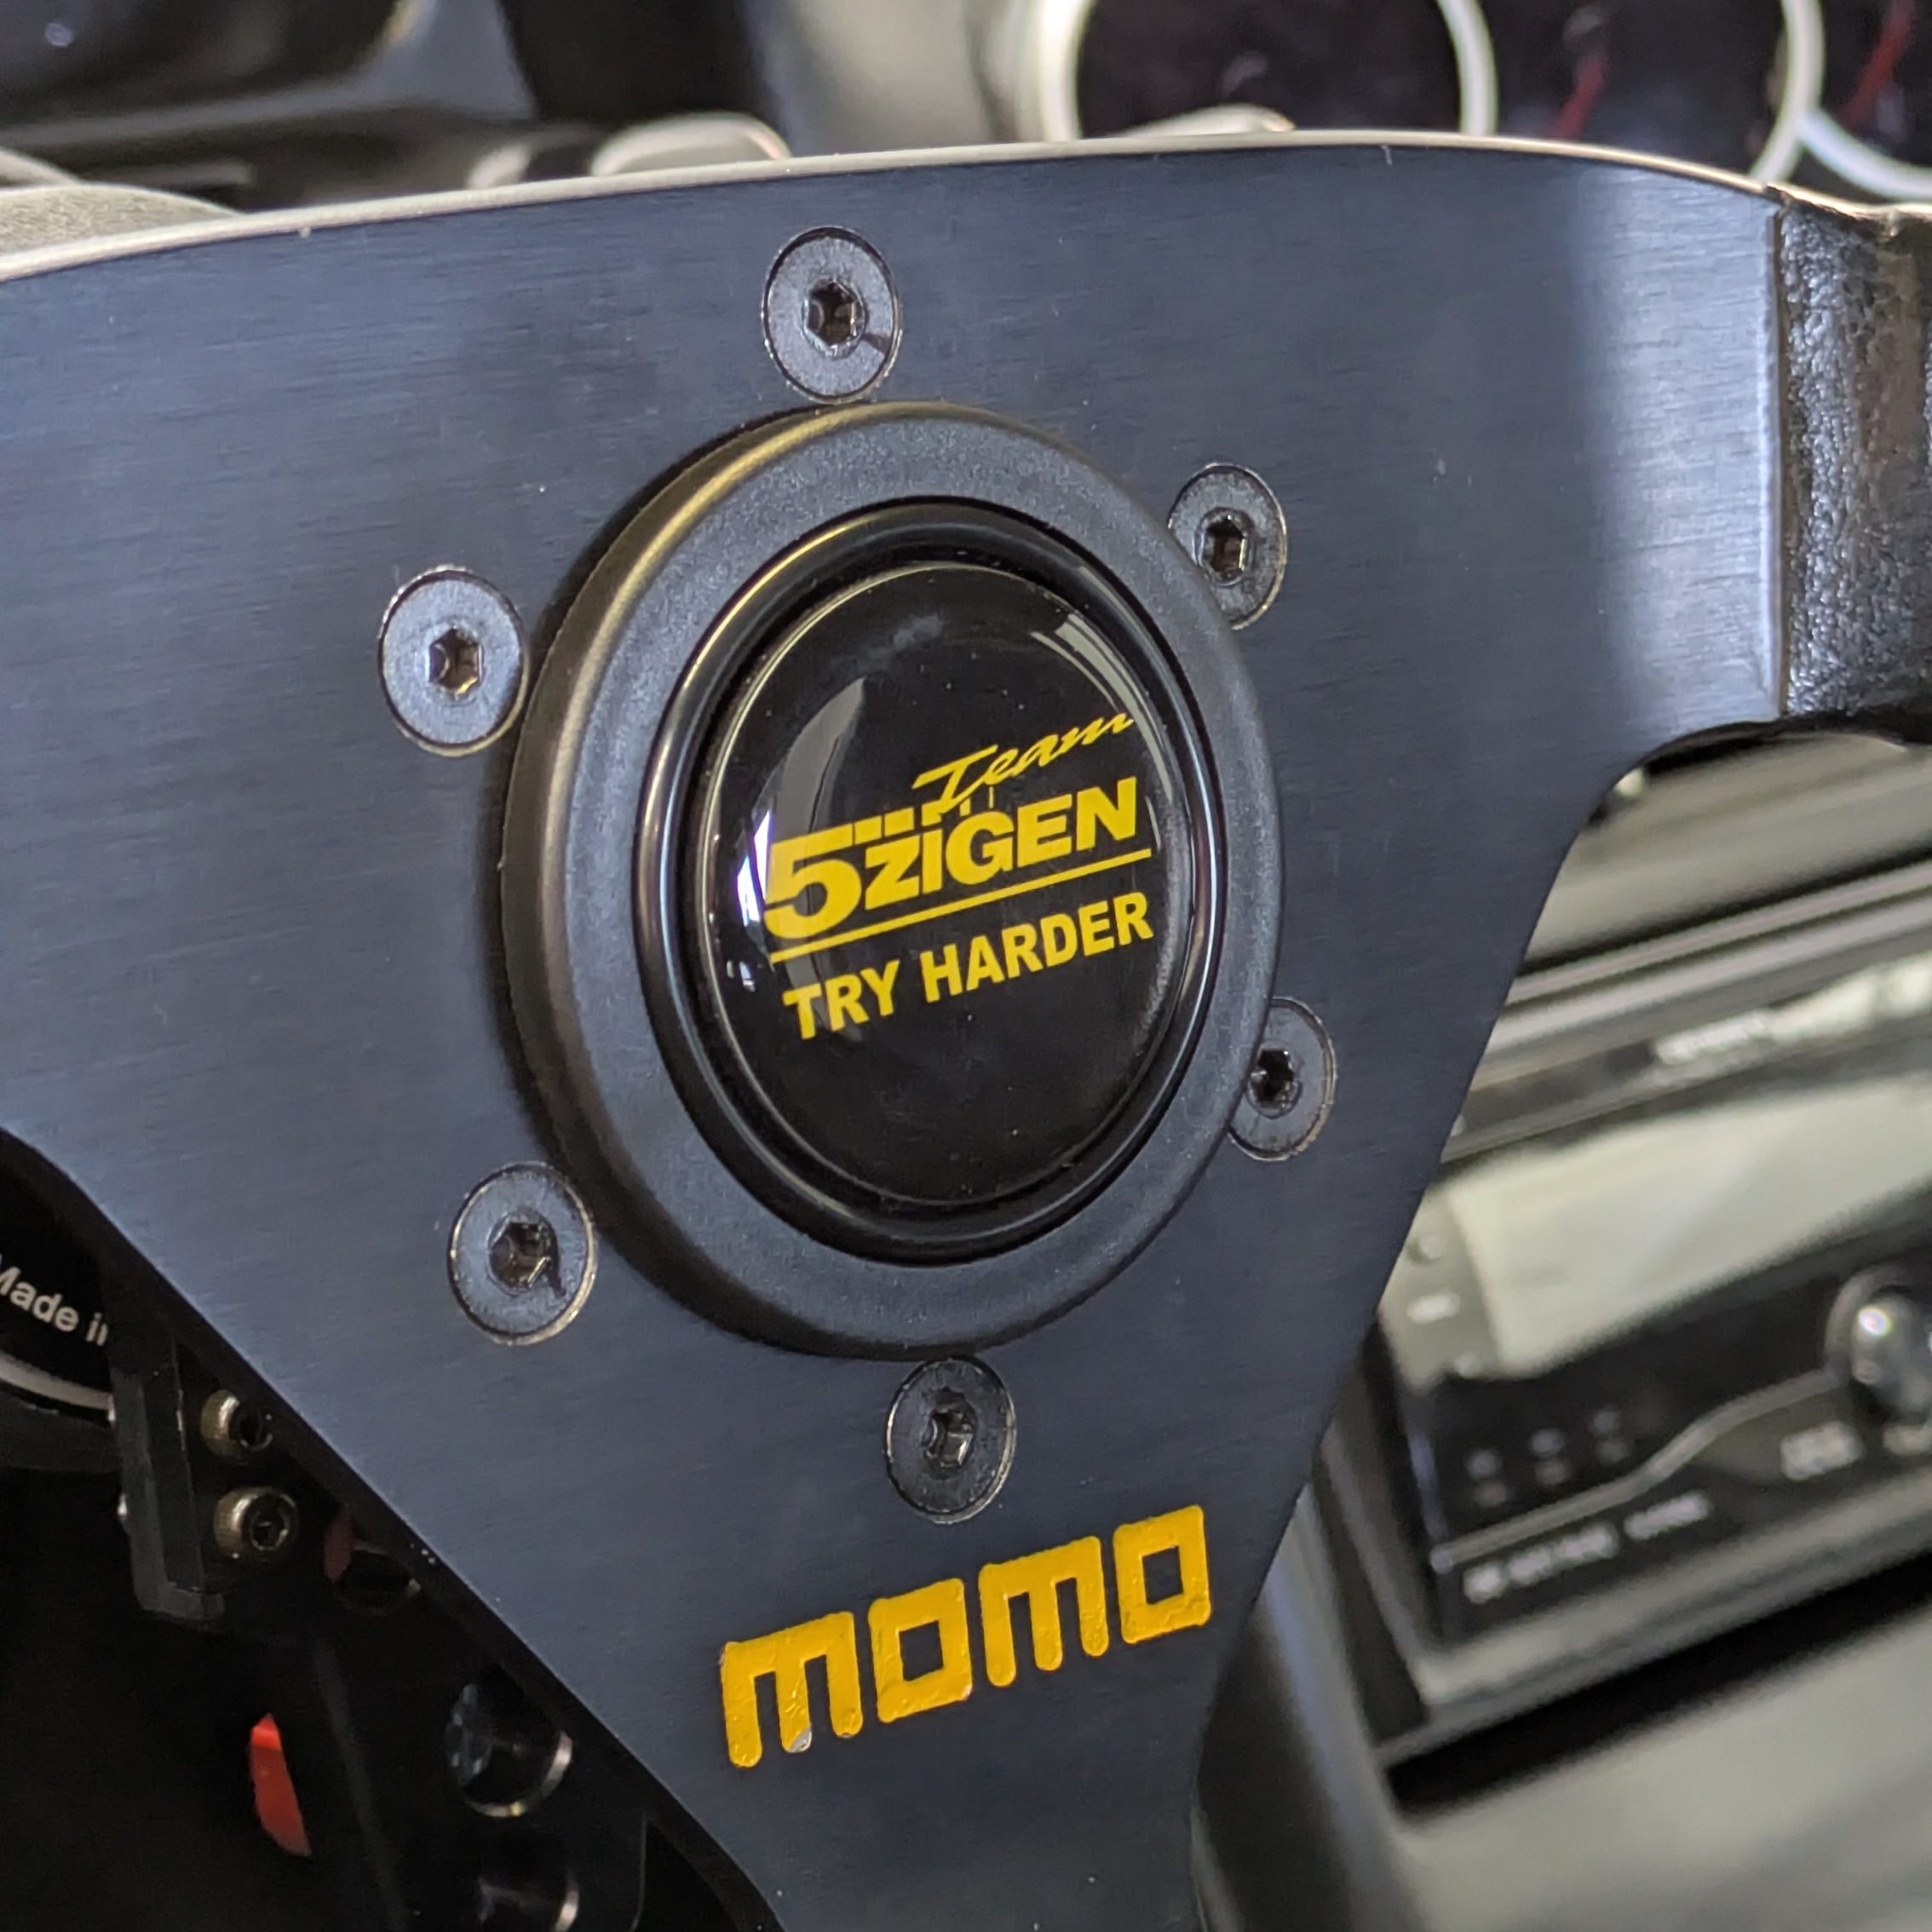
Even with the right steering wheel, it didn’t feel right without the right horn button. The Speedhunters ones didn’t feel right with the old Momo. I went back to Adam and ordered the horn button I wanted all along. My recently acquired set of 5Zigen FN01R-Cs reminded me of the awesome “Try Harder” logo that had adorned their center caps for many years. Adam captured exactly what I had envisioned, and the interior now feels complete. I may eventually track down an 5Zigen N1R steering wheel to match the horn button, but the Momo story and history wins.
And with that, the interior is complete. While not as visually representative of the work quite like the engine bay is, I am really happy with the final product. The time spent tucking, hiding, and simplifying all paid off in a really pleasant place to spend time, and I know there are no gremlins lurking under the dash. This is still, by far, the most perfectly ergonomic car I have ever driven for someone of my fucked up proportions, and with all my small complaints addressed, feels like the right place to be for many drives to come.
At this point, the car was tantalizingly close to being a car, but the home stretch will have to be a separate article.
Until next time.

