
This aspect of the suspension refresh was largely unnecessary if I am totally frank. Sure, there was some 35 year old rubber lingering, and some of the aftermarket arms were of a less-than-desirable brand. But my own completionist really took over, and combined with my mental roadblock of bolting ugly parts to pretty parts, I touched literally every component while it was apart.

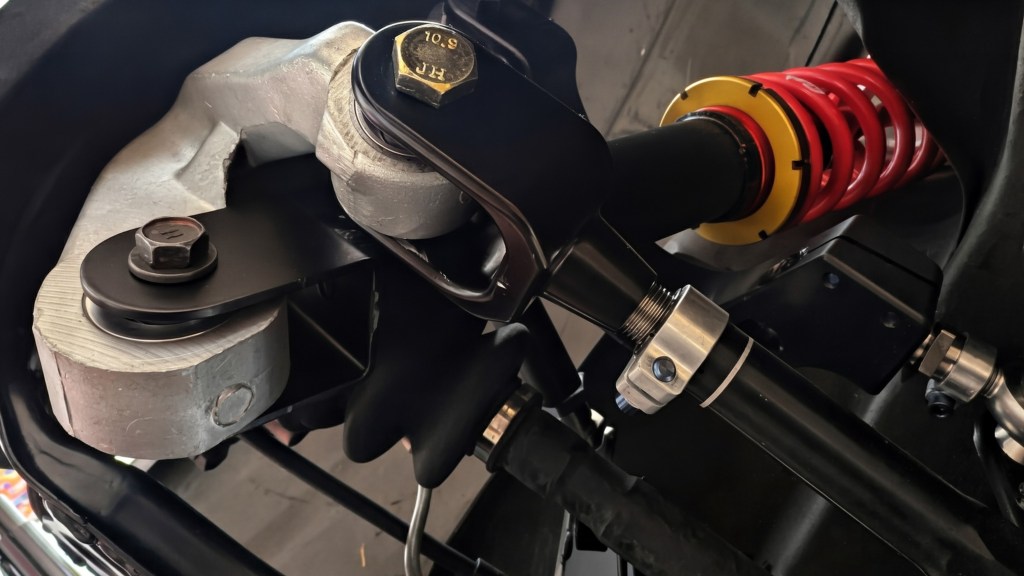
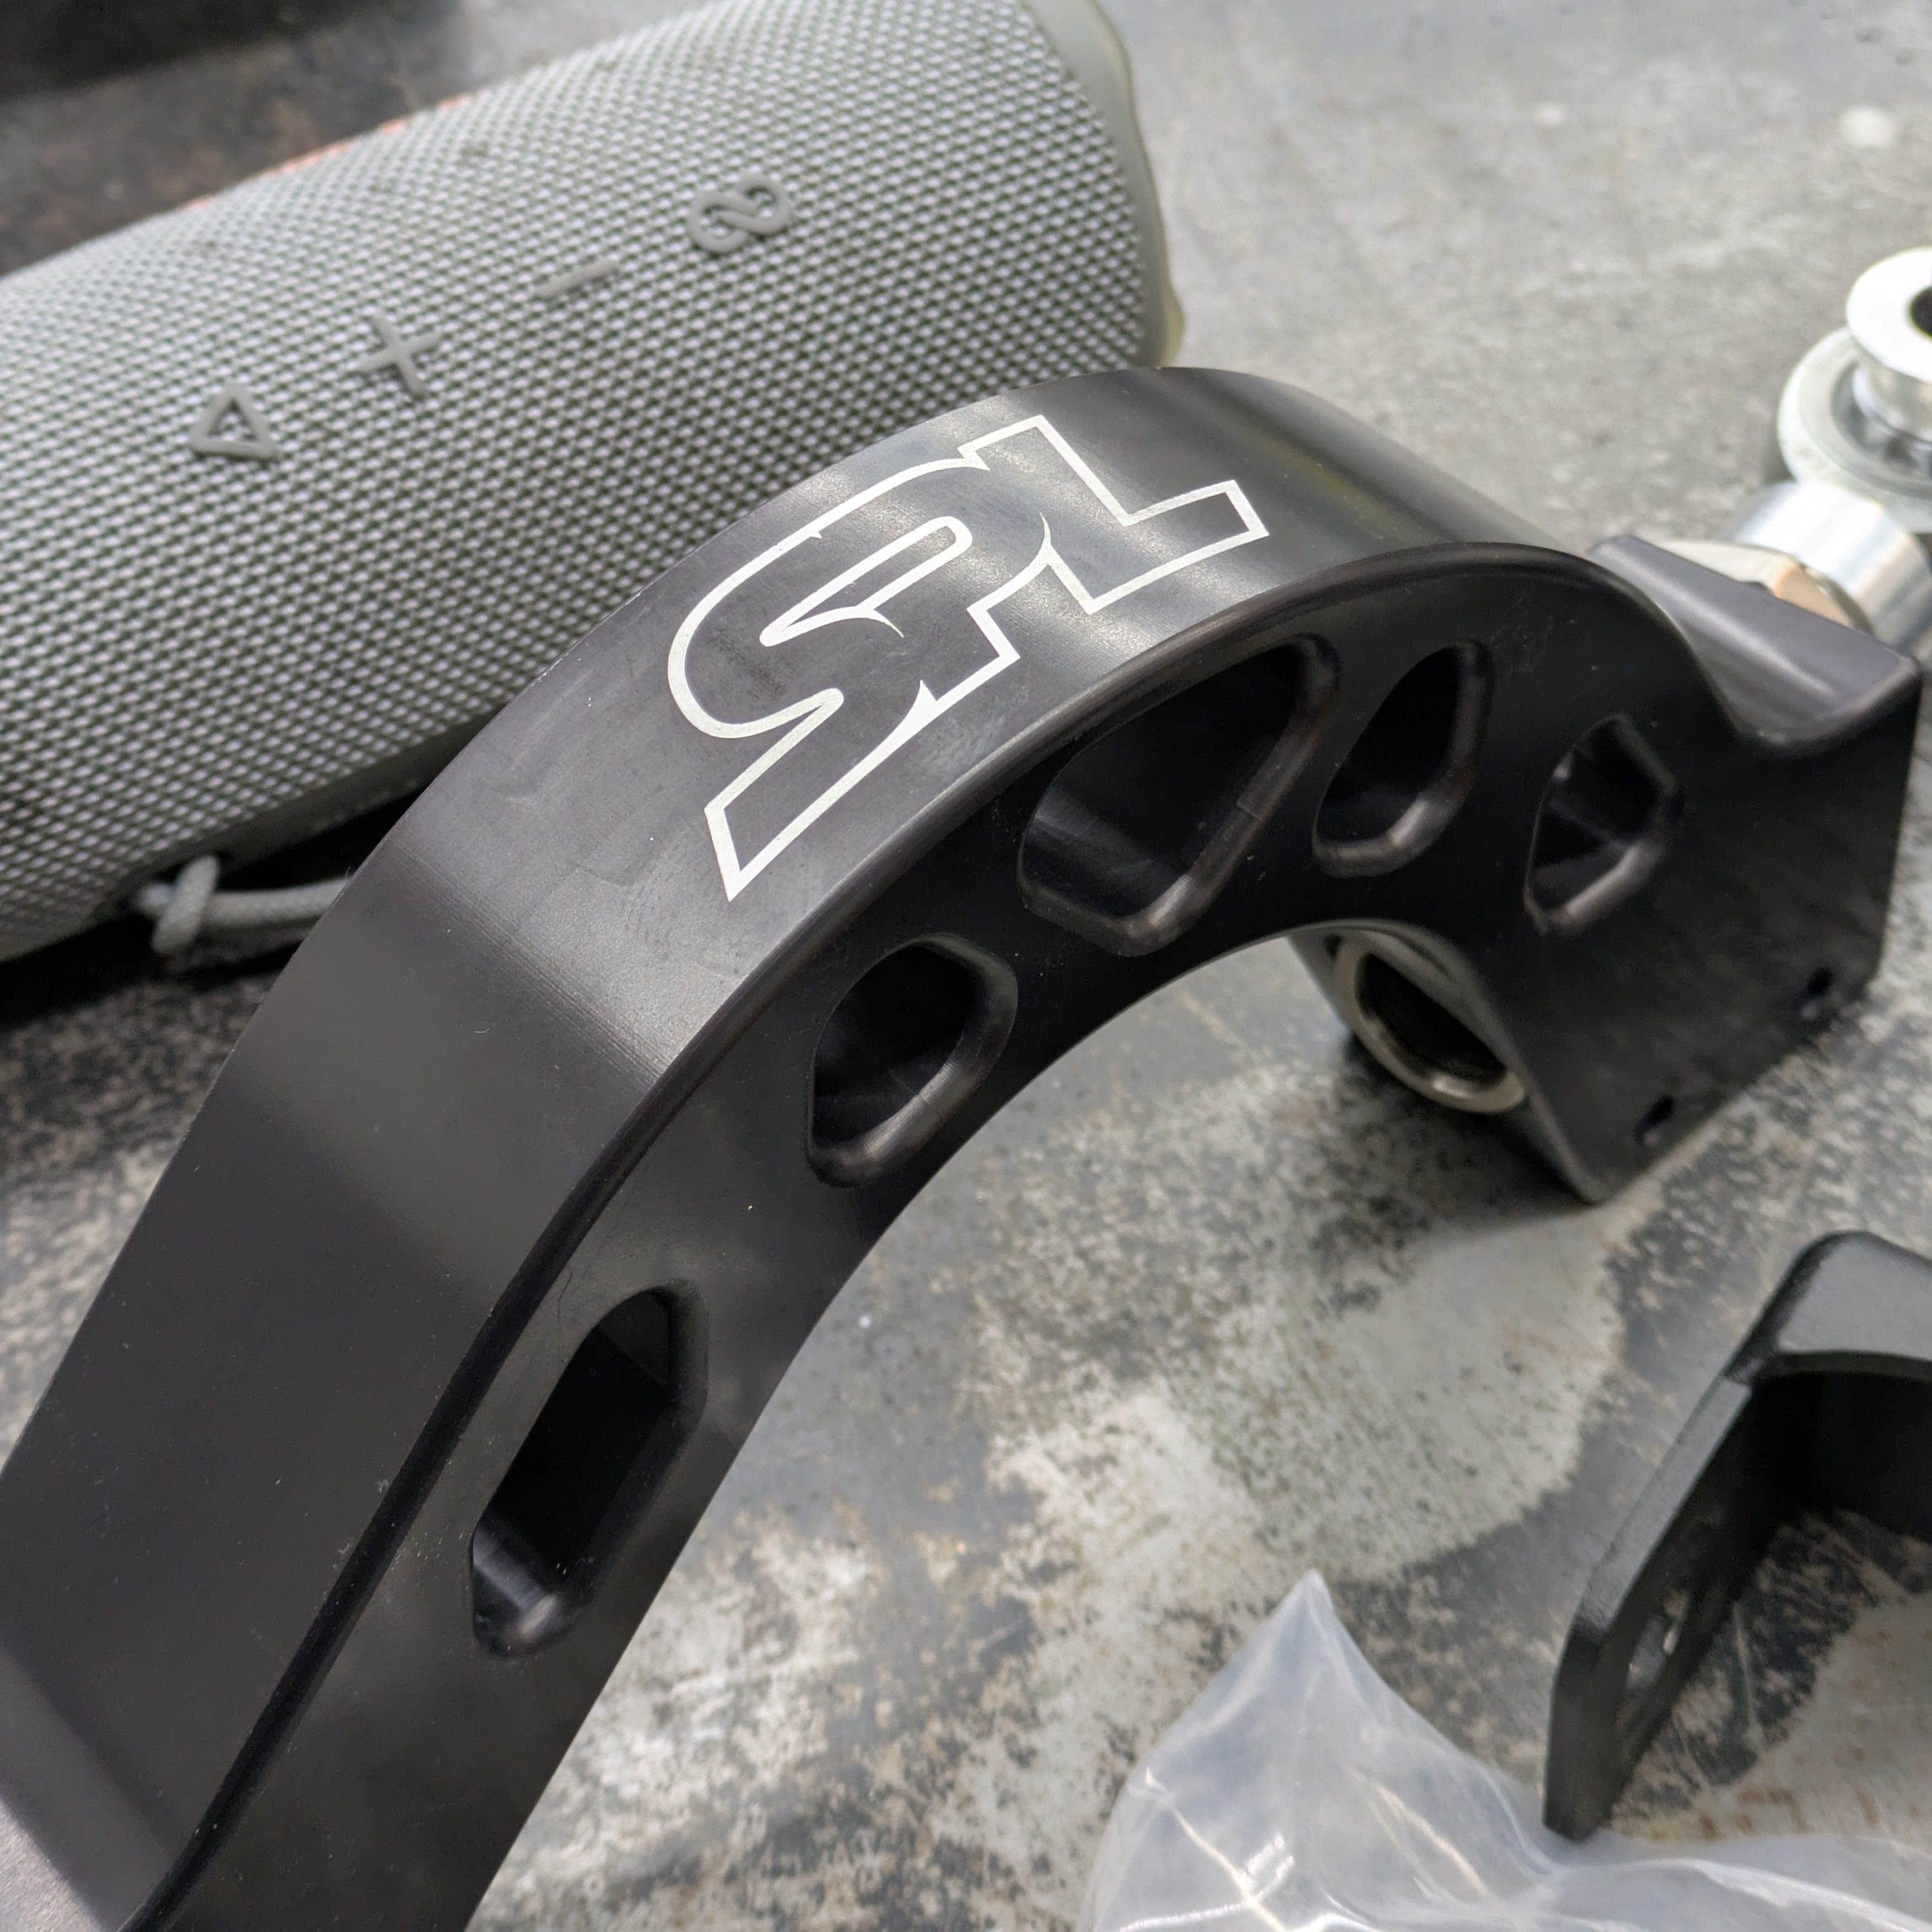
Starting up front, this caster arm change was 100% unnecessary. The Battle Version (RIP Alex) straight arms the car came with were in fine shape, and I am not running enough angle with stock S14 knuckles and rack spacers to need additional clearance. This is more of me saying “there is a dream part and I want it” than replacing due to necessity.
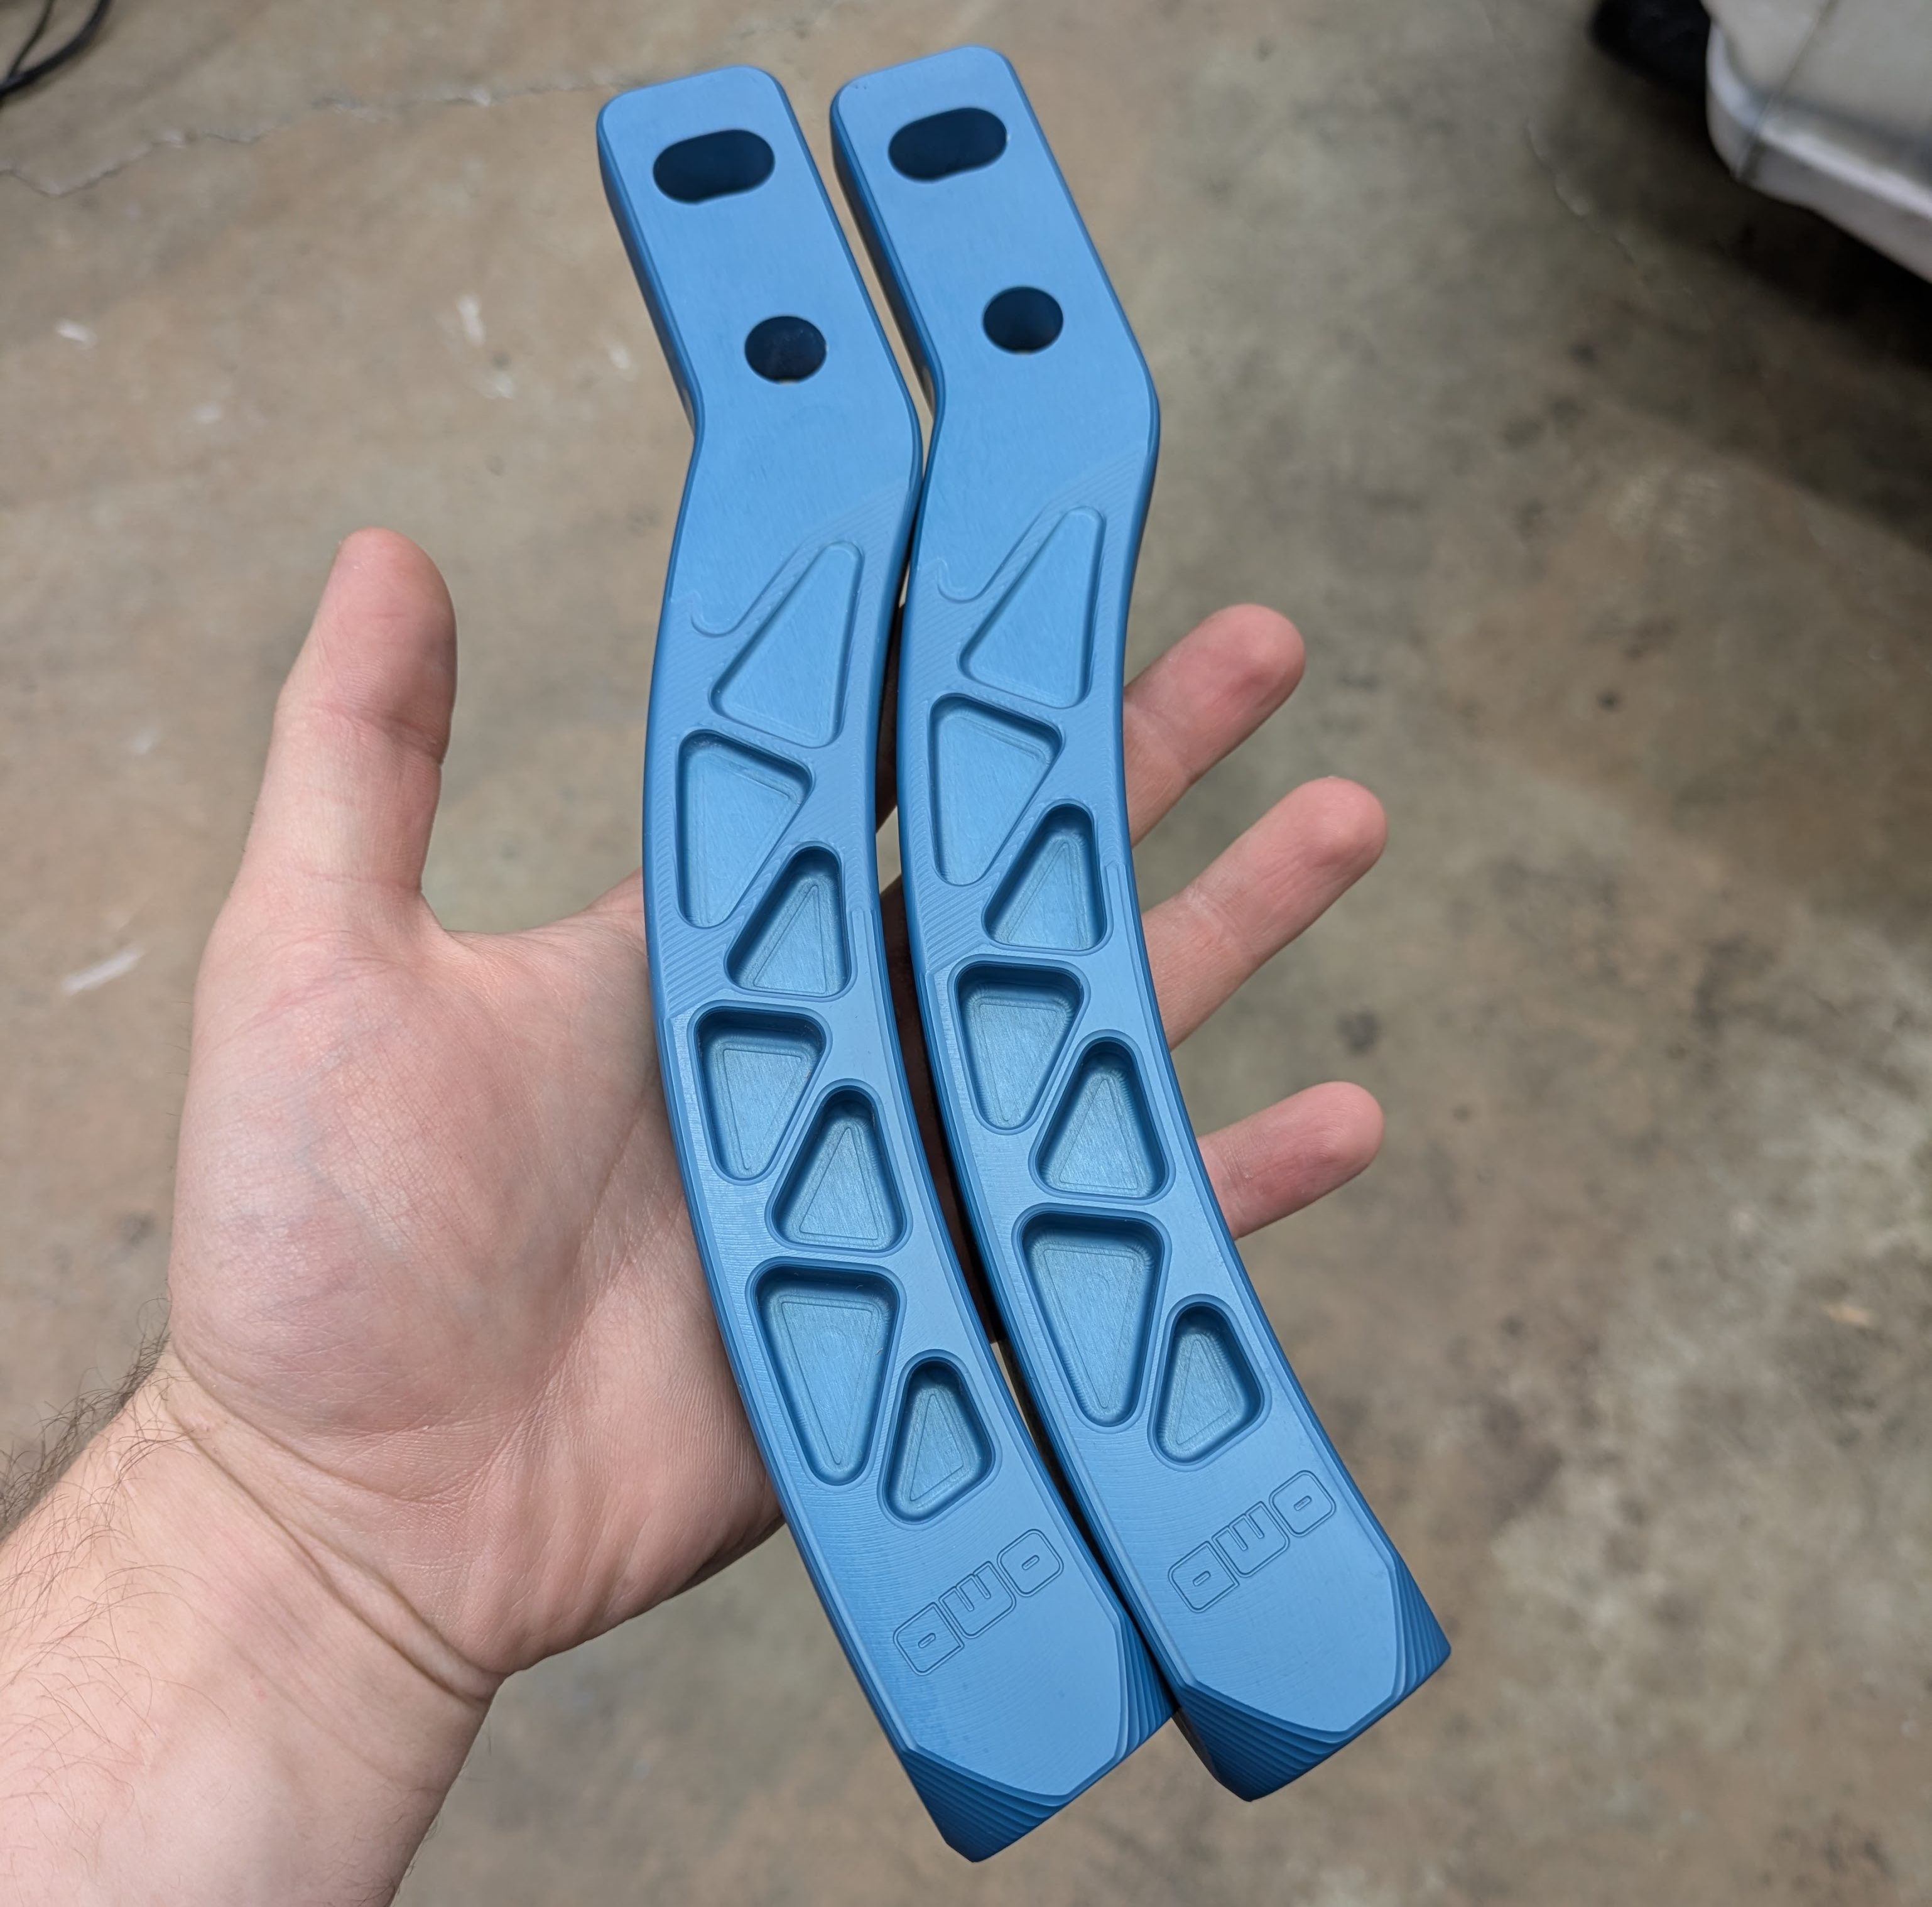
OMD SD, or Otsaka Maxwell Designs San Diego, is a quiet powerhouse in SoCal cranking out some radical projects for customers with discerning taste. Steve mostly turns out crazy (usually turbo) coachbuilt vintage Ferraris, but Martin, the other half of OMD, is a drifter with the same eye for detail. They have many other S-chassis parts including their own knuckles and a full BEAMS swap kit, but these were the standout part that I knew I could use.
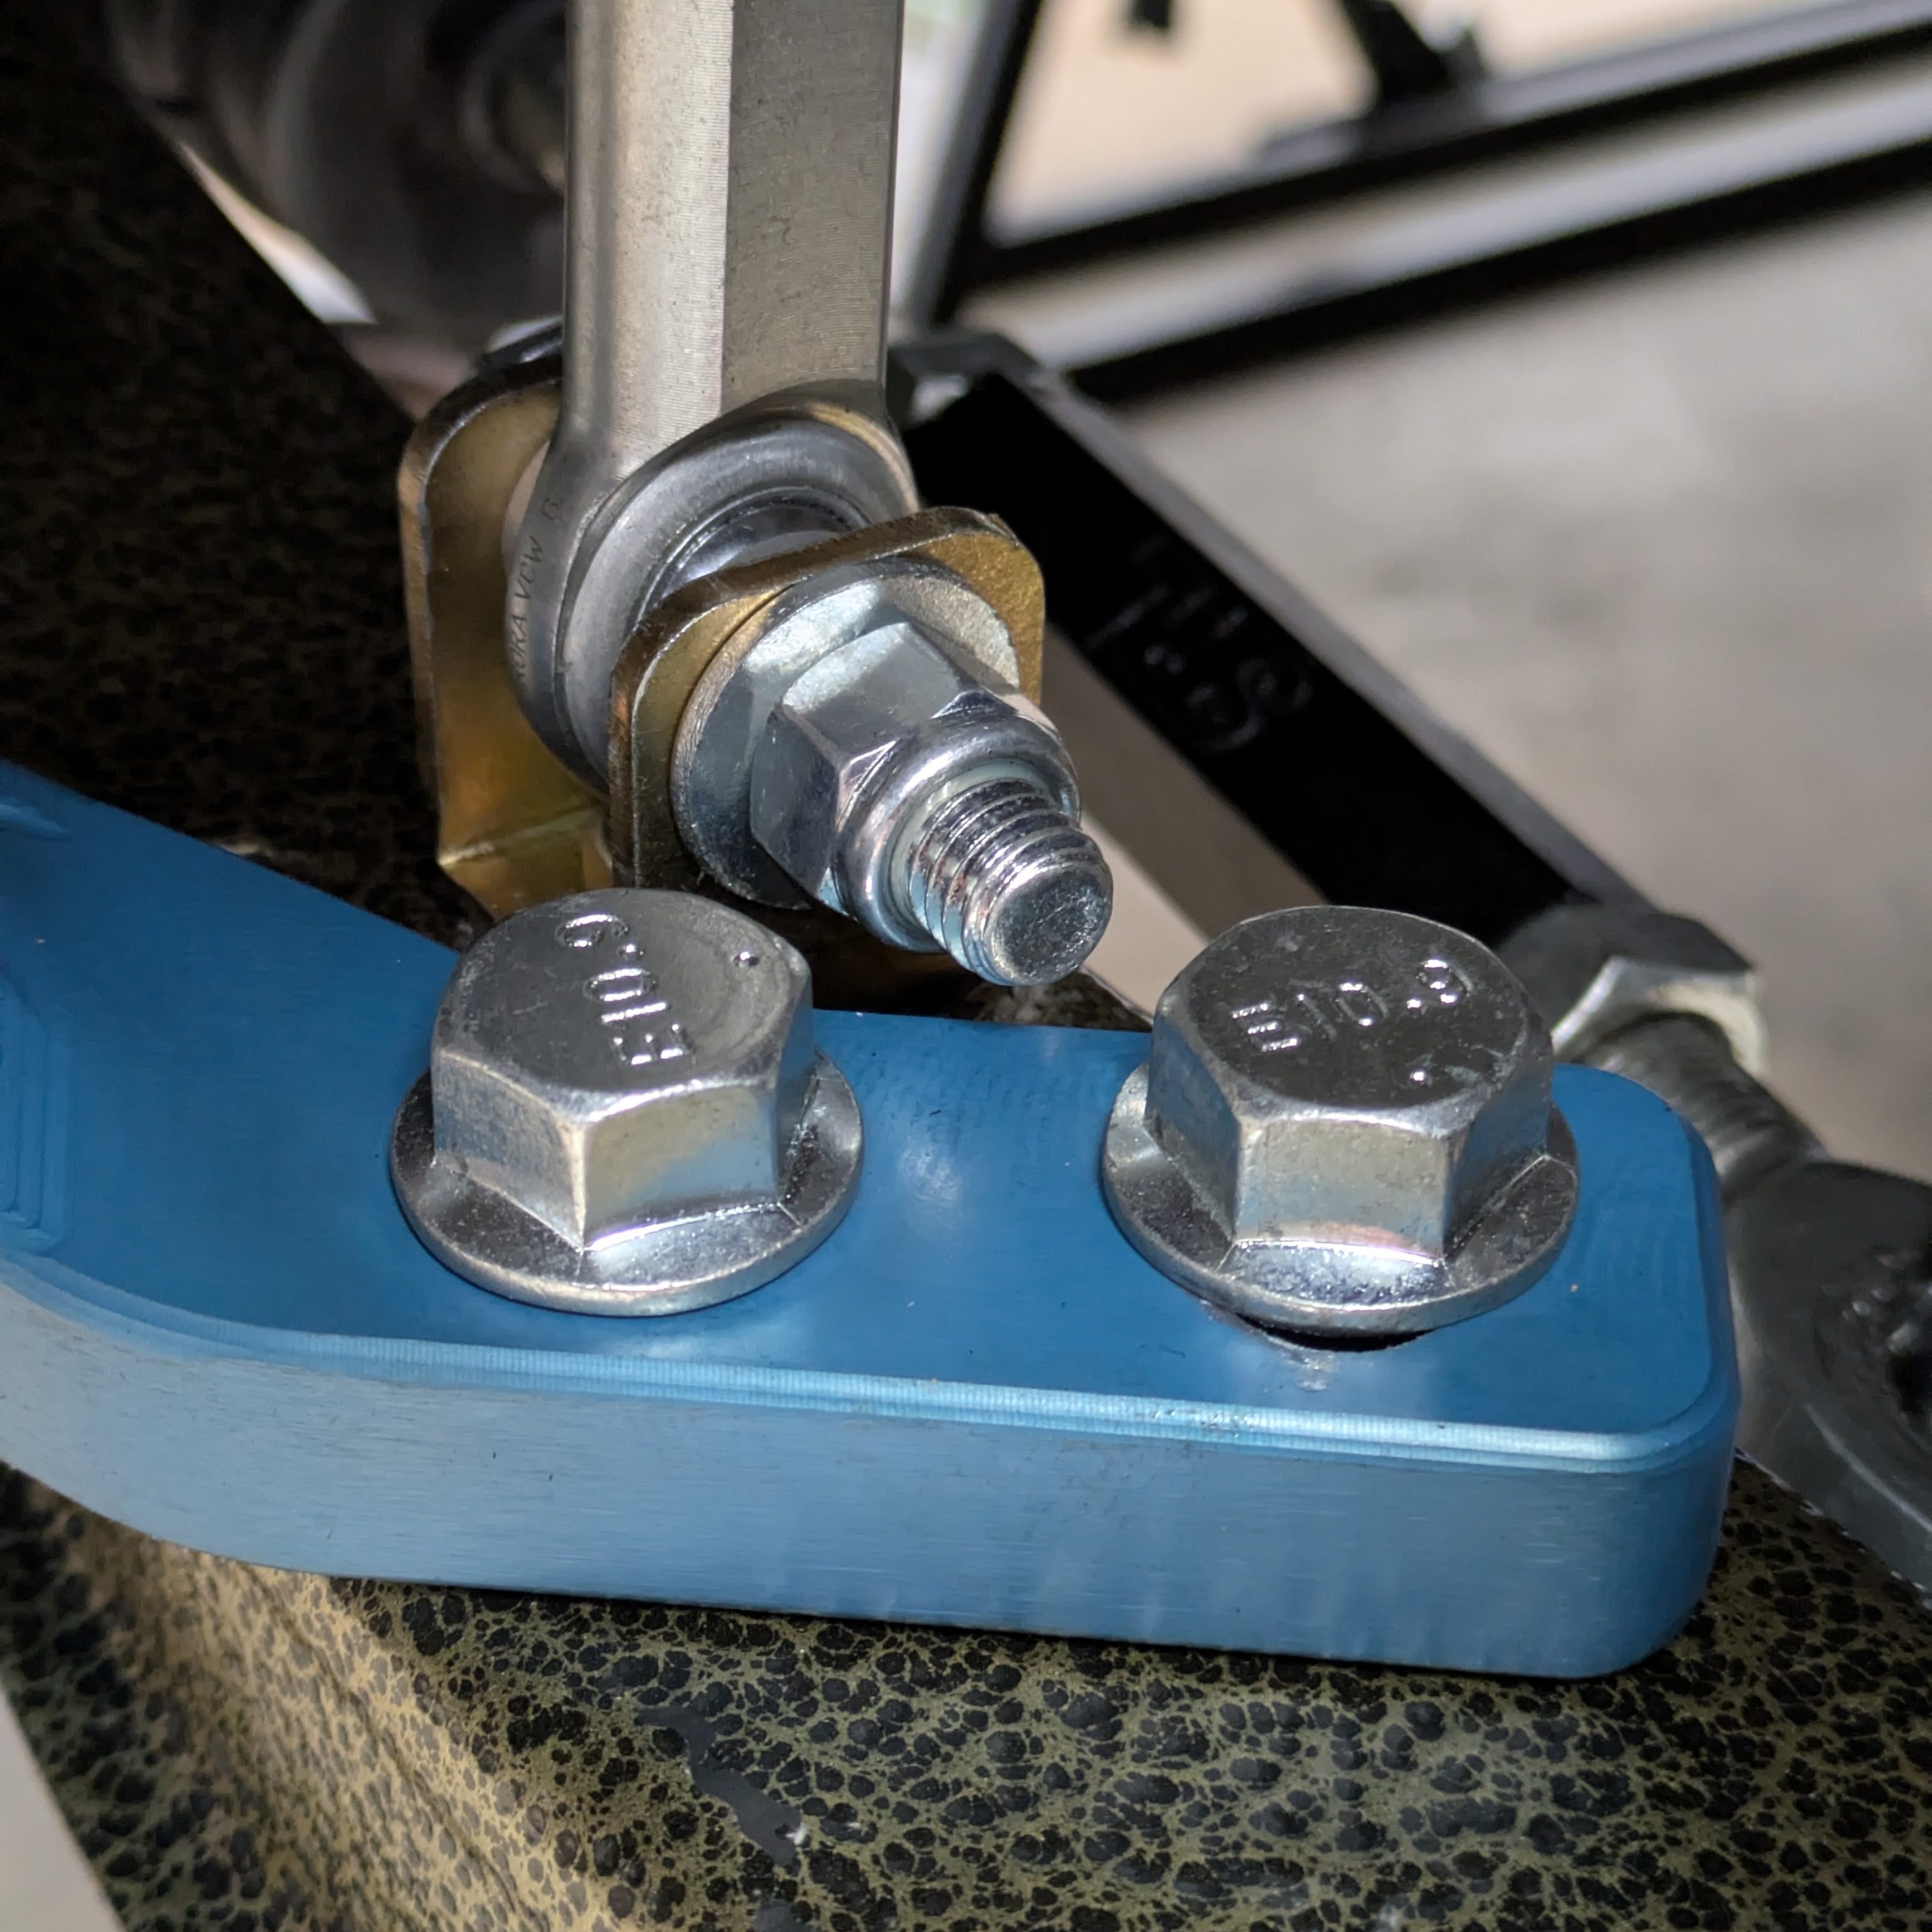
After politely asking for blue (they had to reannodize a red pair), they showed up and they were as nice as I had hoped. It was a toss up between these or VooDoo13, but these had a geometric feature that no other arm had in the inclusion of a radiused slot for the rear-most bolt hole. This is a critical inclusion as this point will need to sweep as it pivots around the other bolt. For that design feature, the story, and the really awesome construction, I was happy to run them.
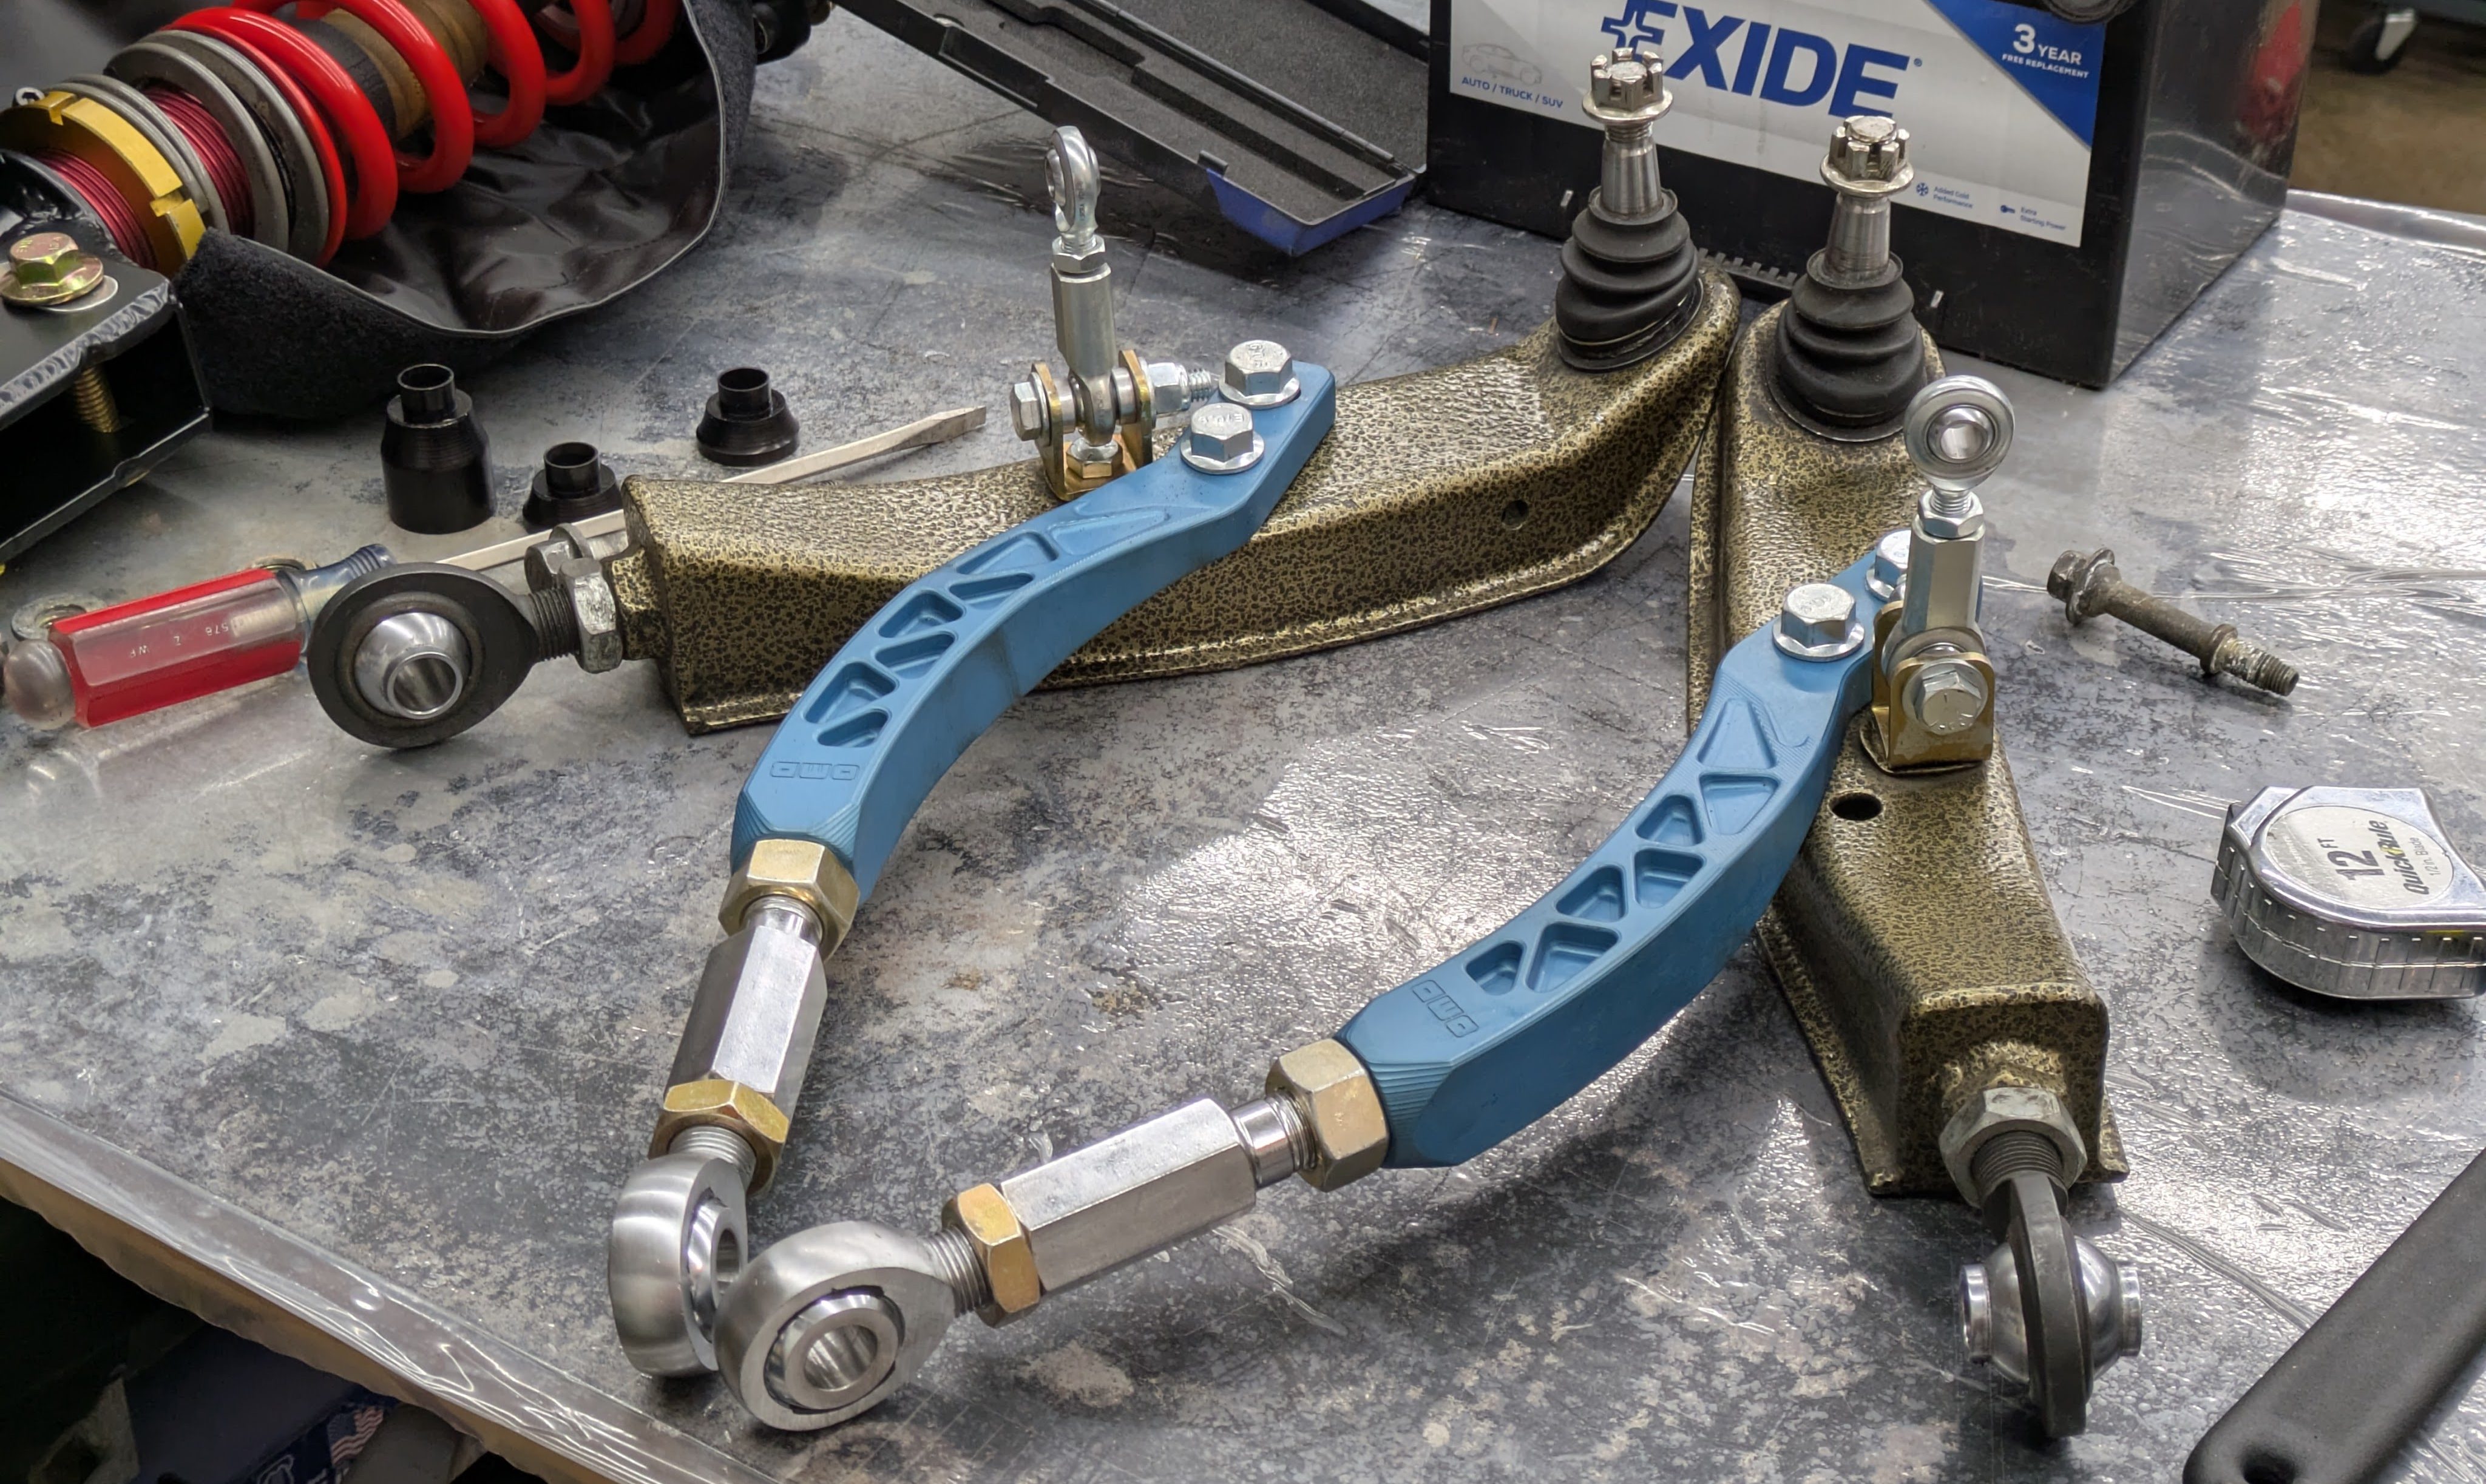
The existing LCAs on the car are worthy of mention as they are one of the only unchanged items in the entire suspension. They are a factory S14 lower arm that has had the inner bushing cut off and plated to accept a threaded rod end and a jam nut. While not being double threaded for easy on car adjustment, this still allows them to be variable length, which came into great importance later on. They were also gusseted on the underside and powdercoated this interesting brown hammered finished.
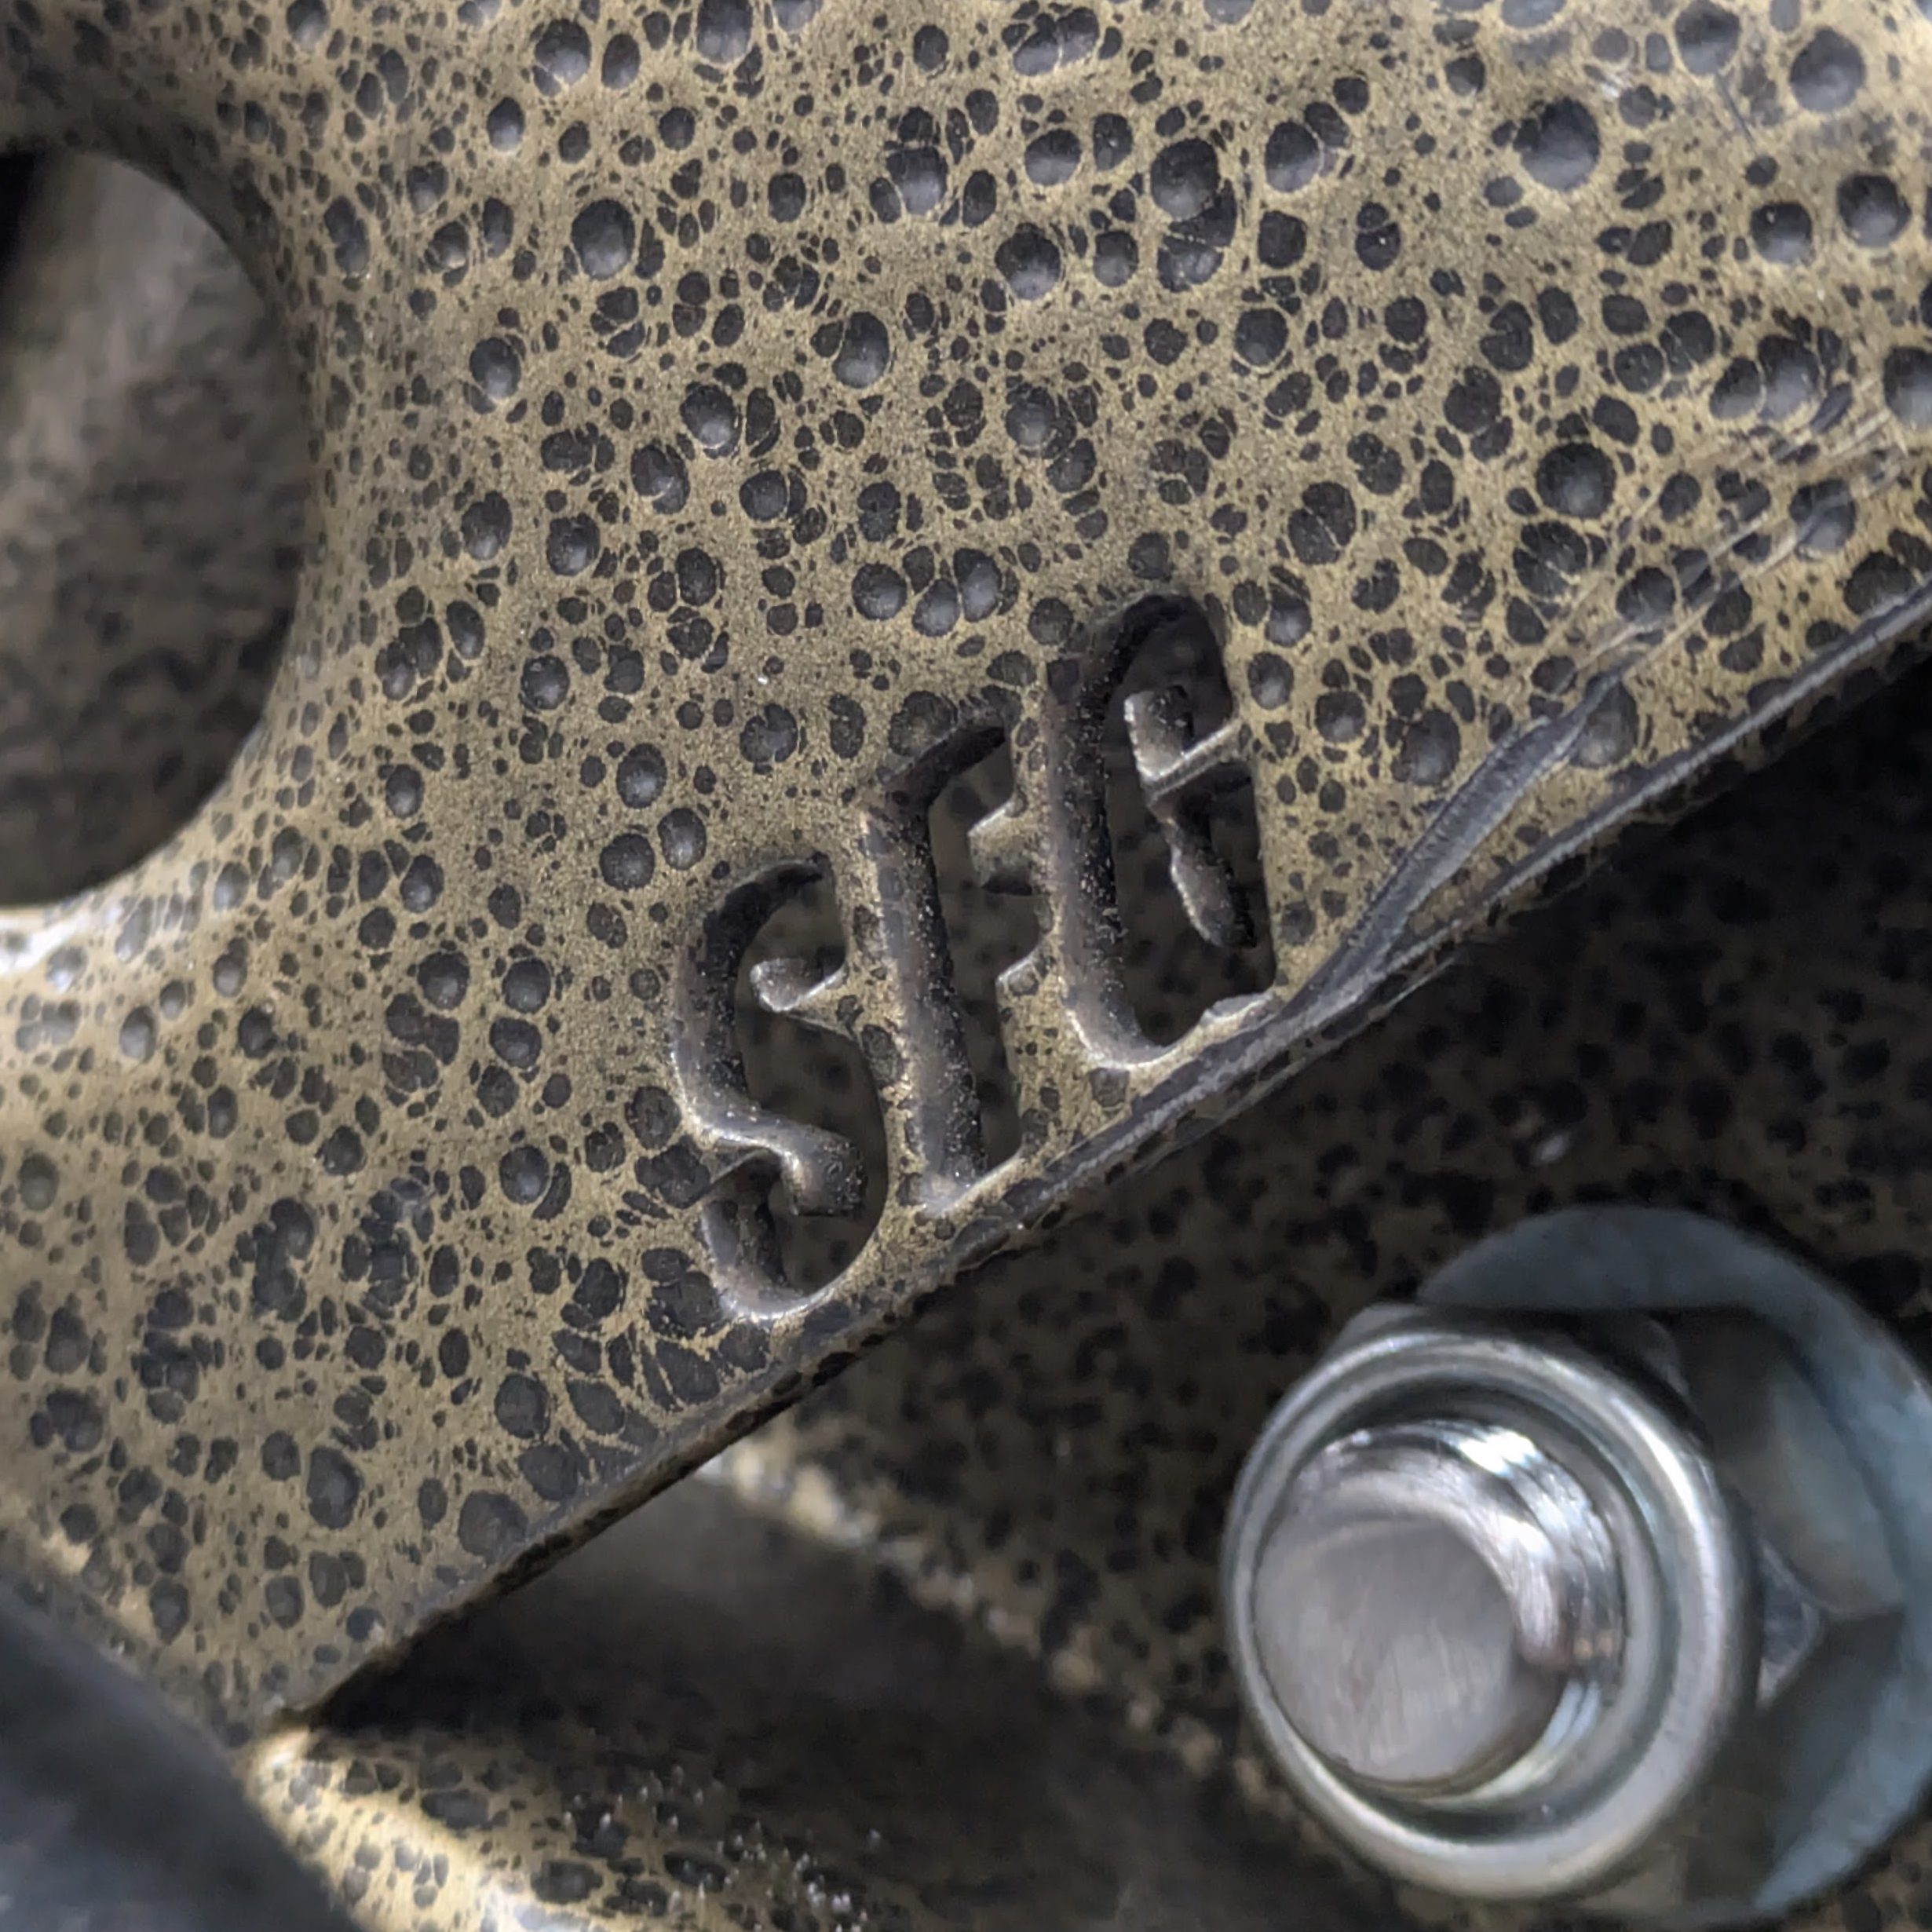
The weird story is that these came off of the Big Country Labs time attack/dual use S13 (I found the Zilvia ad before the site died), and are stamped SFG. If anyone has any insight, I’d love to know more about these.
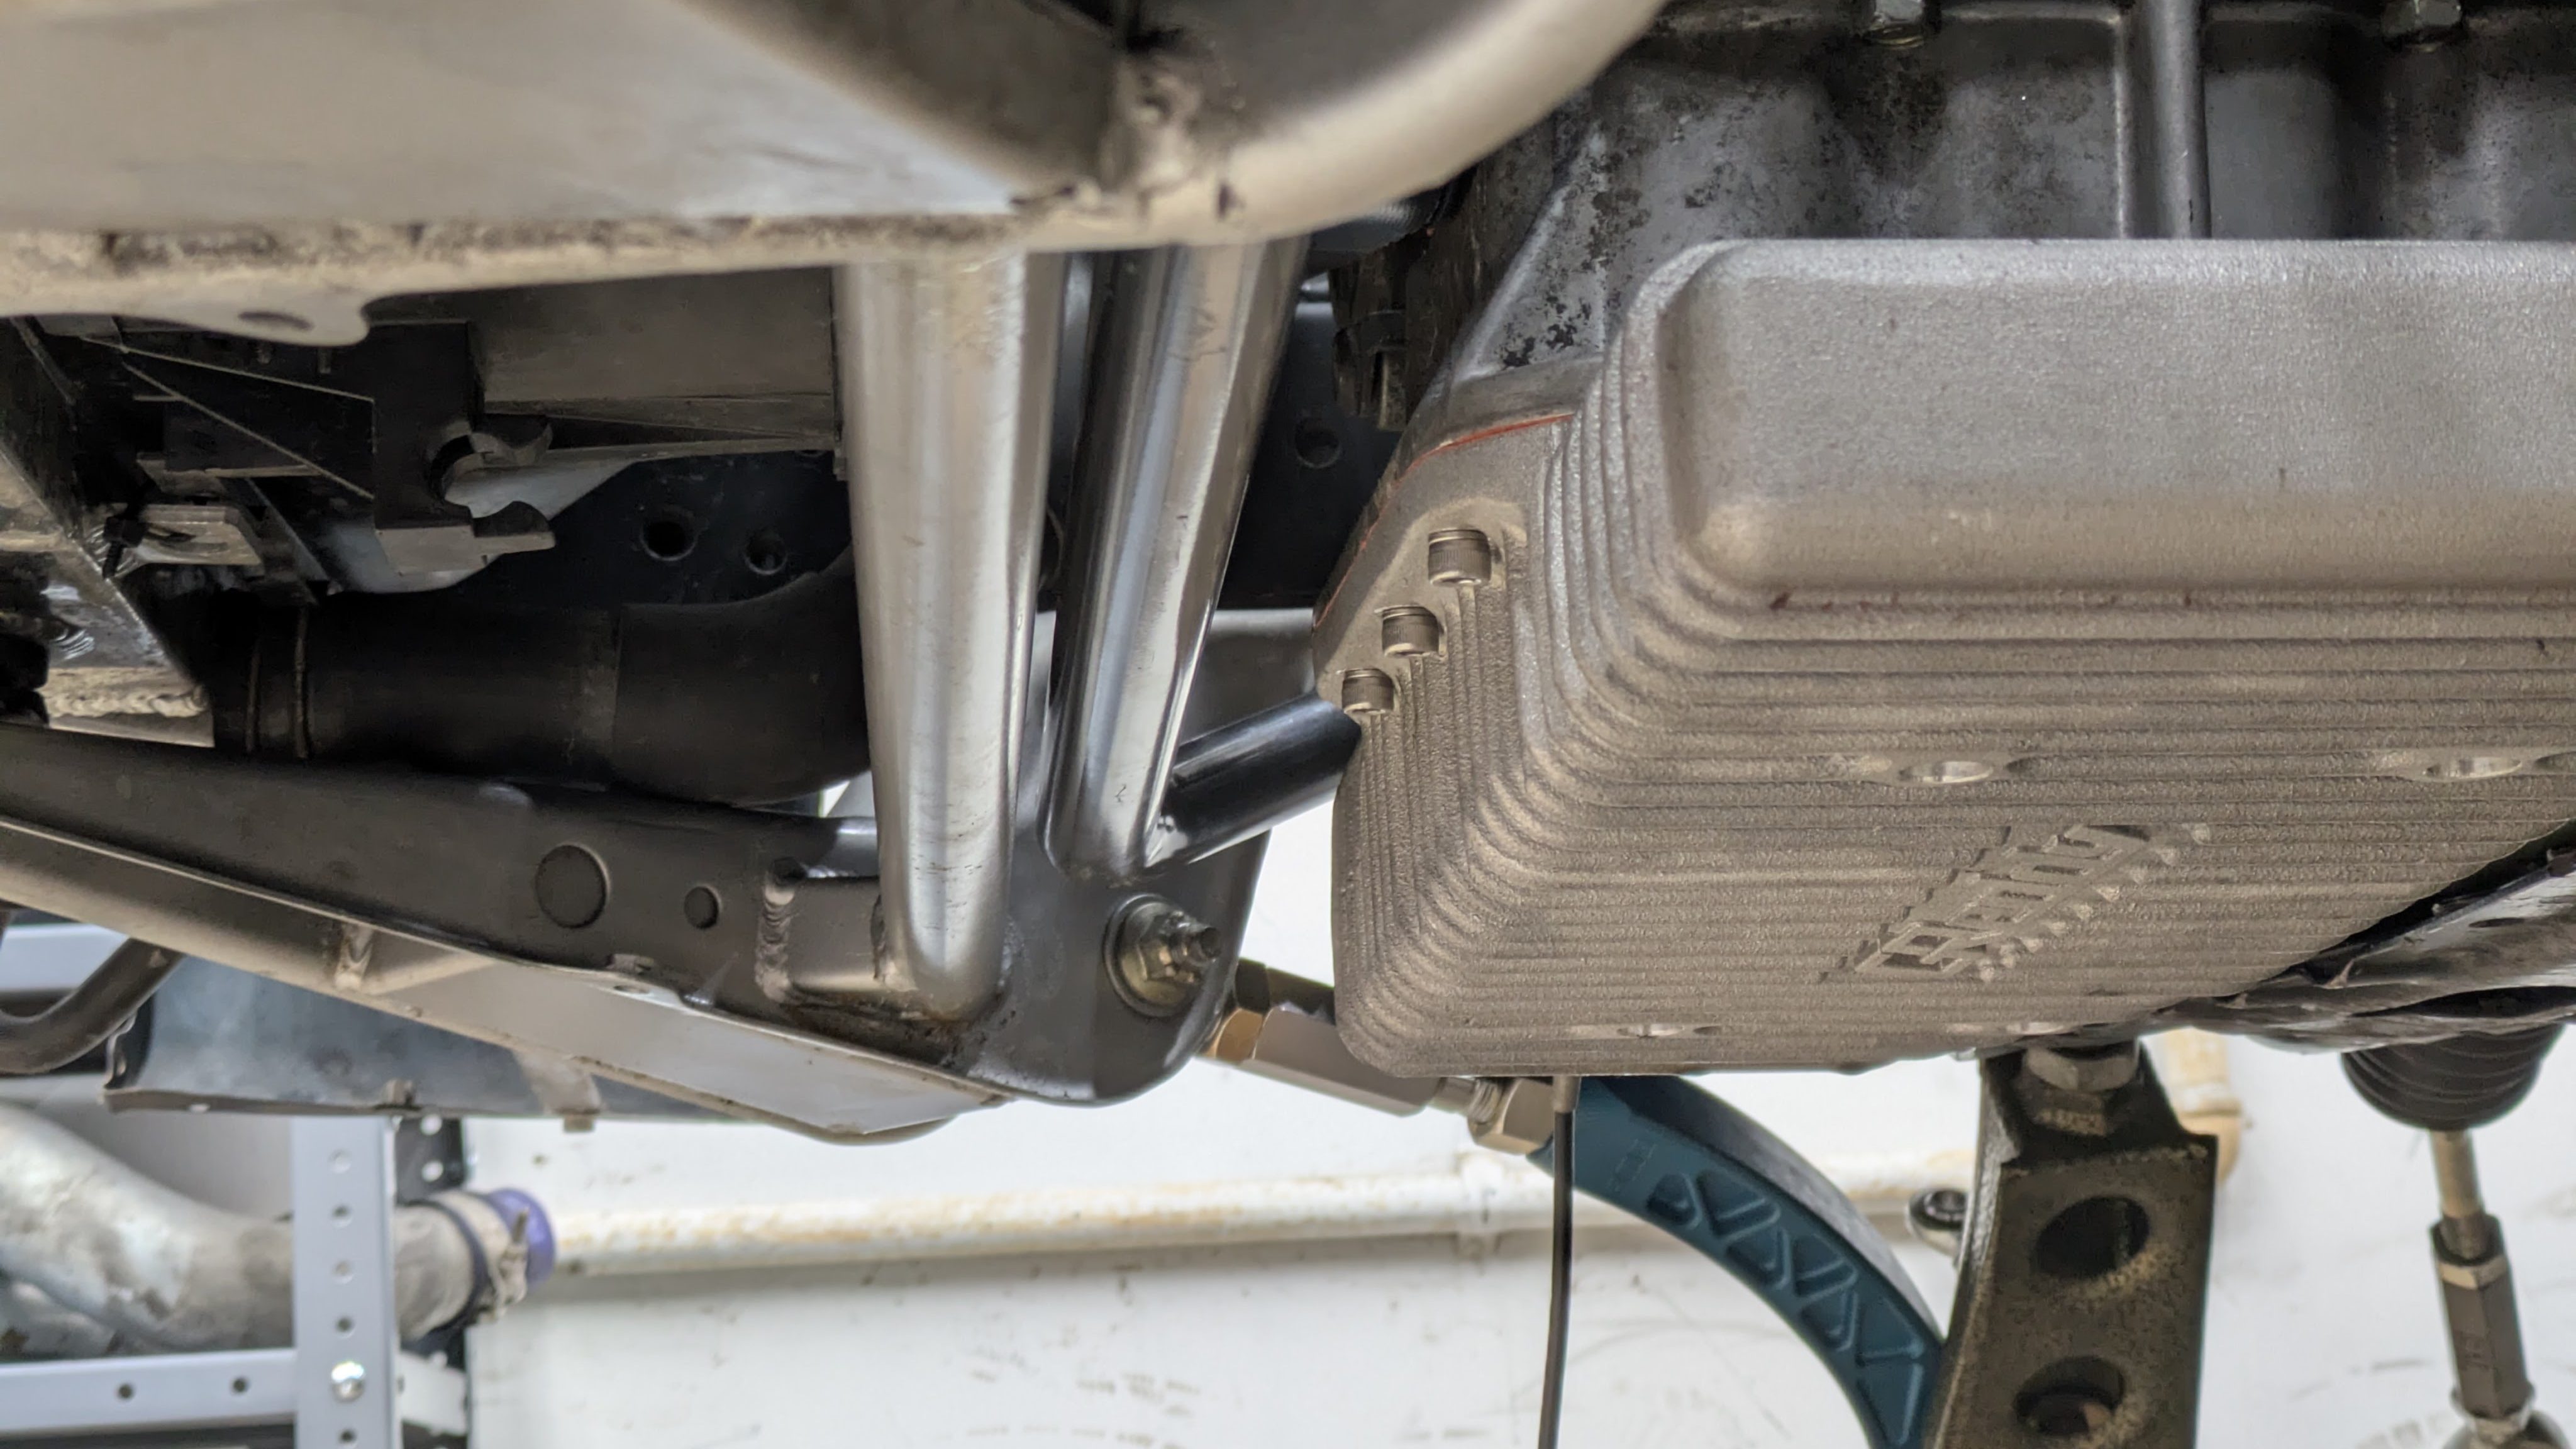
With the tension rods installed, next came the swaybar. Last summer when I went to install the Greddy oil pan I had purchased for the car, I ran into a conflict between my existing Tanabe bar and the wings on the Greddy pan under compression. This did have a Zilvia thread, but I didn’t bother to look until I had the issue. This new Progress swaybar not only fits, but is 3 position adjustable and came with Aurora spherical endlinks. It installed perfectly, and I threw some Stenner AquaShield grease in the bushings to make sure they stayed smooth.
With the front buttoned up minus coilovers, I moved on to the rear. The last time we left off in “More Roots Than Trees”, the rear subframe and diff were installed, but nothing else. I had a plethora of parts saved up and I finally had the canvas to deploy them.
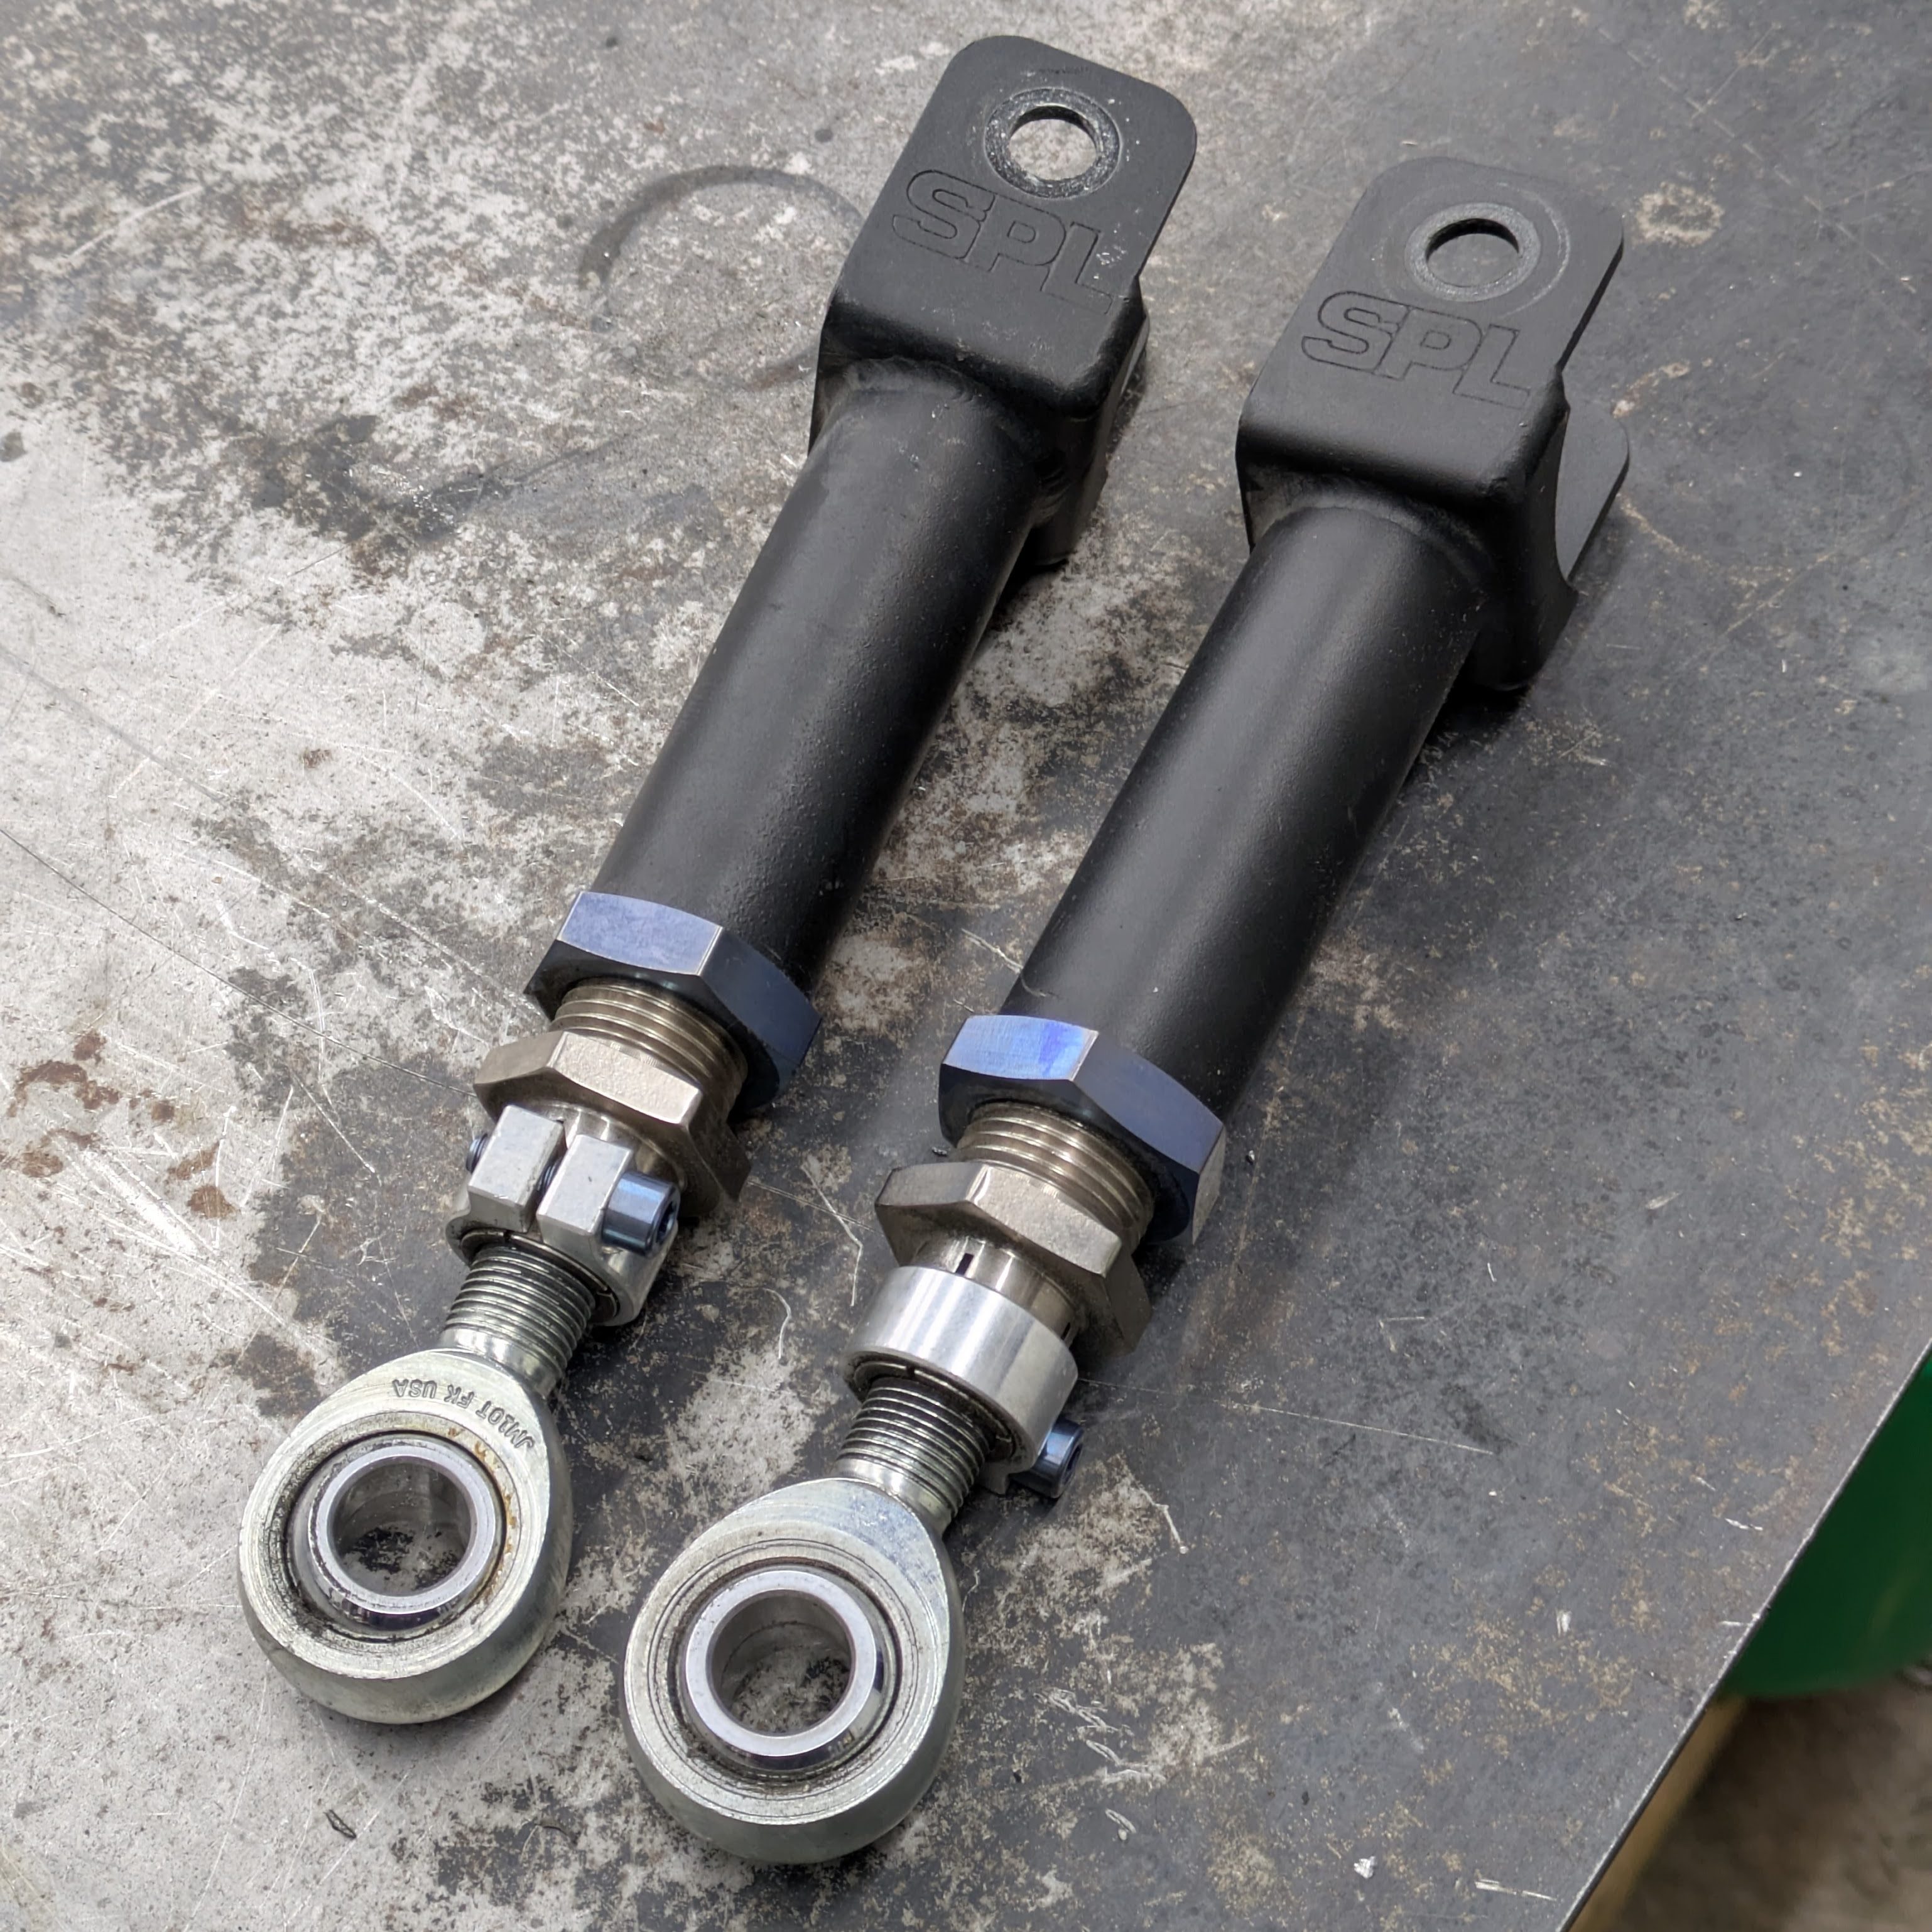
I ended up fully SPL-ing the car. This is because my autism doesn’t like things that don’t match, and the car already had SPL rear traction arms and front bumpsteer correction on it. Once again, Voodoo13 was also in the contention, but SPL locking style is easier and more reliable to deal with, and the fact that they were able to land the white label deal for the Nismo adjustable arms says a lot about their product. I’ve had friends run them for years with no complaints, and I was happy to finally have my own set.
This was mainly just the rear toe and camber arms with their respective lockouts since I already had the rest. I could have gone with their front tension rods, but the design sucks vs the OMD (they accomplish clearance via misalignment spacer offset rather than a curved arm) and they were more money. It should have probably stopped there, but the Black Friday finger was on a hair trigger, and the 20% off got me to act up. We’ll get back to that.
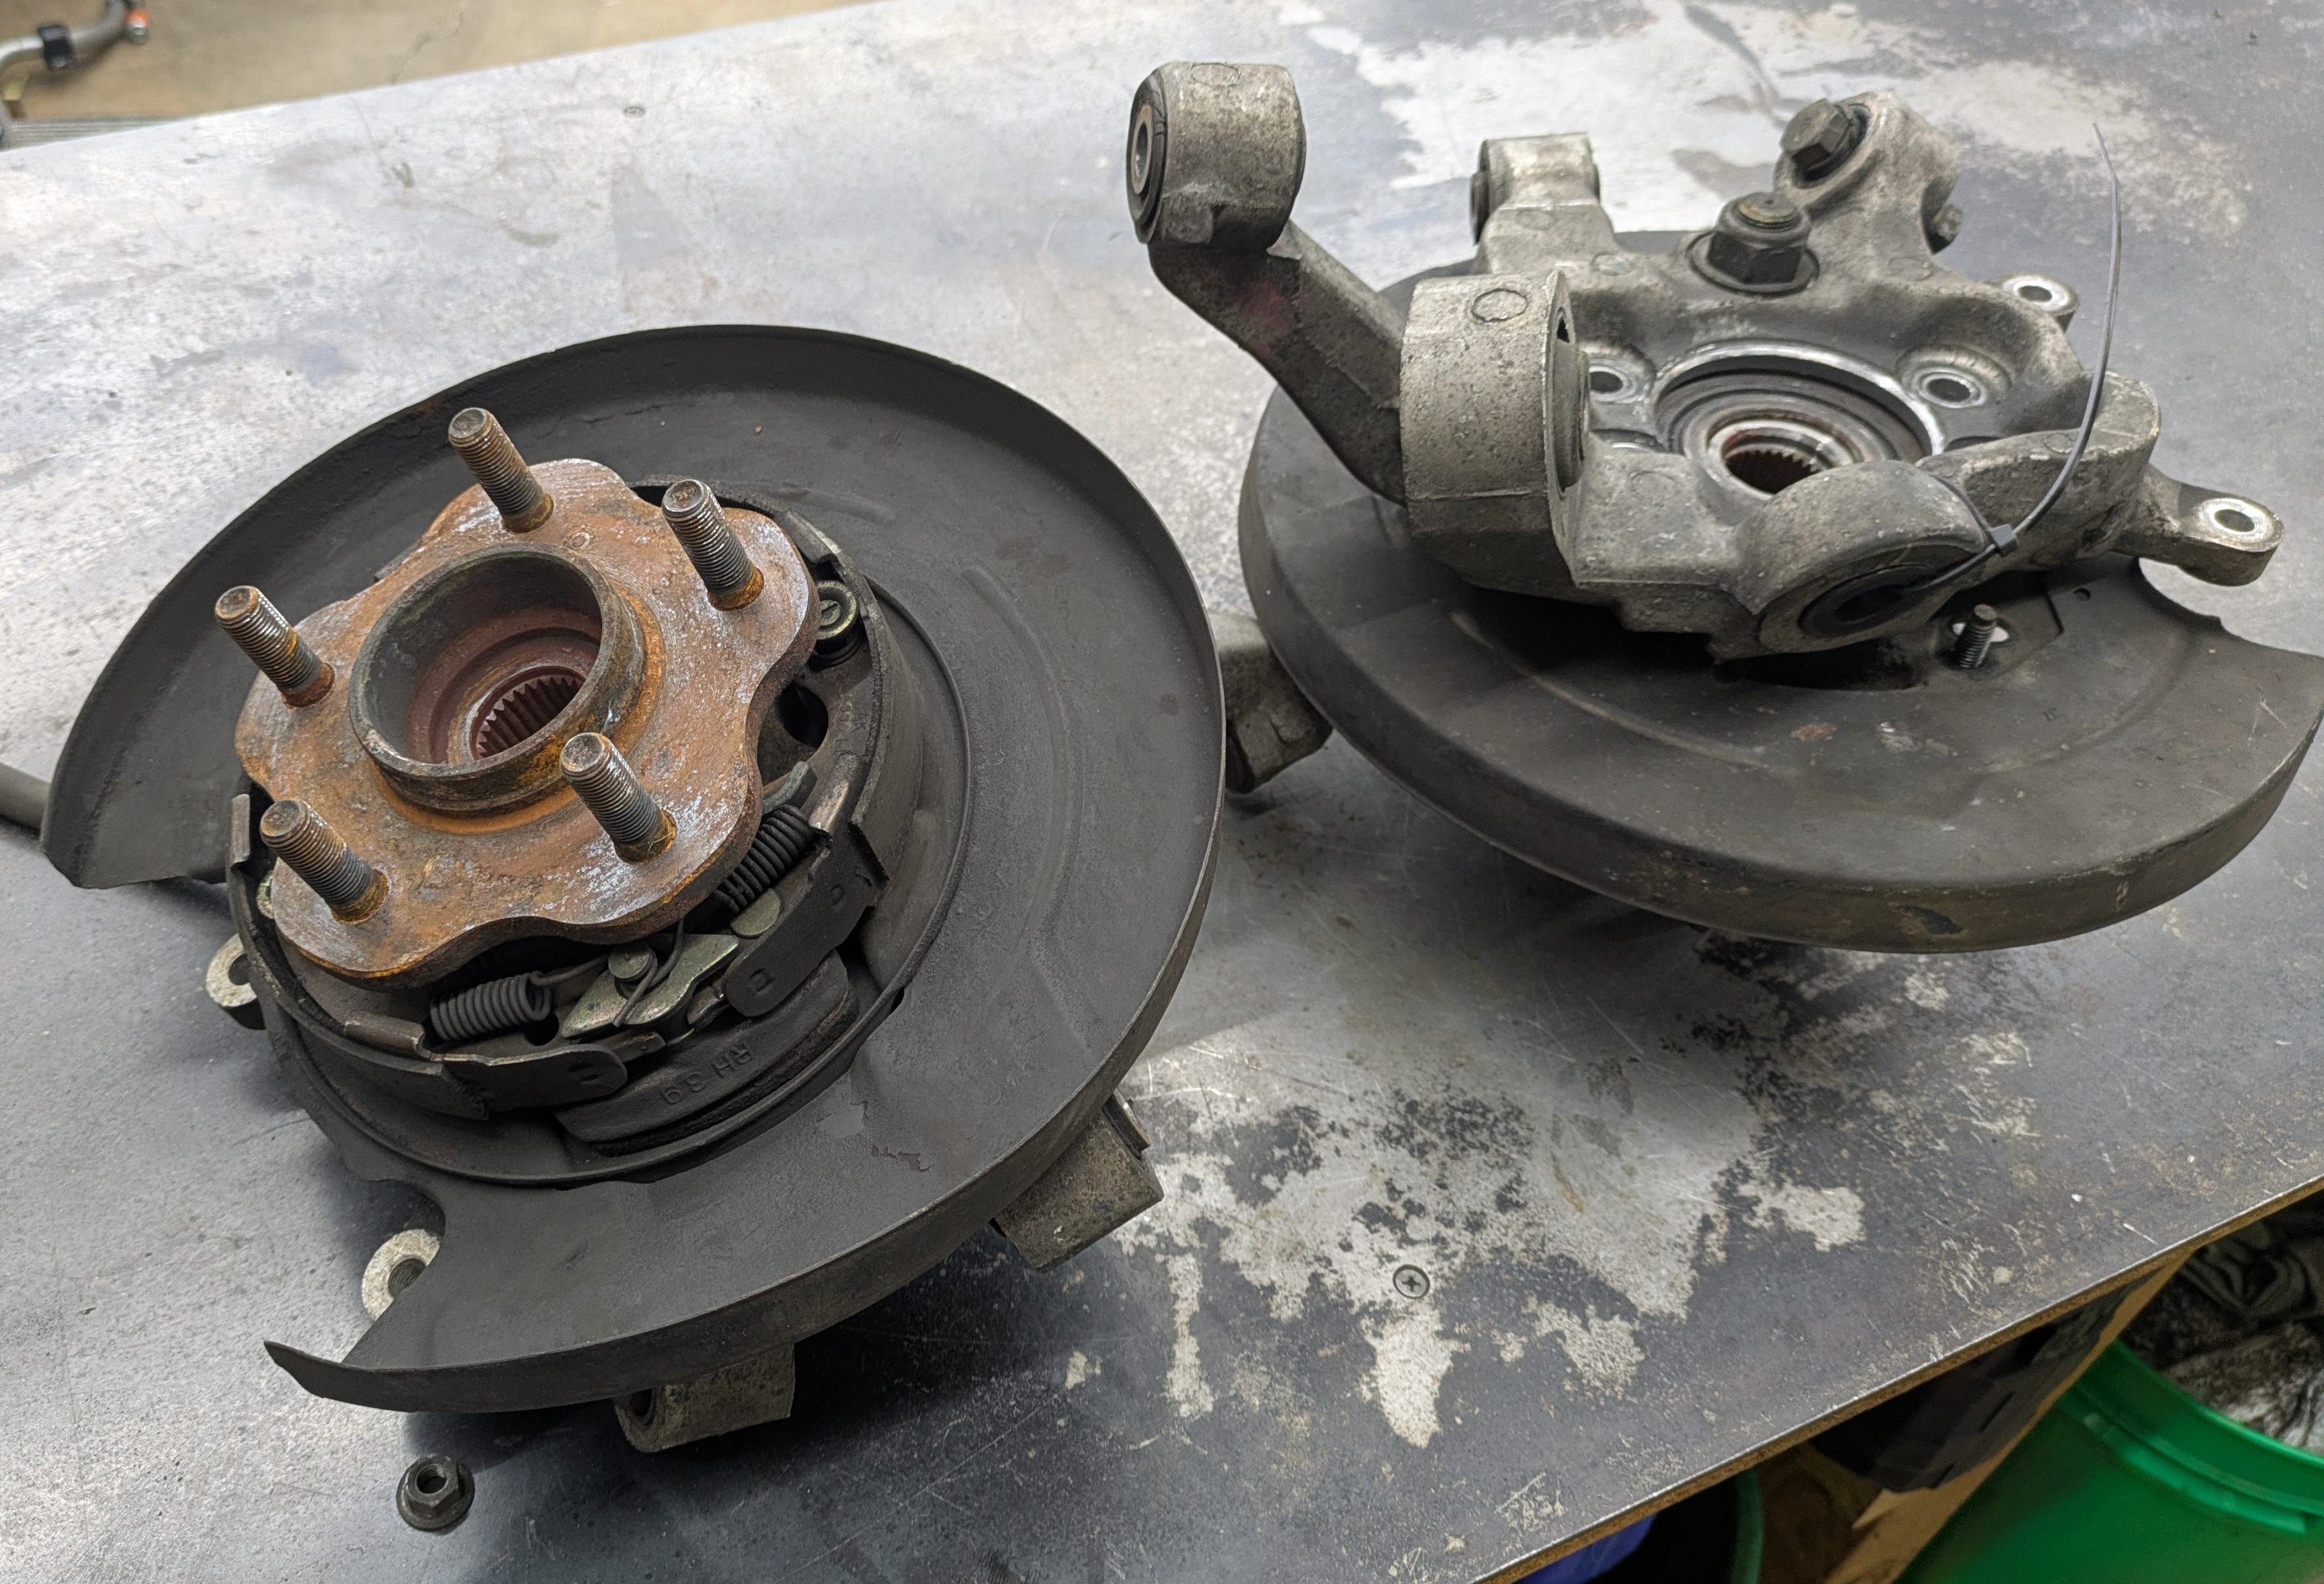
In the whole semi-forged SR deal, I bought Luis’s complete rear knuckle assemblies. This conversion is especially important to convert the car from eyelet to fork style rear mounts for the coilovers. This incudes the aluminum Z32 knuckles, rear Z32 calipers with stainless lines, Hawk HP+ pads, usable Stoptech rotors, all E-brake components including cables and conversion bracket, and the adapter cones to go from S13 ball joint taper to Z32 knuckle. Alex gave me a screaming deal on everything, so it was hard to say no.
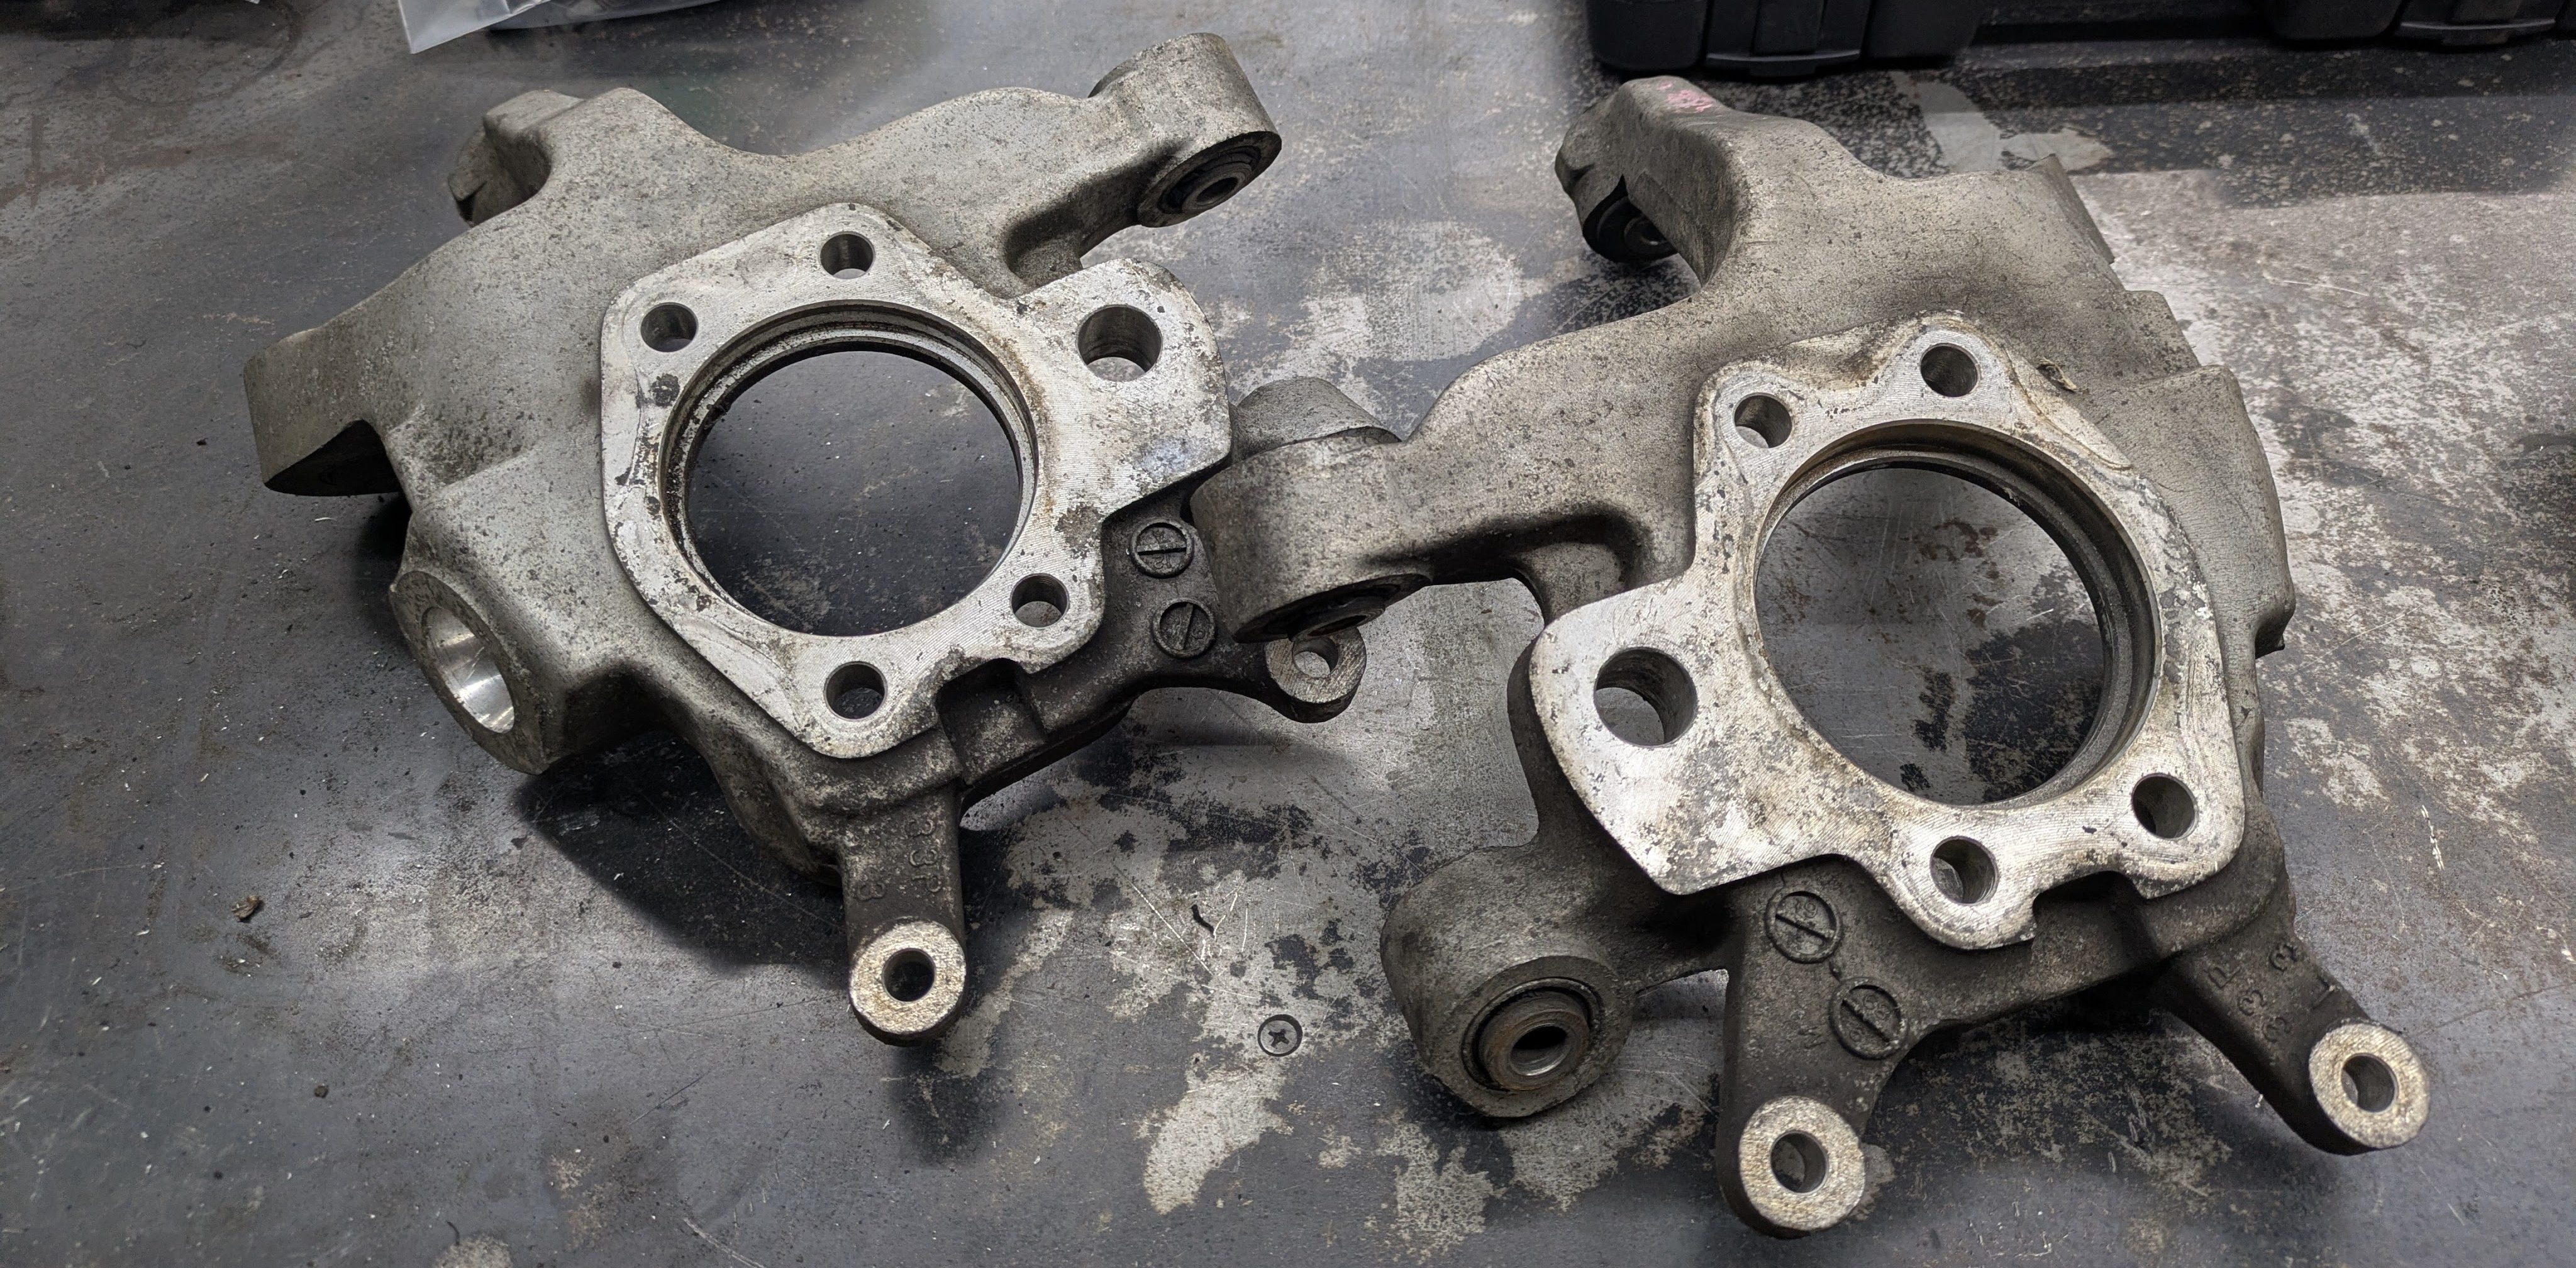
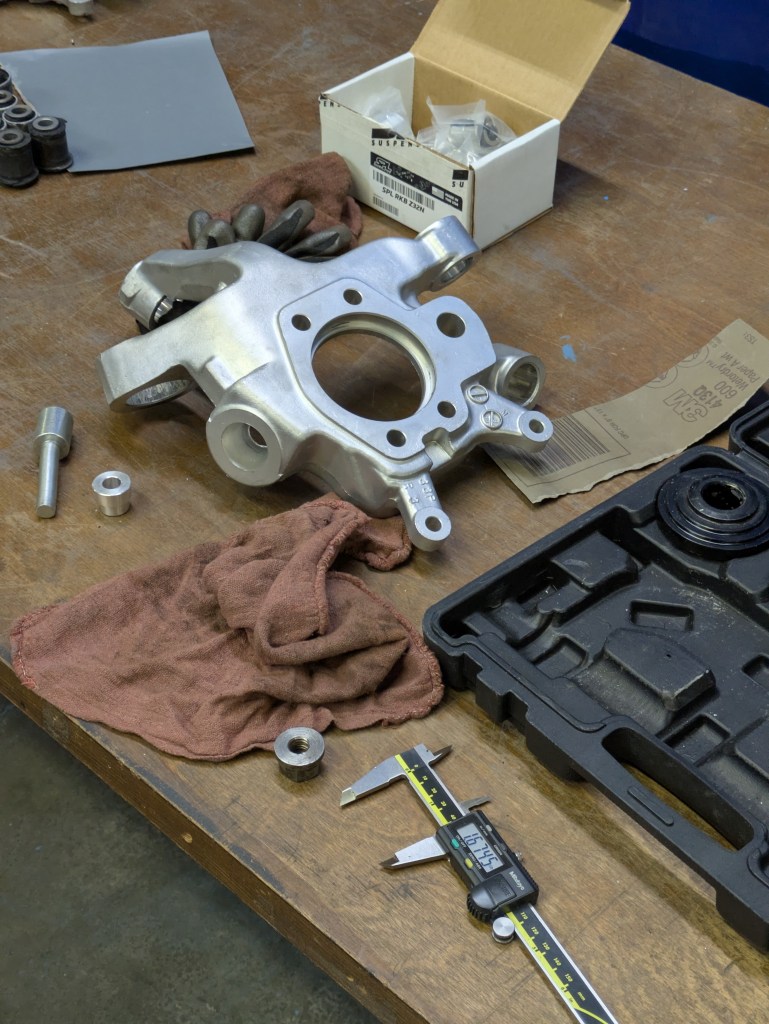
While I was stoked to have the weight saving and very pretty aluminum uprights, they were looking rather mangey after 30 years of service. I considered cleaning them with the methods at my disposal, but around that time, fellow engineering and manufacturing friend Oliver had offered up his homebrew vapor honing setup if I needed anything looking like new, and this seemed like the perfect application for it.
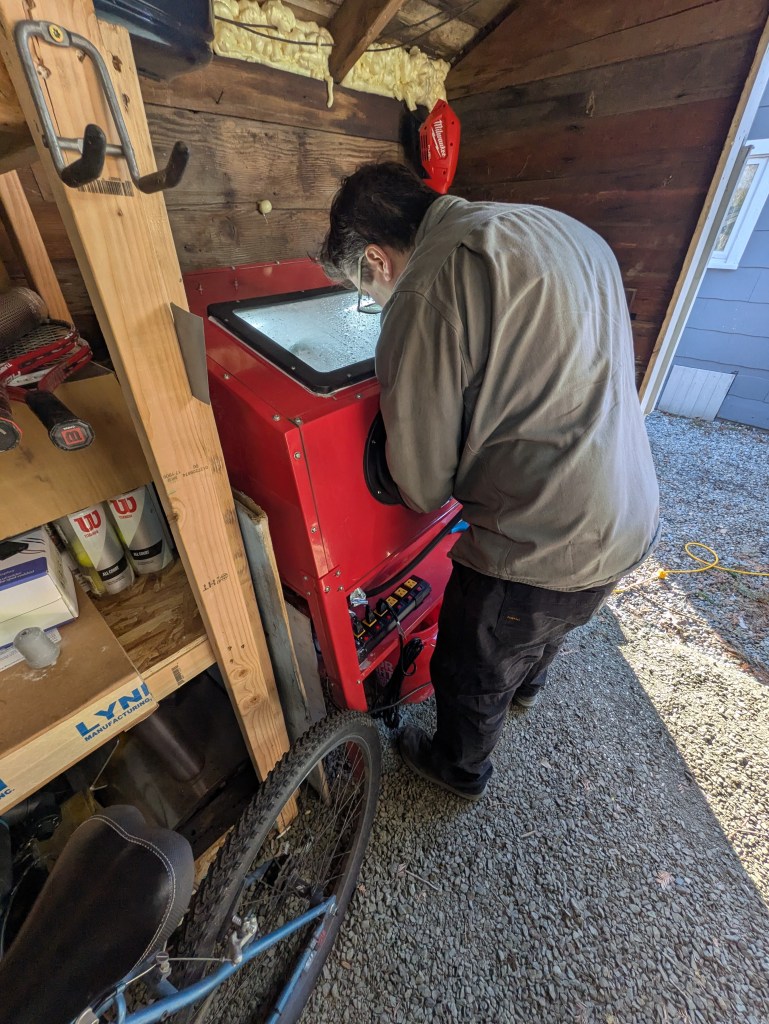
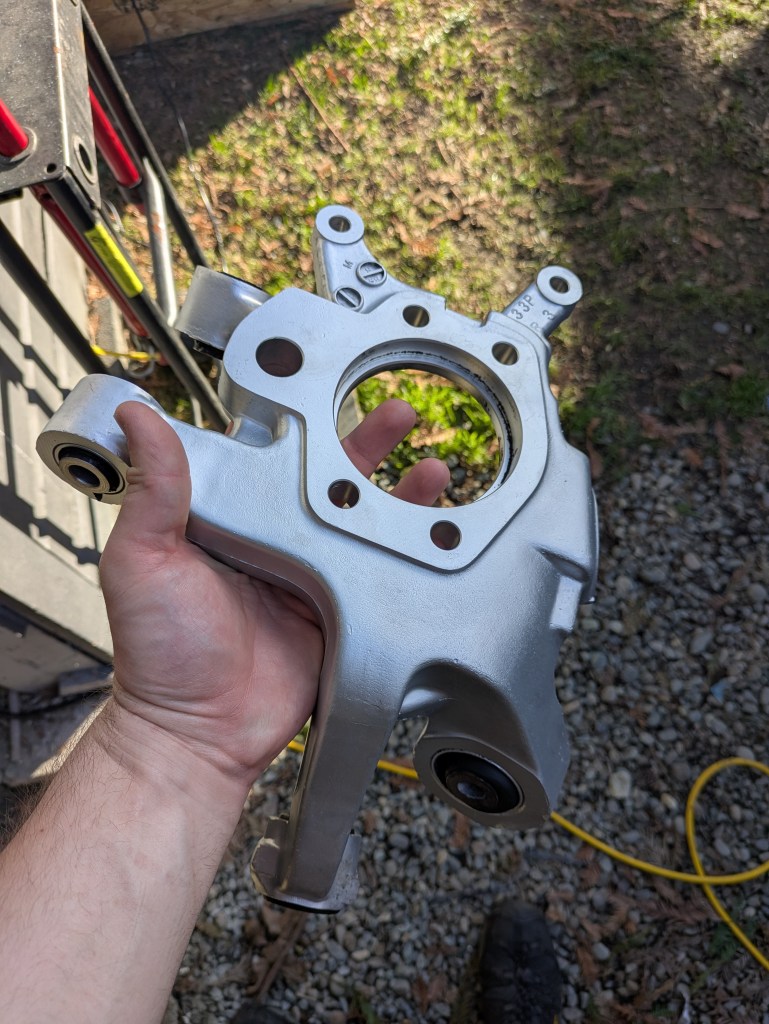
We had a wonderful day talking shop and restoring parts, and I walked away with a pair of knuckles that looked indistinguishable from brand new parts. Needless to say, I was very enthused with the results.
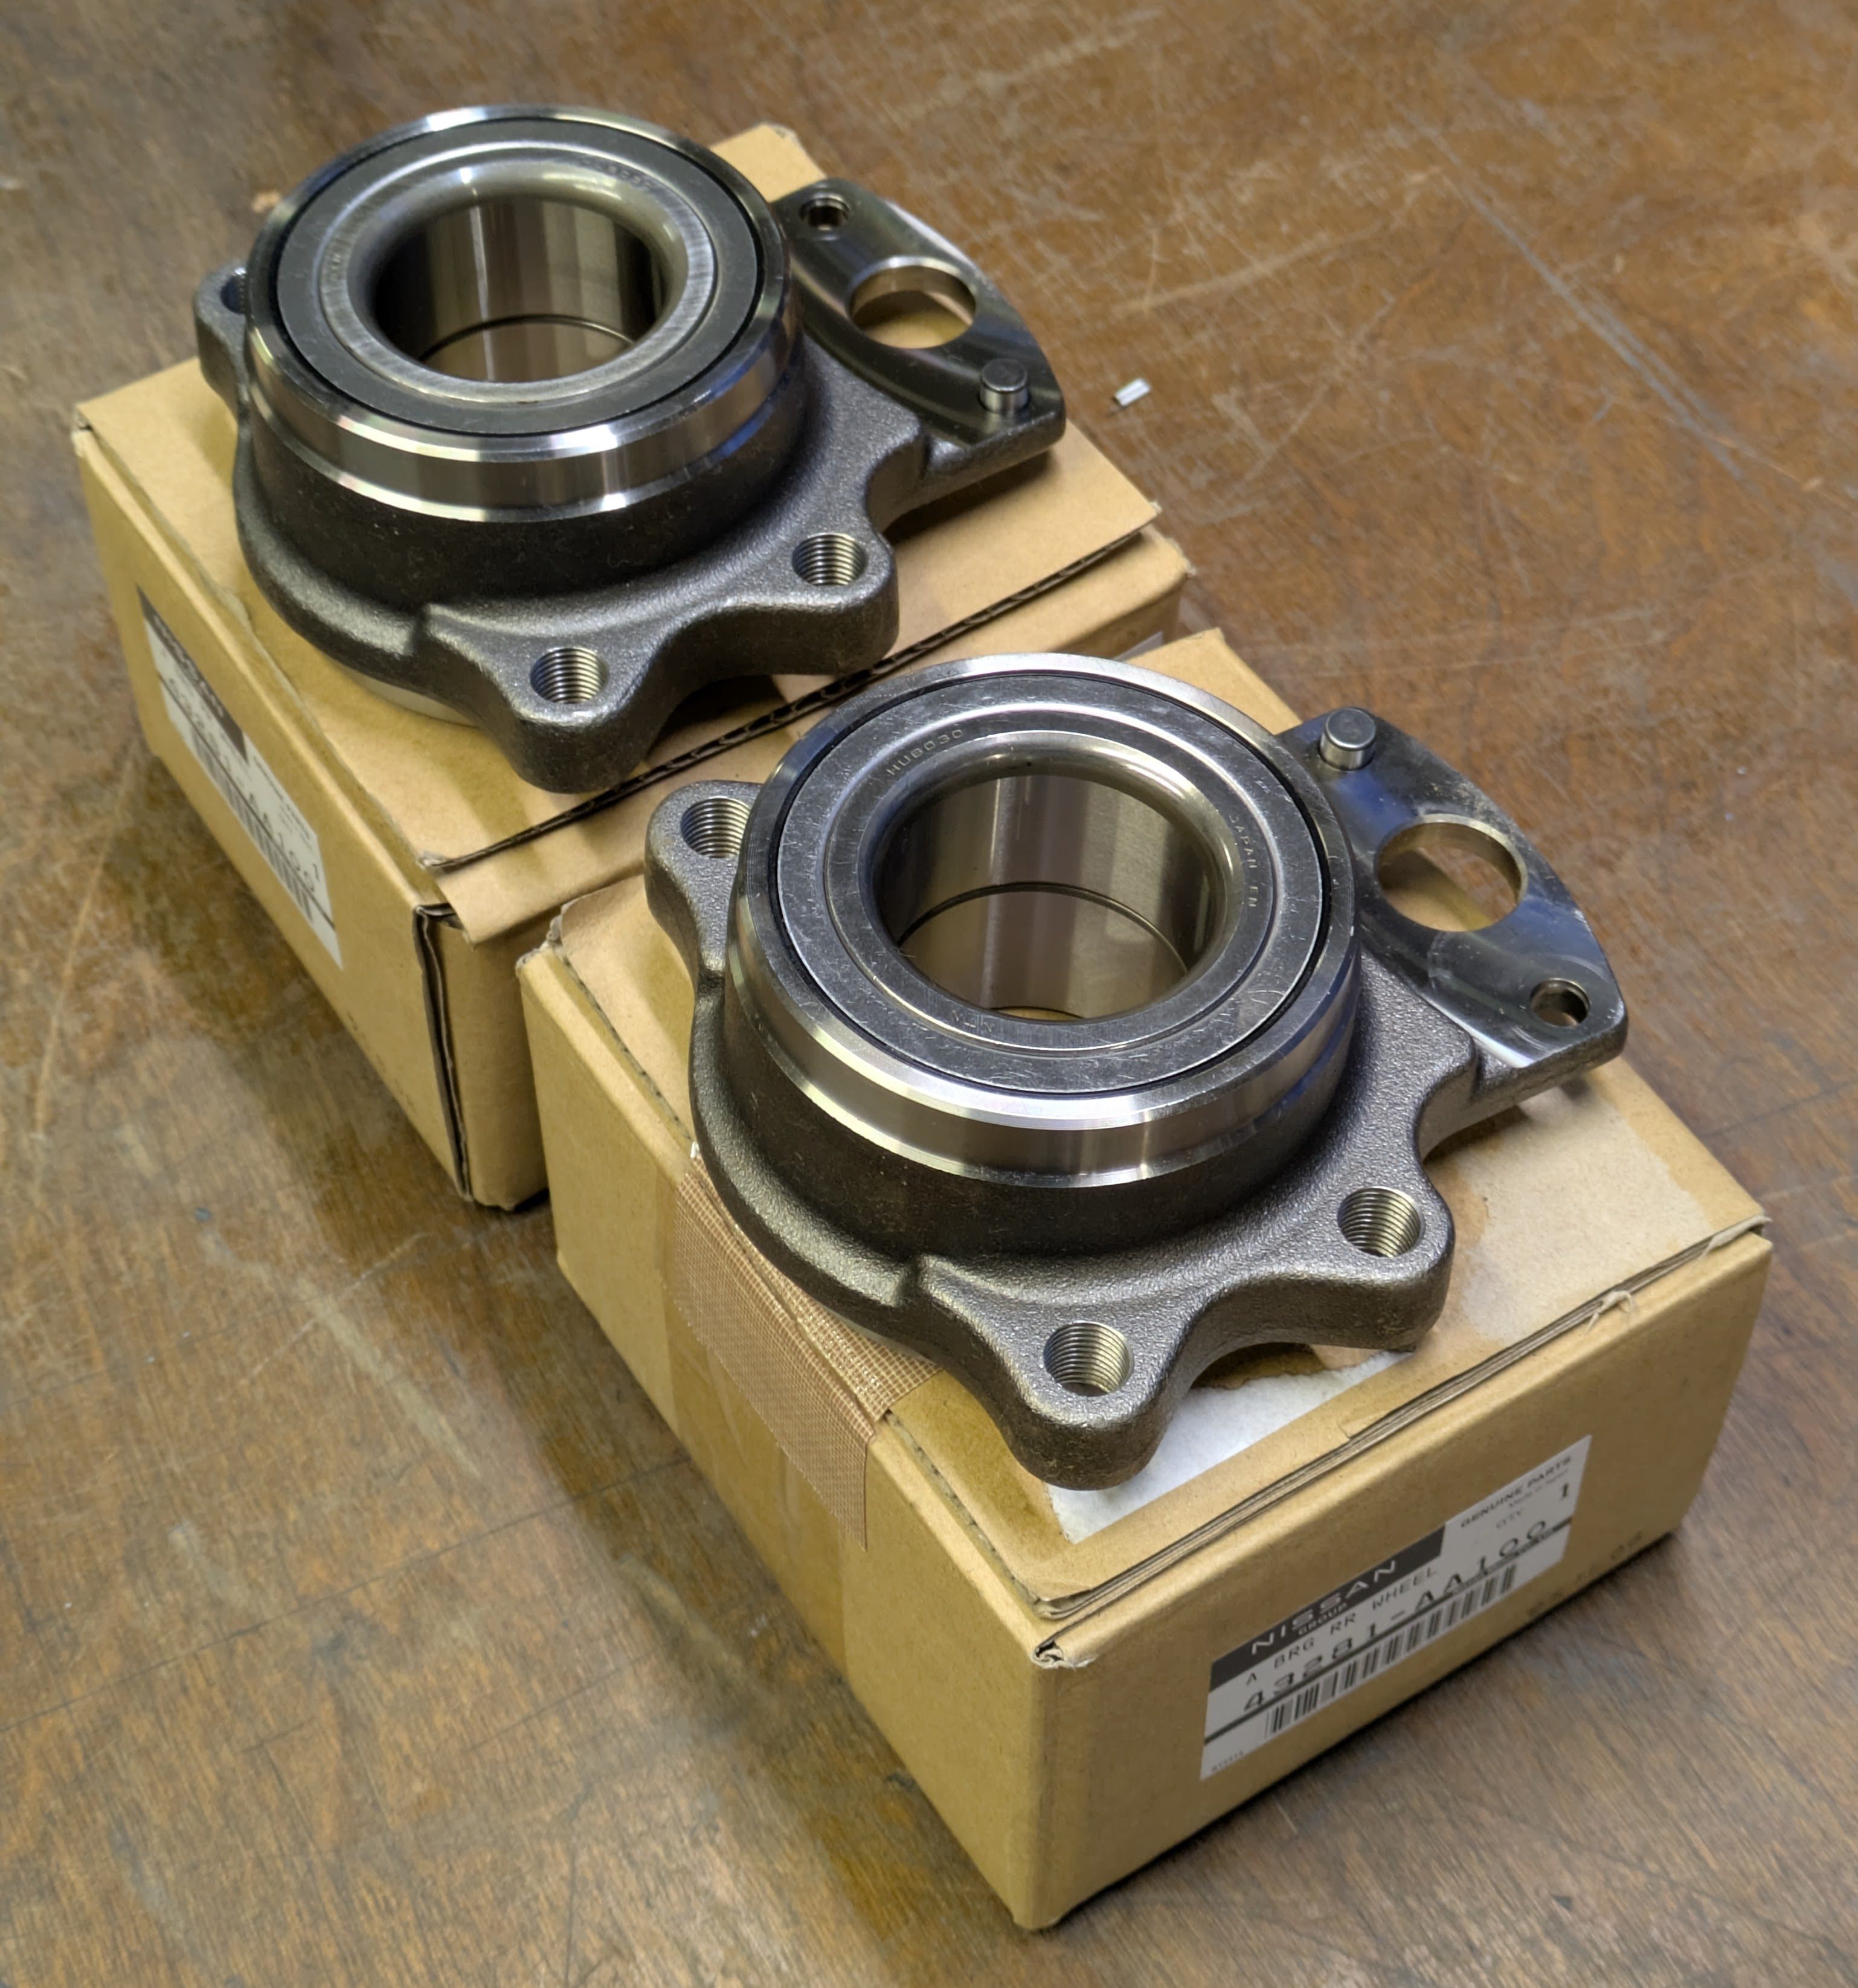
Despite my great deal and my now great looking knuckles, Luis had noted that before the accident, one of the rear wheel bearings was completely toast. After a failed attempt to order “OEM quality replacements” from Z1 (they straight up cancelled my order and refunded me), and after a search on RockAuto netted nothing confidence inspiring, I bit the bullet and ordered OEM. I almost certainty could have gotten away with S13 bearings with the small conversion tab for the E-brake, but when OEM is available, you get it. Nissan only sells one configuration of bearing now, but you can easily reconfigure them by pushing the alignment pin out and pressing it in the opposing side.
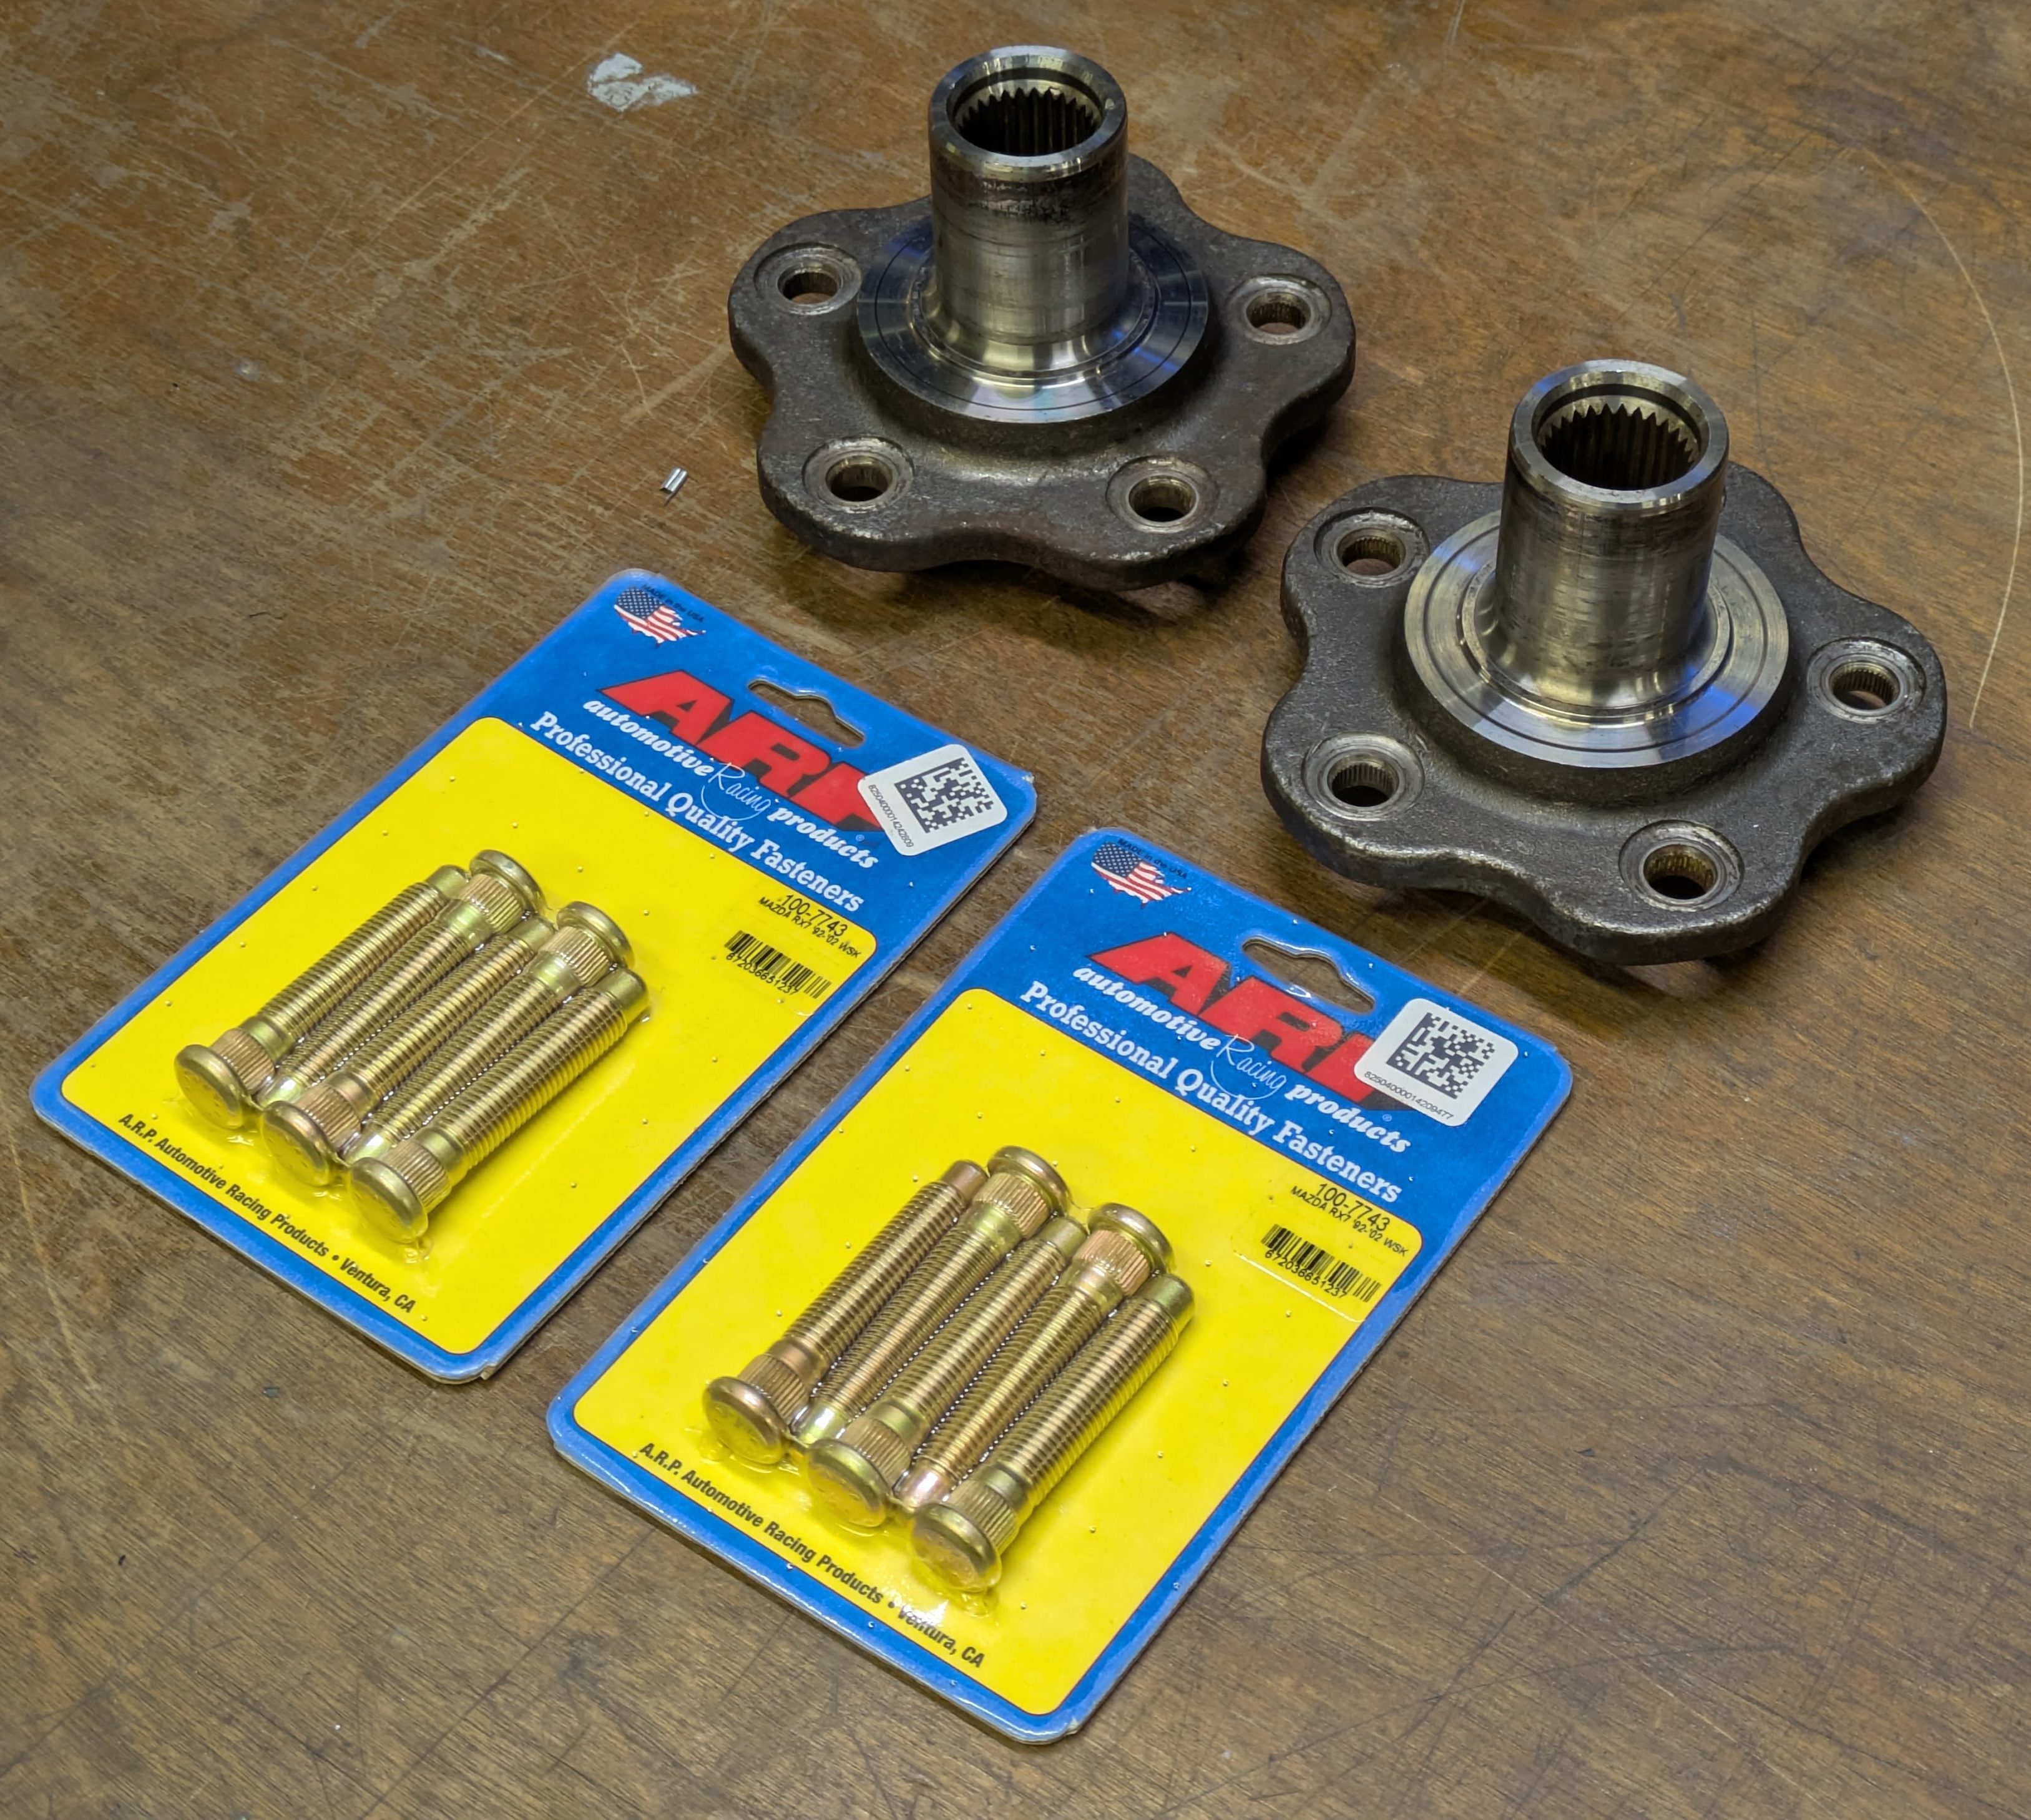
I had also purchased ARP studs as part of the shopping spree for this car, although I took a slightly different approach than normal. Before ordering, I knocked a single stud out of the front and rear to determine the knurl diameter, and then ordered studs in accordance to that. Being on an unknown S14 front hub and Z32 in the back, I wanted to make sure I was ordering compatible studs, but I also wanted to convert the car to M12x1.5 rather than the Nissan/Subaru standard of M12x1.25. All my other cars are 1.5 and it is way easier to find lug nuts if I need spares, so it just made sense to do at the same time.
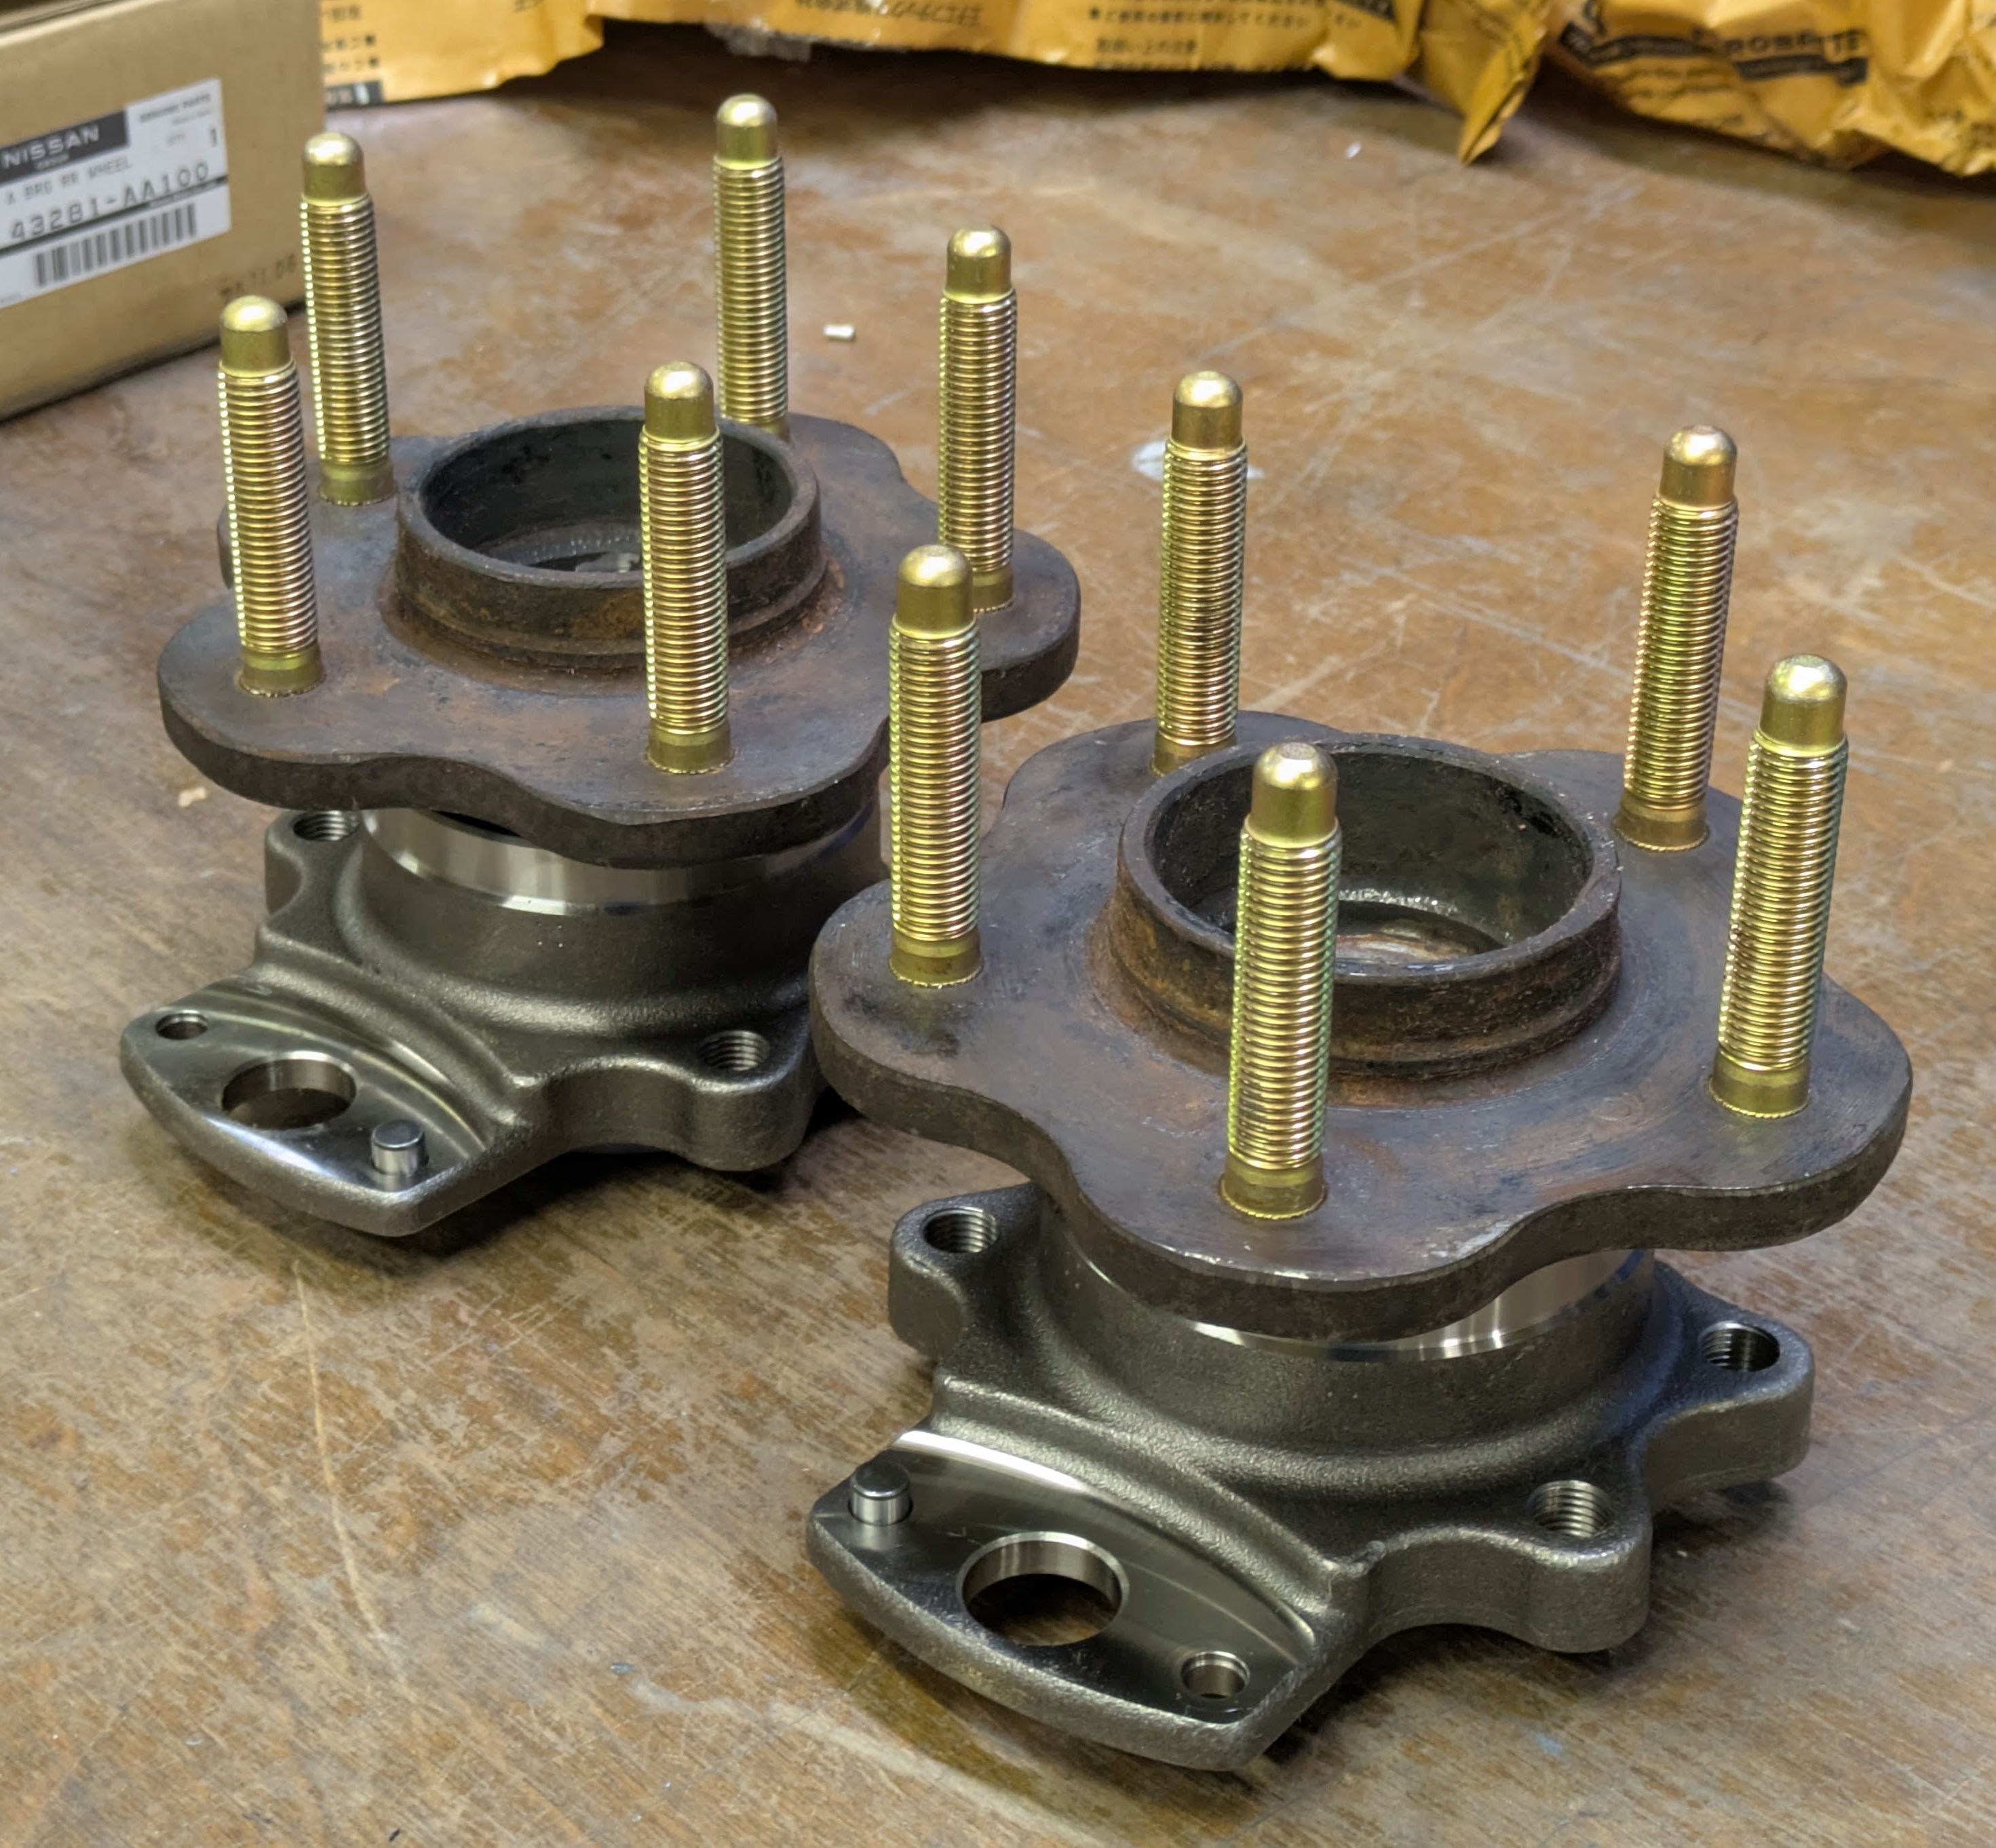
I spent a lunch at work pressing all of the new components together. I cut the old bearing races off of the existing hubs and ultrasonic cleaned them before pressing the whole assembly together. Really happy with the results. Brand new extended studs just do something for me.
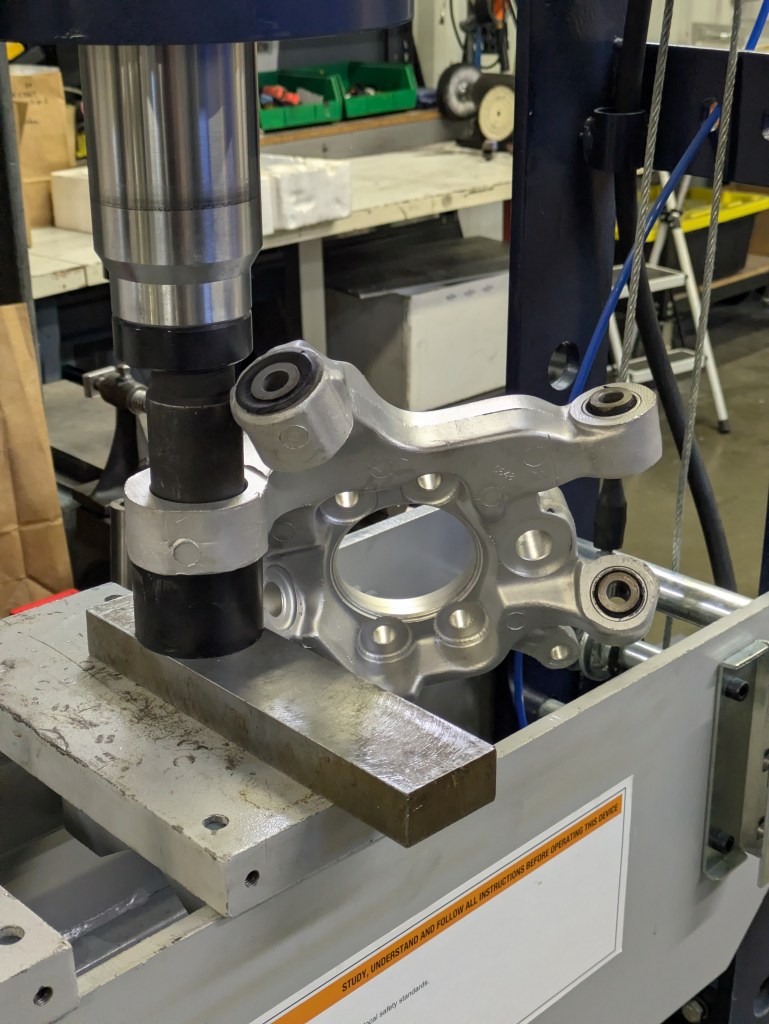
Going back to the SPL shopping spree, and to compliment the freshly restored knuckles and wheel bearings, I decided to go full SPL rear sphericals in the knuckles. Rather than using ball joints, there are 4 rubber bushings in this knuckle from the factory. Three for the arms, and one for the lower shock mount. SPL offers a full monoball replacement, and with consistency and performance being the goal of this car, I just went for it.
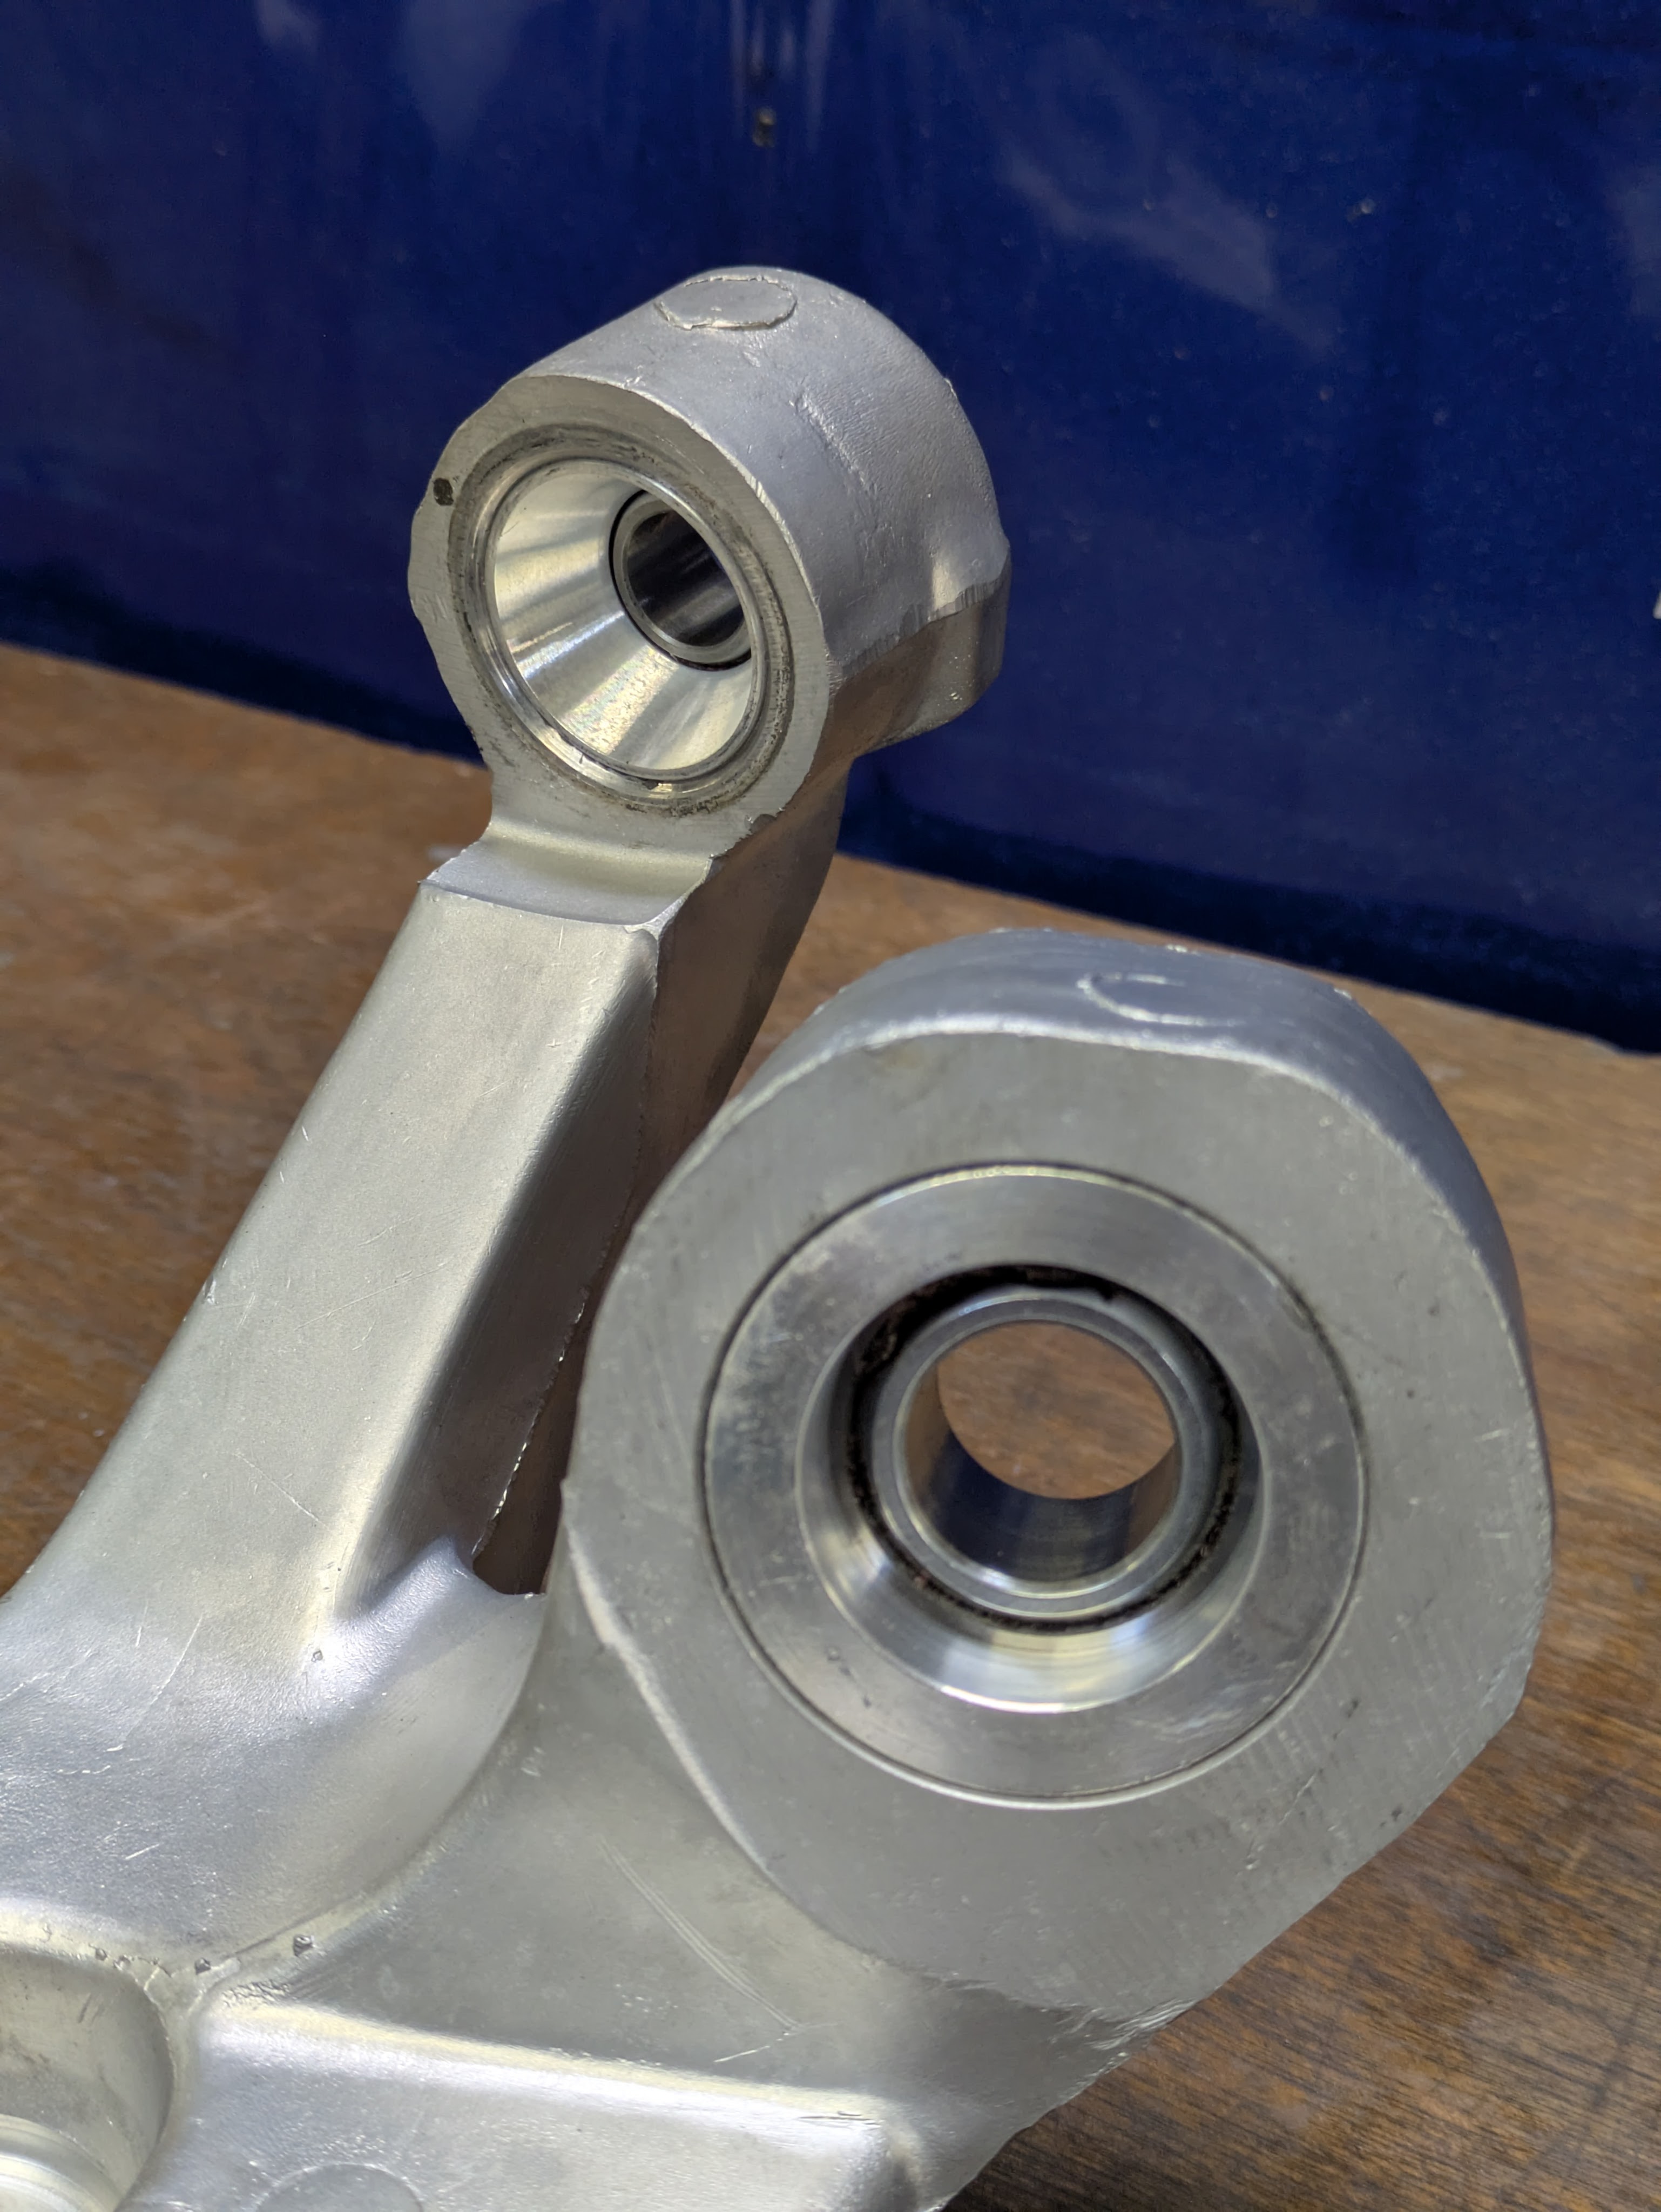
These went in… fine. The install left a little bit desired in terms of amount of pressure to get them to install. The other complaint other than the eyewatering price is the design. The old Defworx and even modern GKTech knuckle bushings feature a one piece housing with a snap ring, so you can easily replace a bearing if one goes out. The SPLs use a clamshell design that requires the 2 piece bearing to be pressed out to replace, and it is green Loctite-ed together. I am praying I don’t have to replace a bearing anytime soon as it will likely mean making a special tool or removing the knuckle entirely to replace. I did end up with a second set of Z32 knuckles from Marketplace for super cheap, and I intend to clean up and have those at the ready for GKTech sphericals should these SPLs give me problems.
Oh yeah, and two of the misalignment spacers were a few tenths (0.0004″) big once the bearings were under radial compression, so I had to polish those down on a grey wheel. I had my issues with this kit. It’s in now, so whatever. Hopefully I don’t have to touch it for a long time.
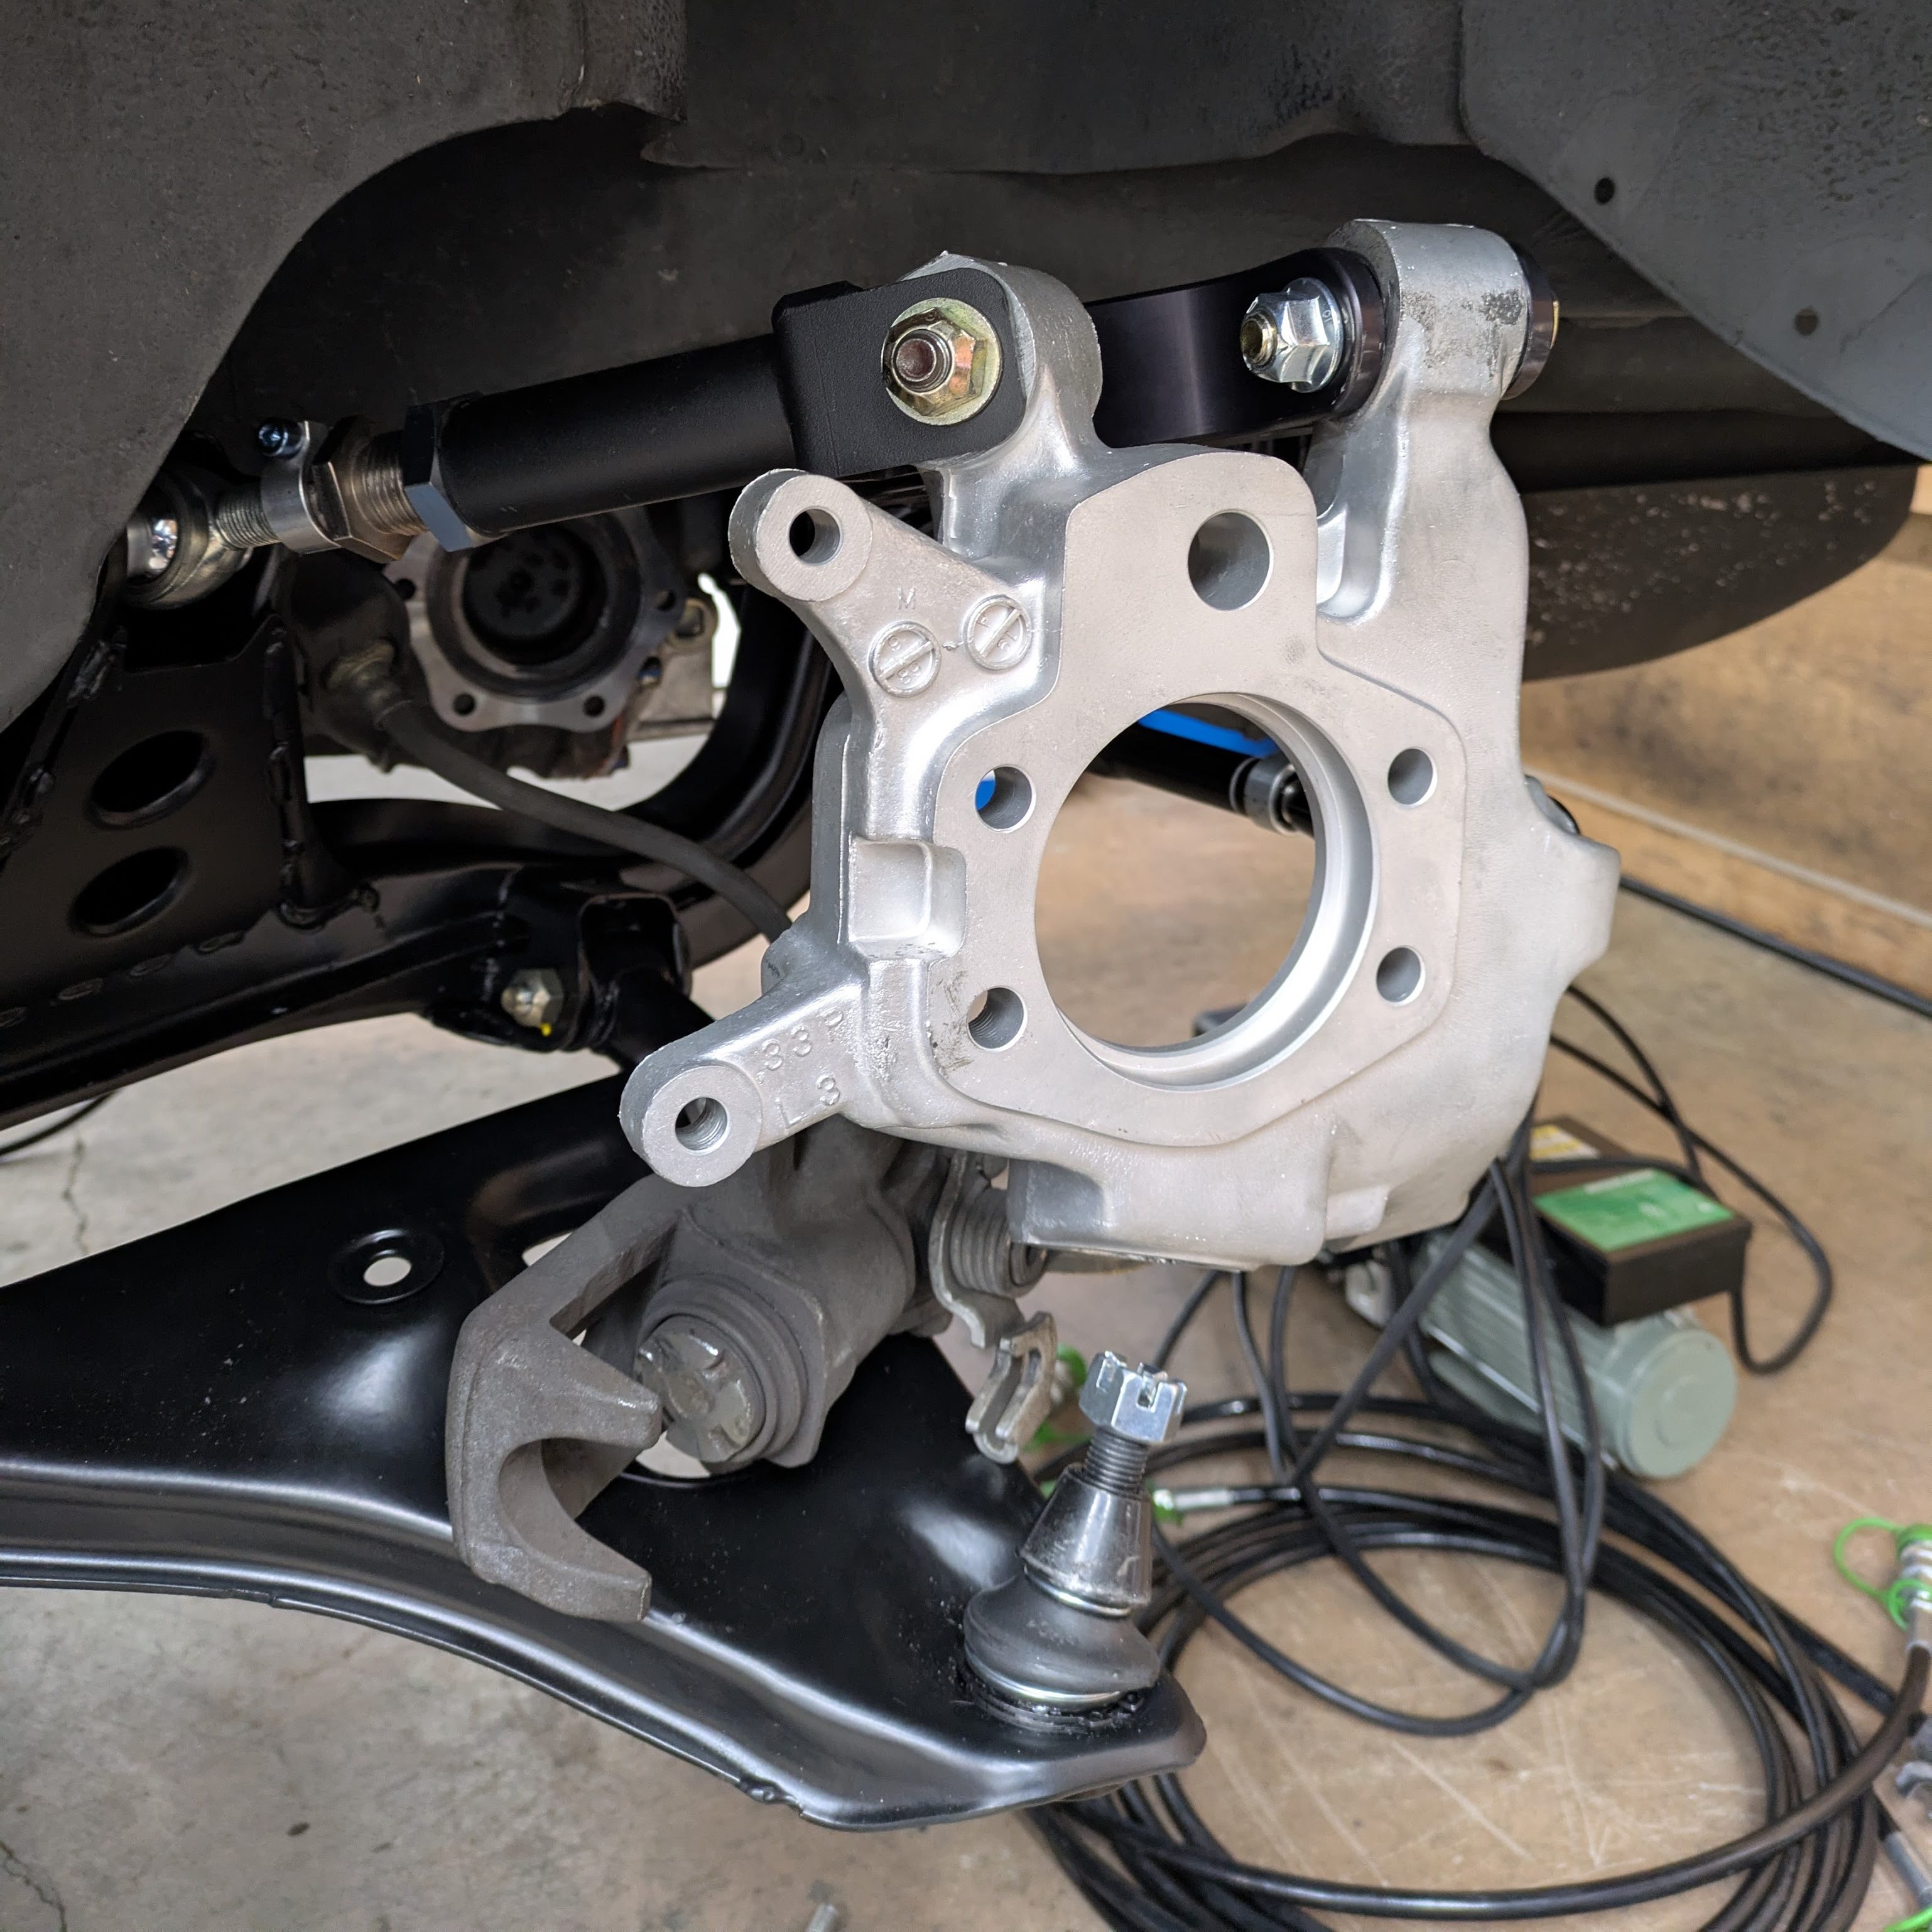
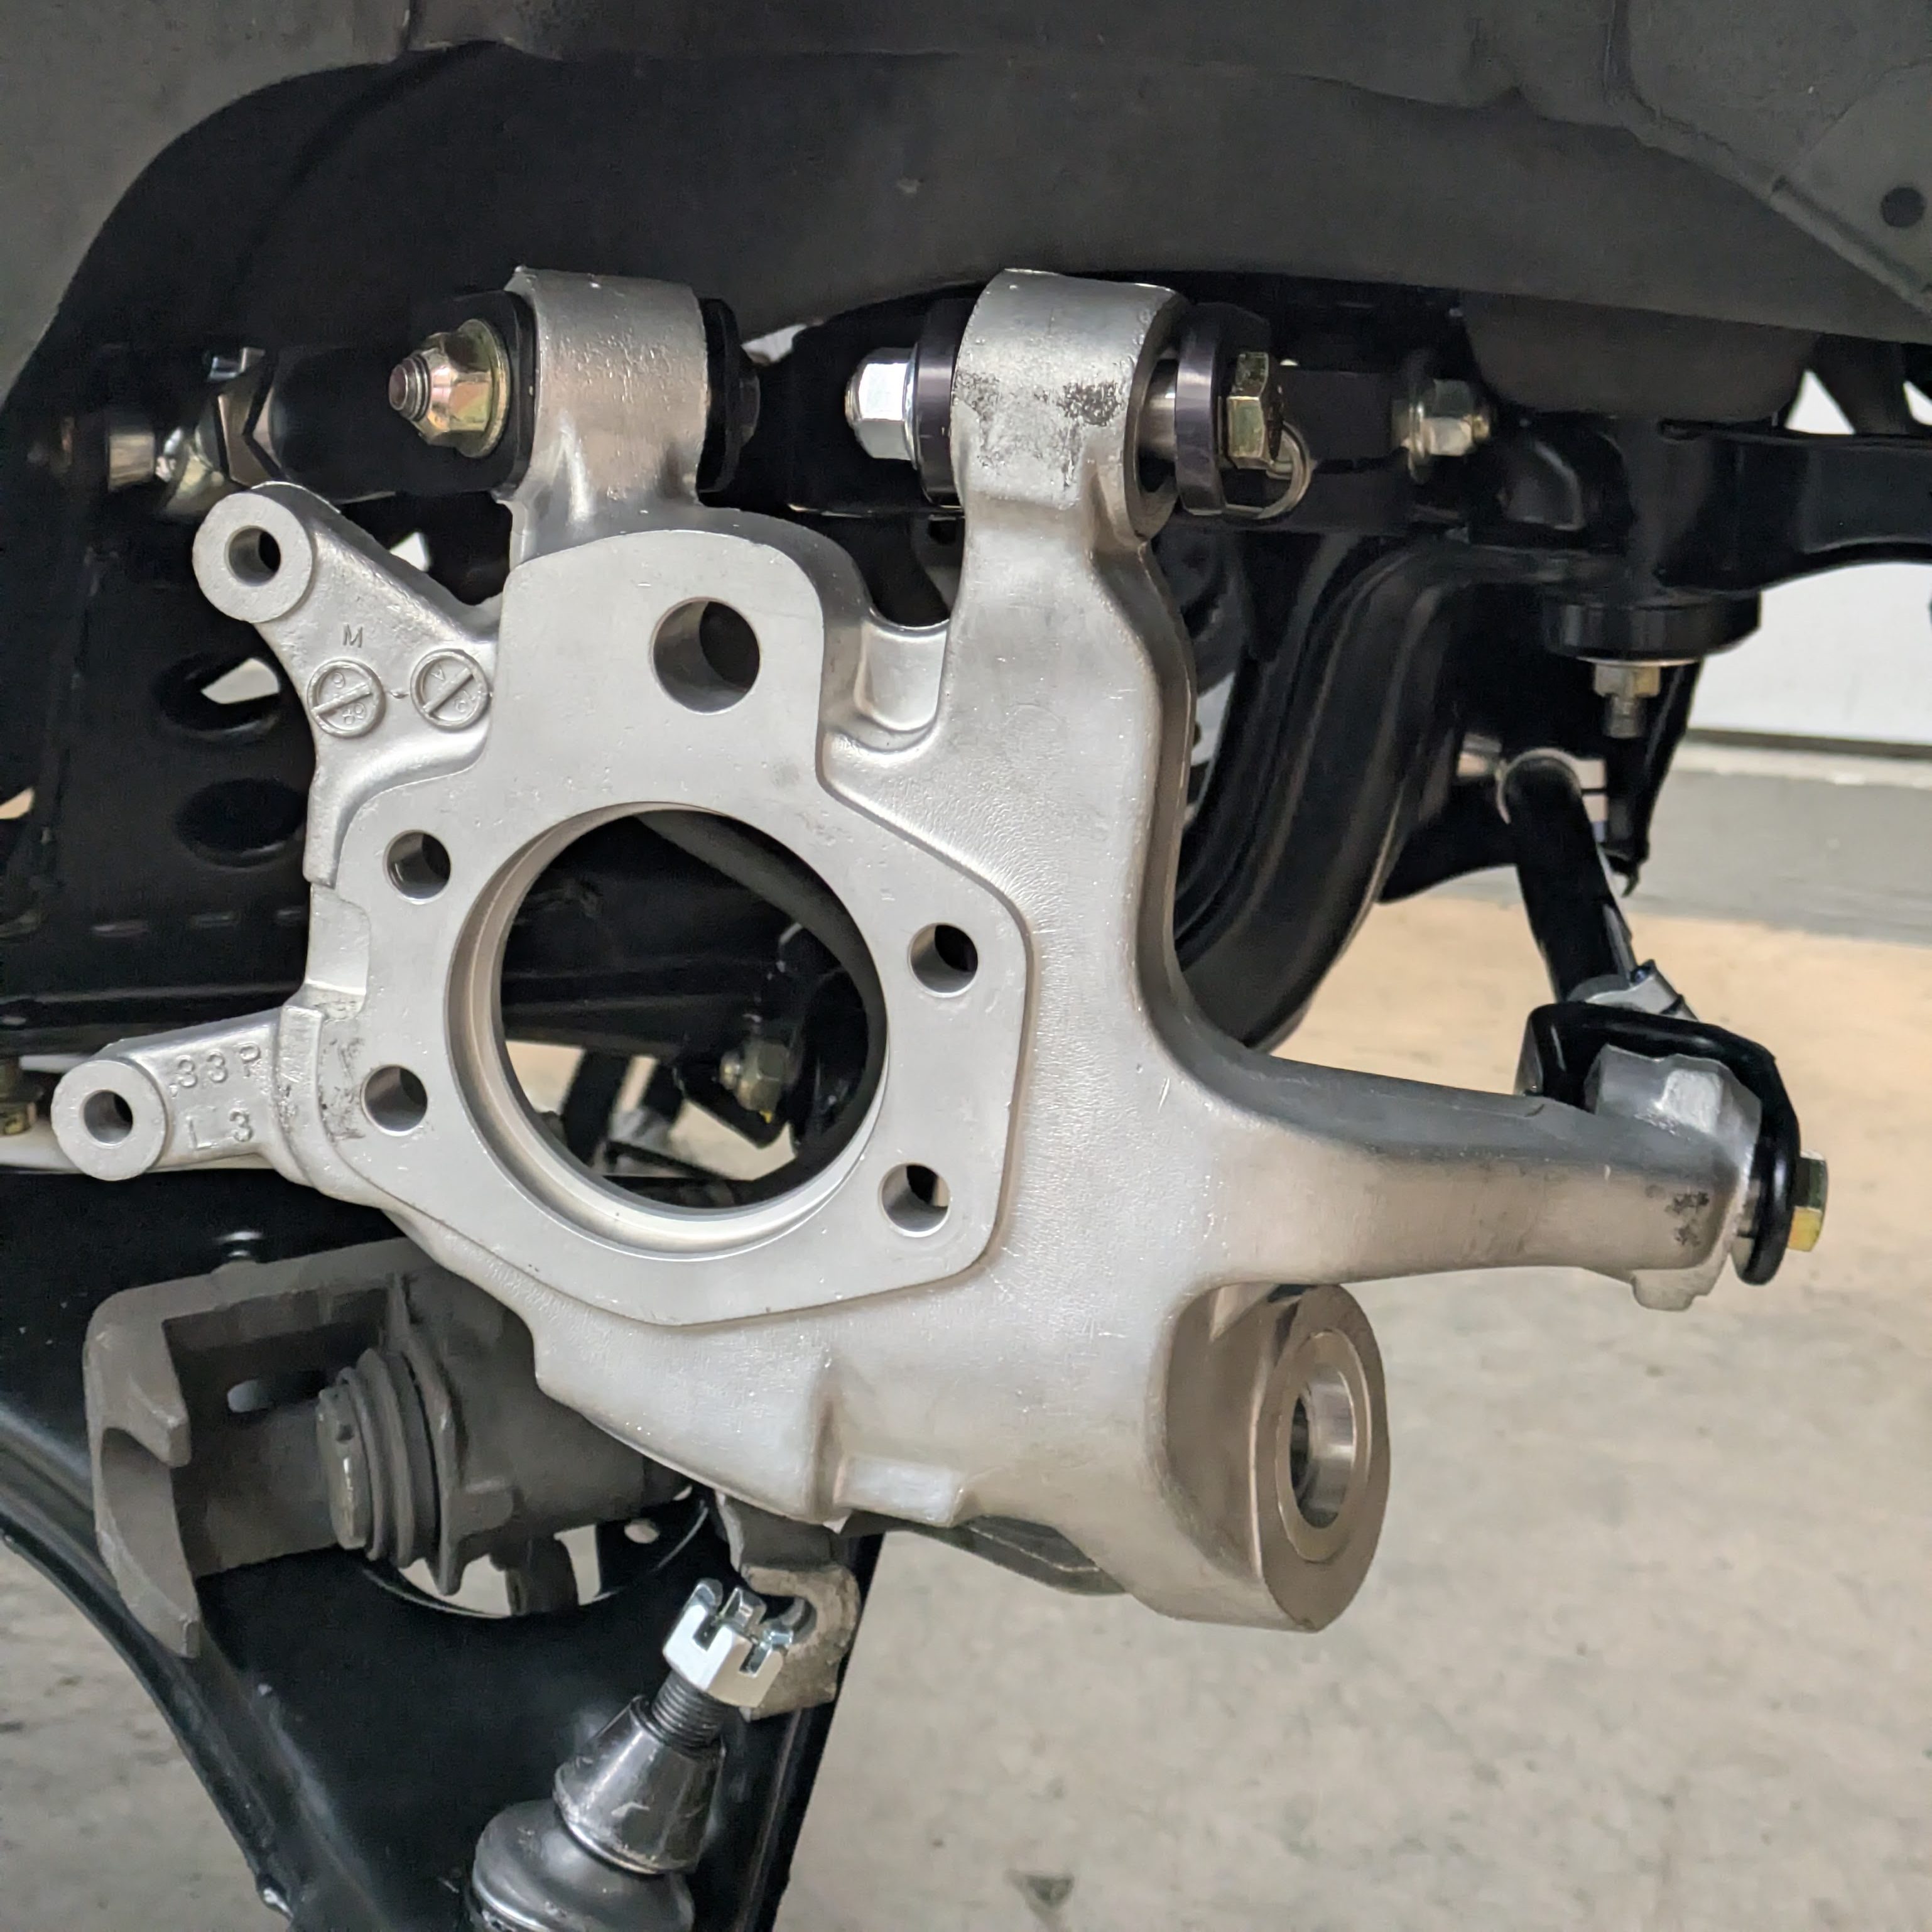
With all of the issues resolved, it was finally time to bolt the knuckles on to the car for good, along with the suit of SPL arms. I have to admit, the effort was worth the result. The combination looks killer. The only note from the install is that I pre-set the traction arm length per GKTech’s recommendation after doing the anti-squat reduction/S14 geometry mod. This set the wheel fairly far back in the wheel arch on an S13, but the performance will hopefully compensate for the visuals.

There was one small problem that I wasn’t too happy with, and I did a poor job of documenting it. There was the concerningly small overlapping contact area between the castle nut and the knuckle/lower ball joint adapter cone. While the LCA getting yanked down is a unlikely scenario, the lack of surface contact was concerning enough to me to measure and manufacture a solution.
Some 15-5 PH H1025 round bar and a lunch break later, and I had two high strength custom washers that would never corrode. These washers worked perfectly and still allowed the castle nut the perfect stack thickness for the cotter pin to intersect appropriately.
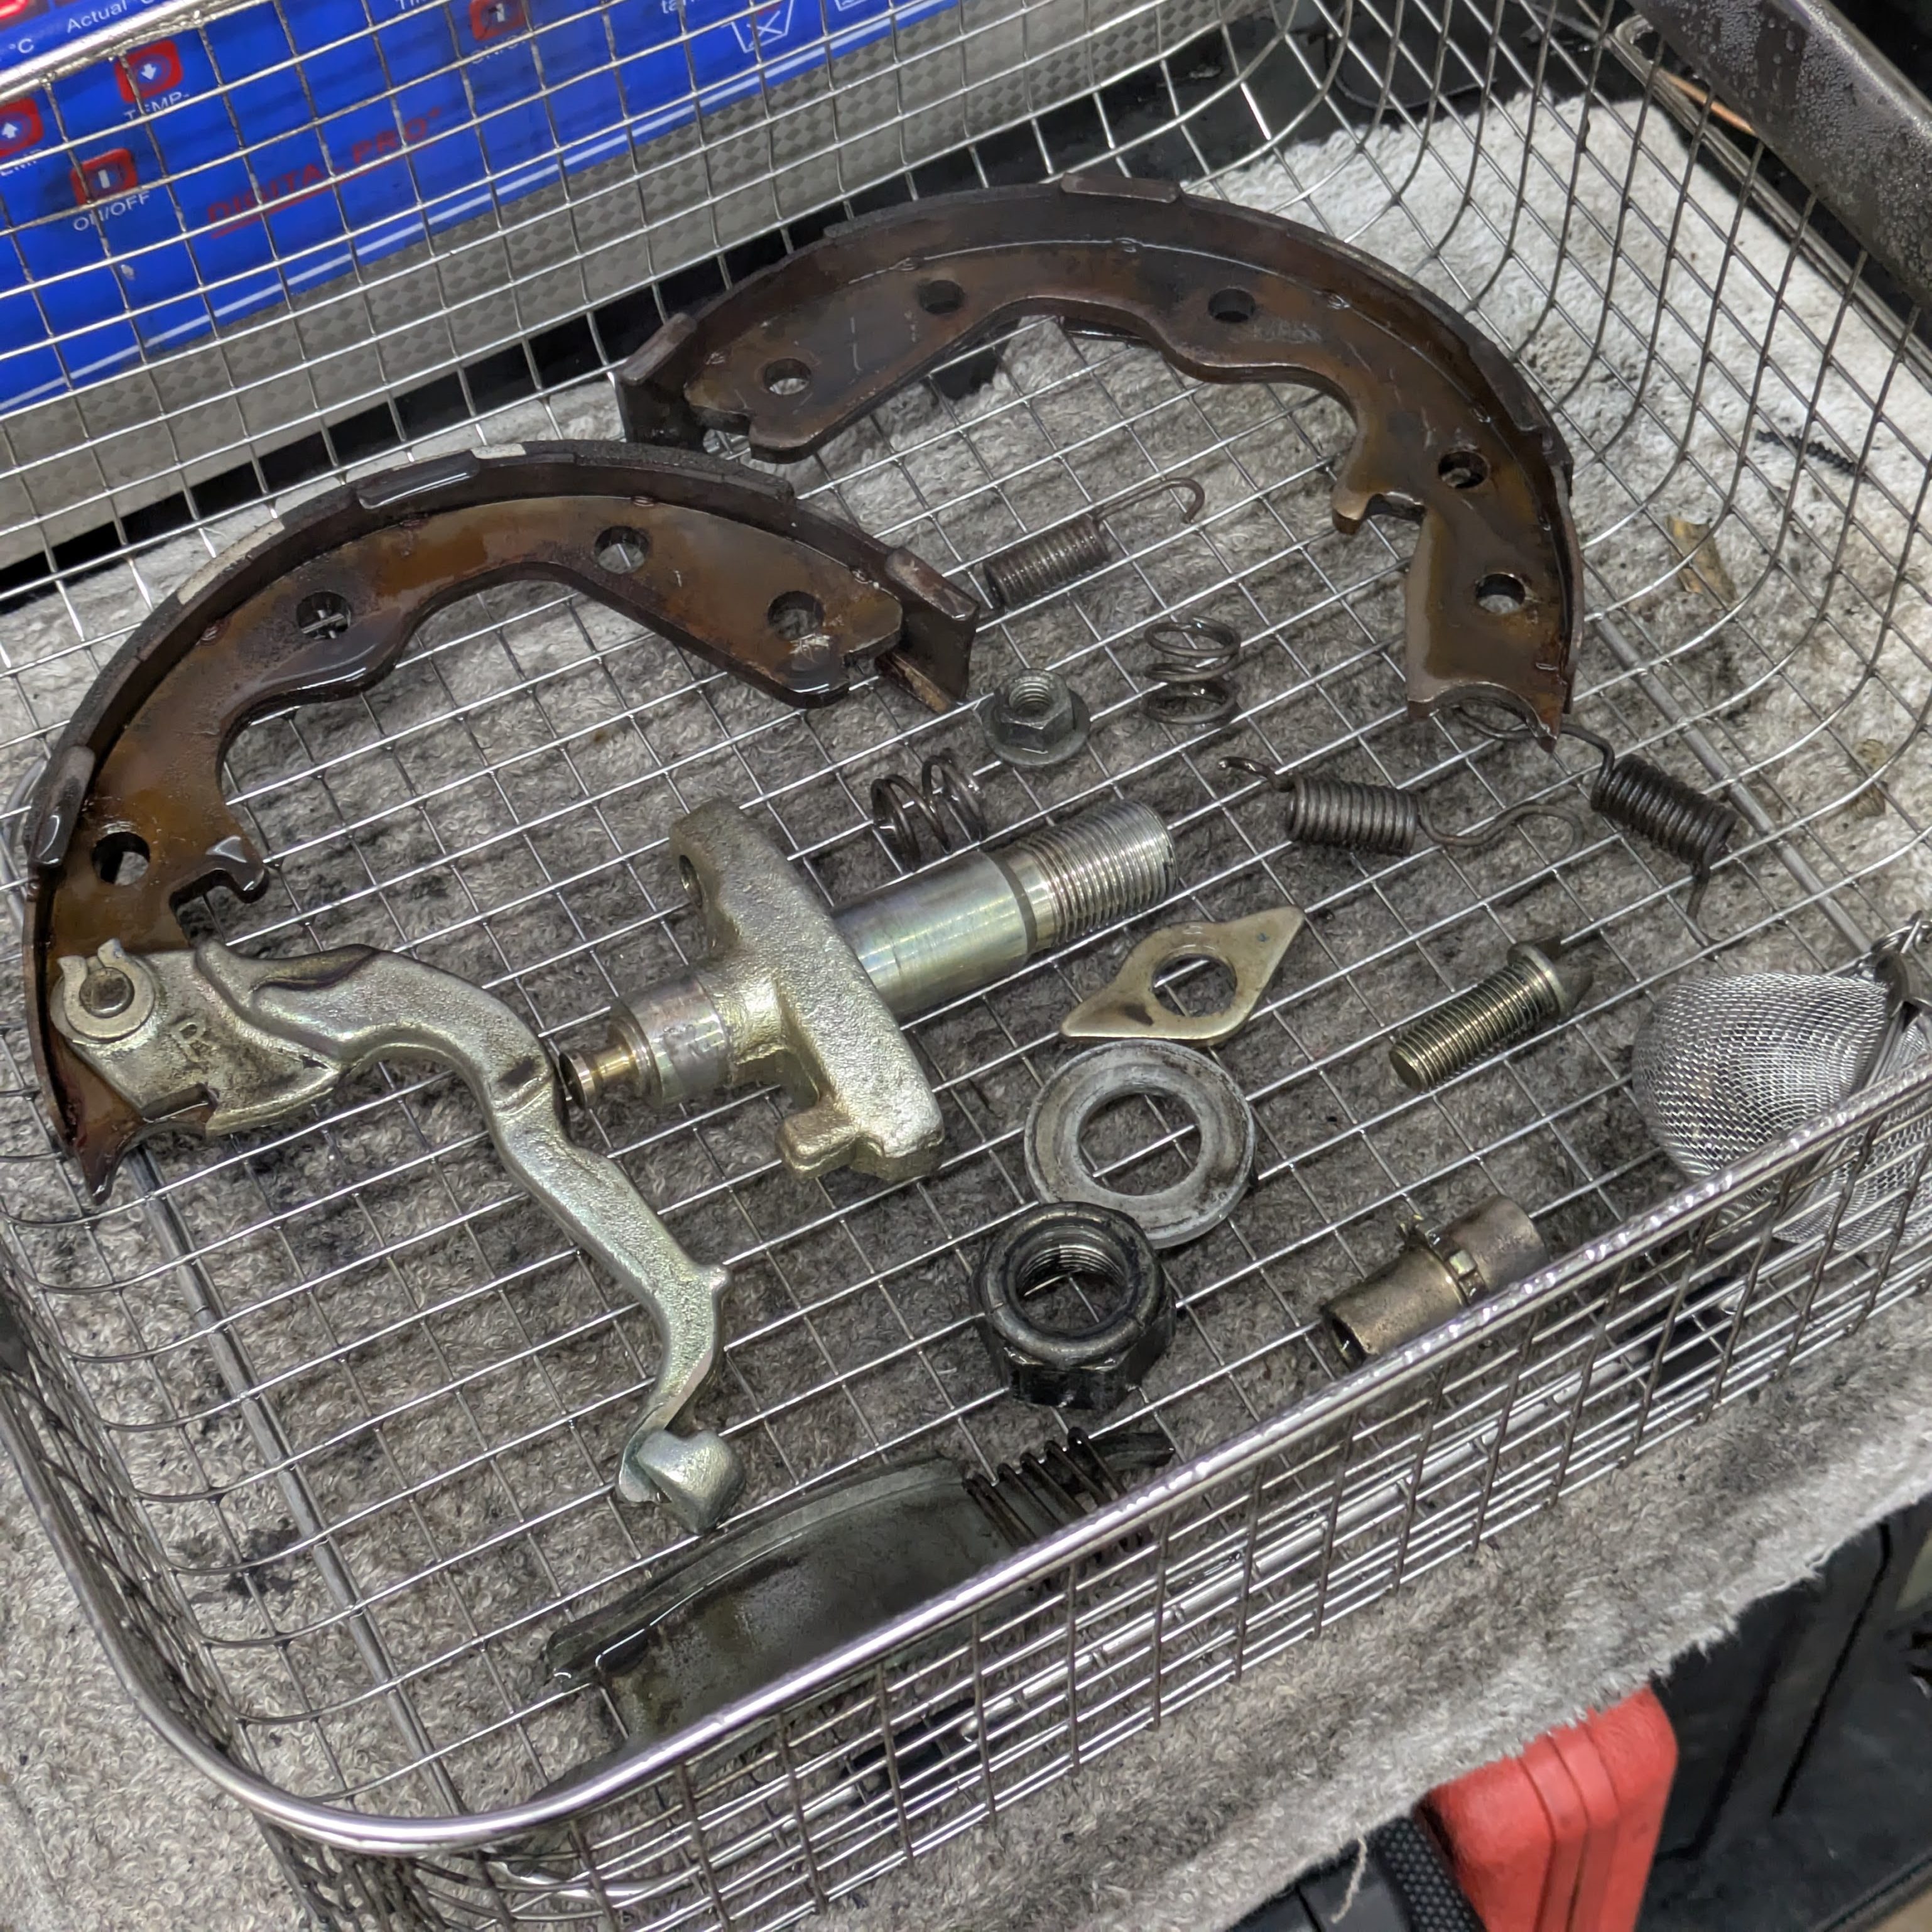
With the knuckles on for good, it was time to address the E-brake and all of it’s components. Drum style handbrakes are known to be a bit of a puzzle box, and Nissan didn’t make any attempt to beat these allegations. It took a few watch throughs of the video and fumbling through the tools, techniques, and order of operations to get it working right. A healthy later of Honda Super Urea grease was applied to the relevant areas, and since I had ultrasonic cleaned everything, it assembled as nicely as this pain in the ass could, and was even nice to look at once completed.

Once the corner packages were assembled, I moved upstream to the cable bracket and tying it into the lever. The Z32 cables work, but the brackets for bracing to the unibody are in the wrong place, requiring the use of a conversion bracket. This happens to be an older Street Faction one (RIP), and was exactly what I needed except for the fact that some idiot (me) raised the subframe to the point where the driveshaft hits the bracket.
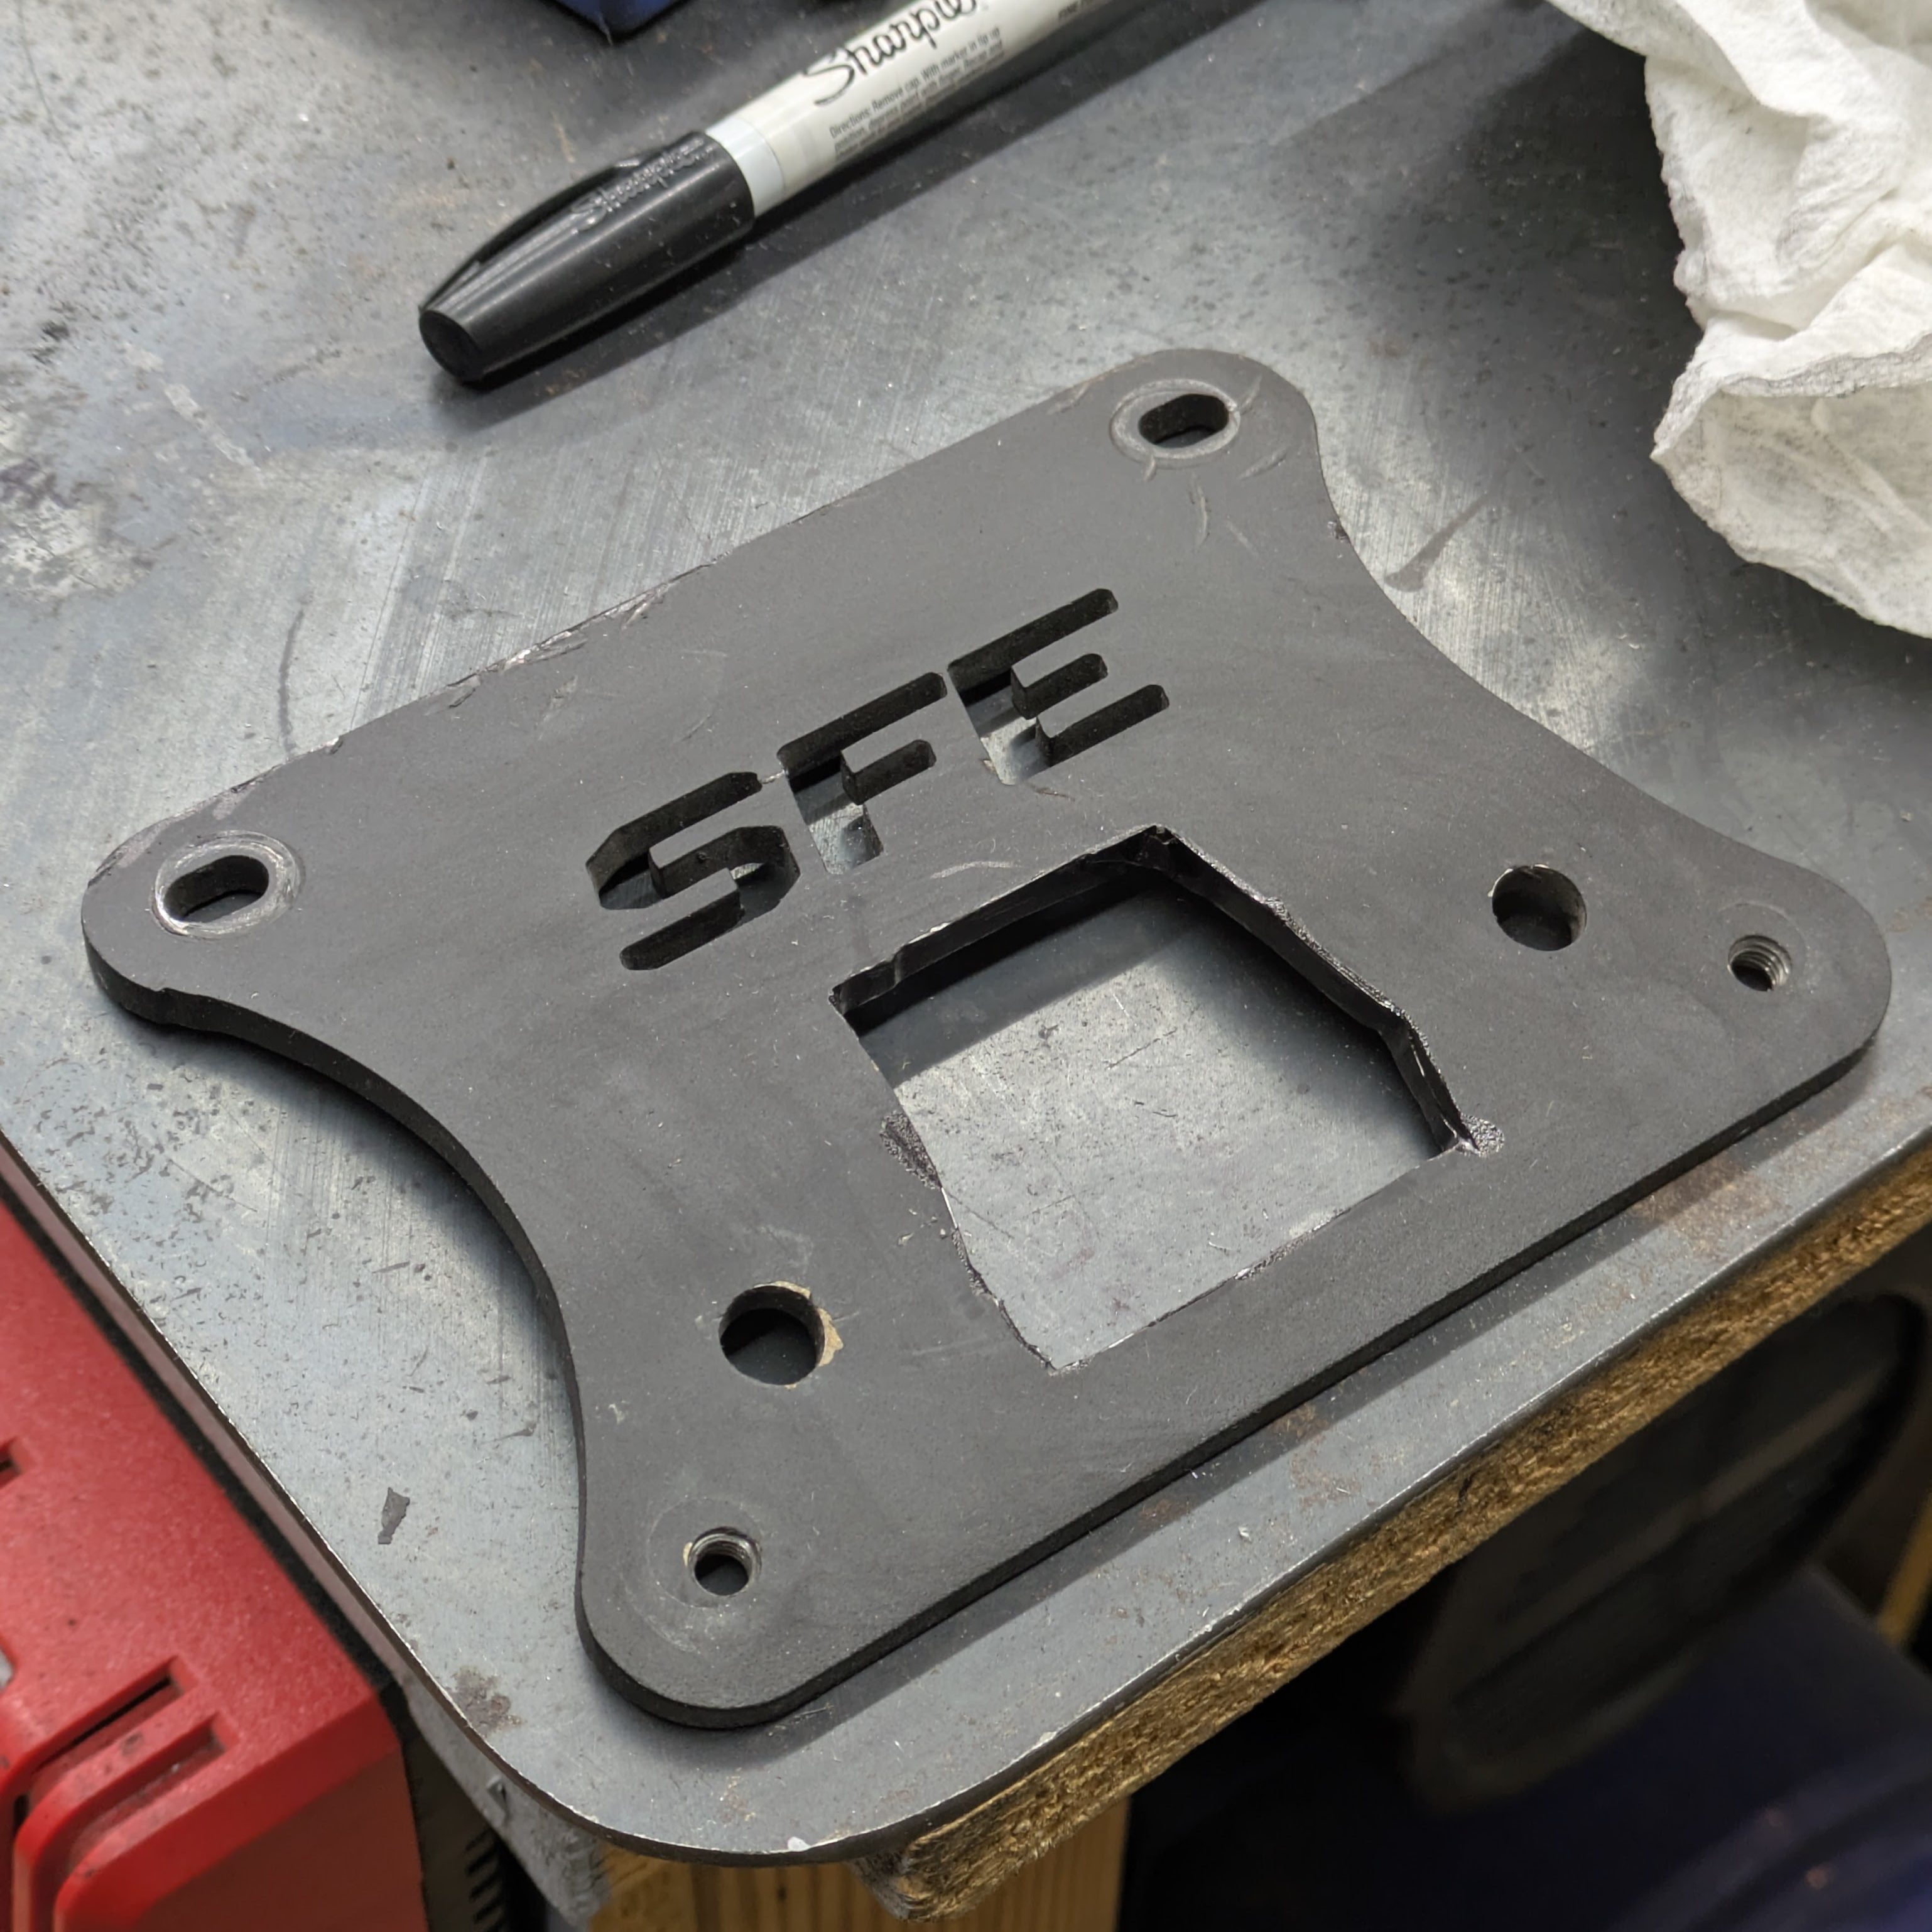
This caused me to cut the center brace out of the bracket and also slightly re-angle it, which allowed just enough clearance so even if the center support bearing fully loads up vertically, it cannot rub against the bracket. It is also worth noting that the management brackets on the cables that are supposed to connect to the subframe also don’t work because again, idiot raised the subframe up and now the cables cant go in their normal homes. Fortunately, they happily sit on top of the subframe and it all worked out.
With all of that faffery sorted, I threw the rotors on and adjusted the E-brake. It grabs low and firm now and should have no issue locking up if there is a need to rip a skid.
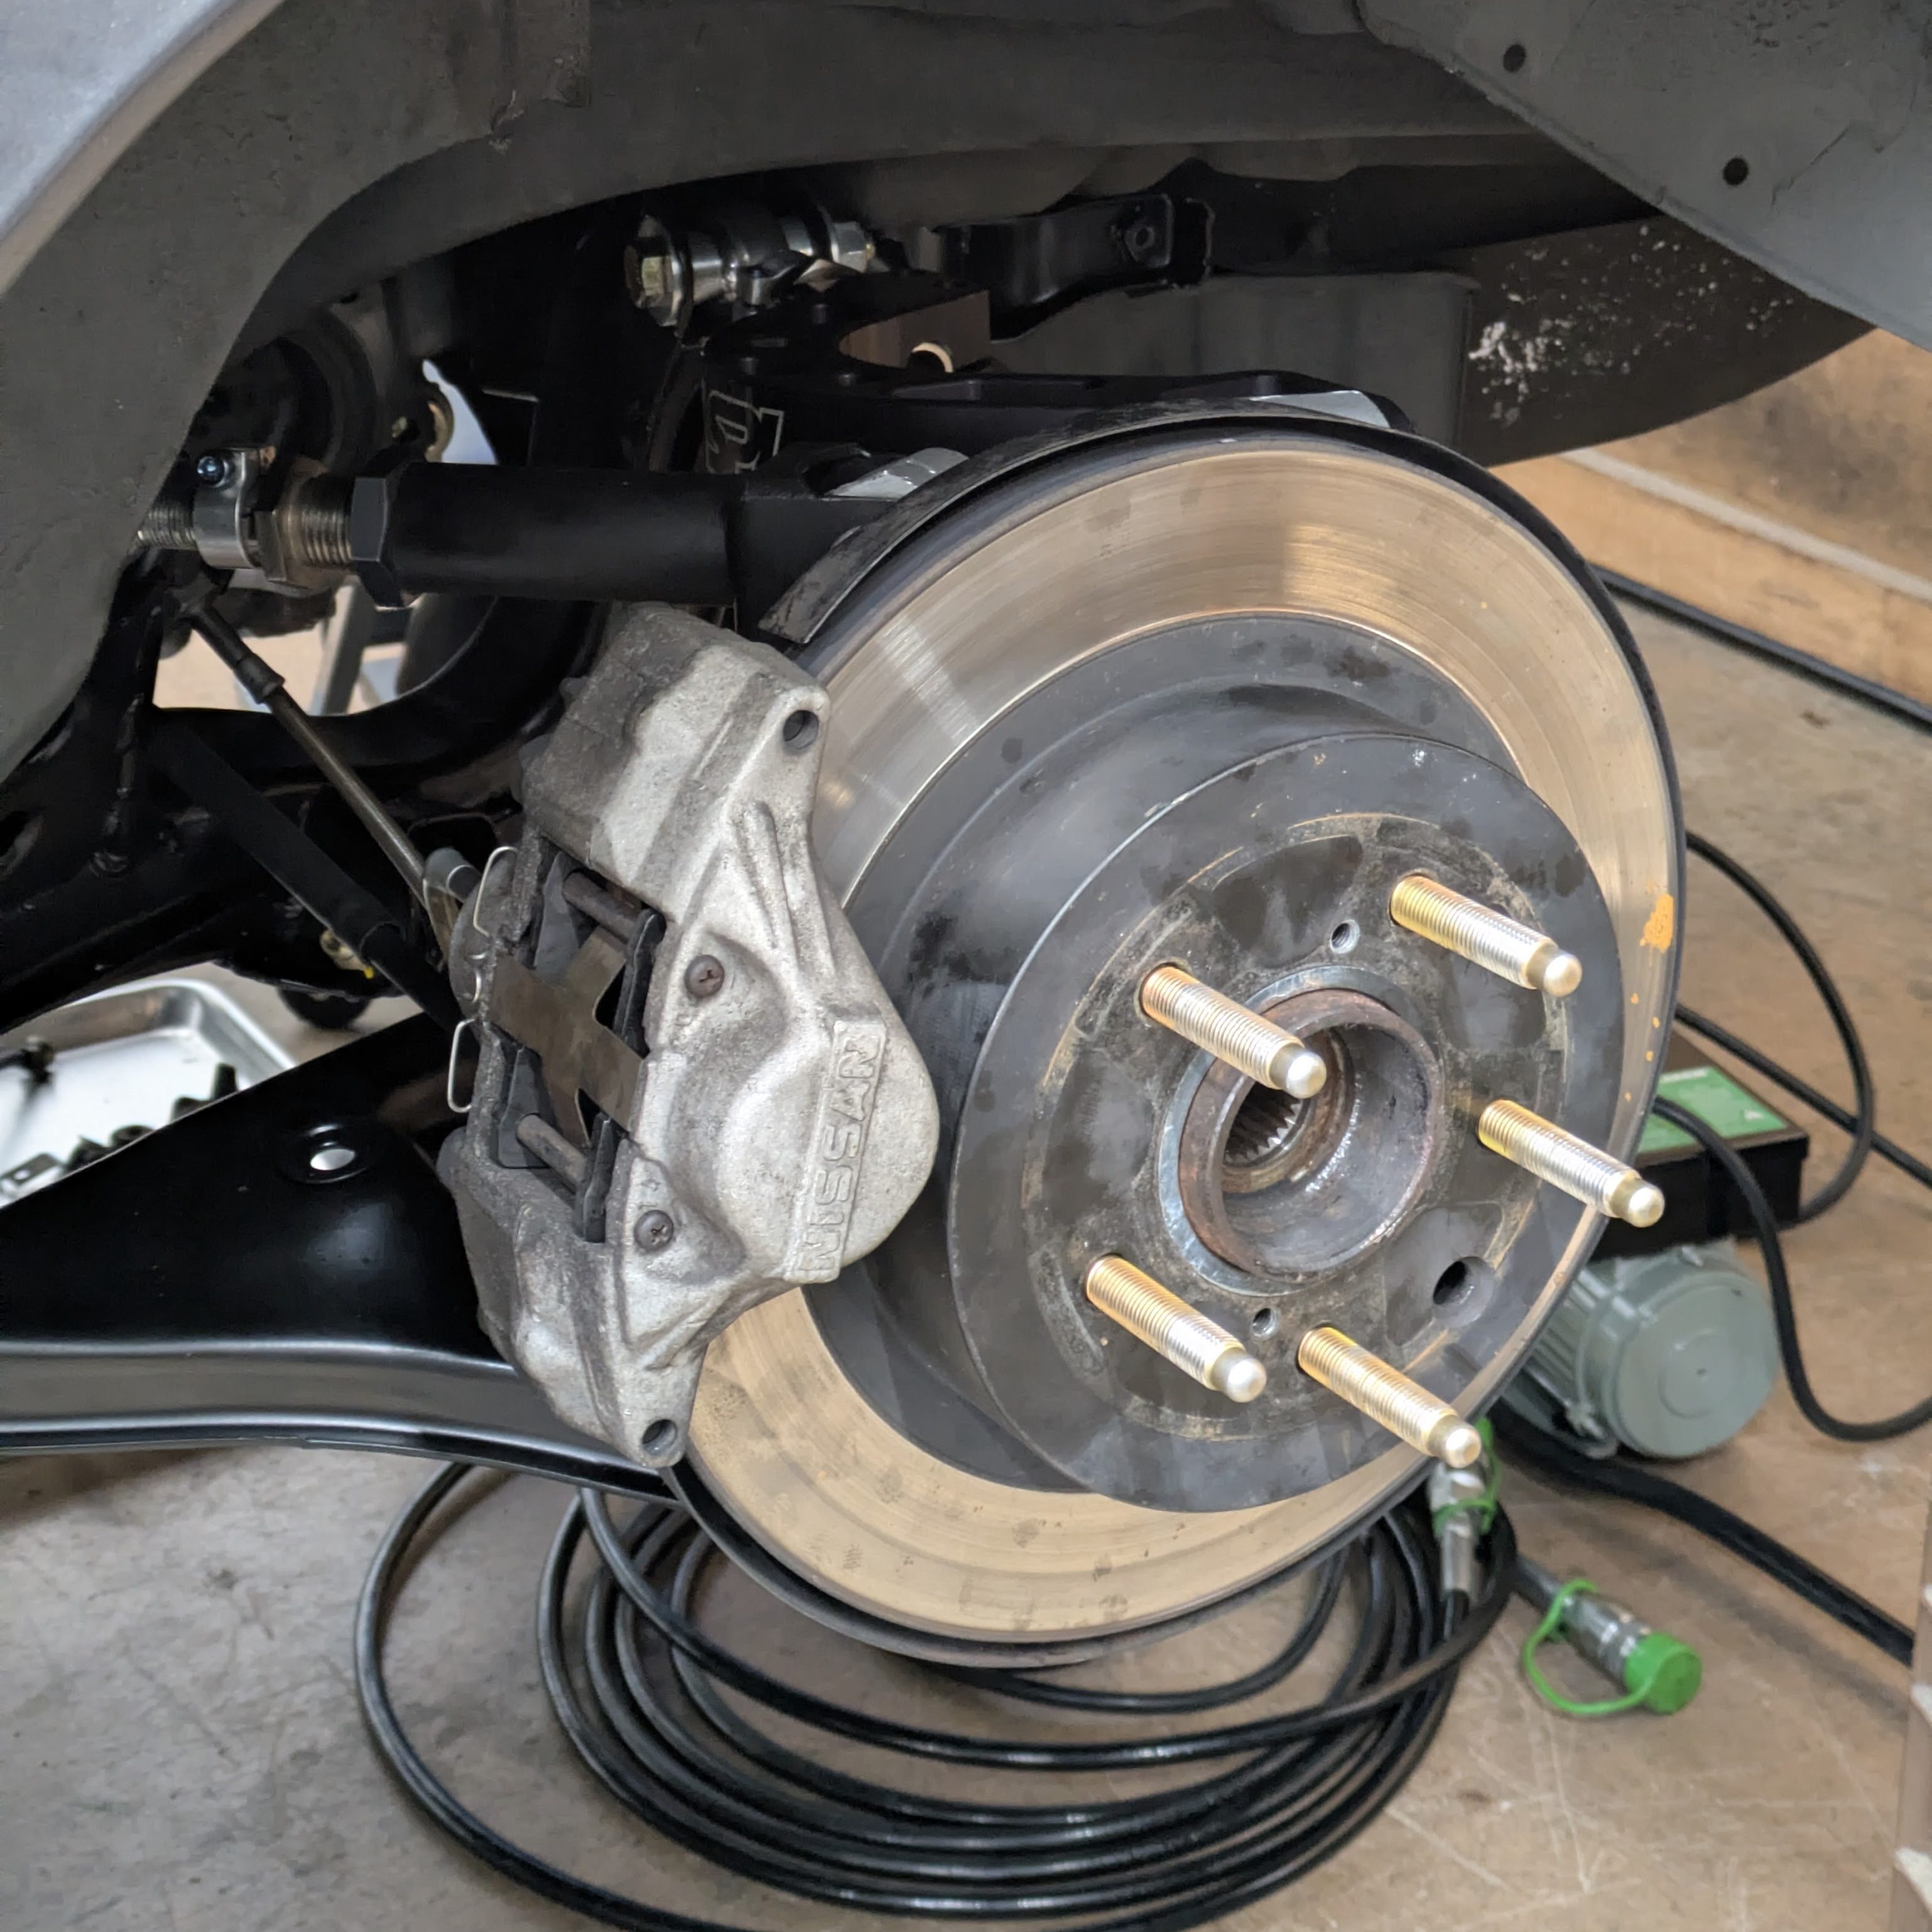
Once the E-brake stuff was done, I threw the calipers back in. Its rare to find OEM Z32 calipers in good shape these days, so I was thankful to have these. I did ultrasonic clean them before they went on just to get some of the grime off. This car will need a full caliper refinish, but I want to make sure that this is the setup I want long term.
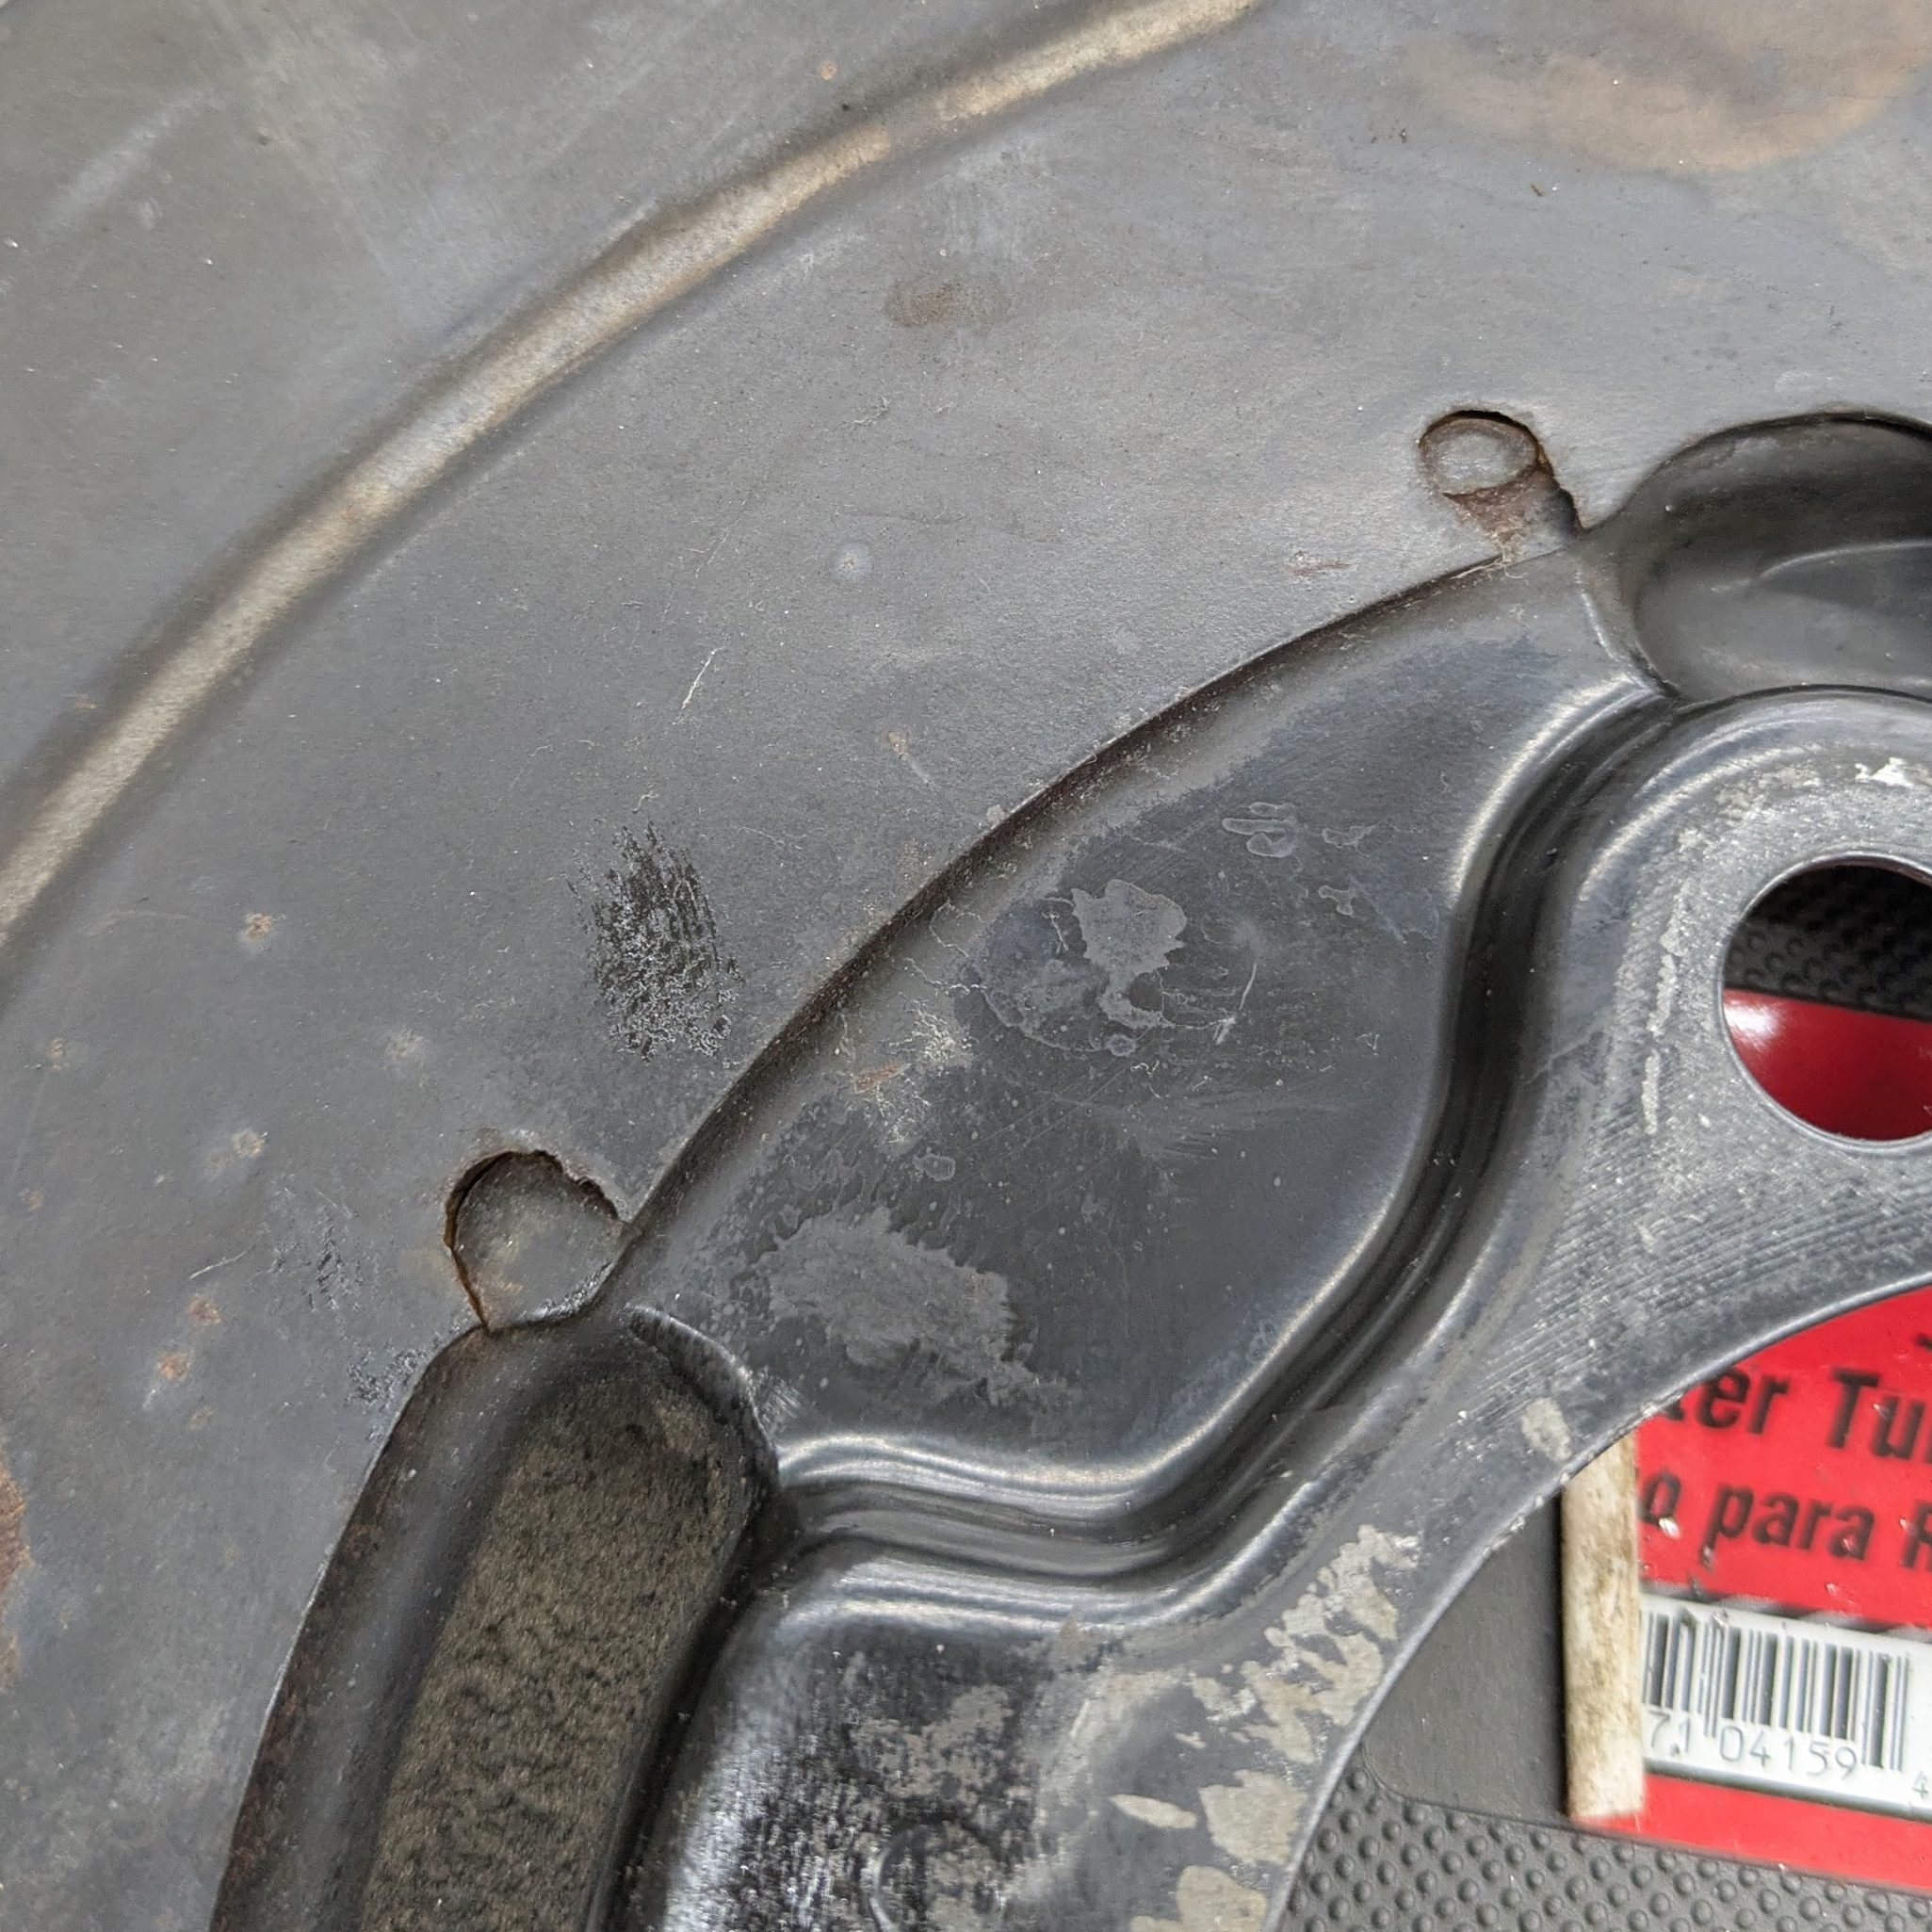
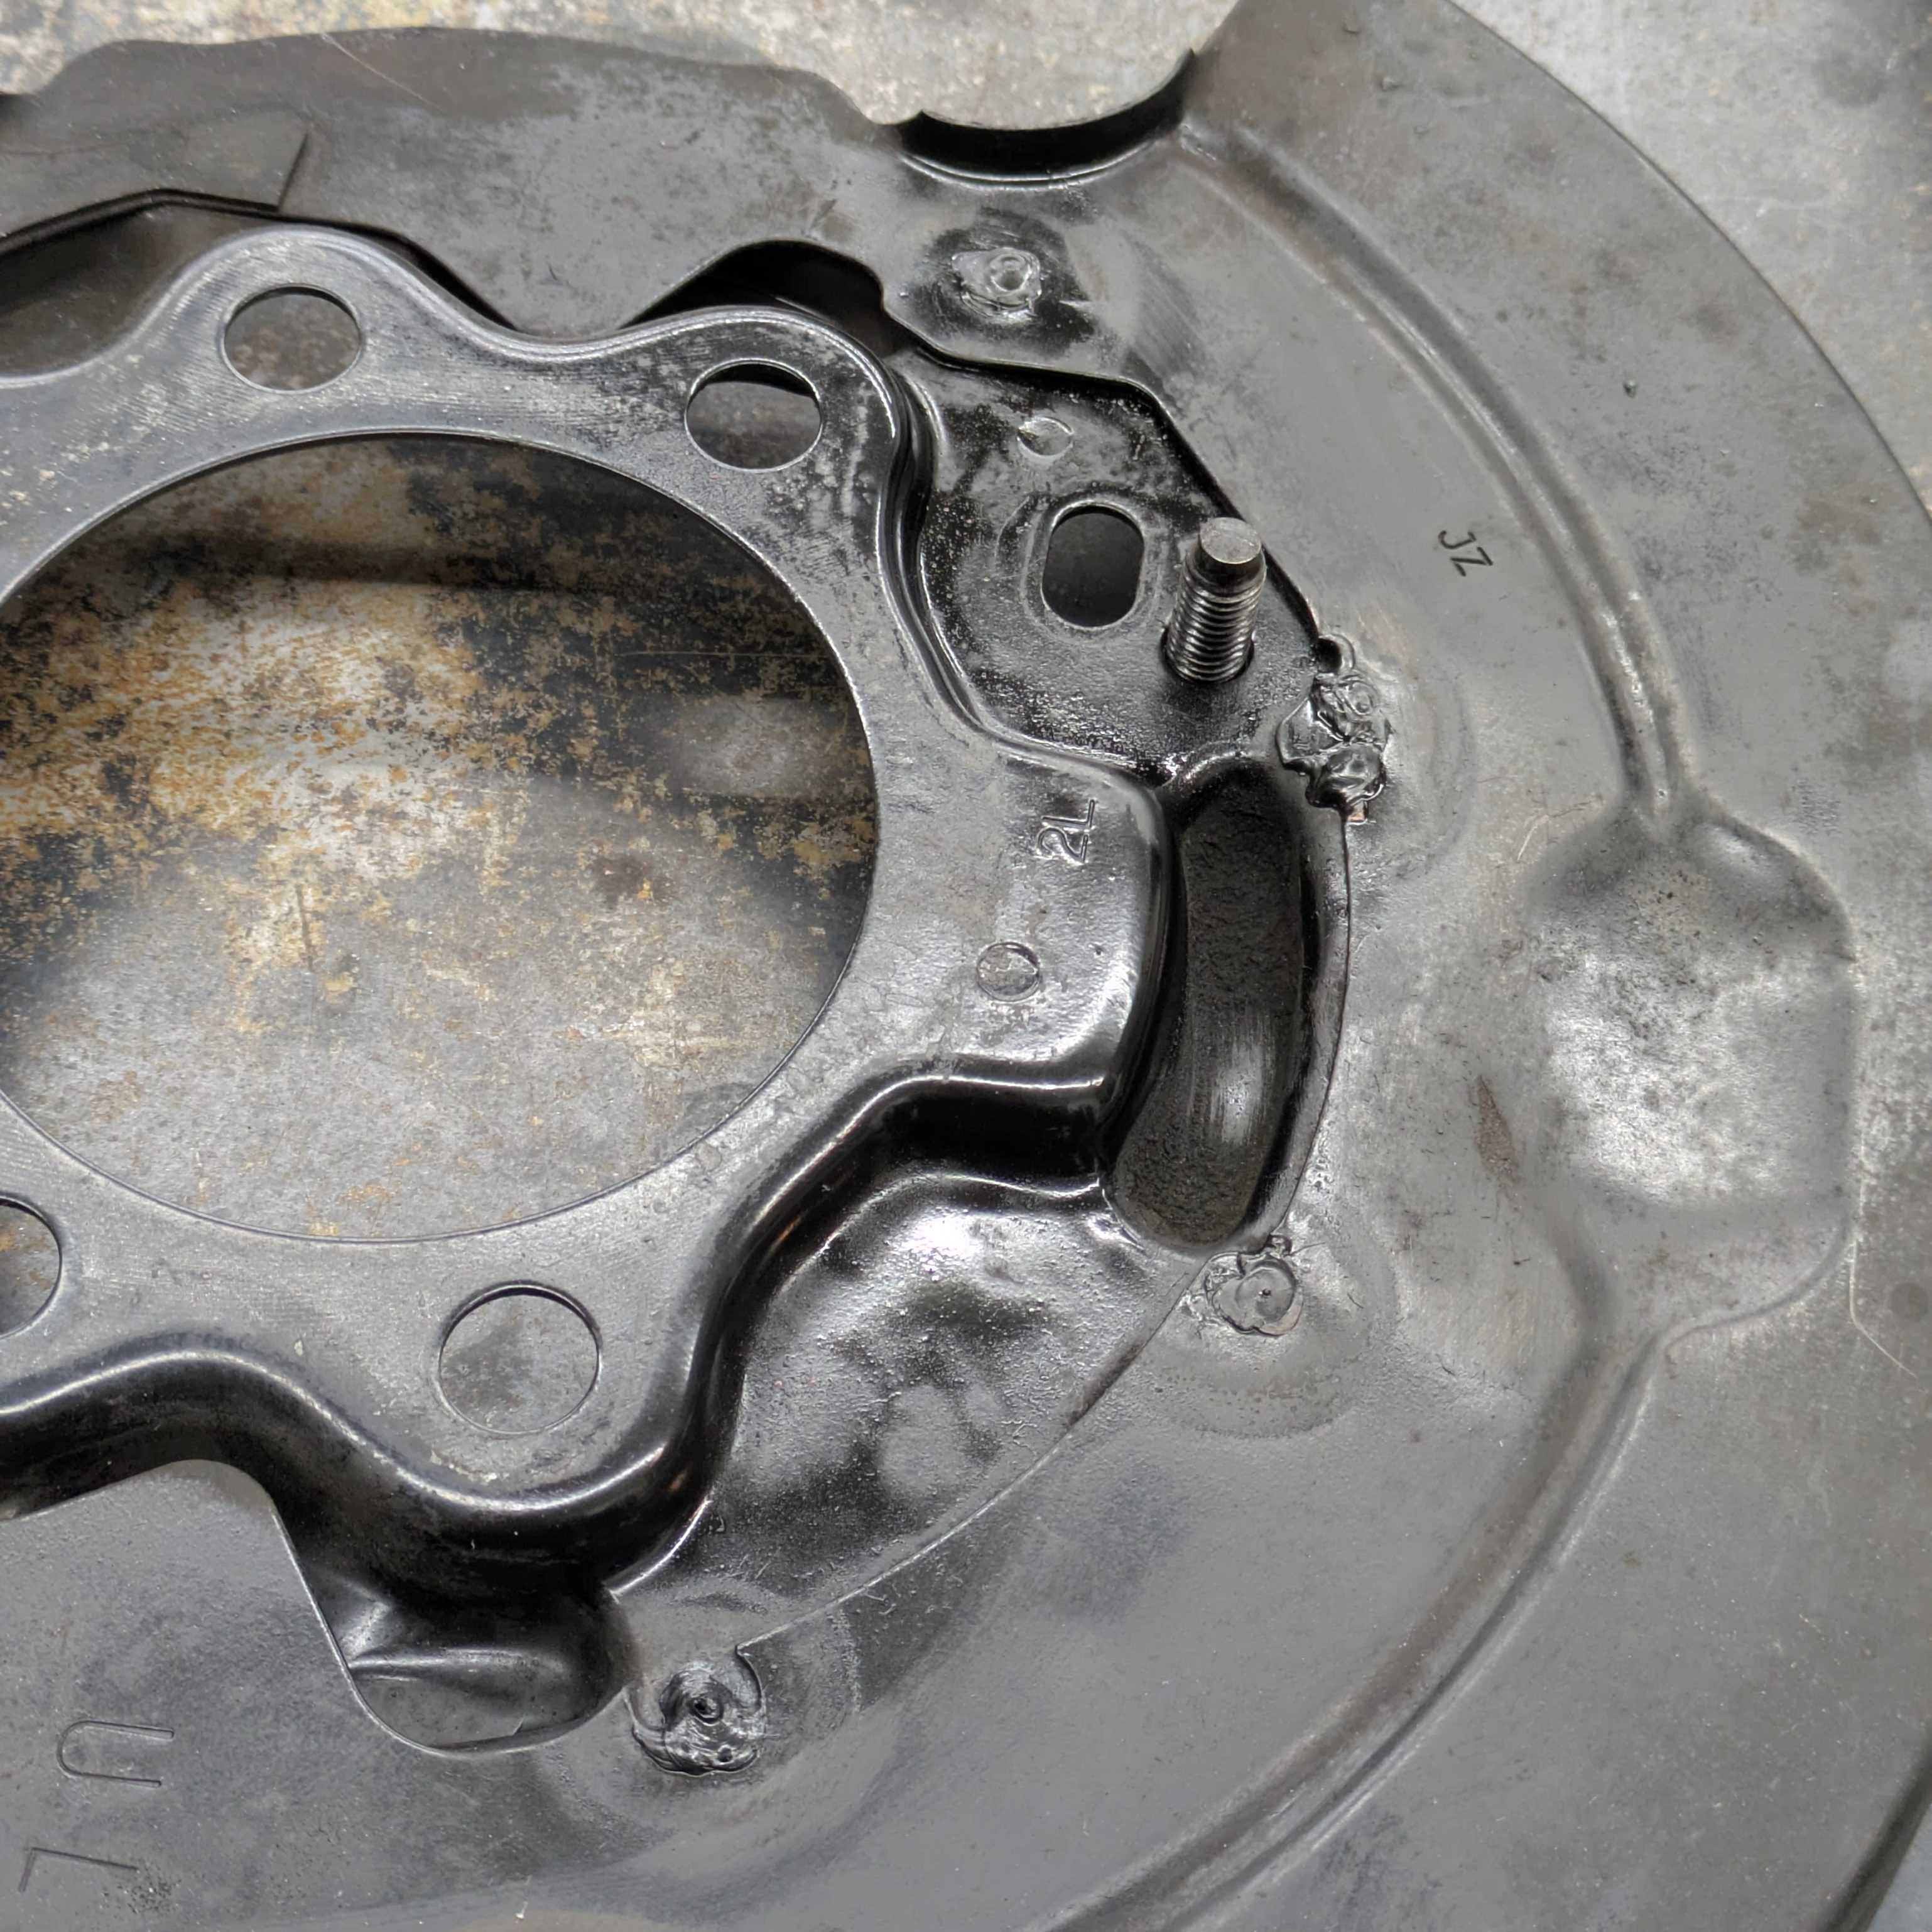
Unfortunately, once it was all together, an issue I should have addressed at the start when I noticed it made itself known and undeniable. The drivers side E-brake backing plate had multiple failed spot welds that were causing the backing plate and dust shield to move independently of one another. I poked it to check and sure enough, it was definitely going to rattle. I begrudgingly pulled it all back apart, had Ethan weld it, painted the spot welds, then put it all back together. While a low time/effort/financial investment, I should have just done it earlier.
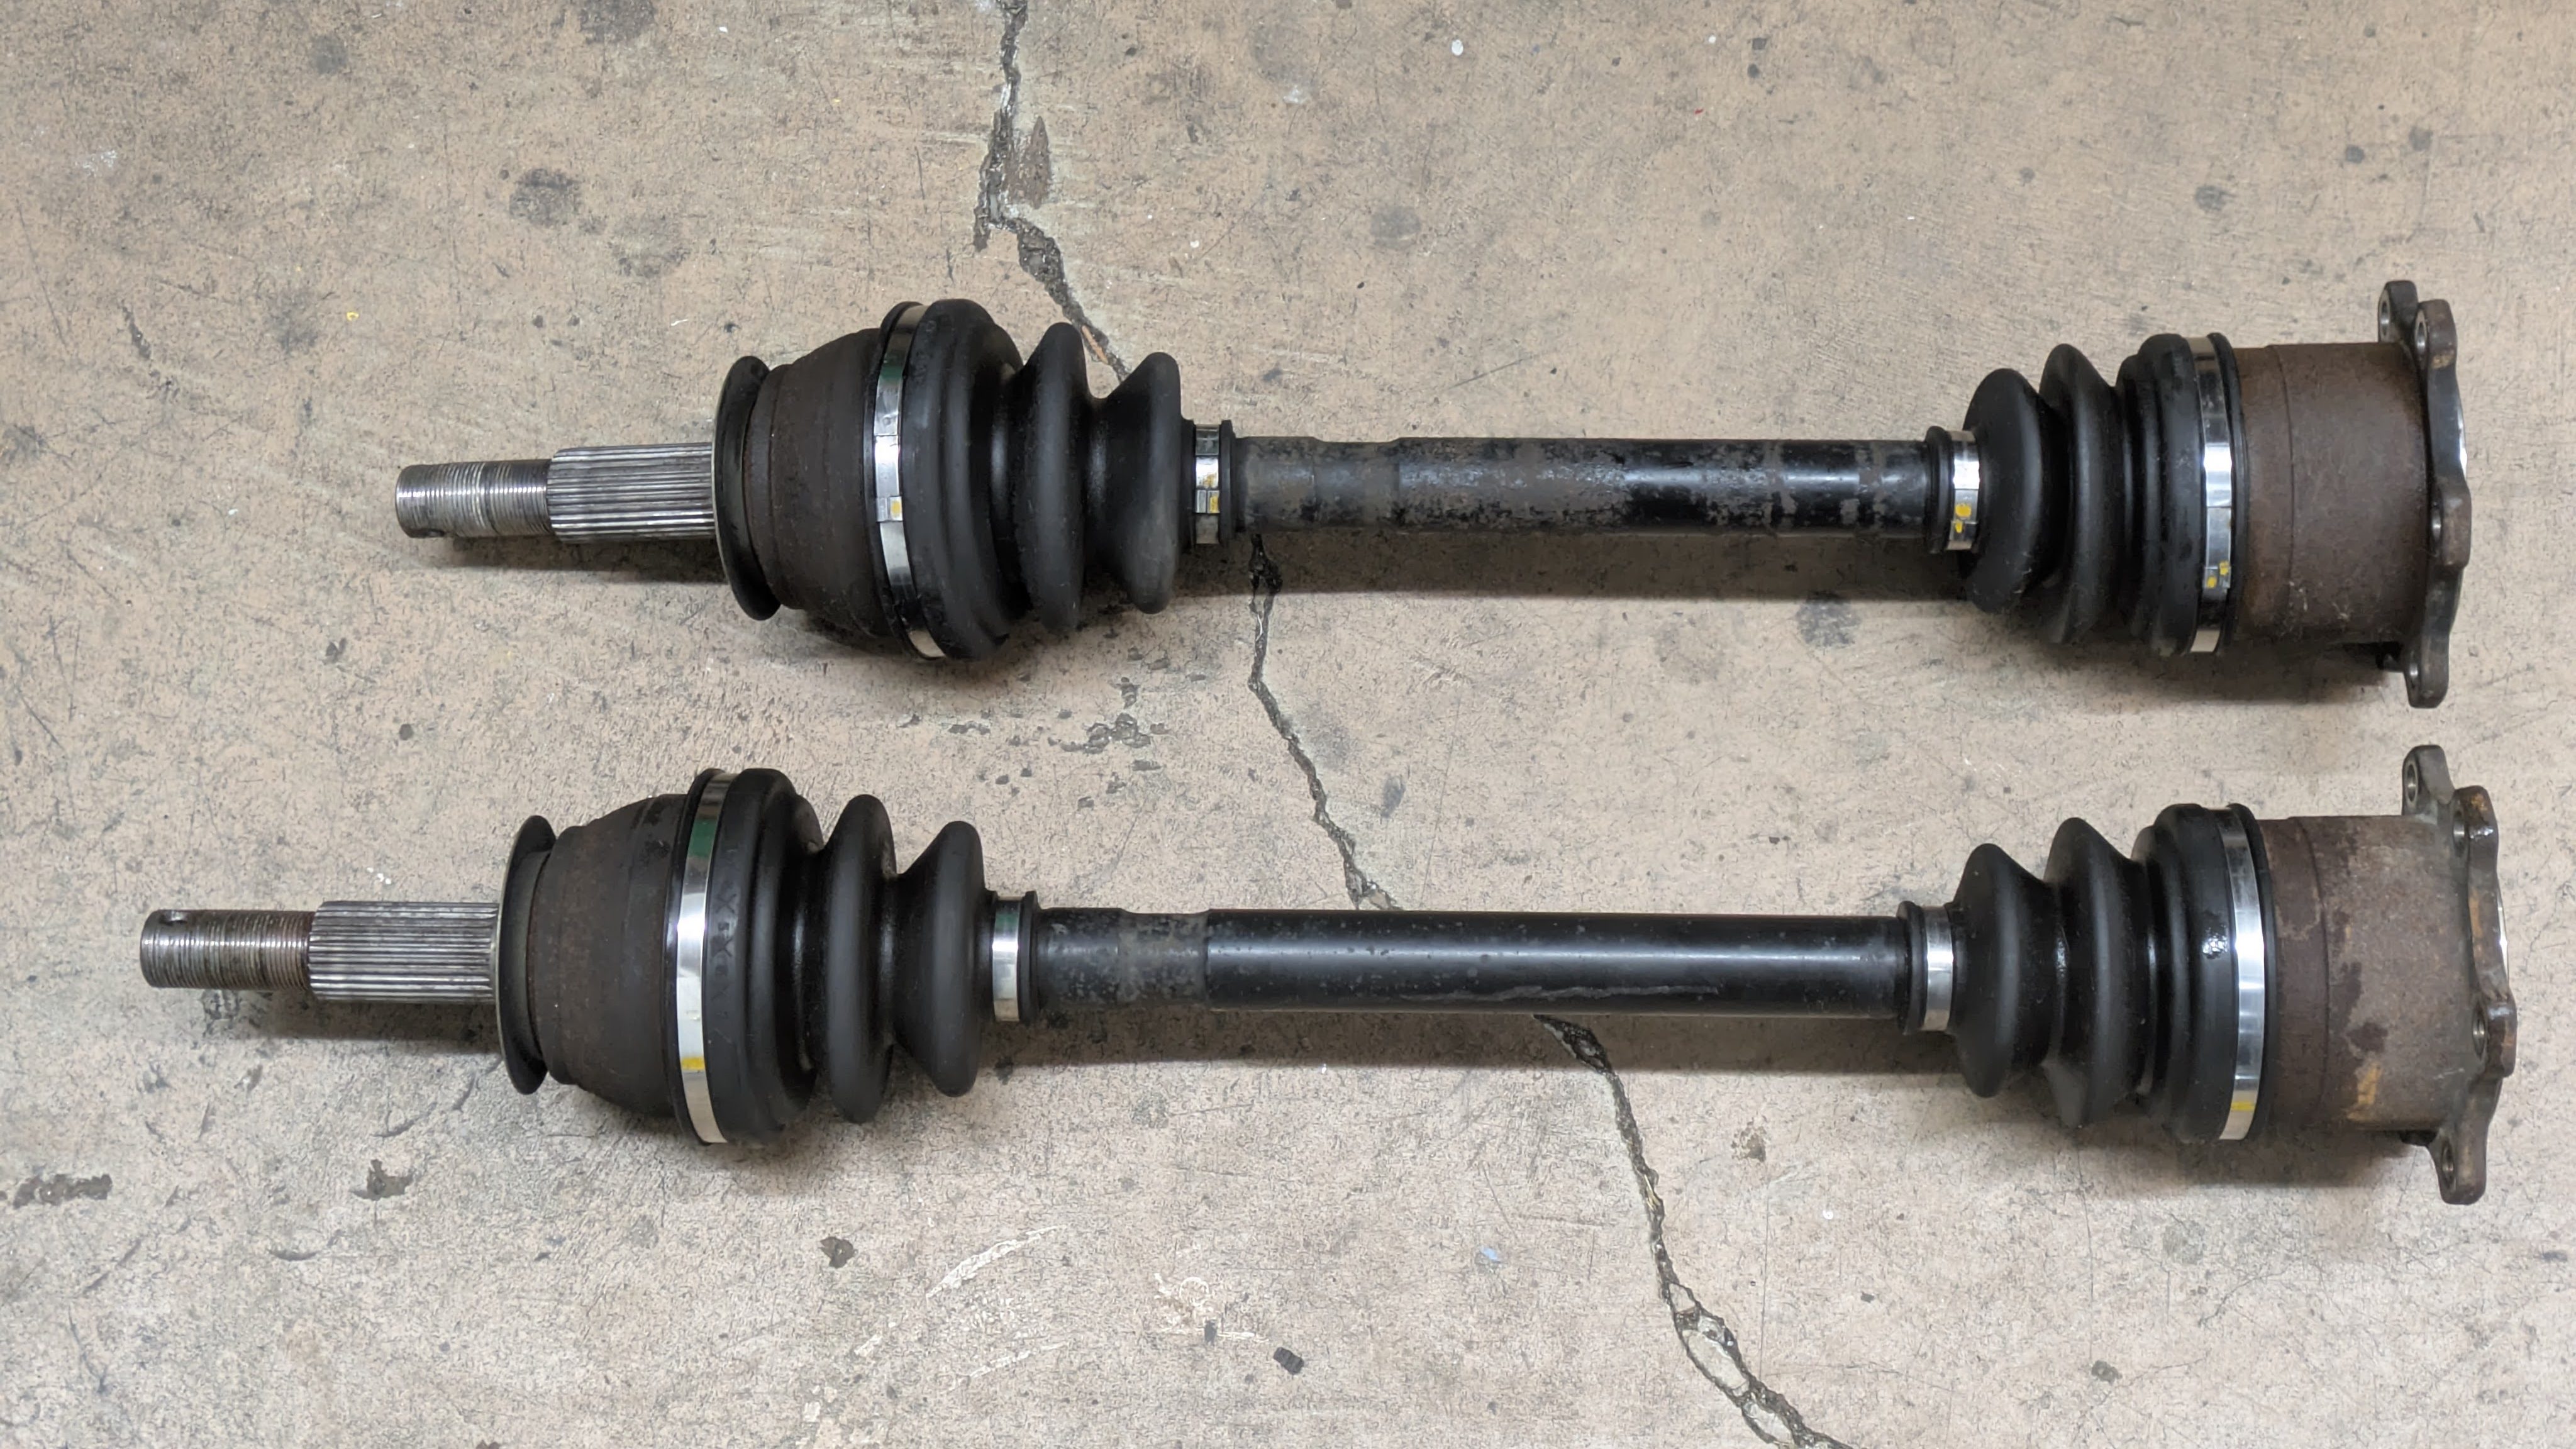
It was about this time that I threw the axles in. This was the last thing I needed to do before the car hit the ground as I didn’t want to destroy my brand new wheel bearings. I have extensively talked about this in the past post “More Roots Than Trees” about my debacles getting this car Z33 converted (out of necessity not choice). These are nothing special OEM Z33 axles off Marketplace, but they cleaned up nice and fit as intended, so I can’t complain. The factory Z33 bolts are too short, so they were replaced with some 10.9 flange head, shanked bolts and Nyloc nuts.
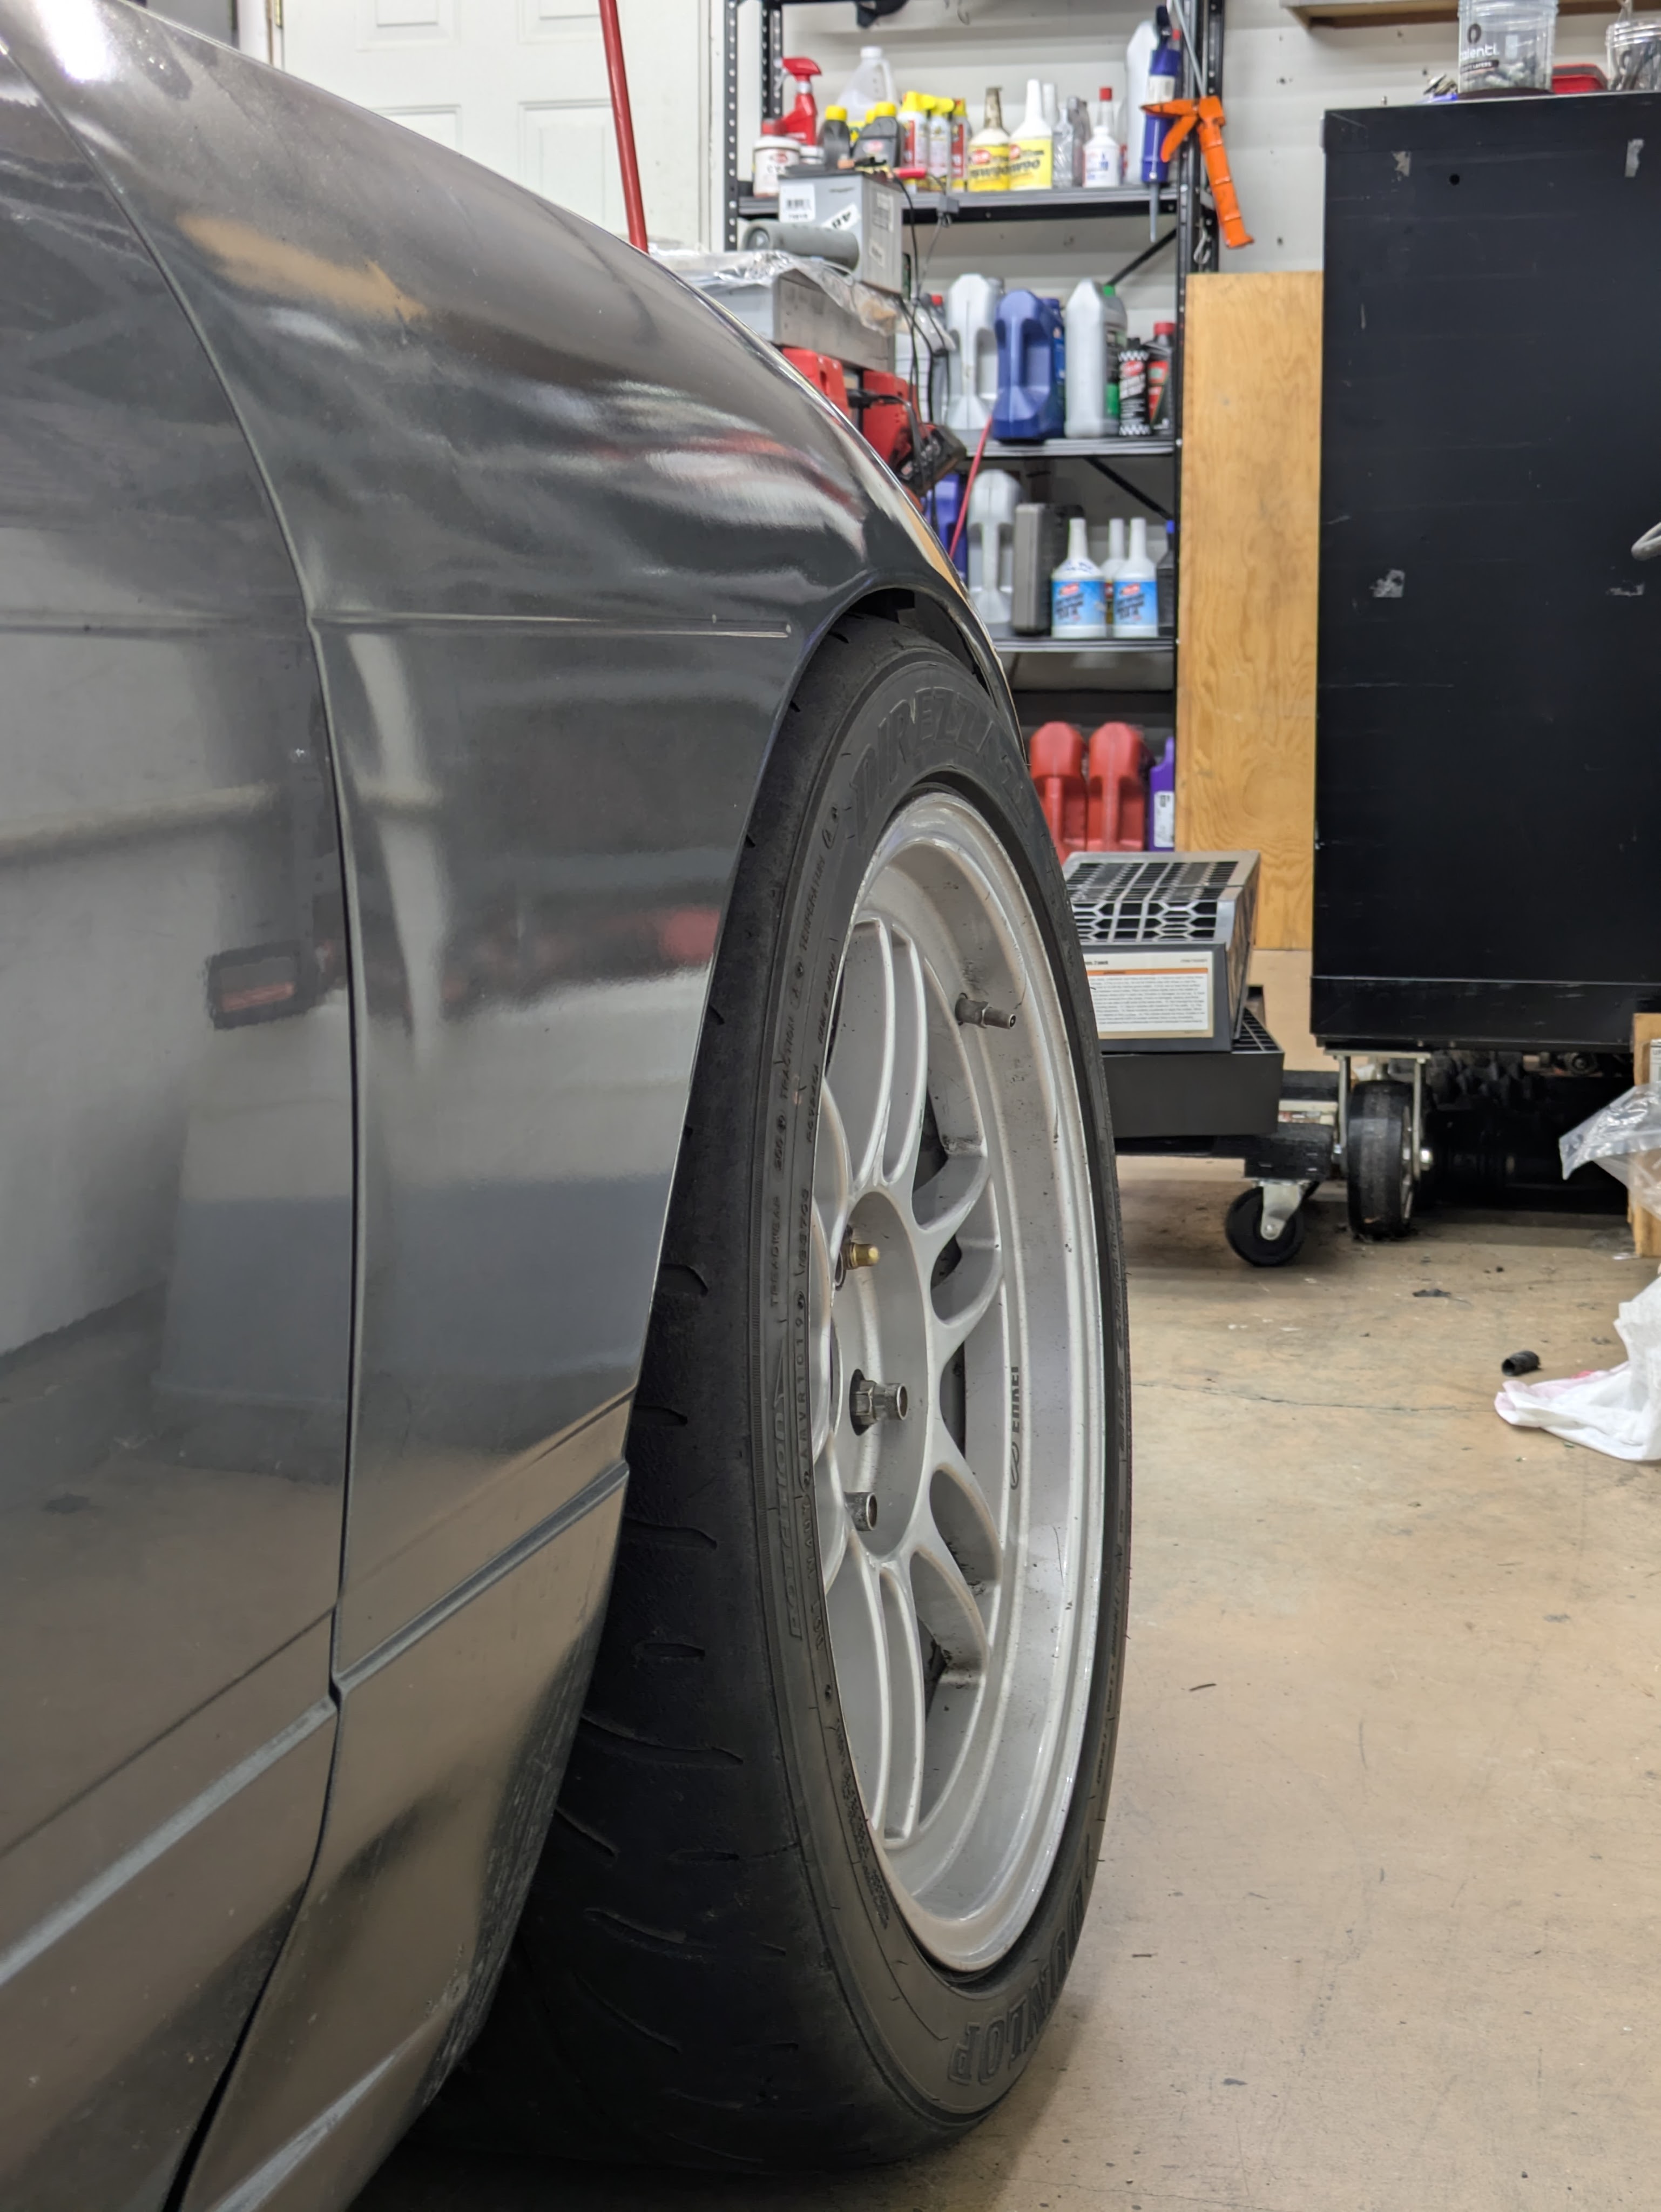
Before the car could hit the ground, I needed to resolve the final clearance issue. During the shock setup, I made the decision to cut back the front wheel spacer to the minimum viable amount to give me more outboard clearance.
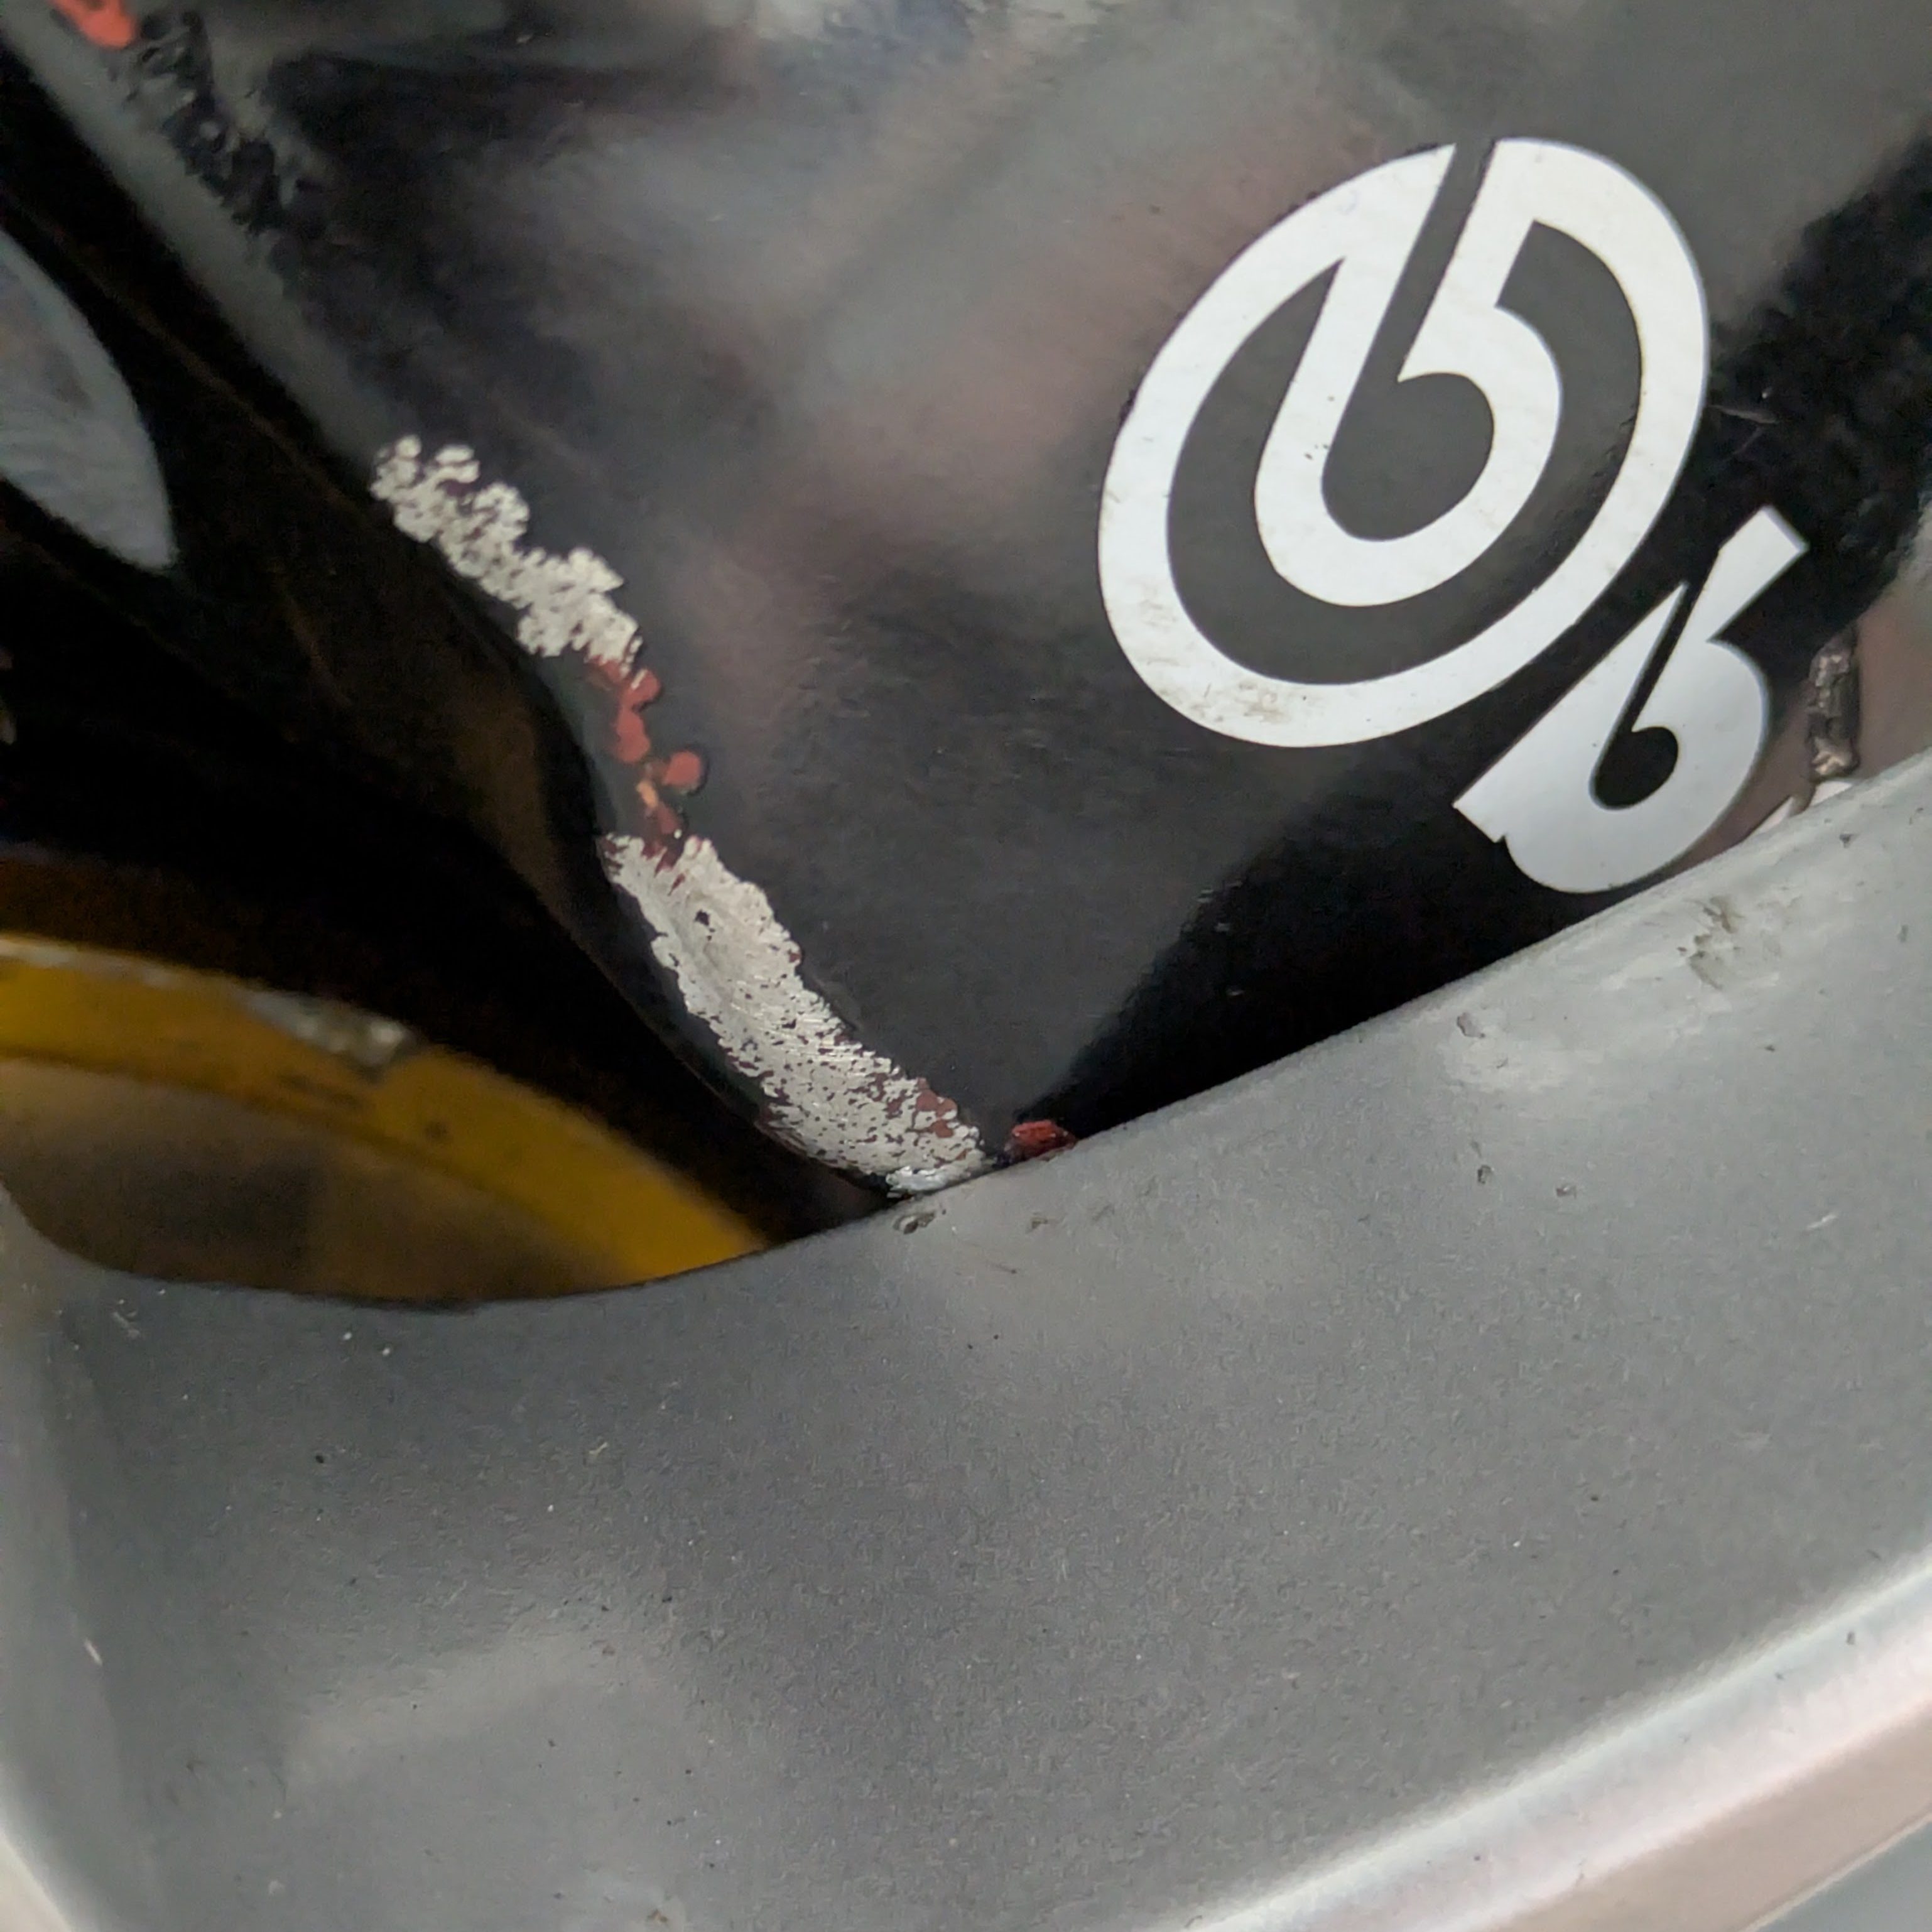
This was made increasingly difficult by my selection of wheels. RPF1s have never been generous in caliper clearance, but it is the only wheel that is available new, that was around in the early 2000s (for era correct-ness), that is light and strong enough to track. The car looks great on them, so it was only right that I figure out how to run them. All my other wheels for this car have tons of caliper clearance, so this is the only set that I have to be concerned about.
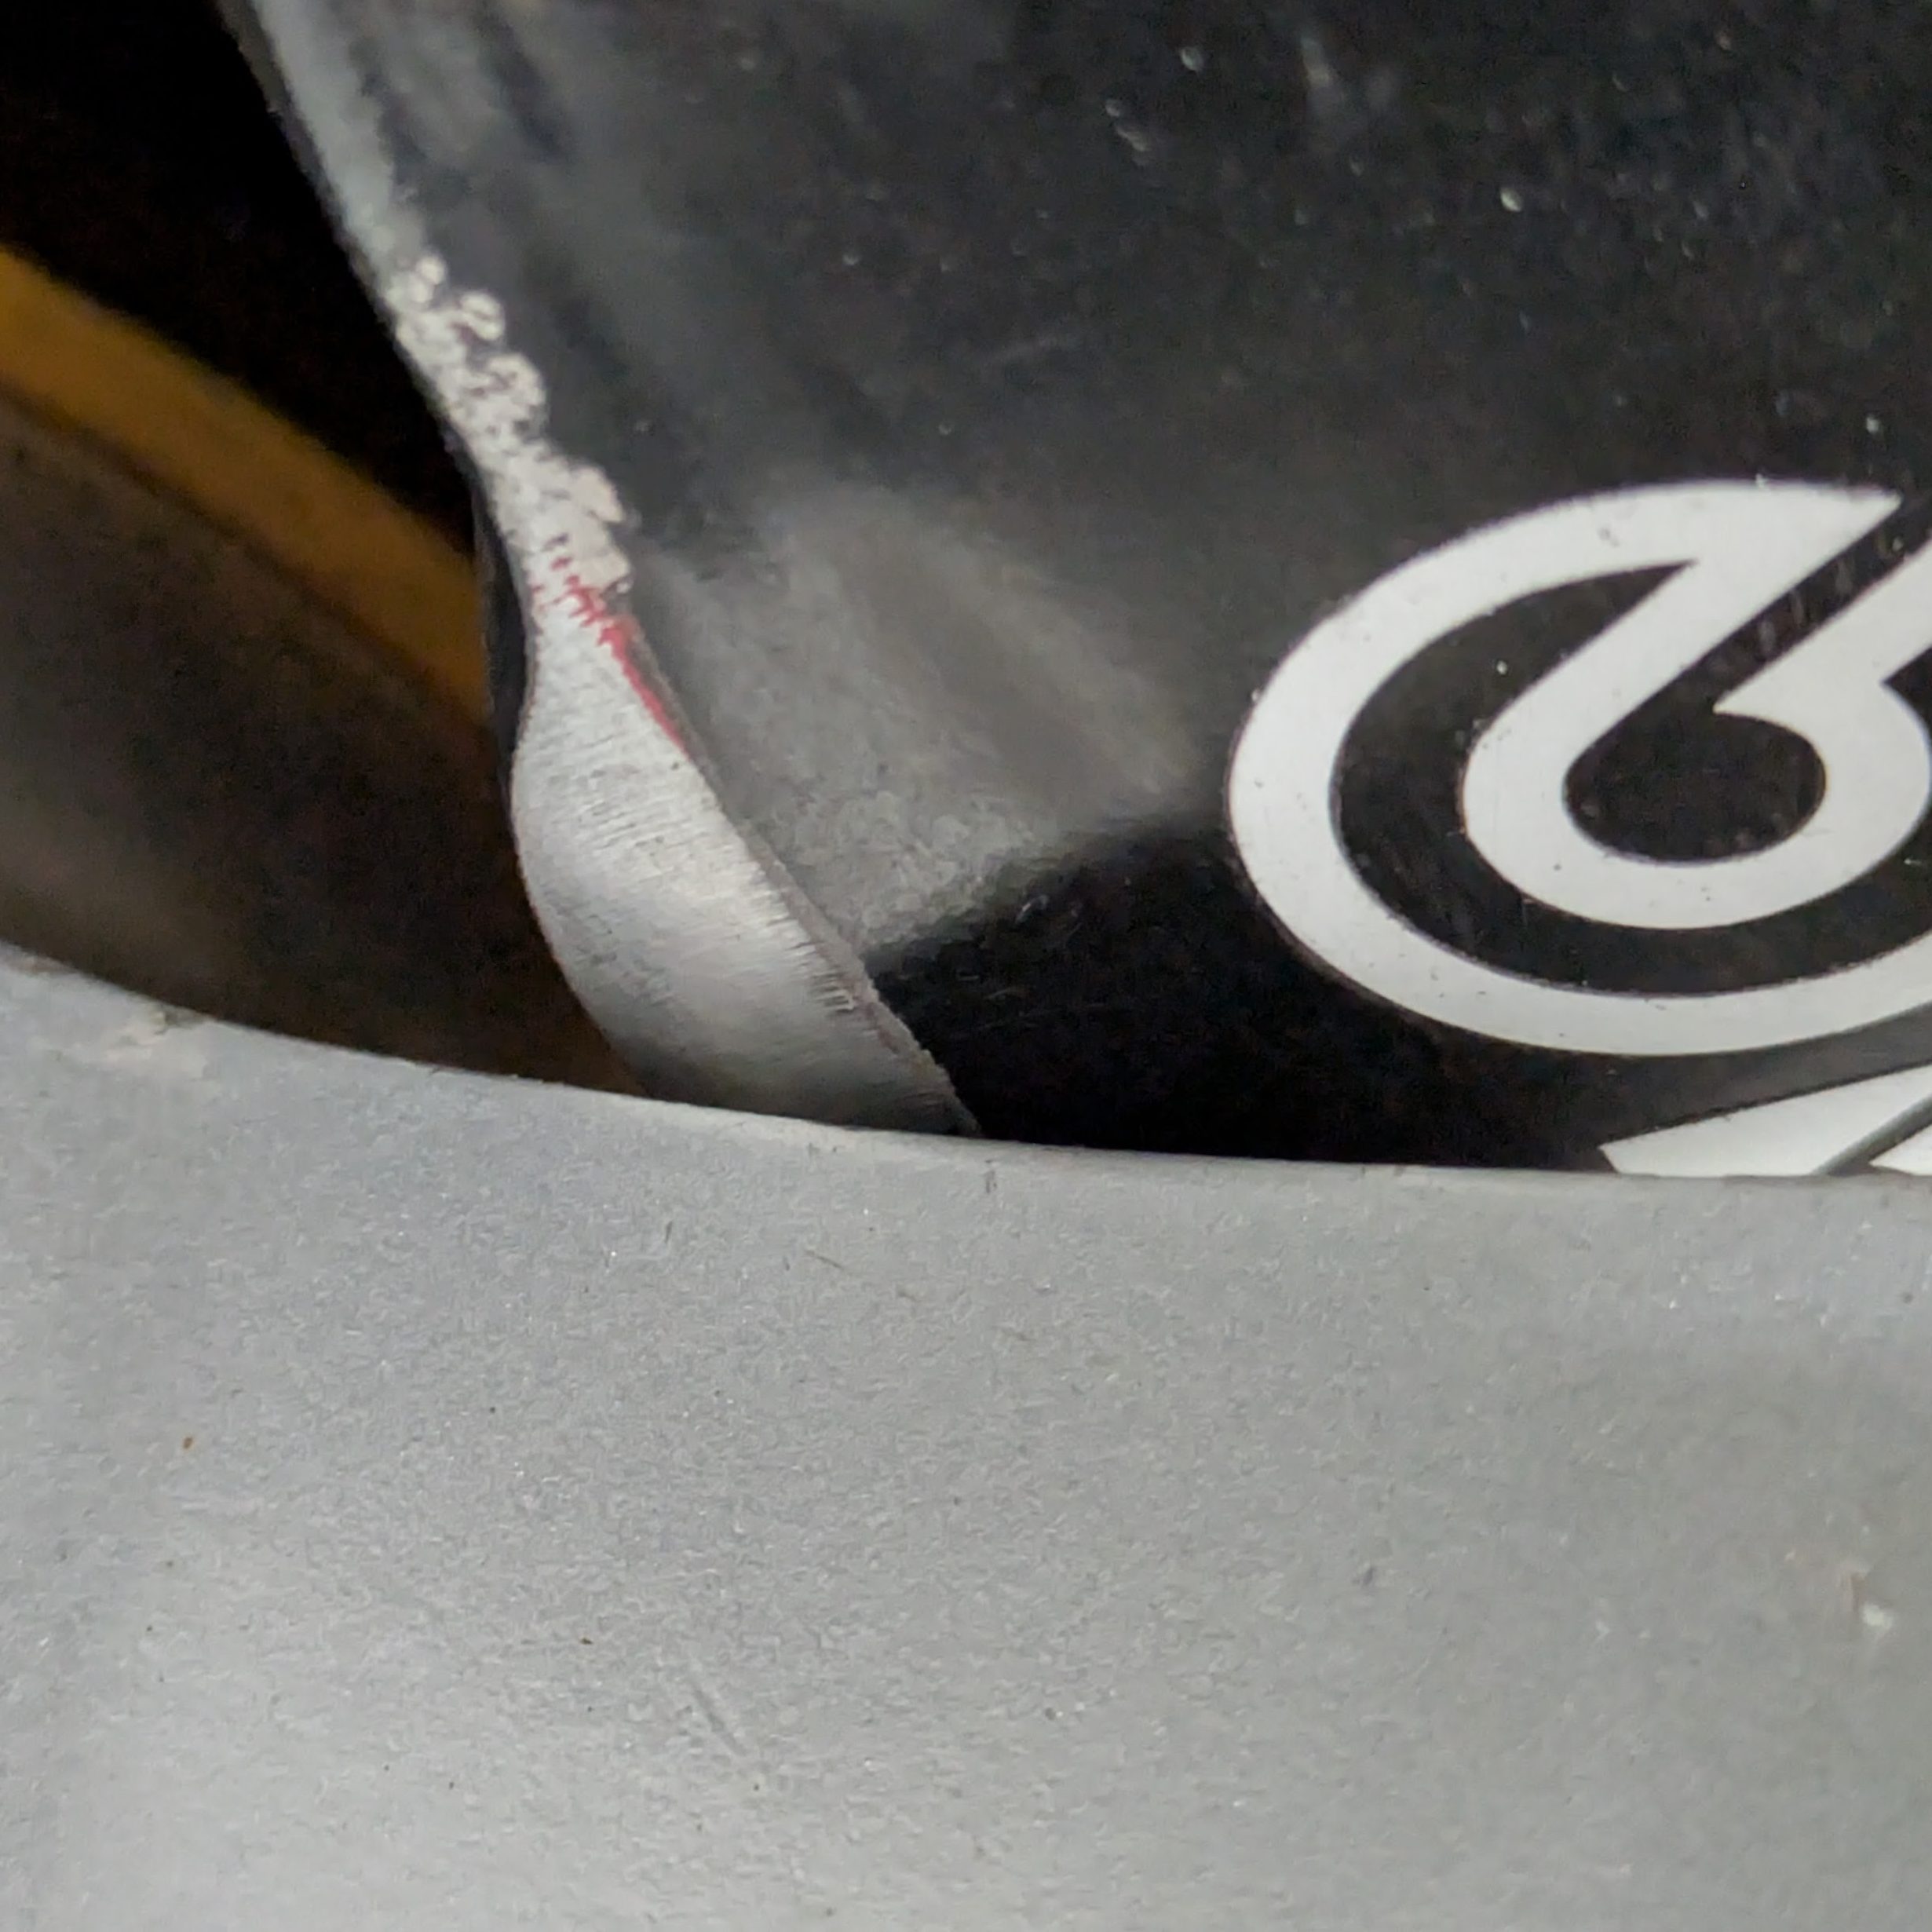
I elected to shave the calipers a few millimeters. These Evo 9 Brembo calipers (known more generically as F40s) have enough thickness in this region to accommodate for it, so the clearance was made. Again, I’ll refinish the front and rear calipers in the offseason.
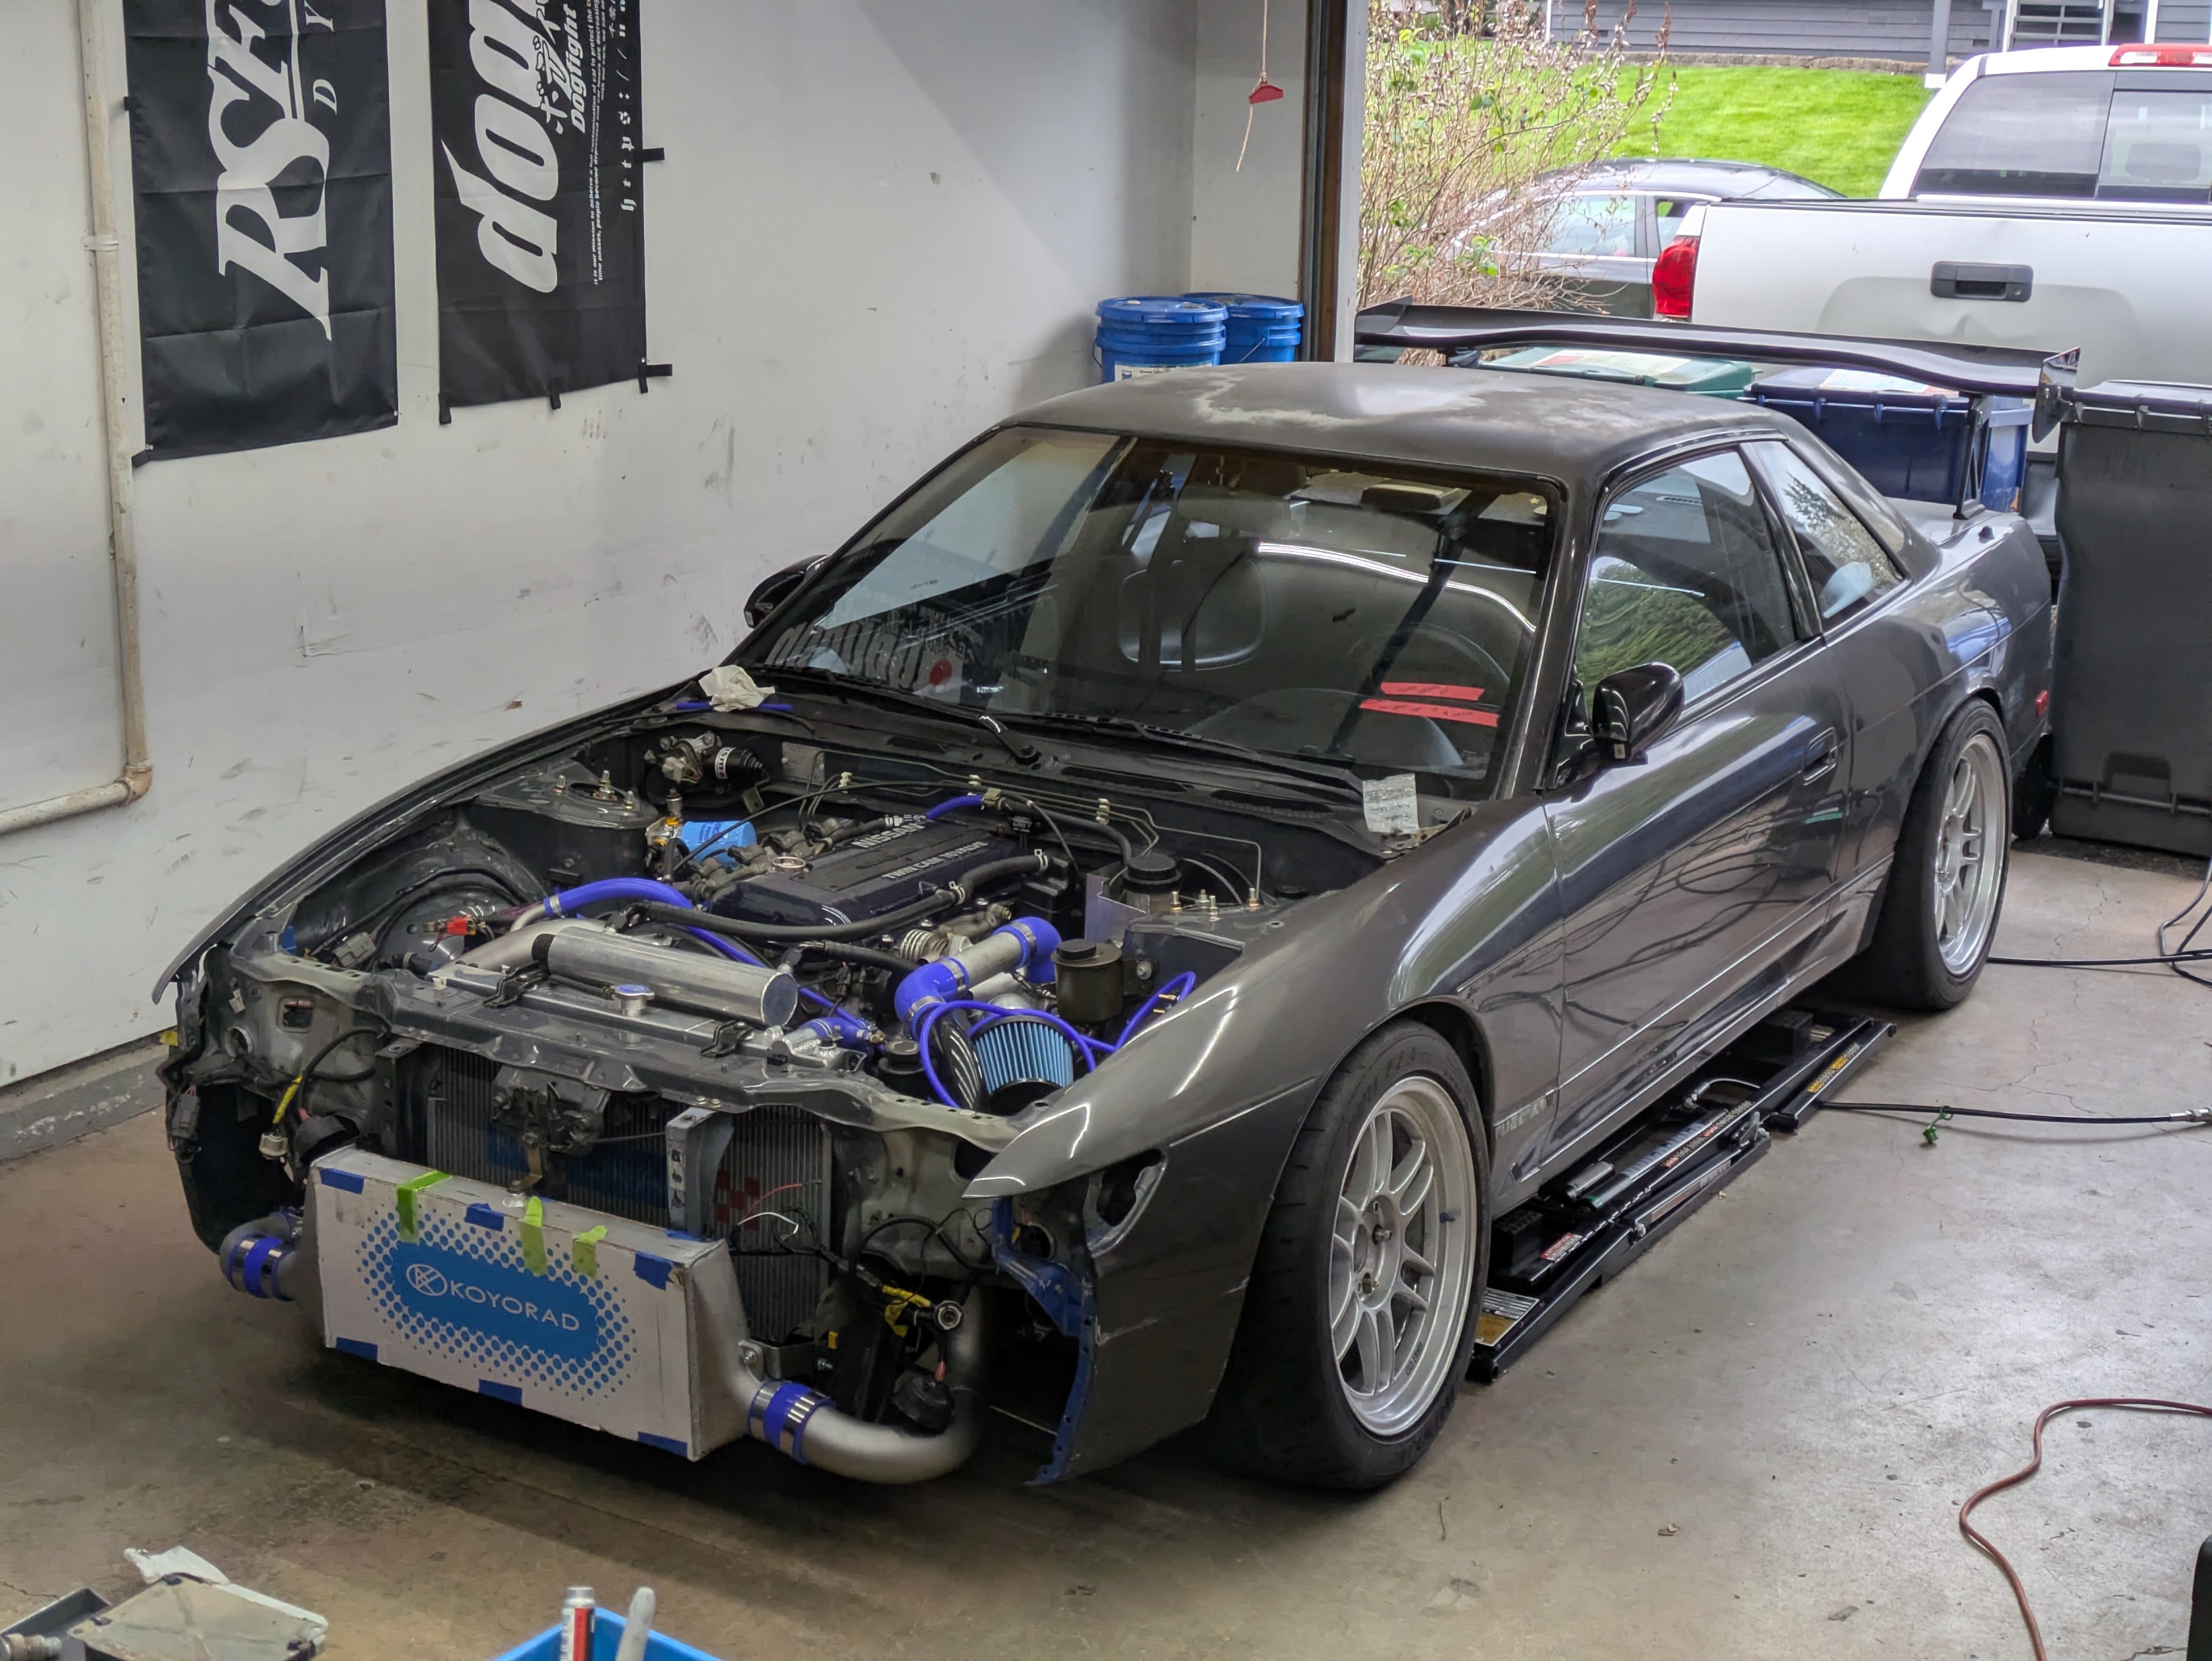
Seeing a car hit the ground after 19 weeks unable to support it’s own weight was a trip. I always forget how low the car is when I’ve spent so much time looking at it 24″ off the ground. I spent a while on the ride height, settling on what I figured would be low enough for my own taste but still functional in terms of usability over bumps as well as shock travel. It changed a bit during corner balance, but that’s for later.
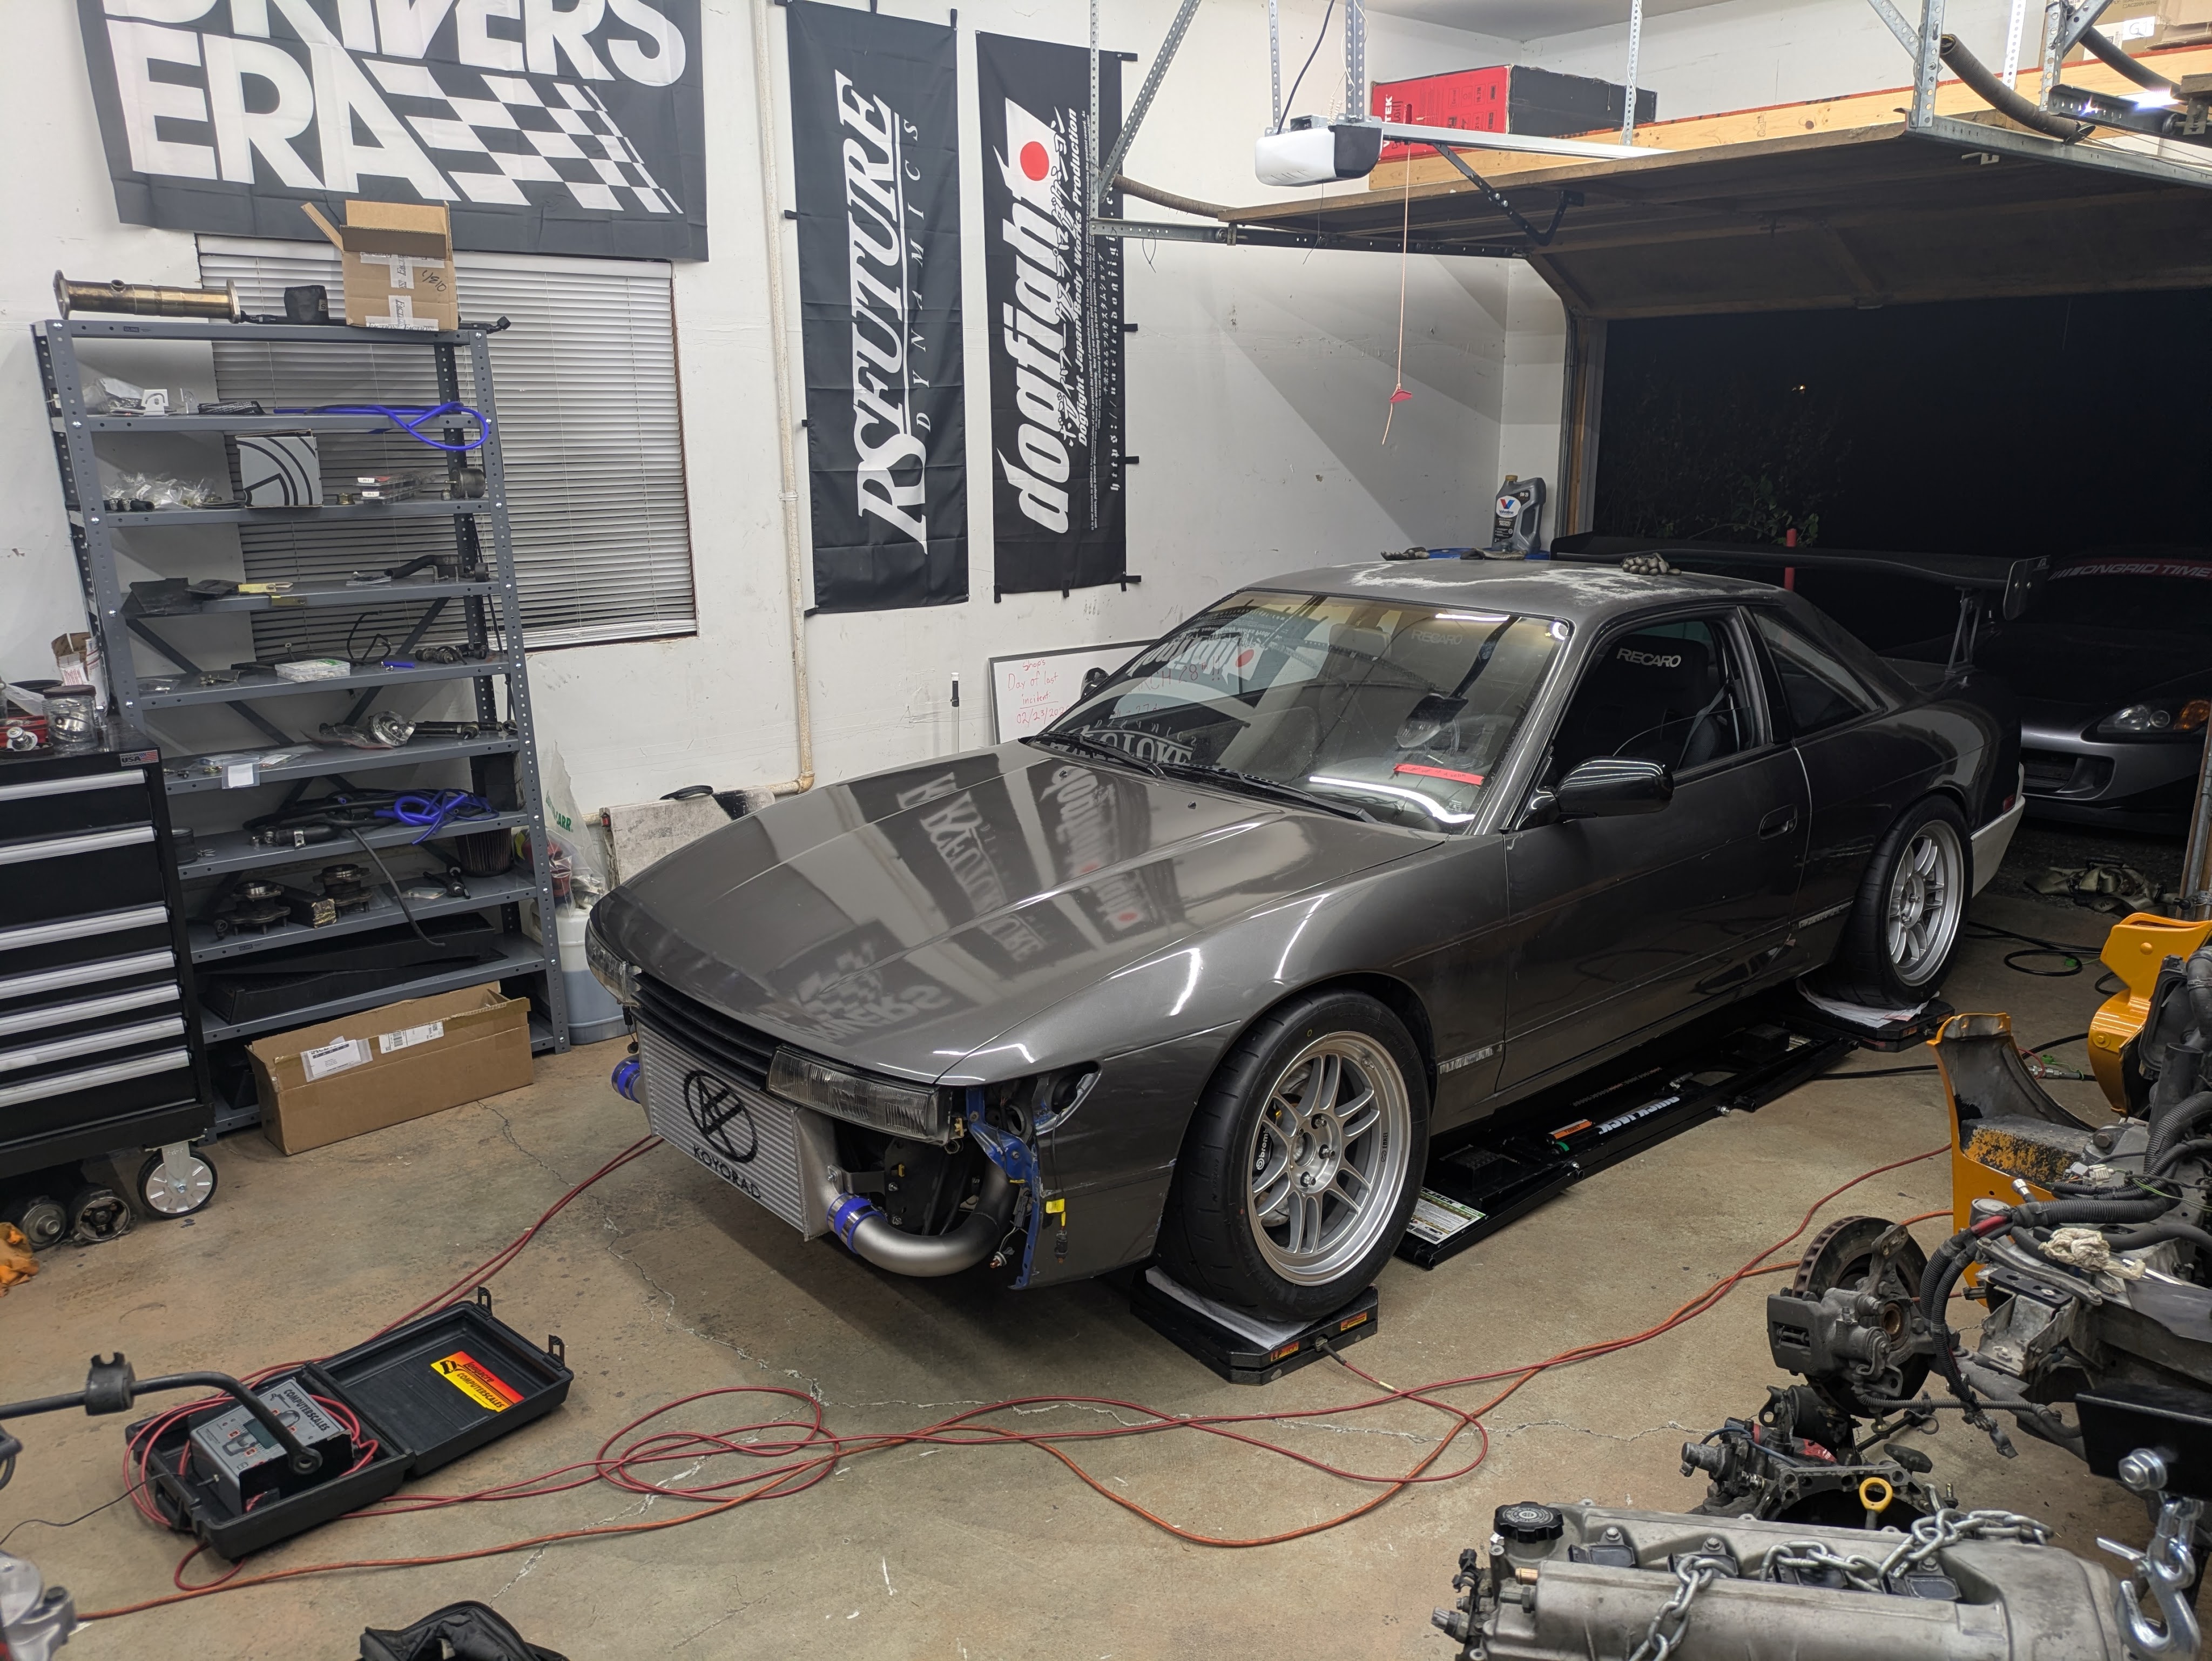
The last part of suspension setup that I could do at home was corner balancing. I have been fortunate enough to own my own scales for a while, and they have been an invaluable tool for proper car setup on my own cars as well as my friend’s. It’s also just cool to know what cars weigh to talk shit to your friends. This car in the as-weighed configuration (no front bumper, crash bar, or side skirts) weighed 2580lbs at just over a half tank of fuel.
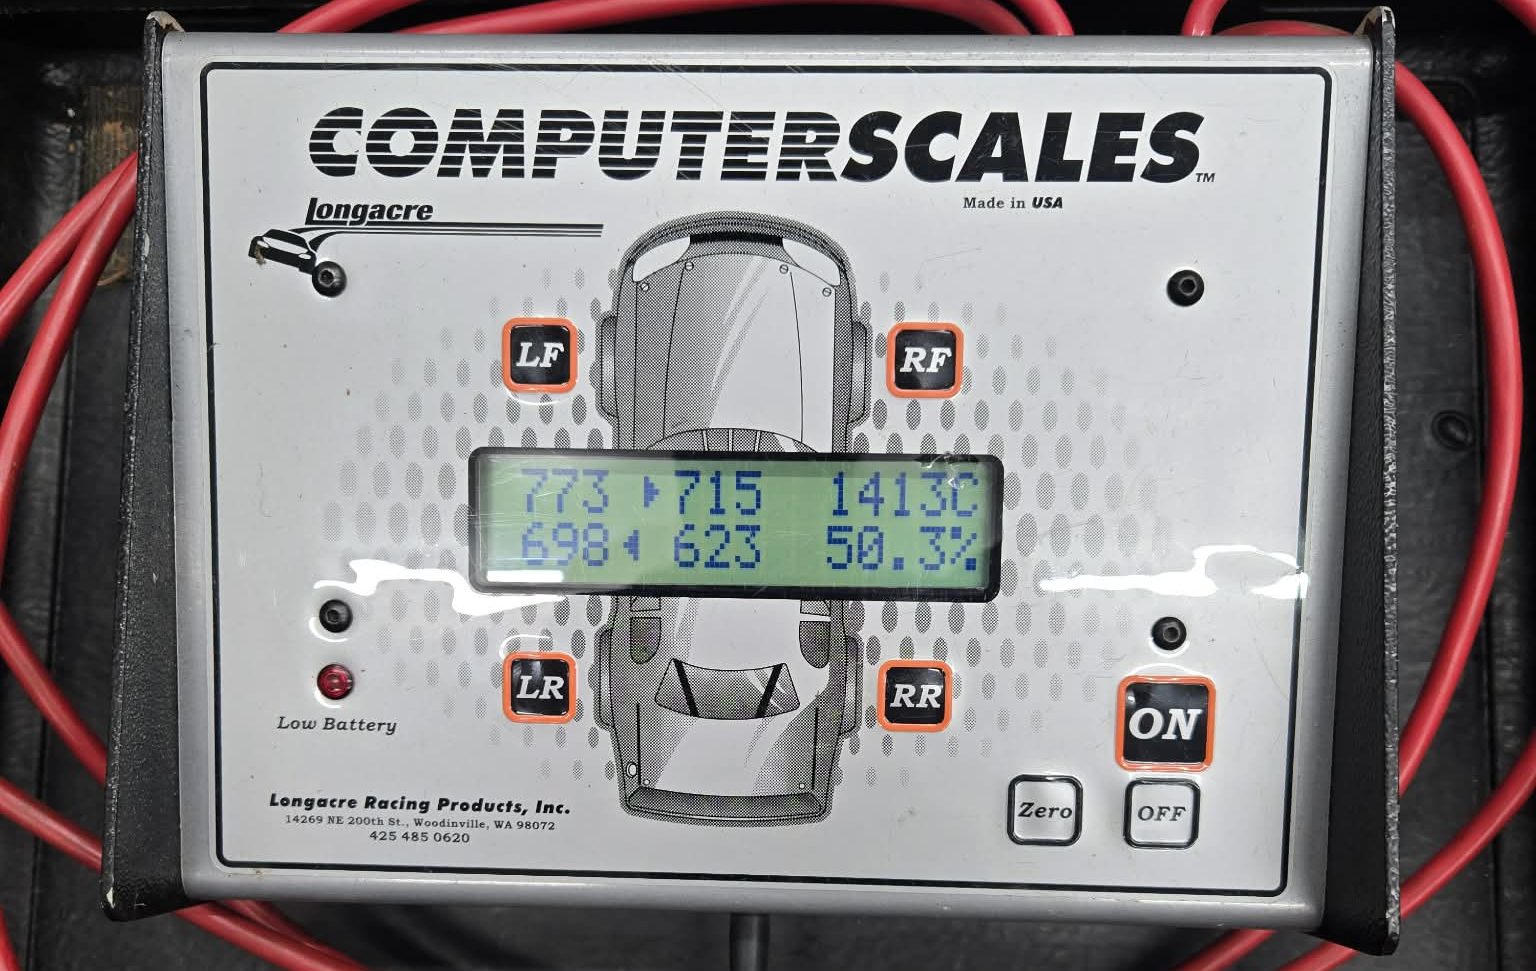
This car started off with a 7% cross-weight discrepancy, which is significant given the dynamic environment of a track car. Certainly enough to cause inconsistent handling behavior side-to-side. With an evening spent cranking collars, Will and I were able to get the car to a 0.3% difference with me in the car. Sure, you can chase it more, but at some point it’ll be good enough for who it’s for. With that completed, the only suspension work left is a final alignment and bolt check. All very manageable considering what tasks have lied before it.
While not as triumphant as the last article where I basically built my own coilovers, it was a necessary batch of work, and one worth posting about for documentation’s sake. Getting the suspension situated with fitment, travel, corner balance, and the pending alignment was definitely a hearty chunk of why I took this car apart last winter, the list is continuing to dwindle in size as the weeks go on.
Until next time.
