
If you’ve ever spent any time around me, you may know that bench racing, and more specifically, bench building is possibly my favorite part of cars. The phrase “automotive wedding planner” fully resonates with me. I love the assemblies, parts, and techniques almost (key word: almost) as much as I like the driving.
One of the many reasons I am drawn to the S Chassis platform, and more broadly, 90s + 00s Japanese cars, is their near bottomless customization potential. This is not to say that there isn’t a reasonable/viable limit; Just like it’s easy to over-season a dish while cooking, you can over-modify a car if you let it get out of hand. While I find myself going hard in many categories, I try to stay away from that line. If you think in terms of Forza, don’t tune a car too far outside of it’s original class.
This was one of those times where I wanted it all, partially for the function, but honestly, to check all the boxes. I wanted fresh, I wanted new, I wanted sweat equity mods that make a difference, and boy did I get the first half of the last part. This was a mission, and a hell of a lot more pleasant to sit here and write about than actually do.
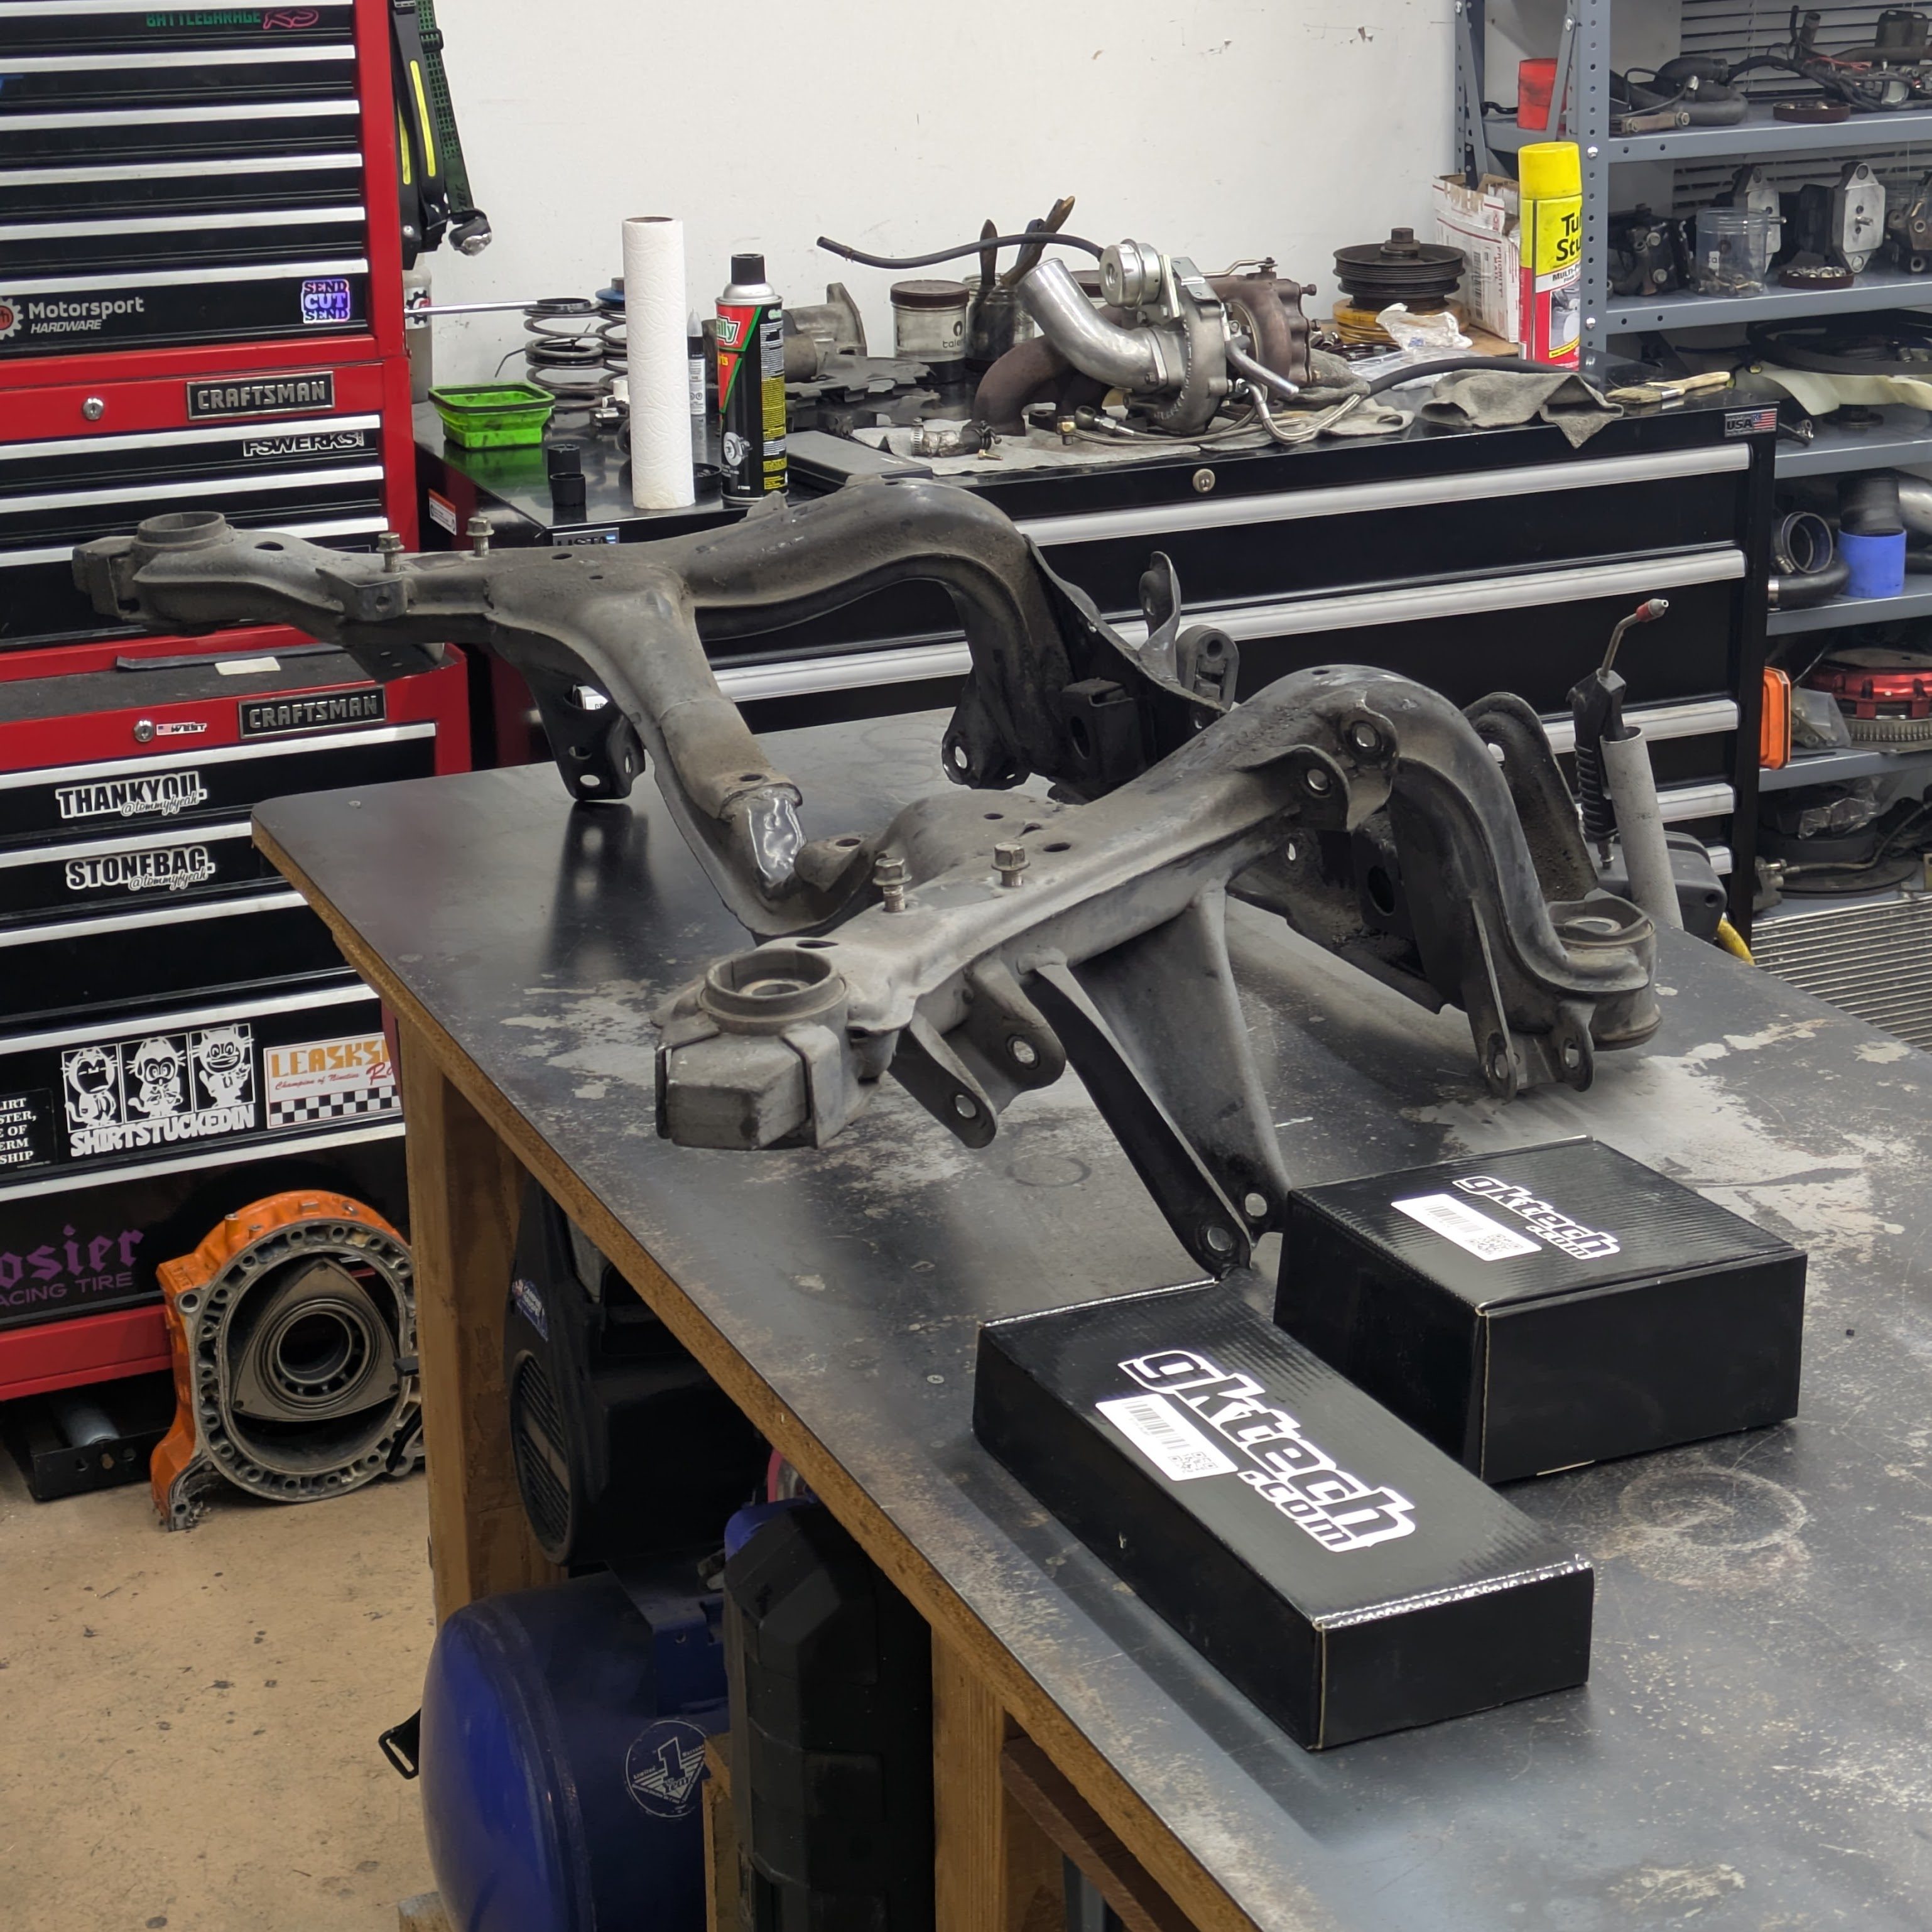
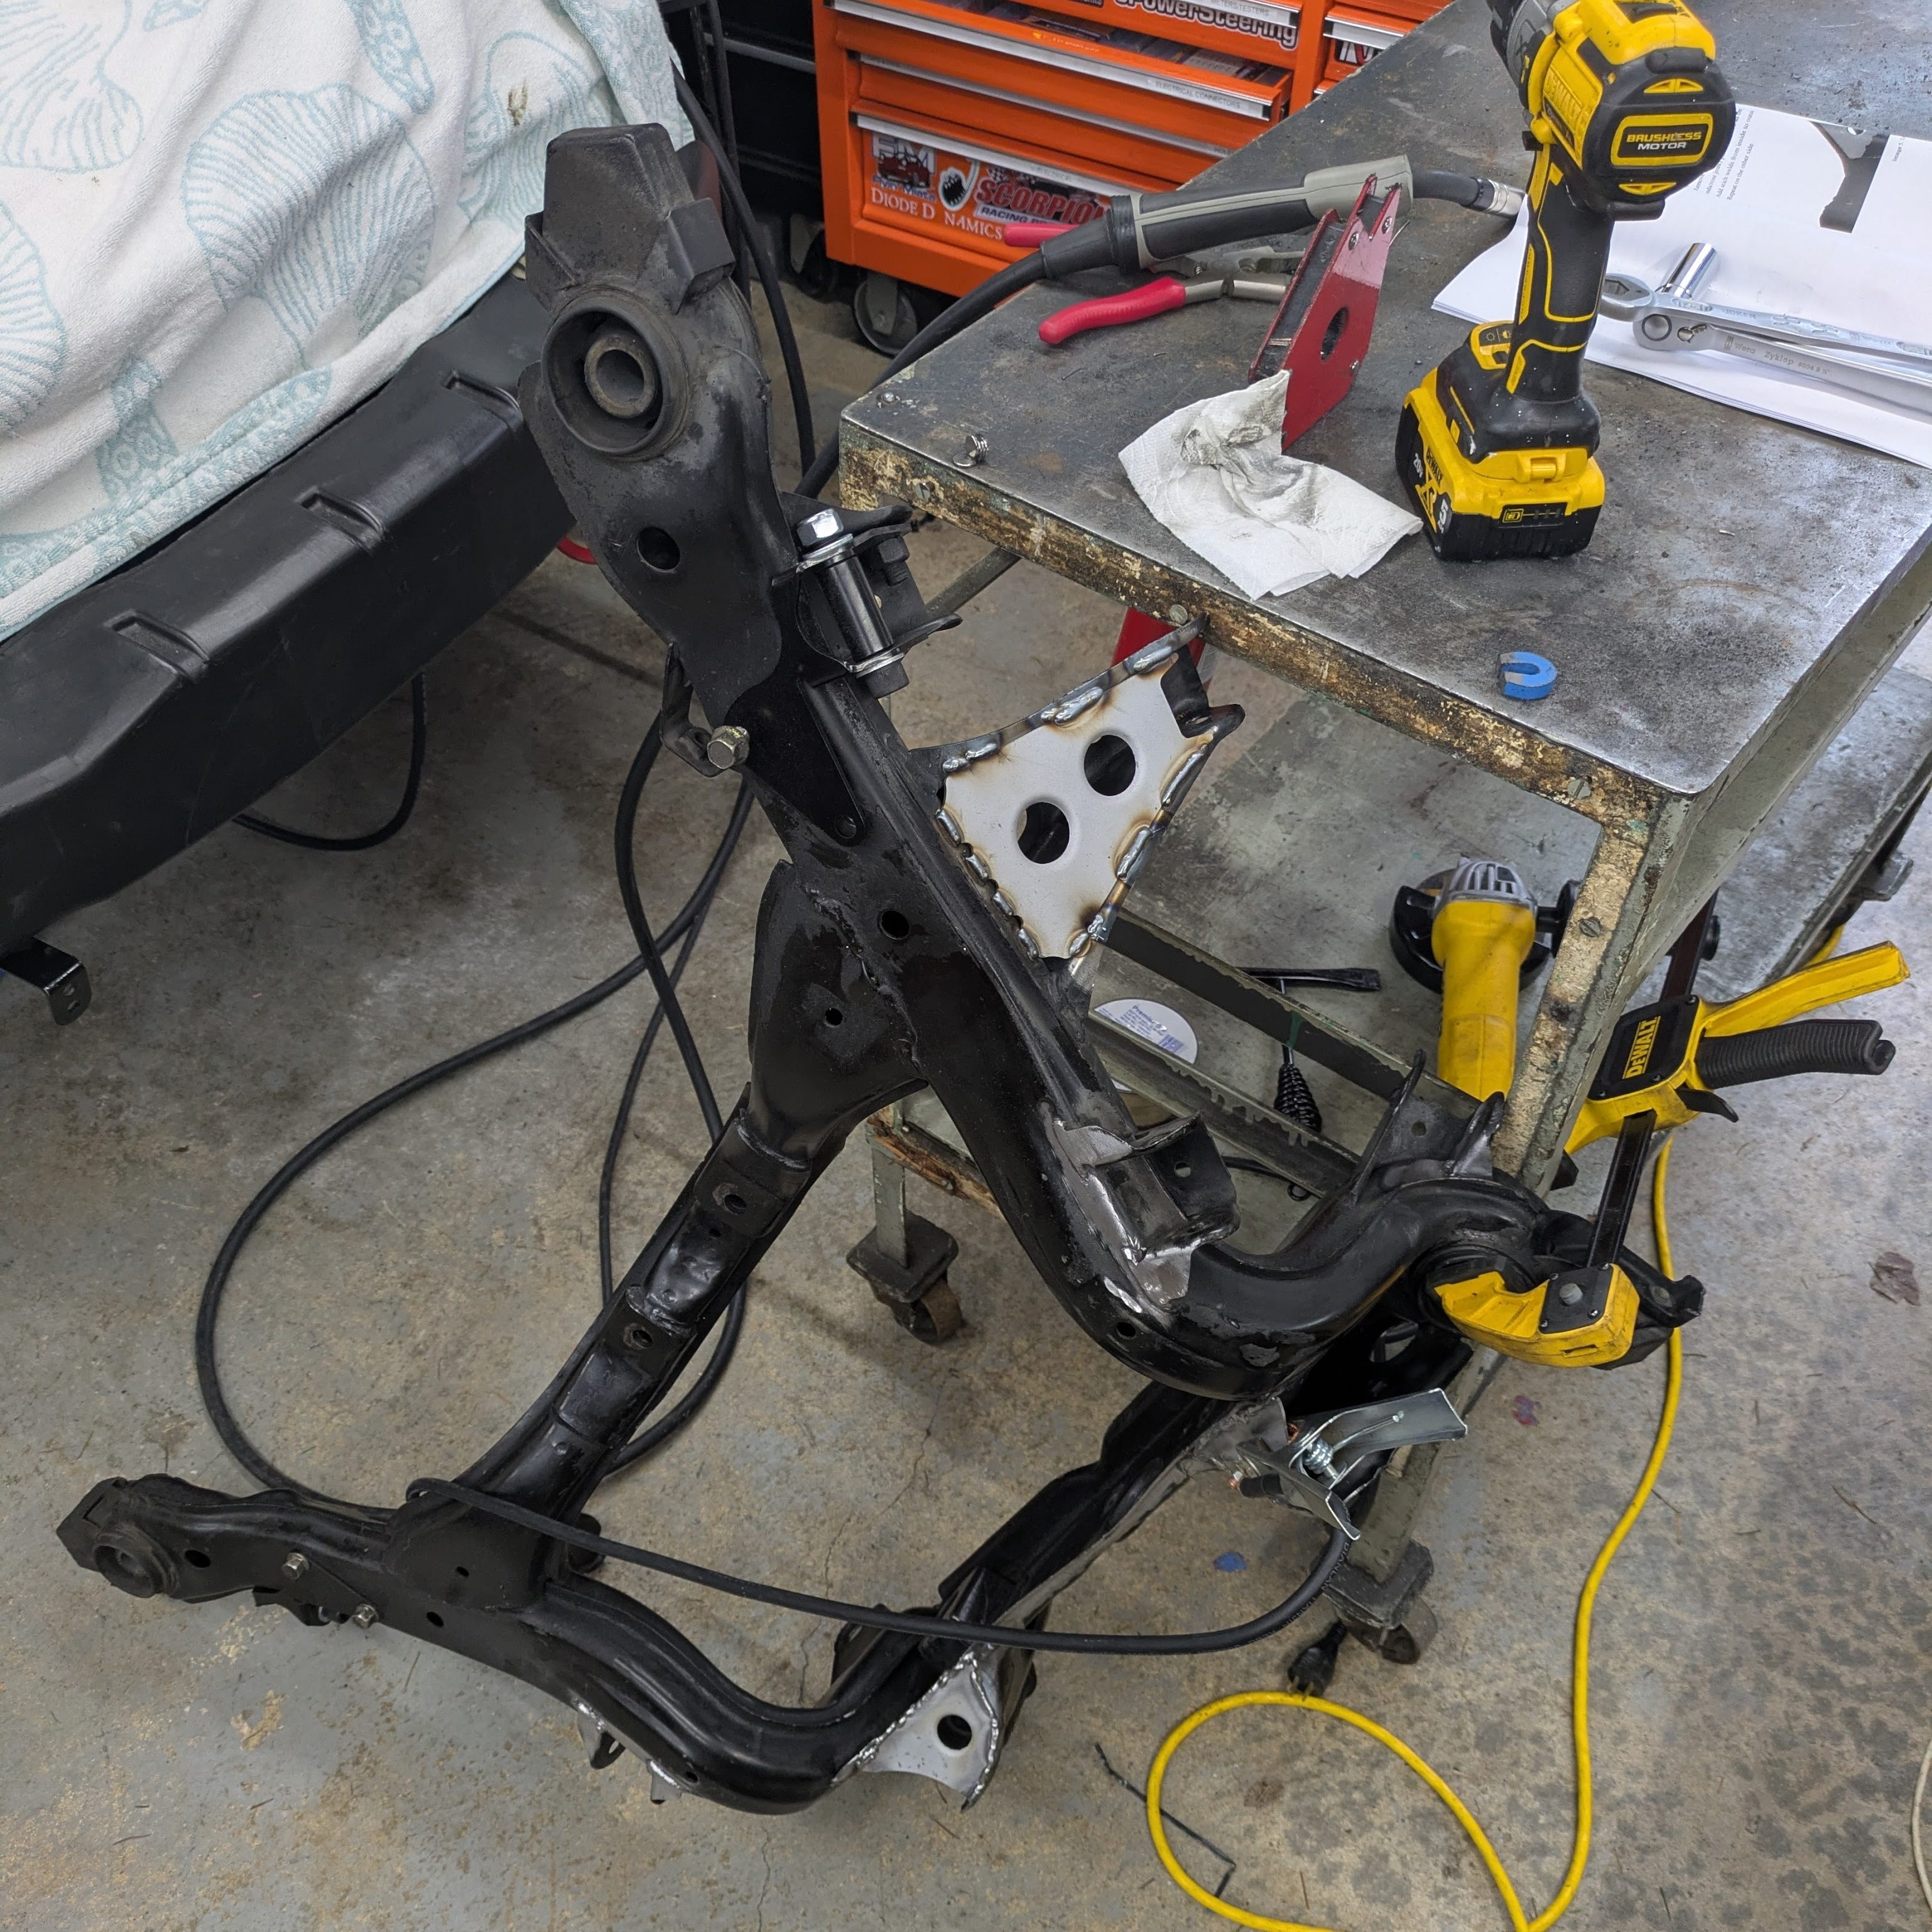
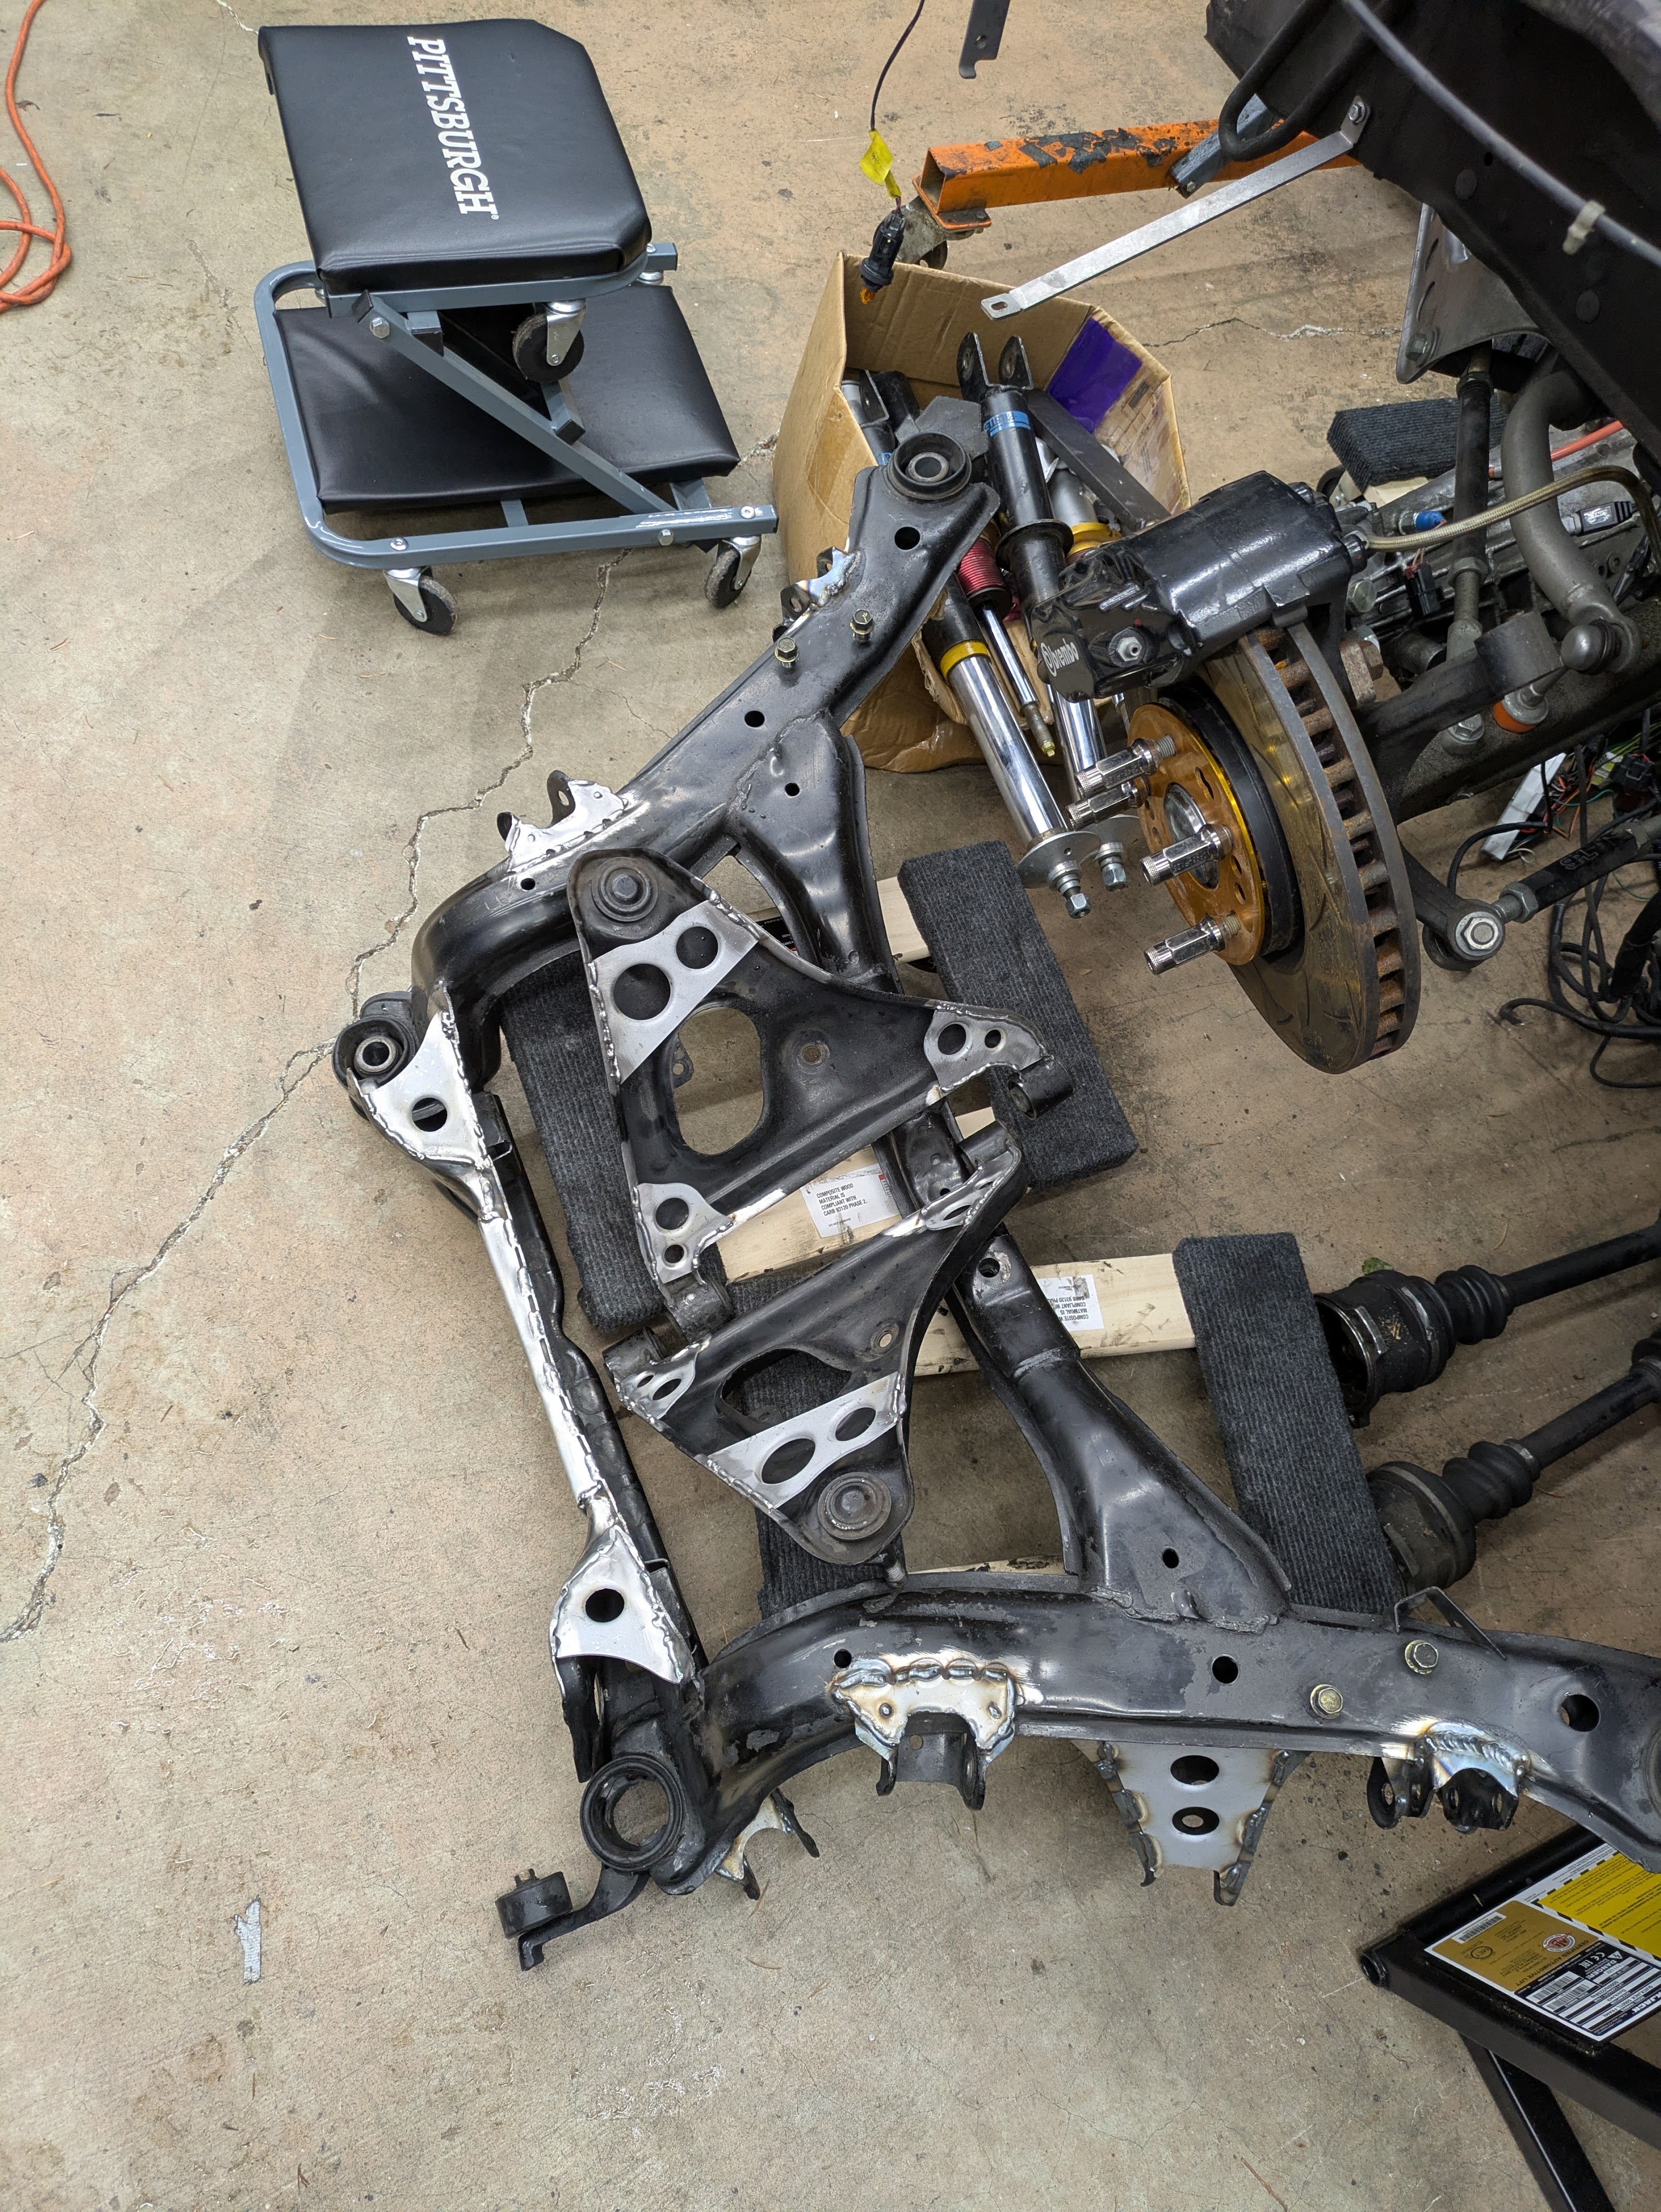
This was my starting point: the original rear subframe and control arms out of my S13. They are fairly unremarkable; dirty, but in decent shape. The subframe has had a past incident, which I’ll elaborate on in a minute.
GKTech will be a familiar name throughout this post. They got my wallet pretty good on Black Friday, as well as being the exclusive retailer of some of these parts. We begin on a weeknight evaluating the components I have and the parts I bought.
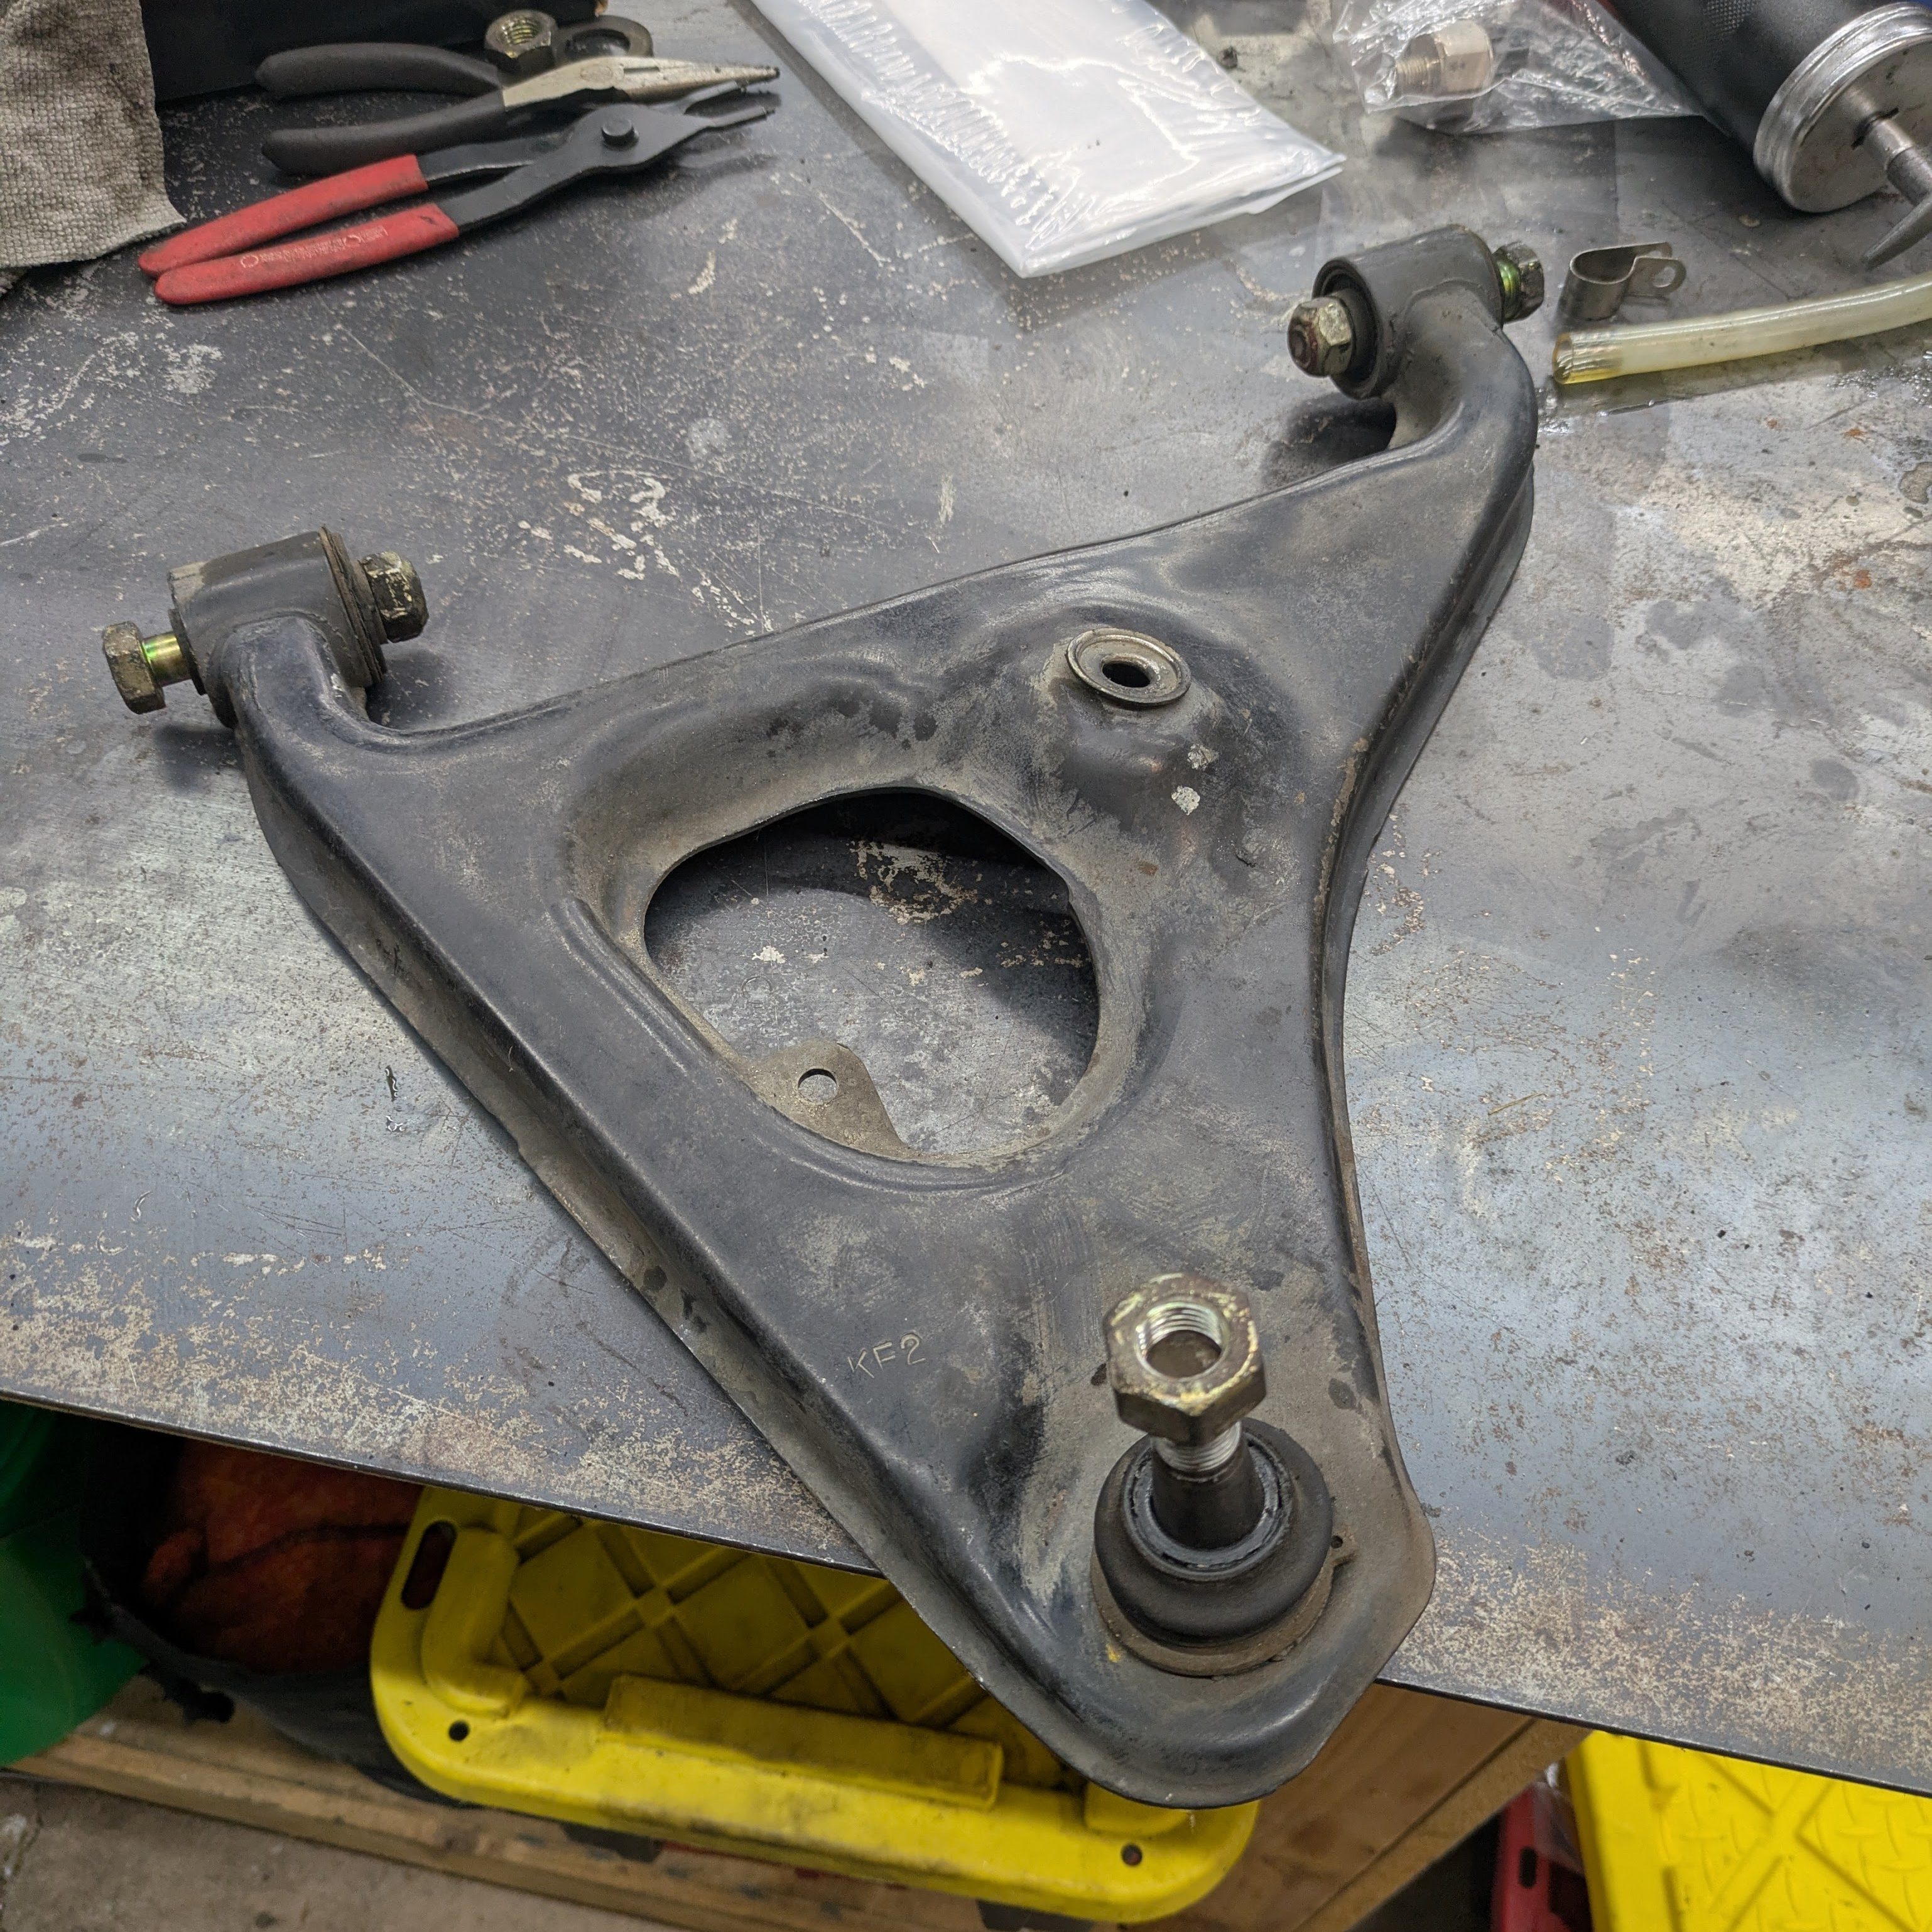
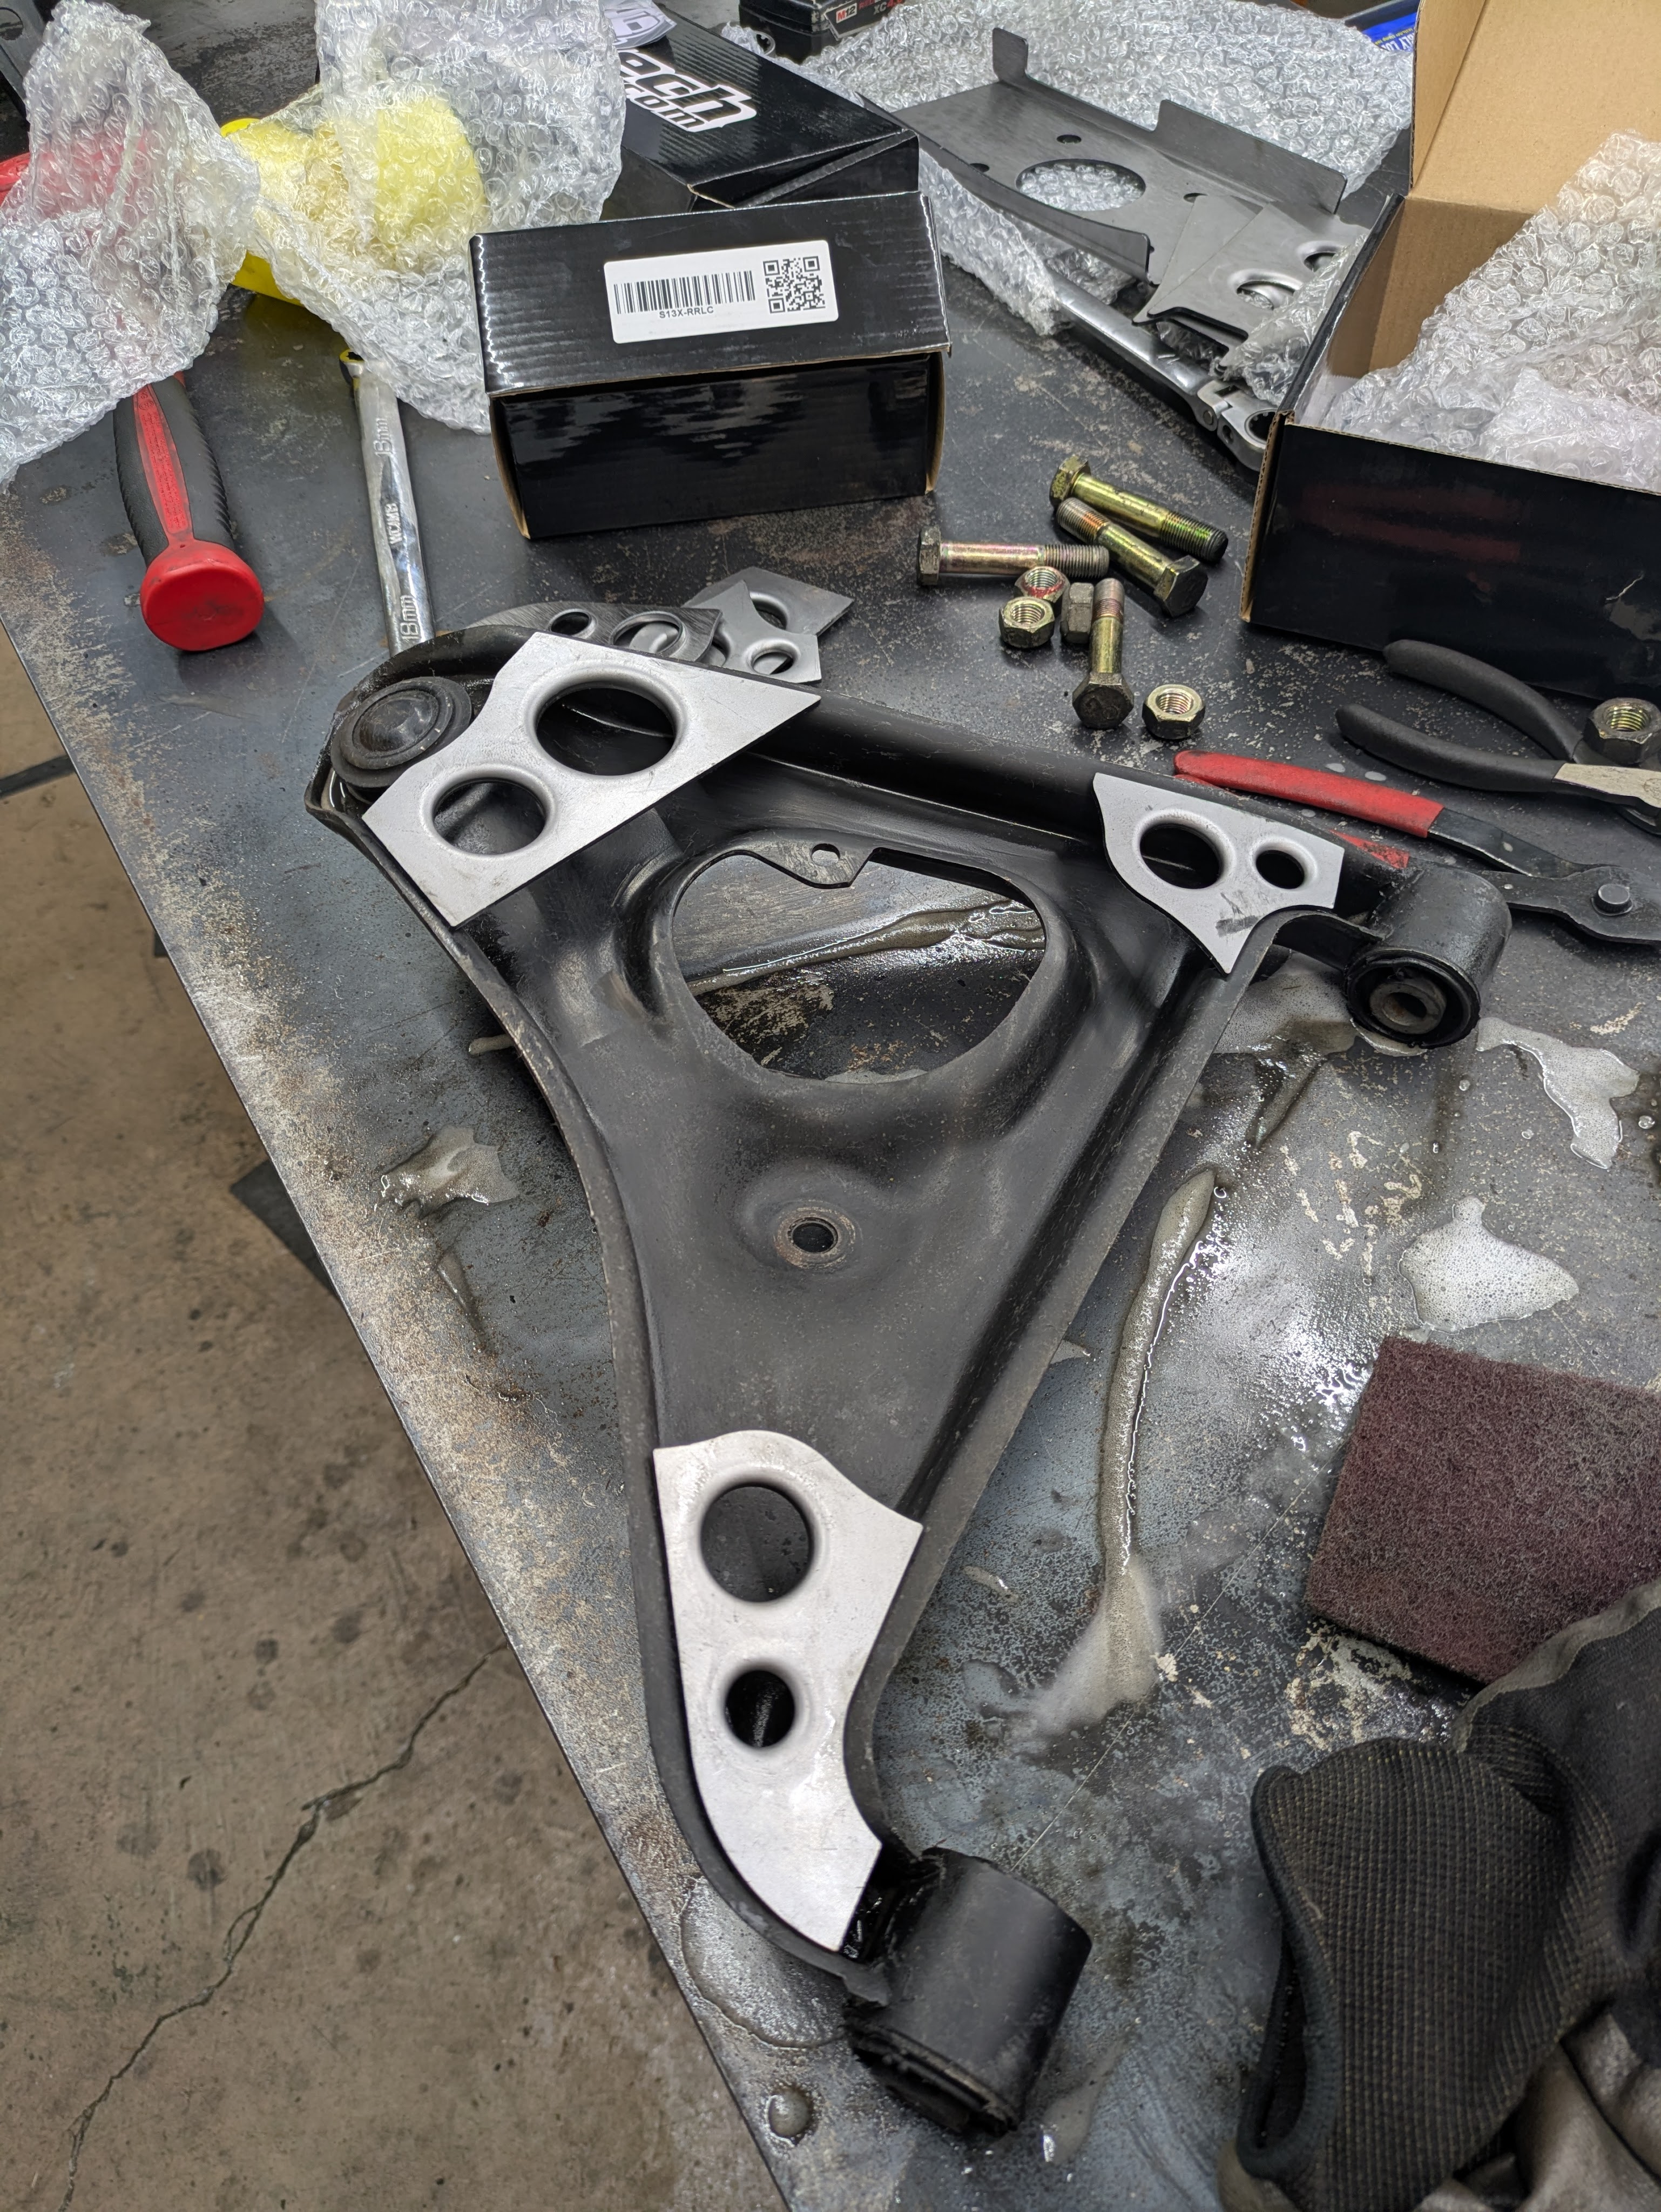
Alright, off the deep end we go, and you can now see where these mods are headed. If I am going to retain factory lower control arms, weld-in reinforcements plus spherical bearing retrofit and new ball joints (which were due for replacement) seemed like a reasonable investment. I justified the weld-in plates citing Nismo’s inclusion of them in their OEM+ arms, as well as that there was already welding to be done on these parts.

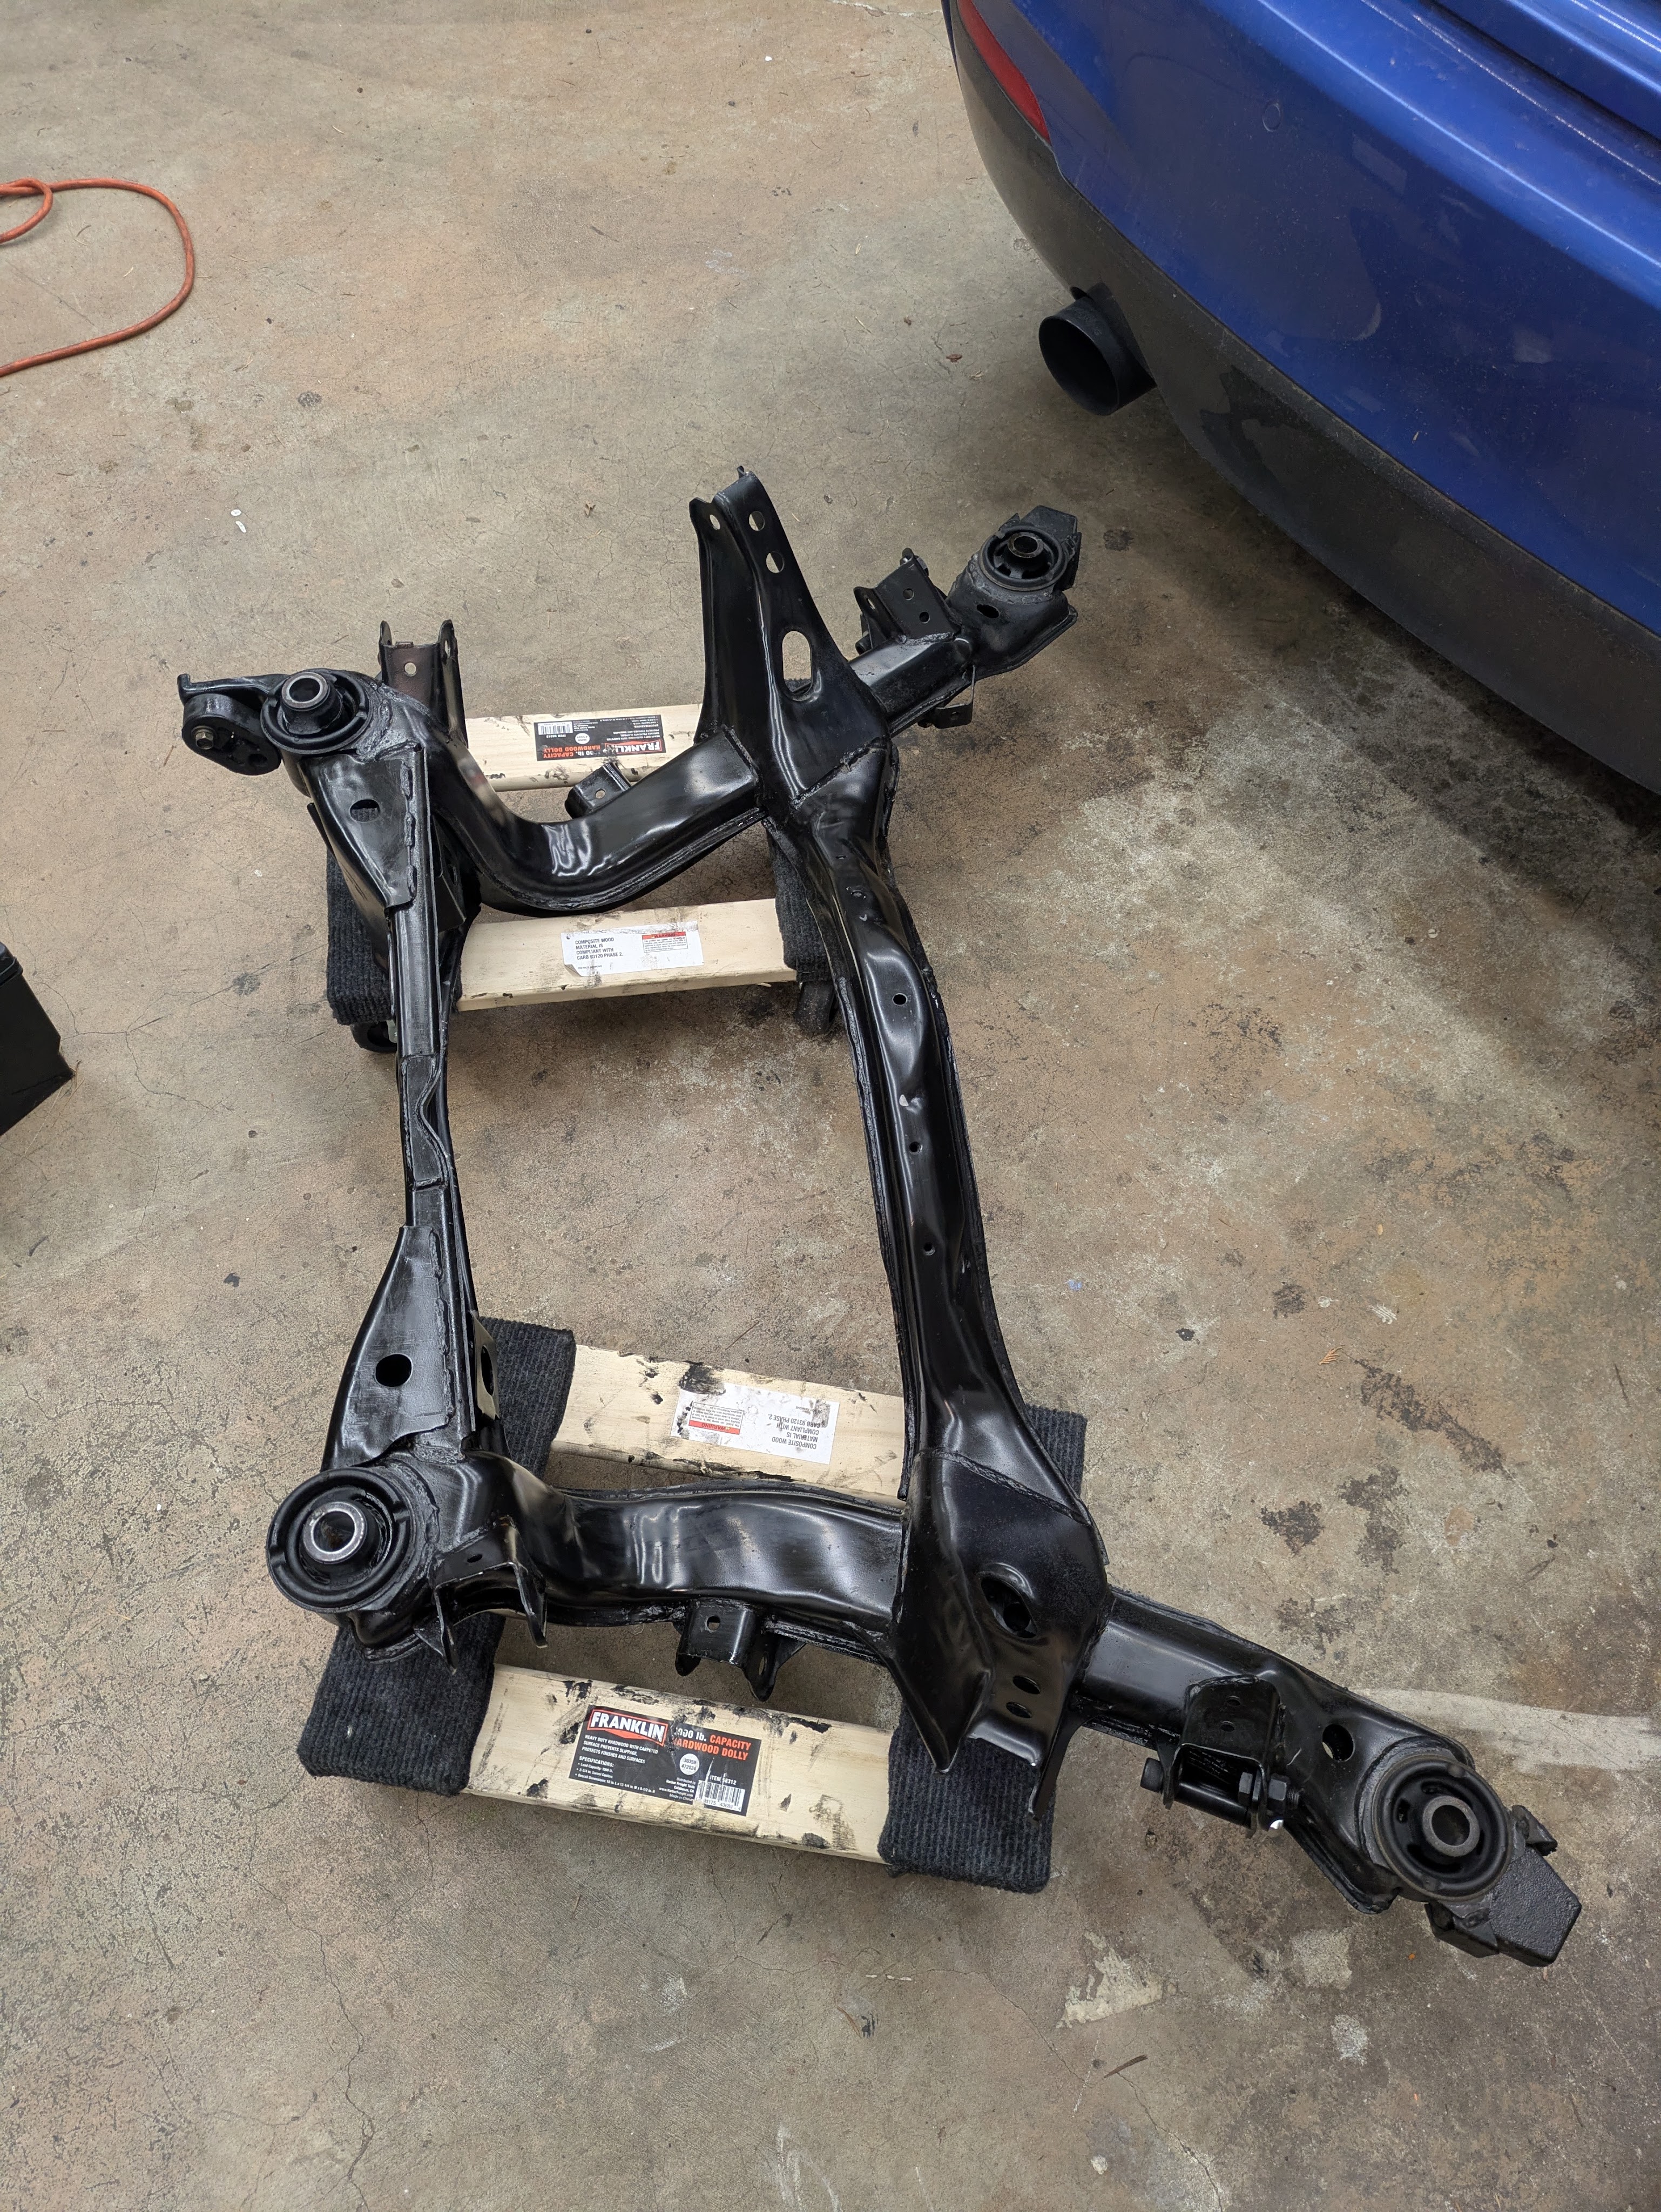
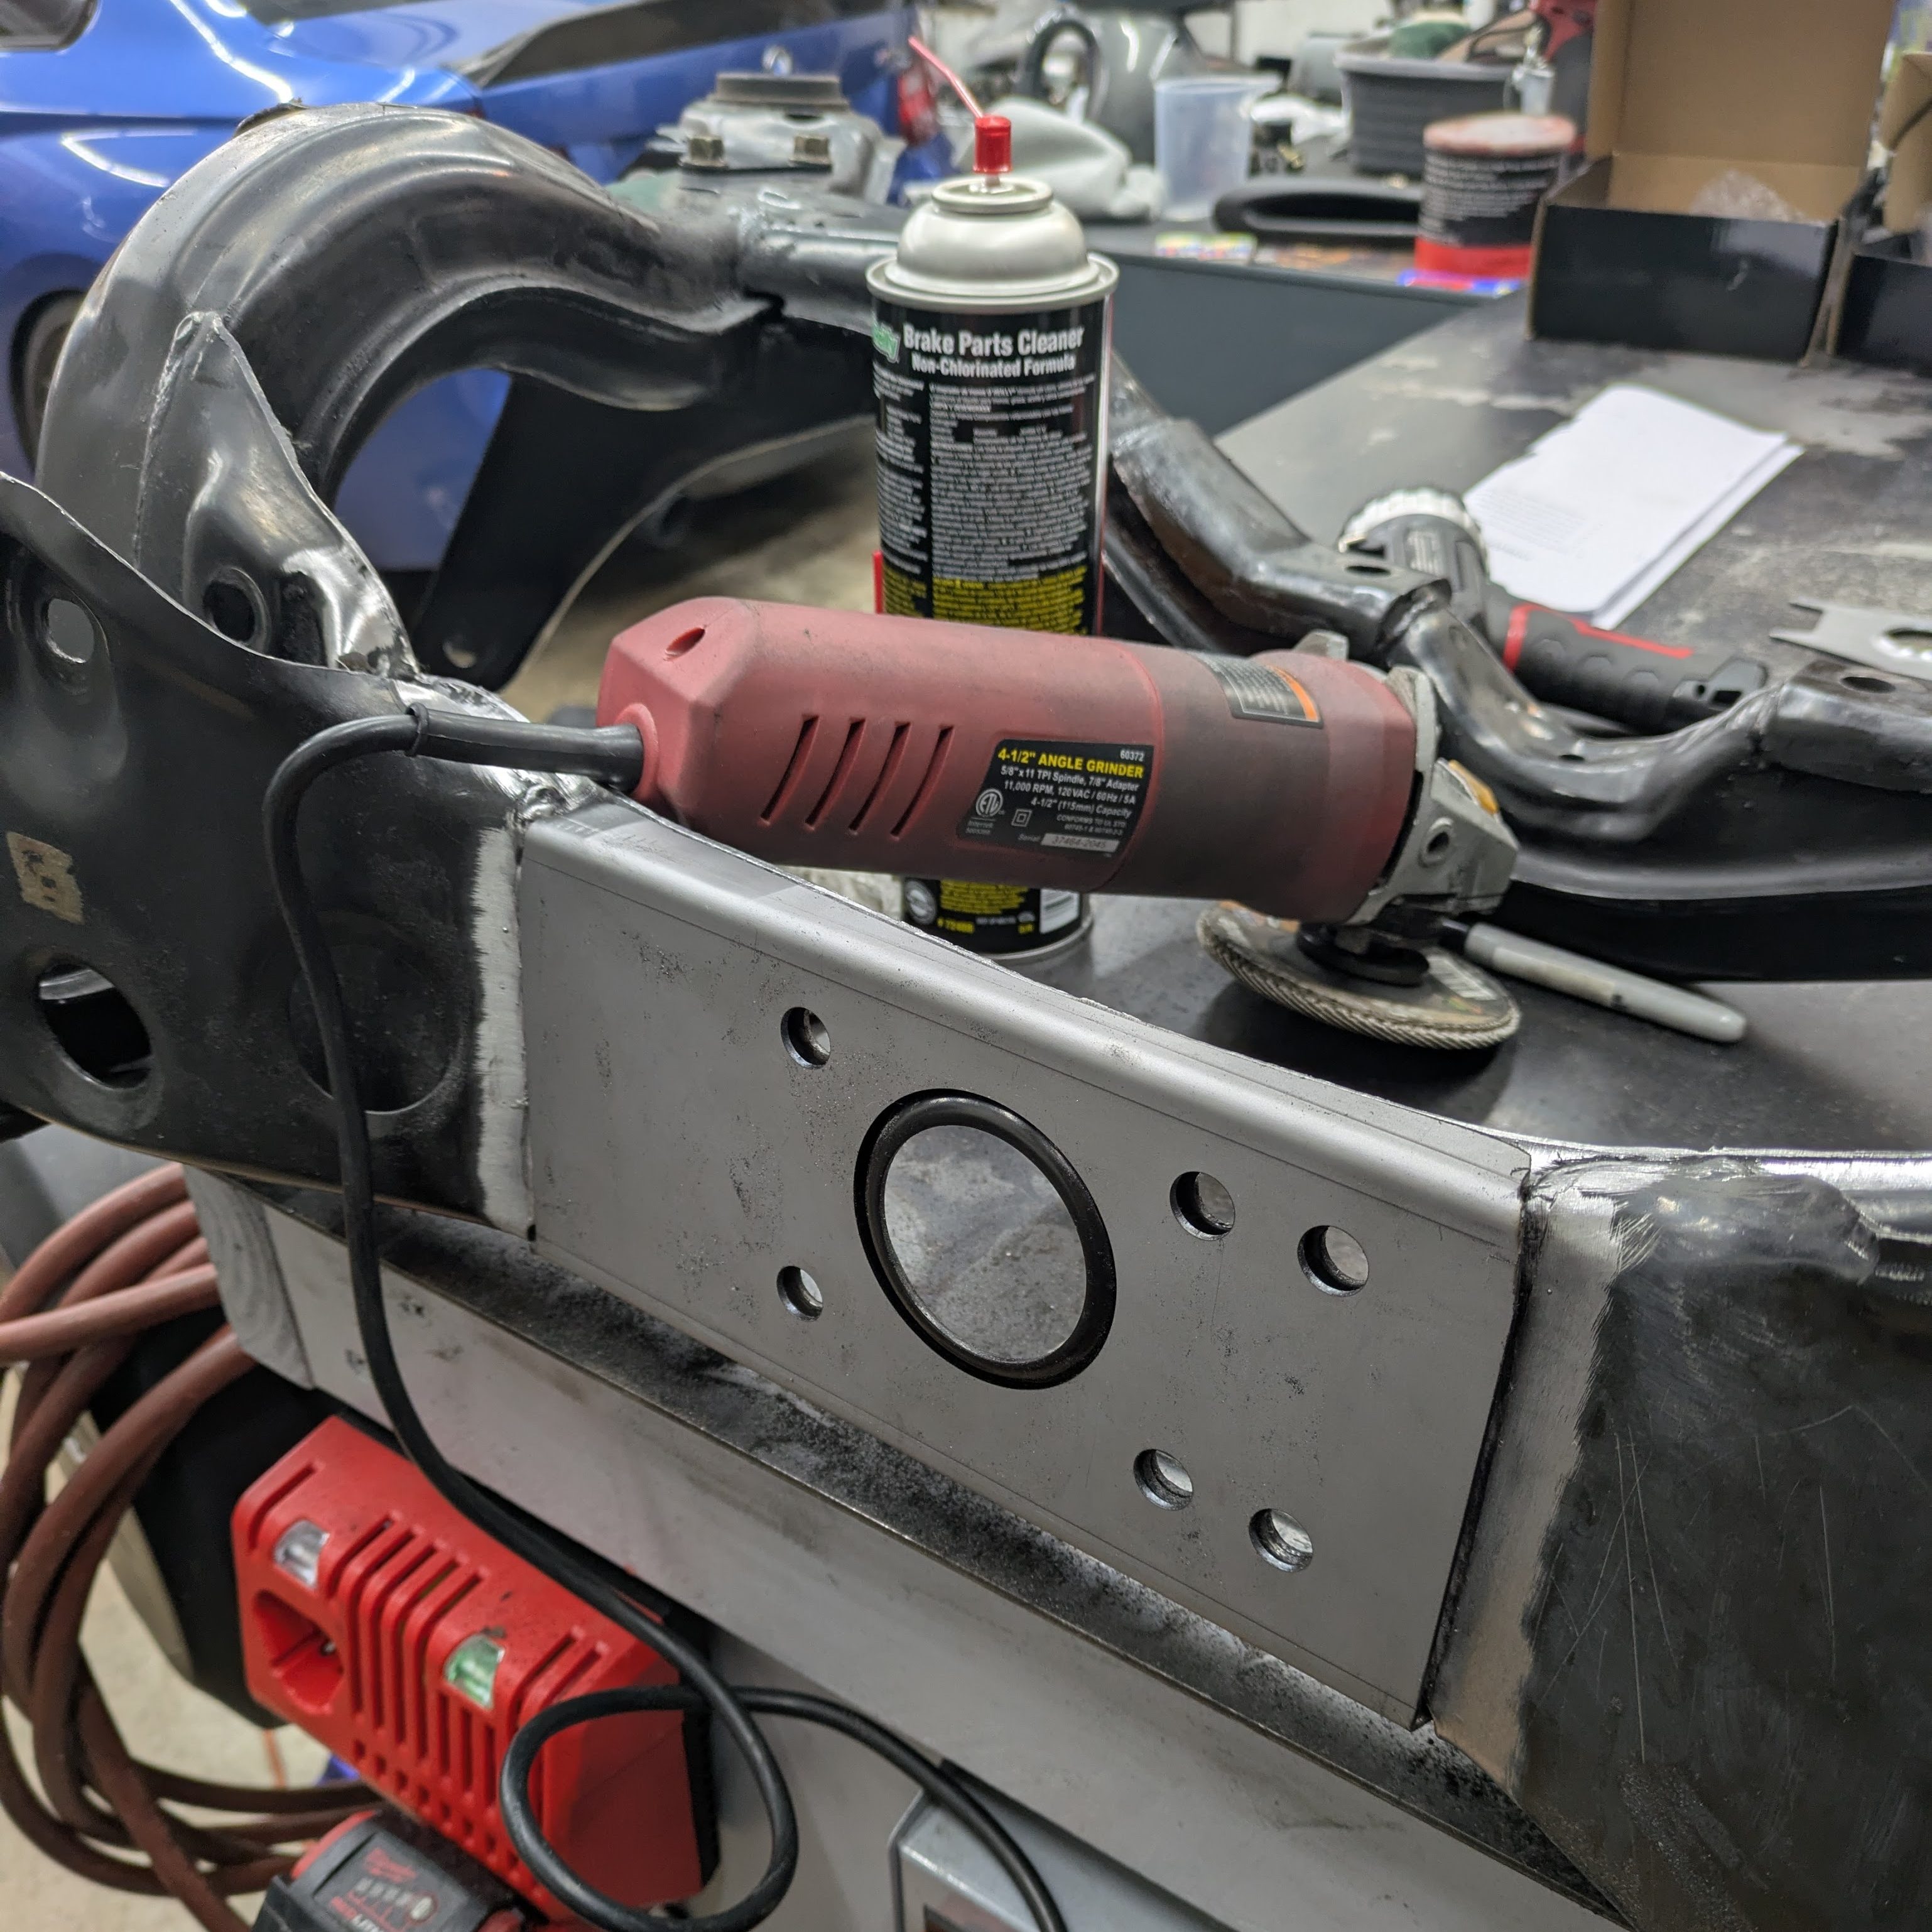
The subframe gets a similar treatment. Full reinforcement kit on all suspension mounting points, as well as the diff mount. Micro-optimization. More of a feel-good thing than a performance thing.
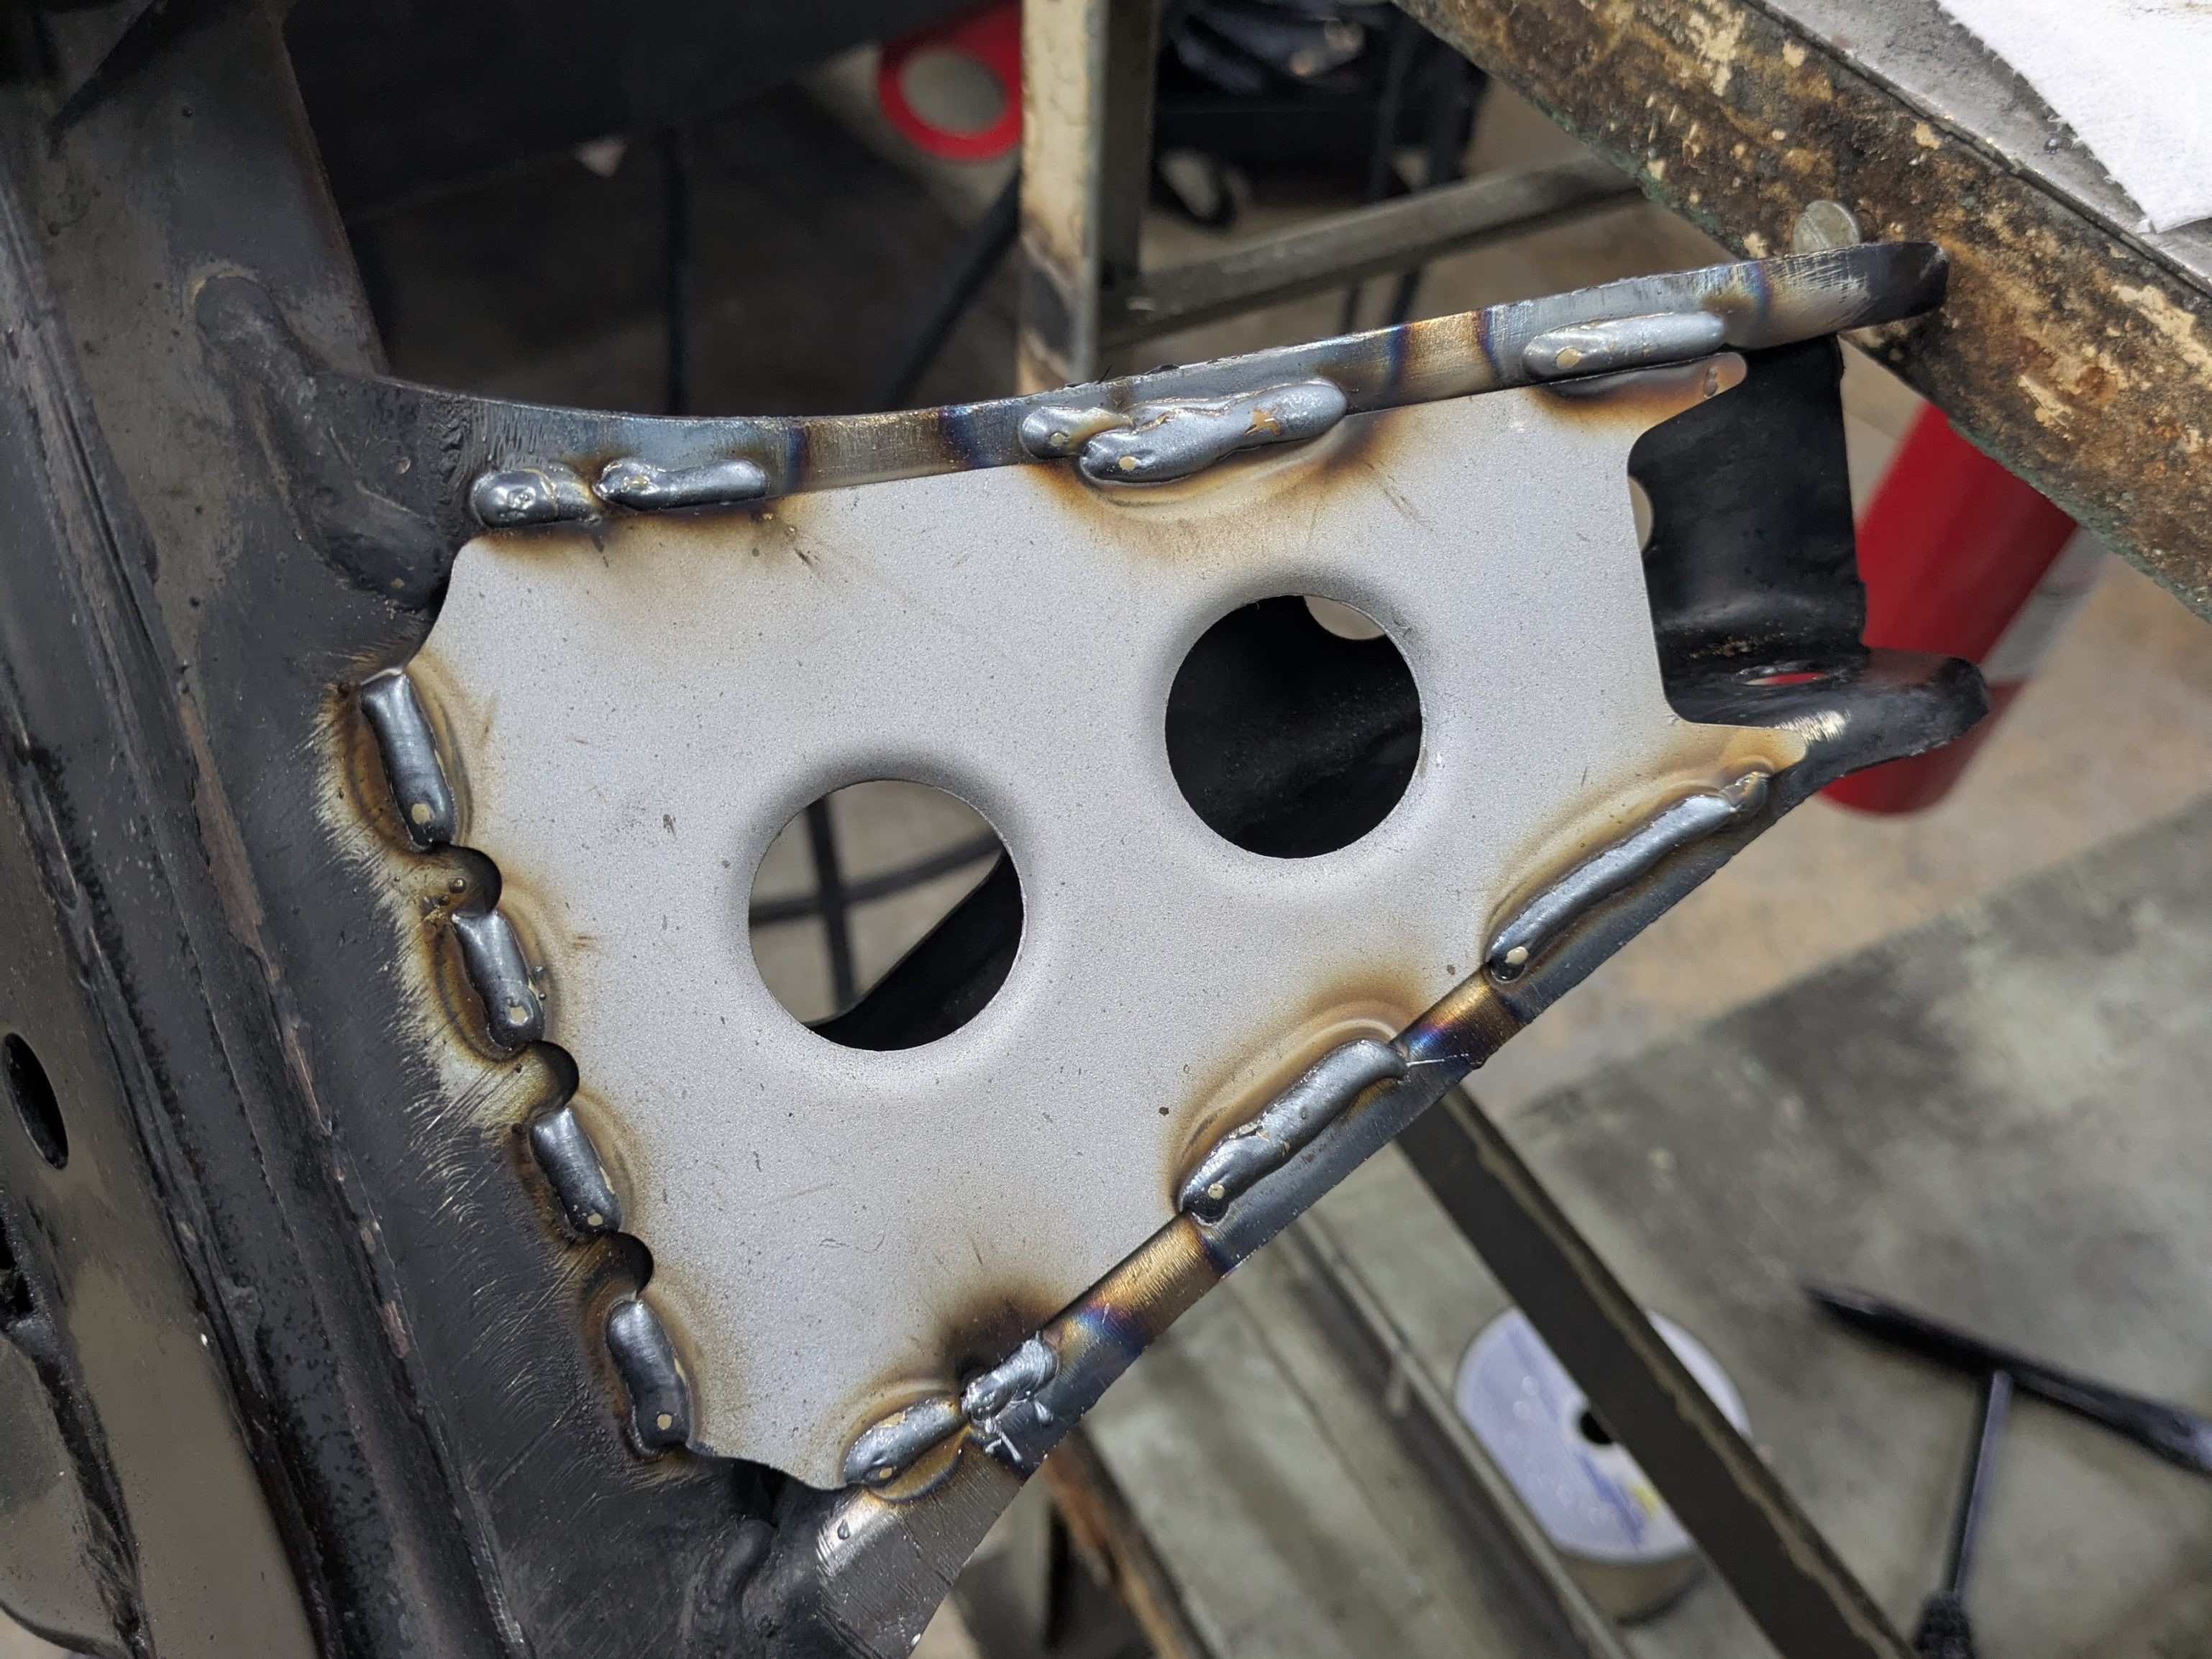
To their credit, these reinforcement plates for both the subframe and control arms fit very well. Fairly effortless fit-up if you wanted to TIG weld them. This is where the compliments will stop for now.
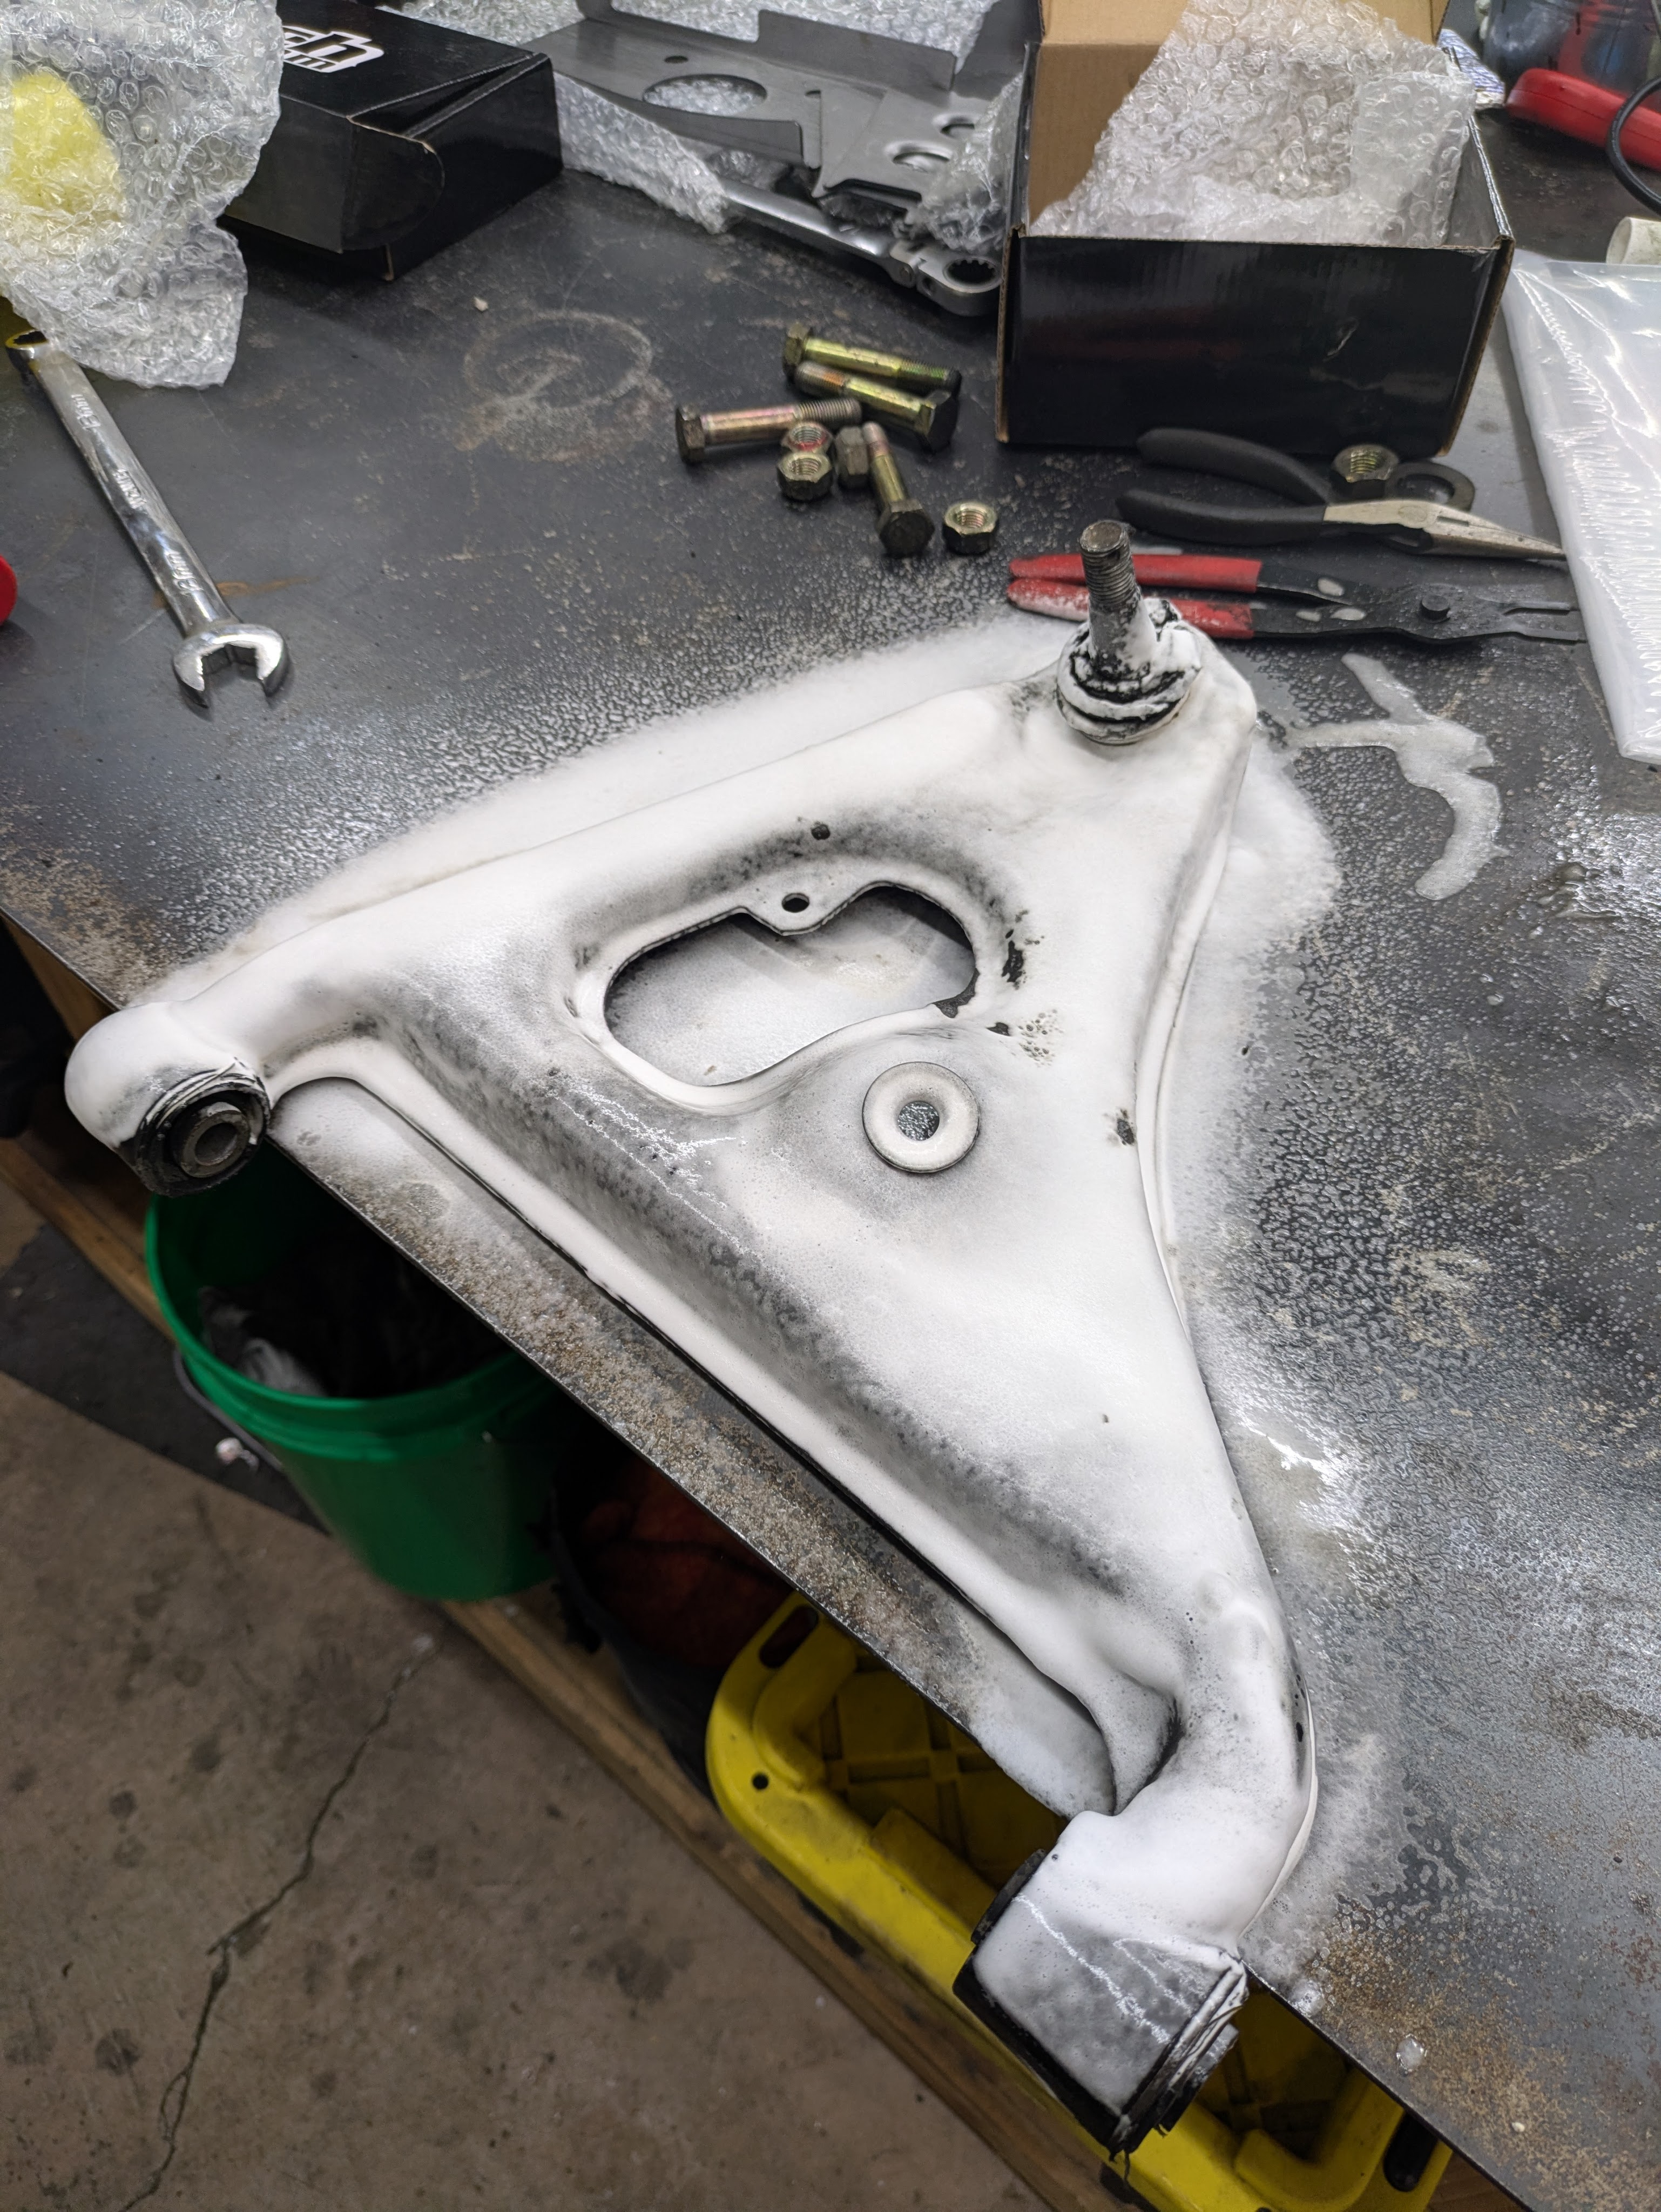
I spent another weeknight cleaning the subframe to make it serviceable. I wanted to avoid cleaning while I was welding to make the day go by smoother since I would be using someone else’s garage and welder. I also did bare metal treatment and welding prep ahead of time for the same reasons.
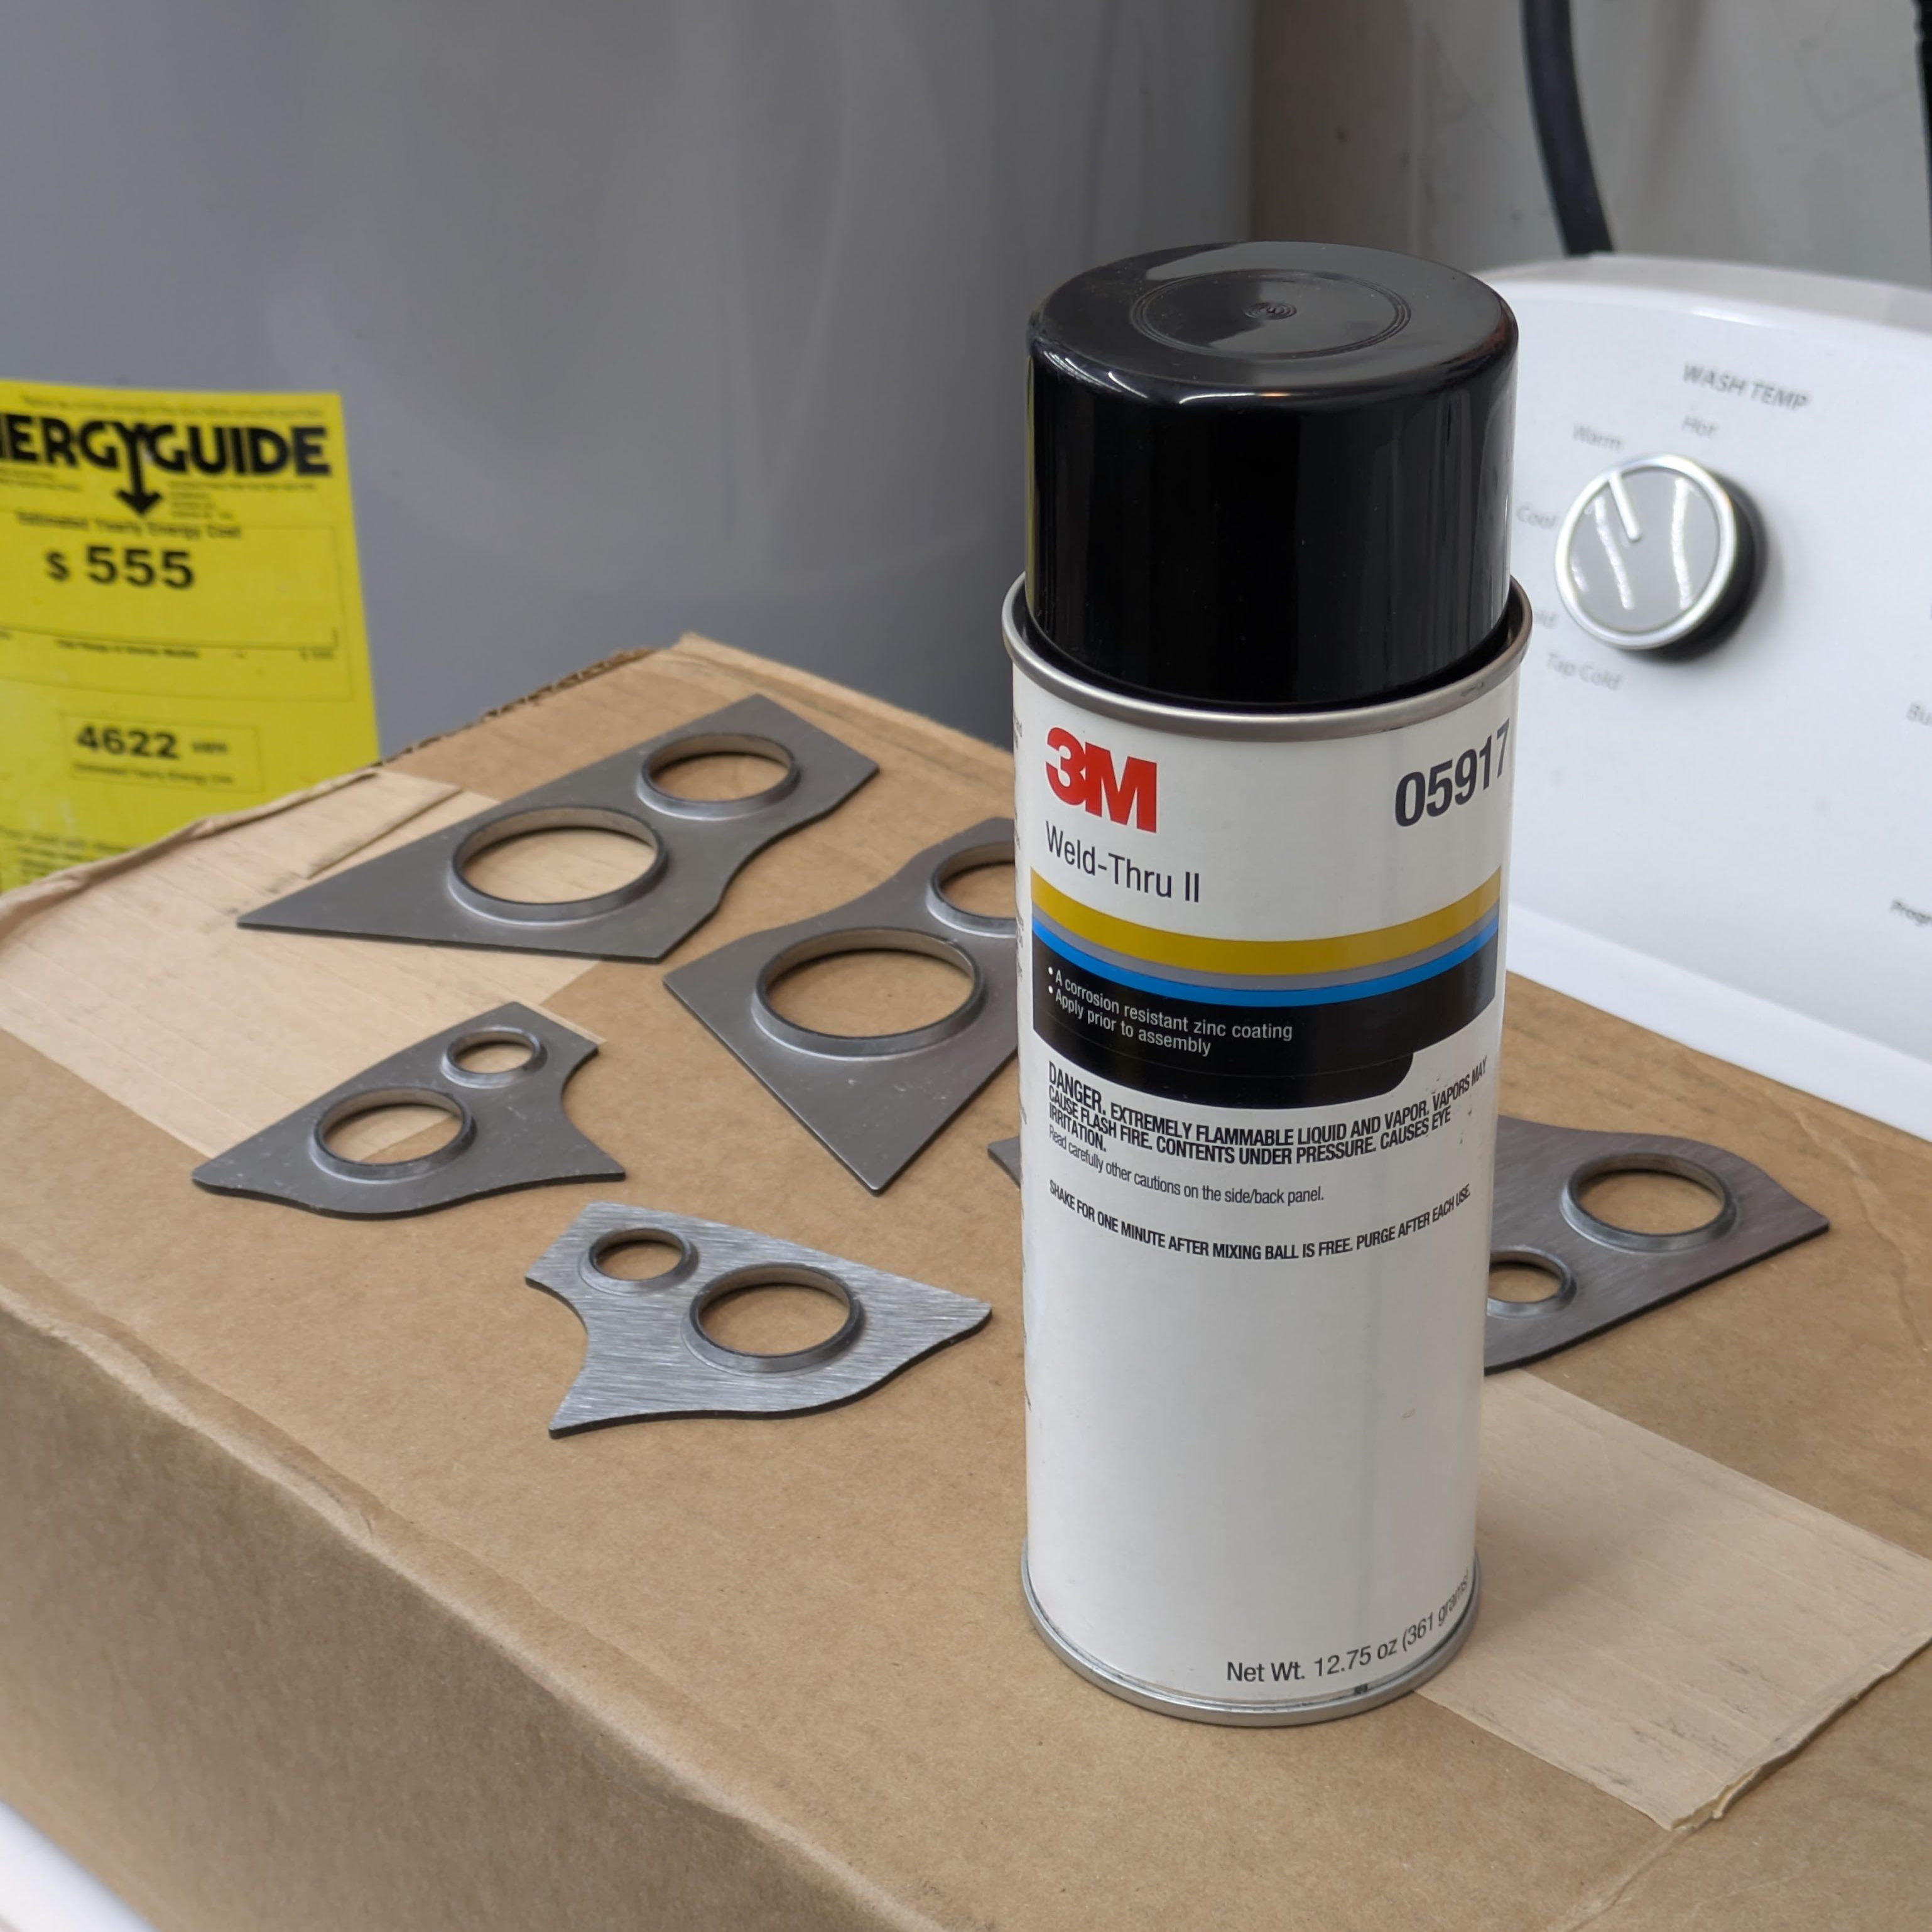
The only kit of the reinforcement kit that needed any work was the diff plate. It needed some very slight circumference trimming near the factory welds for the variance in this particular subframe. Took all of 10 minutes to get it where I wanted it to be, and it also received a coat of Weld-Thru II.
On the day welding was to occur, I brought all my crap + motivation over to the residence of my coworker and inner circle homie Cameron, and we got to work.
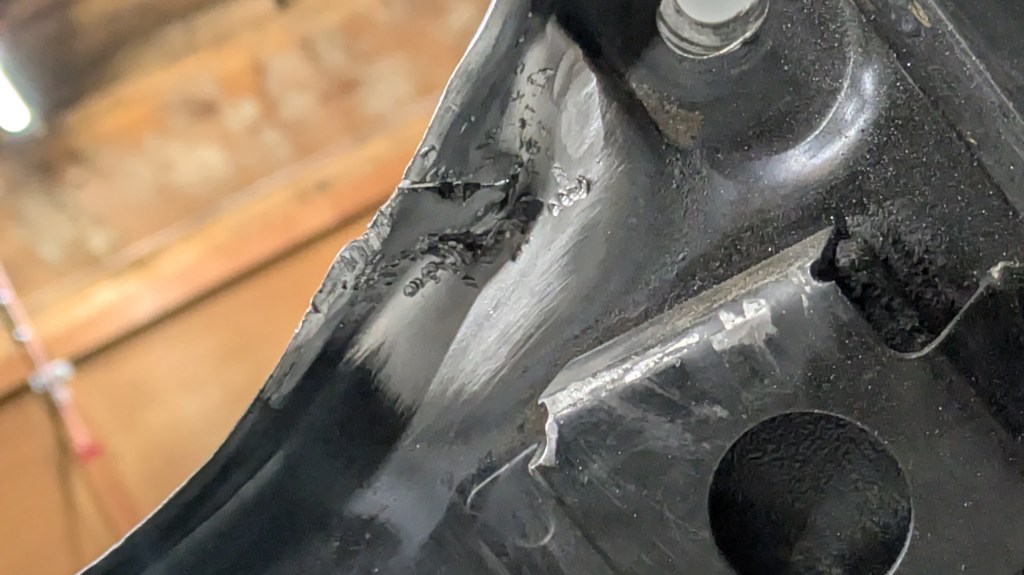
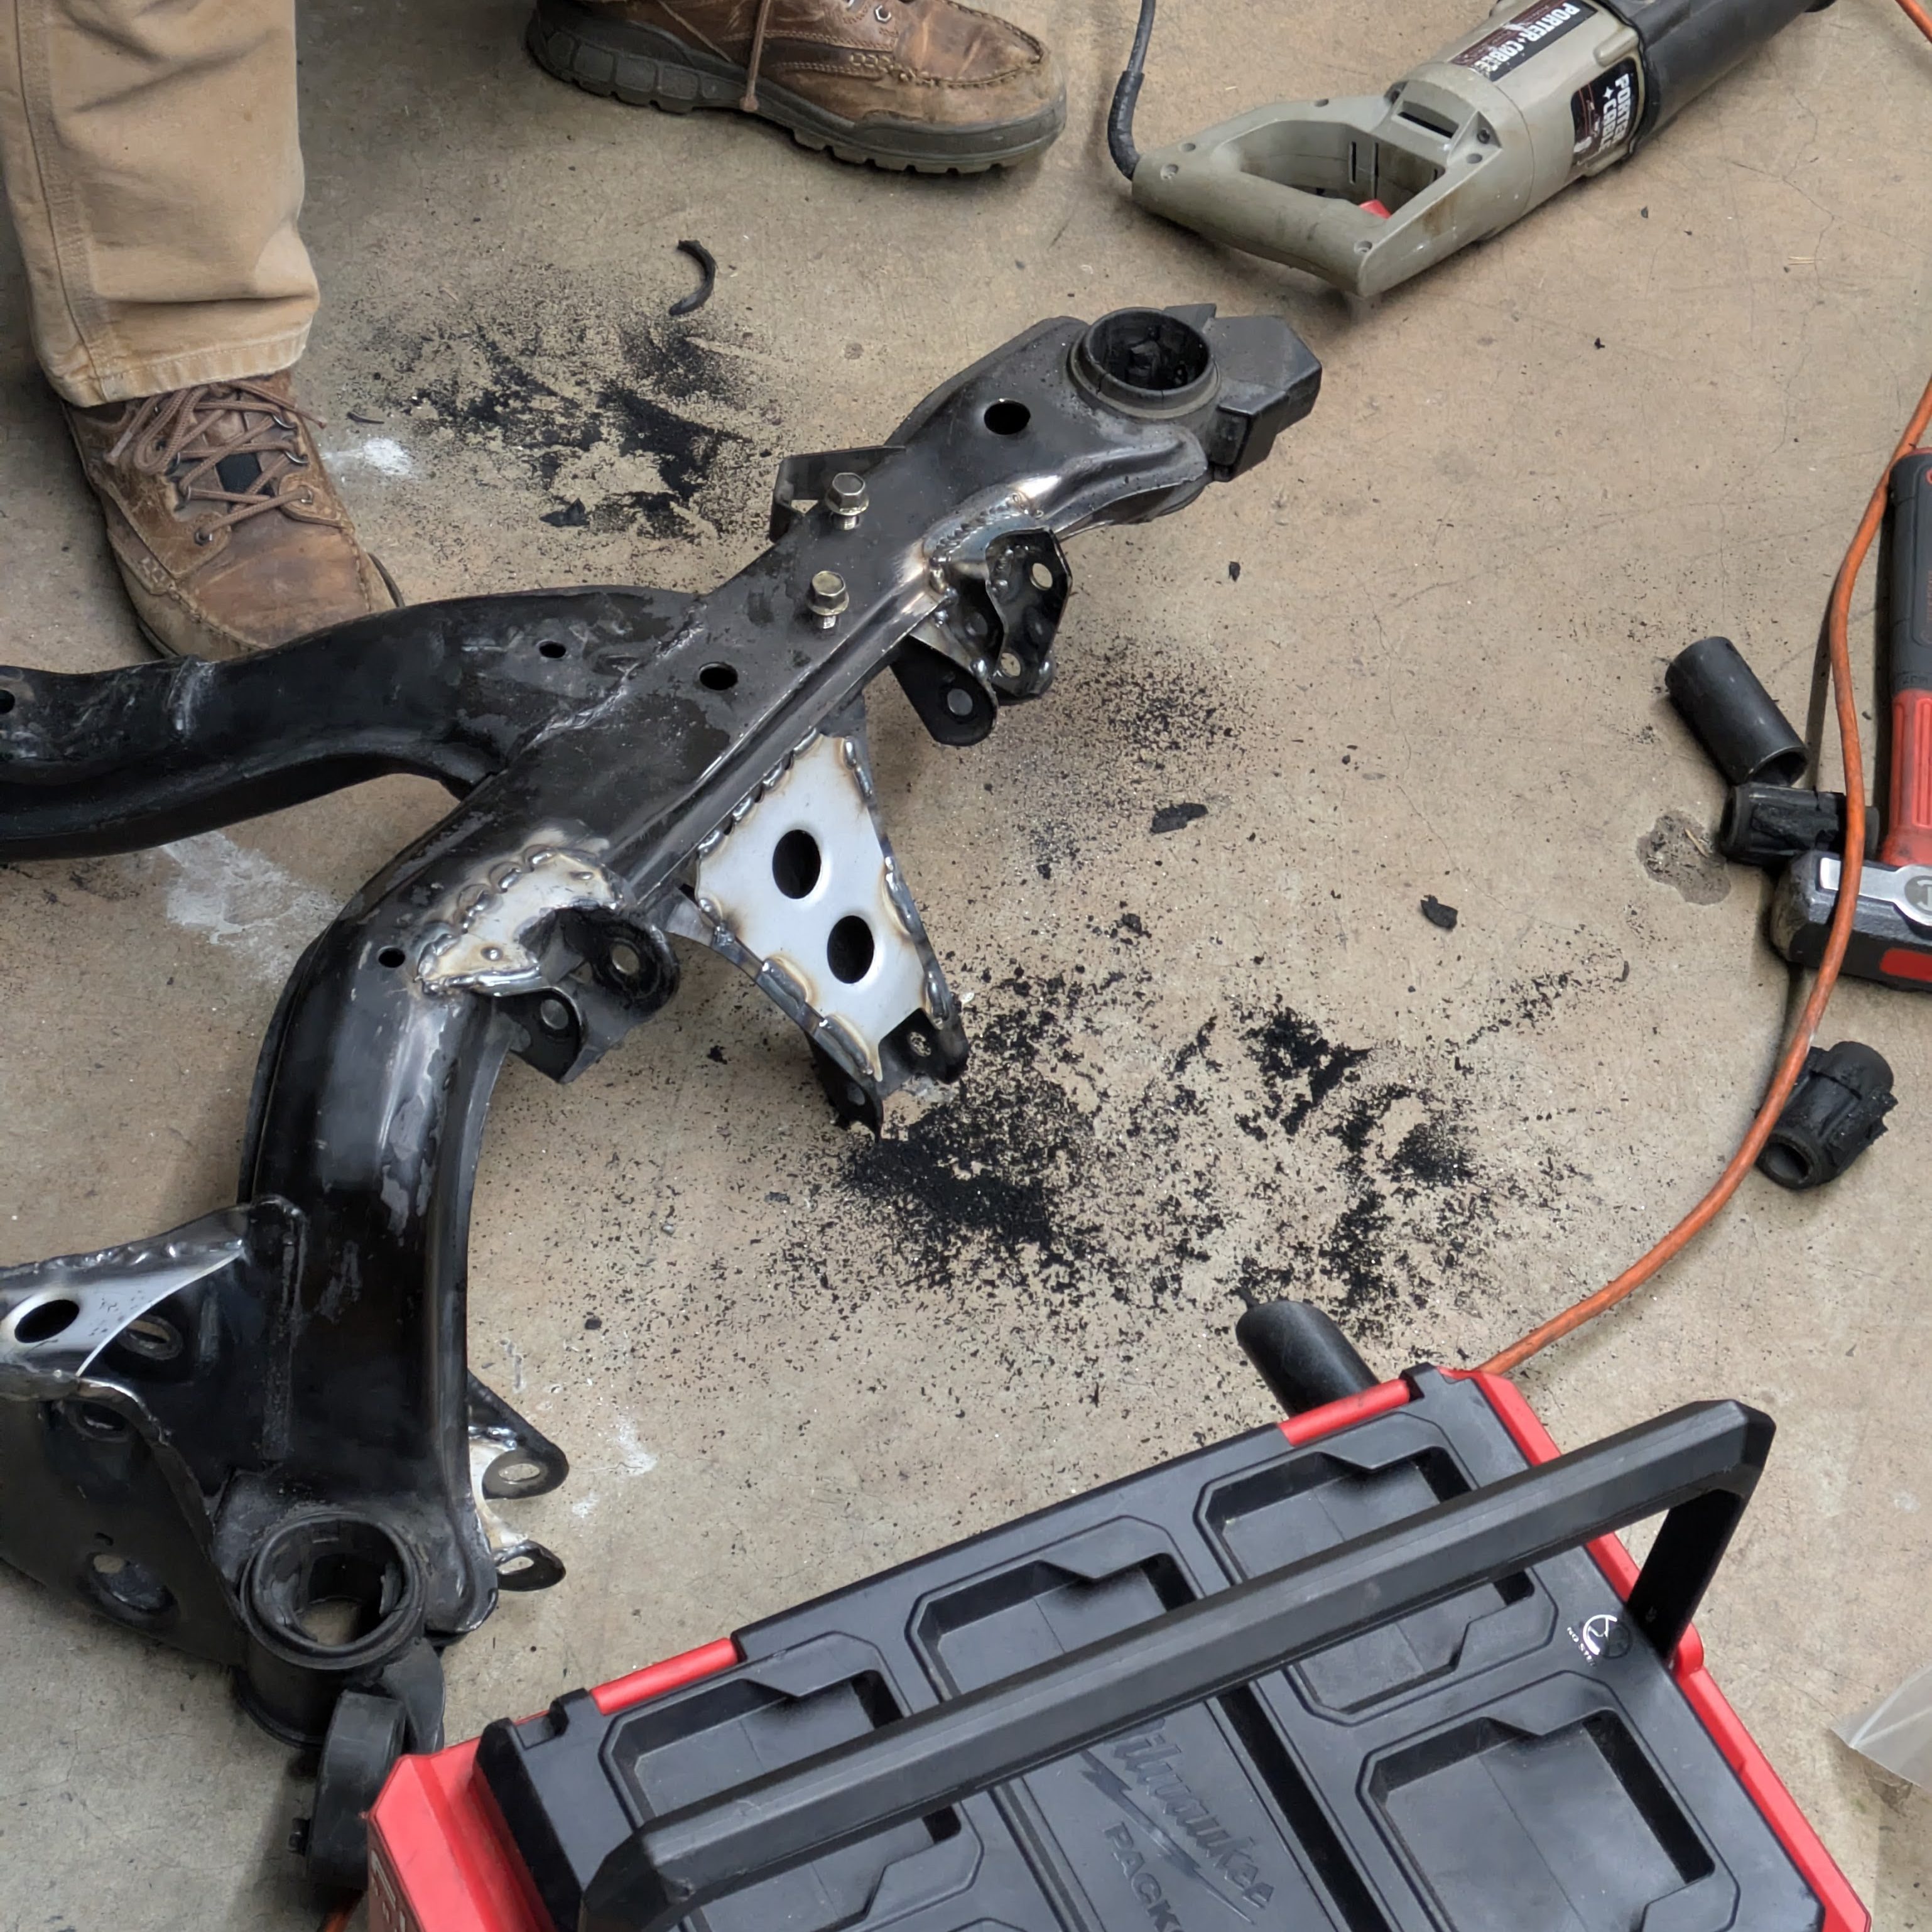
This was this subframes aforementioned “incident”: My guess is the hardware rattled loose and the axle ejected out of it’s pocket and whacked the subframe, as the diff flanges also took damage. Unfortunately this damage resulted in a pretty significant tear right near a suspension pick up point. As these subframes aren’t the strongest out of the box, a significant structural compromise such as this had to be addressed, which led to all these other mods.
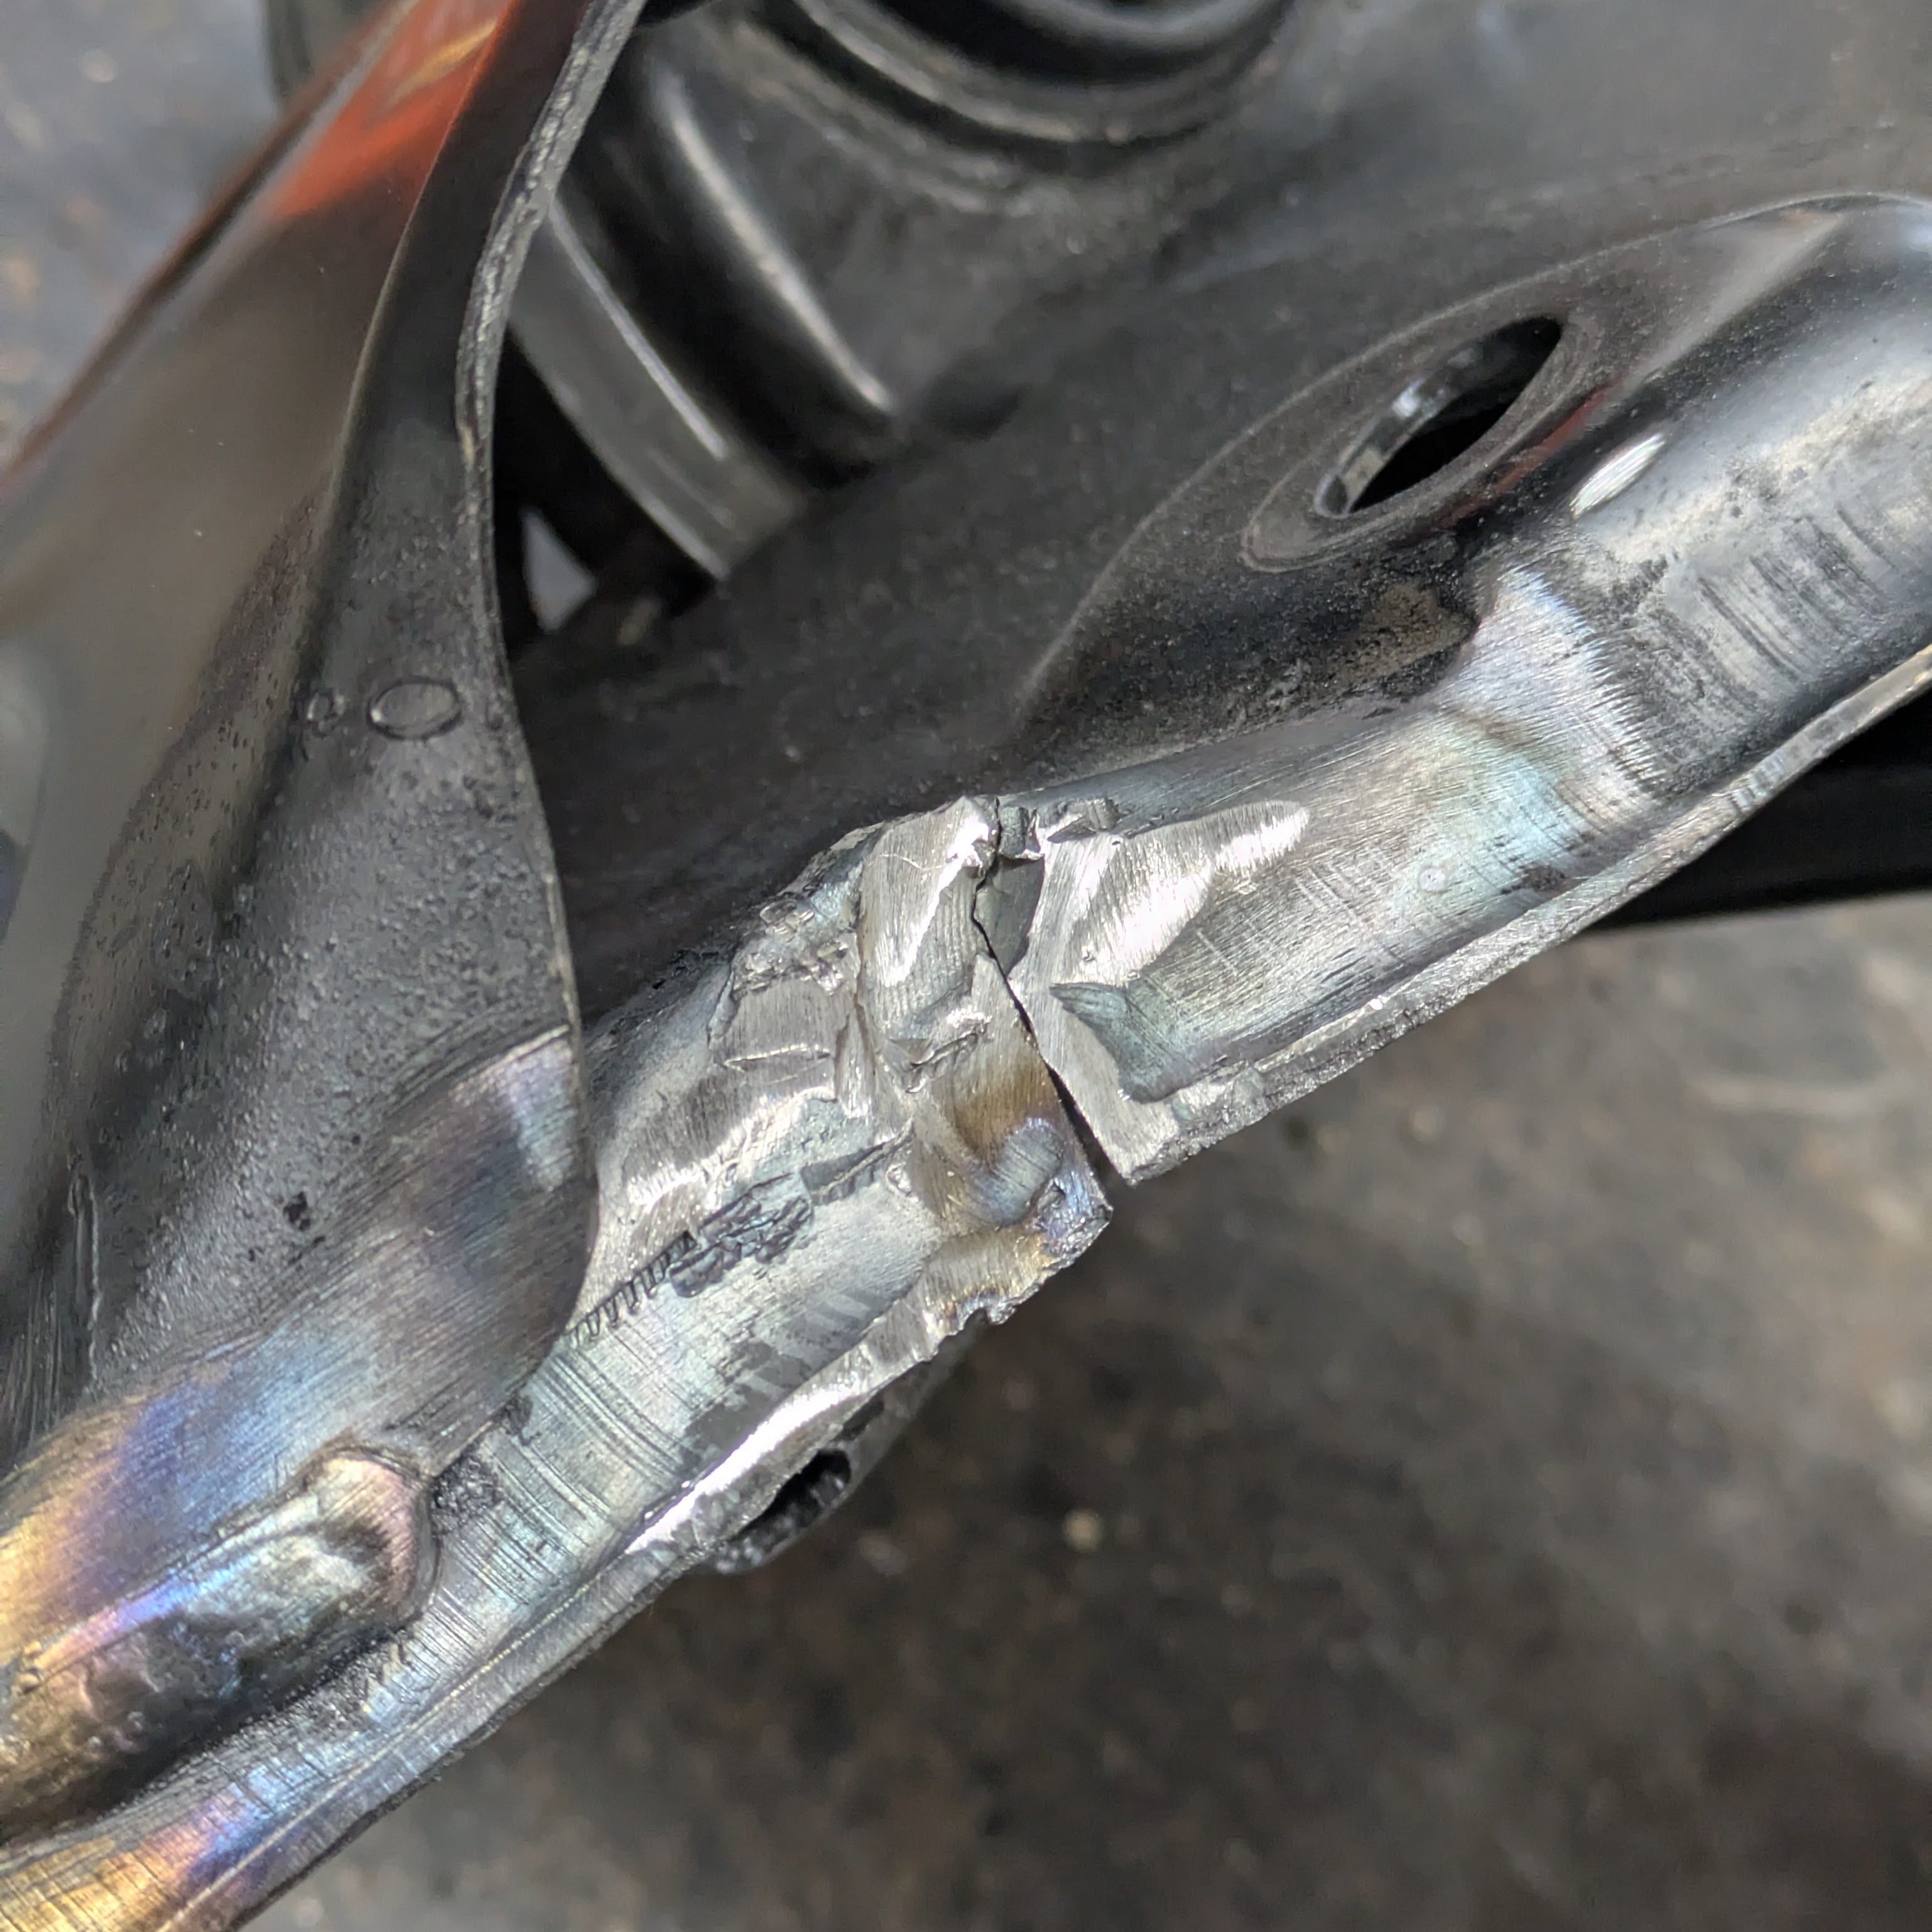
With the combination of a torch, vise grips, and some creative punching and hammering, we were able to get the gap closed back up and the buckle out of the subframe.
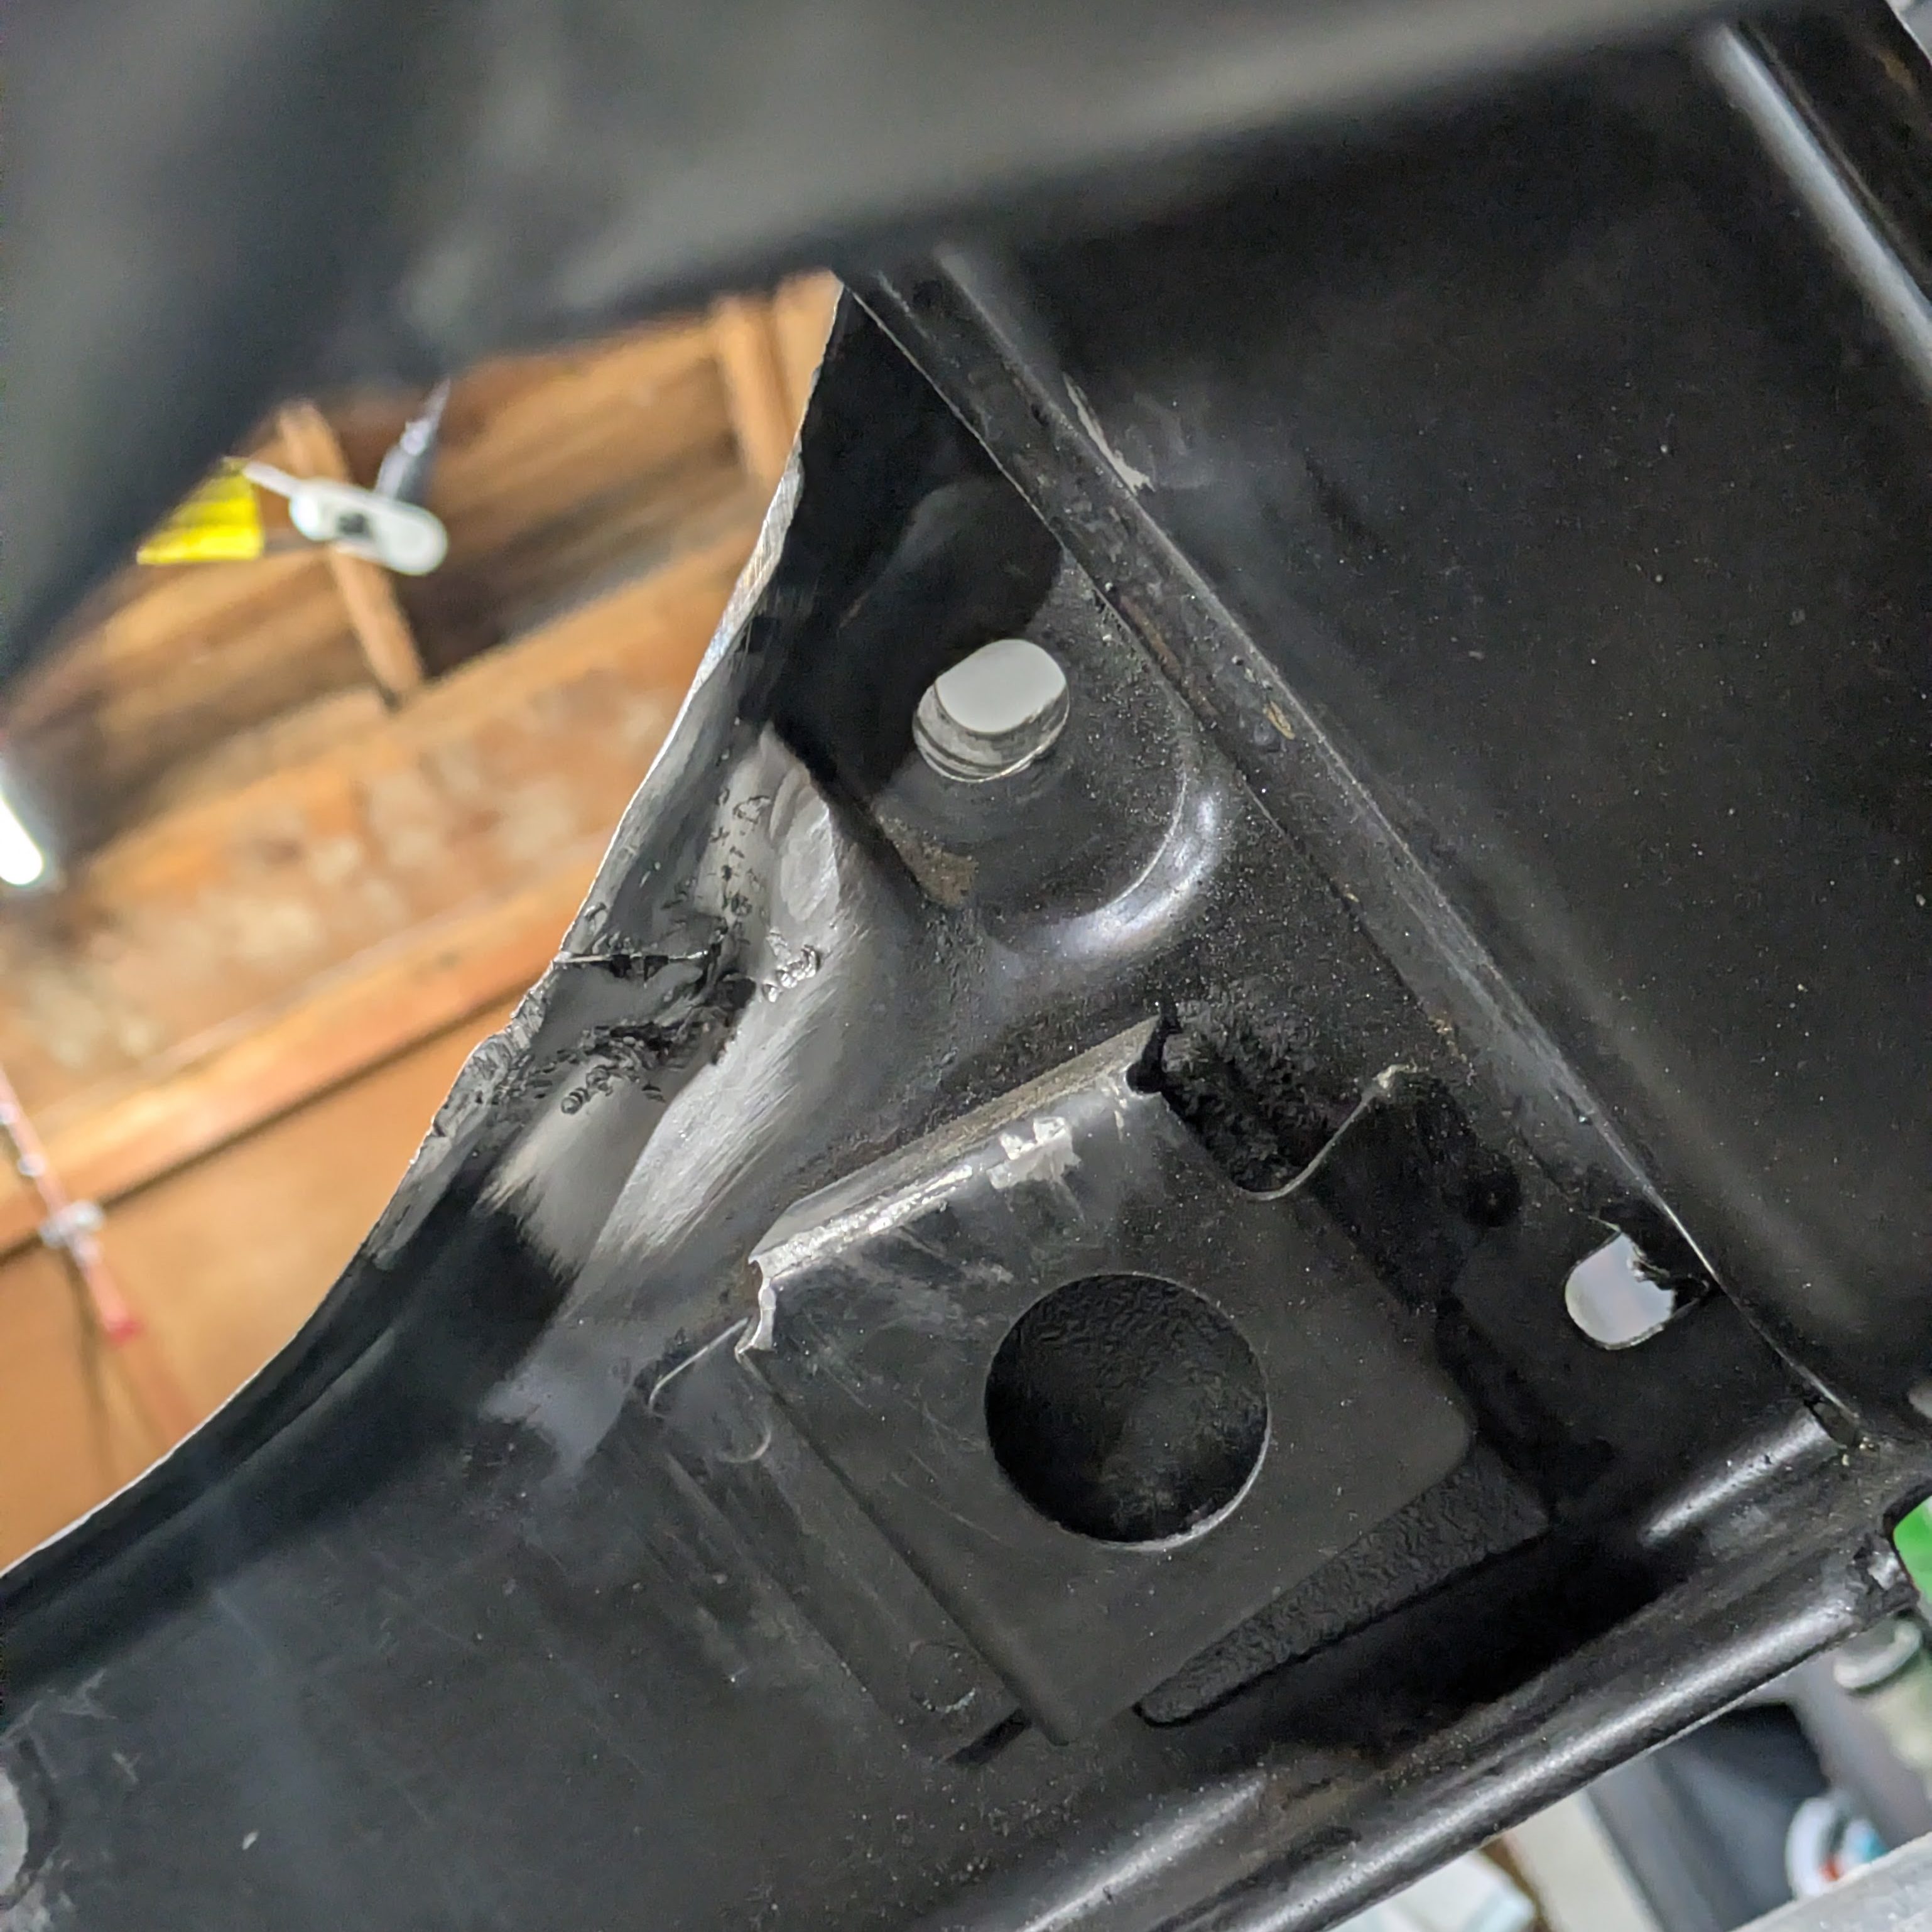
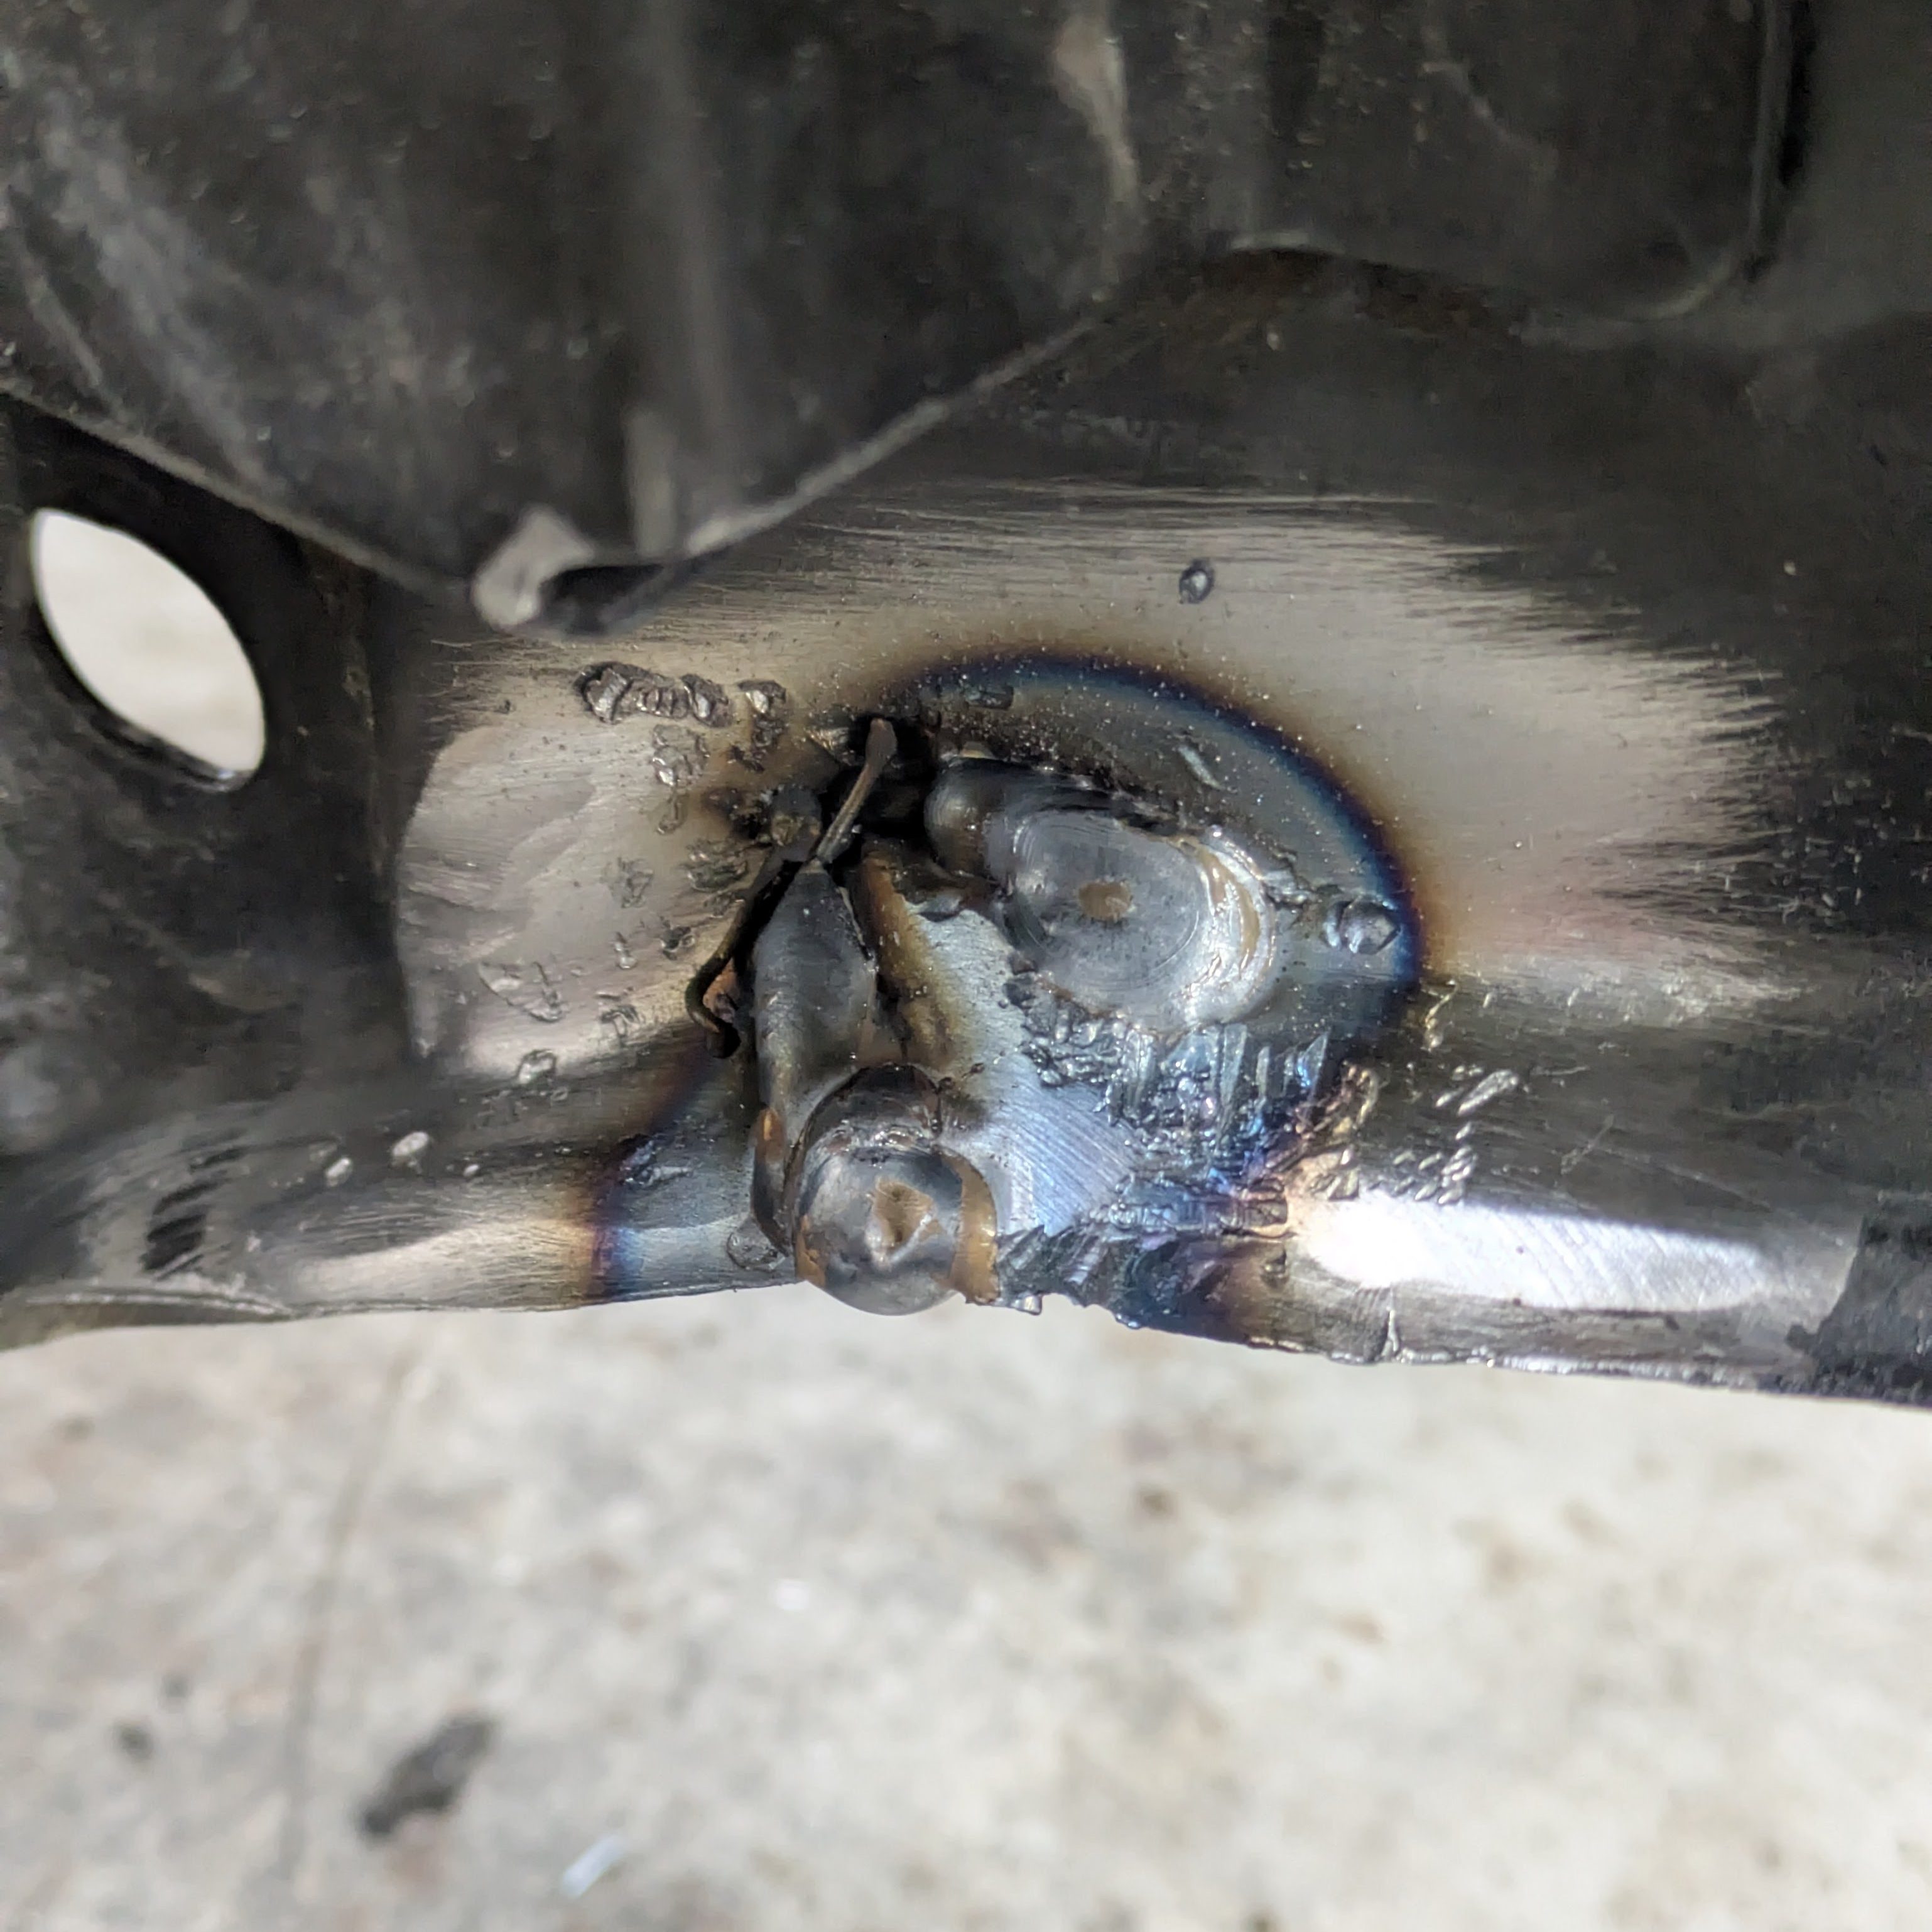
I then glued it back together, slamming as much metal on to the seam as I thought it would need. It was my first weld of the day and you can tell. While visually bleh, you wont see it in a second.
This also begins documentation of Thomas’s pretty schmedium welds. They aren’t that pretty, and occasionally I fully miss and have to redo an area, but as a conceptually trained welder, not a physically trained one, any seat time usually results in improvement. I trust all of these to do their job, and that’s what I care about.
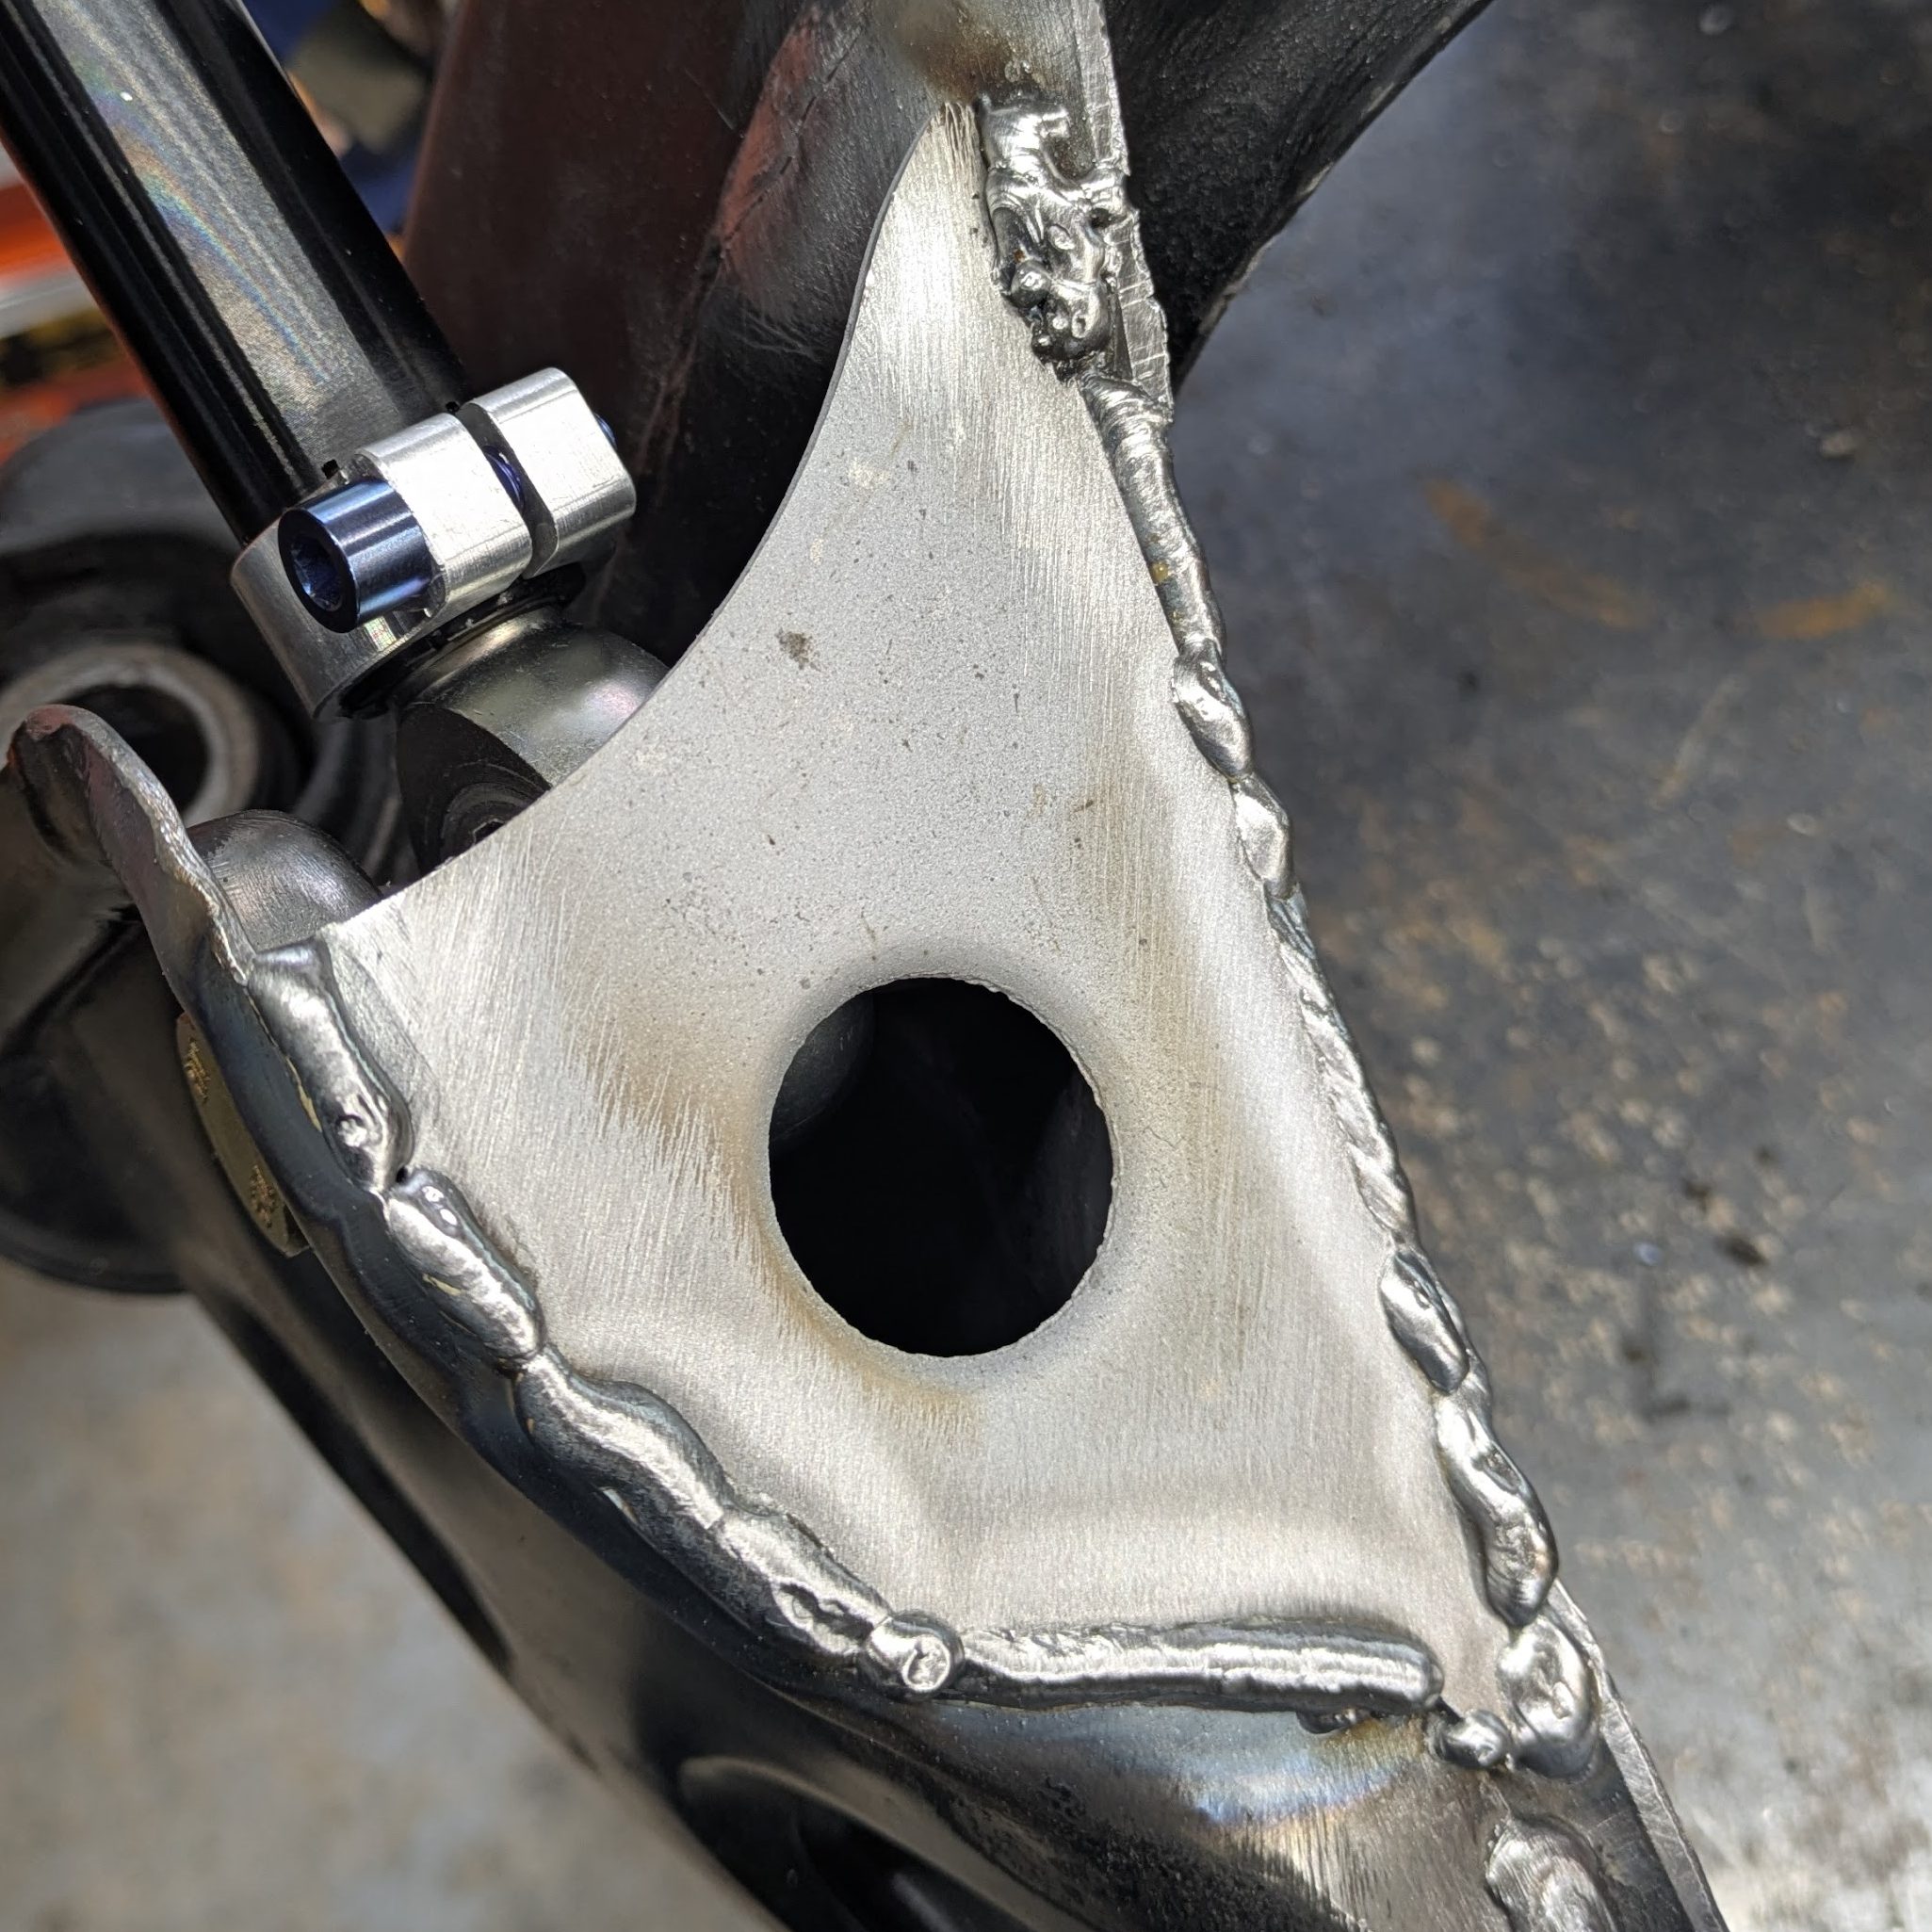
After repairing the axle damage, the first reinforcement plate got burned on, and after that the pace picked up significantly. Mock up plate, install arm in pocket, satellite tac in place, remove arm, flow metal.
With all the big parts welded in, we are going to take a quick aside and explain the other modification I was performing, first the function, then the fit-up and execution. I did a poor job of documenting this during the process, primarily due to the immense amount of frustration and uncertainty it caused.
Nissan performed some important revisions from the S13 to the S14/15, same with the equivalent Skylines at the time. One of the most significant being a large rear suspension geometry change to reduce the anti-squat. Without getting into the weeds of suspension geometry (I’ve made and lost friends over those tangents), the relevant feeling from the driver’s seat is that this car has a really tough time planting it’s rear tire under power application, especially with the torque that the T28 makes. This is due to the rear suspension resisting damper compression and attempting to generate traction by shoving the tire into the ground rather than planting the tire with suspension compression and weight transfer. Rear separation/anti-squat is an incredibly effective strategy in a drag/straight line environment where combating wheelies due to too much grip is the concern, however in a track/autox car, it usually means spiking the tire/overloading it during power application and either spinning or wheel hopping.
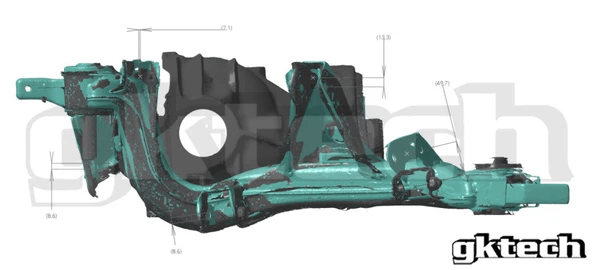
In the image below (straight from GKTechs’s site), you can see that the S14 front lower control arm point (grey) is lowered by about 2″ from the S13 point (blue). This was the revision made by Nissan to promote suspension squat and increase traction.
The easiest path forward would be to buy an S14 subframe and convert it to work in an S13 using offset subframe bushings and the correct S14 RLCA to compensate for the 10mm increase in track width. Unfortunately, we are far past the days of cheap S-Chassis parts, so that solution is expensive if you can even find one. Nissan will happily sell you a brand new S15 rear subframe, but I don’t have that kind of coin.
But fret no longer! GK Tech made special brackets that fixture off of the swaybar mounting bolts to weld in S14 geometry into your S13. They lower the control arm mount 2″ (which is the max allowed deviation for a factory pickup point in the Formula Drift rules), and allow you to retain all of the good things about an S13 subframe (solid differential mounts, right track width, exhaust mounts) while gaining the geometry improvements of the S14. On top of that, it’s cheap, and has a good instructional video and paper instructions. What could go wrong?
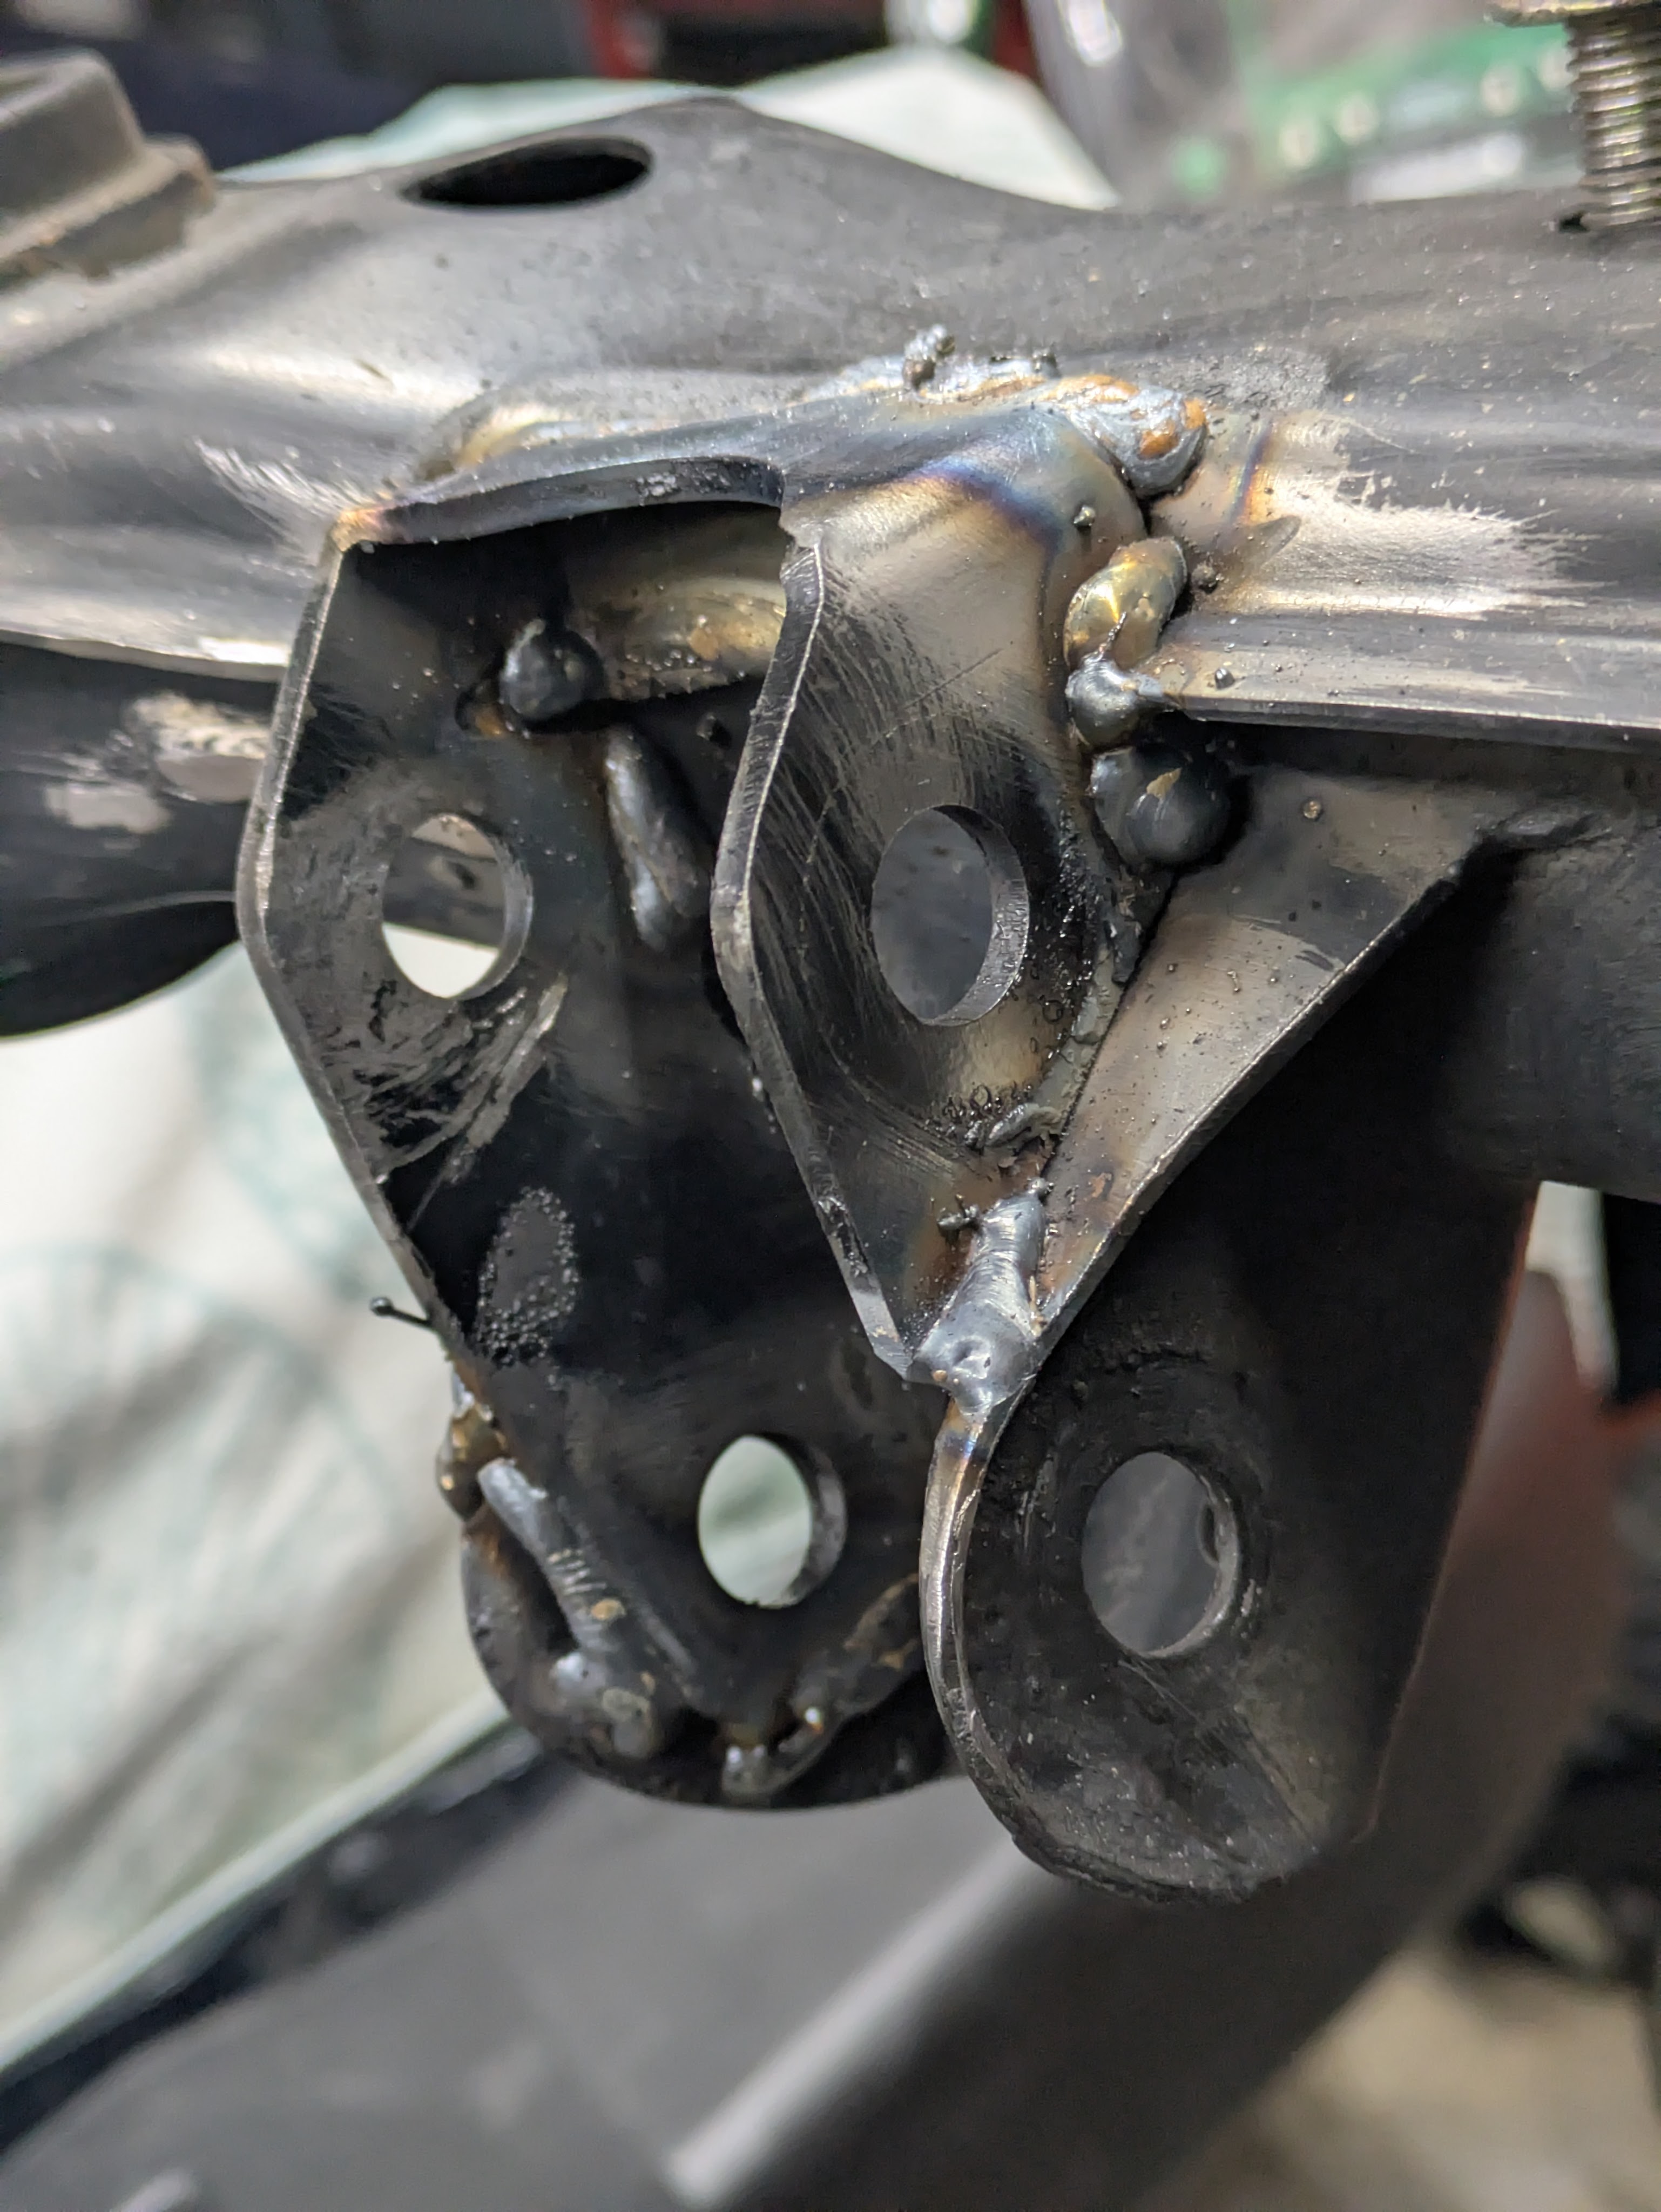
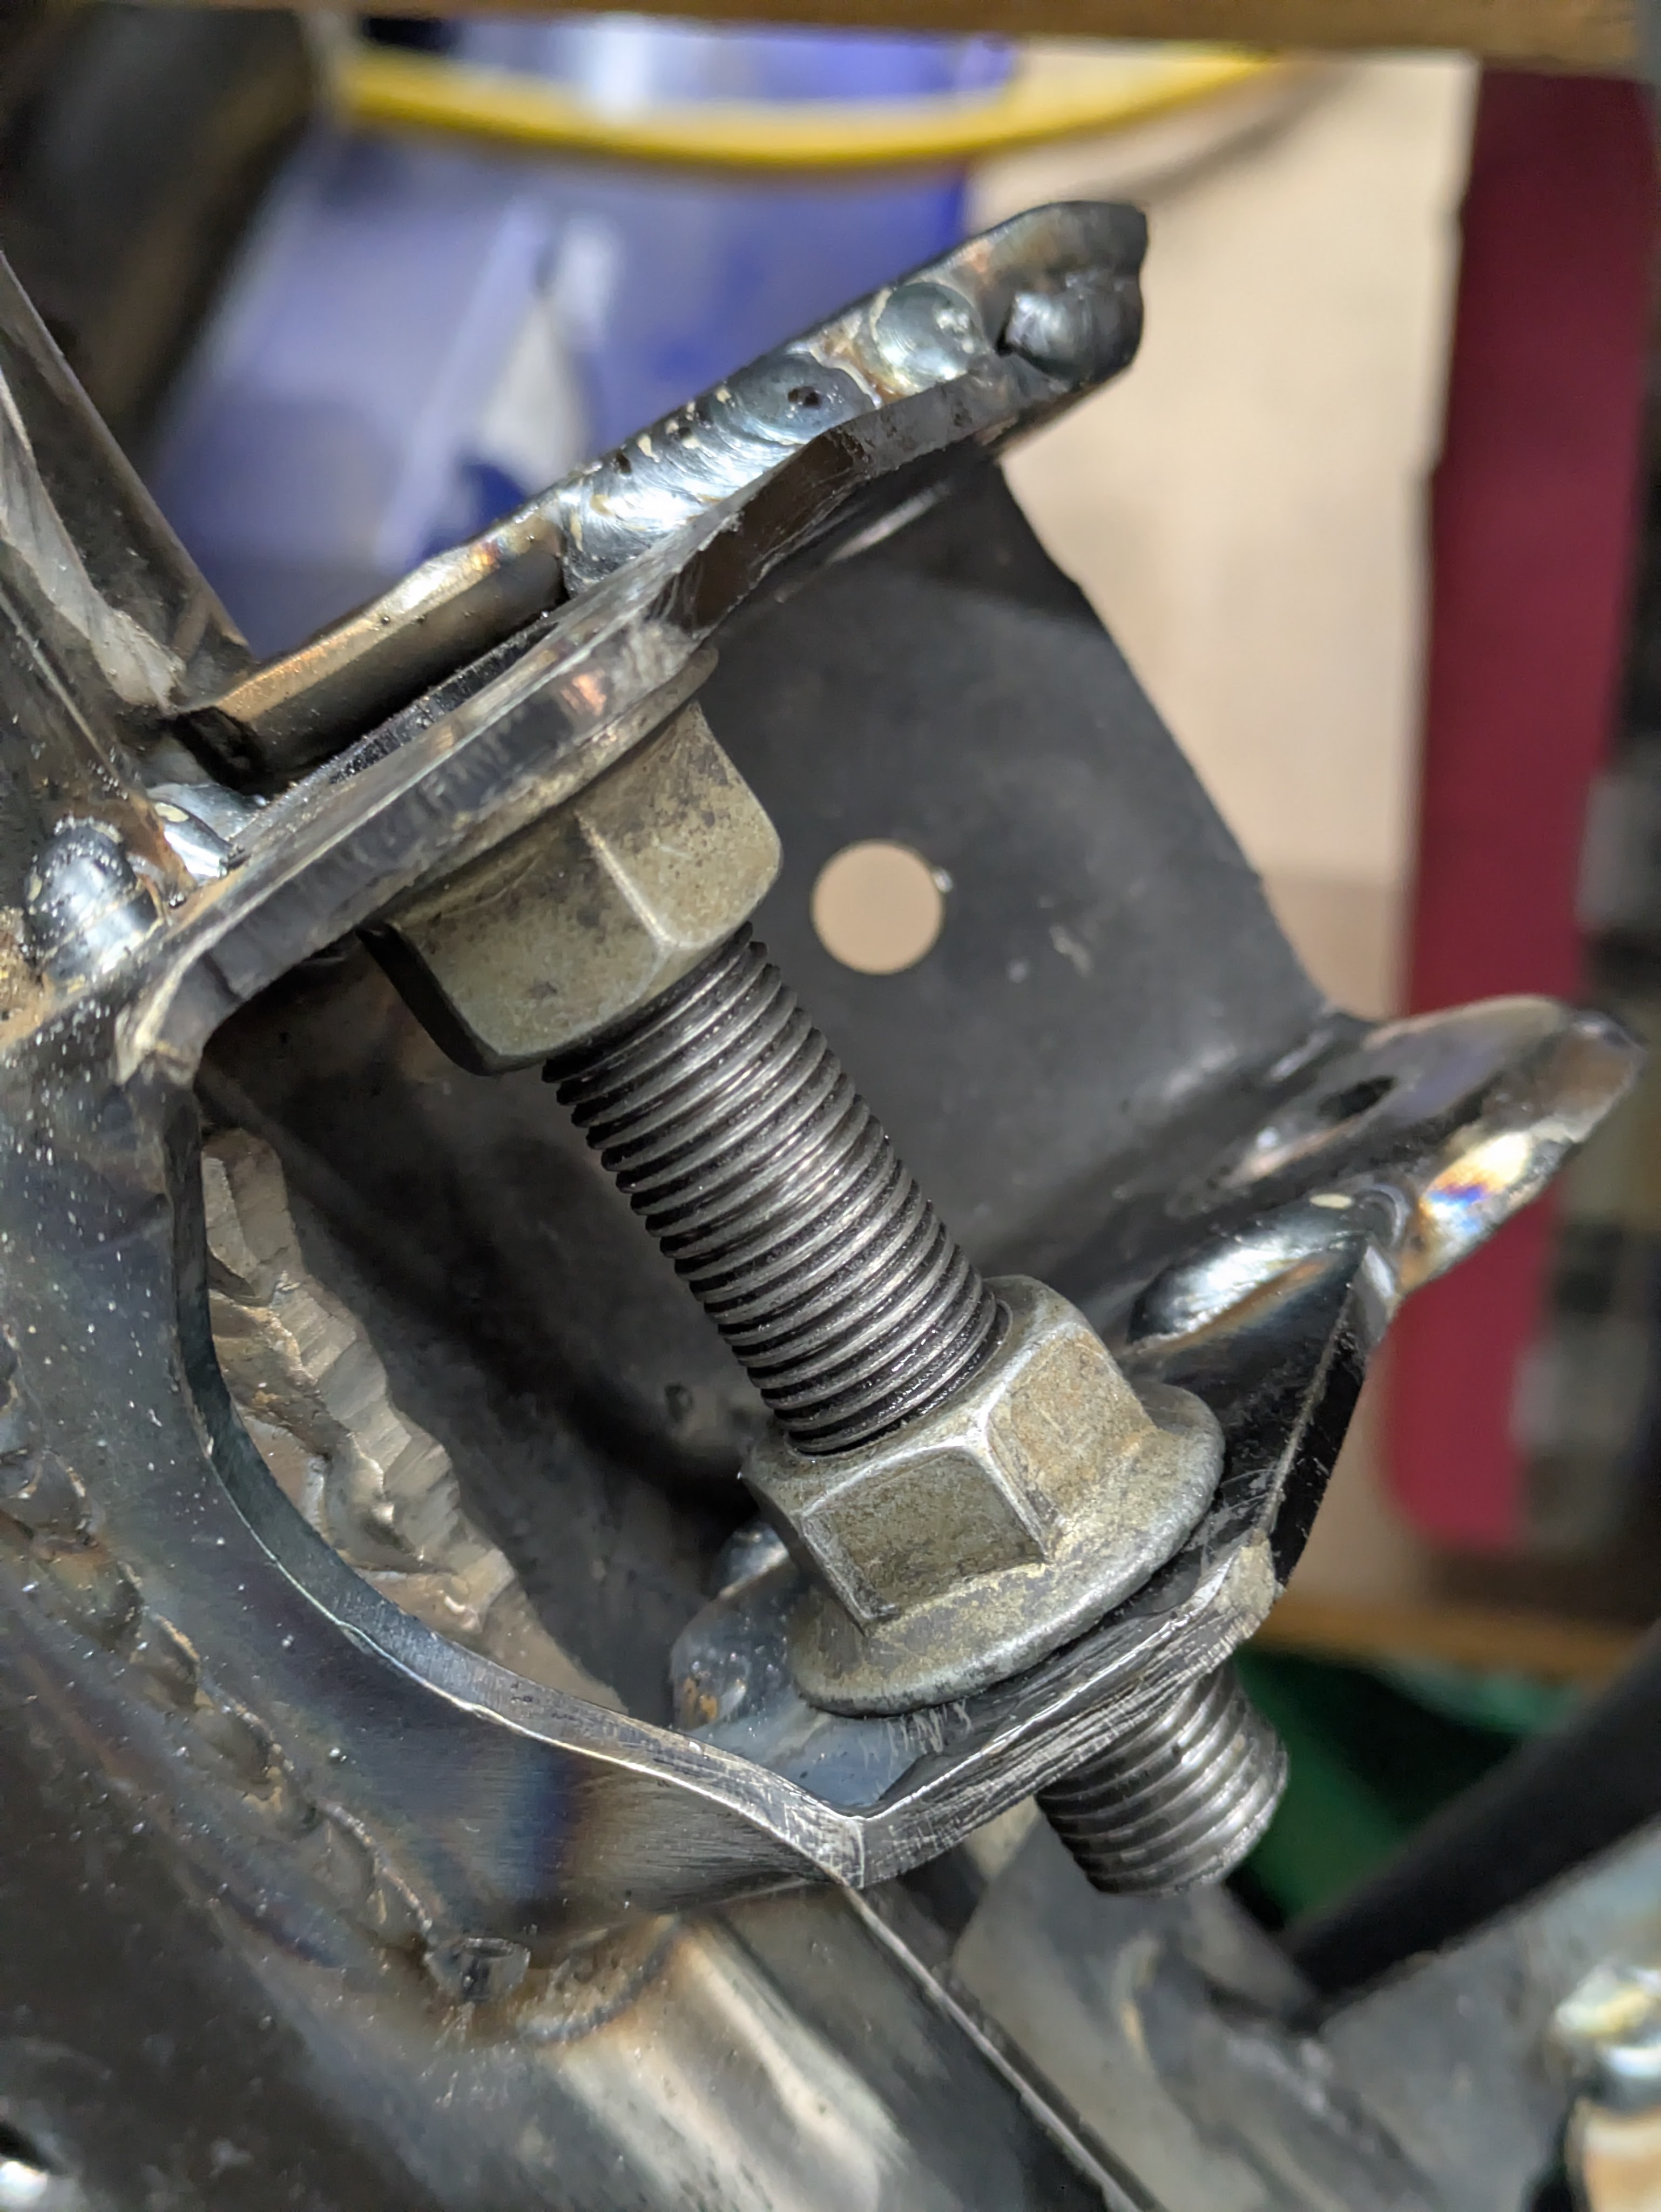
Turns out: a lot of it. This relocation bracket fits like absolute trash. I found it nearly impossible to have confidence in it’s location. It wants you to use the two swaybar mounting bolts on the bottom of the subframe, and the S13 upper mount location with some included machined spacers to secure the bracket in place for locating and welding. Unfortunately, it was difficult to get all 3 fixture points to play nice without having the bracket be really far away from the subframe. While the gaps were still bridge-able, it certainly didn’t feel good while welding them in.
What I was really concerned with was width of the pocket wouldn’t be correct despite the included spacers to combat warping, as well as the distance between the front and rear pockets for the lower control arm to mount being wrong as the lateral location felt almost like choose-your-own-adventure even when the bolts are tight. They want you to use the rear lower control arm to verify that distance, but if you do both the rear lower control arm reinforcements and subframe modifications in the same day (something which doesn’t feel unreasonable), it doesn’t make sense to install the spherical bearings in the arms (which are required to do as the rubber bushings would be significantly misaligned) just to check fitment as I wanted to refinish the arms post-reinforcement.
Without the arms to check it properly, I was a little nervous burning them in, but it had to get done. I can say now that they do (kinda) fit and everything will work out (hopefully), but just be aware of the shortcomings of this product and the high level flaws that will generate a lot of annoyance. I have confirmed with two other people, including a full-time fabricator, that this kit fits like shit. I still do think its worth the effort, but it isn’t without it’s flaws; it’s not in scathing review territory, but definitely advisable difficulty.
Alright back to the plates that fit ok, except the diff plate also sat with me the wrong way.
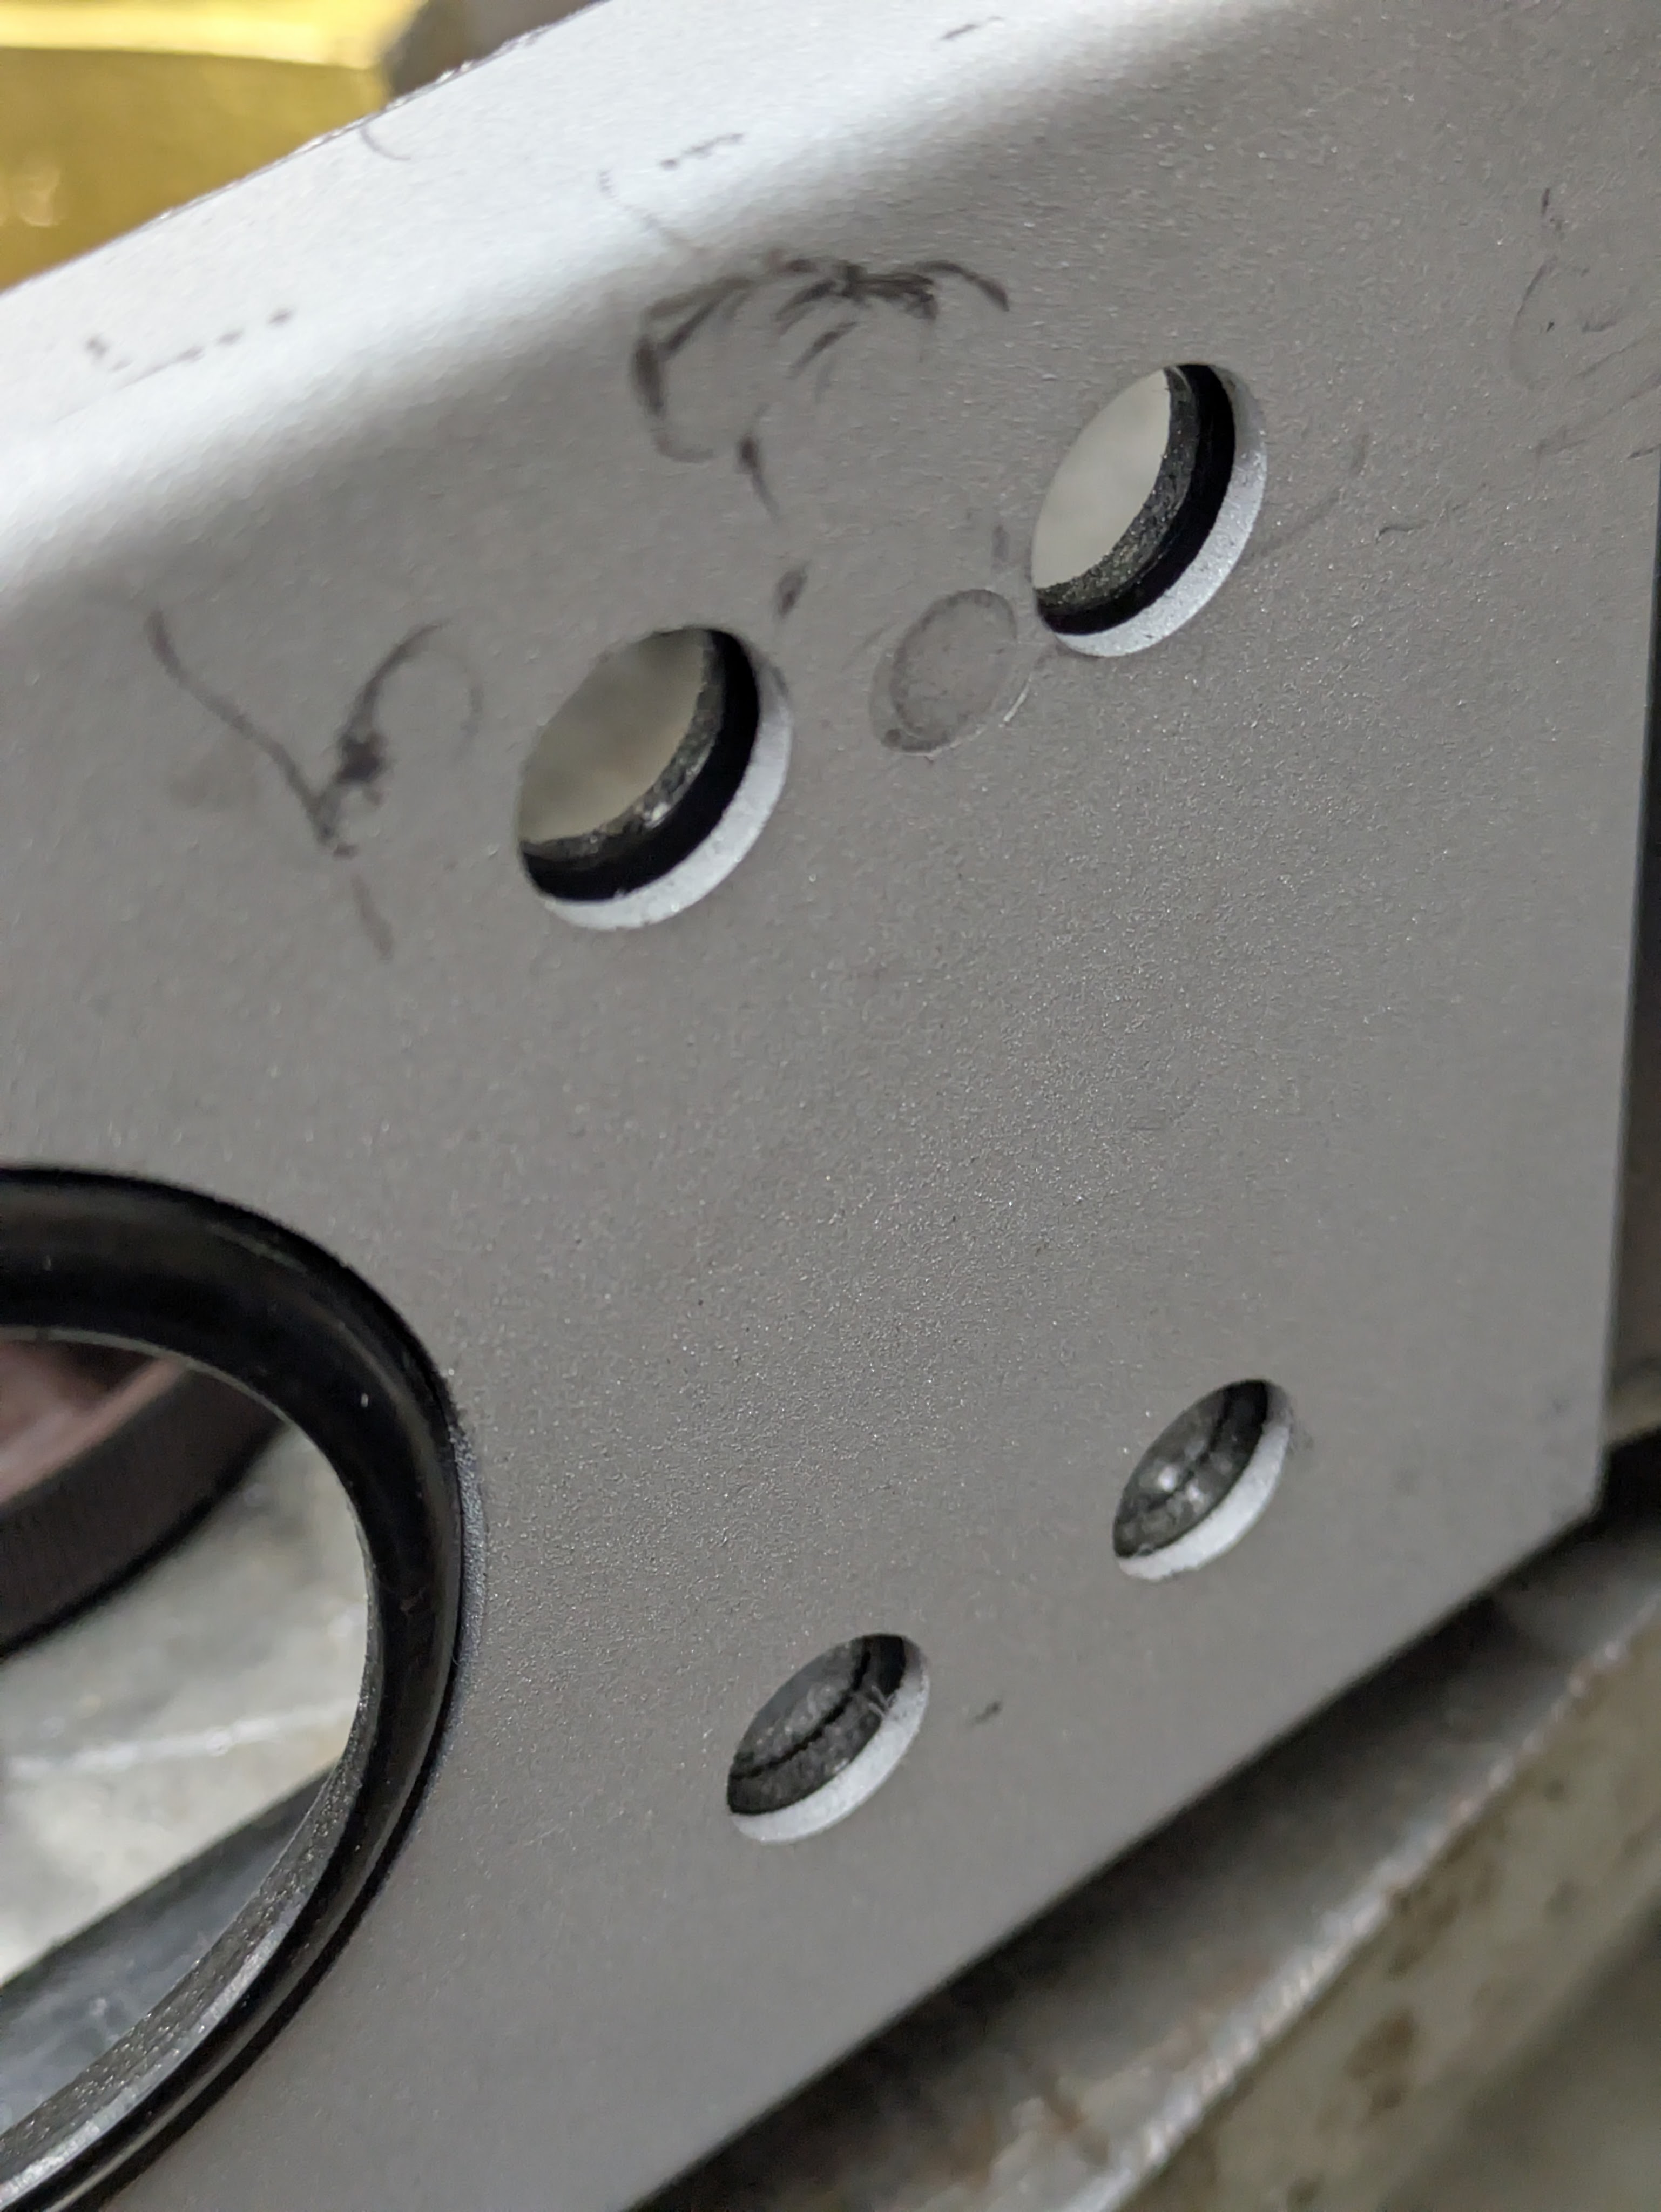
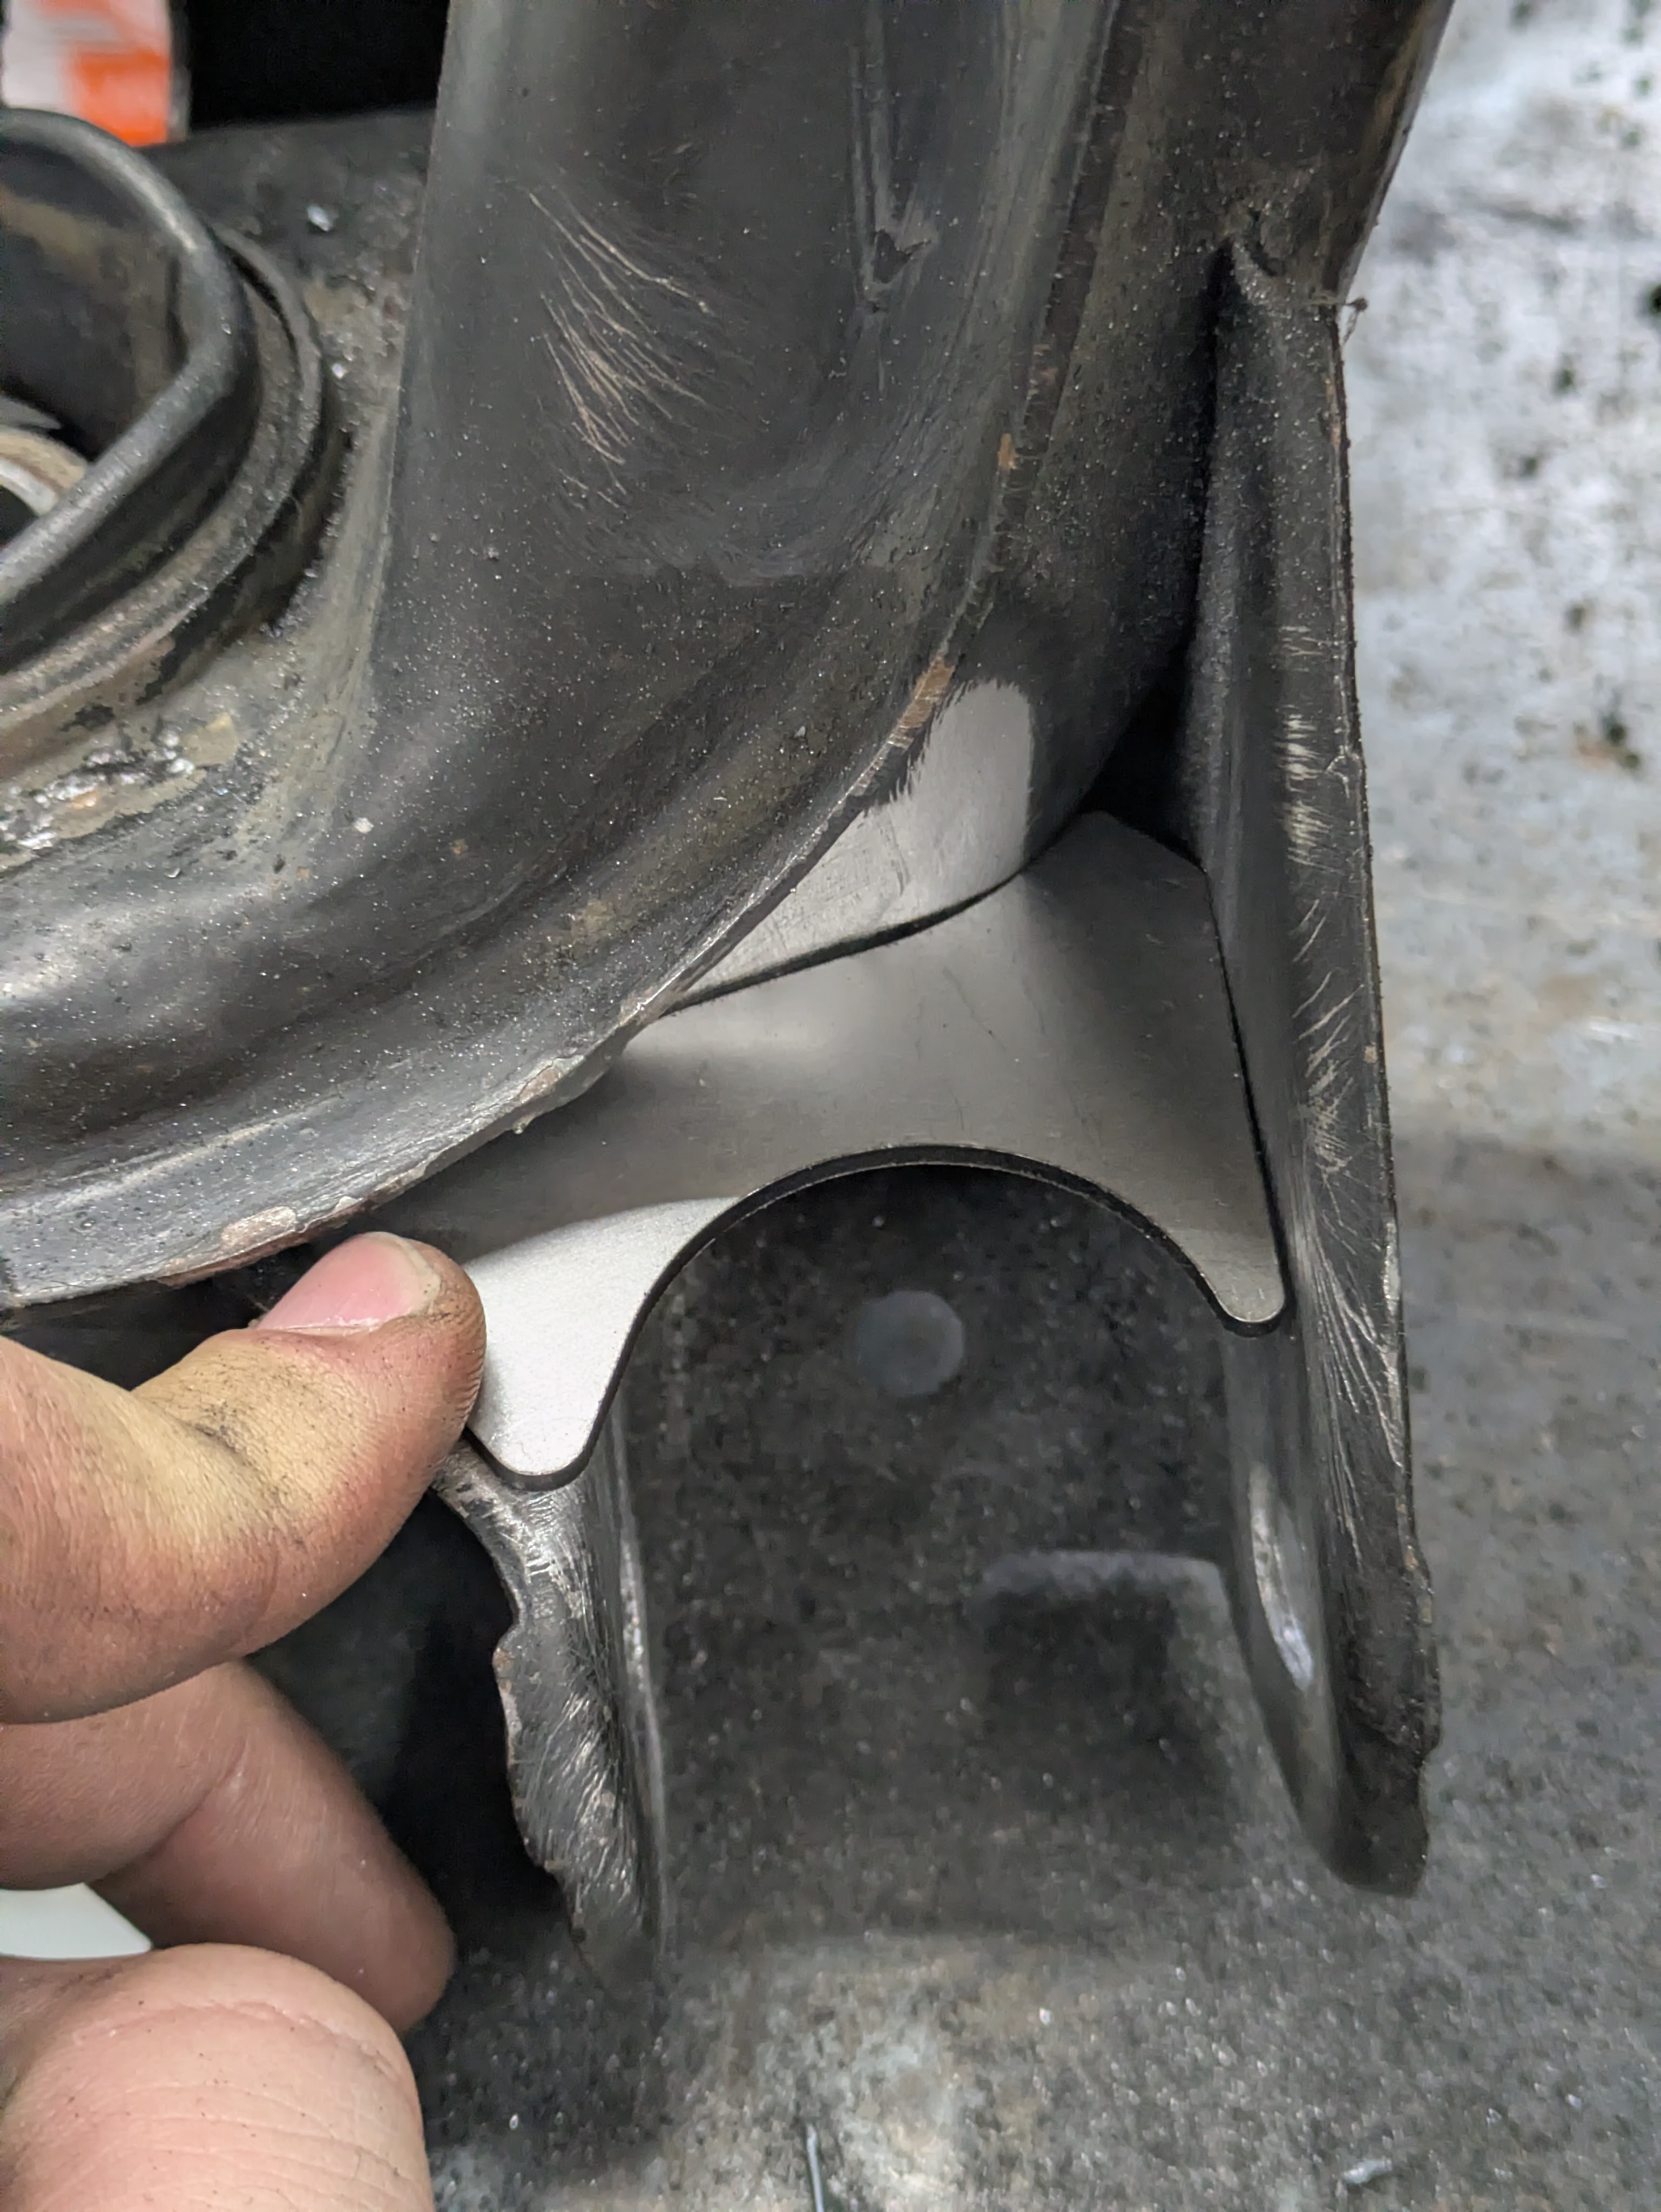
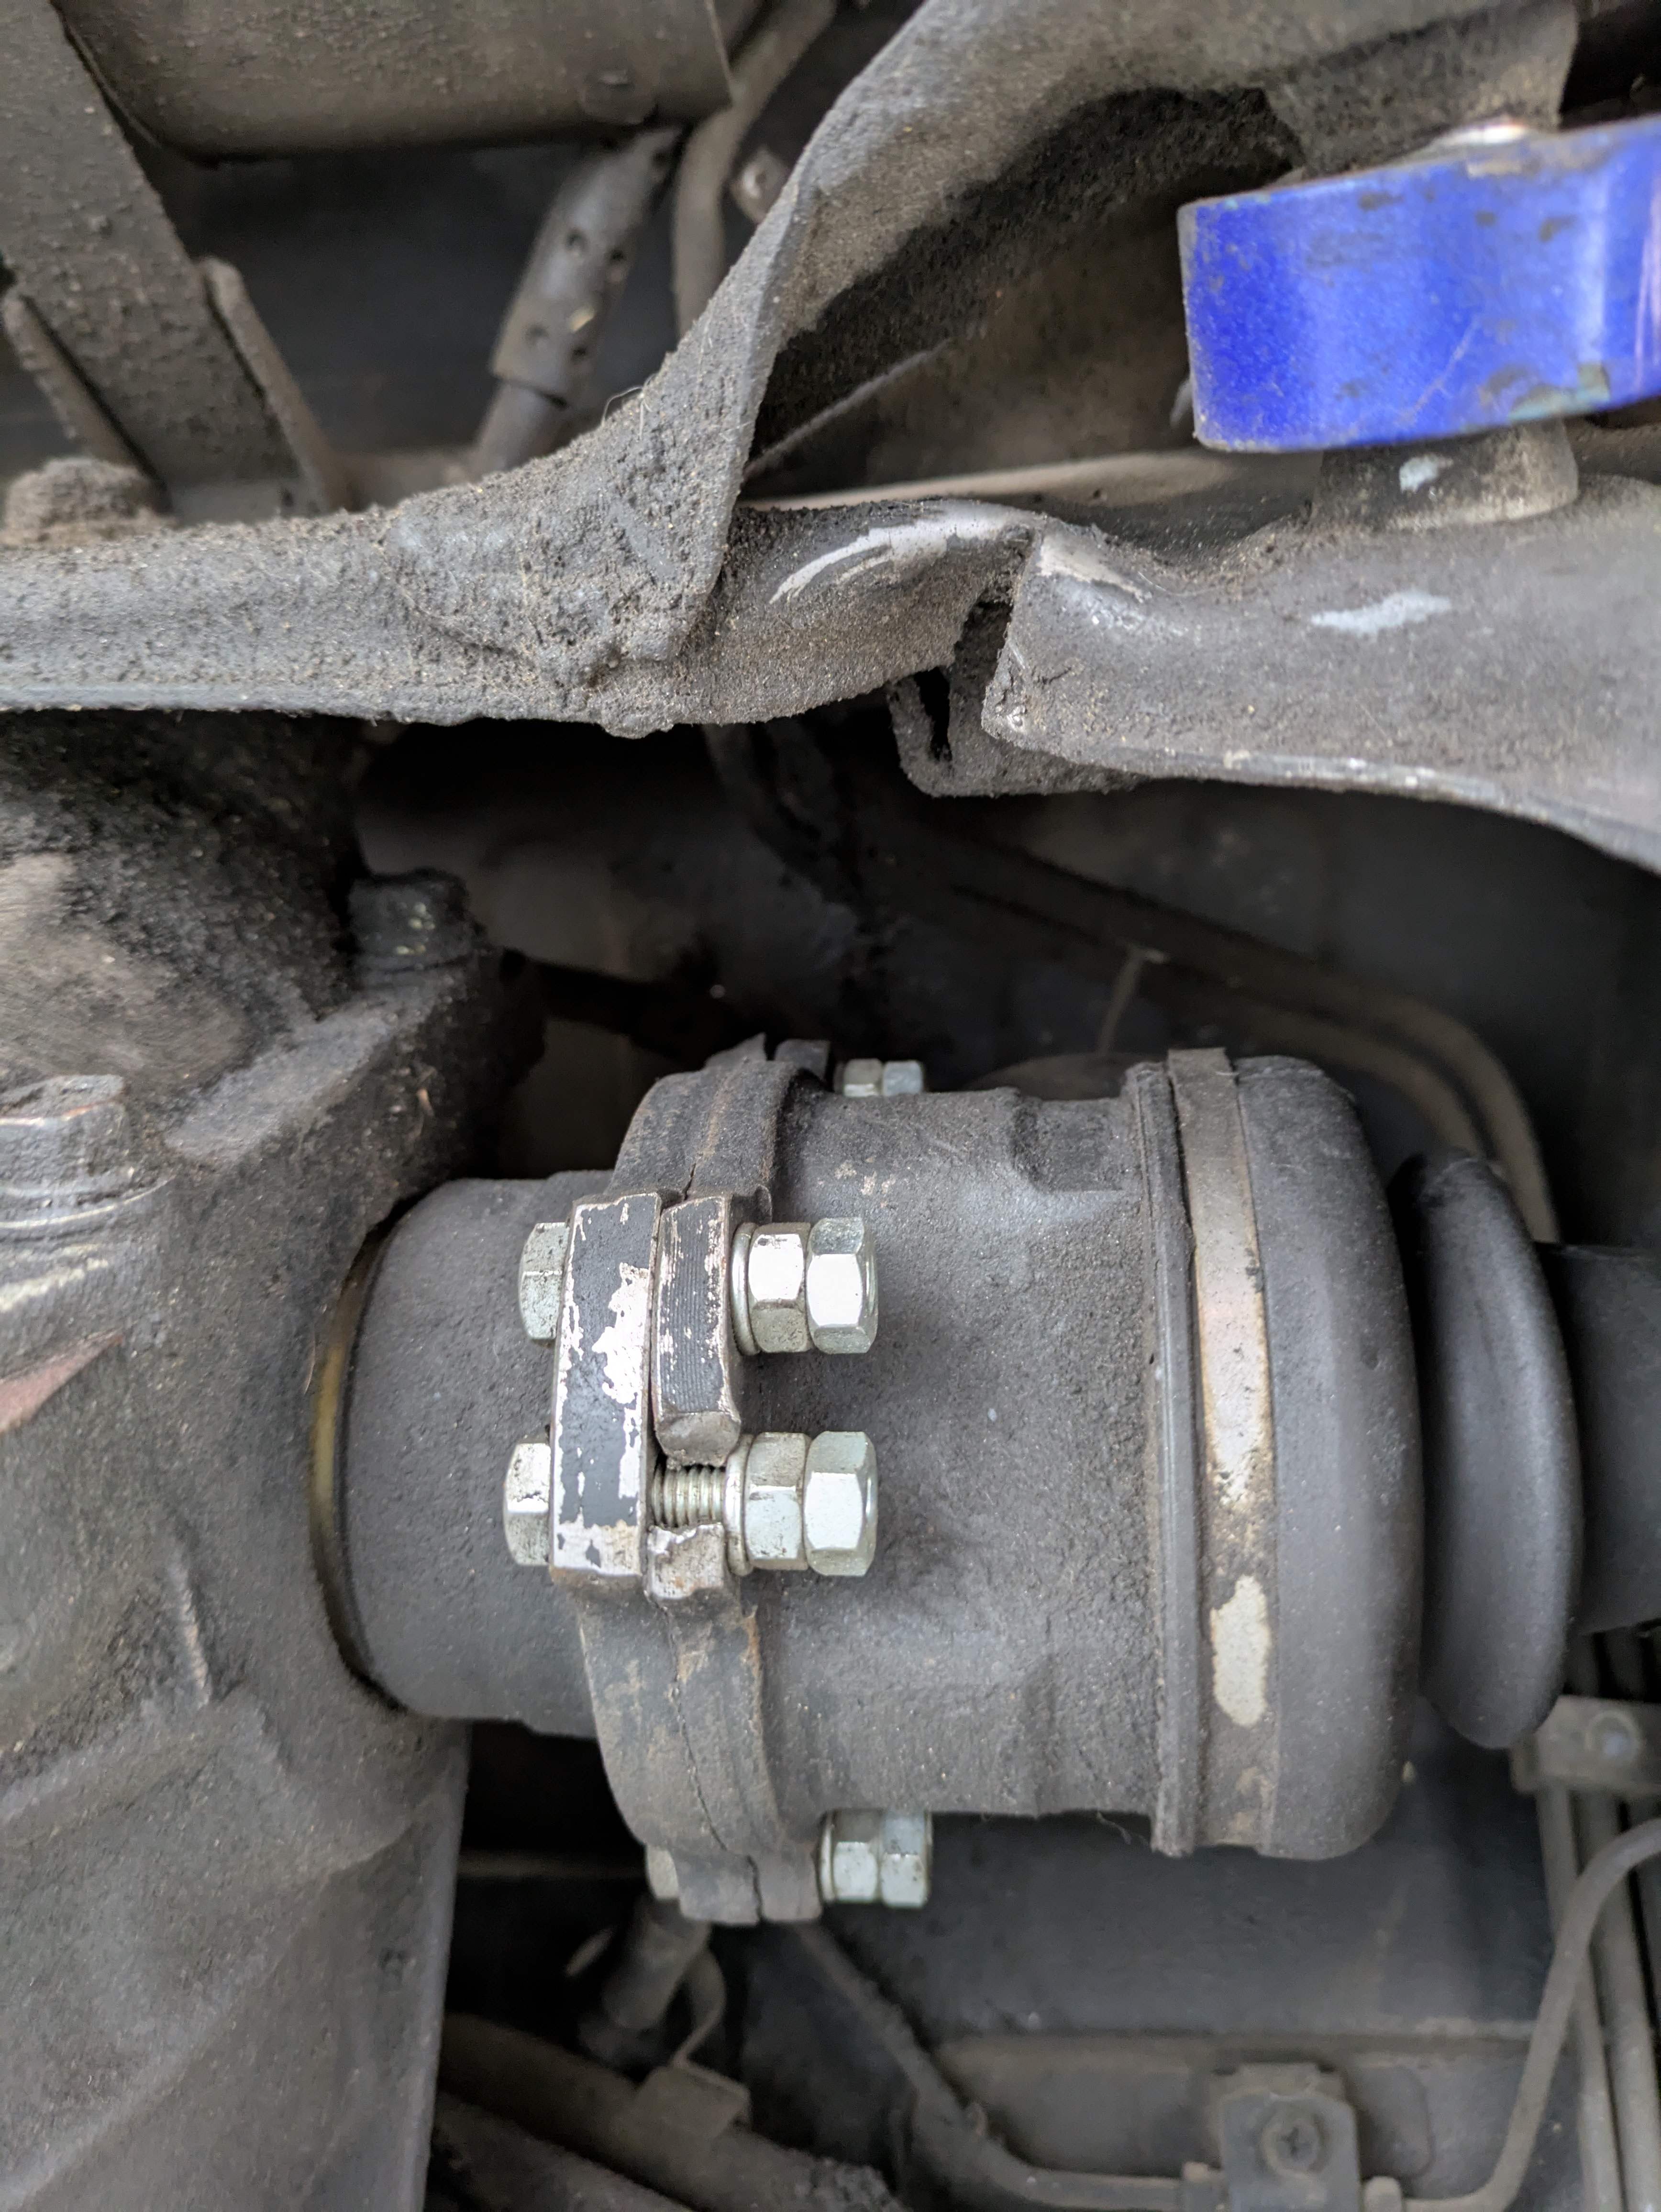
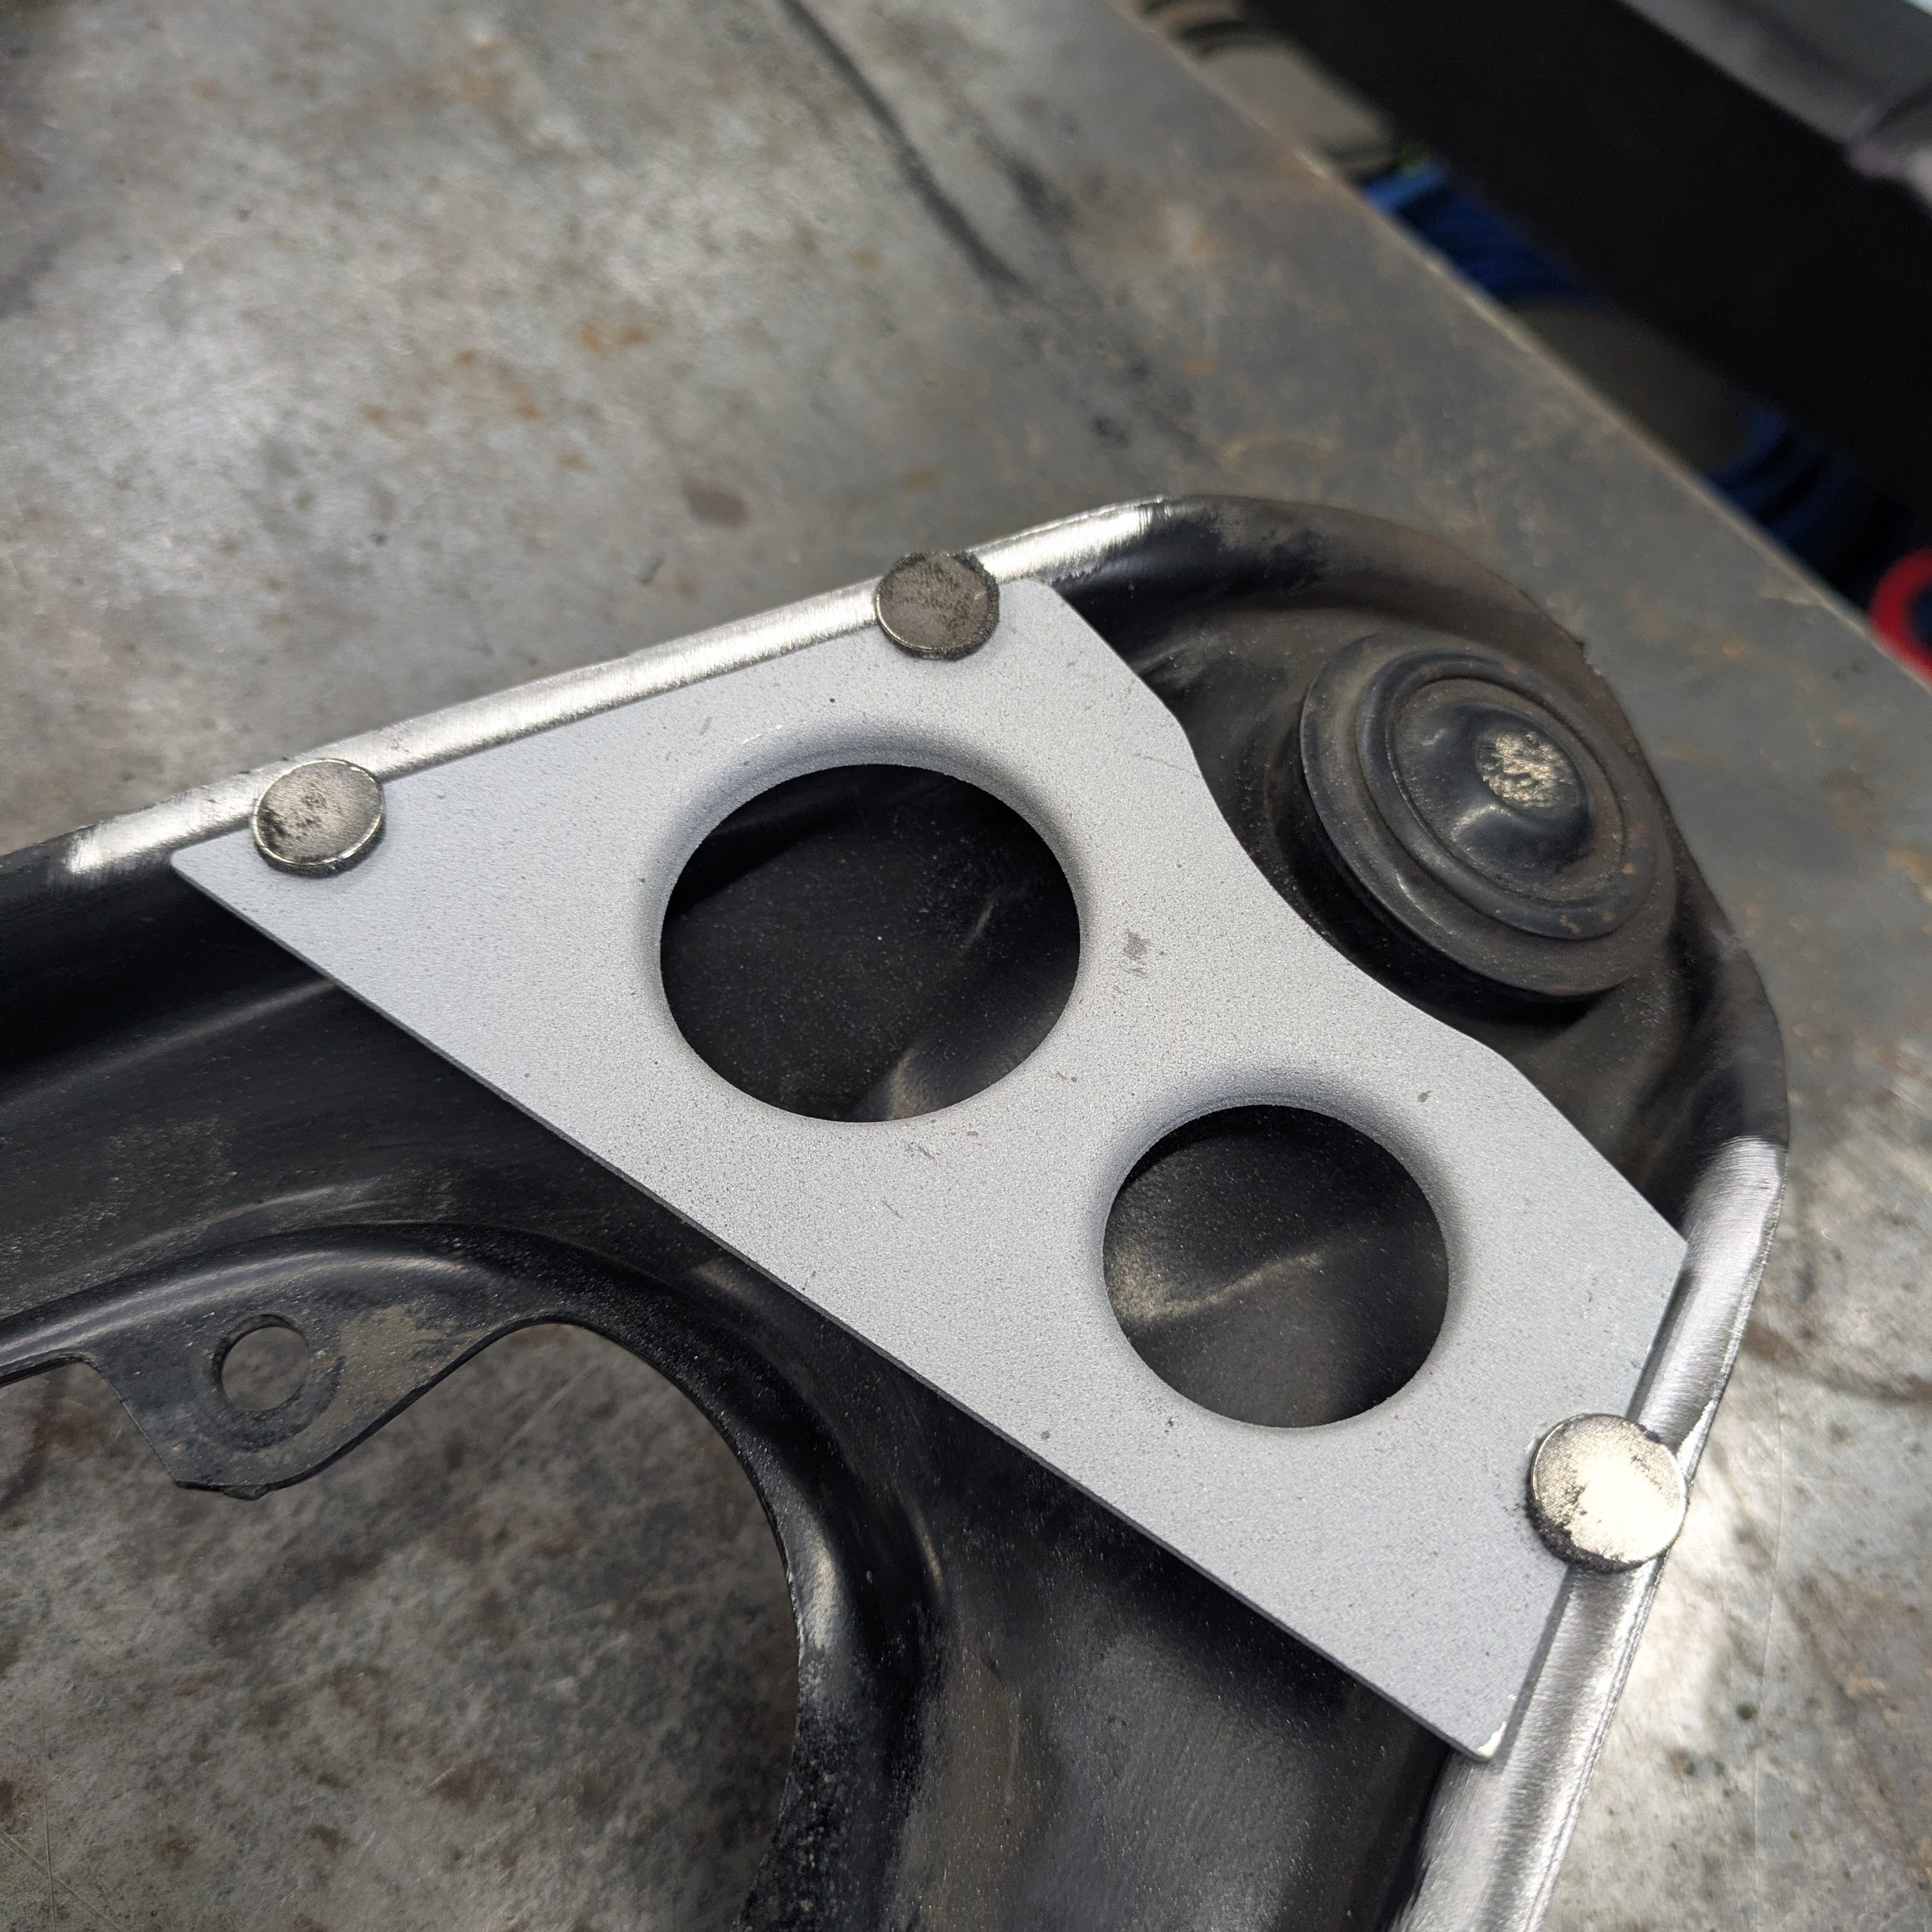
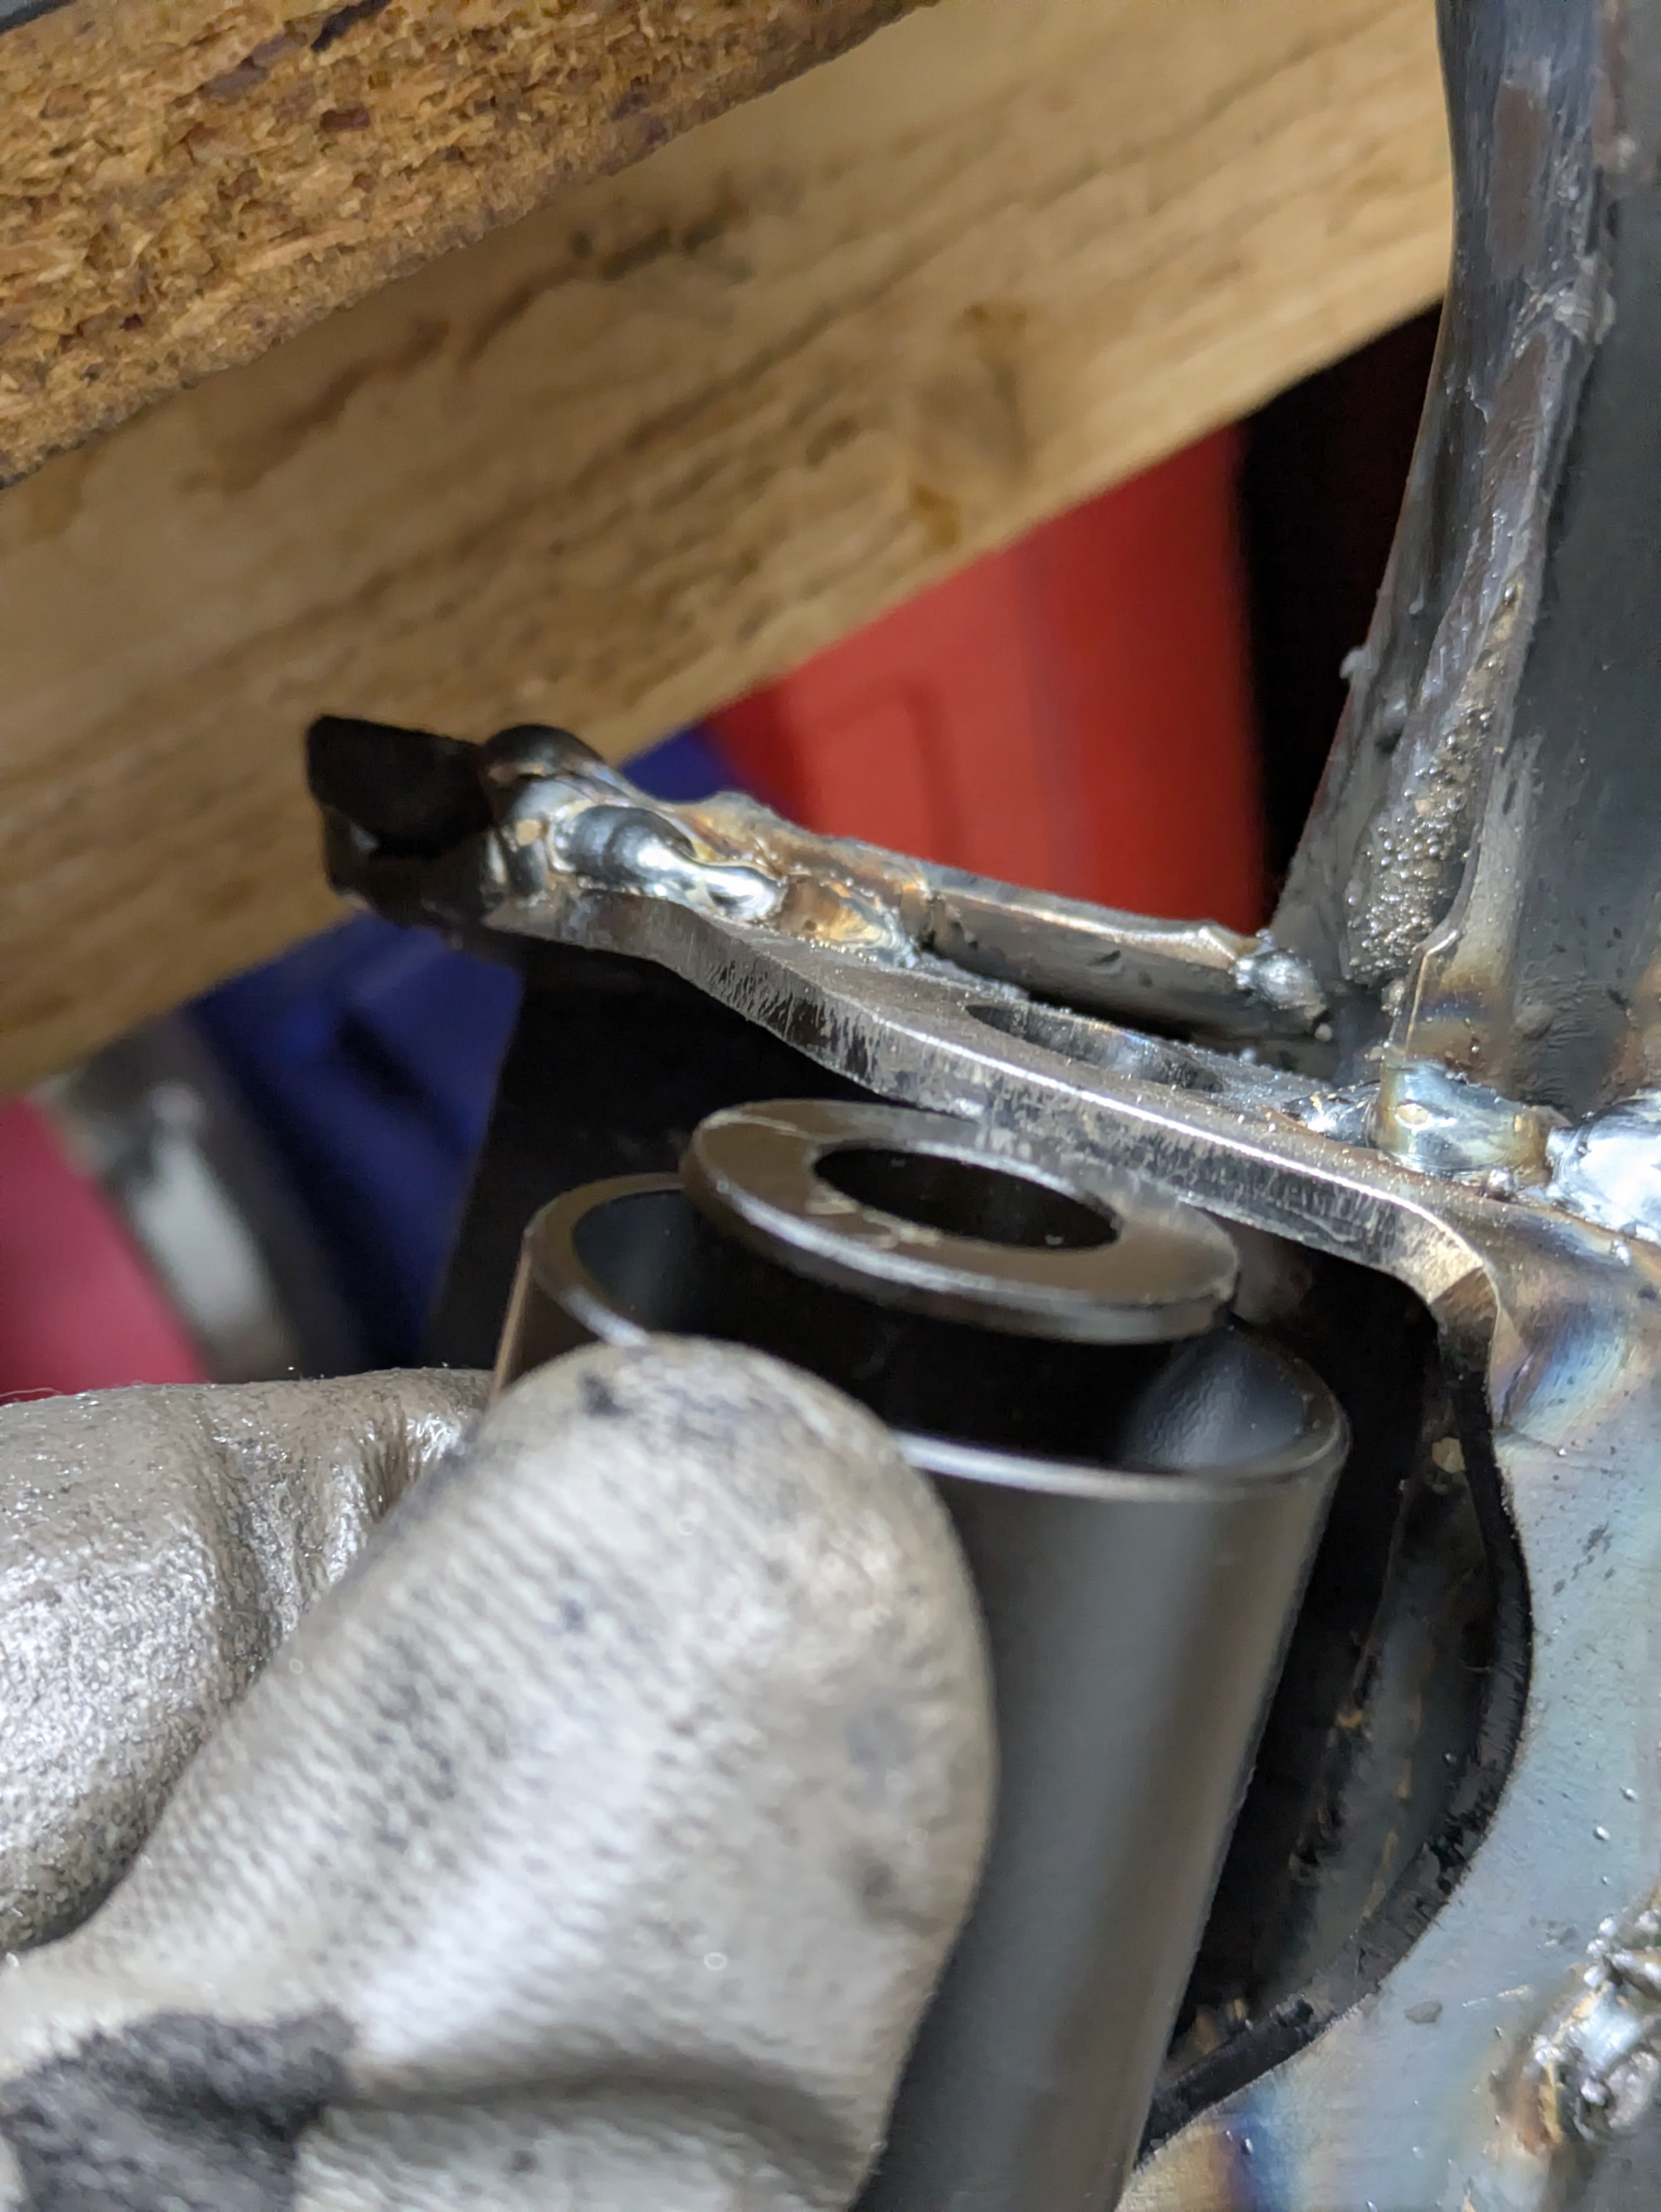
Take note of the lower holes having a continuous bore, while the upper holts have a gap in between the plate and the subframe. This is due to a feature of the factory S13 subframe that means these mounts are not on the same plane, and welding this plate in as-is might cause issues in the future.
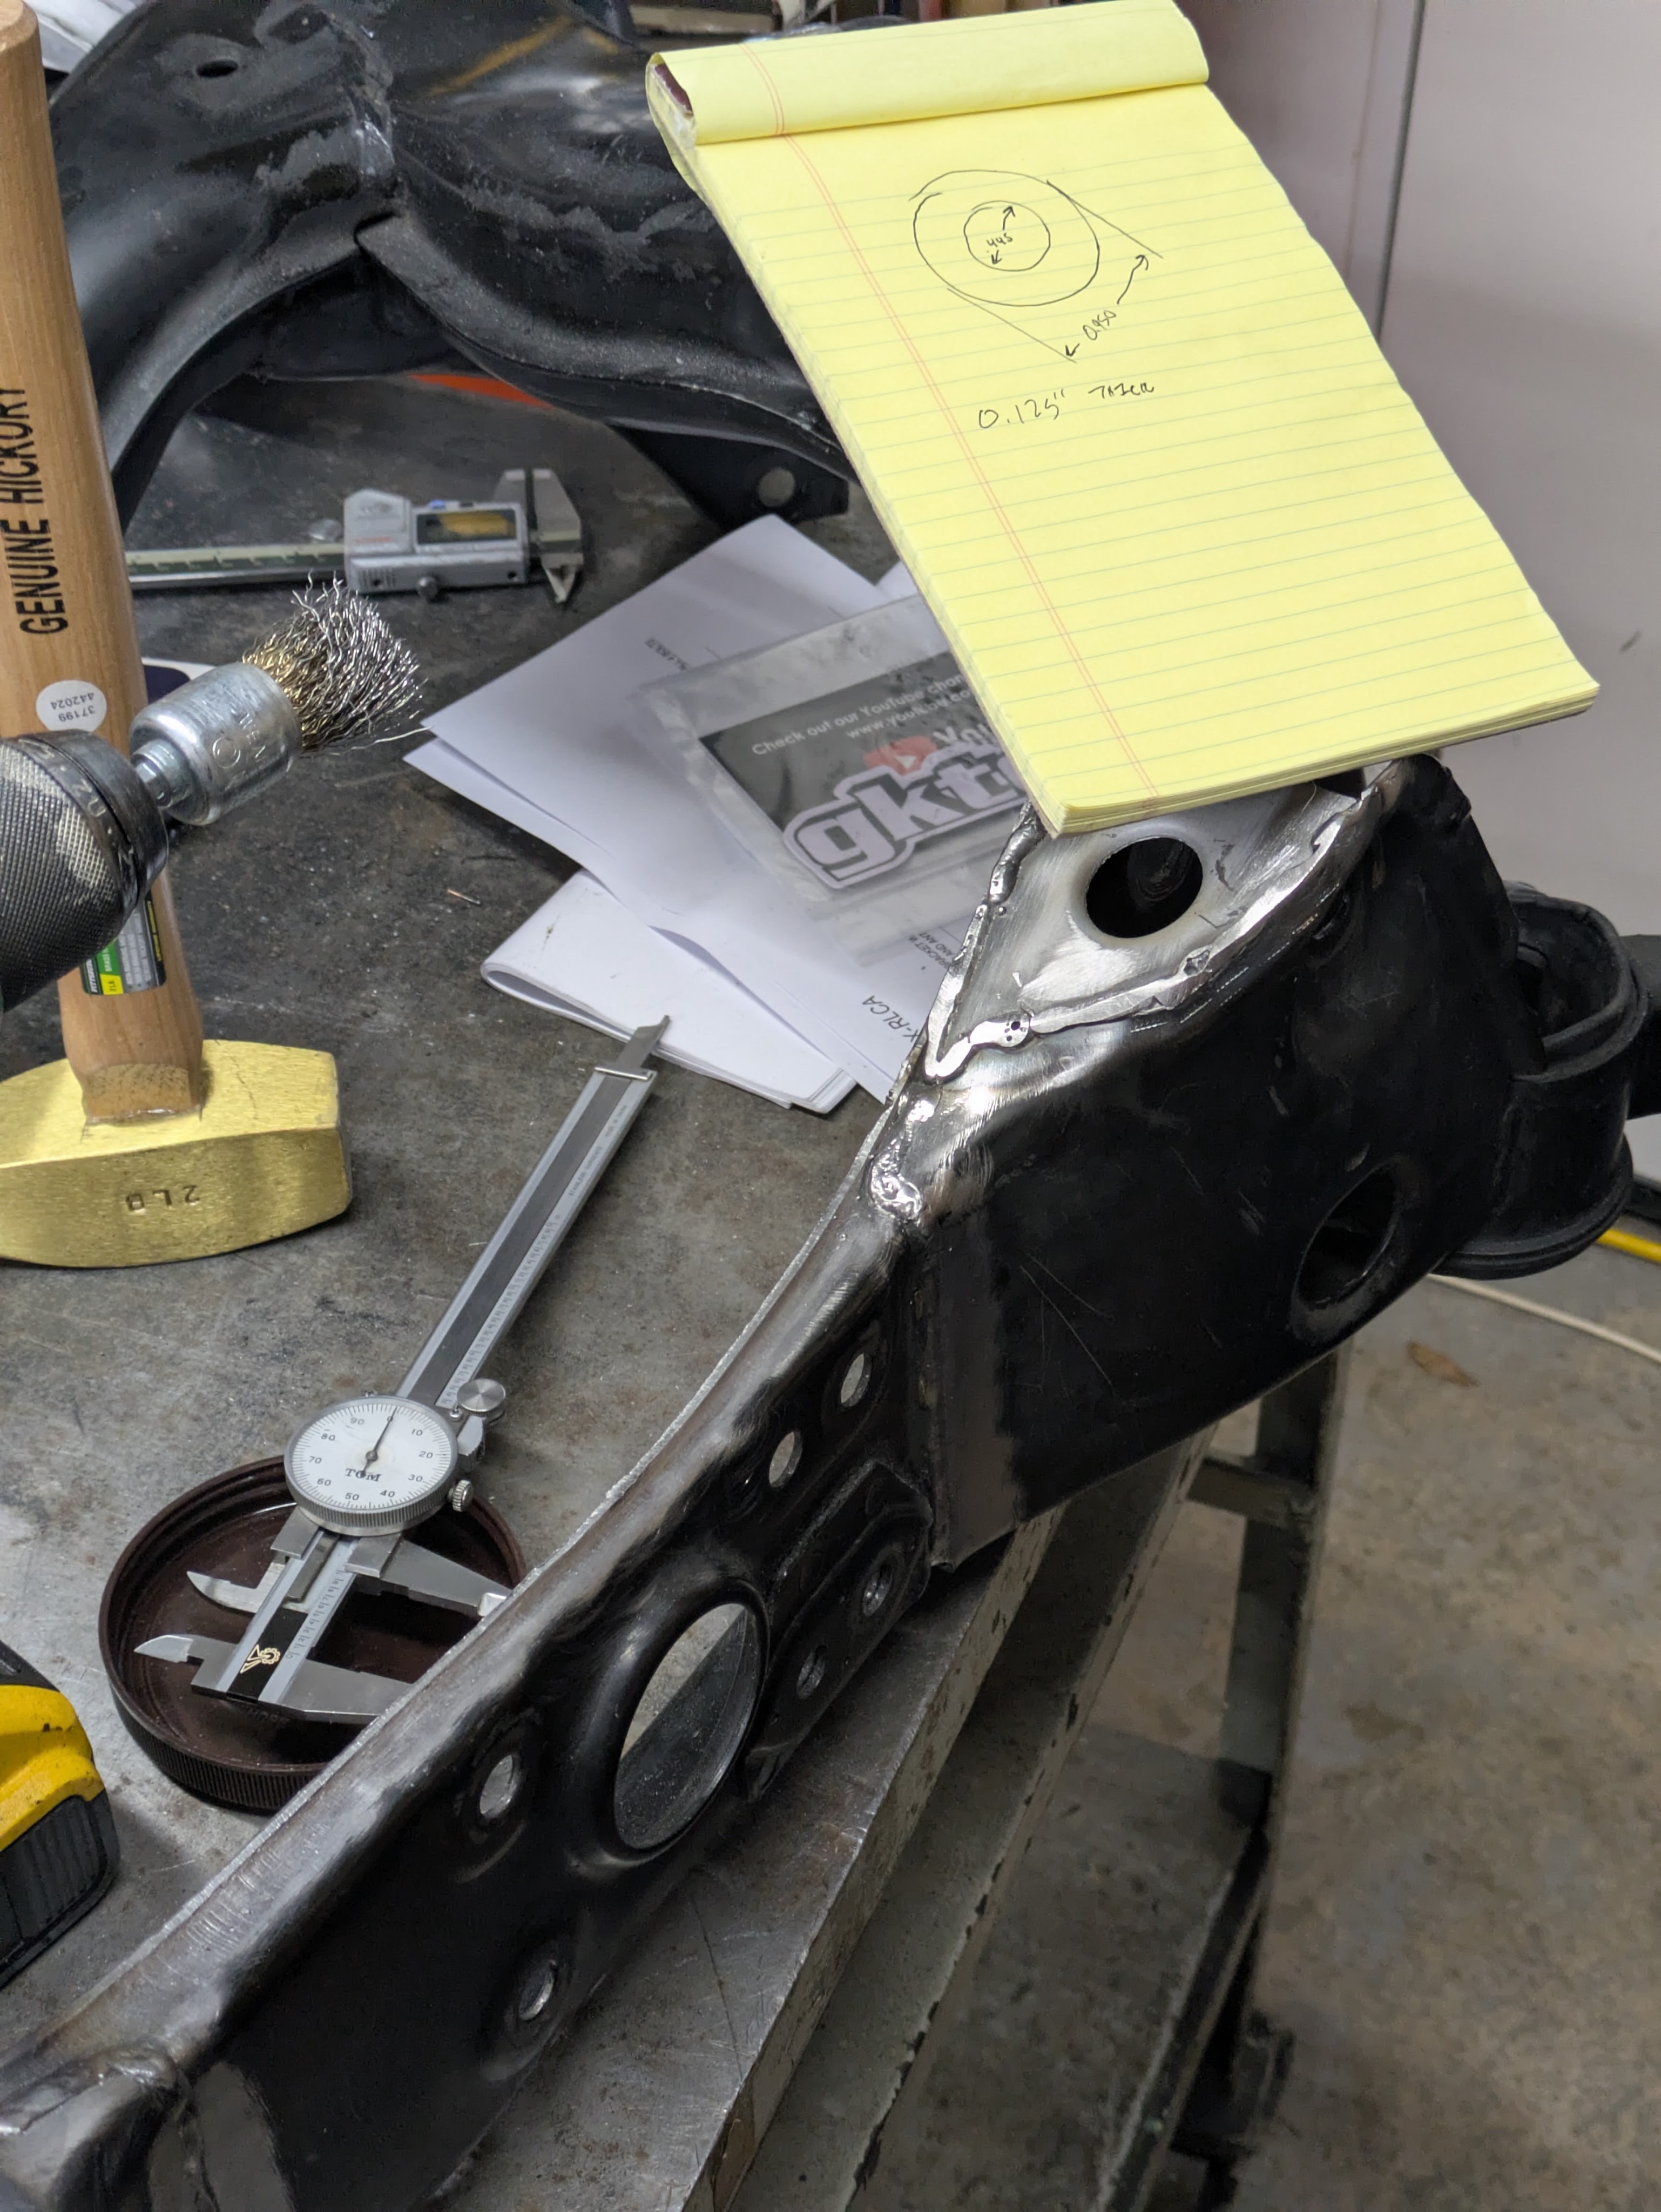
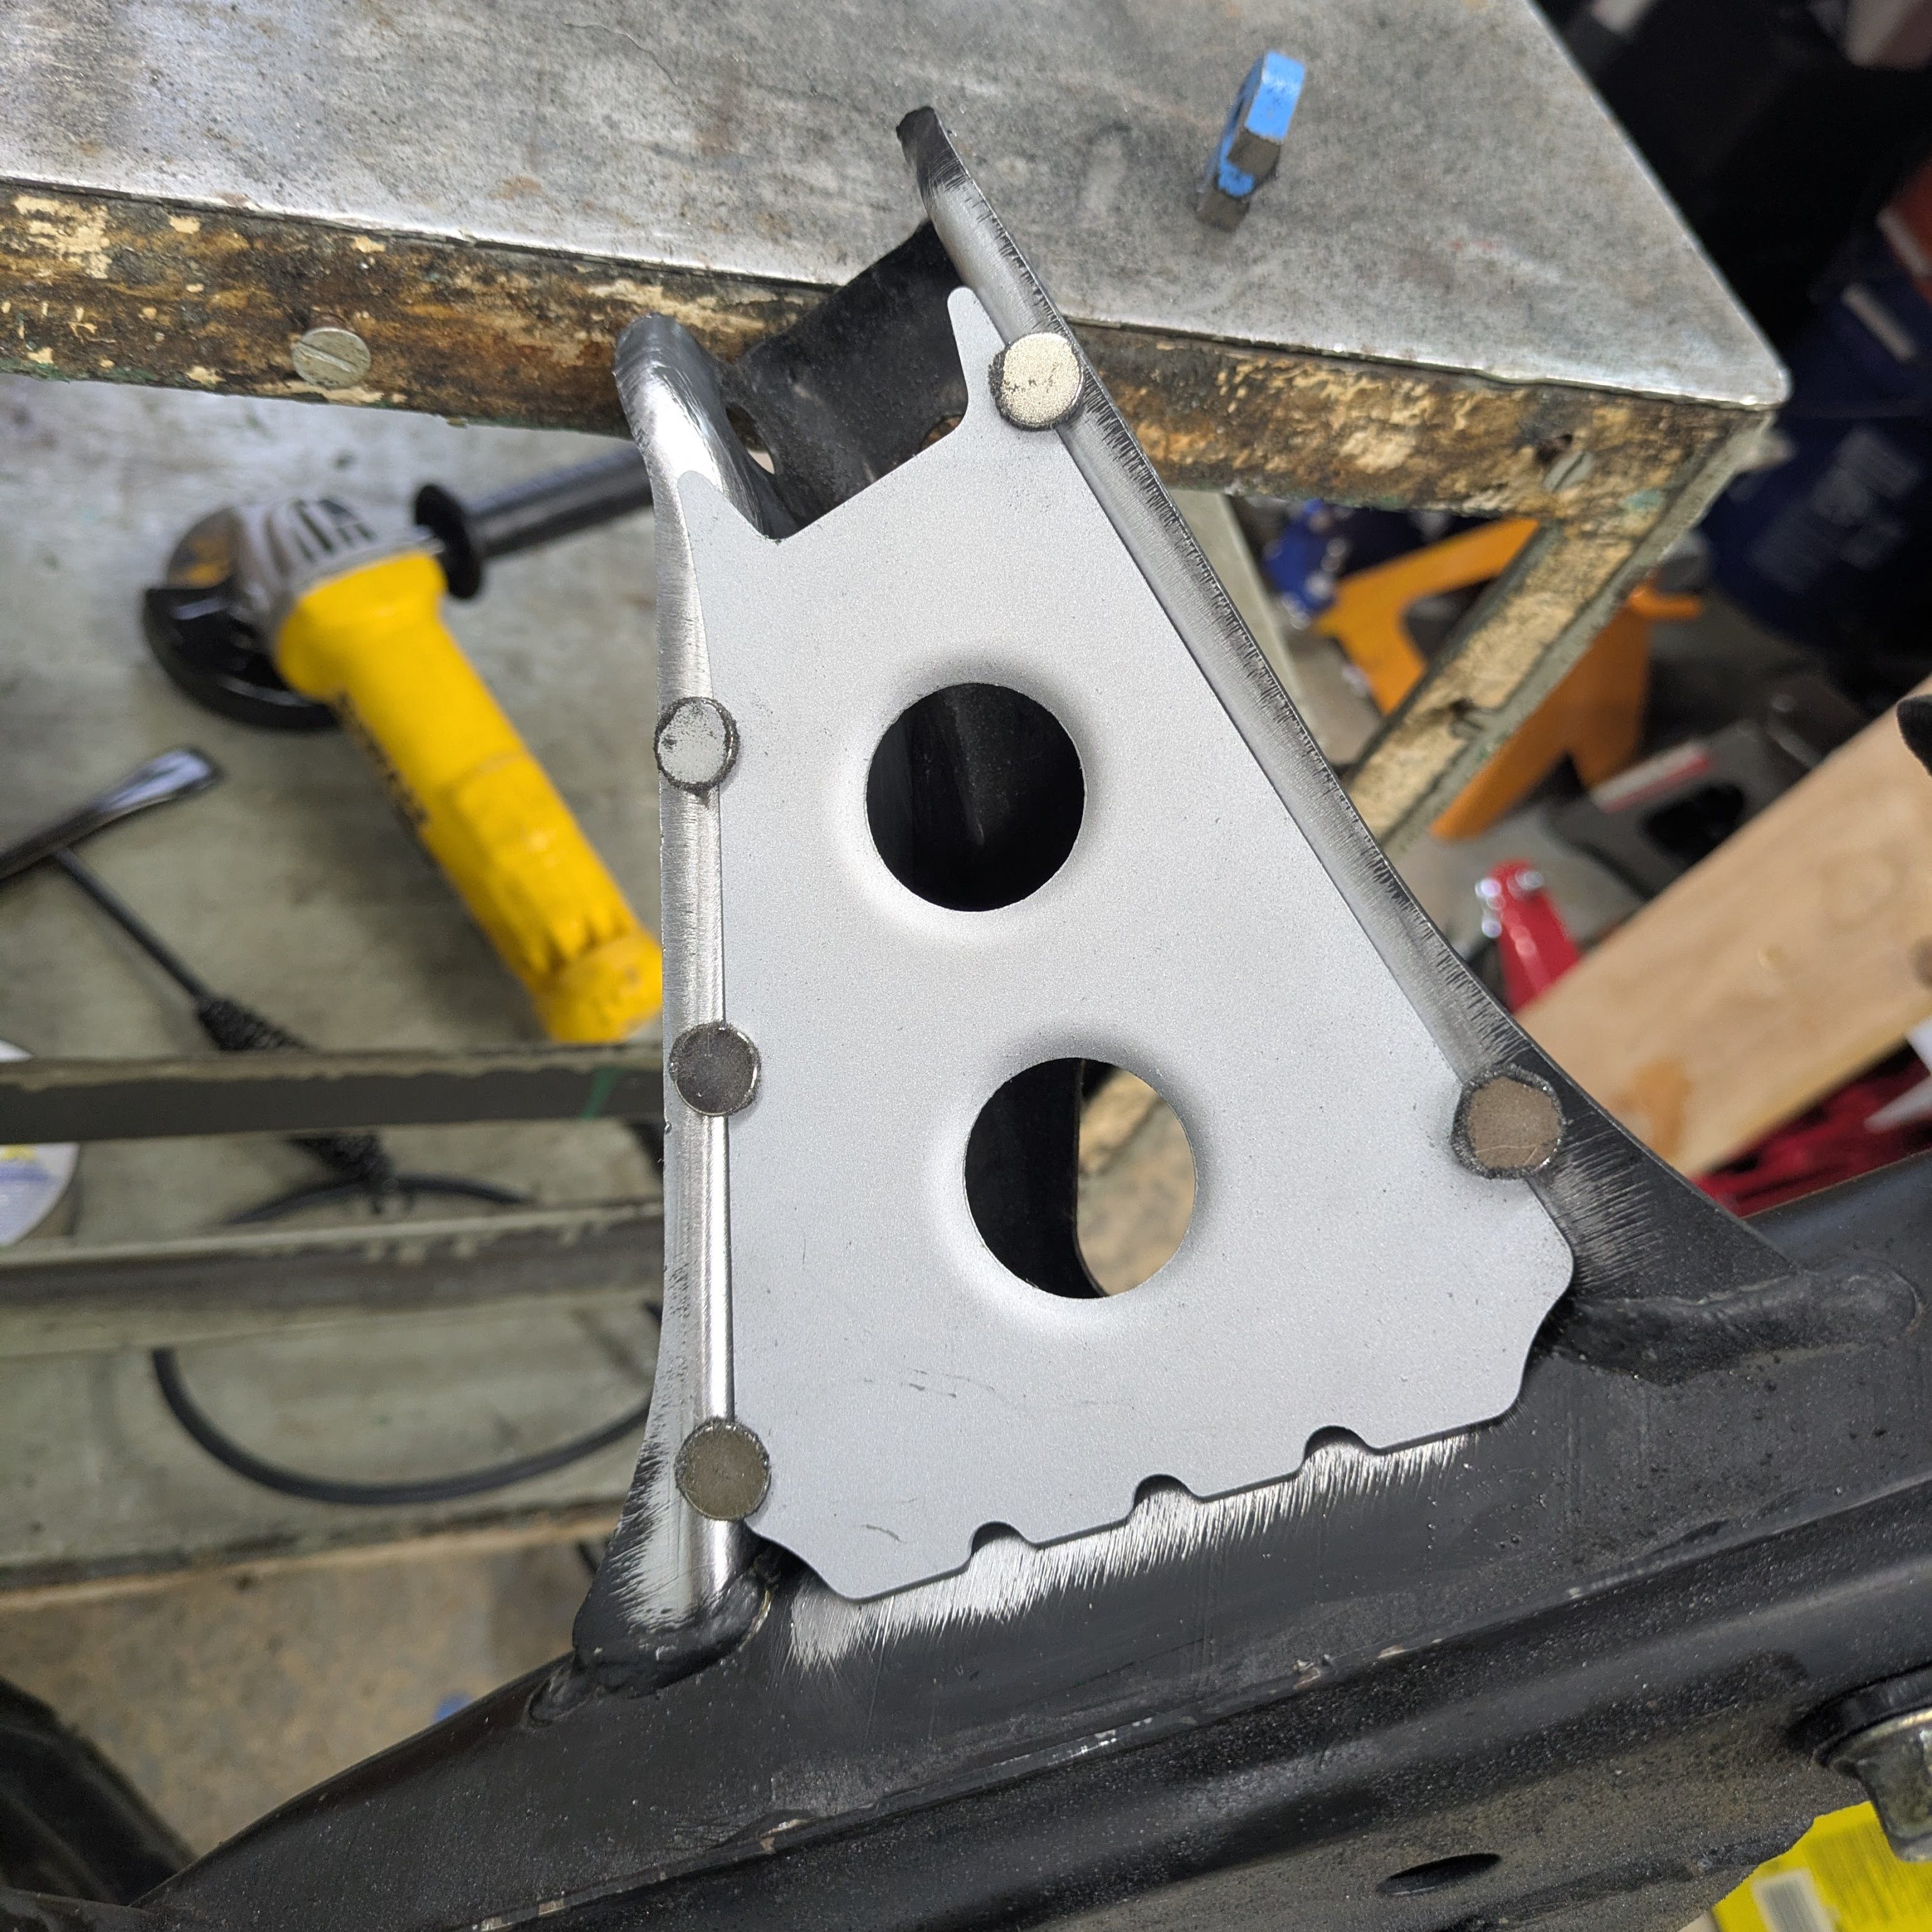
You can see the cause of the height mismatch better in this image, as that bottom right side has the additional plate spot welded to the subframe. While small (approx. 0.125″), this gap will cause the plate to buckle and move even when welded in. I considered pre-bending the plate with the diff studs and sending it, but that also didn’t feel right. I wanted it to just fit like a factory piece would.
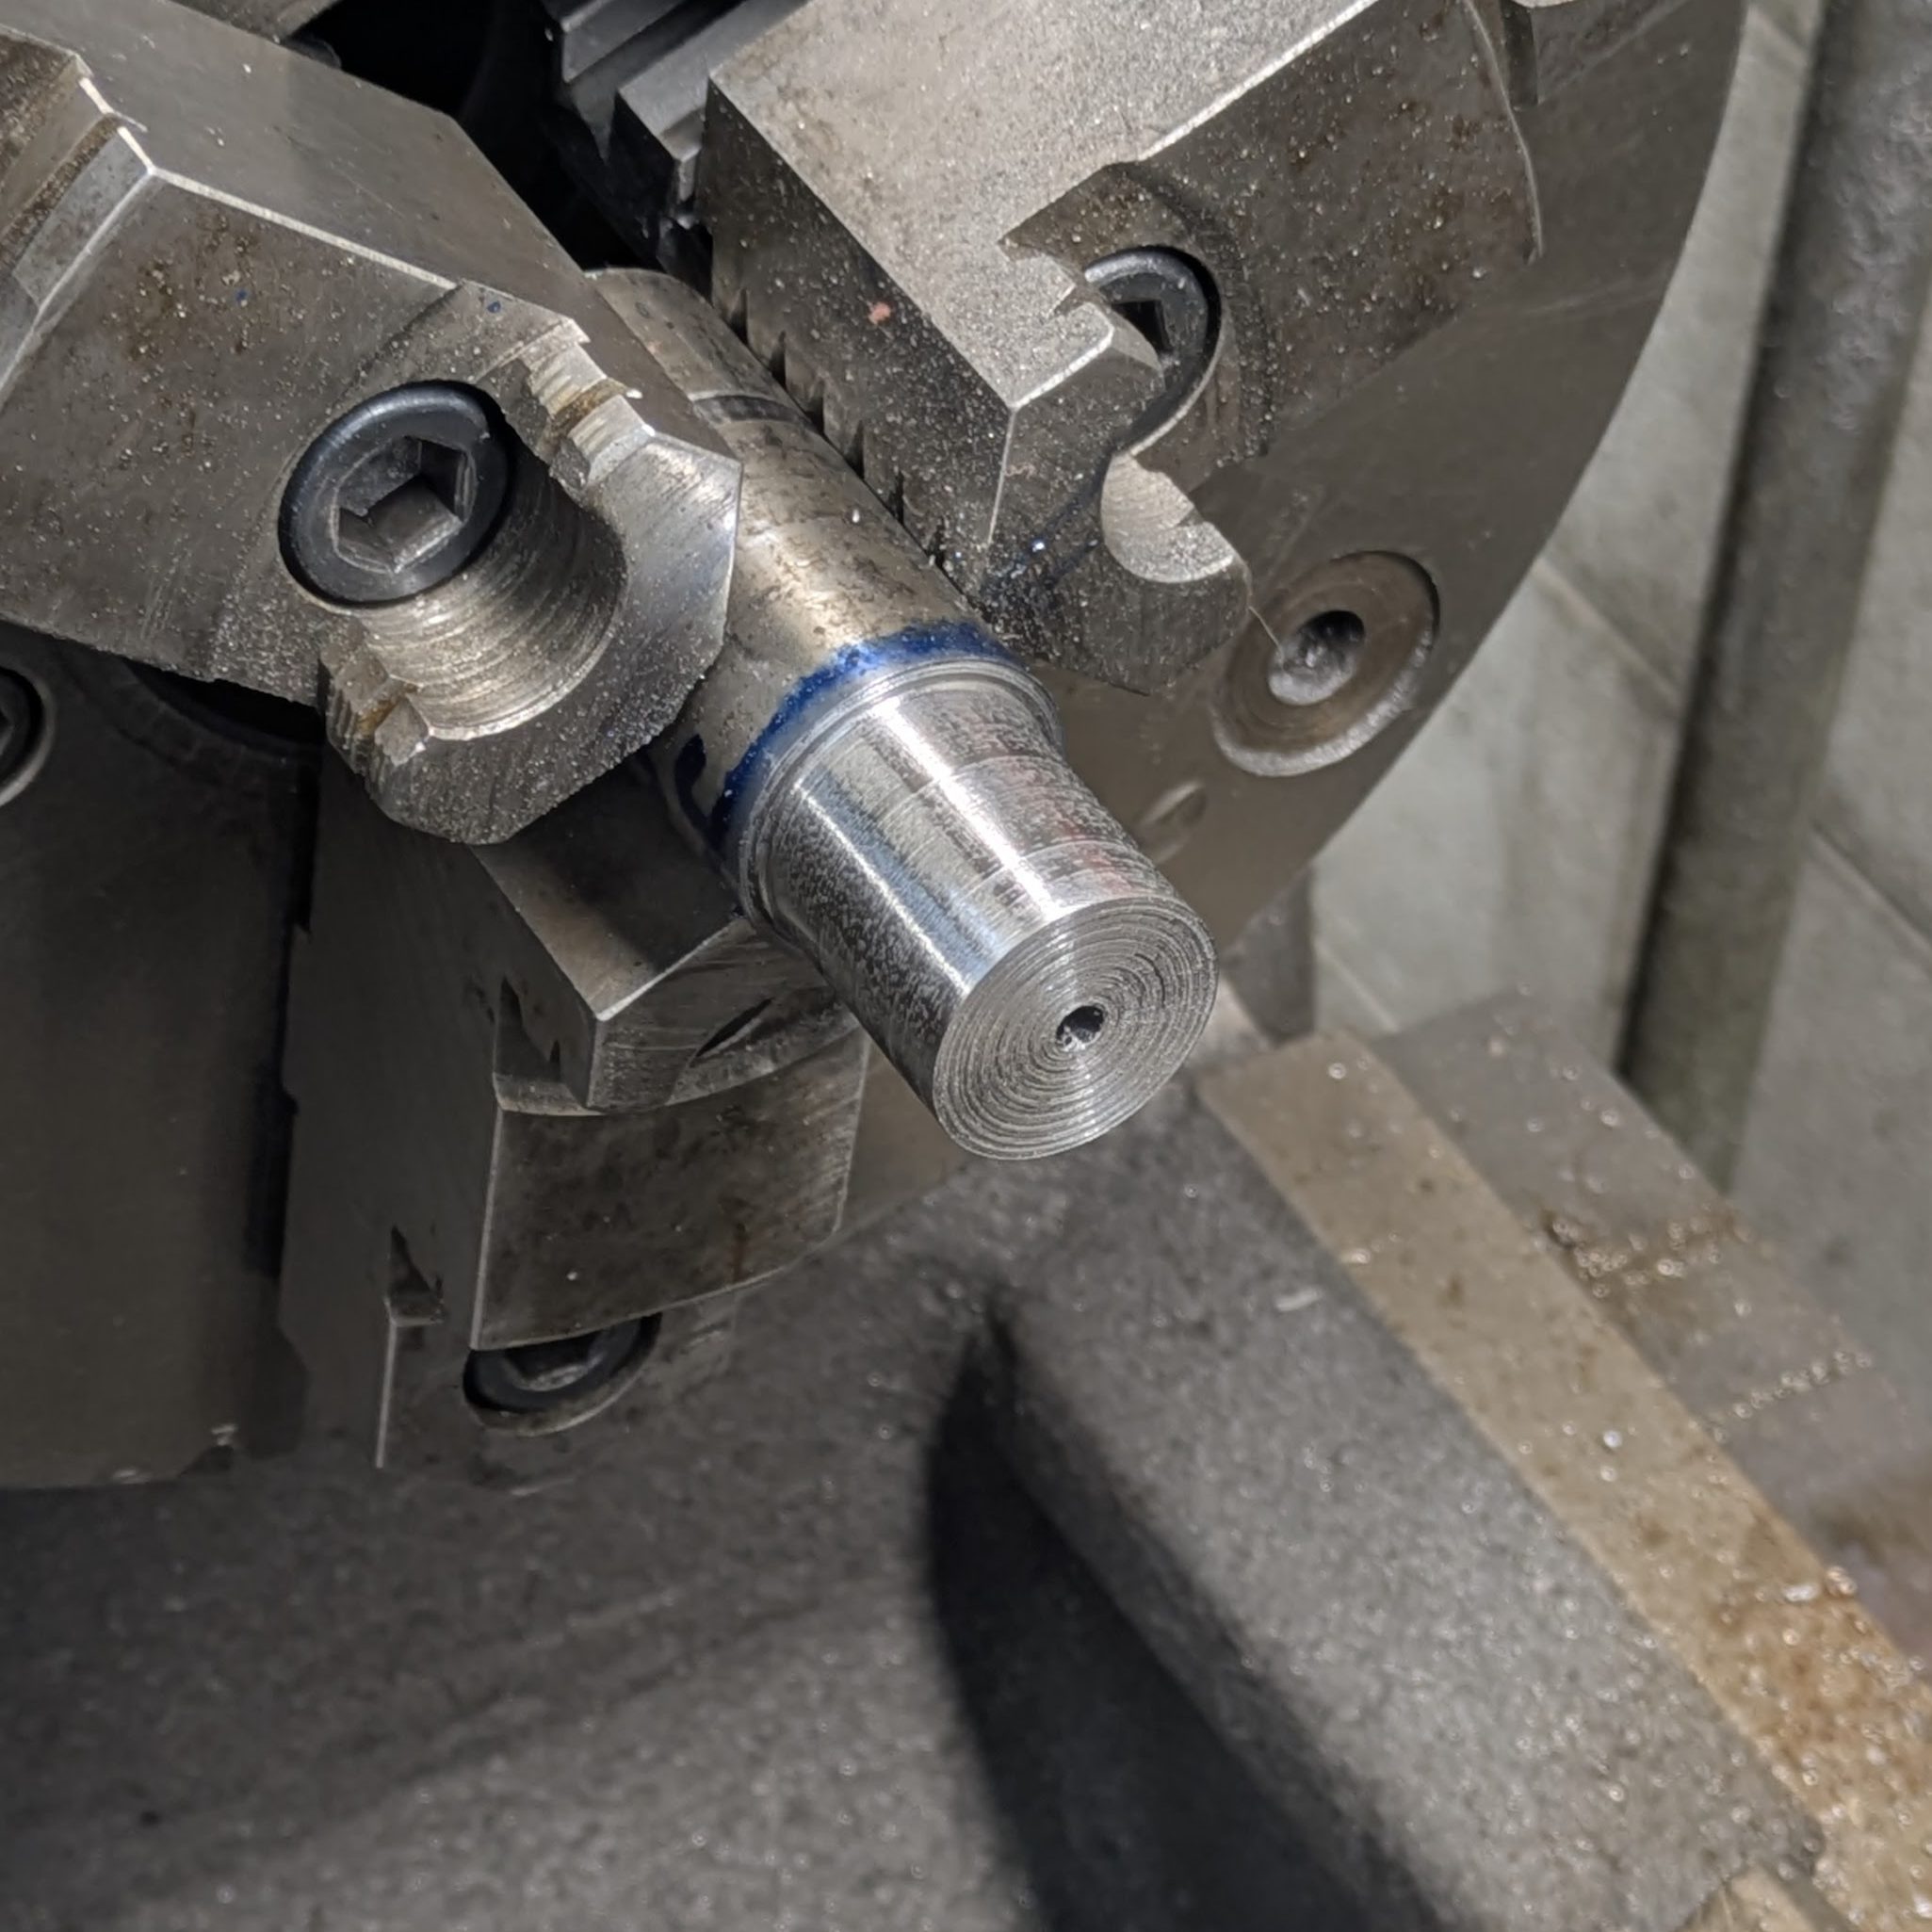
I elected to measure and machine custom washers the next day at work to take up the space. This seemed to be the best option for a good fit without significantly modifying/stressing the shape of the plate. I found bar end of some 4340 Chromoly in the scrap bin, which worked perfectly.
And for once, it didn’t matter.
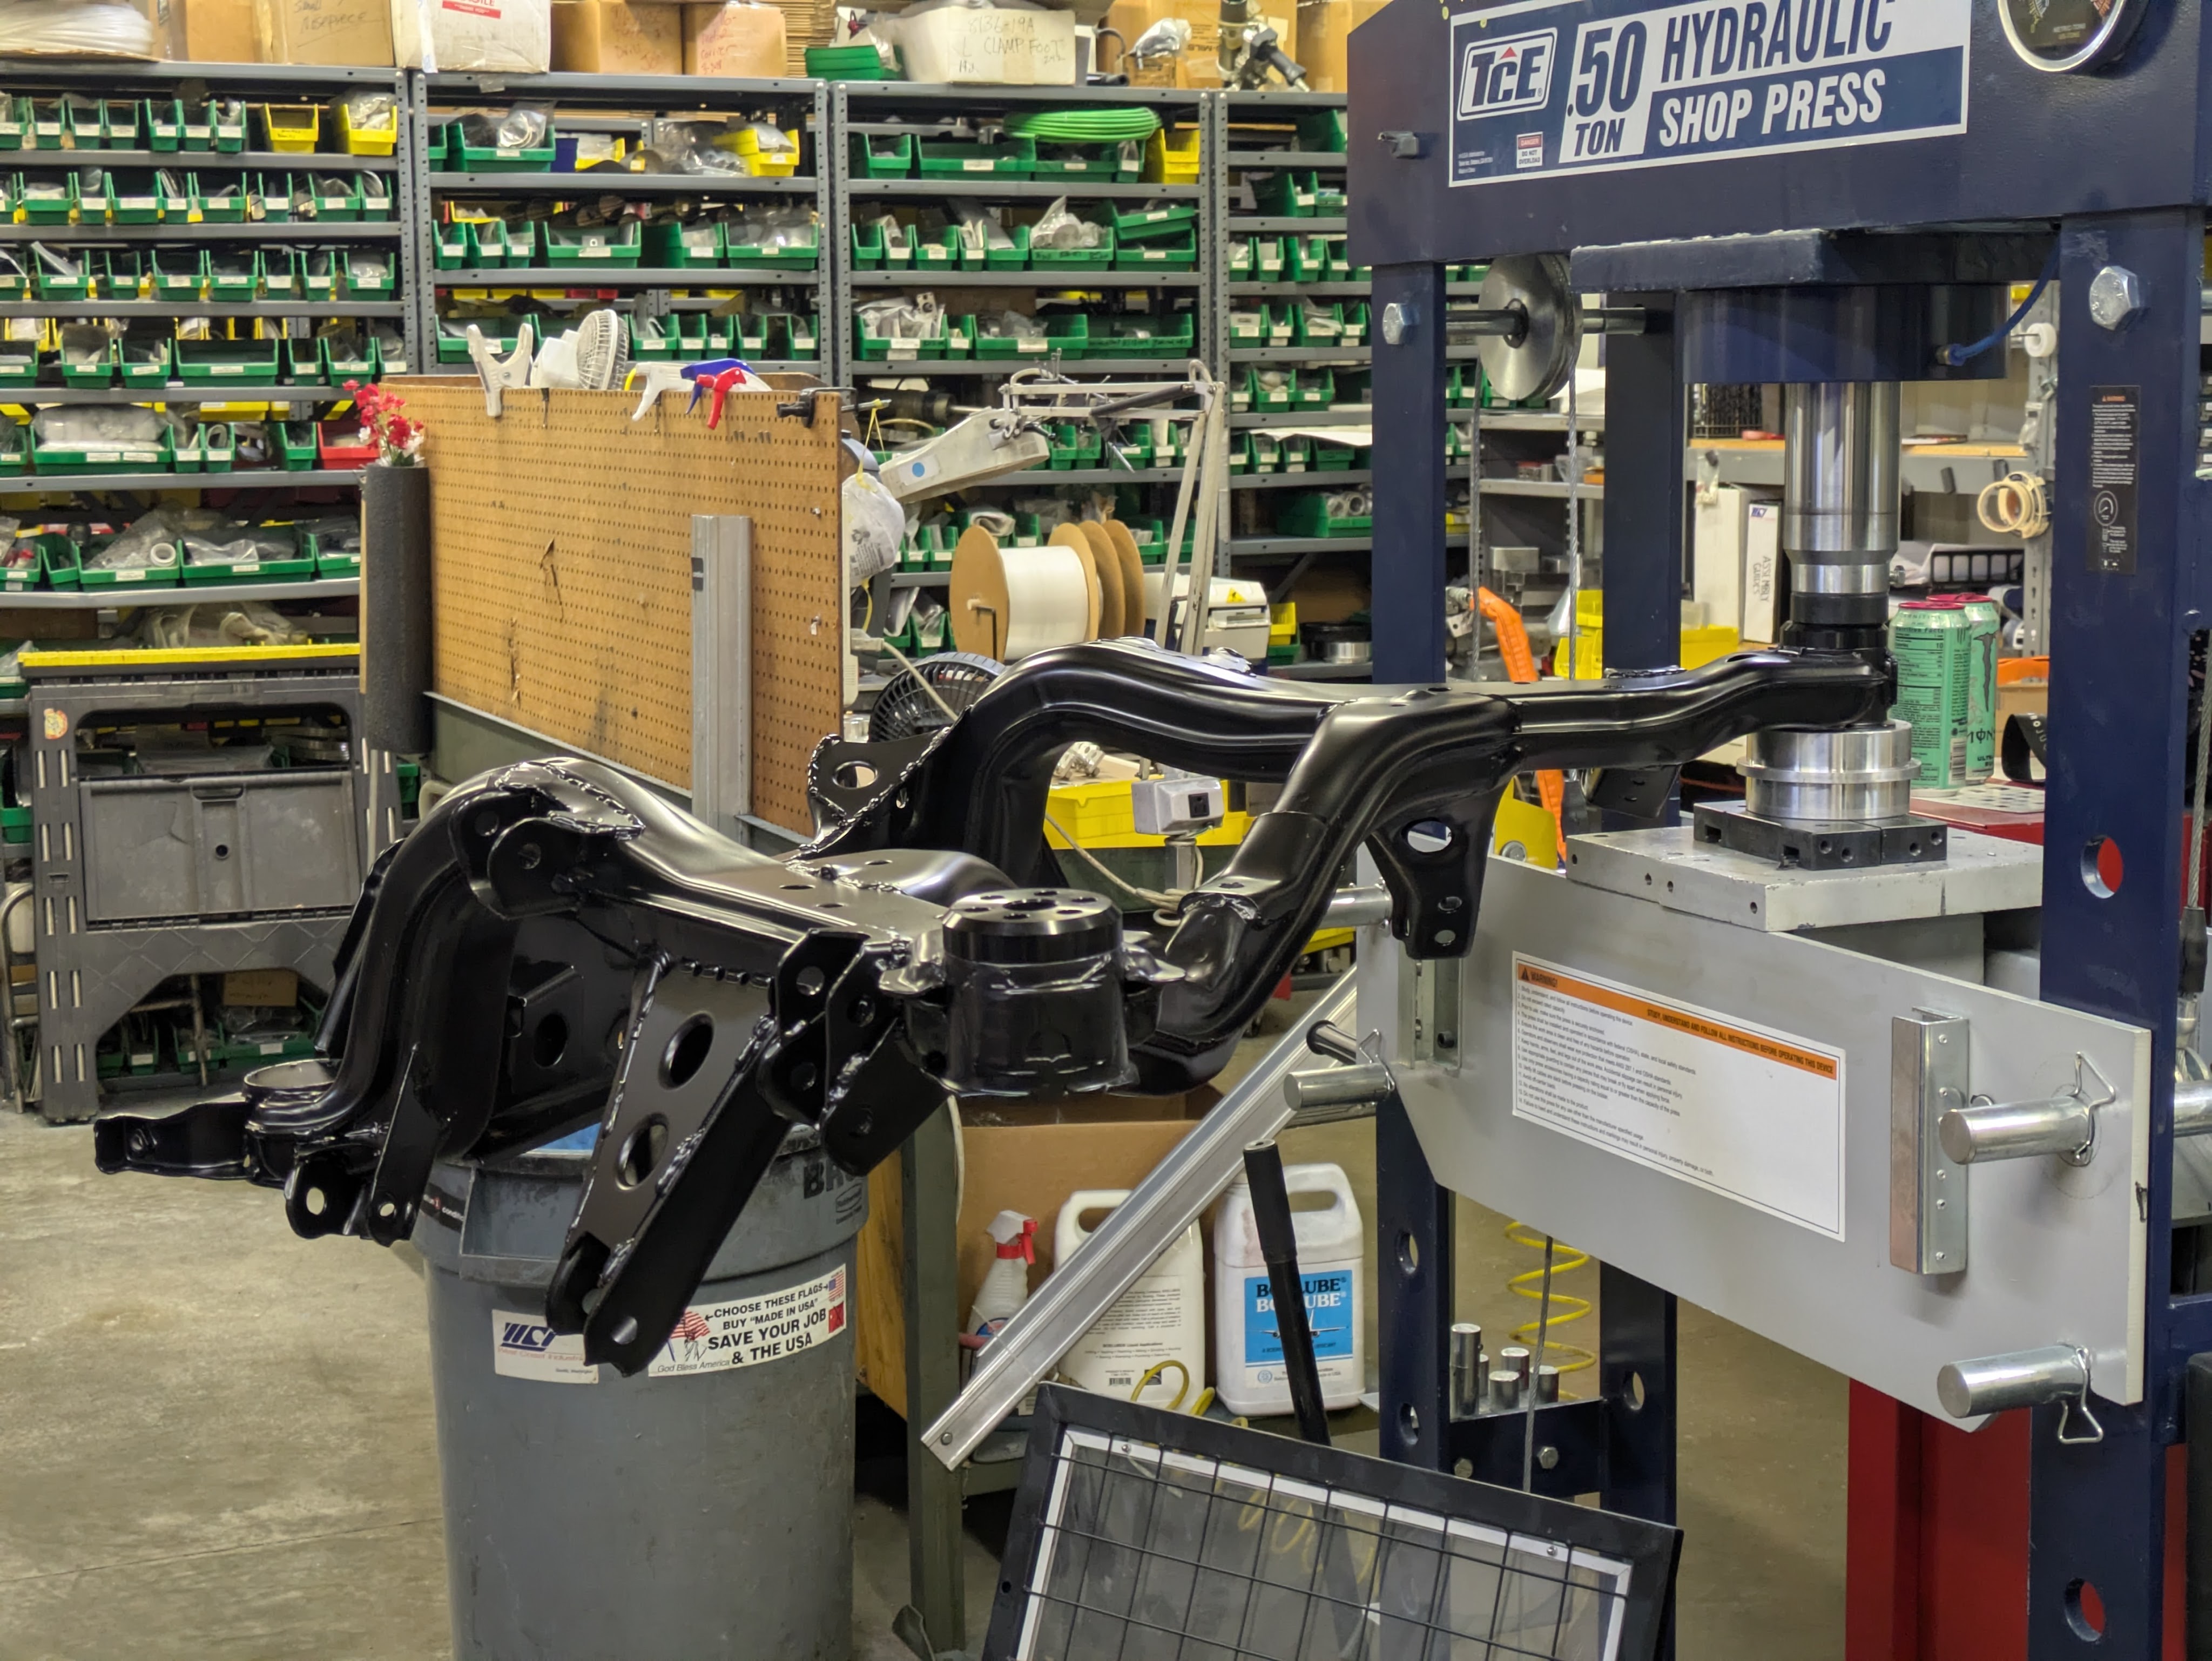
Once I got all the parts home from my 1.2 day thrash of welding, I took a hiatus from this particular project to work on other aspects of the car. However, I knew I had to wrap this up if I wanted to get the rear suspension back together anytime soon, I had to finish what I started.
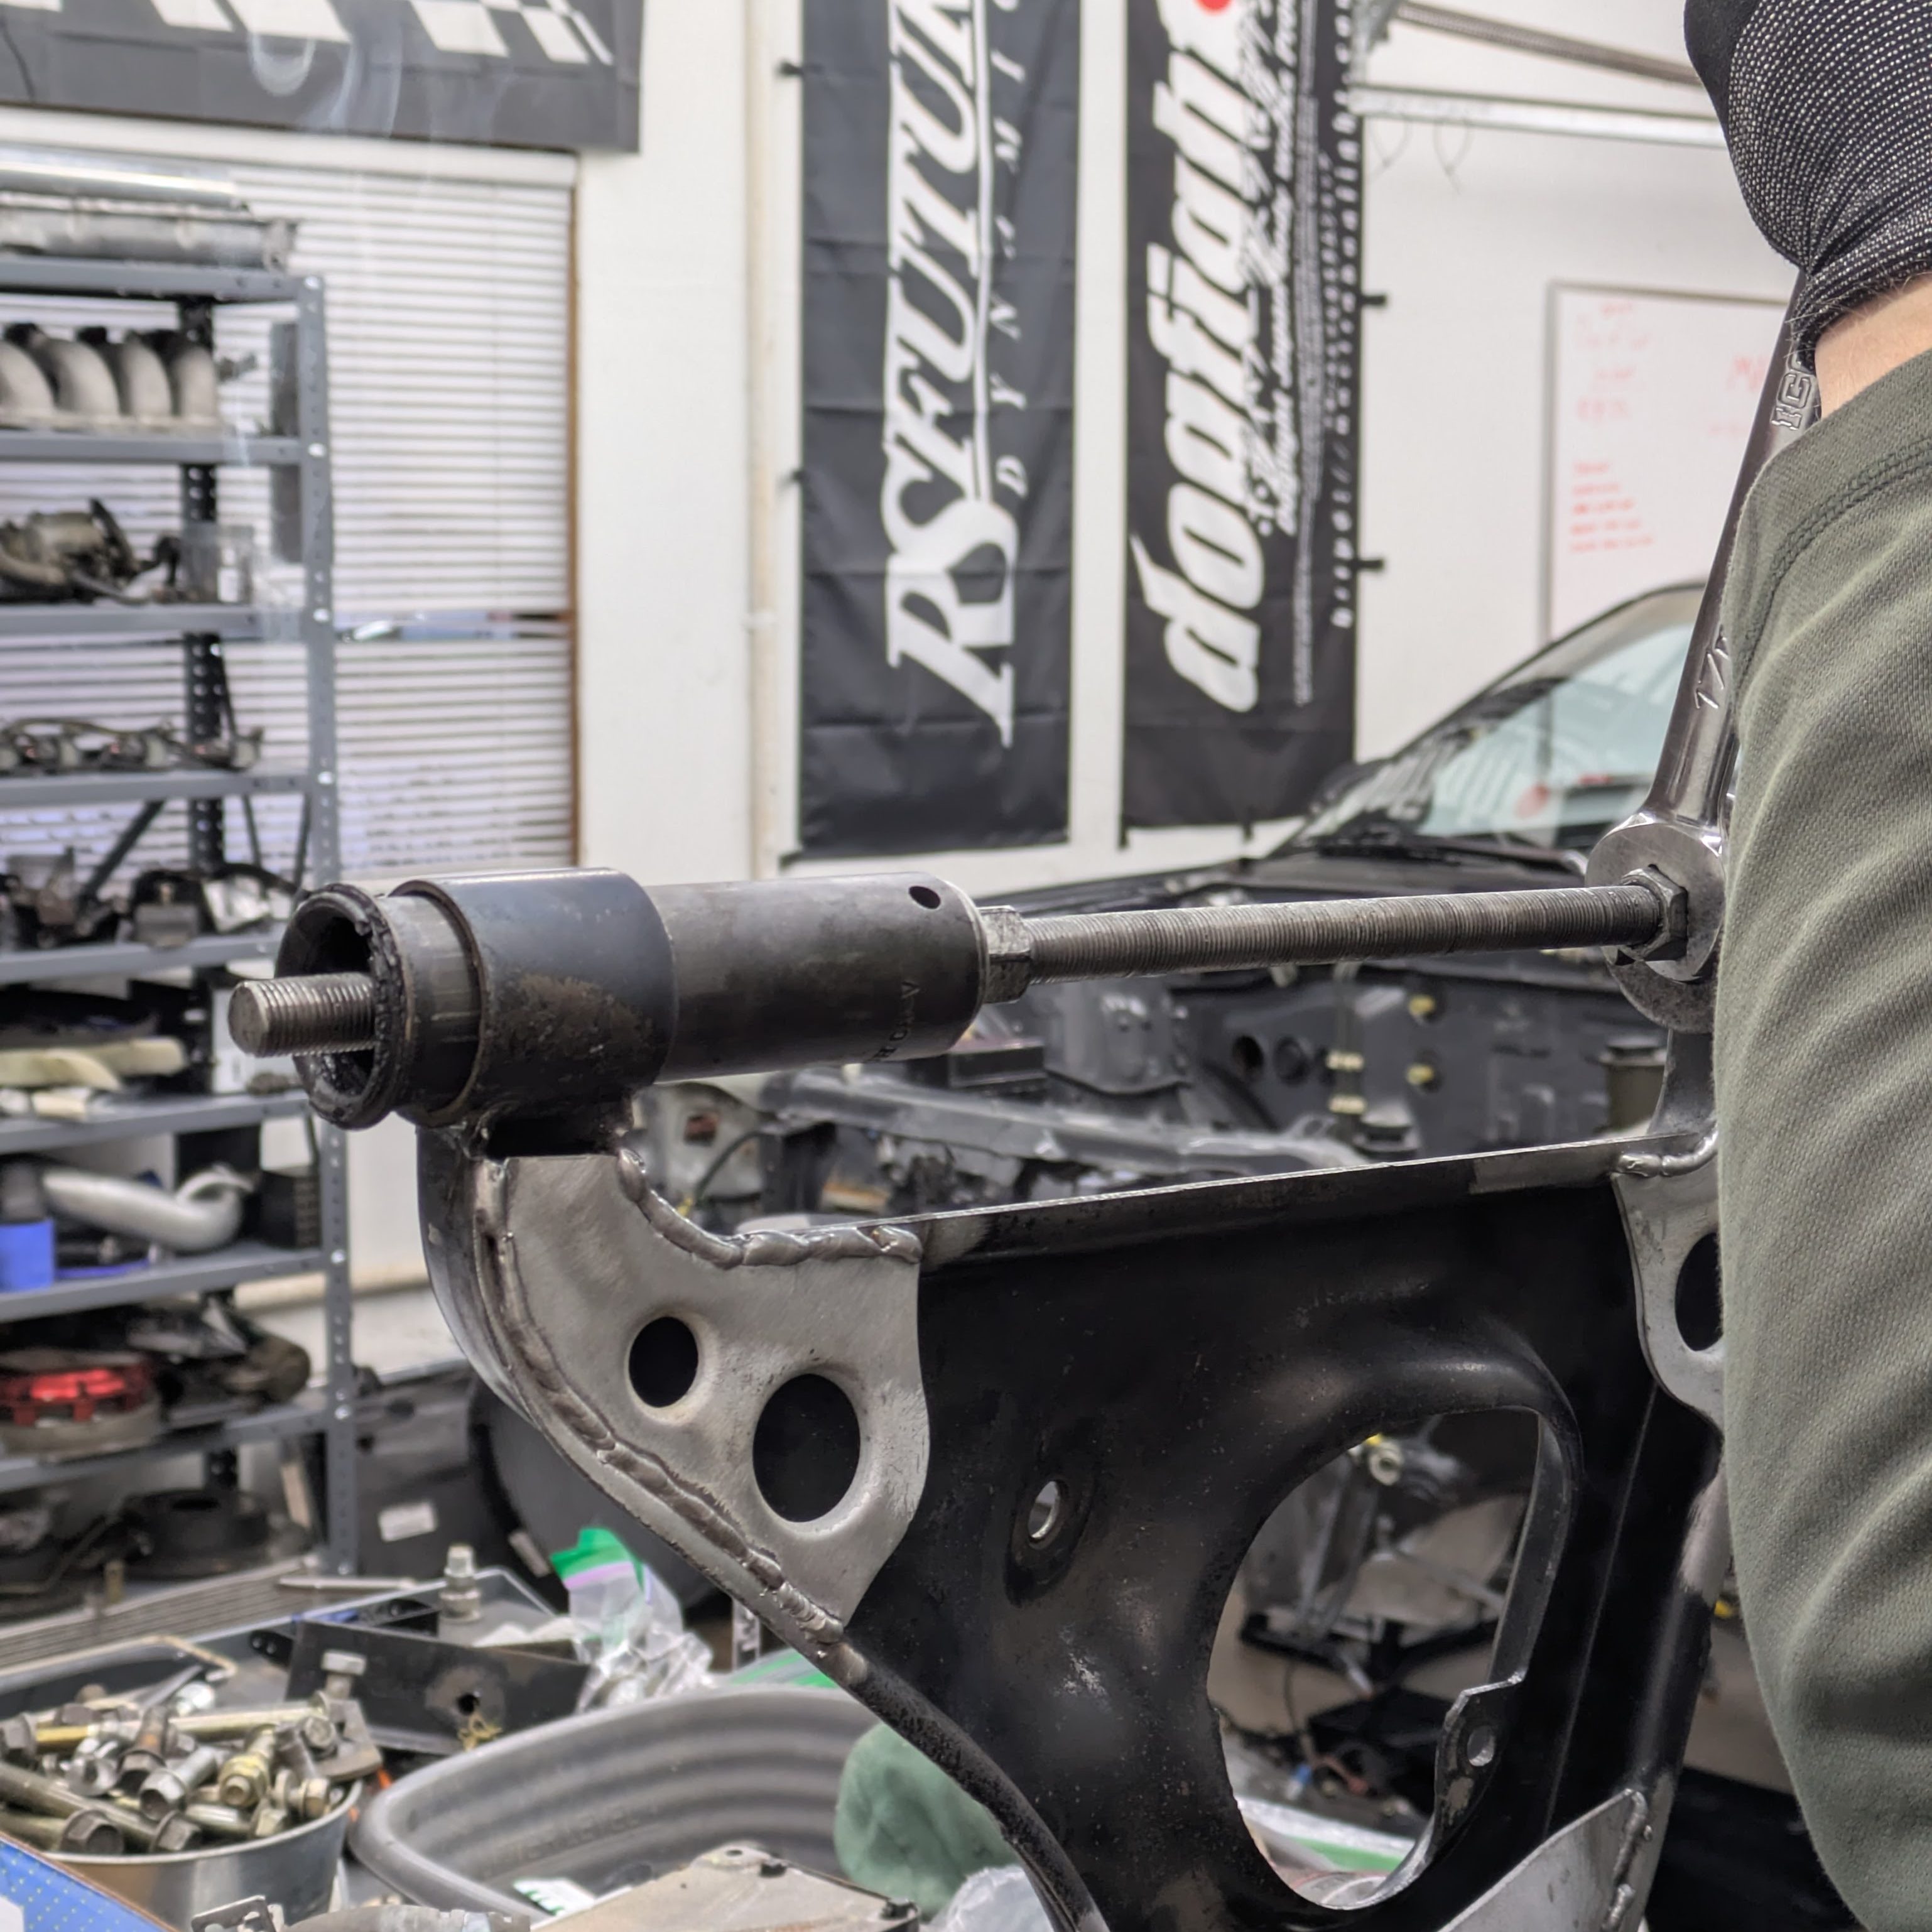
The lower control arms came first. My father and I were able to fashion a bushing removal tool out of some threaded rod, a socket, and some nuts/washers. This made swift work of the tightly pressed metal without setting anything on fire, which is the only way the internet knows how to remove bushings. We did use the torch on the outside of the control arm in an attempt to loosen up the press fit, which was effective.
Next came the subframe bushings, which are never a fun job. One of the inner sleeves was completely separated from the rubber when the subframe was removed, so it was time for these to get replaced.

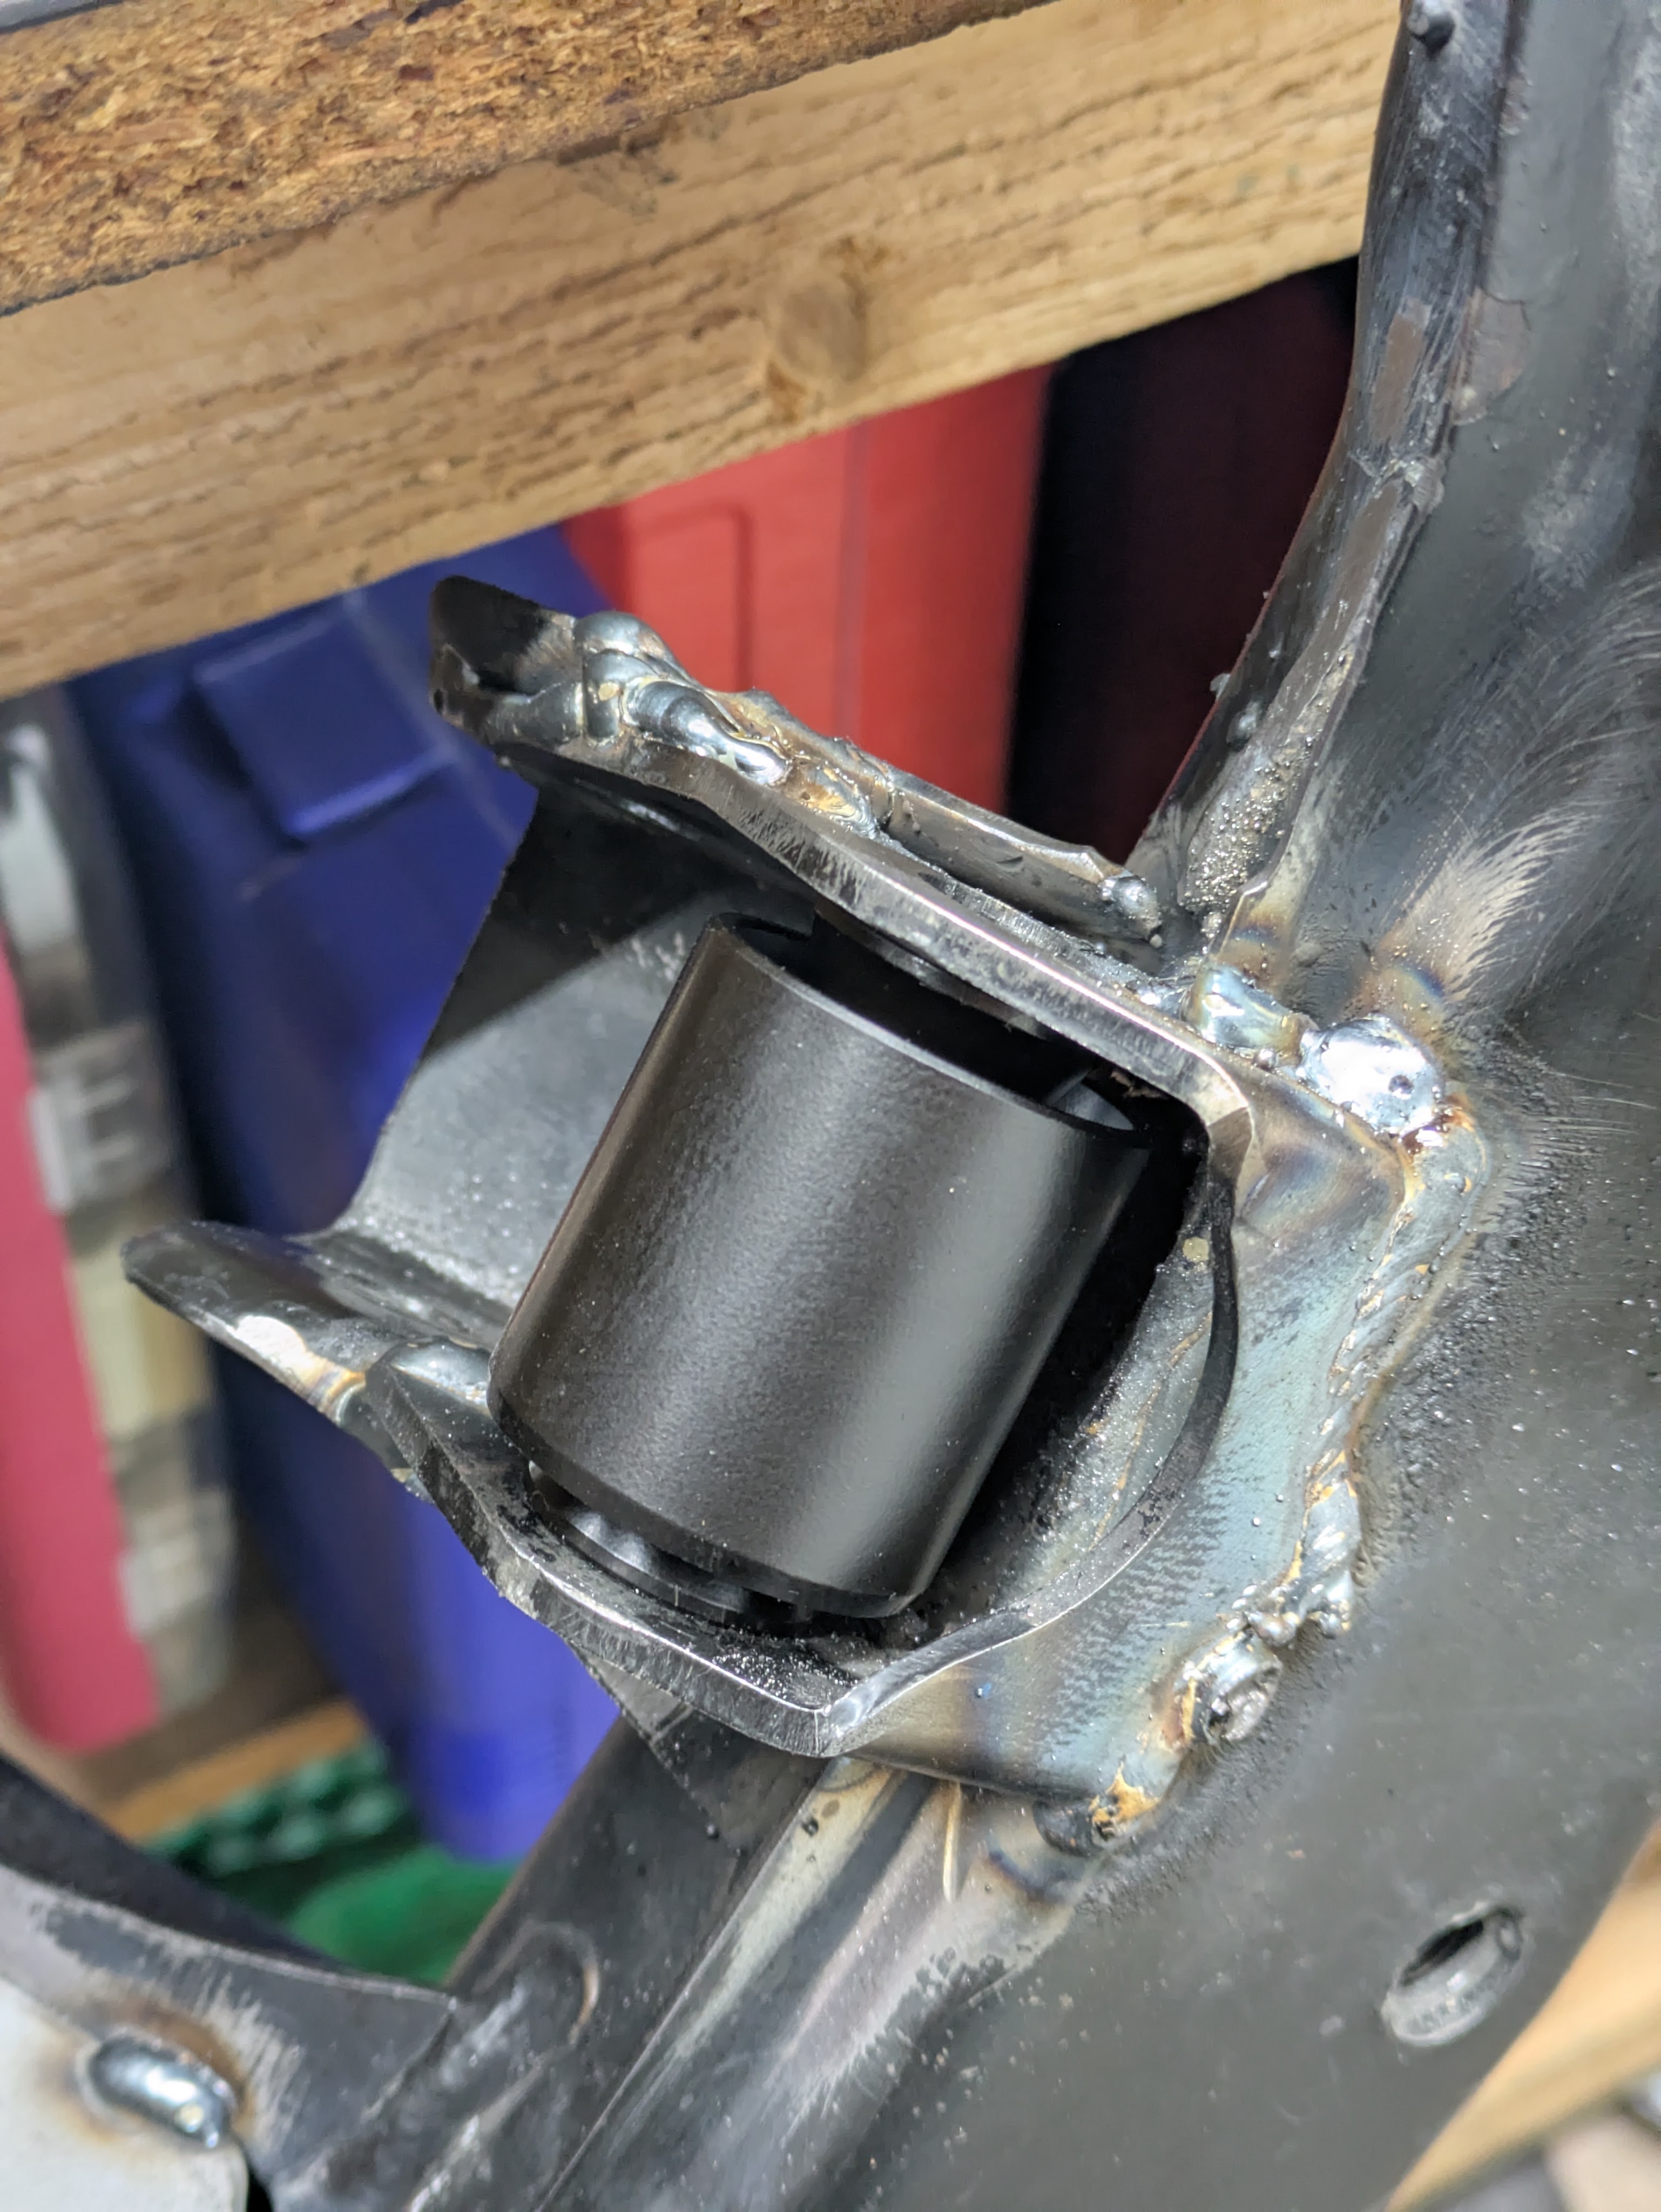
Before locking in the subframe cosmetics, I wanted to make sure that all of the arms actually fit in the pockets they are supposed to reside in. I used the GKTech spherical bearings as a reference on the new RLCA pickup point, and they sure didn’t fit despite welding them in with the correct spacer stack.
I again fashioned a tool out of threaded rod, this time a shorter piece with two nuts to evenly expand the pocket without changing the global location like you would with a hammer. This worked, and had the added benefit of being useable in every pocket on the subframe. I also reused the longer tool to adjust the width of the RLCAs before the spherical got installed as they were slightly different. Hard to say if it was manufacturer differences or caused by us removing the bushings. I finished the evening by grinding any intrusive welds away from where bolt flanges could lie once it was all assembled.
With those tweaks, it was time to make the parts visually reflect the effort I had put into them. I debated back and forth between painting them with some kind of higher quality two part chassis paint, or just making it someone else’s problem. I eventually landed on the latter, and after shopping vendors in my area, I settled on one not too far from home, that was responsive over the phone and email. Goes a real long way for me.
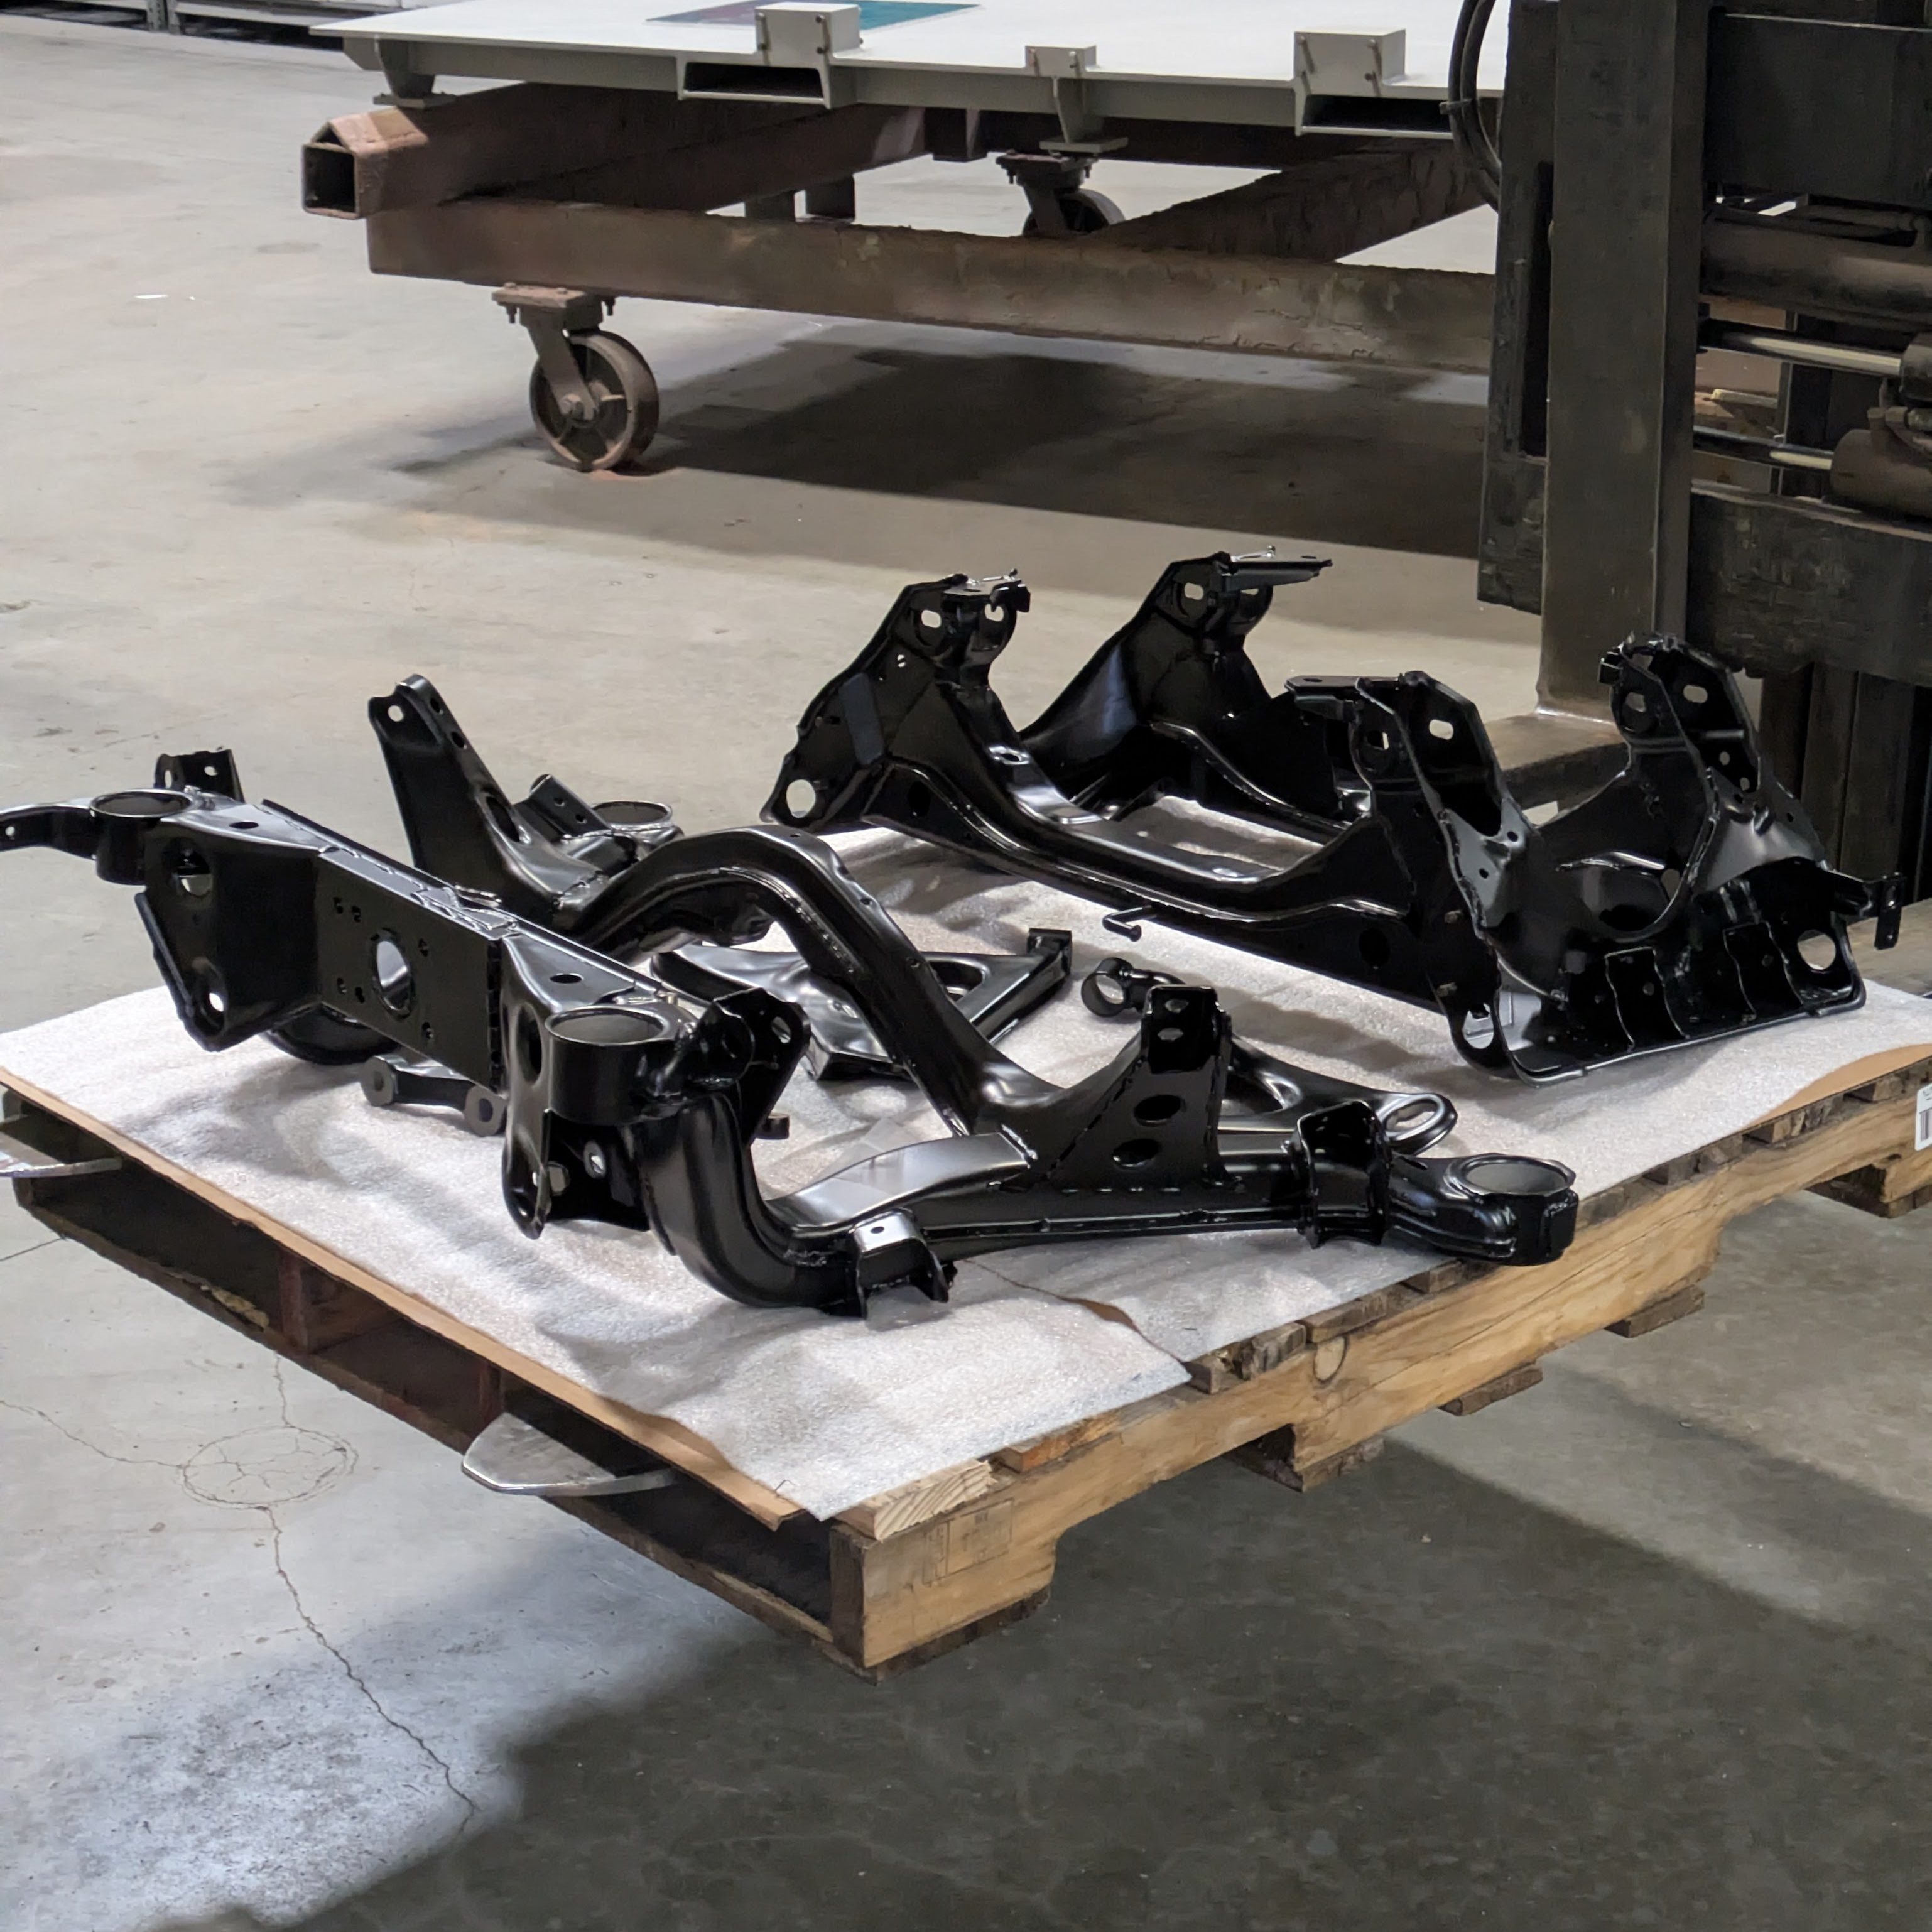
The parts were all refinished in Cardinal Paint (ironic name for a powdercoat manufacturer) T002-BK08, which is a 20% semi-gloss finish. I wanted OEM look, and it’s pretty much dead nuts. Super smooth, minimal contamination, and a great price. It definitely hid all of my welding and grinding crimes far better than I could have anticipated. All of the relevant bores for bushings and bearings were masked by the powdercoater per my directions, so they were immediately ready to accept hardware. I picked these up in the morning before work, and everything was installed by the end of lunch.
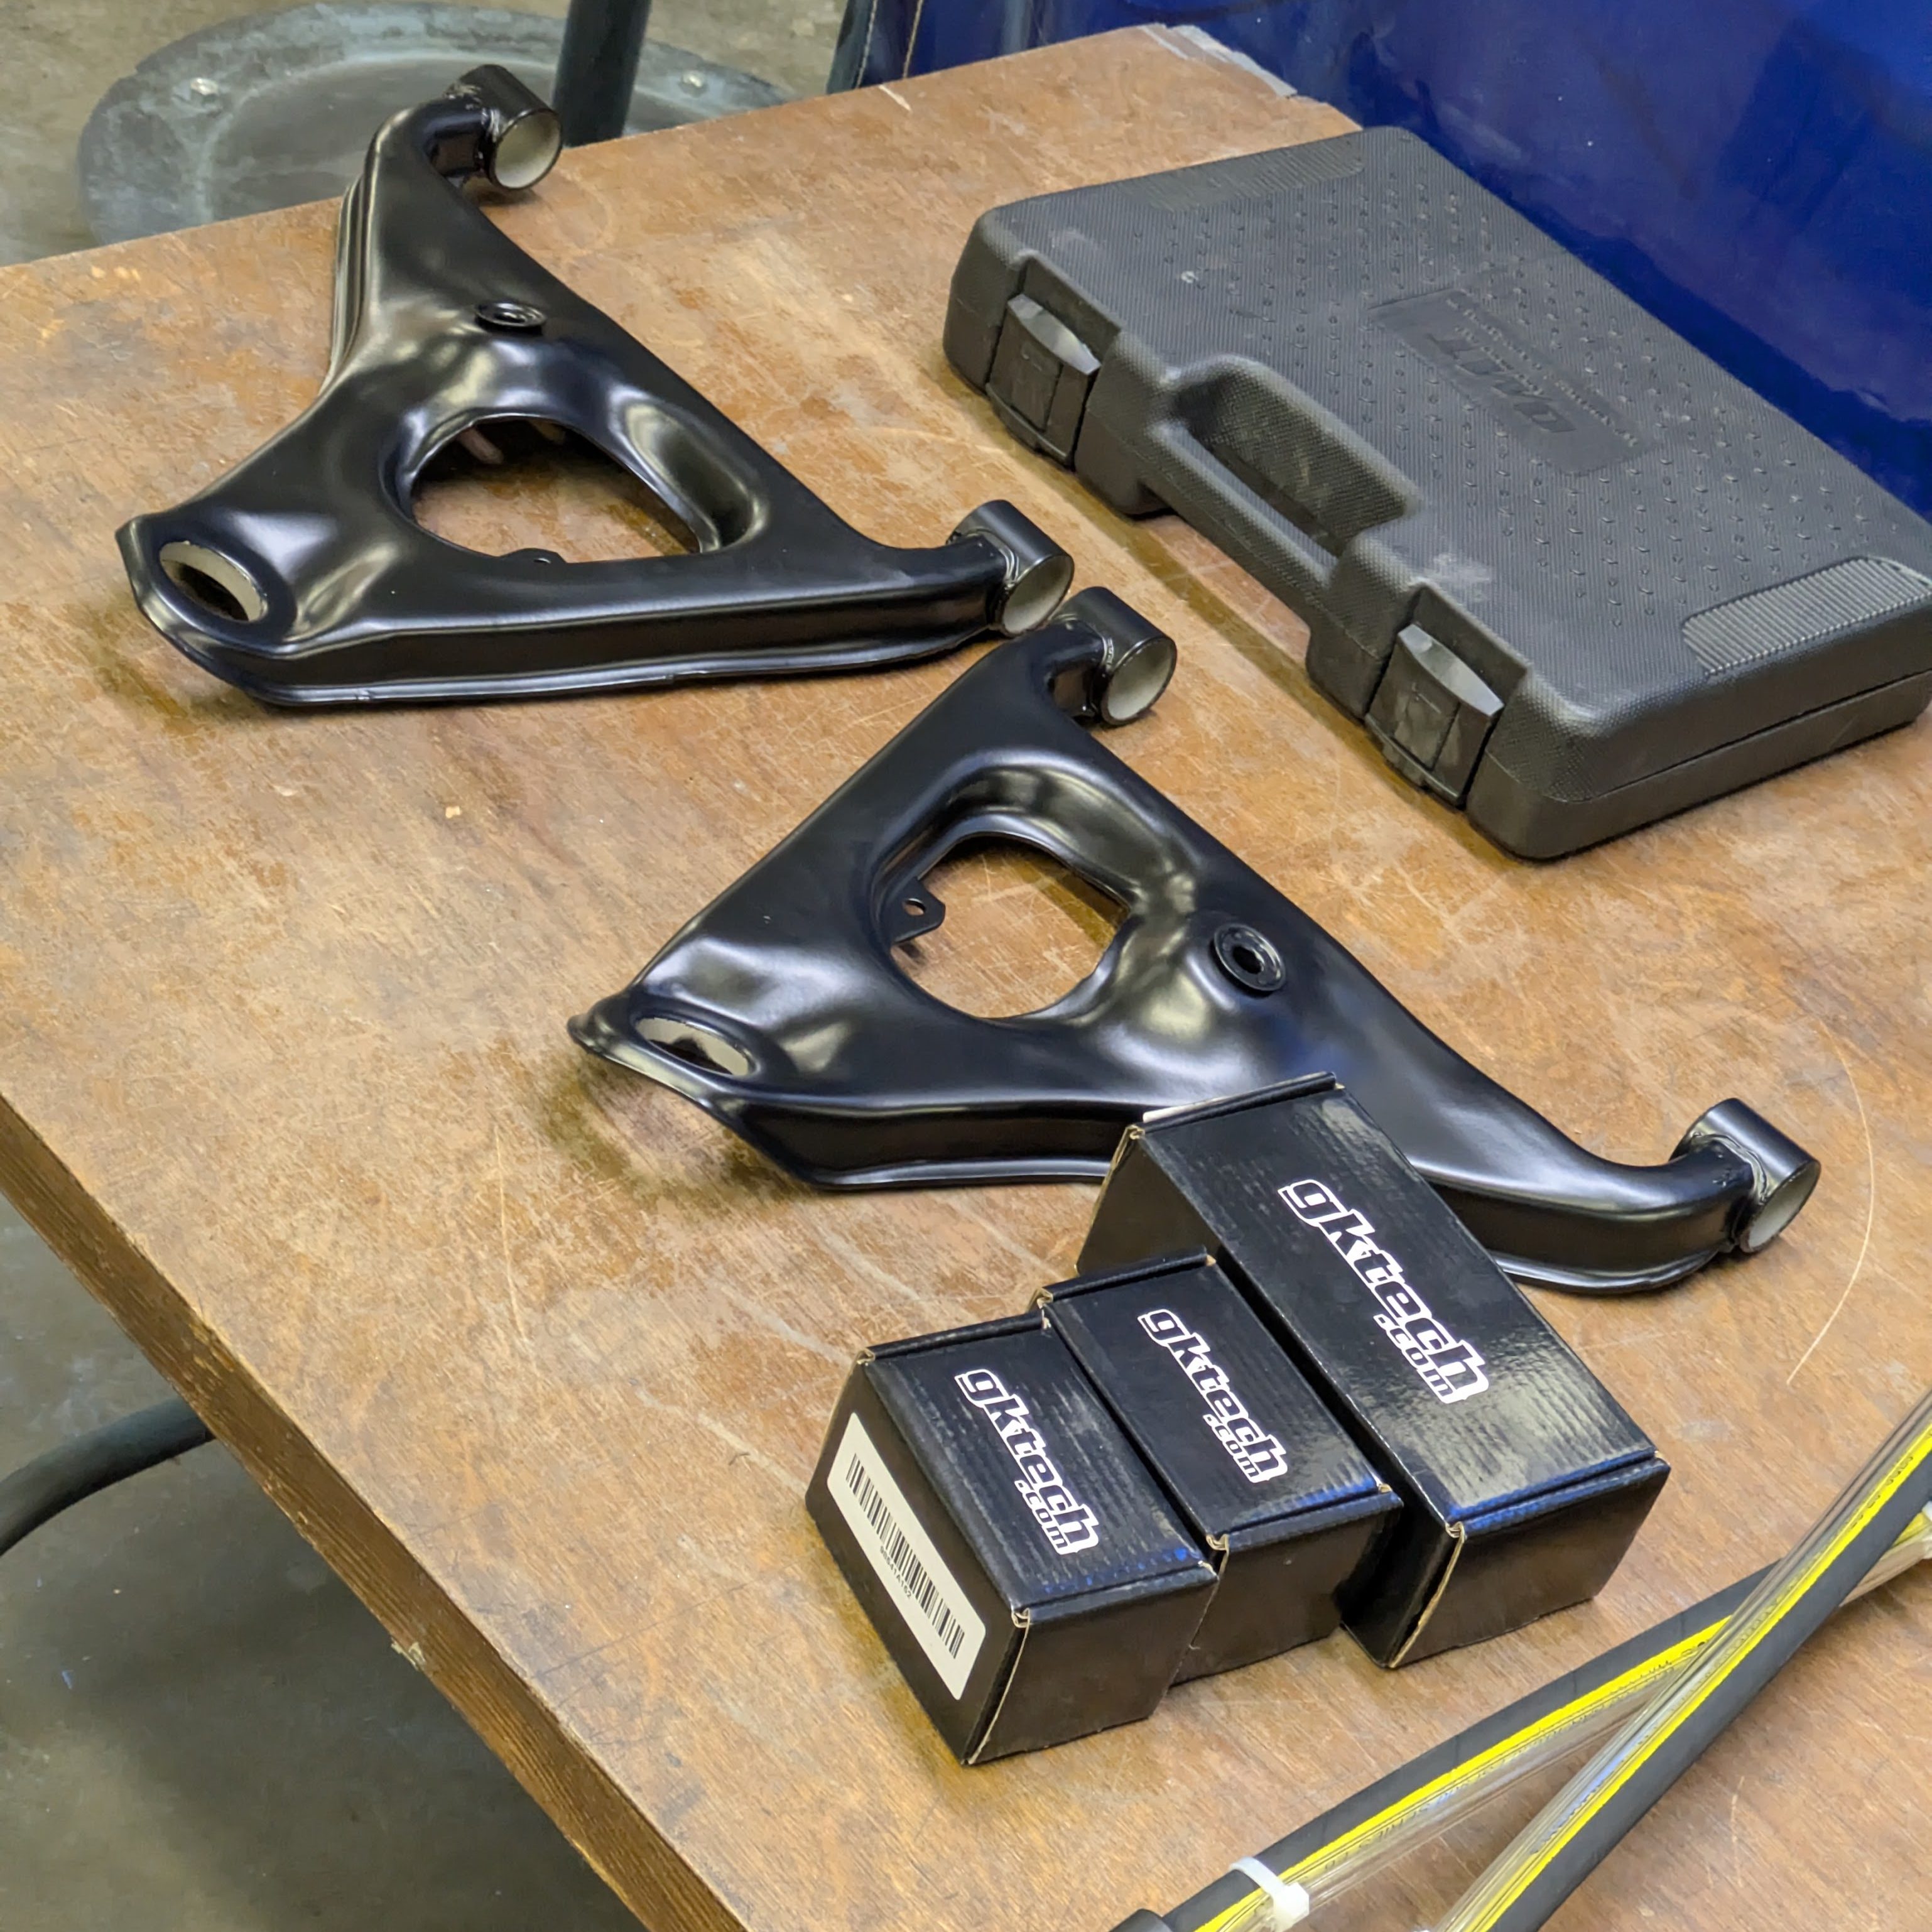
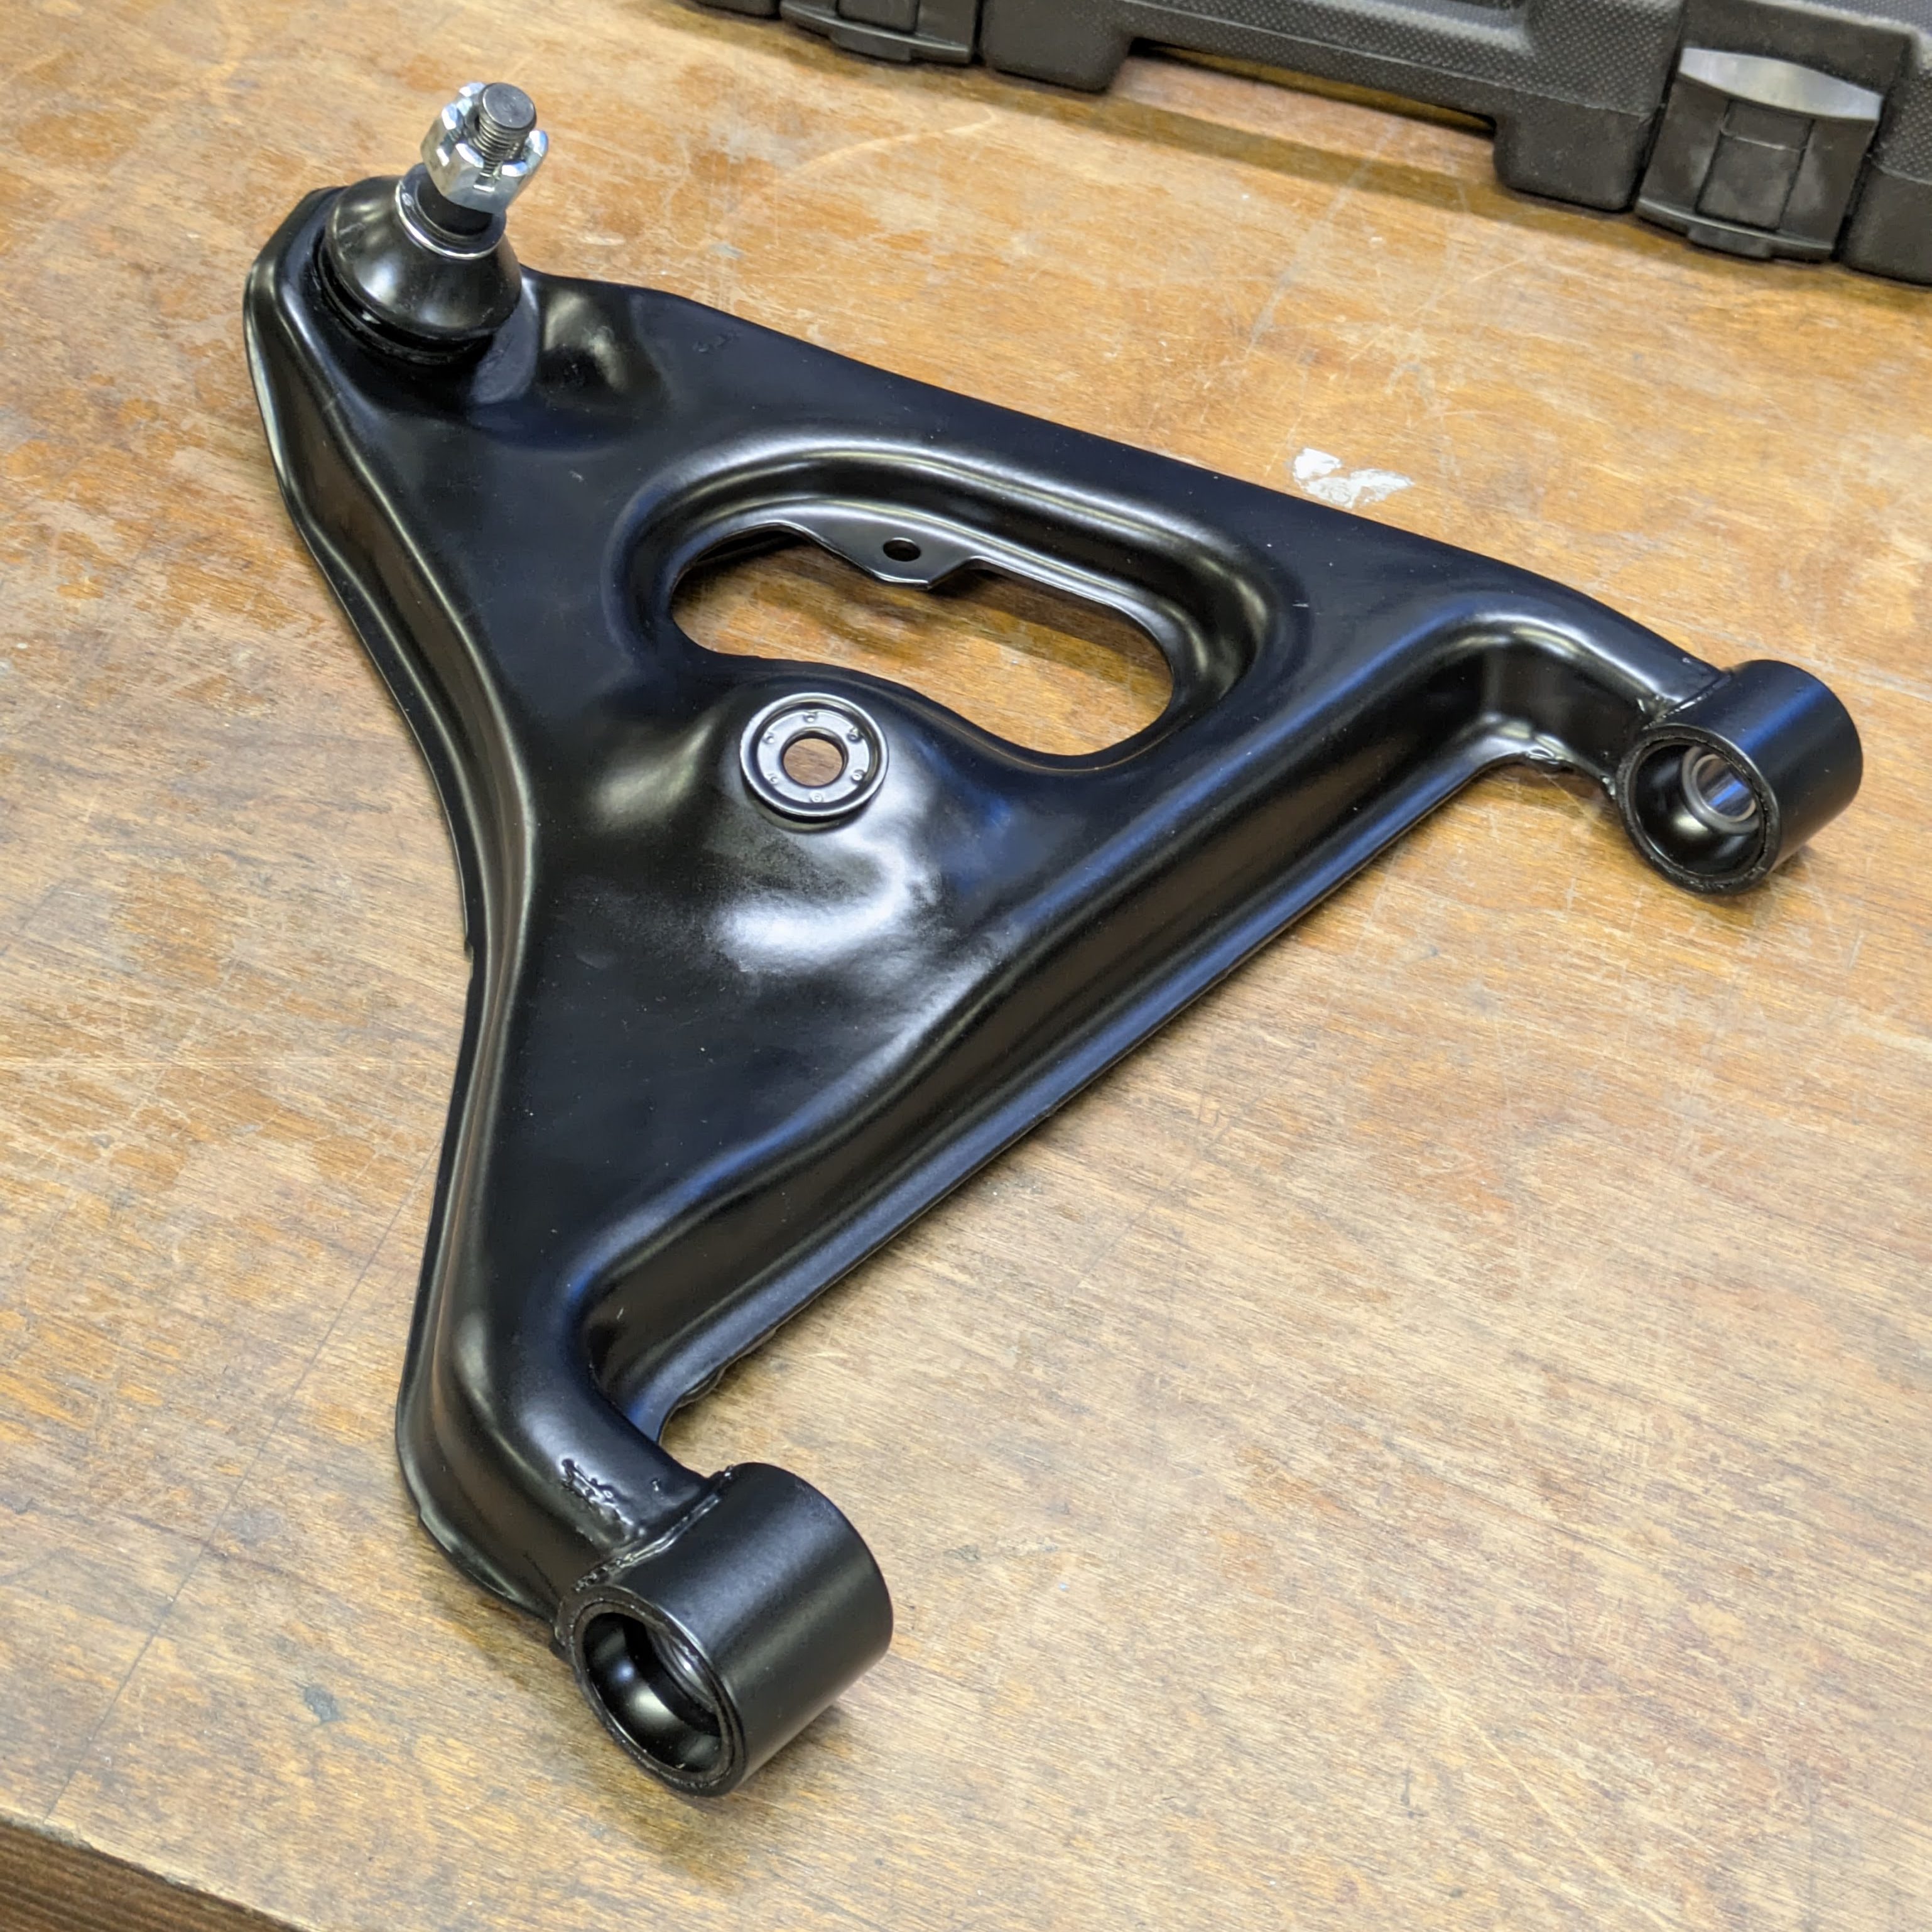
The GKTech sphericals fit great, but the ball joint had the mild disappointment of requiring the removal of the lower part of the boot to press in for install. It wouldn’t be a huge deal if the wire retaining the boot was even slightly reusable but it isn’t. I’ll fashion some kind of equivalent solution.
With all the hardware pressed in, I’m pretty damn proud of these. While I have way too many hours into them for what they are, it’s the highly optimized OEM part I want them to be.


Very similar story for the subframe. GKTech aluminum subframe bushings are nothing special, but I was already making the order. These intentionally designed to raise the subframe 15mm, or as high as it can go in the car before it hits the body. This was part of my compromise for not running drop knuckles as I could claw back some of my roll center correction by globally moving all of the pickup points.
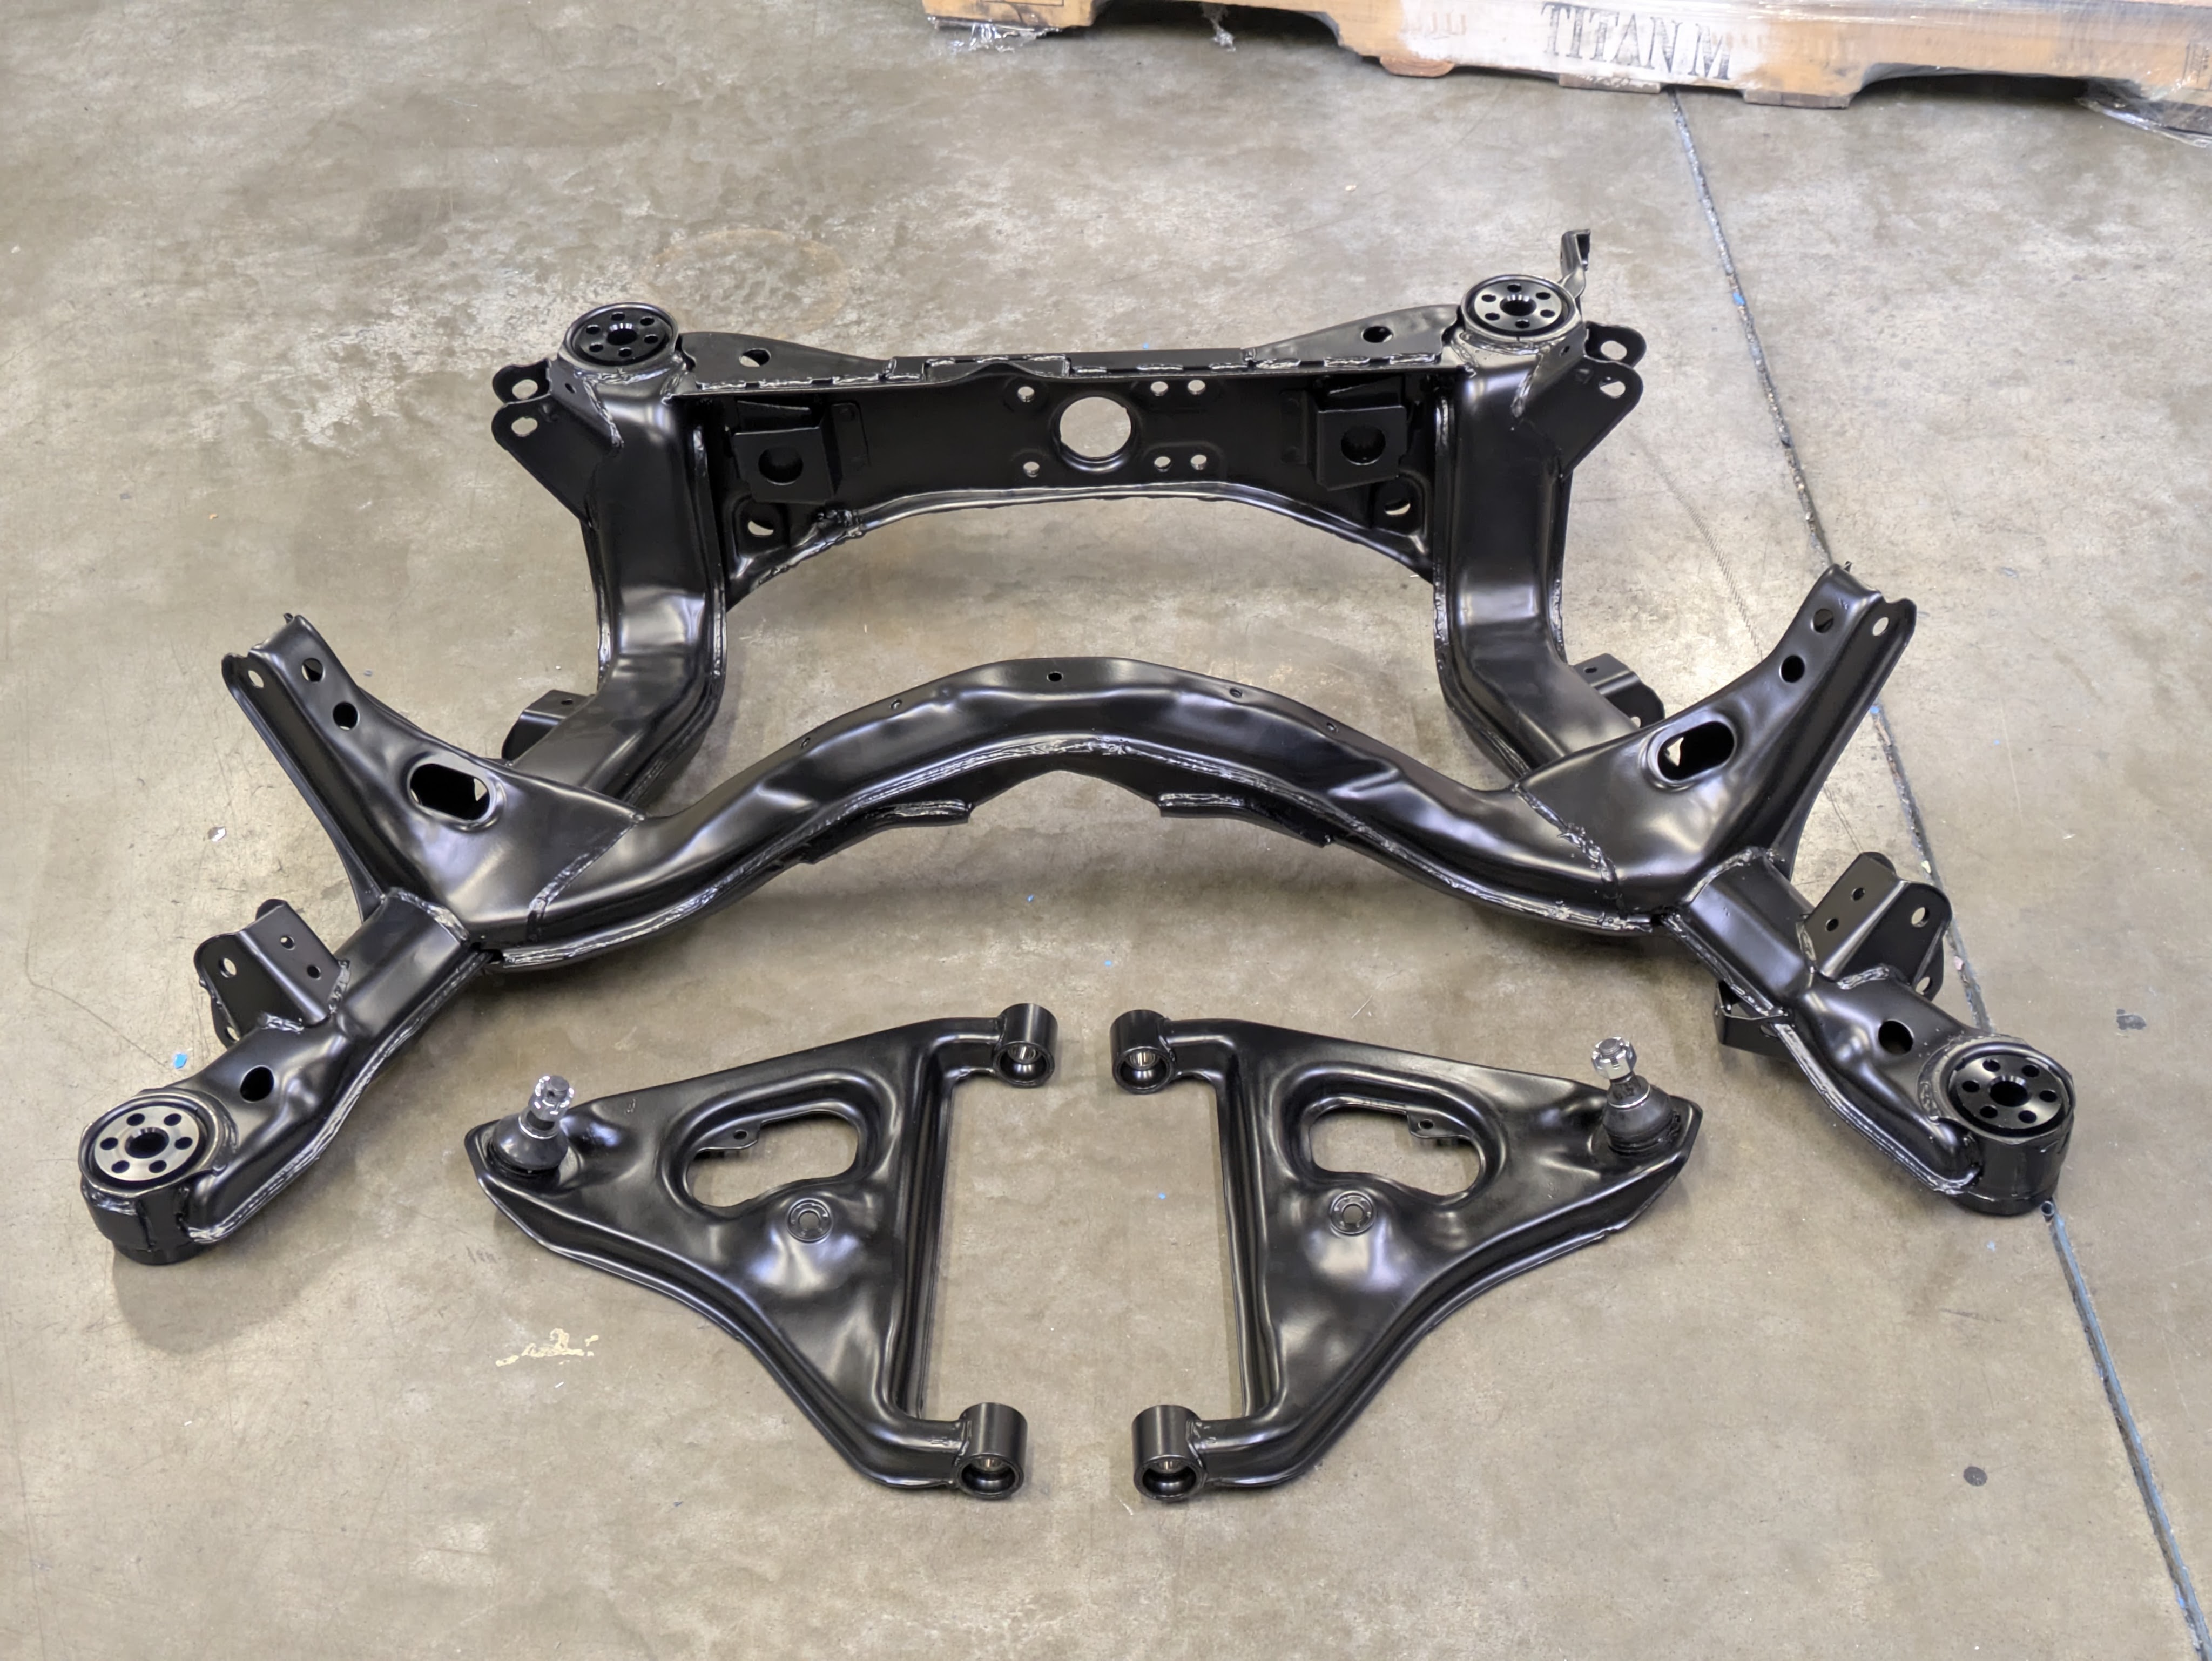
And with that, the rear end restoration and refurbishment project is complete. While some welds could be prettier and the fitment could be slightly improved, I am content with the outcome. This sentiment may change if the RLCAs still fight me on install, but we will cross that bridge when I get there.
This was one of the big hurdles for getting the car rolling again, and with these components complete, I can finally begin re-installing parts that have been taking up significant floor space for the last few months. Similar to the engine, these are some of those pivotal refurbished parts that houses many other components I have been shoveling effort into restoring and improving, so we should get some good momentum going once these are back in the car.
I think the burning holes in my hoodie and black boogers part of this build has come to a close, or at least I hope so. There’s part of me that misses it from old jobs I used to have, but it’s not something I actively seek out anymore. All good fun though.
The title of this post is rather misleading. There are many more ways to have done this right, most of which involves using learned experience that I don’t have. But there’s no better way to learn than to do, and there’s something right about doing it yourself. That feeling doesn’t fade, and that’s what I’m chasing.
Until next time.
