

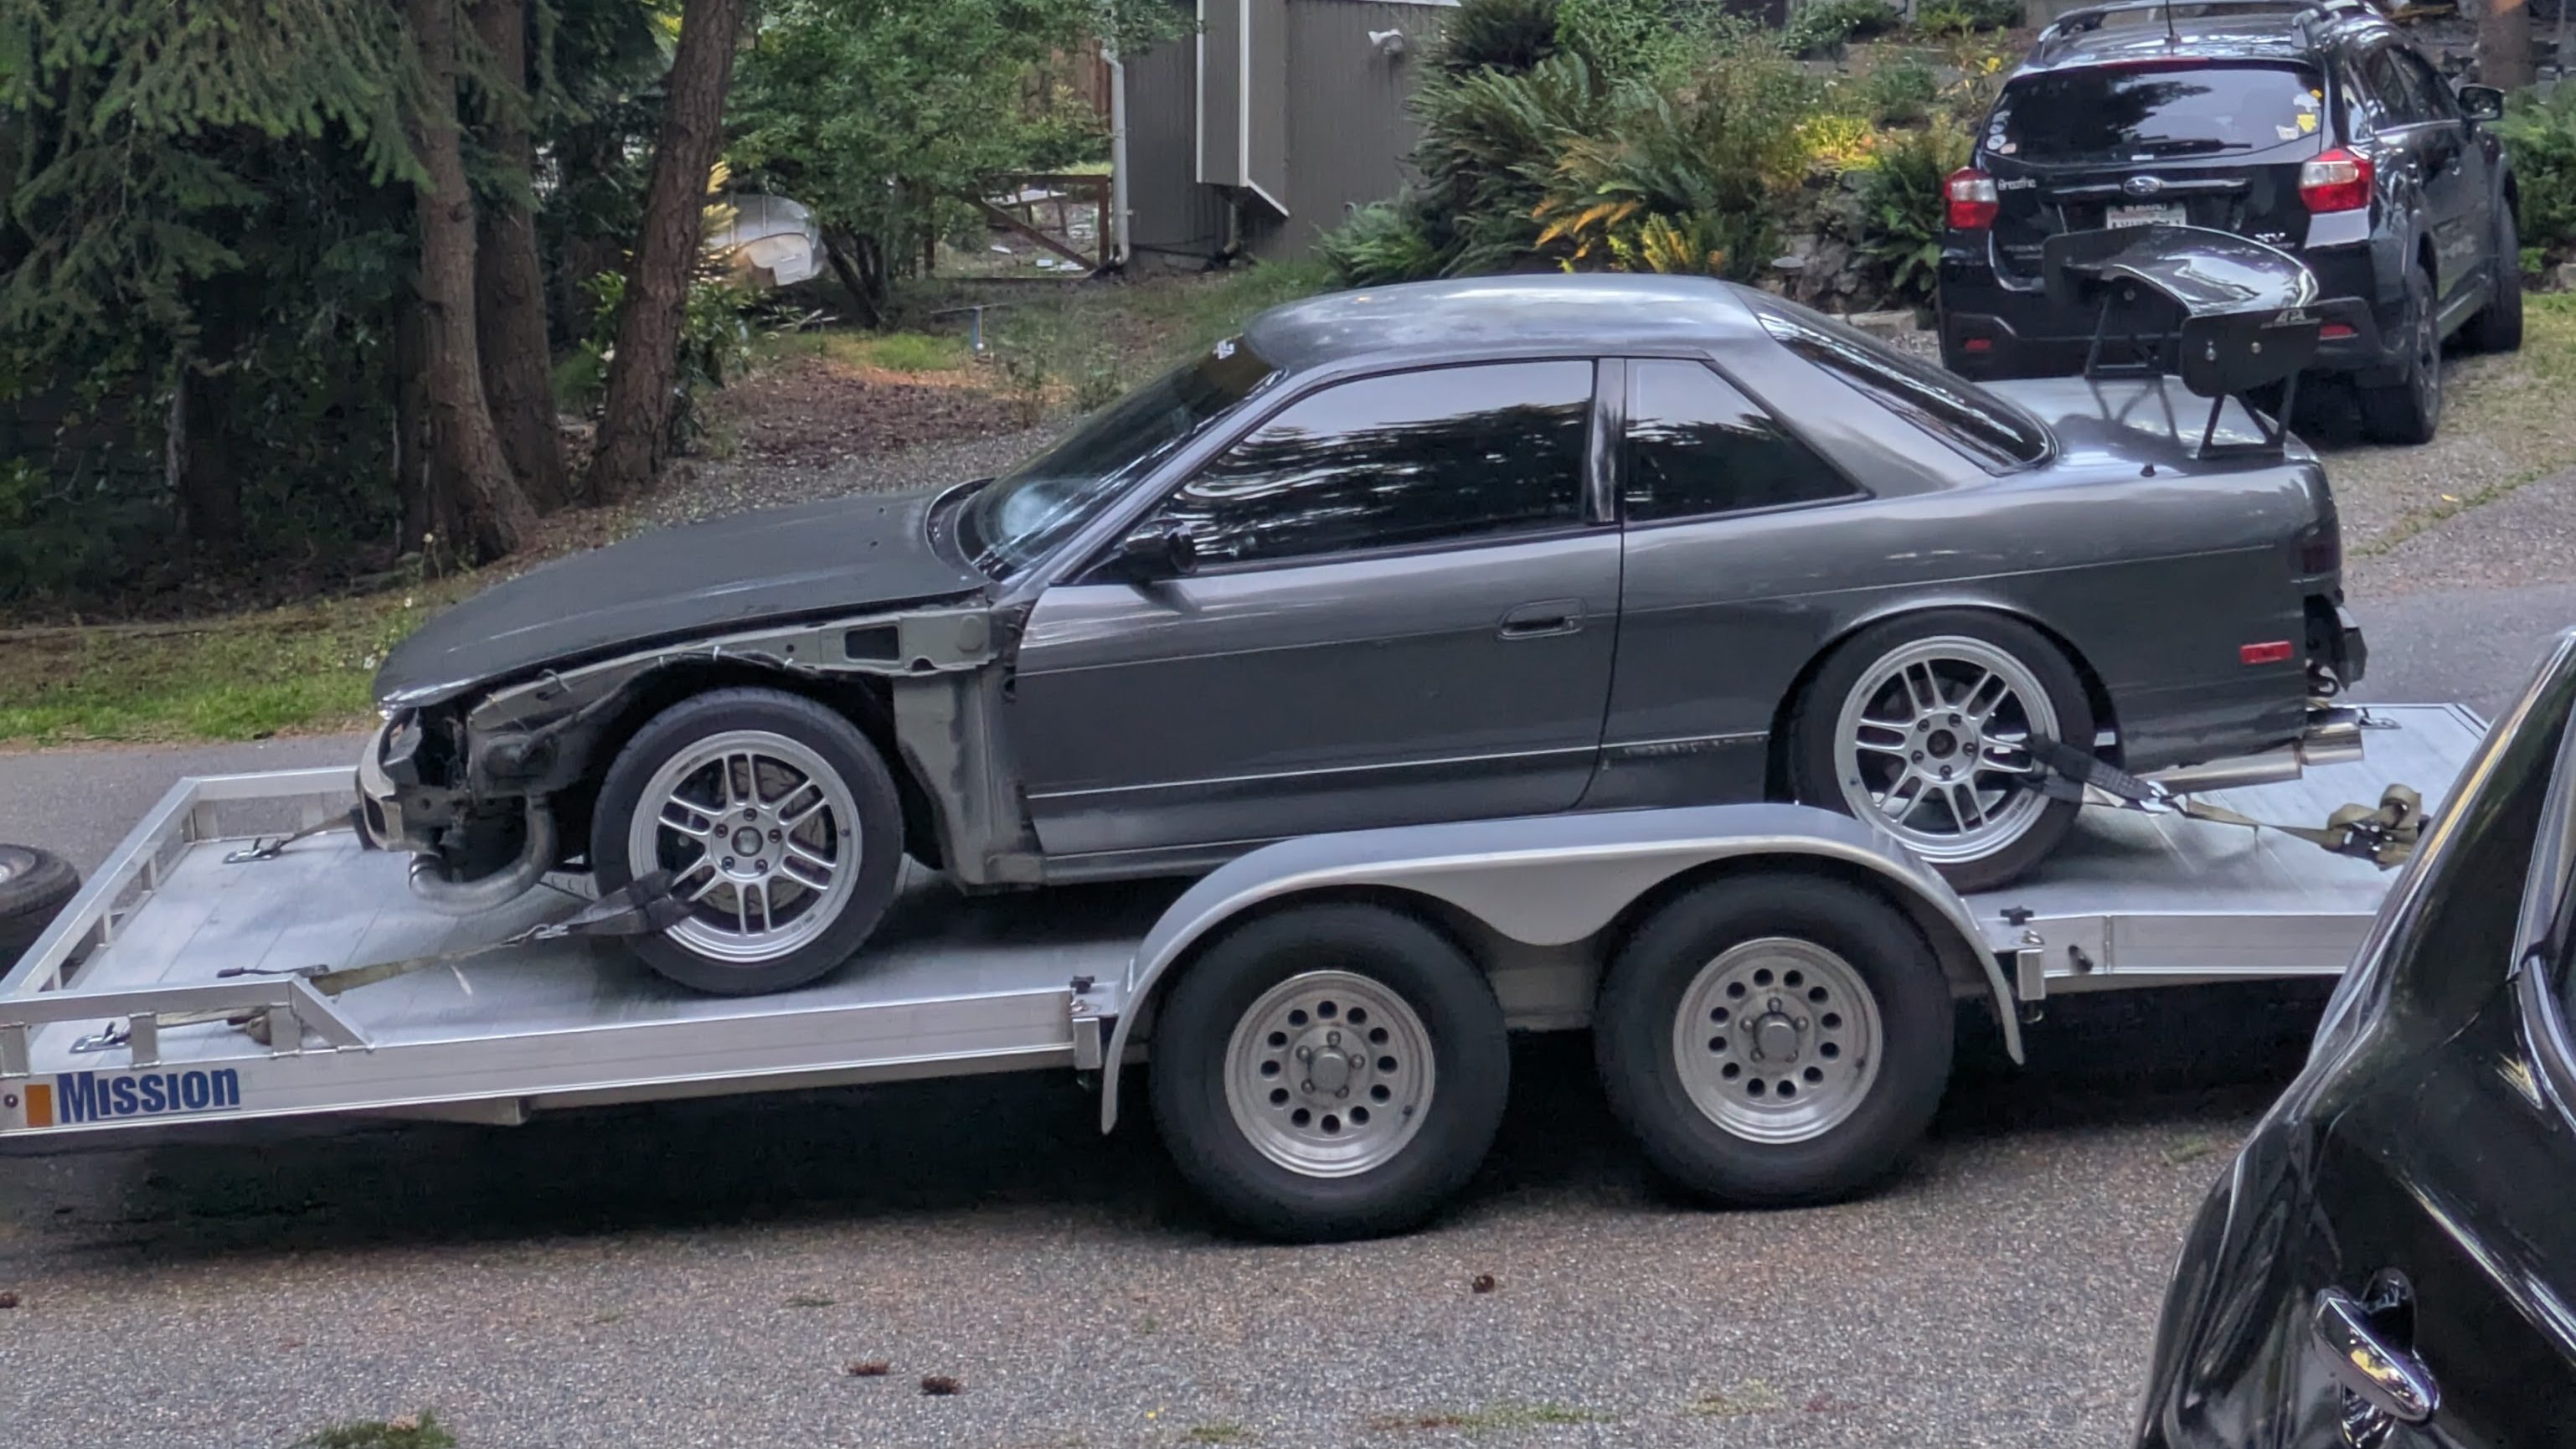
Between a broken collarbone, and the significant amount of restoration work that went into the Miata, my S13 has sat rather neglected pretty much since I bought it. This is the result of a driver induced part failure, but we’ll get to that. My motivation to still have something to drive for the rest of the season post Miata sale was very high, so on a free Sunday evening with the garage cleared out, I ran north and retrieved the car and all of the parts that had migrated off of it for various reasons.
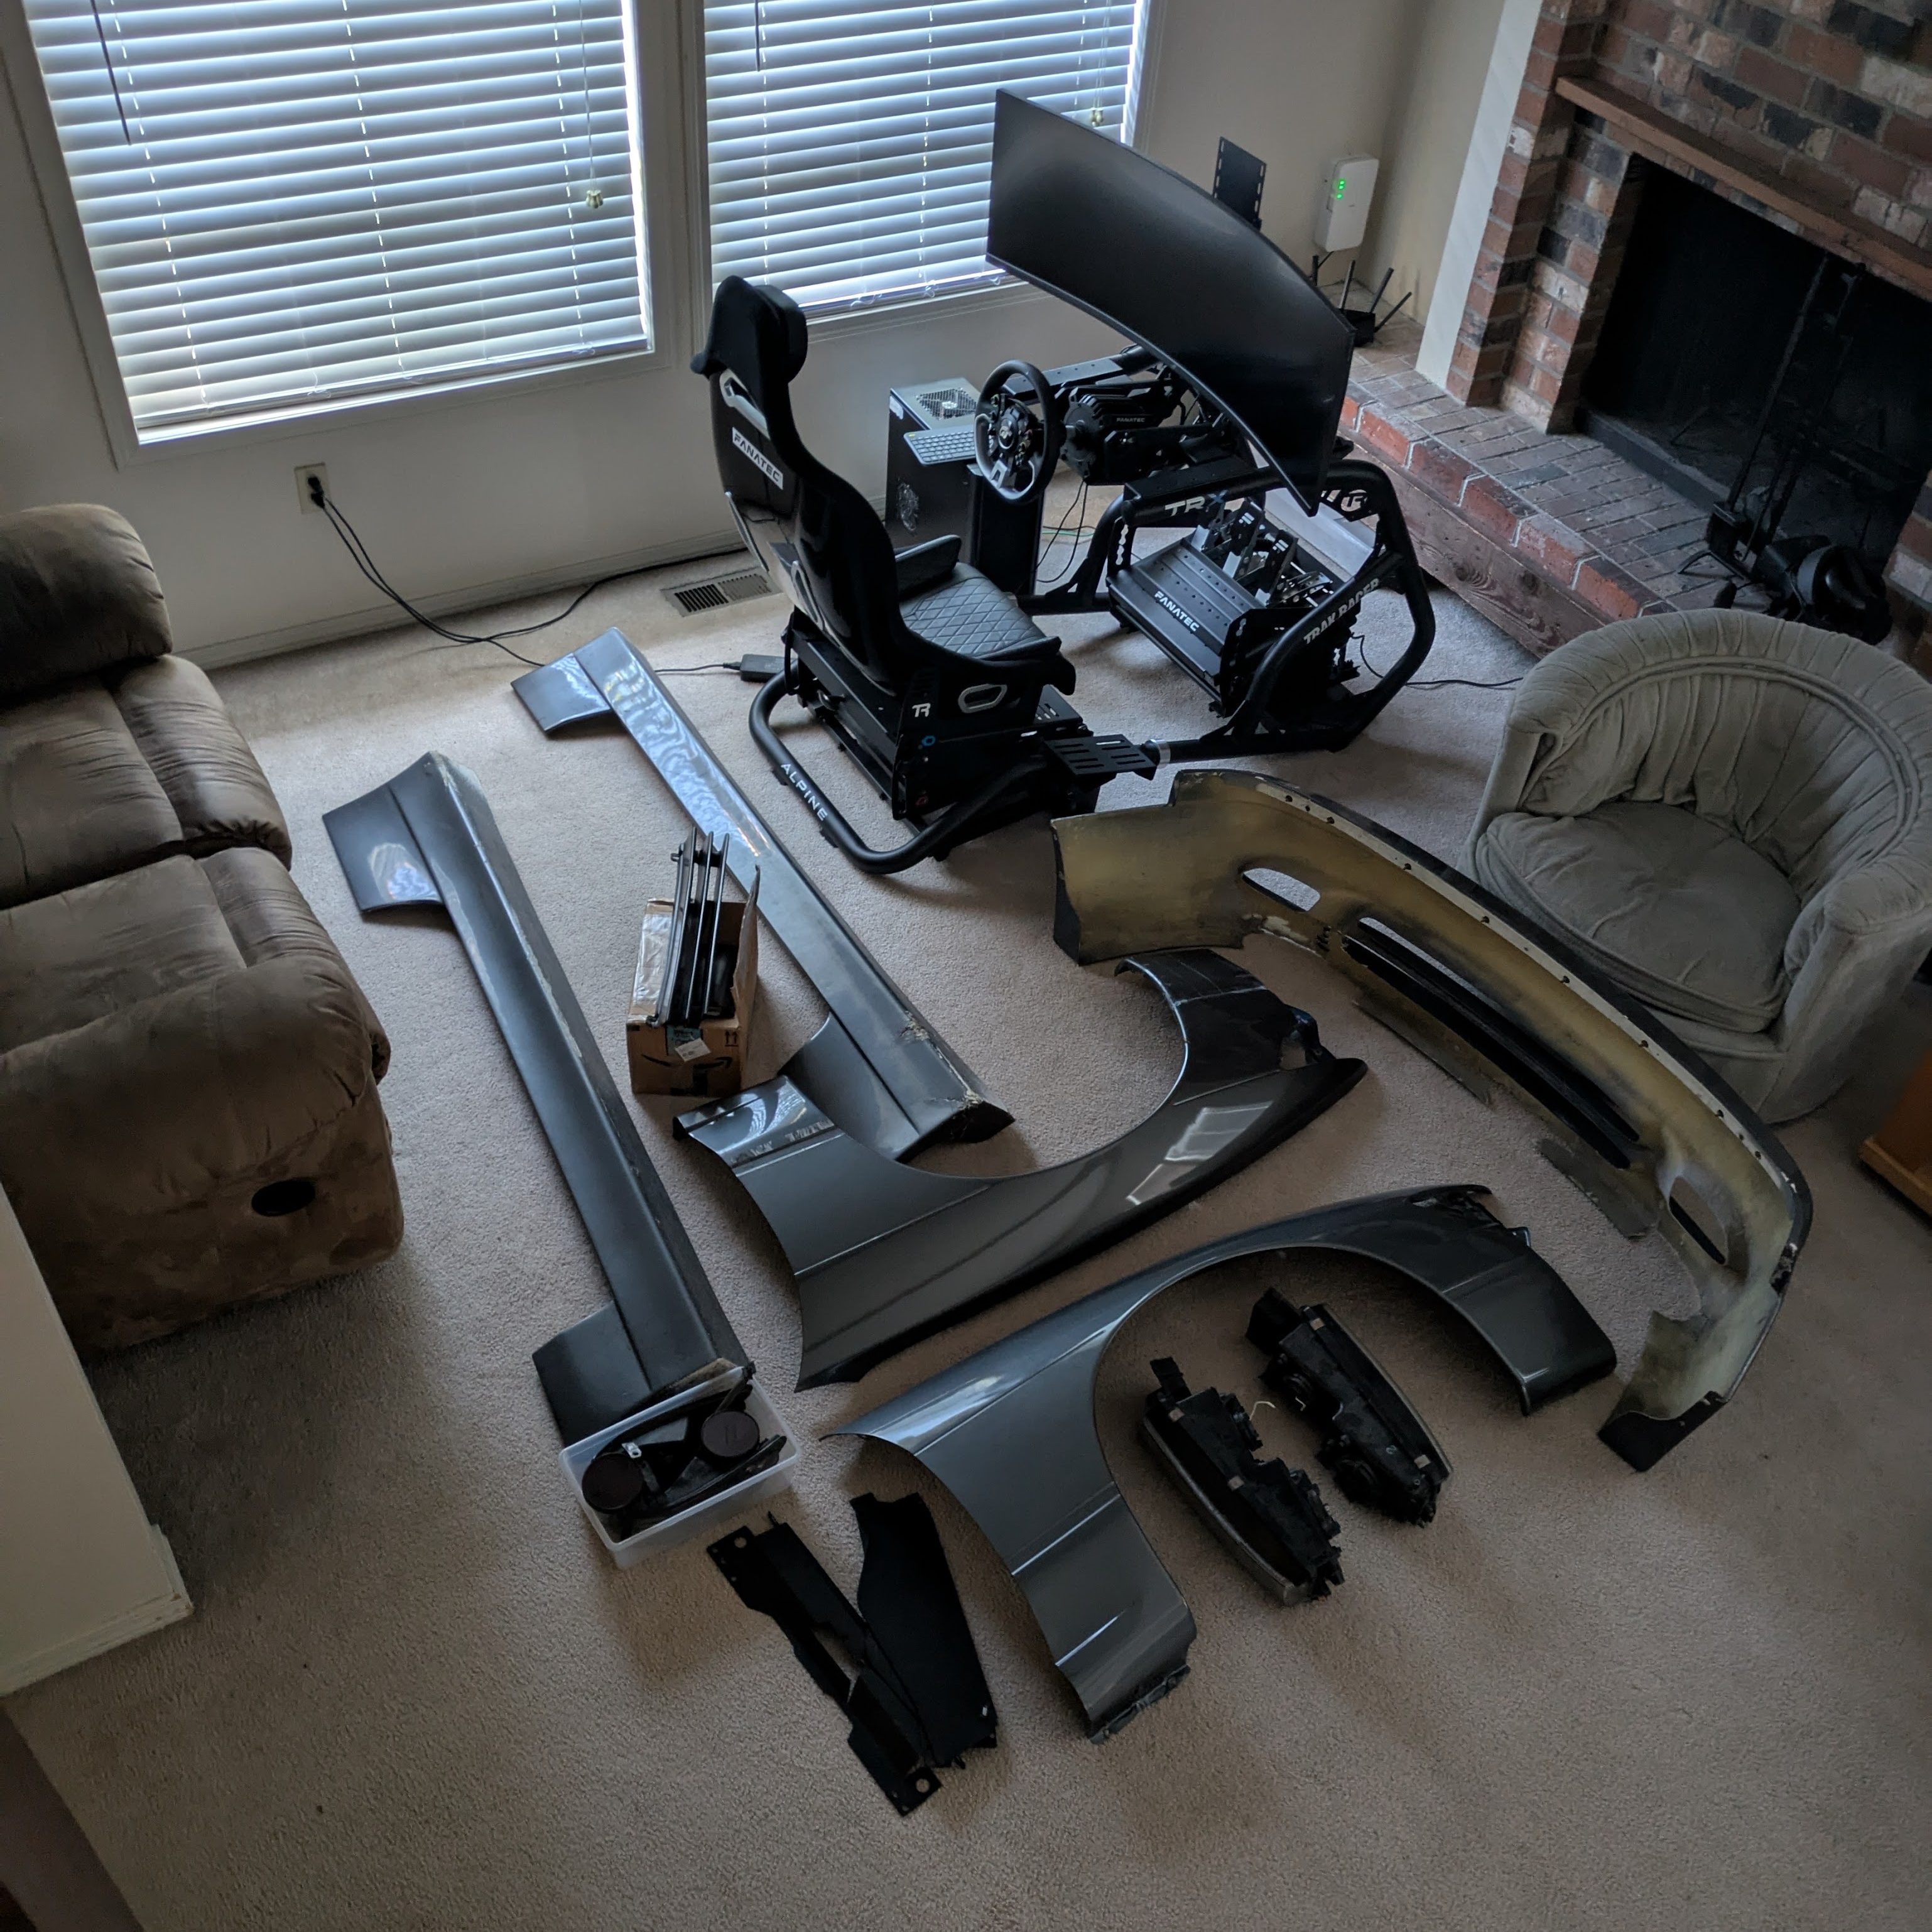
Once the parts were all home safe and accounted for, it was time to 1. figure out a list of things to accomplish to get the car back on the road in a satisfactory way, and 2. figure out how all this mess went back together as it had been months since I disassembled it.
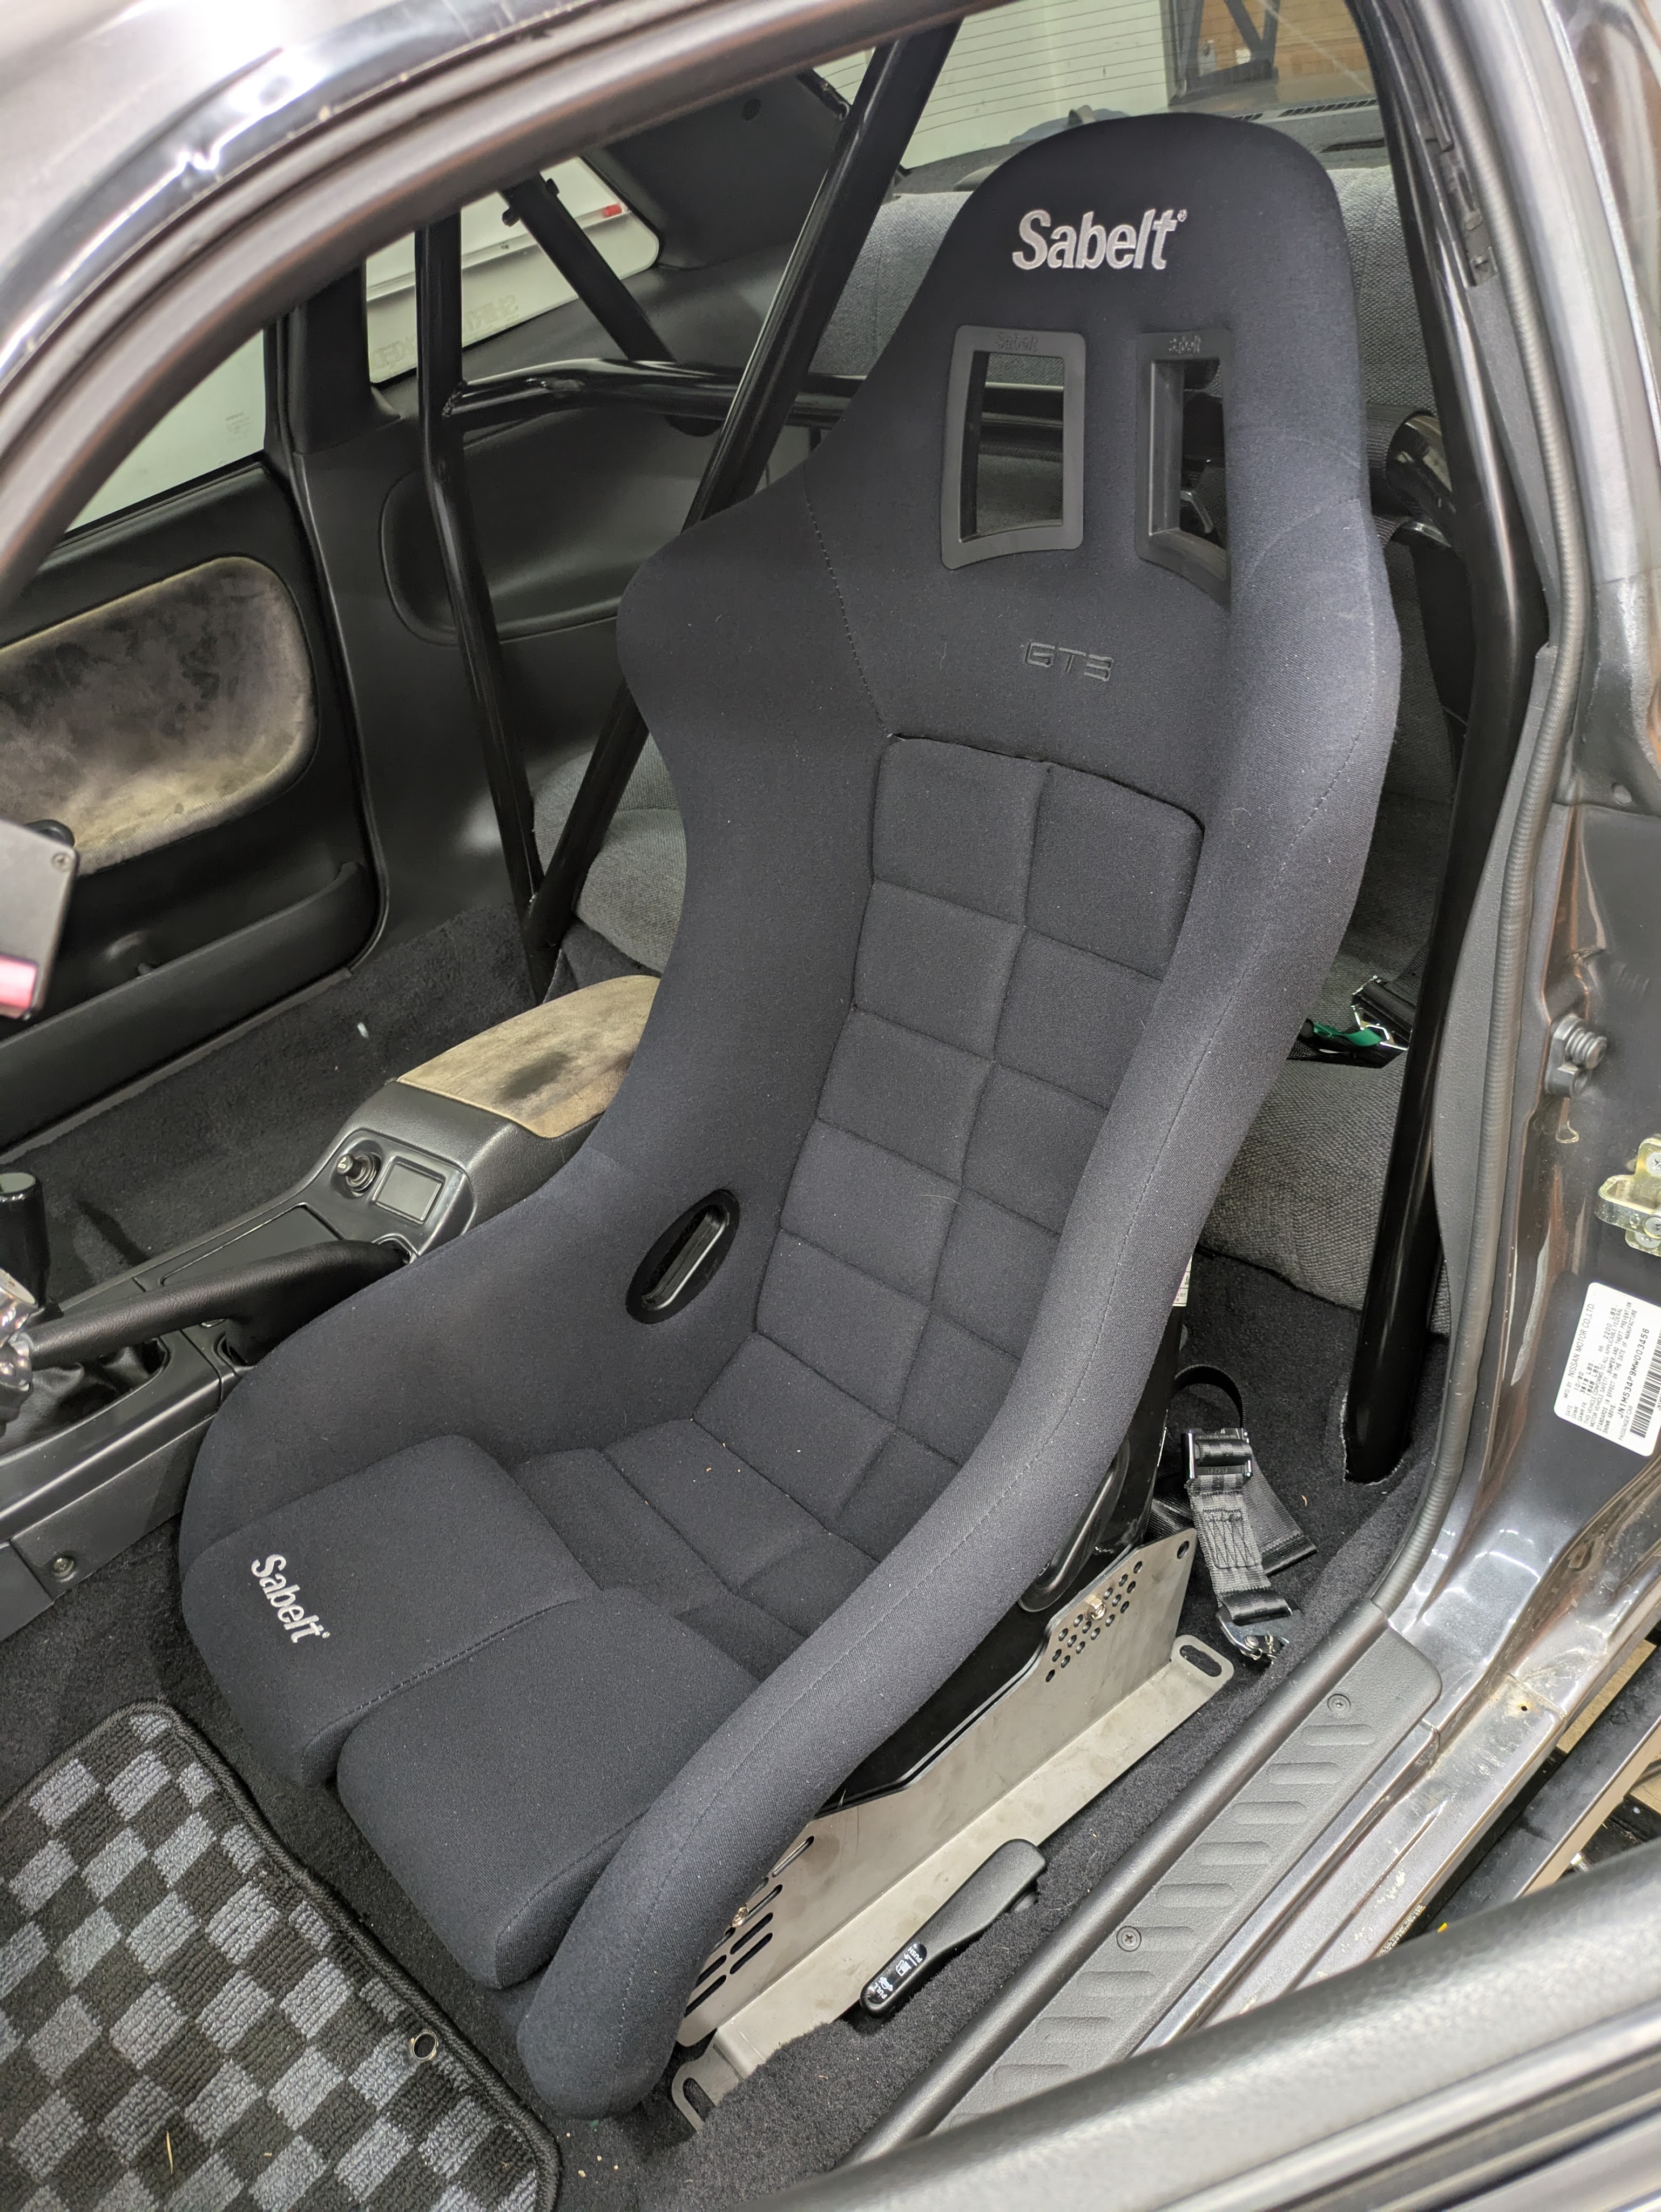
While being counter intuitive on paper, the first thing to tackle was a seat that I fit in, that fit in the car, that allowed me to fit in the car. I had removed the rep Bride that the car came with, as well as the genuine Bride sliders months prior as I knew I was going to be replacing those pieces in the future. I robbed this Sabelt GT3 from my IS300 to use it as a sanity check, and the results were not promising. Due to the geometry of the seat, which featured a significant drop in the back to allow room for the cushions, it was really difficult to get the driver low, especially with the cat hump in the way. I knew this wasn’t going to be the permanent seat for the car, and I didn’t want to do major fabrication or modification, so I went hunting.
I’ve always dreamed of a pair of fixed back Recaros in a car; that pair of logos peeking through the windshield just means business. They have always had the best aesthetics, while being well built, while being incredibly comfortable and safe. S13 Master Alex had had a set of Profi XLs in his S13 on Garage Star(RIP) brackets, and he is notably taller than I am. After some marketplace wheelin’, an impulsive purchase, and some repop GS brackets from Defworx, we have:
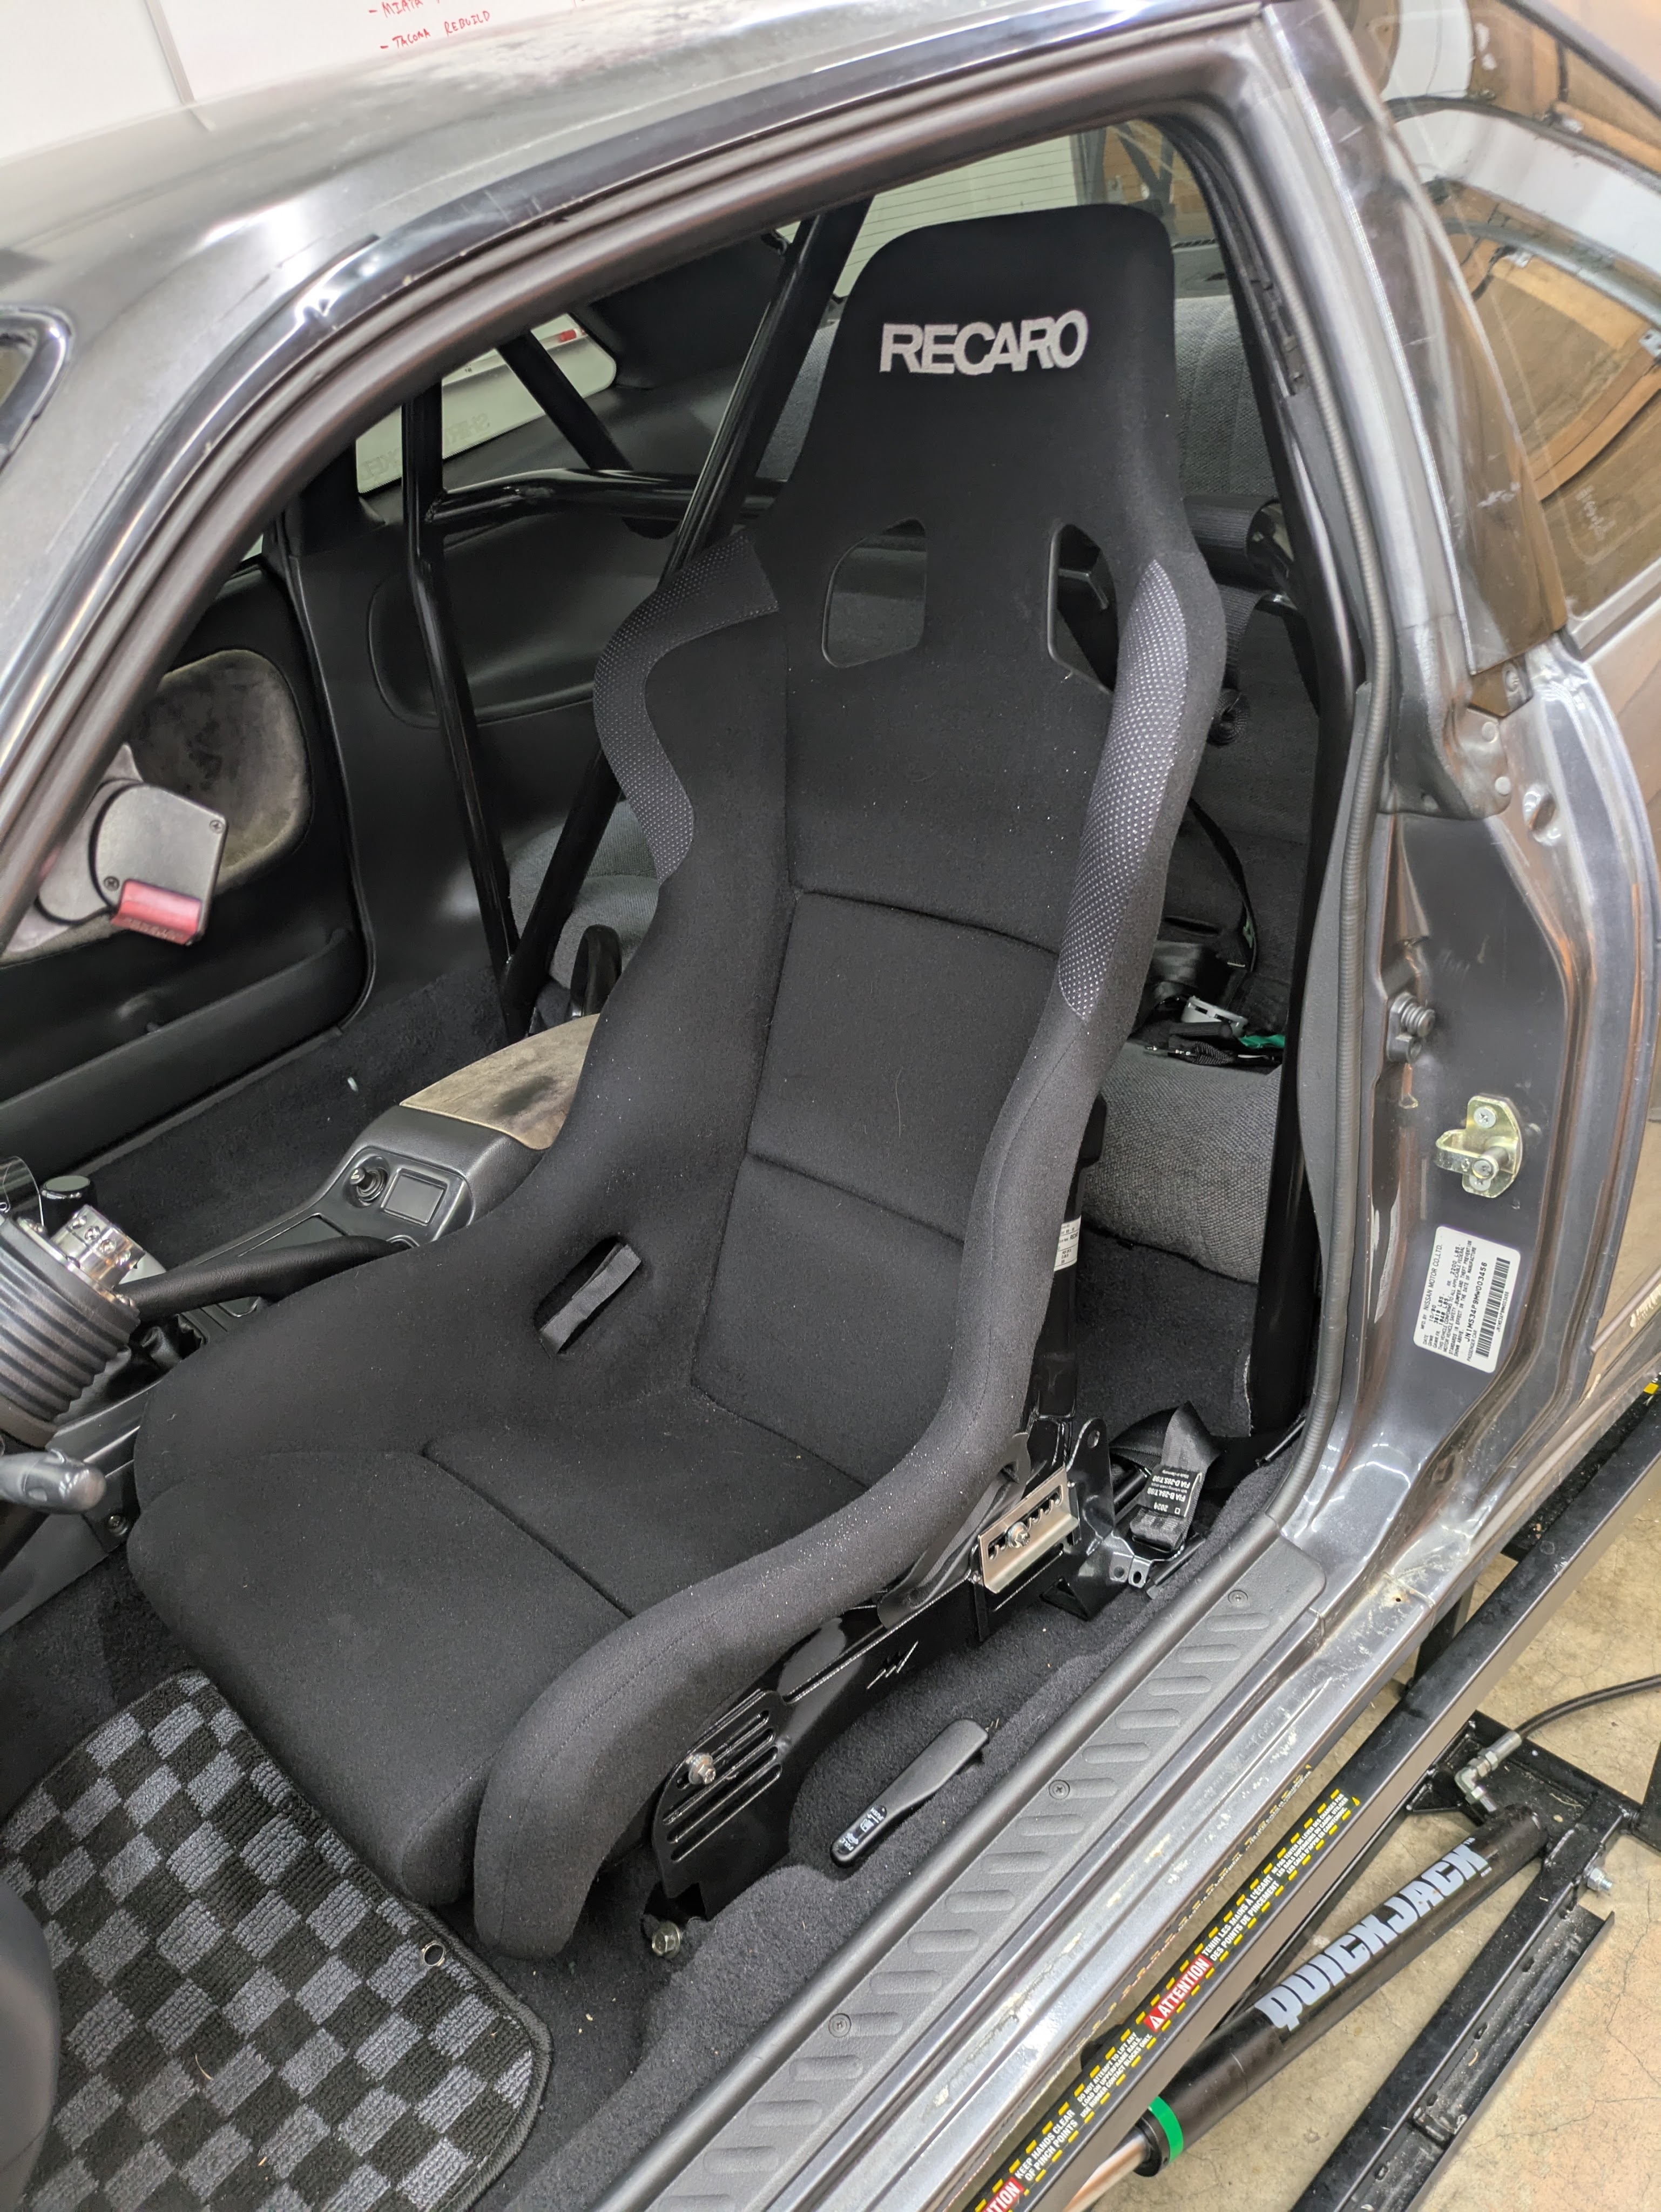
Ergonomic perfection. I have never fit so well in a car, even in cars that I have custom built brackets for. It took me 2 attempts to find the literal perfect seating position for someone of my dimensions (6′ with 30″ inseam, so all torso), and the brackets bolted right in with only minor clearance required. Big ups to Defworx for making a set an exceptional set of brackets. Highly recommend. These are the “Wide/Large” Version as the XLs are real big.
Since I purchased a pair of seats, and after how well this affair went, I ordered a second set of brackets to mount the passenger side. Guess I’ll need to find a matching Schroth Flexi 2×2 harness for that side. Good problems to have I guess.
Now on to the list of functional requirements. The reason the car has actually been tucked away for all these months is that a monkey (me) did a burnout on a rainy day and the clutch stopped working. I figured the clutch pivot had broken, shoved it into storage, and decided to deal with it later as I had PLENTY on my plate at the time.
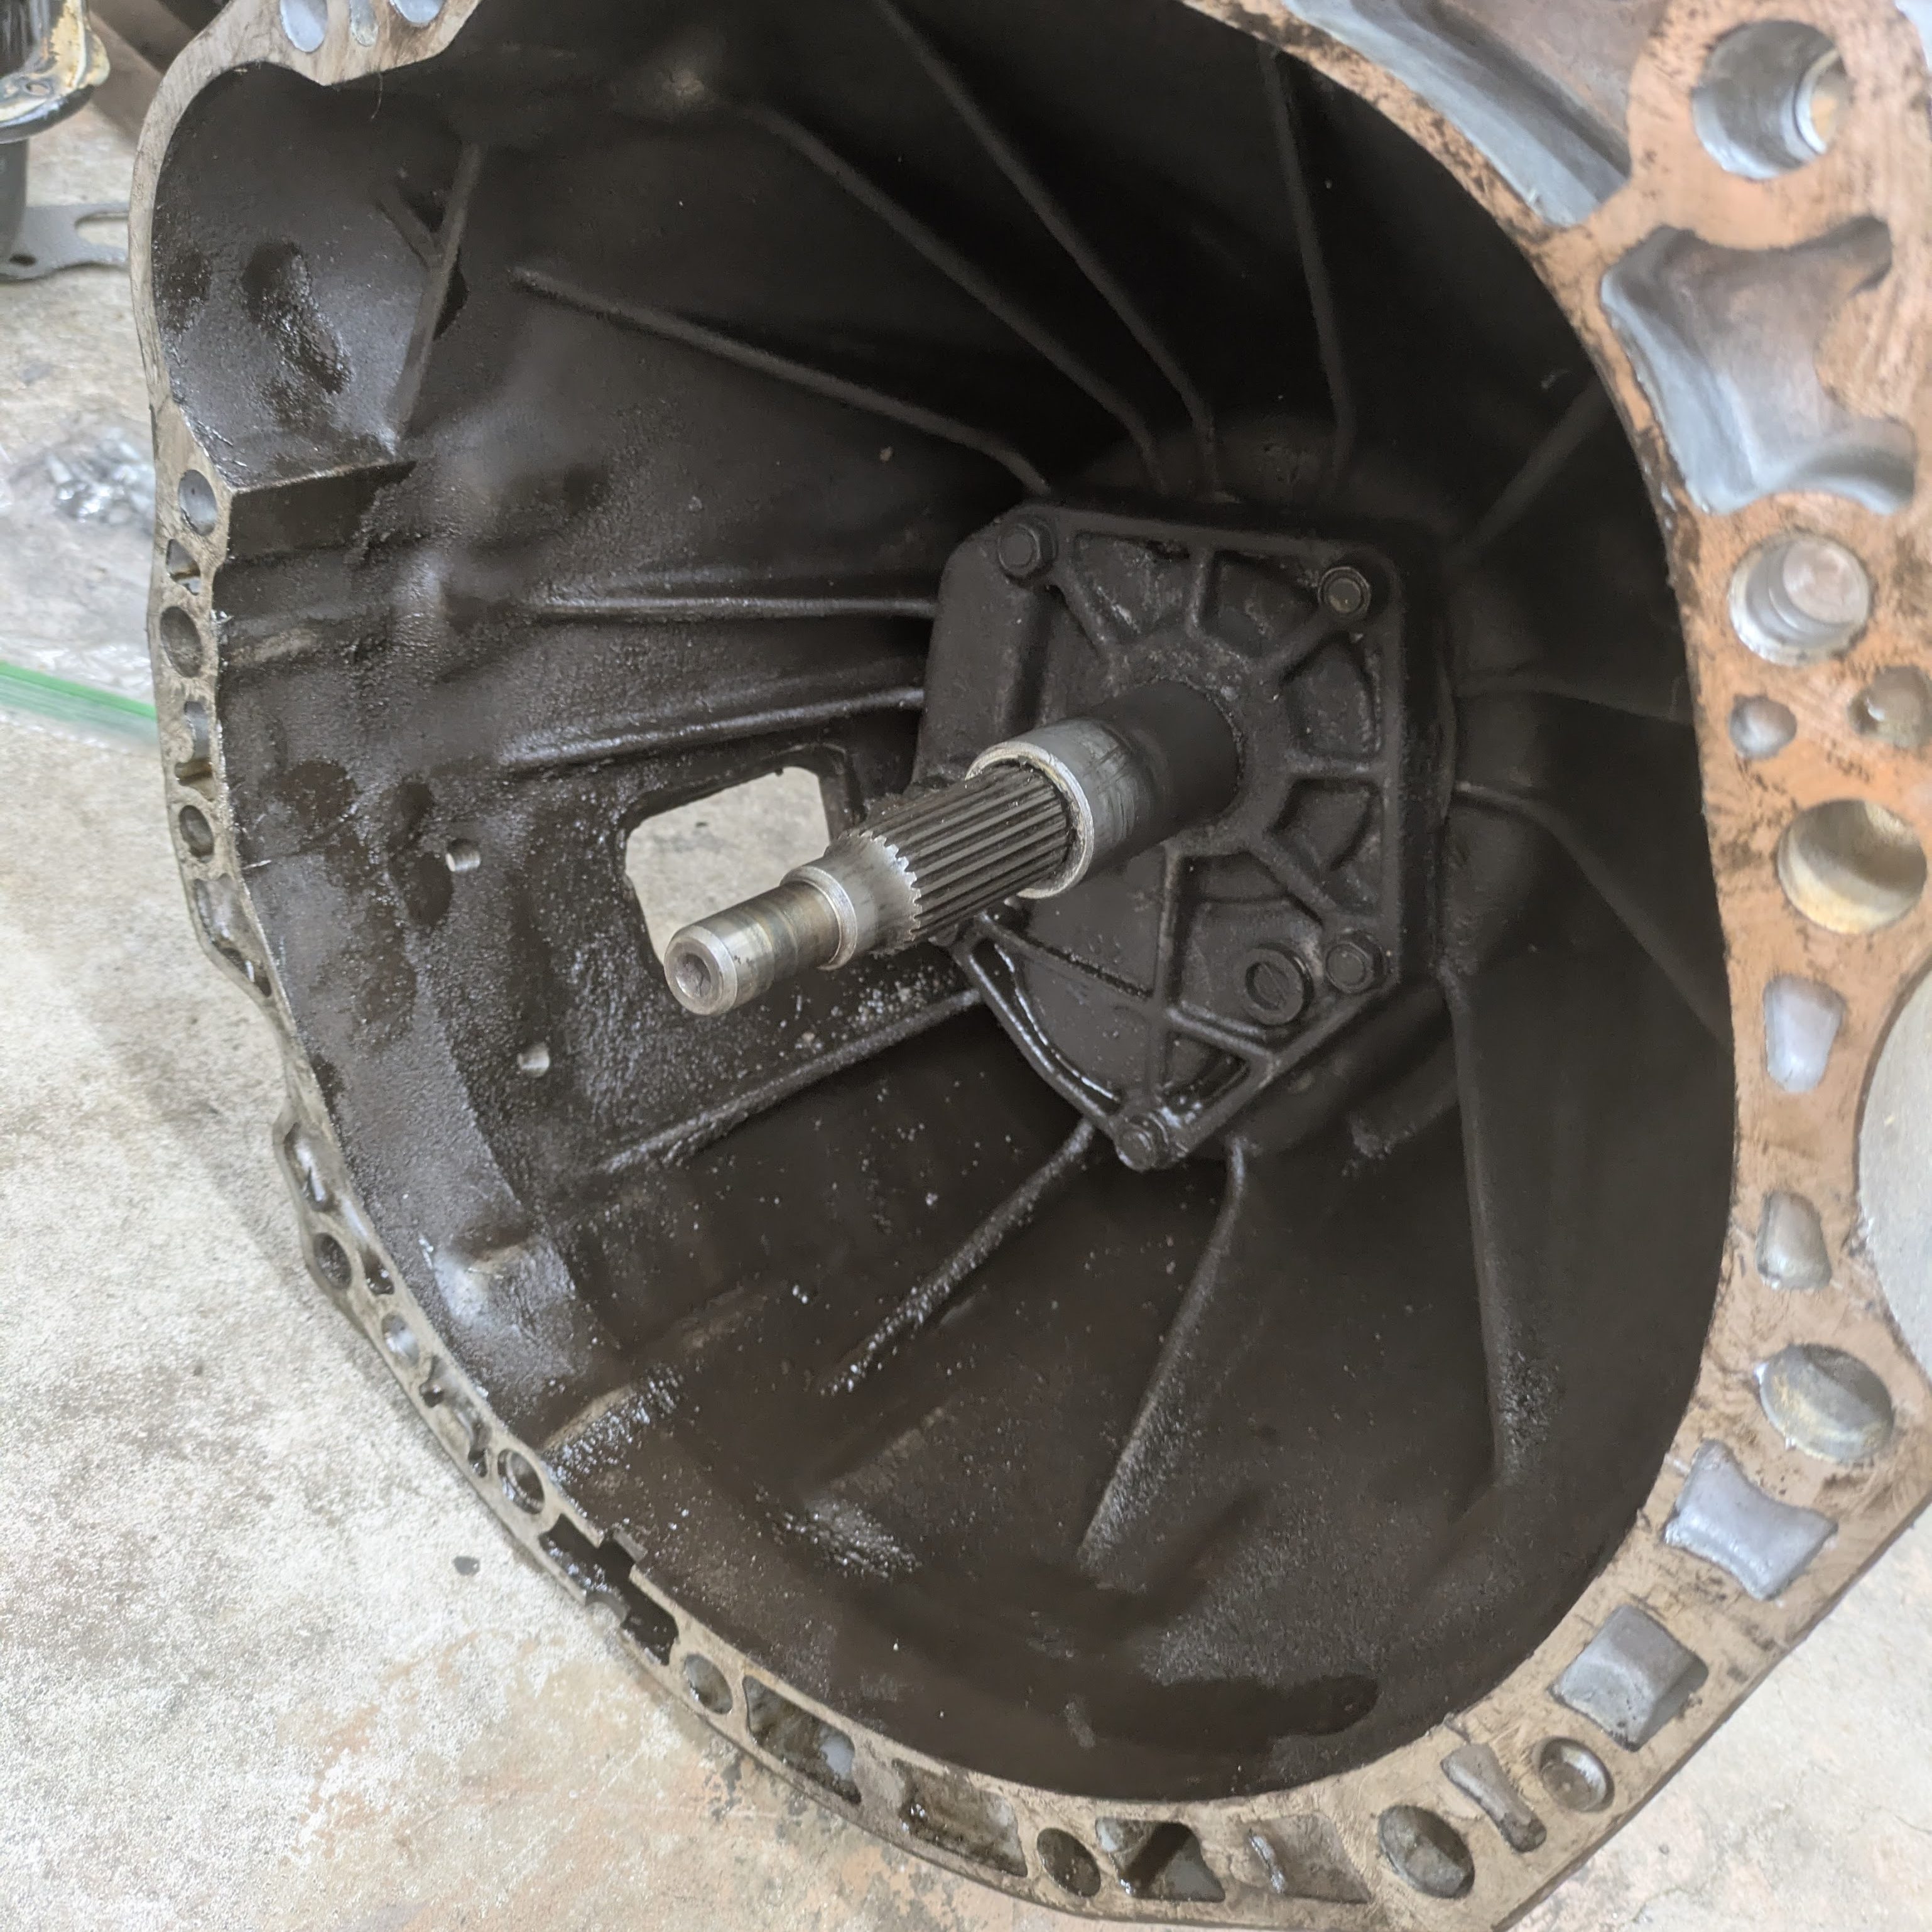
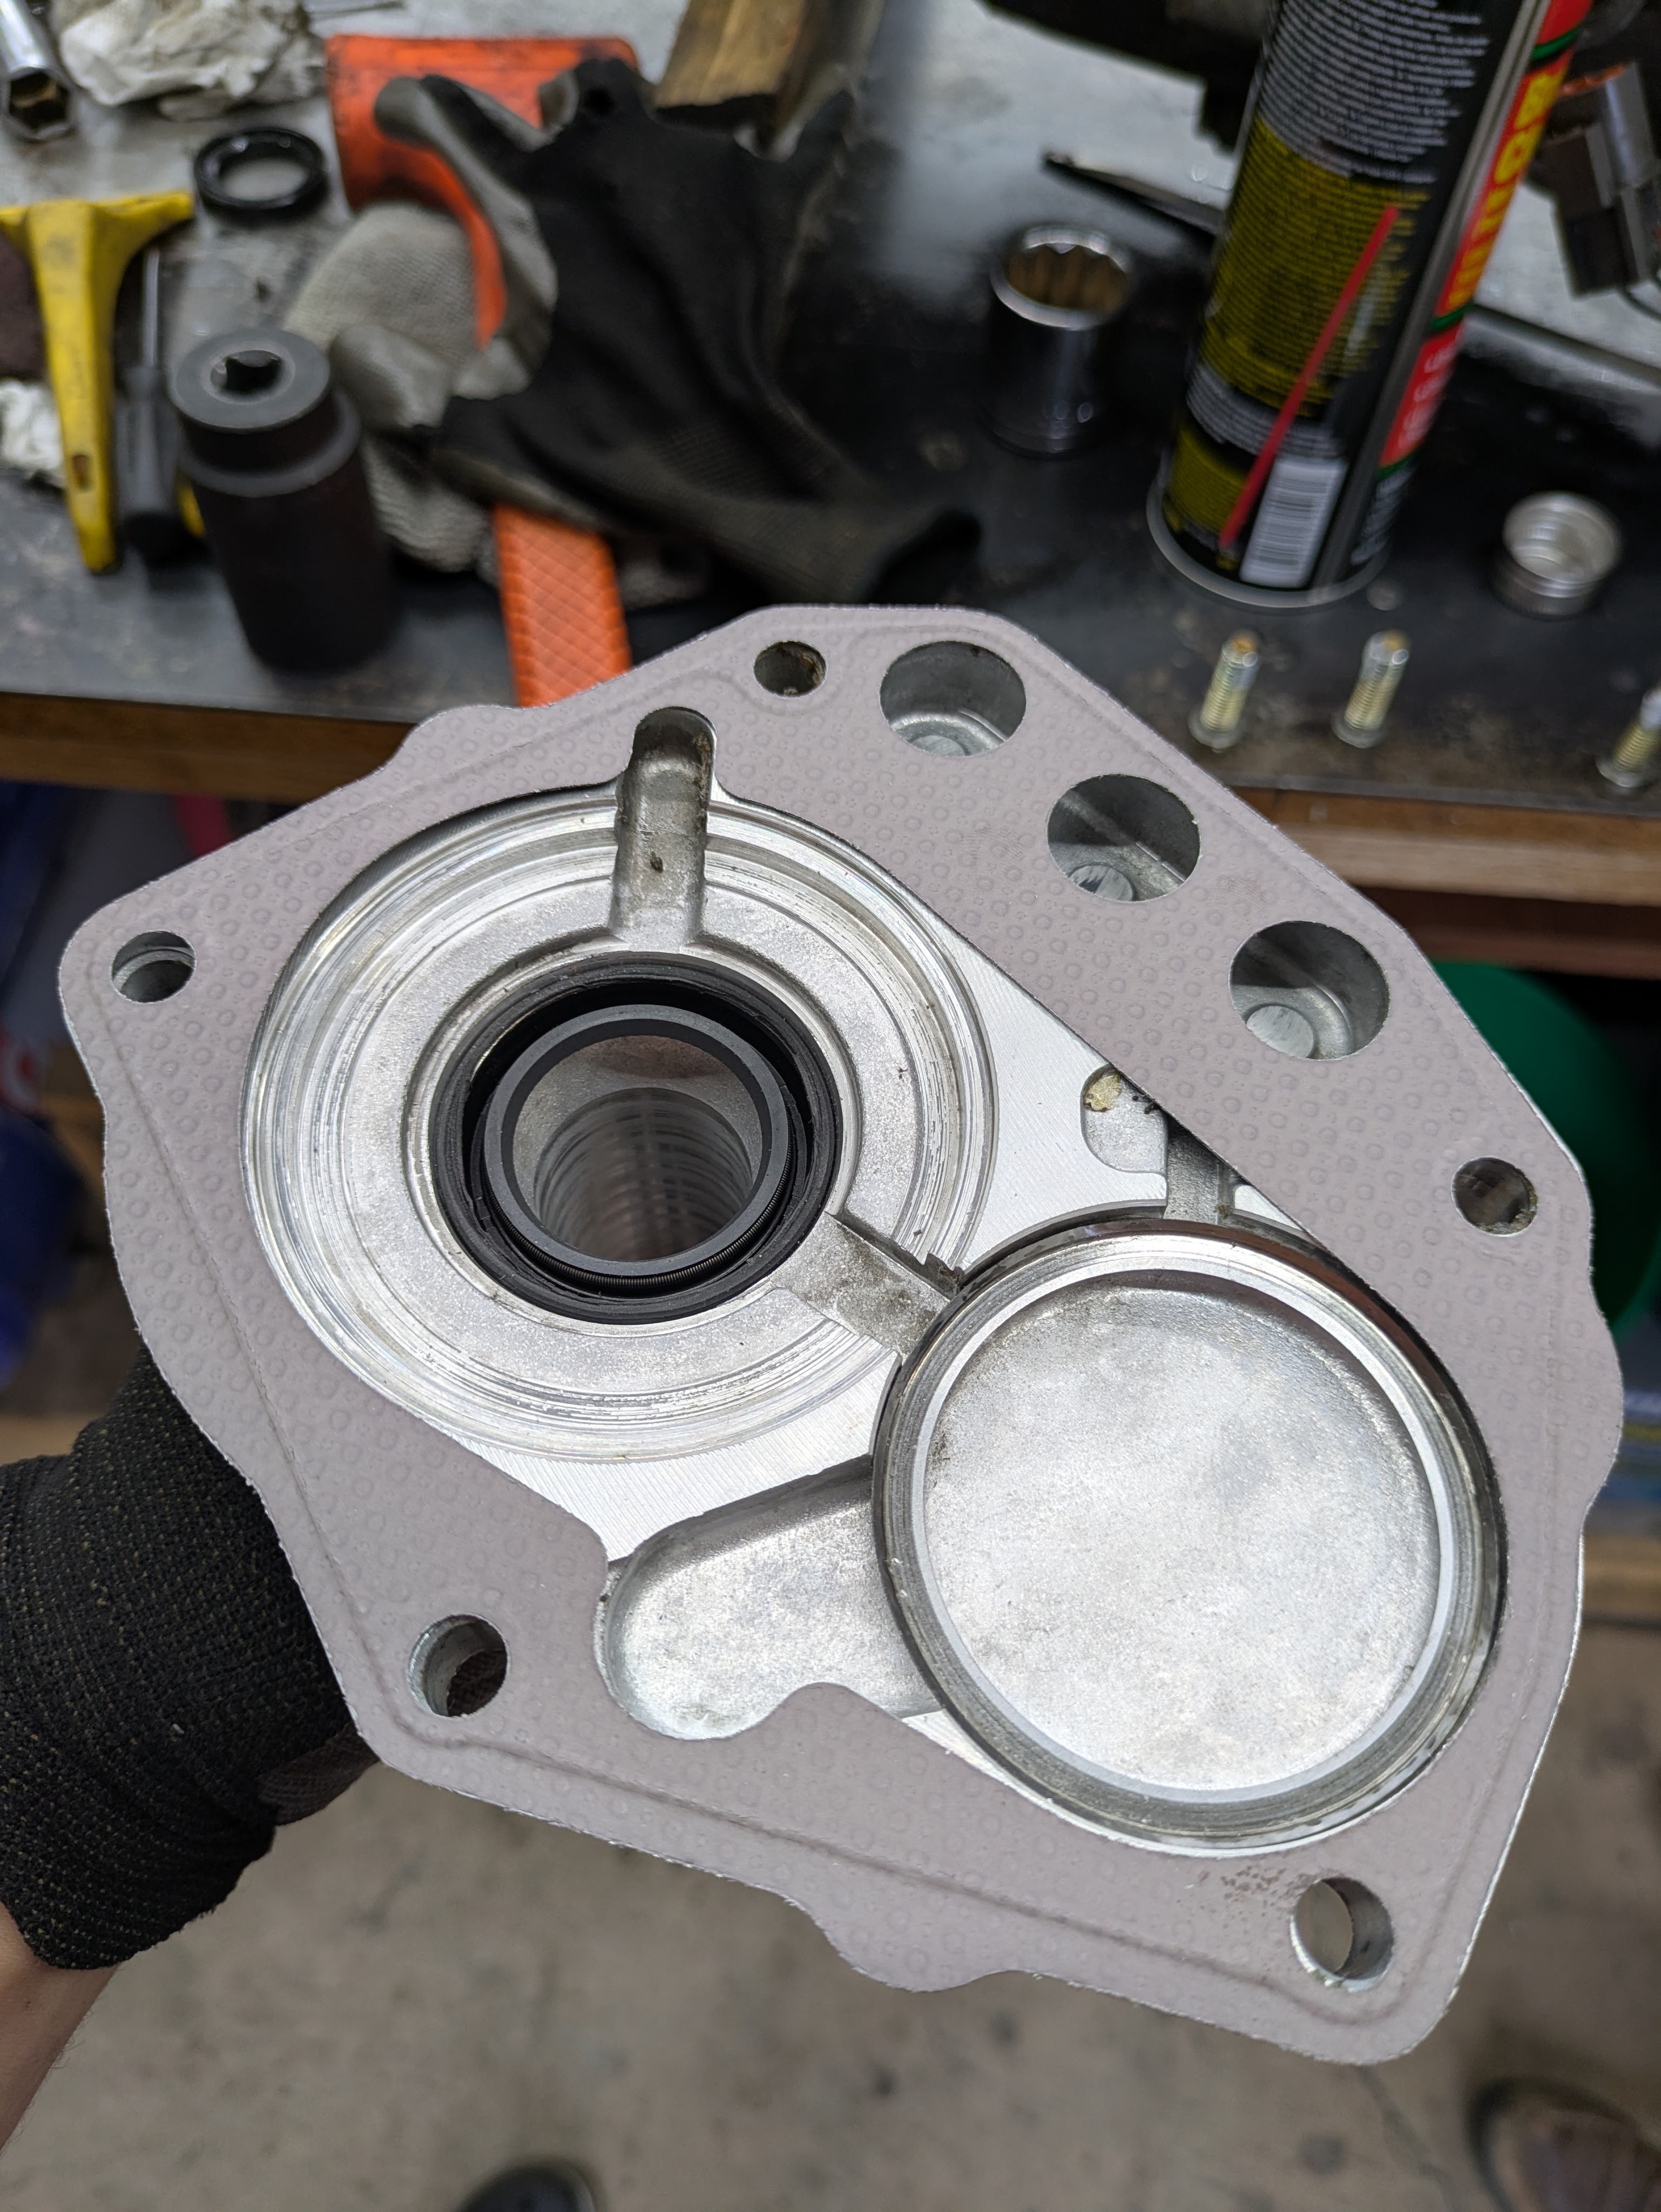
After getting the car in the air, a quick inspection netted that it was not in fact the pivot ball, but something deeper. To compliment that, the leak originating from the bellhousing that was disclosed in the for sale ad was, in fact, still very present. While I really wanted to drag the car to Oregon and pull the trans for an S13 maintenance extravaganza, I had a feeling that I was going to be thrown a curveball, and sure enough, I was. My father and I pulled the transmission (with what felt like way too much effort) on a weeknight to discover a couple of interesting factoids.
- The leak was in fact originating from the input shaft, which is rather uncommon vs a rear main seal. Easy fix, just abnormal.
- We have ejecto springo cuh.
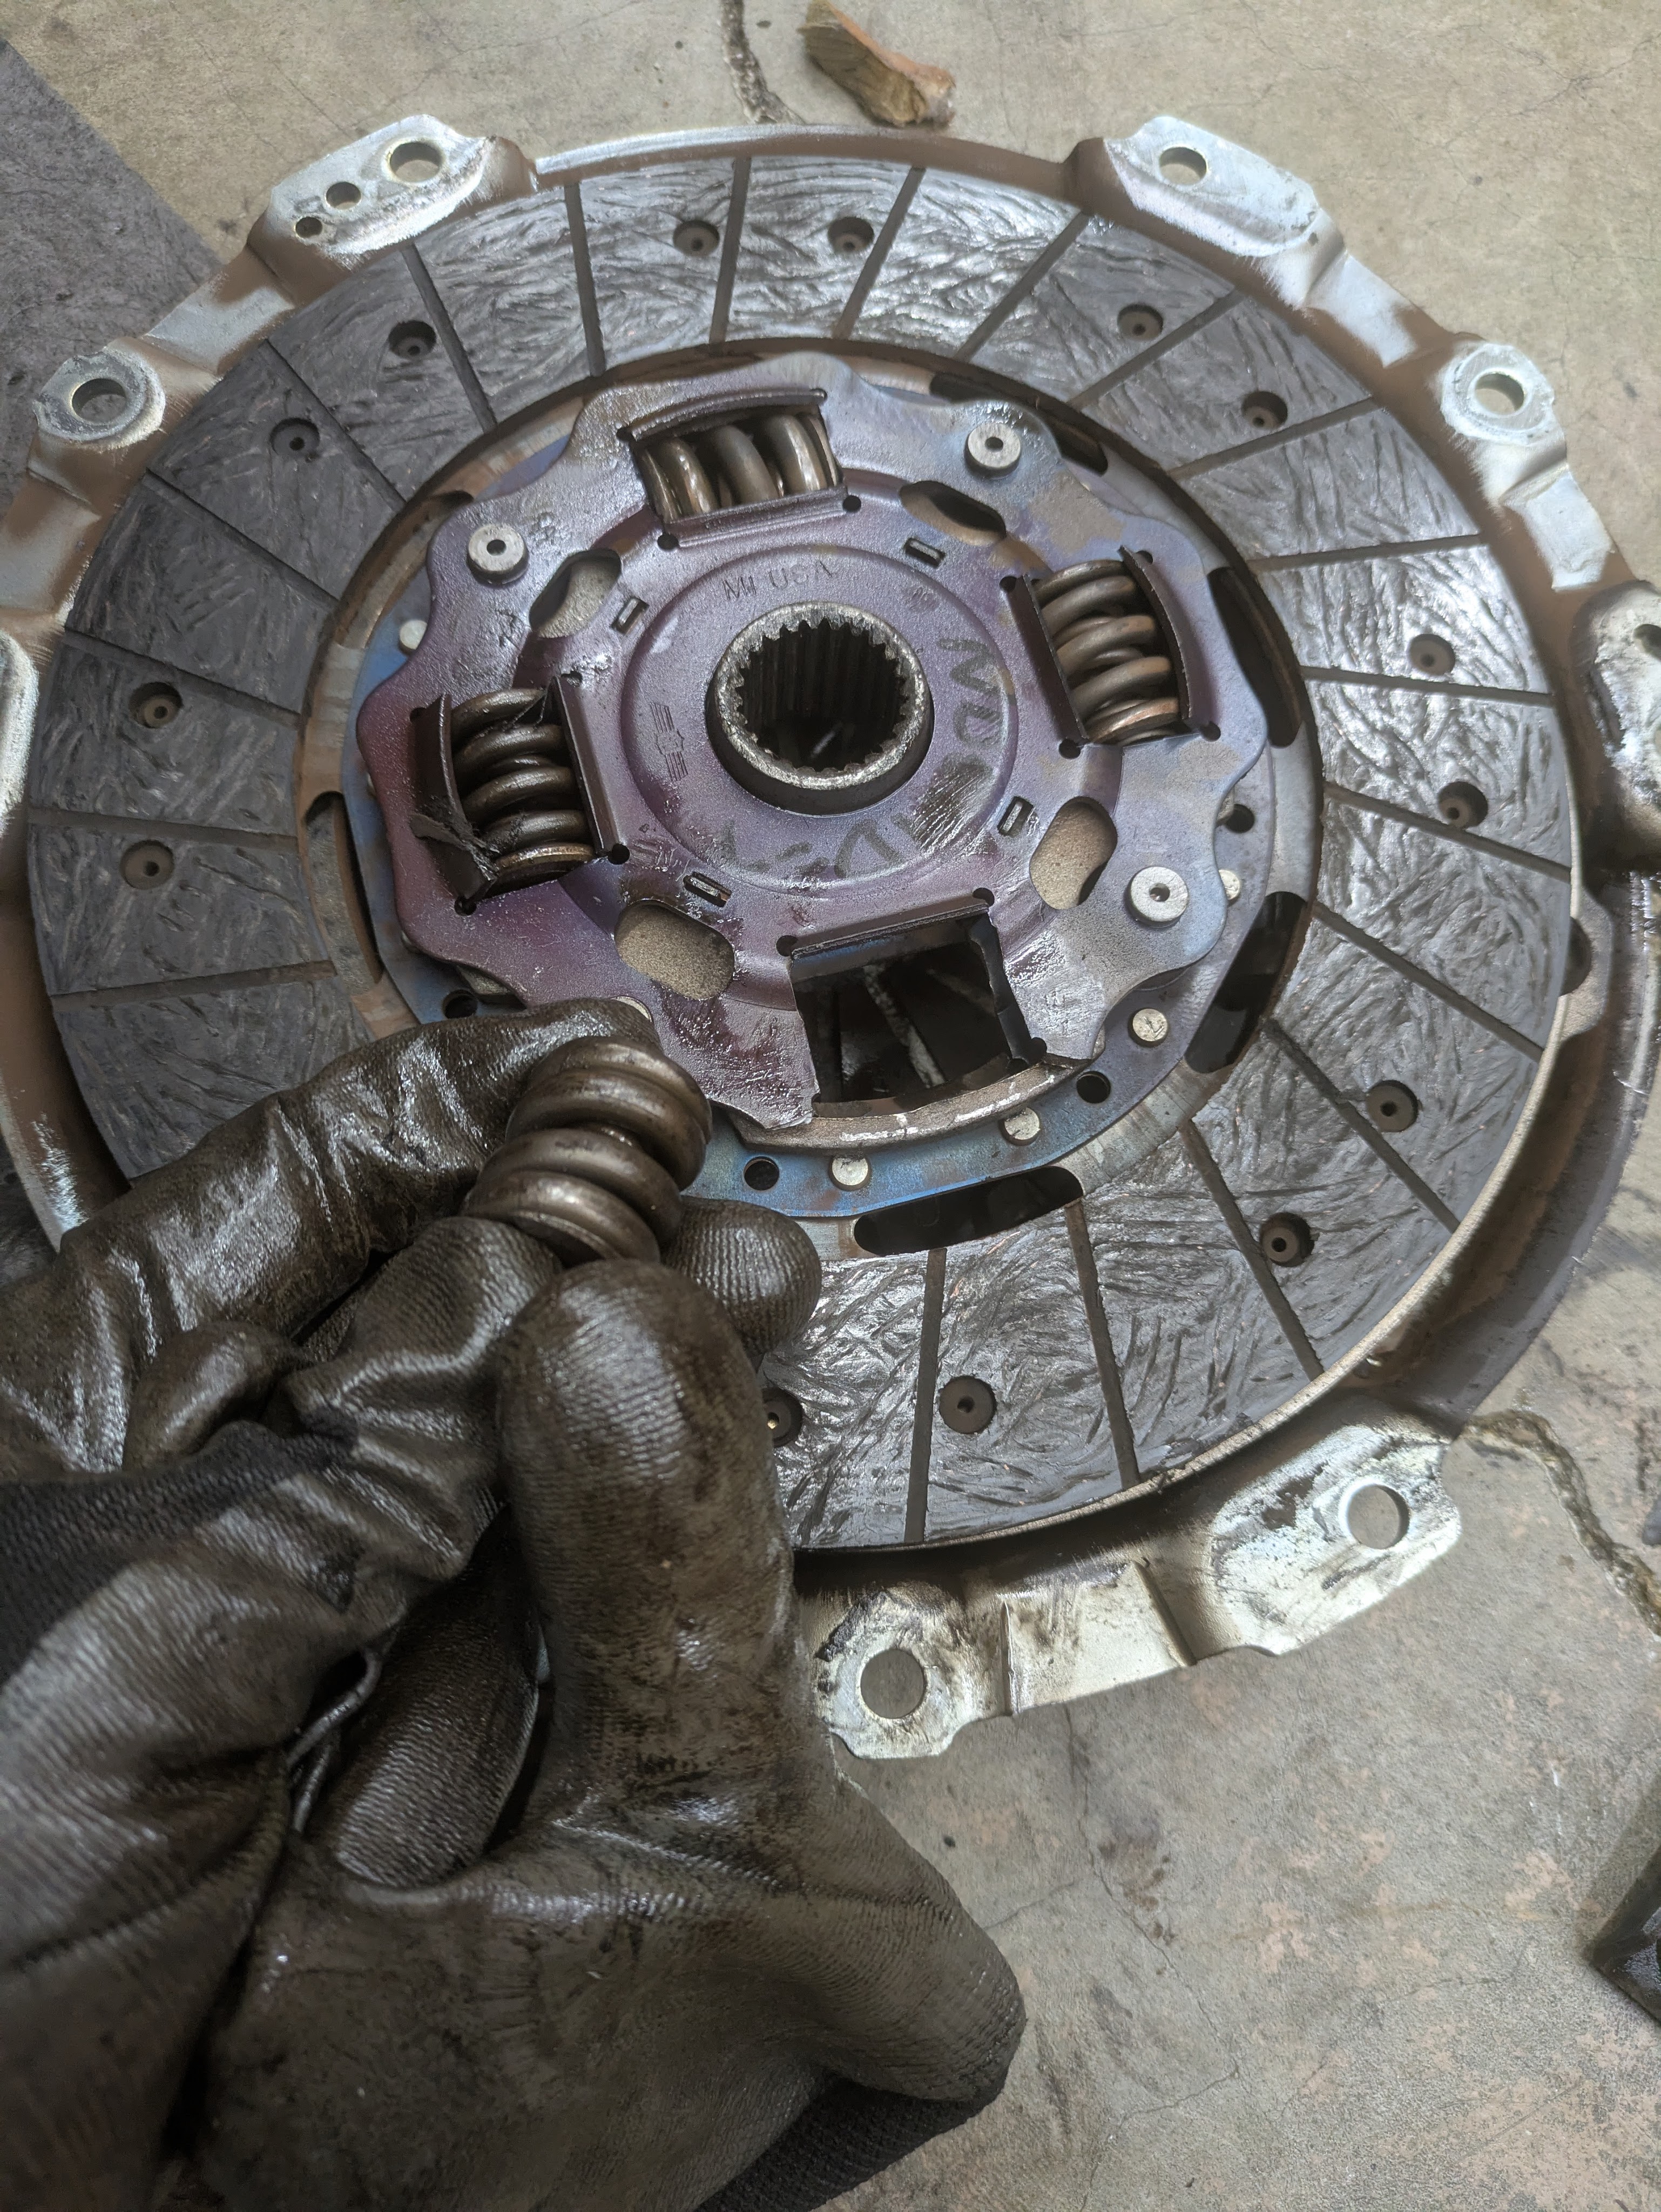
This would explain why the transmission was a galactic pain in the ass to remove. After all the bellhousing bolts were removed, it would slide about an inch away from the motor before it would get totally seized. 11PM determination found a suitable stack of a sacrificial 1-2-3 block, as well as some big ass pry bars with PB Blaster to eventually break past the sticky spot. It turns out that the spring had ejected into the diaphragm, causing an incredibly weird clutch sensation, as well as side loading everything in the assembly and kicking the friction disc off center, which was why the transmission was so hesitant to come off. Everything else regarding the clutch looked great, but it had clearly clutched it’s last kick.
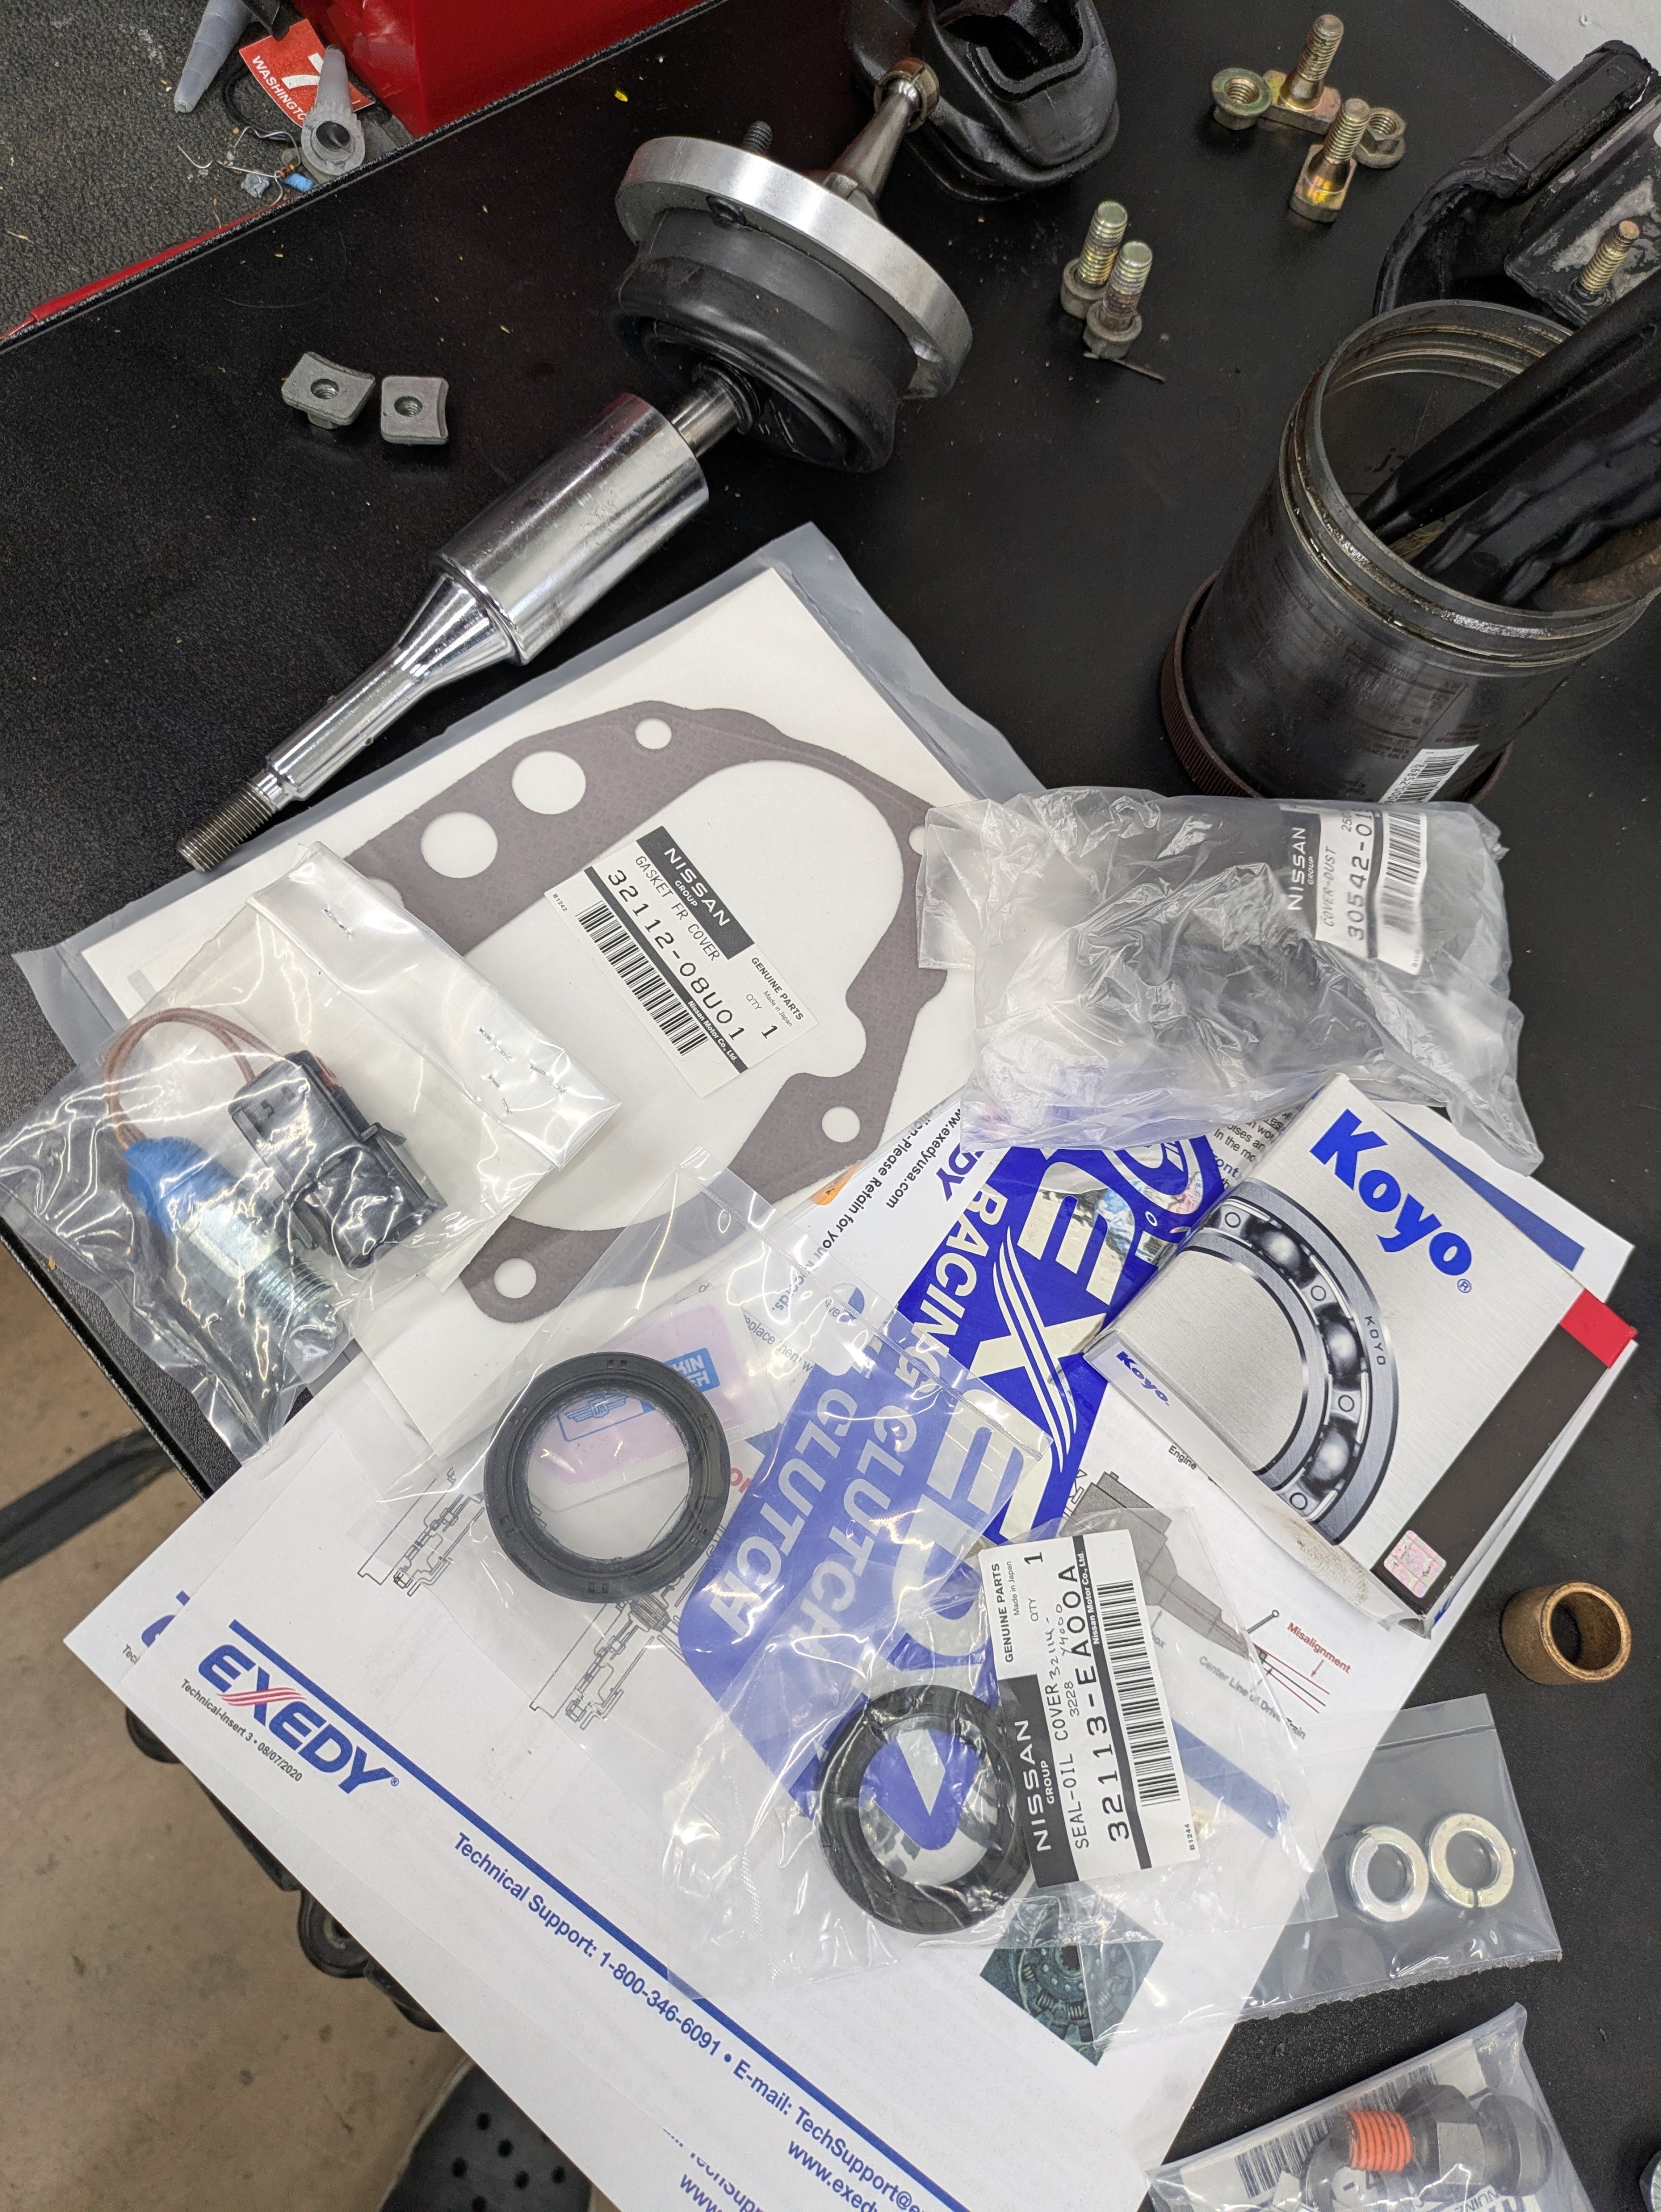
To avoid a complete snowball in terms of budget and complexity, the beloved and desired Nismo Coppermix was postponed for future additions, and another Exedy Stage 1 was ordered. If I break this one, its getting Nismo-ed, but I have a feeling that an unknown age (at least 2008) clutch in a 240 has seen a lot of abuse. I was able to get all of the gaskets and clutch parts straight from Faction! Motorsports. Always love supporting the boys when I can. Parts were ordered so I had time to kill.
That excuses why the car hasn’t been on the road for the last few months, but why has the front end been off?
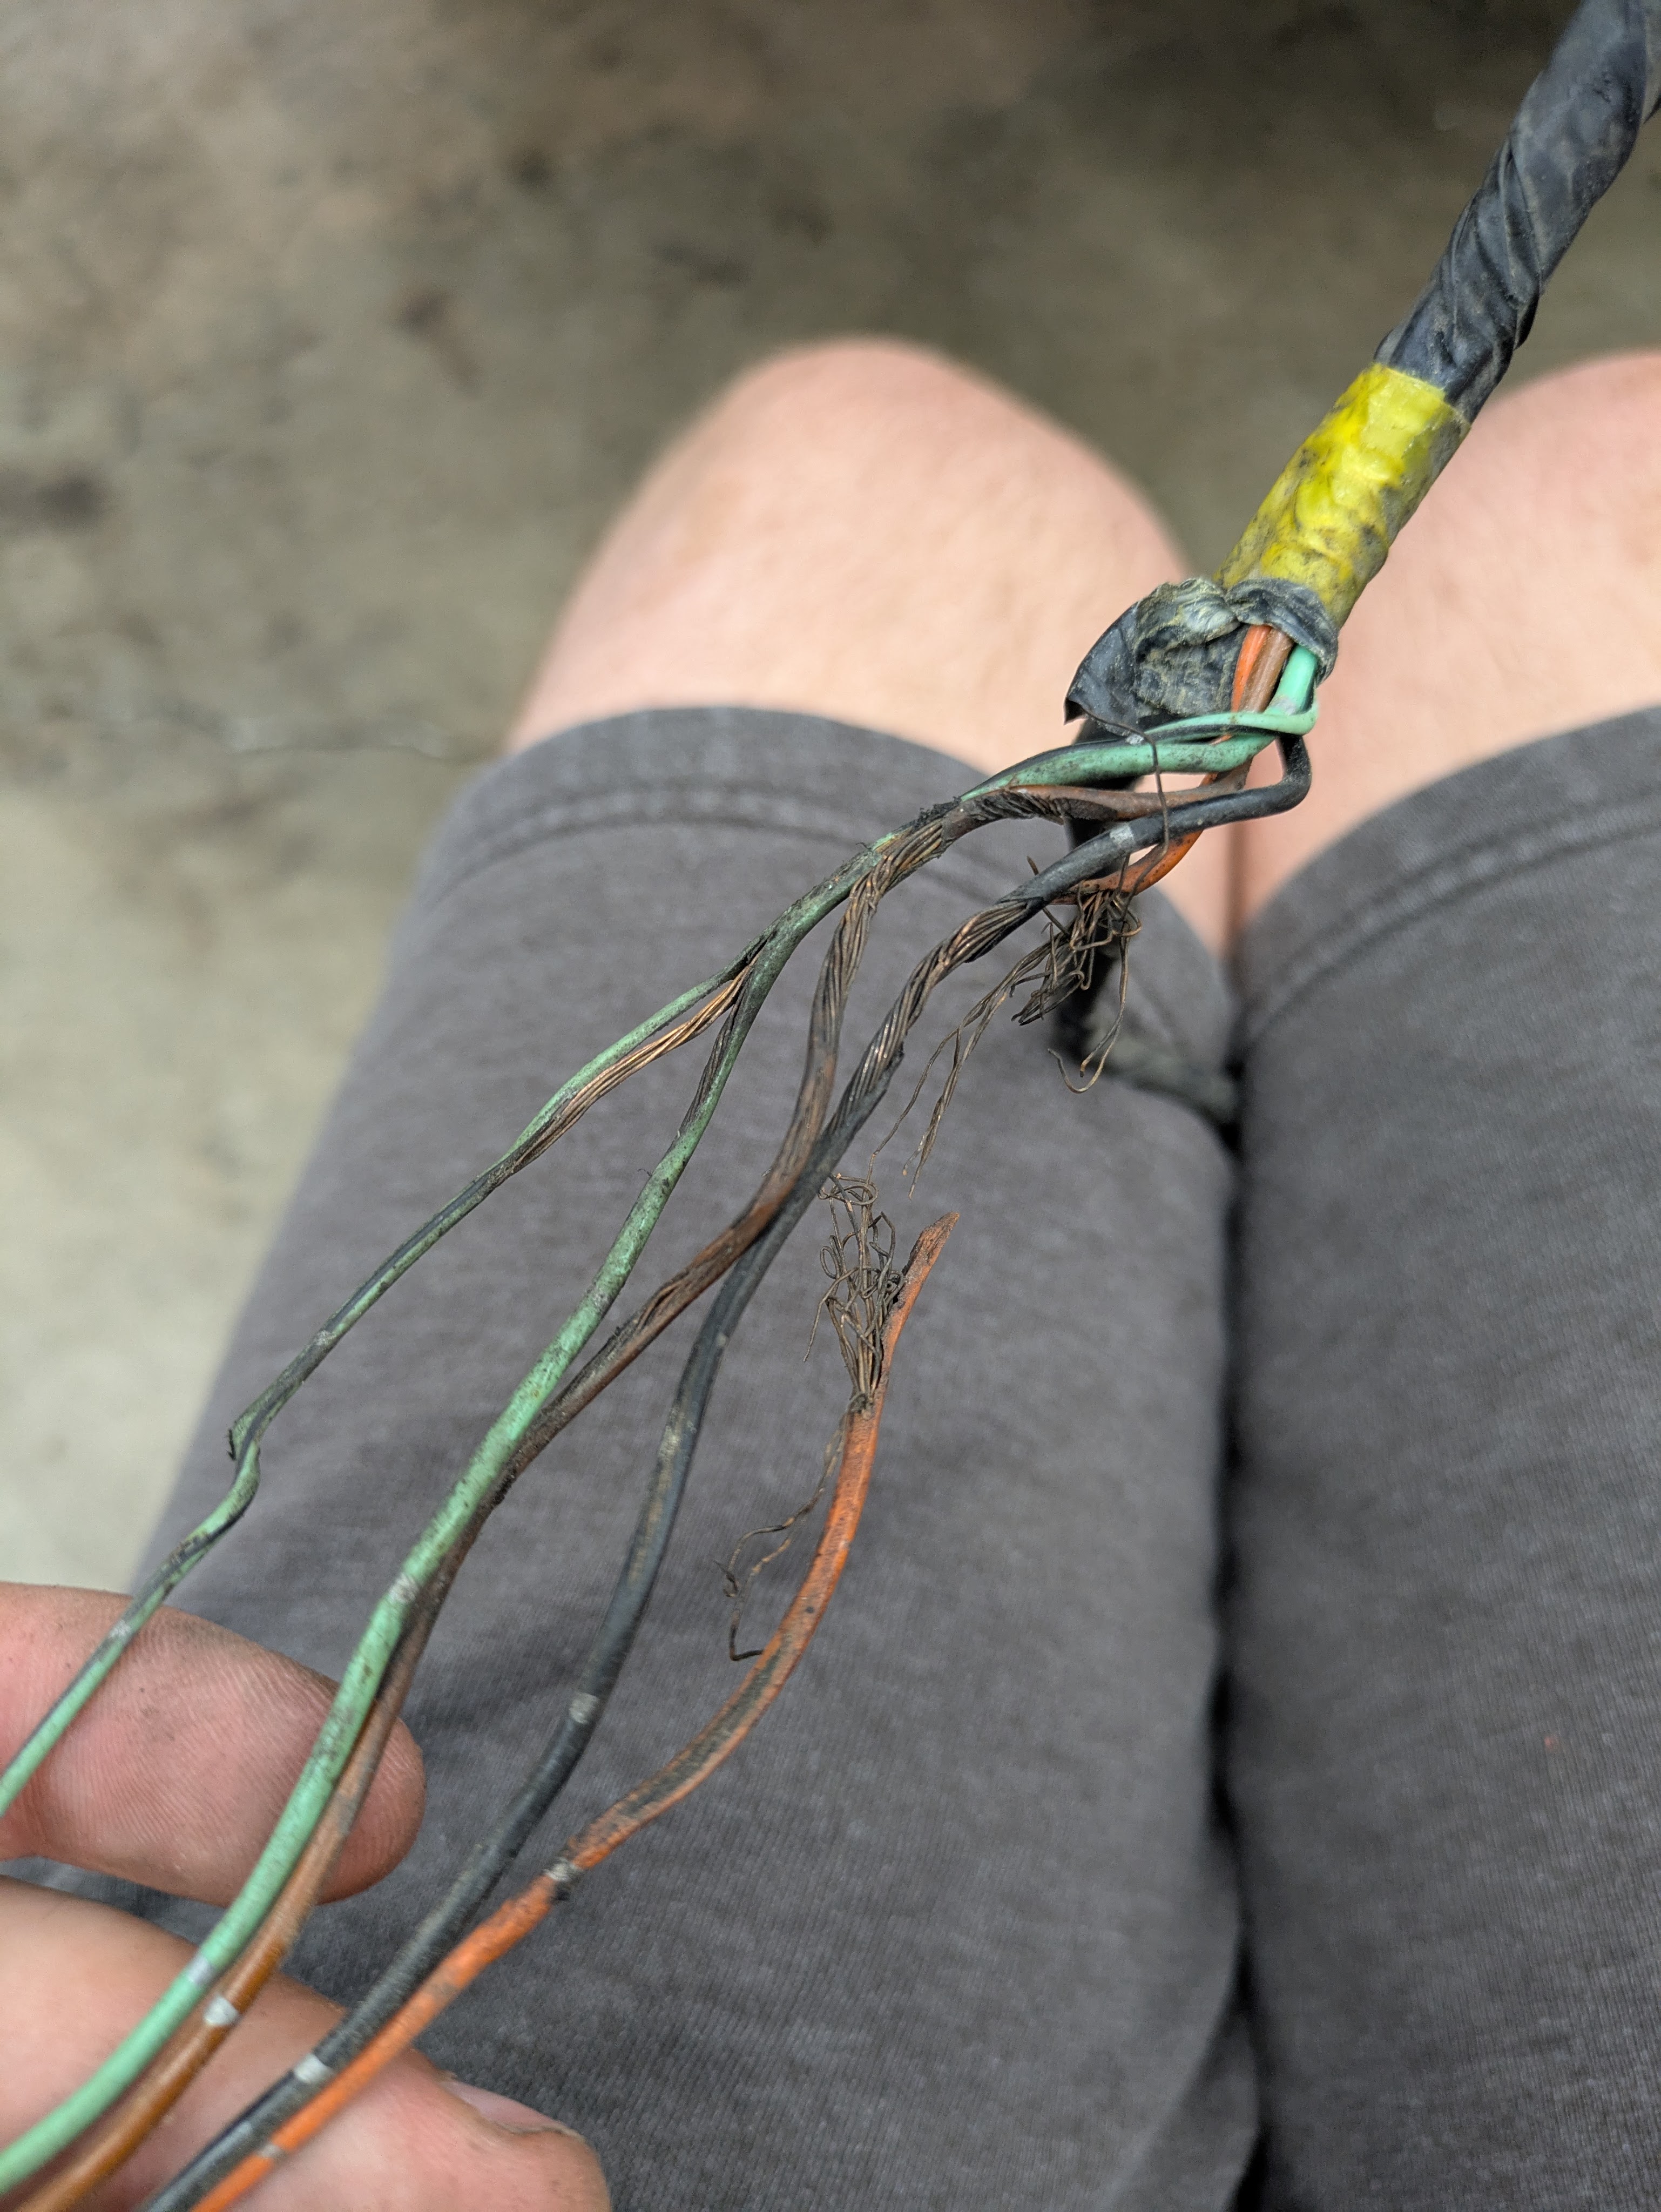
During my first weekend of digging around the car (previously documented in “Delusions and Grandeur”) , I discovered the wiper harness had a kinetic engagement with the rather large wheels and tires that had adorned this car previously. Rather than covering it back up with a fender and forgetting about it, I wanted the car to have wipers (basic PNW necessities), and despite the fuse being popped not allowing current to travel to it anyway, I didn’t want it to get worse or potentially get ripped out.
I had ordered the solution to this problem when I found it, but the parts sat on the shelf until now. Once I had the car back, and the space to perform the work, it was go time.
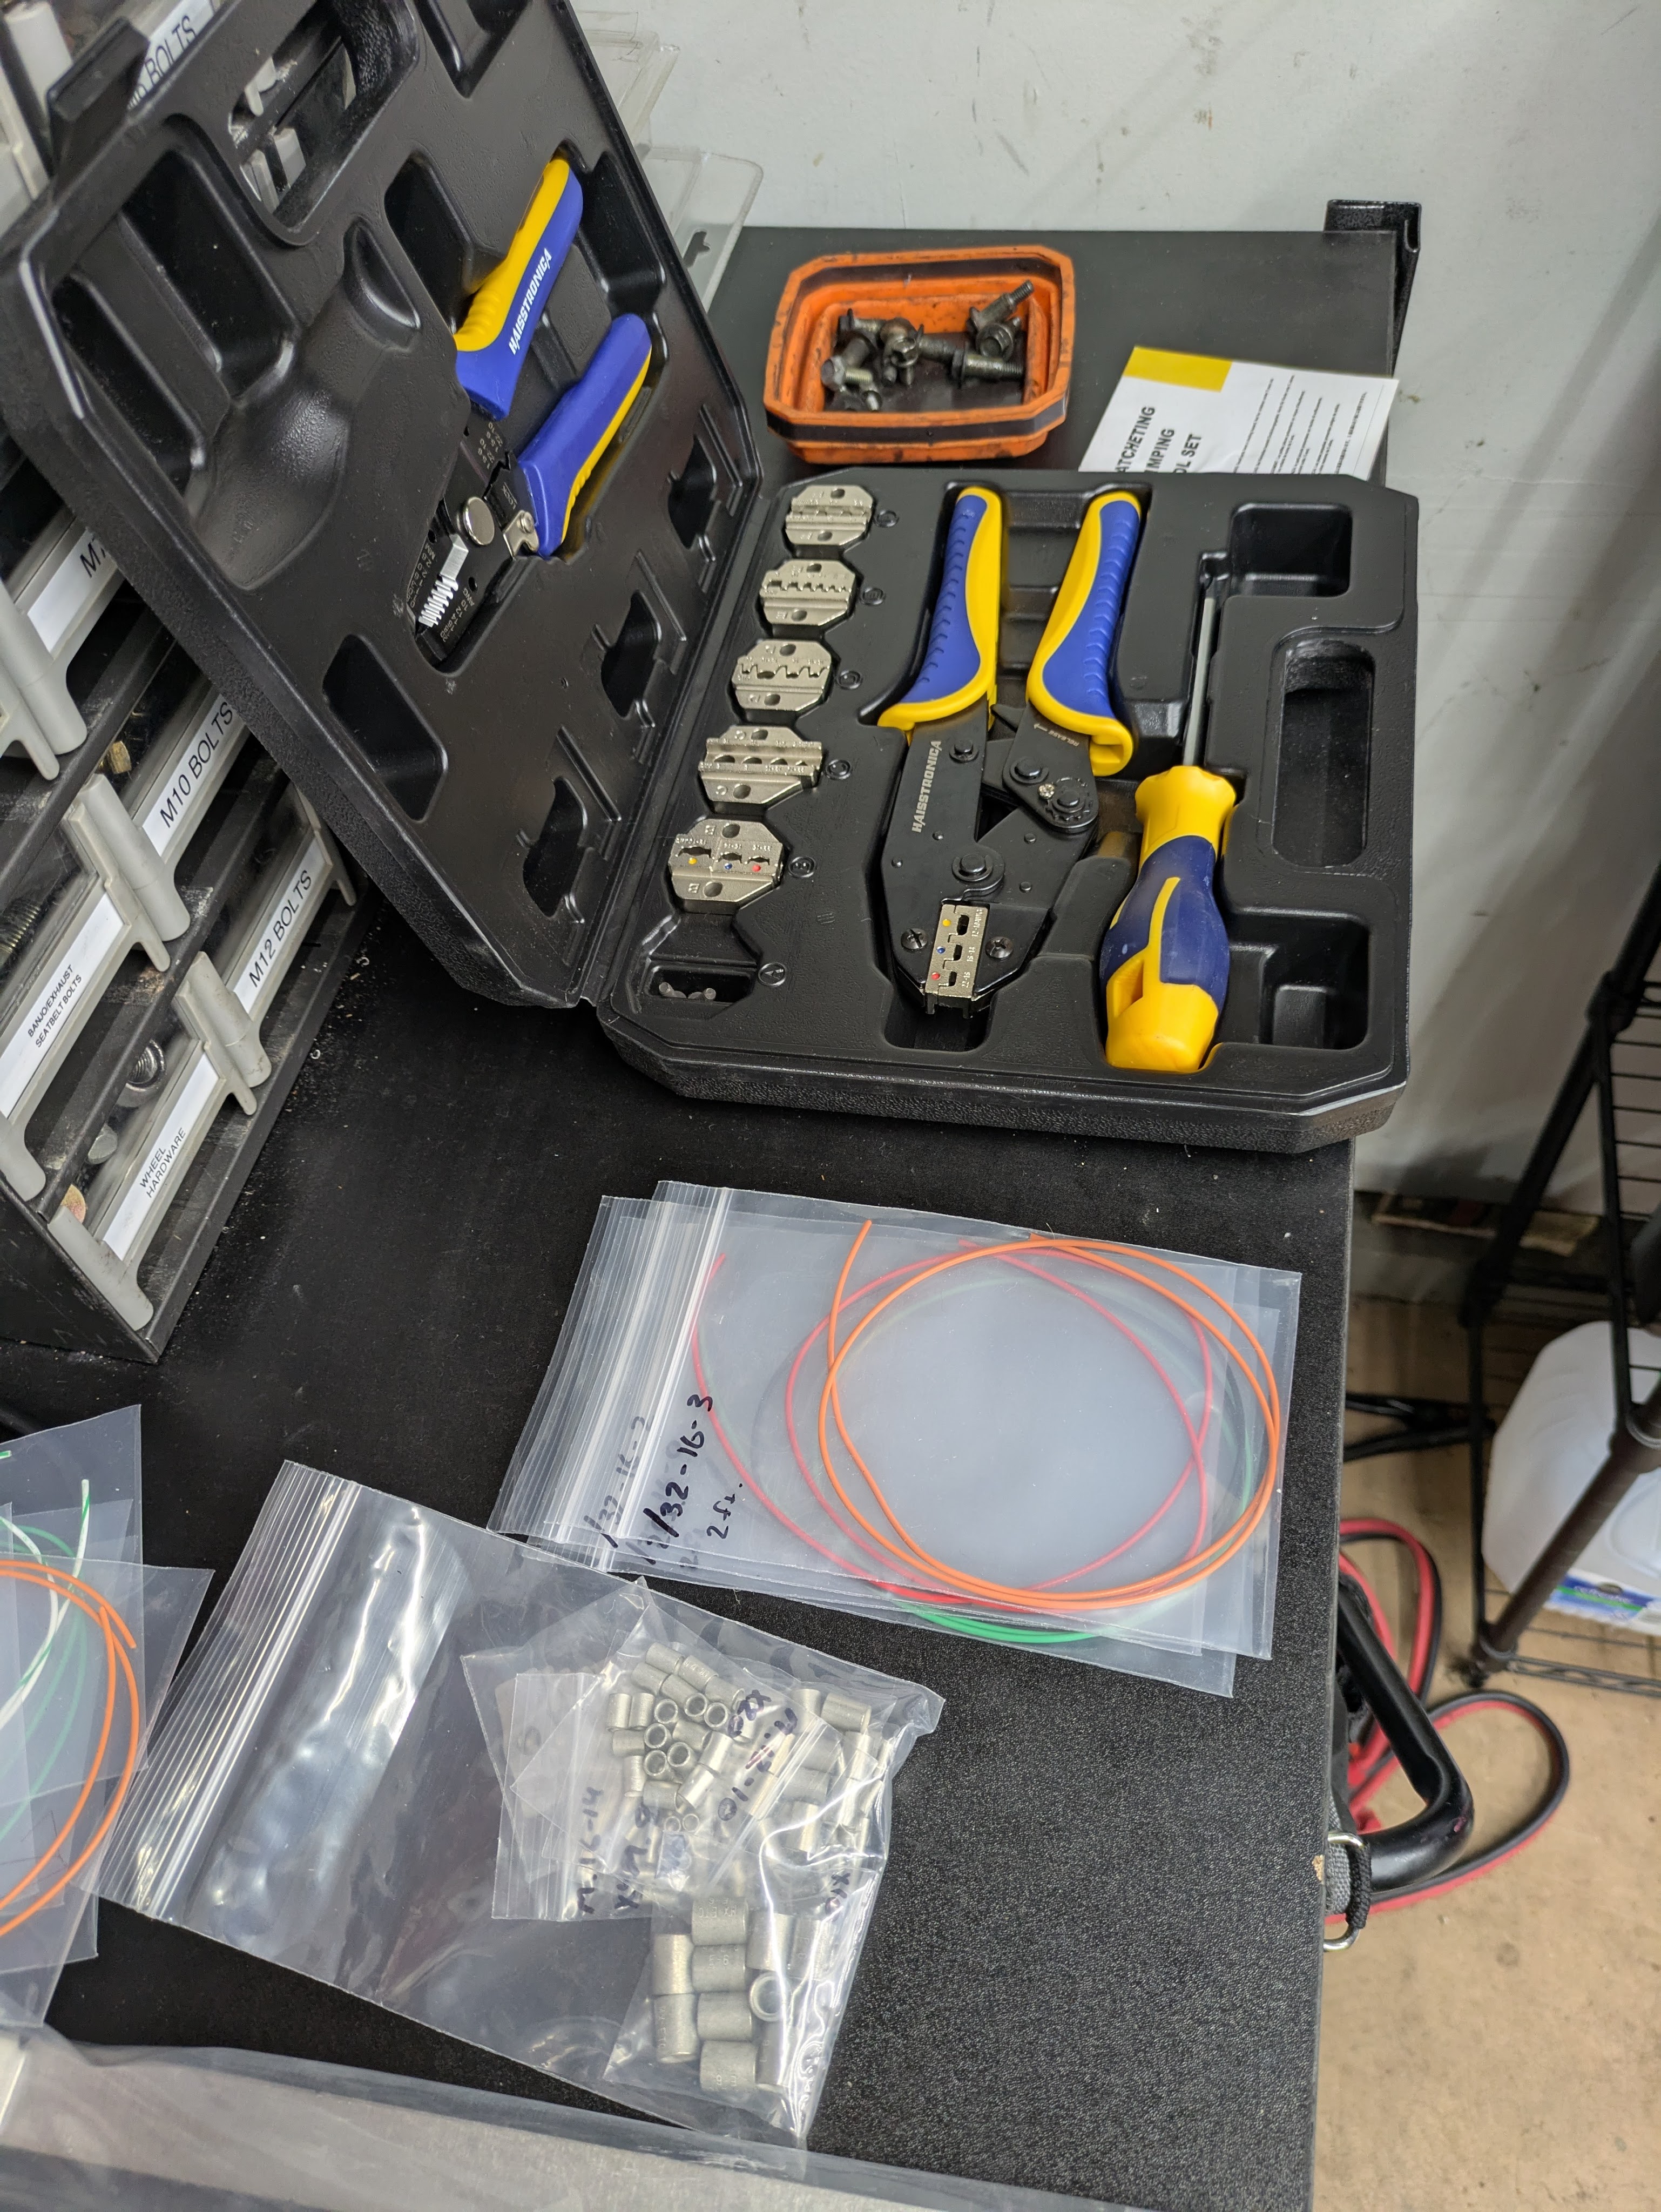
The solution, in this case, was total overkill. While I had used baller wire before, this was probably the nicest stuff I had used to date. Tefzel wire and parallel splices sourced from Race Spec. While the nice materials were in the budget, unfortunately the Race Spec branded Rennsteig PEW12 Crimp Tool Frame was not, and I ended up with a setup from Amazon that cost 1/6th of what just the tool and the jaws would have cost. If I do a lot more wiring like this, I’ll invest in the good stuff, but the Amazon kit was shockingly competent and complete, with every jaw type I could ask for. I became intimately familiar with it during this weekend, as I spent most of it doing wiring.
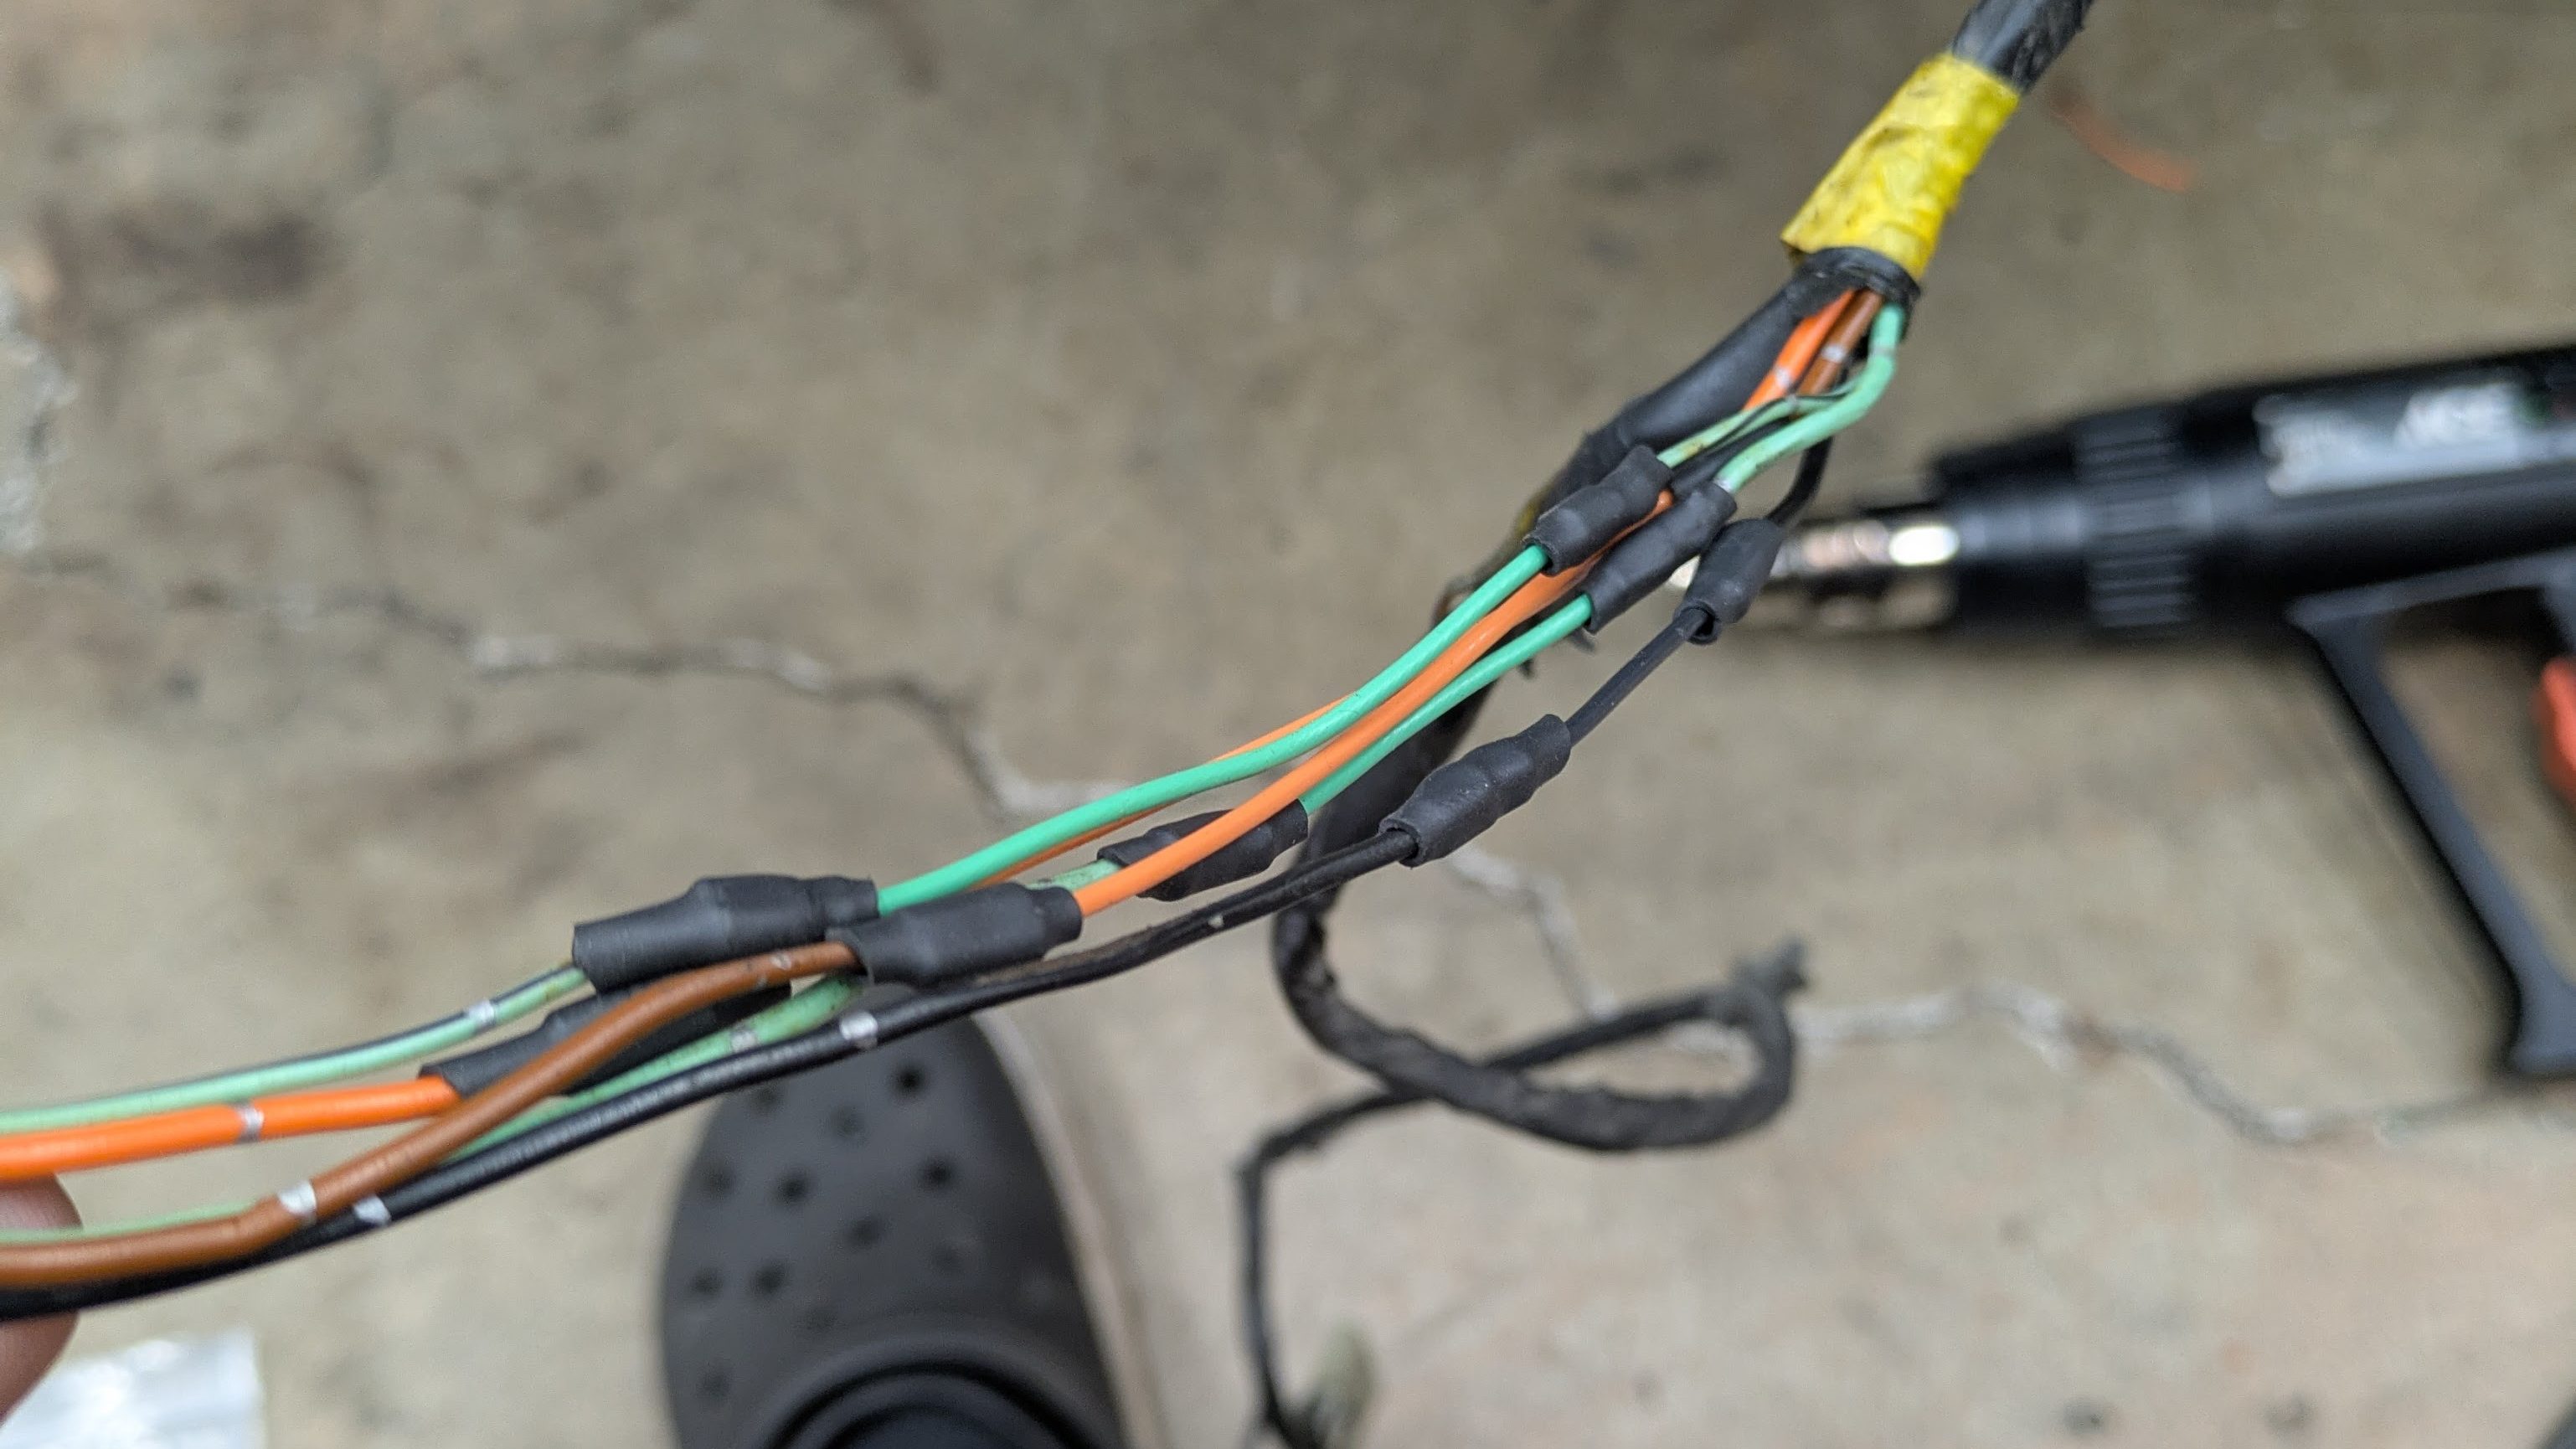
This was my “turning chicken shit into chicken salad” result. Parallel splices, new wire, and some 3:1 heat shrink netted a decent result. I did my best to stagger the splices where I could, but unfortunately the tire had its way with the harness in a pretty concentrated spot, so I could only do so much without cutting the branch way back. I loomed the harness and routed it in a safer way, and after a fuse replacement (for hopefully the last time), the car has functional wipers for the first time in over 13 years.

From here, I figured it would be a matter of hanging the front end back on, and call it a reasonable-length day, but the car had other plans. After significantly massaging mounting points and the fender itself, I was able to get the drivers side fender on and fitting a lot better than before. However, I went to reinstall the headlight and found that not all was well.
Those of you familiar with Silvia front end conversions would know that it’s not an entirely plug-and-play affair. While the low/high beam bulb hooks straight into the factory harness, that only covers the outer socket on the brick headlight. The inner one is a fog light, and due to how crappy (both in aiming and light output) these headlights are, it would be greatly appreciated if I could get as much light as possible out of these things.
What I had discovered when I pulled the front end off back in March was that there was a mess of aftermarket wiring around each of the headlights, with mystery wires going all over the place. This was an isolated spot of garbage in what is otherwise a decently well built car, and although the cooling panels cover it from public eye, I knew it was there and it was bothering me. After discovering that the whole circuit didn’t actually do anything, I felt I had the liberty to rip all of it out and actually make the fog lights work in the most OEM way possible.

This is what I ended up removing from the front end, which was basically its own circuit piggybacking off of a stock one. It gets power straight from the battery, with an inline glass fuse into a relay that switches on the fogs.
Here’s the weird thing: I could totally understand running a harness like this if it was to avoid cutting up the factory chassis harness, however the chassis harness WAS STILL CUT TO MAKE THIS WORK. The harness was using the signal wire for what was the old pop up headlight button to trigger this aftermarket relay and wiring. The only rational explanation is that the gold standard forum documentation that I used to redo this circuit (from around 2007) might have succeeded this particular Silvia front end swap, as this car has been around for a long time.
The correct way to do it is to use the complete pop up headlight circuit, which has switched and fused power/ground to provide signal and power to the power the fog lights. The ultra kosher way to do this is scavenge a pair of harnesses from an old set of pop ups so it is a plug and play affair, however since my chassis harness was already cut, I didn’t feel terrible cutting it up a little bit more and making it right.
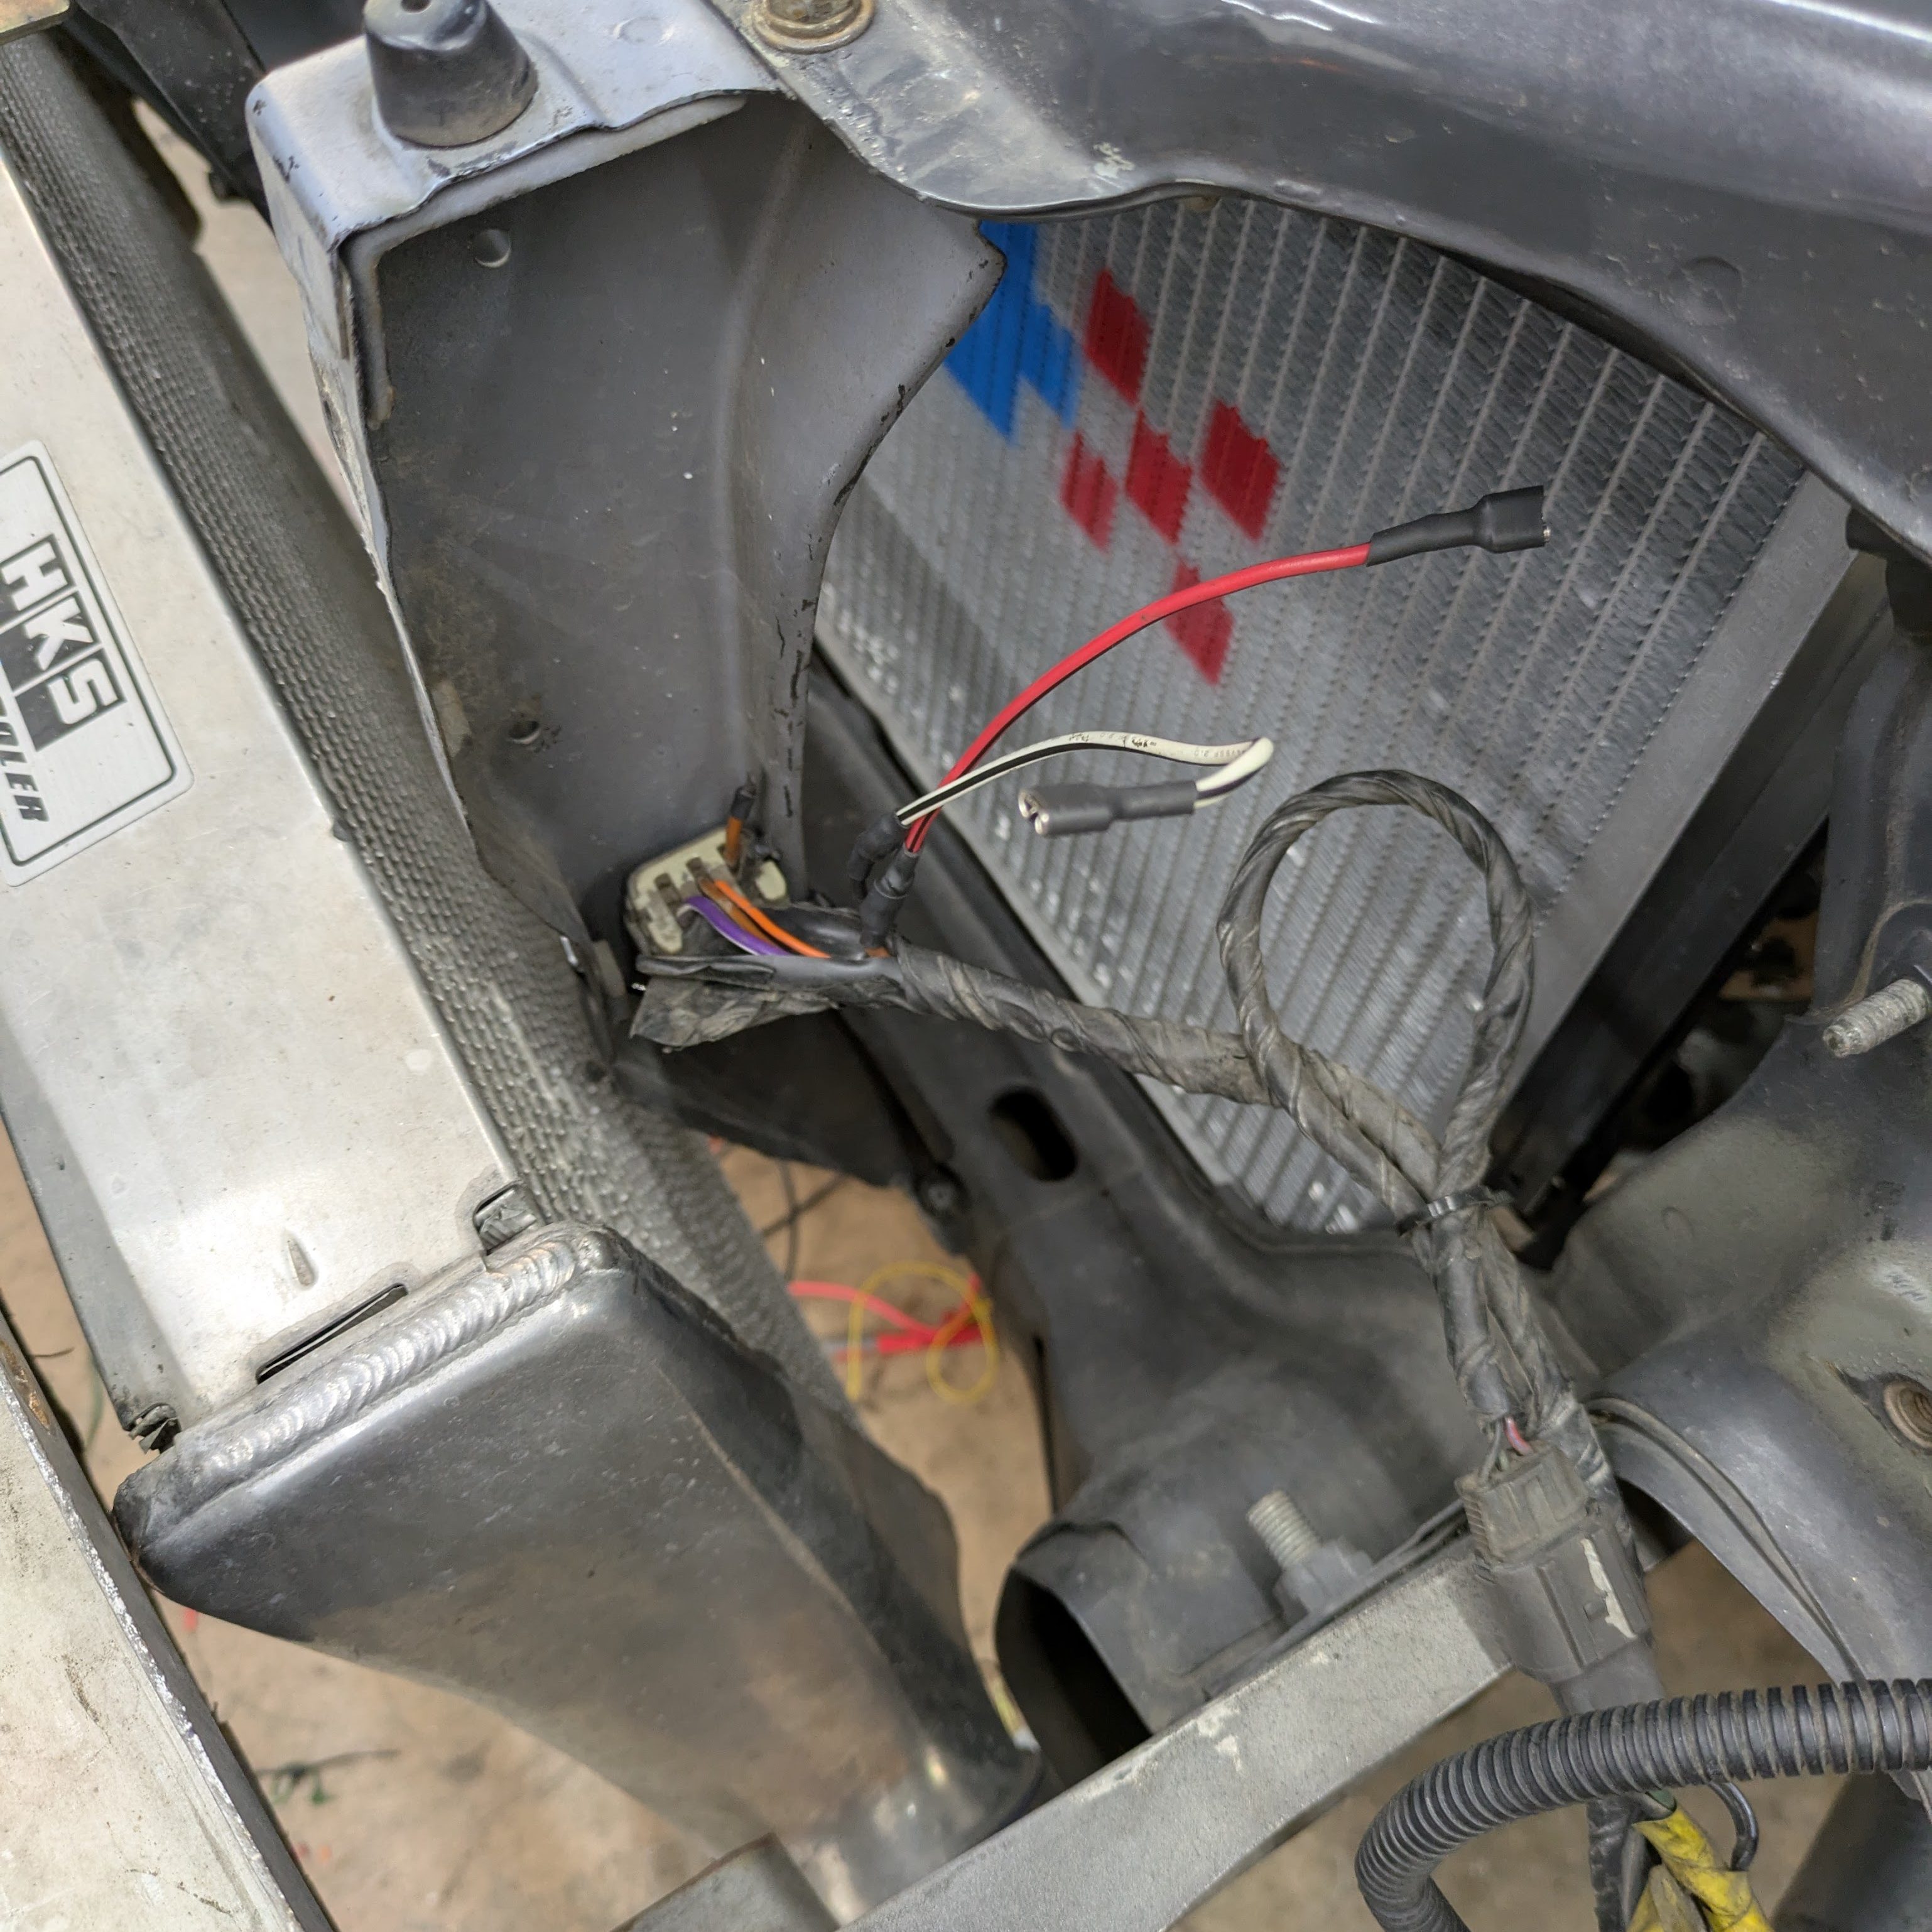
I pulled the power and ground straight from the chassis harness into a pair of spade connectors. While not the most glamorous thing, it is the connection that the H3 bulbs that exist in the headlights use, and it keeps the wiring bulk and complexity down. I was able to zip tie the connector to the headlight support bracket, so there is no chance of tension on the spade connectors. Once completed on the other side in a similar fashion, I had functioning Silvia fog lights, with the touch of the old pop up button, using all factory relays and fuses.
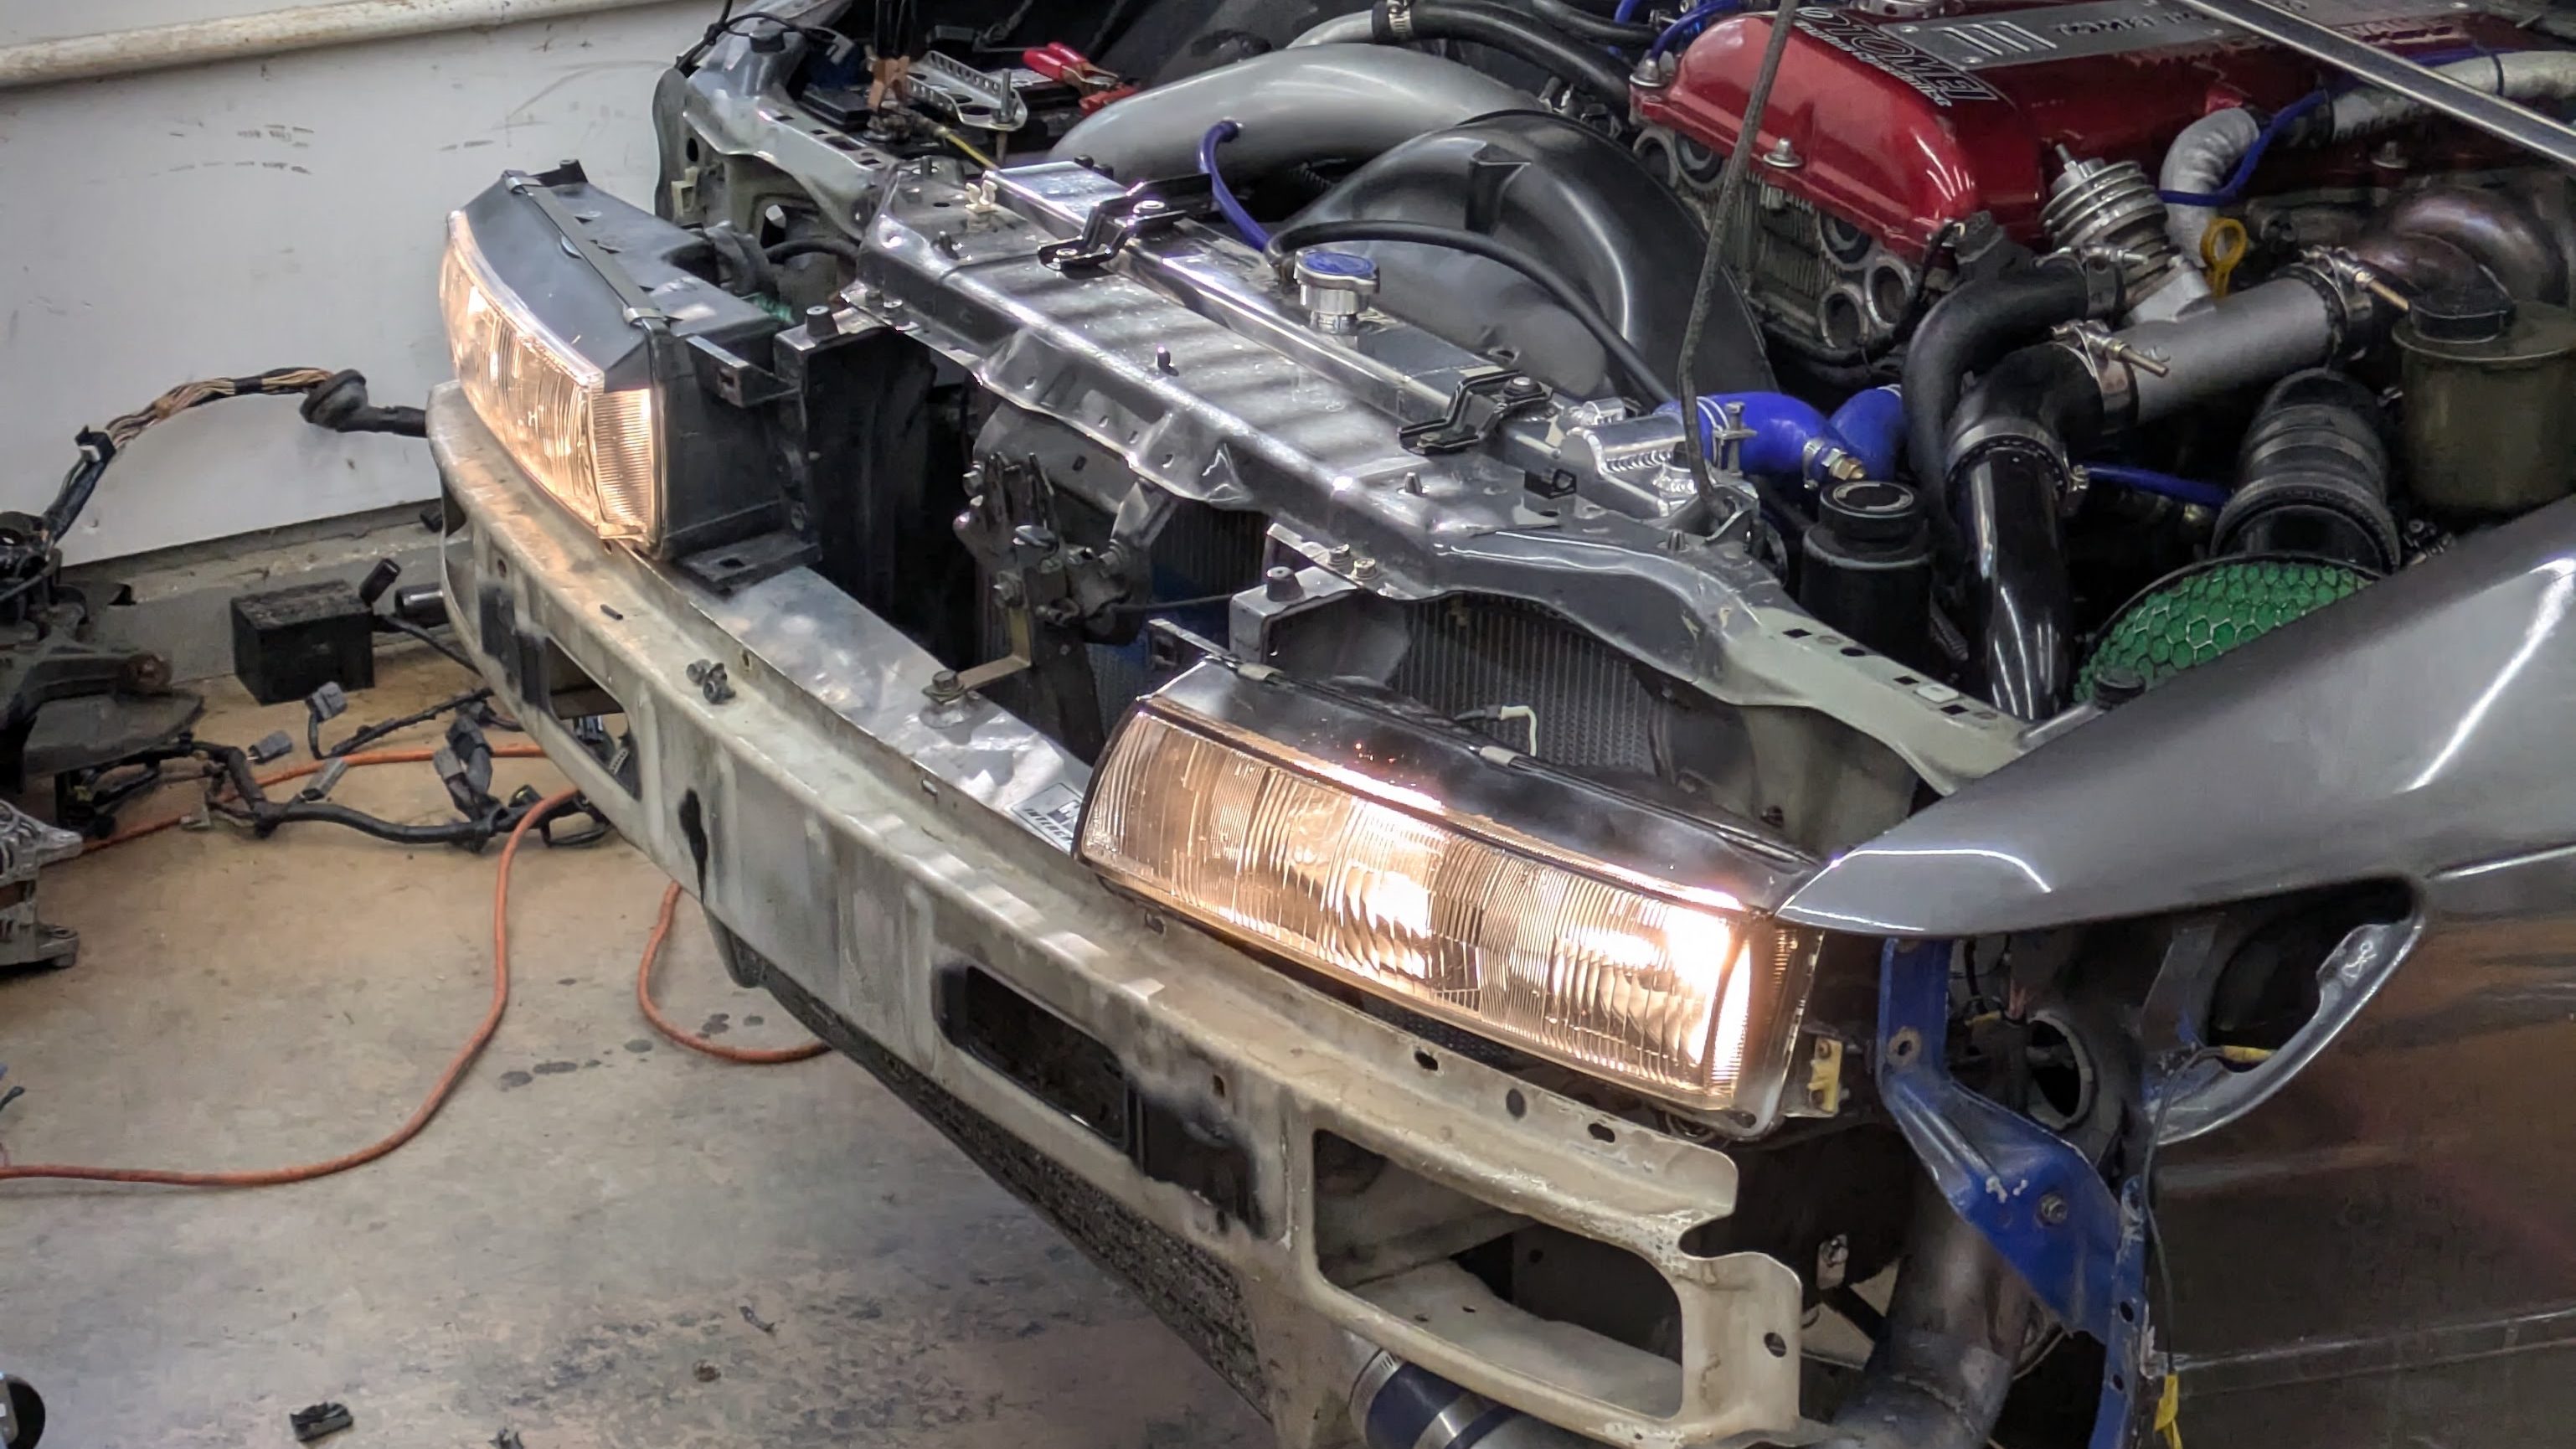
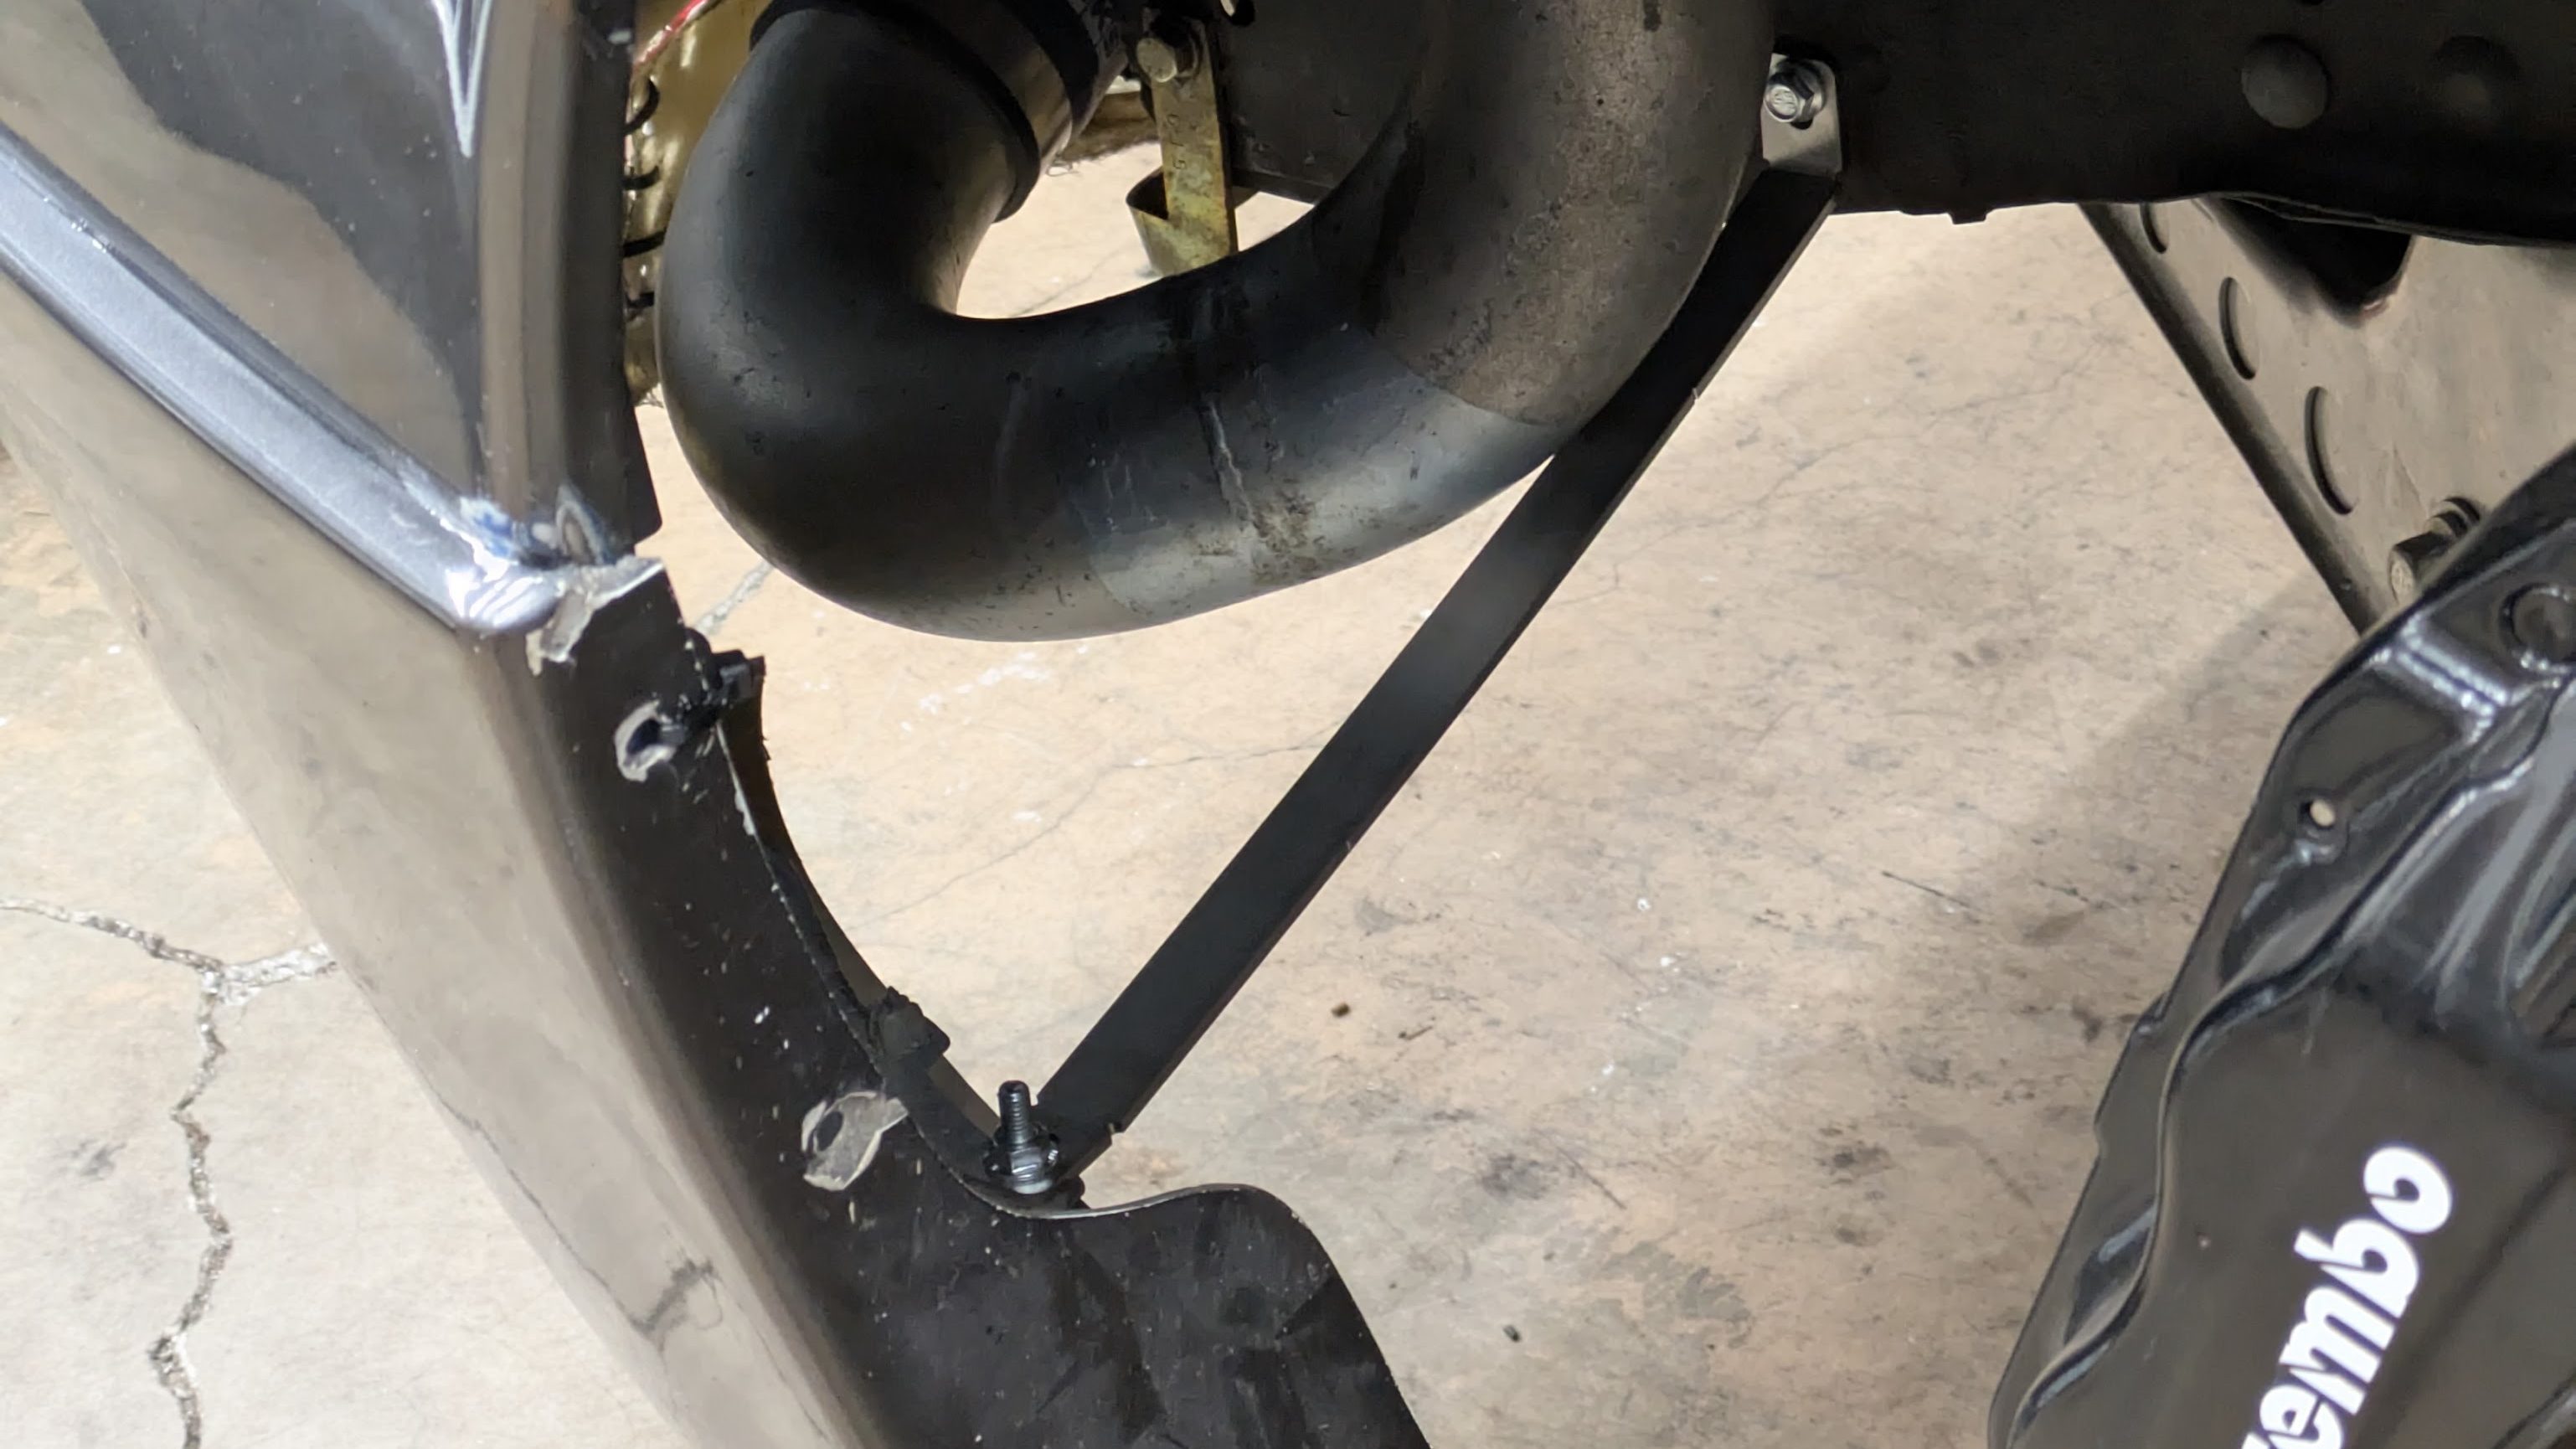
With the wiring completed for the day, I went about installing the rest of the front end back on the car. I added a pair of EnglishTuned Fender braces, which made the whole front end fit significantly better. I had 1 factory one previously, with it totally missing on the other side. The bumper is held on with zip ties in the corners, but the factory support bar along the crash beam for the entire rest of the way. Fitment is not too bad for ancient fiberglass.
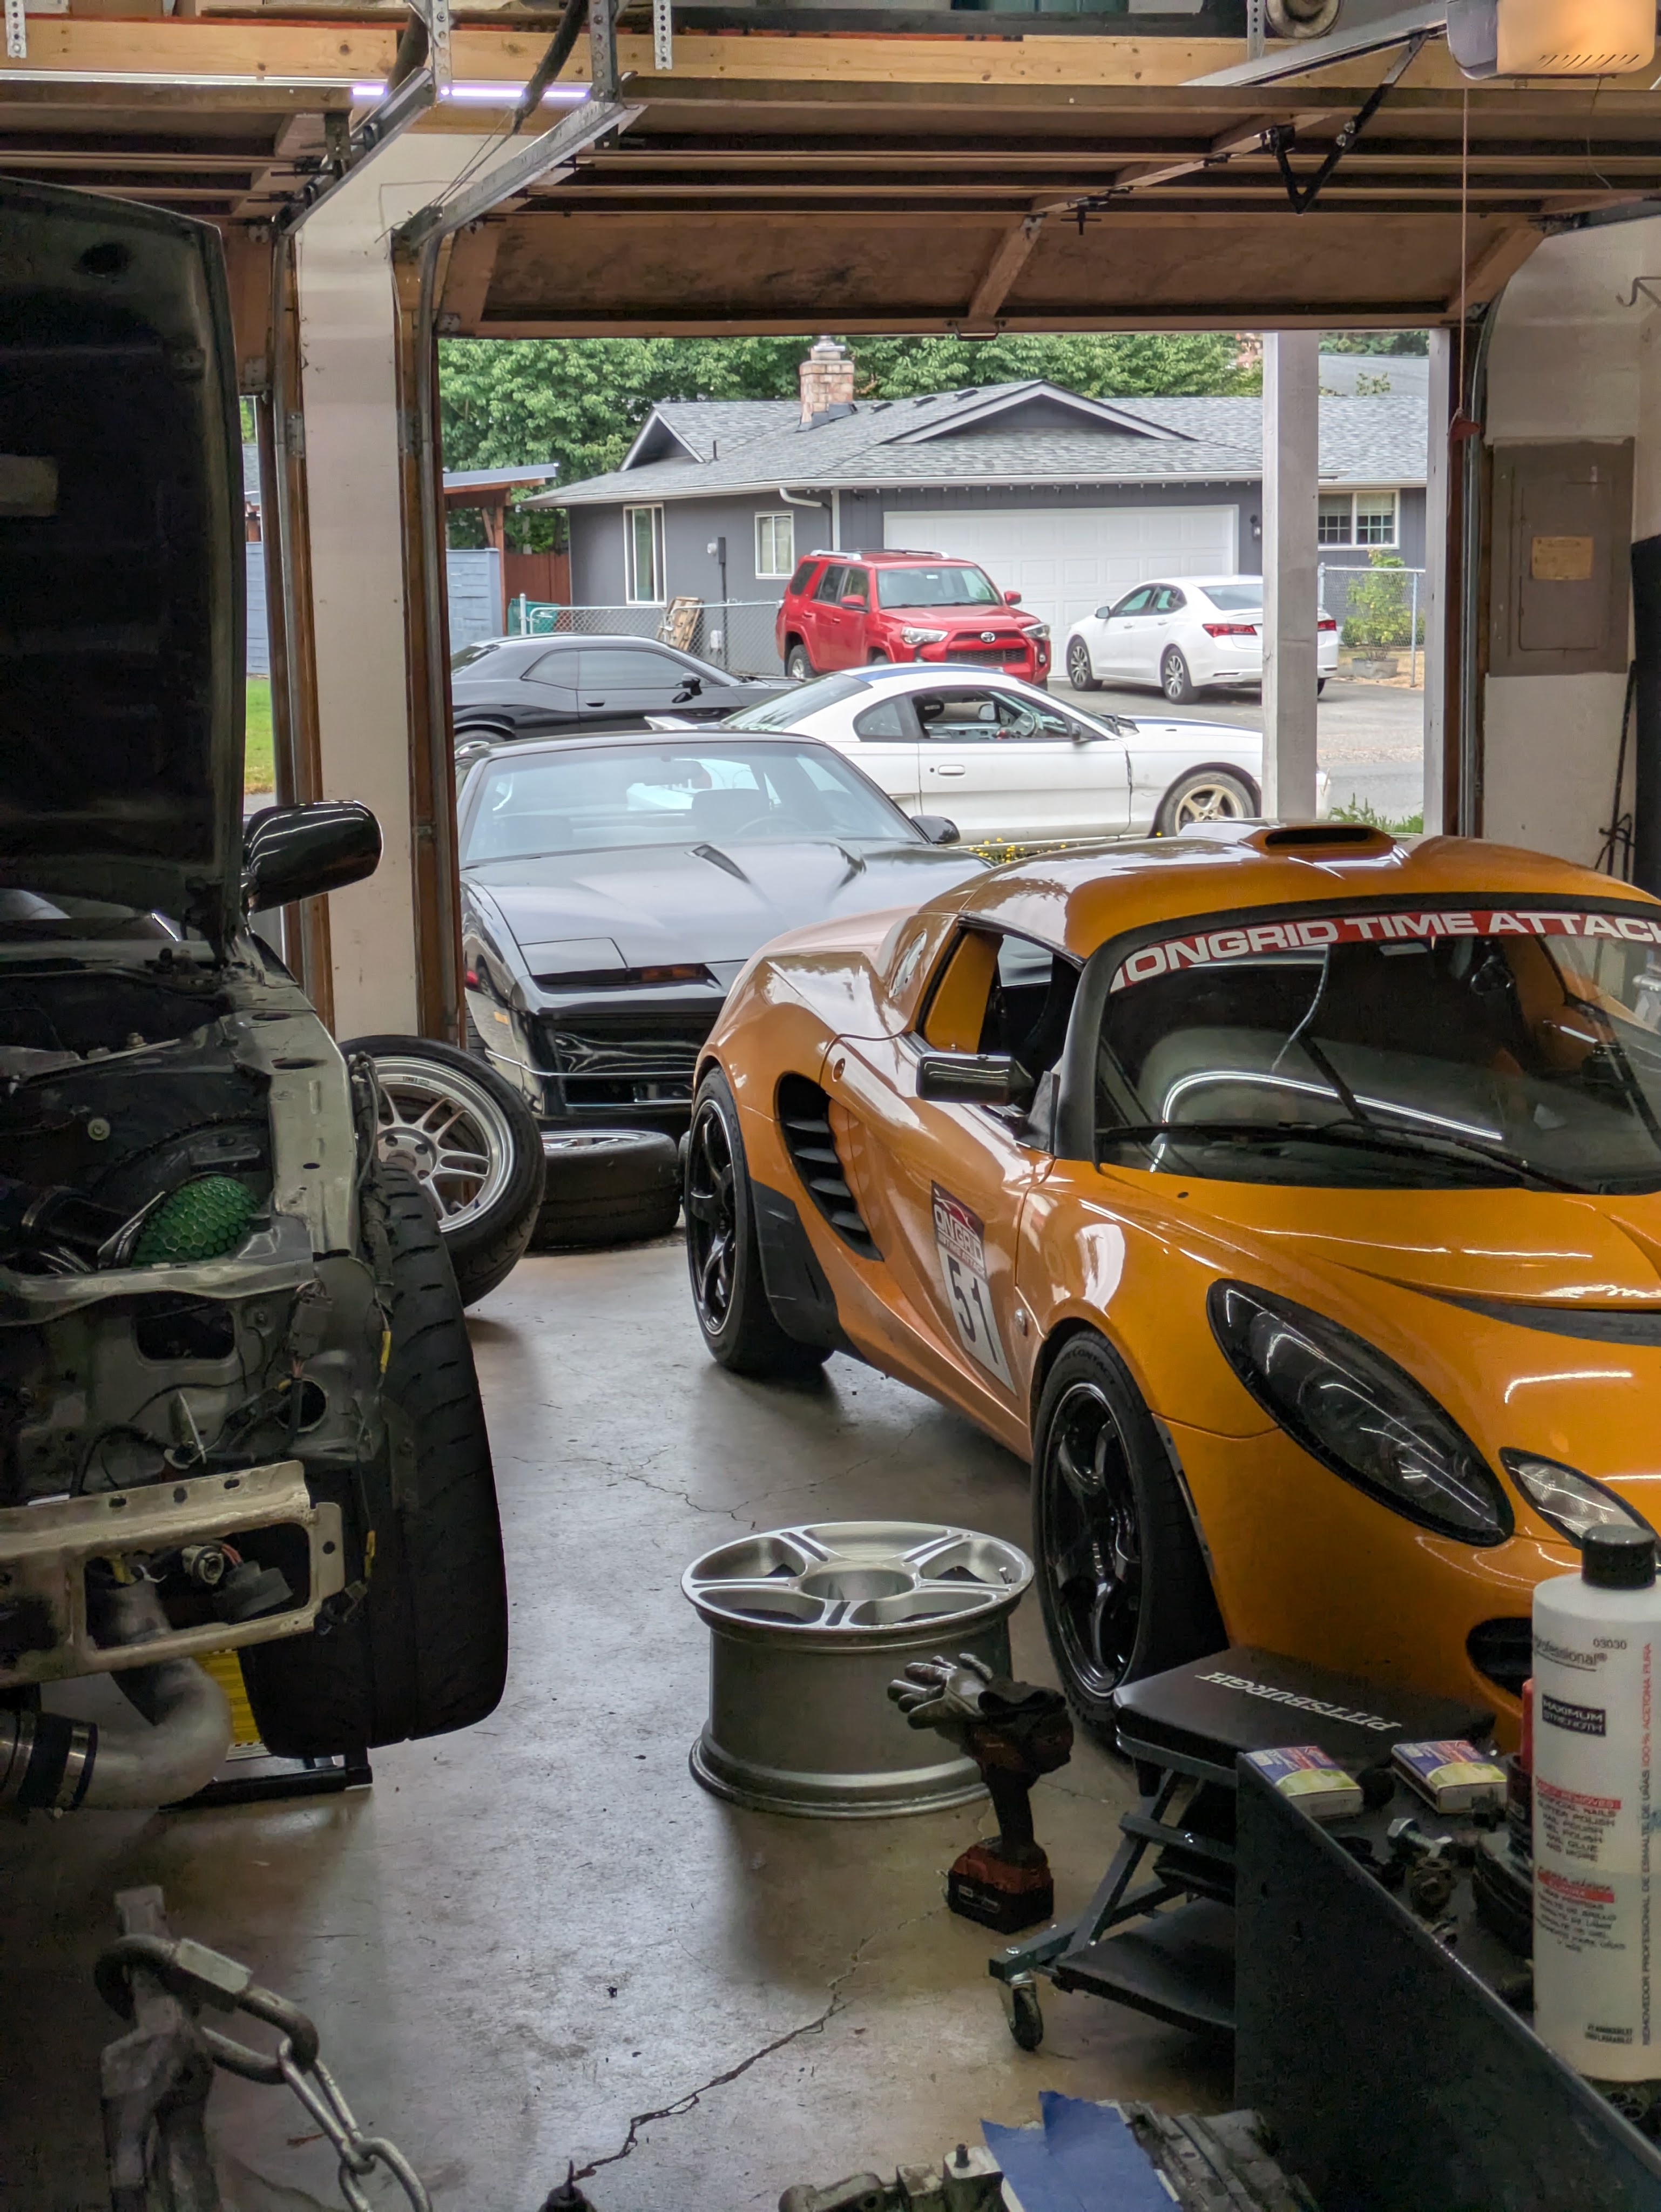
After a few more zip ties to stitch the front bumper back together in a few spots, reinstalling all of the cooling panels, and setting it down, the car was cosmetically complete for the first time in many months. It felt really good to have the parts out of my living room and back on the car, especially now that they fit better.
The following day, I had a few hours to kill before a friend was scheduled to show up to work on his car. I figured I’d at least start the install of one of the cooler pieces I had acquired while the car was down.
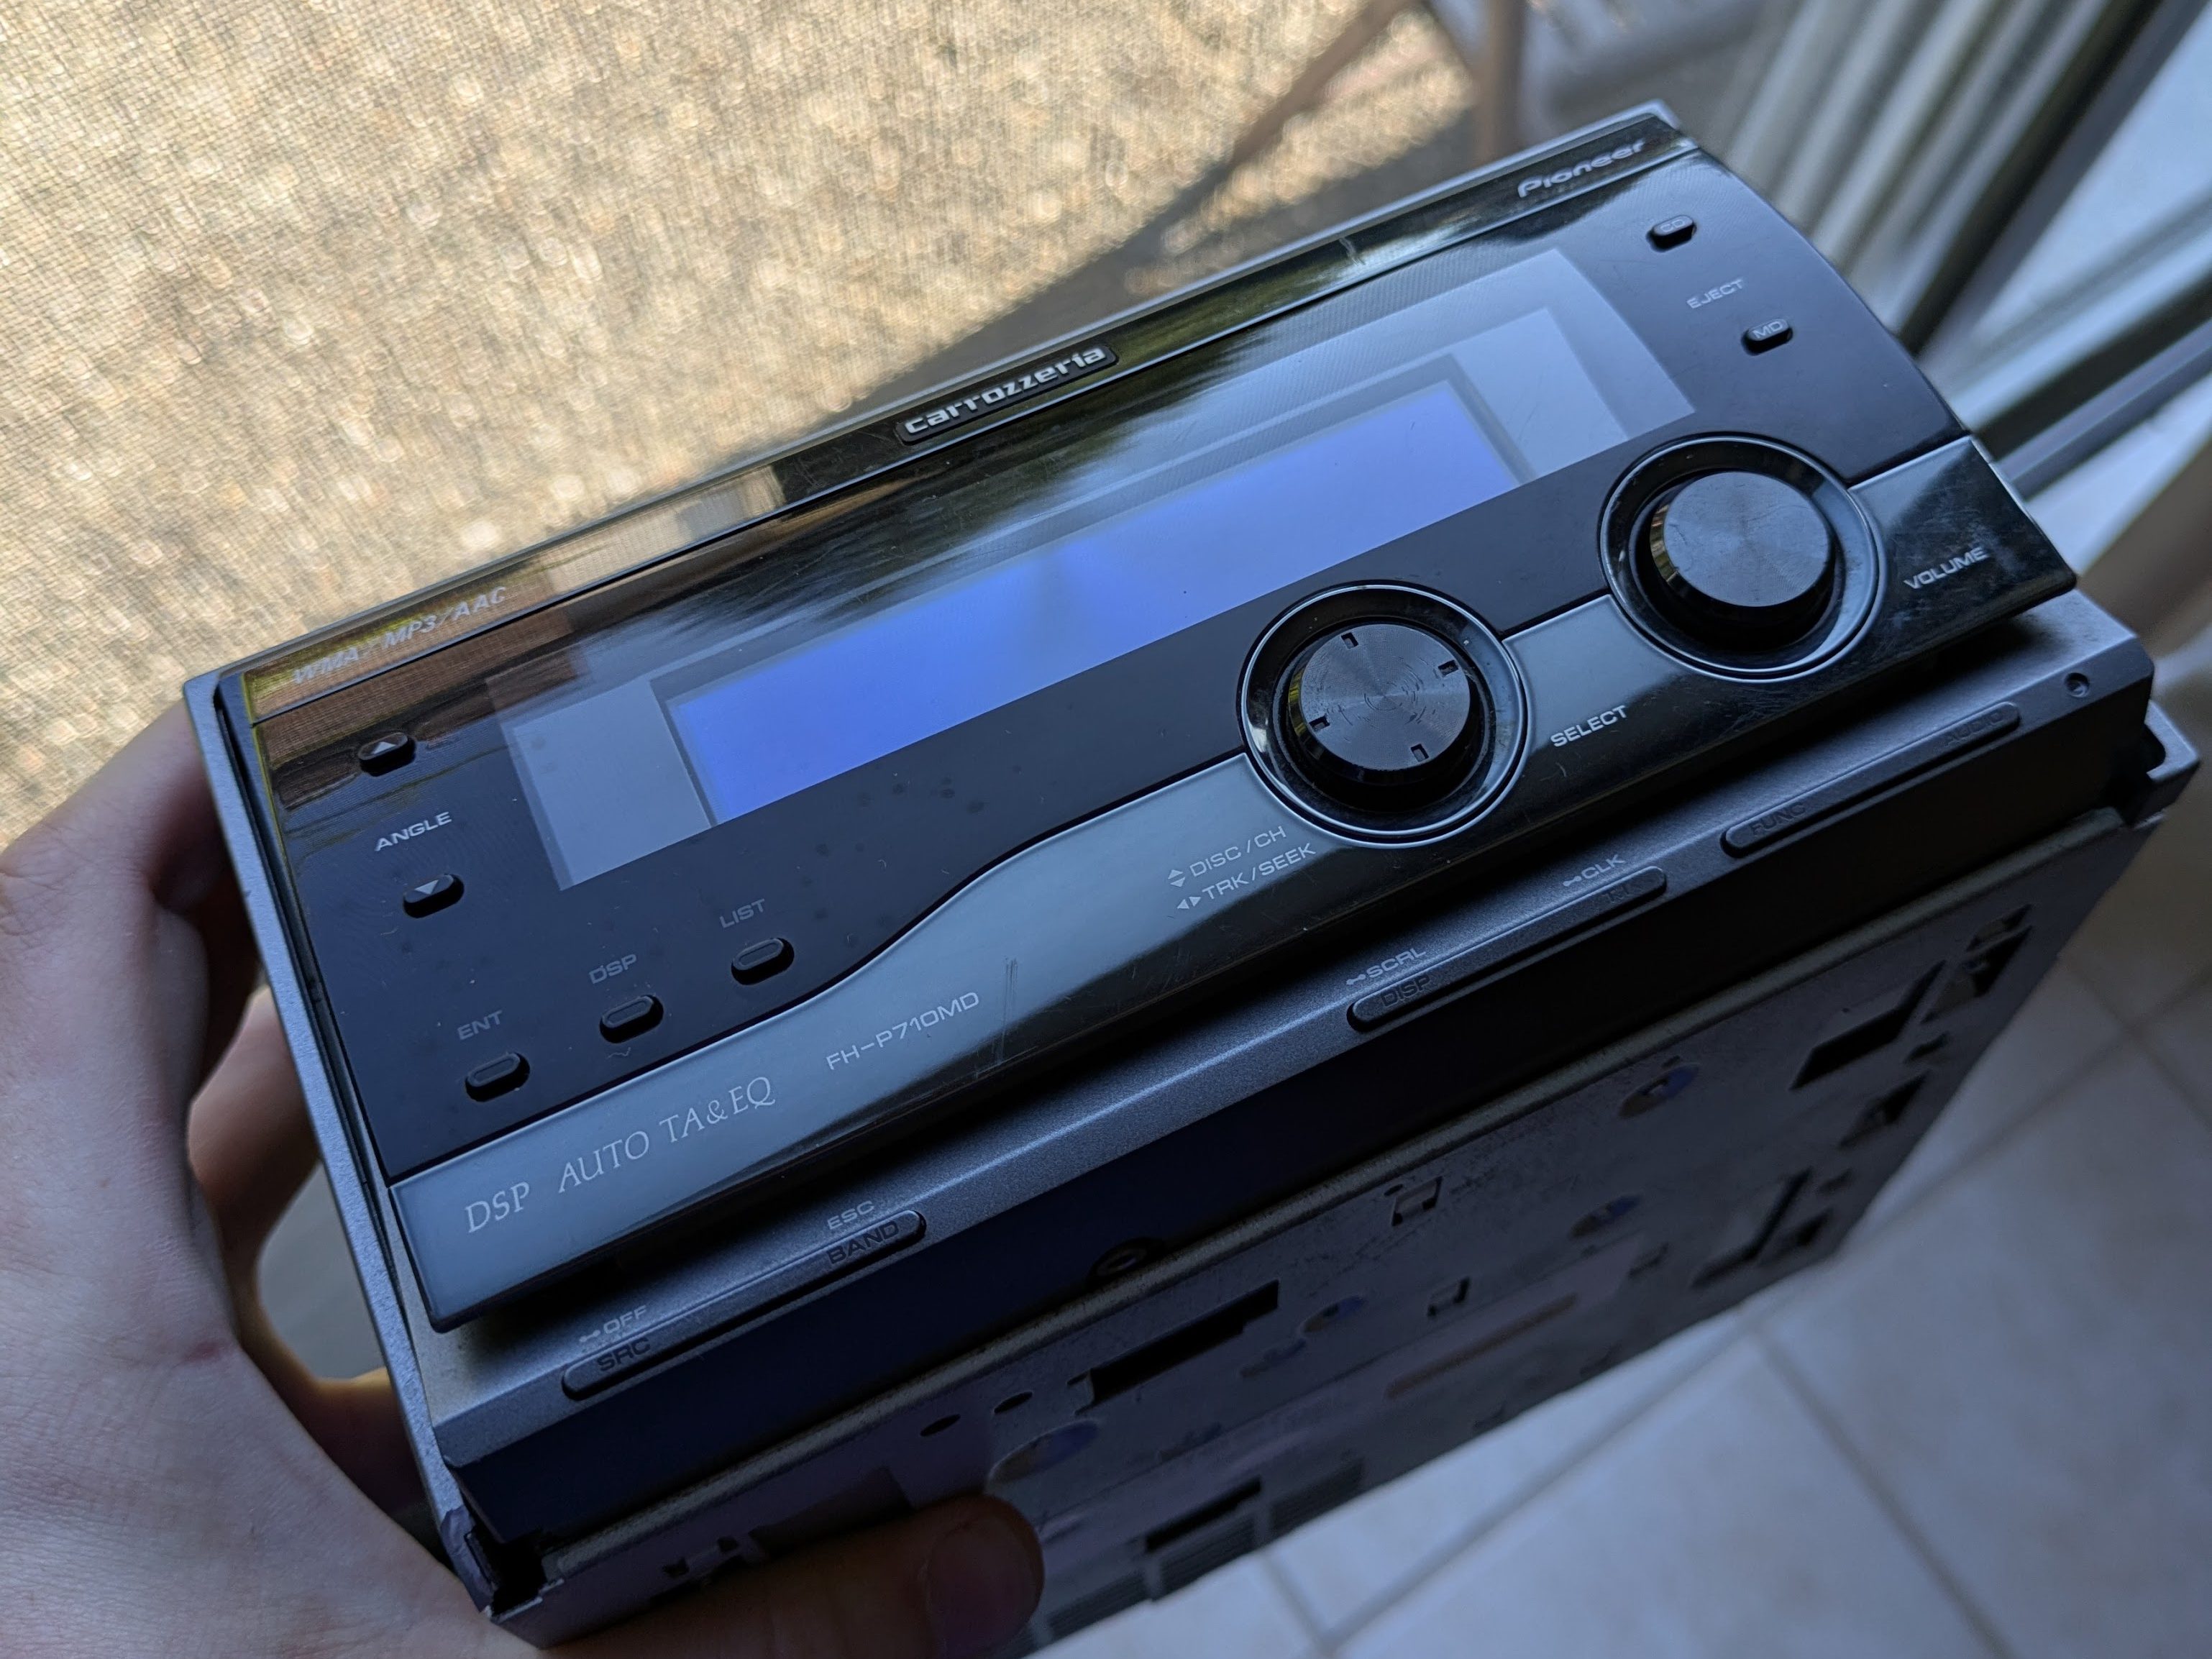
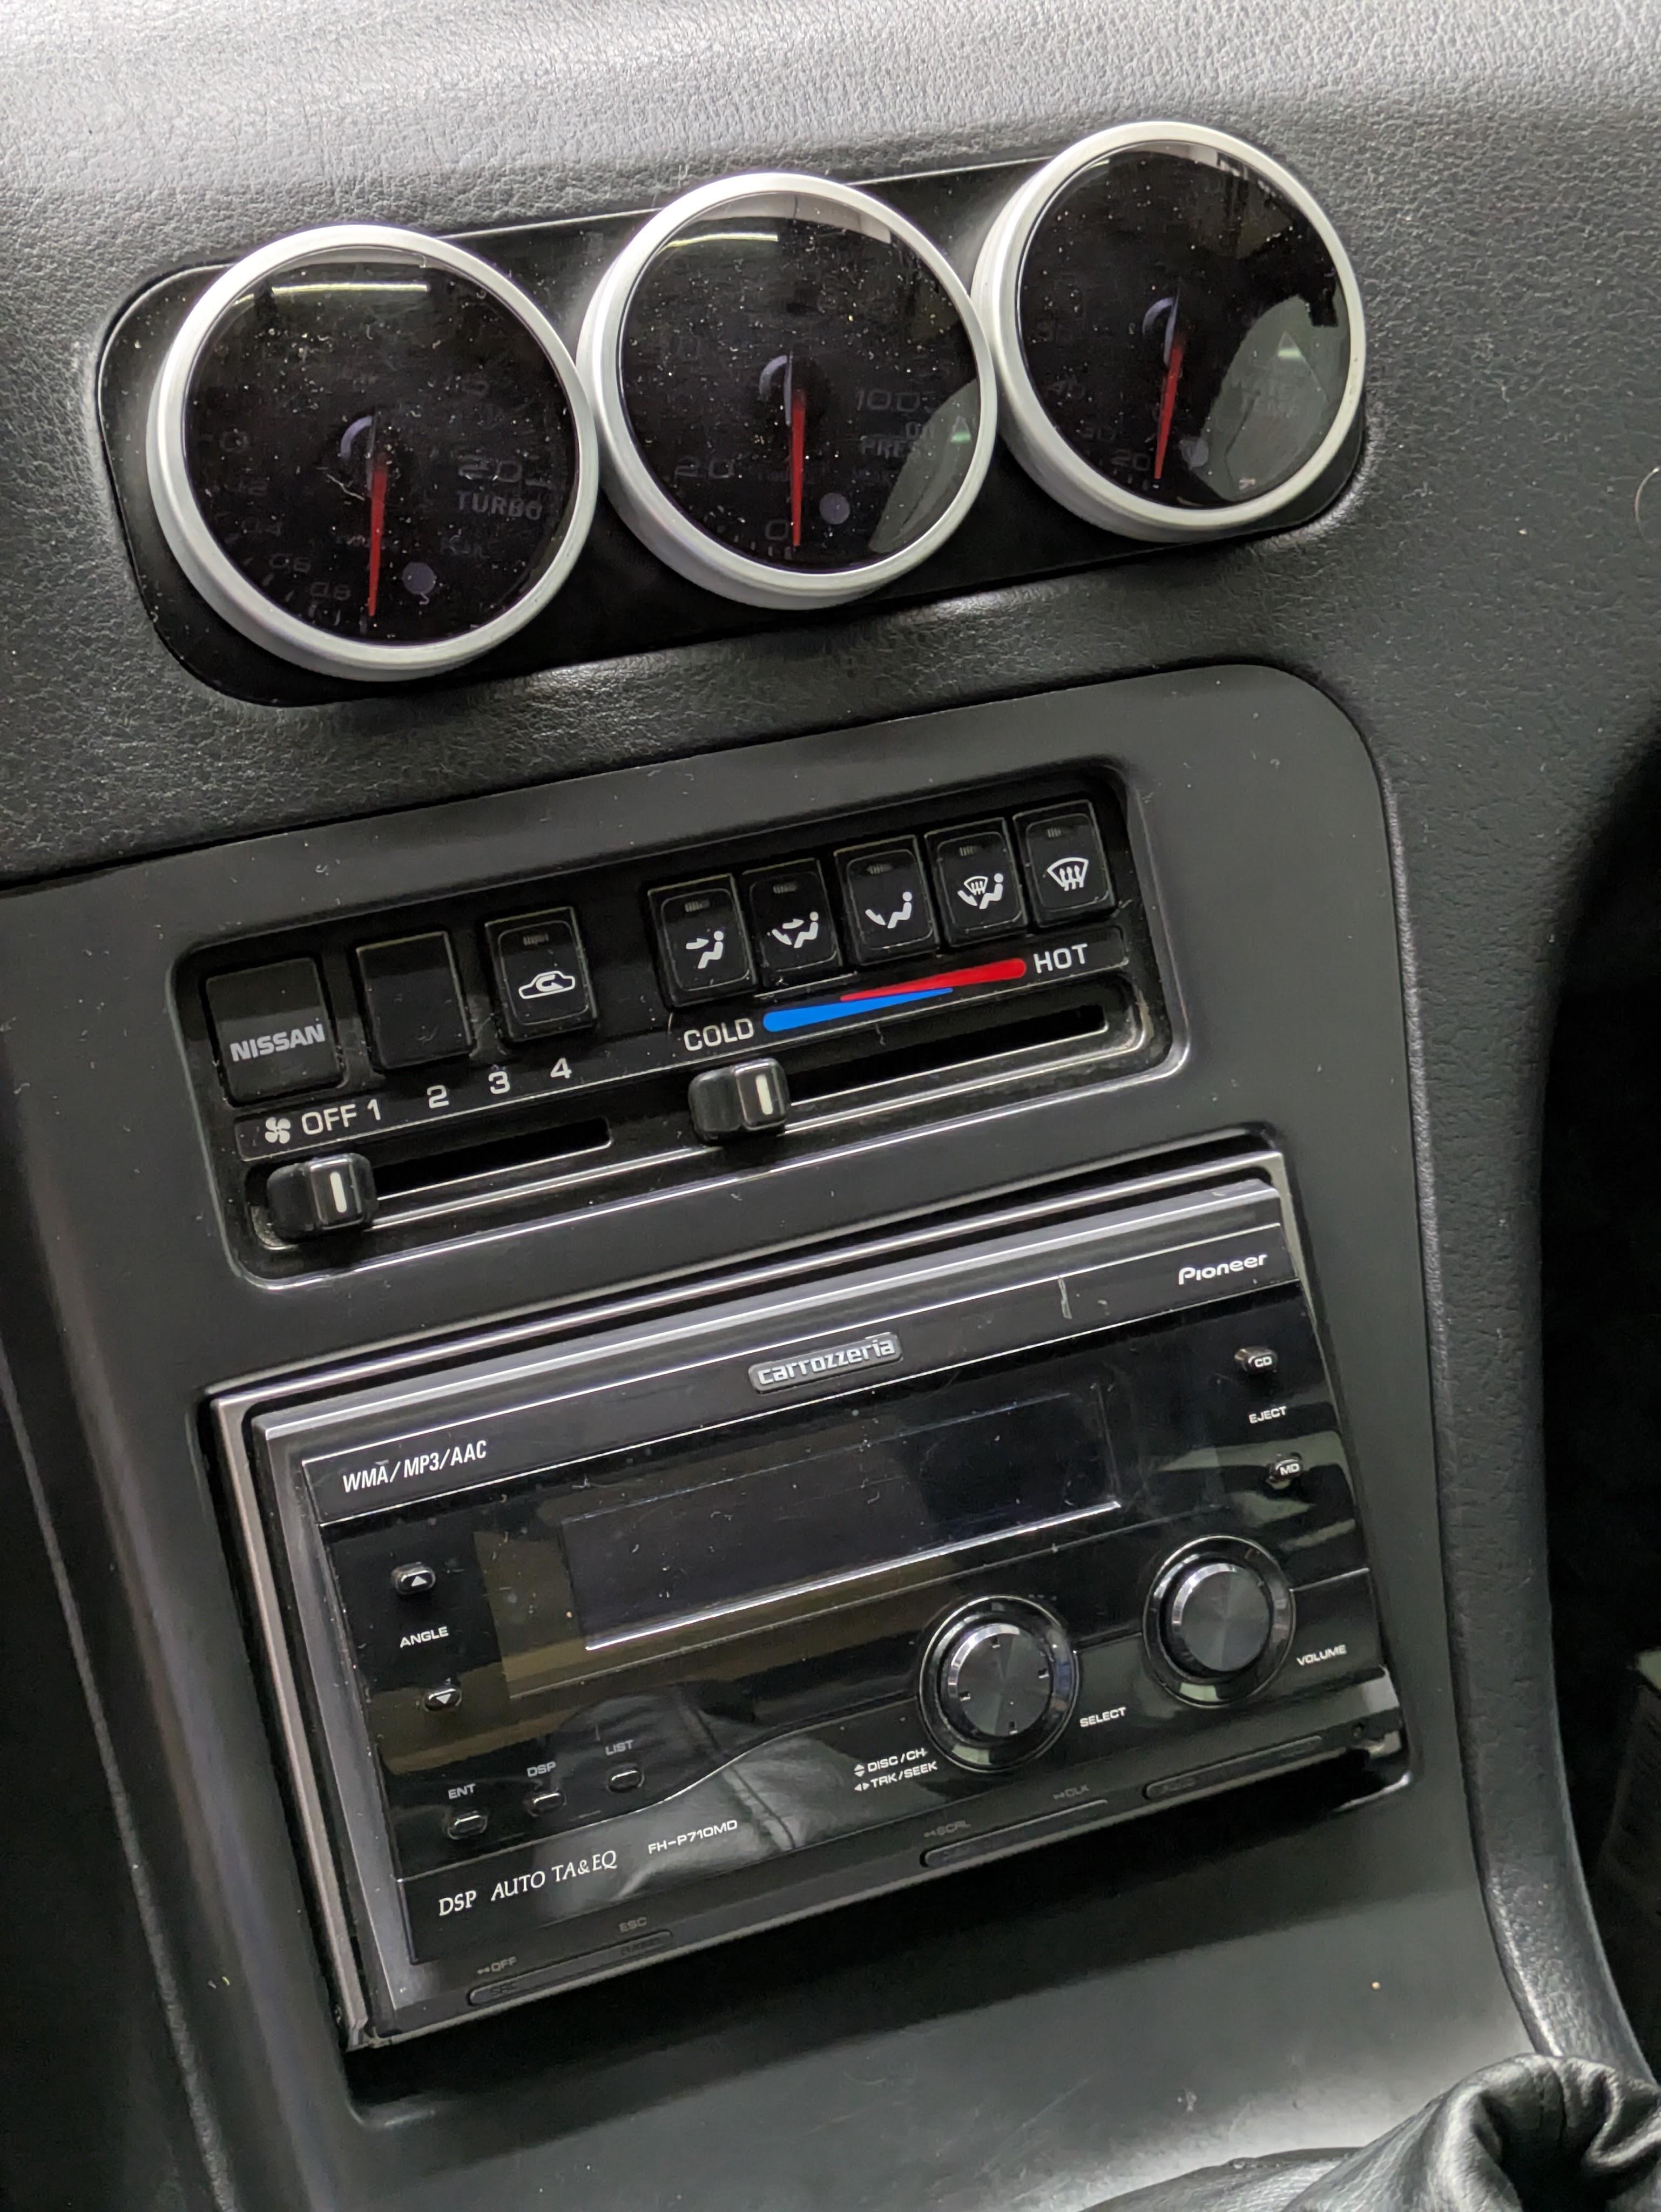
This is a Pioneer Carrozzeria FH-P710MD, a Japanese market exclusive radio that came out in 2006, packing all of Japan’s favorite legacy media including Compact Disc and Mini Disc. This motorized piece of lunacy has a power hinging face to access the physical media bays, as well as a library of undeniably radical visualizers. For those in the know, this radio is known for it’s dolphin animations.
This discovery was rather recent, as I’d been seeing more people put period correct head units into their “of an era” builds. I originally was going to source one via SmartKrew, which is a business that buys up period radios, then cleans, tests, and adds Bluetooth to them. It’s a very turn key service, but after missing out on a drop despite camping it really hard, I figured that I probably had the skills to do the same things.
I ended up sourcing one out of Japan off of eBay, and it showed up exactly as described and rather quickly. It came with a flying leads pigtail, and I ordered an adapter from Pioneer to S13 right after finding the radio. While not the same plug, it was the same wire color and rough wire order, so it was very easy to play connect the colors with.
There were a couple of ways to approach the Bluetooth addition. Most of the vintage radio restoration services use the DROK module (my Miata did when I had a resto service performed), which can be sliced into the system in a variety of ways. After debating the merits of that, I decided that not risking the delicate 20 year old radio would be preferable, and I found another solution that didn’t involve cracking it open. Pioneer has a proprietary media expansion standard called IP-BUS. I believe it was mainly for CD changers and other media input, but what I care about is that 1. This radio has it. And 2. I can get a plug in Bluetooth to IP-BUS module for $11. While not as elegant as it requires separate power and ground and is another box hiding under my radio, it was worth it for the simplicity.
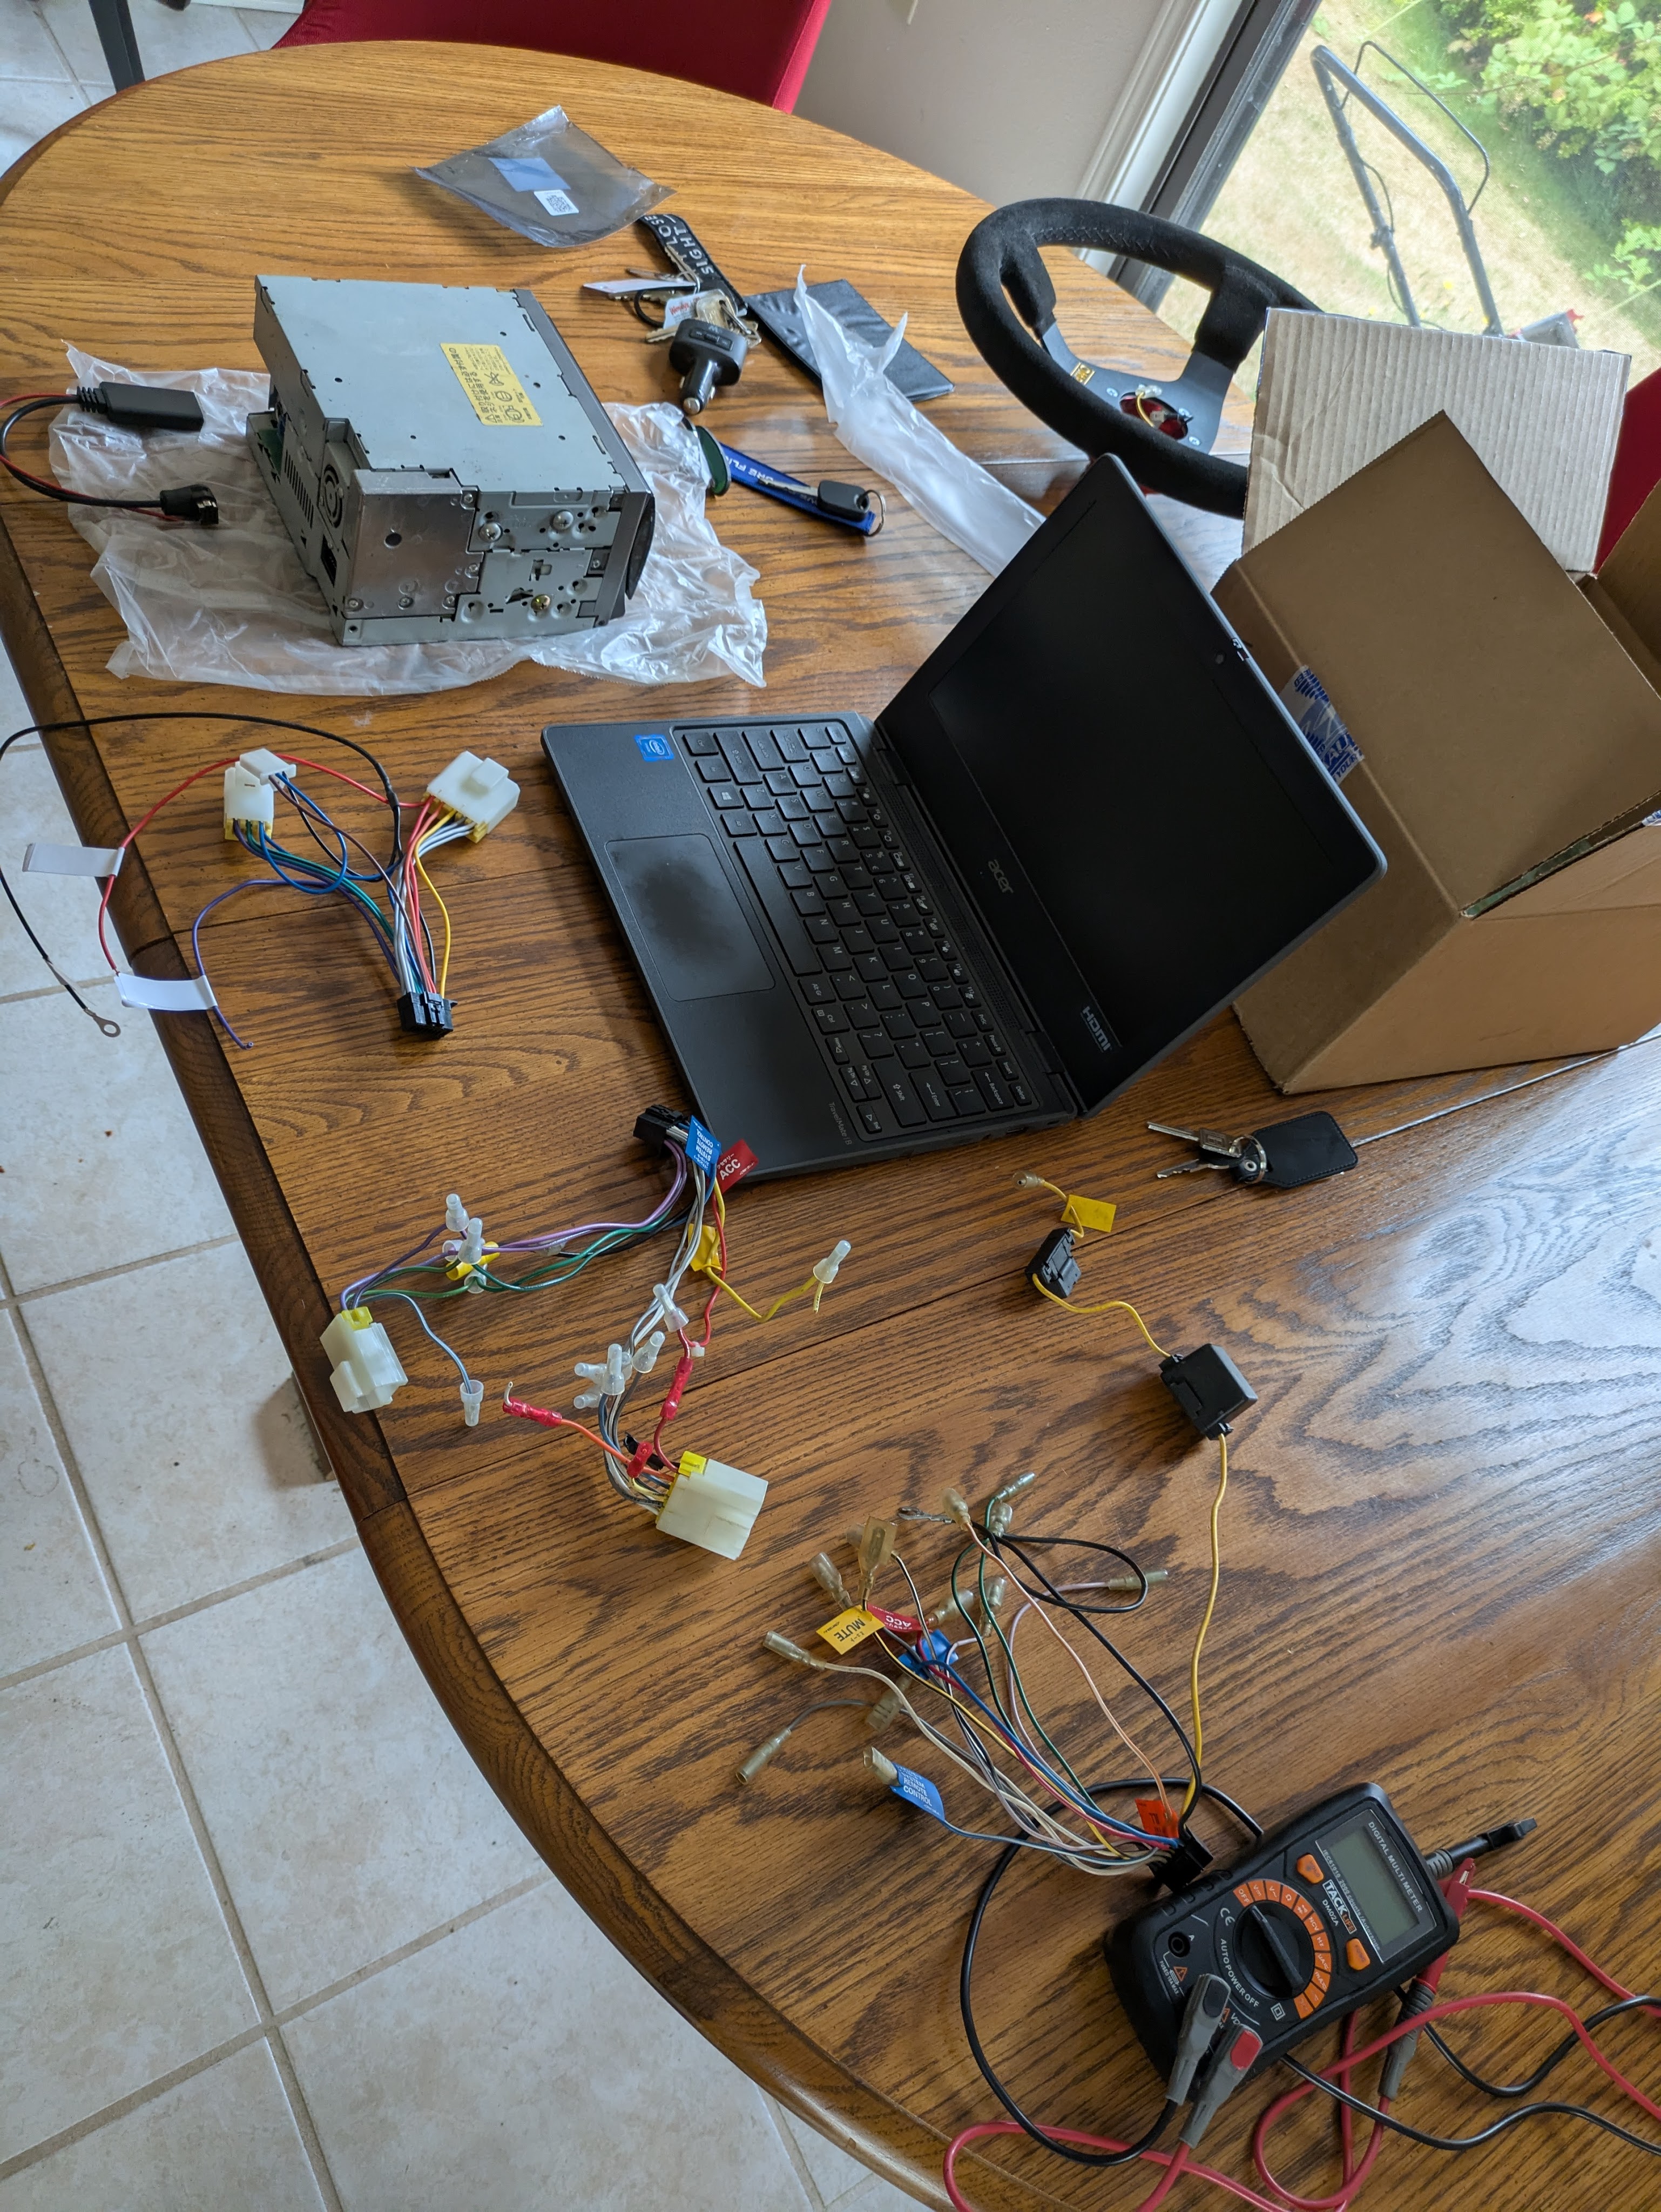
These were the 3 harnesses before surgery. Top left is brand new Pioneer to S13, Middle is the previous radio harness that came out of the car, and lower is the “flying leads” pigtail that I got with the Dolphin display.
While the radio wiring on the bench went well, the wiring in the car had seperate plans.
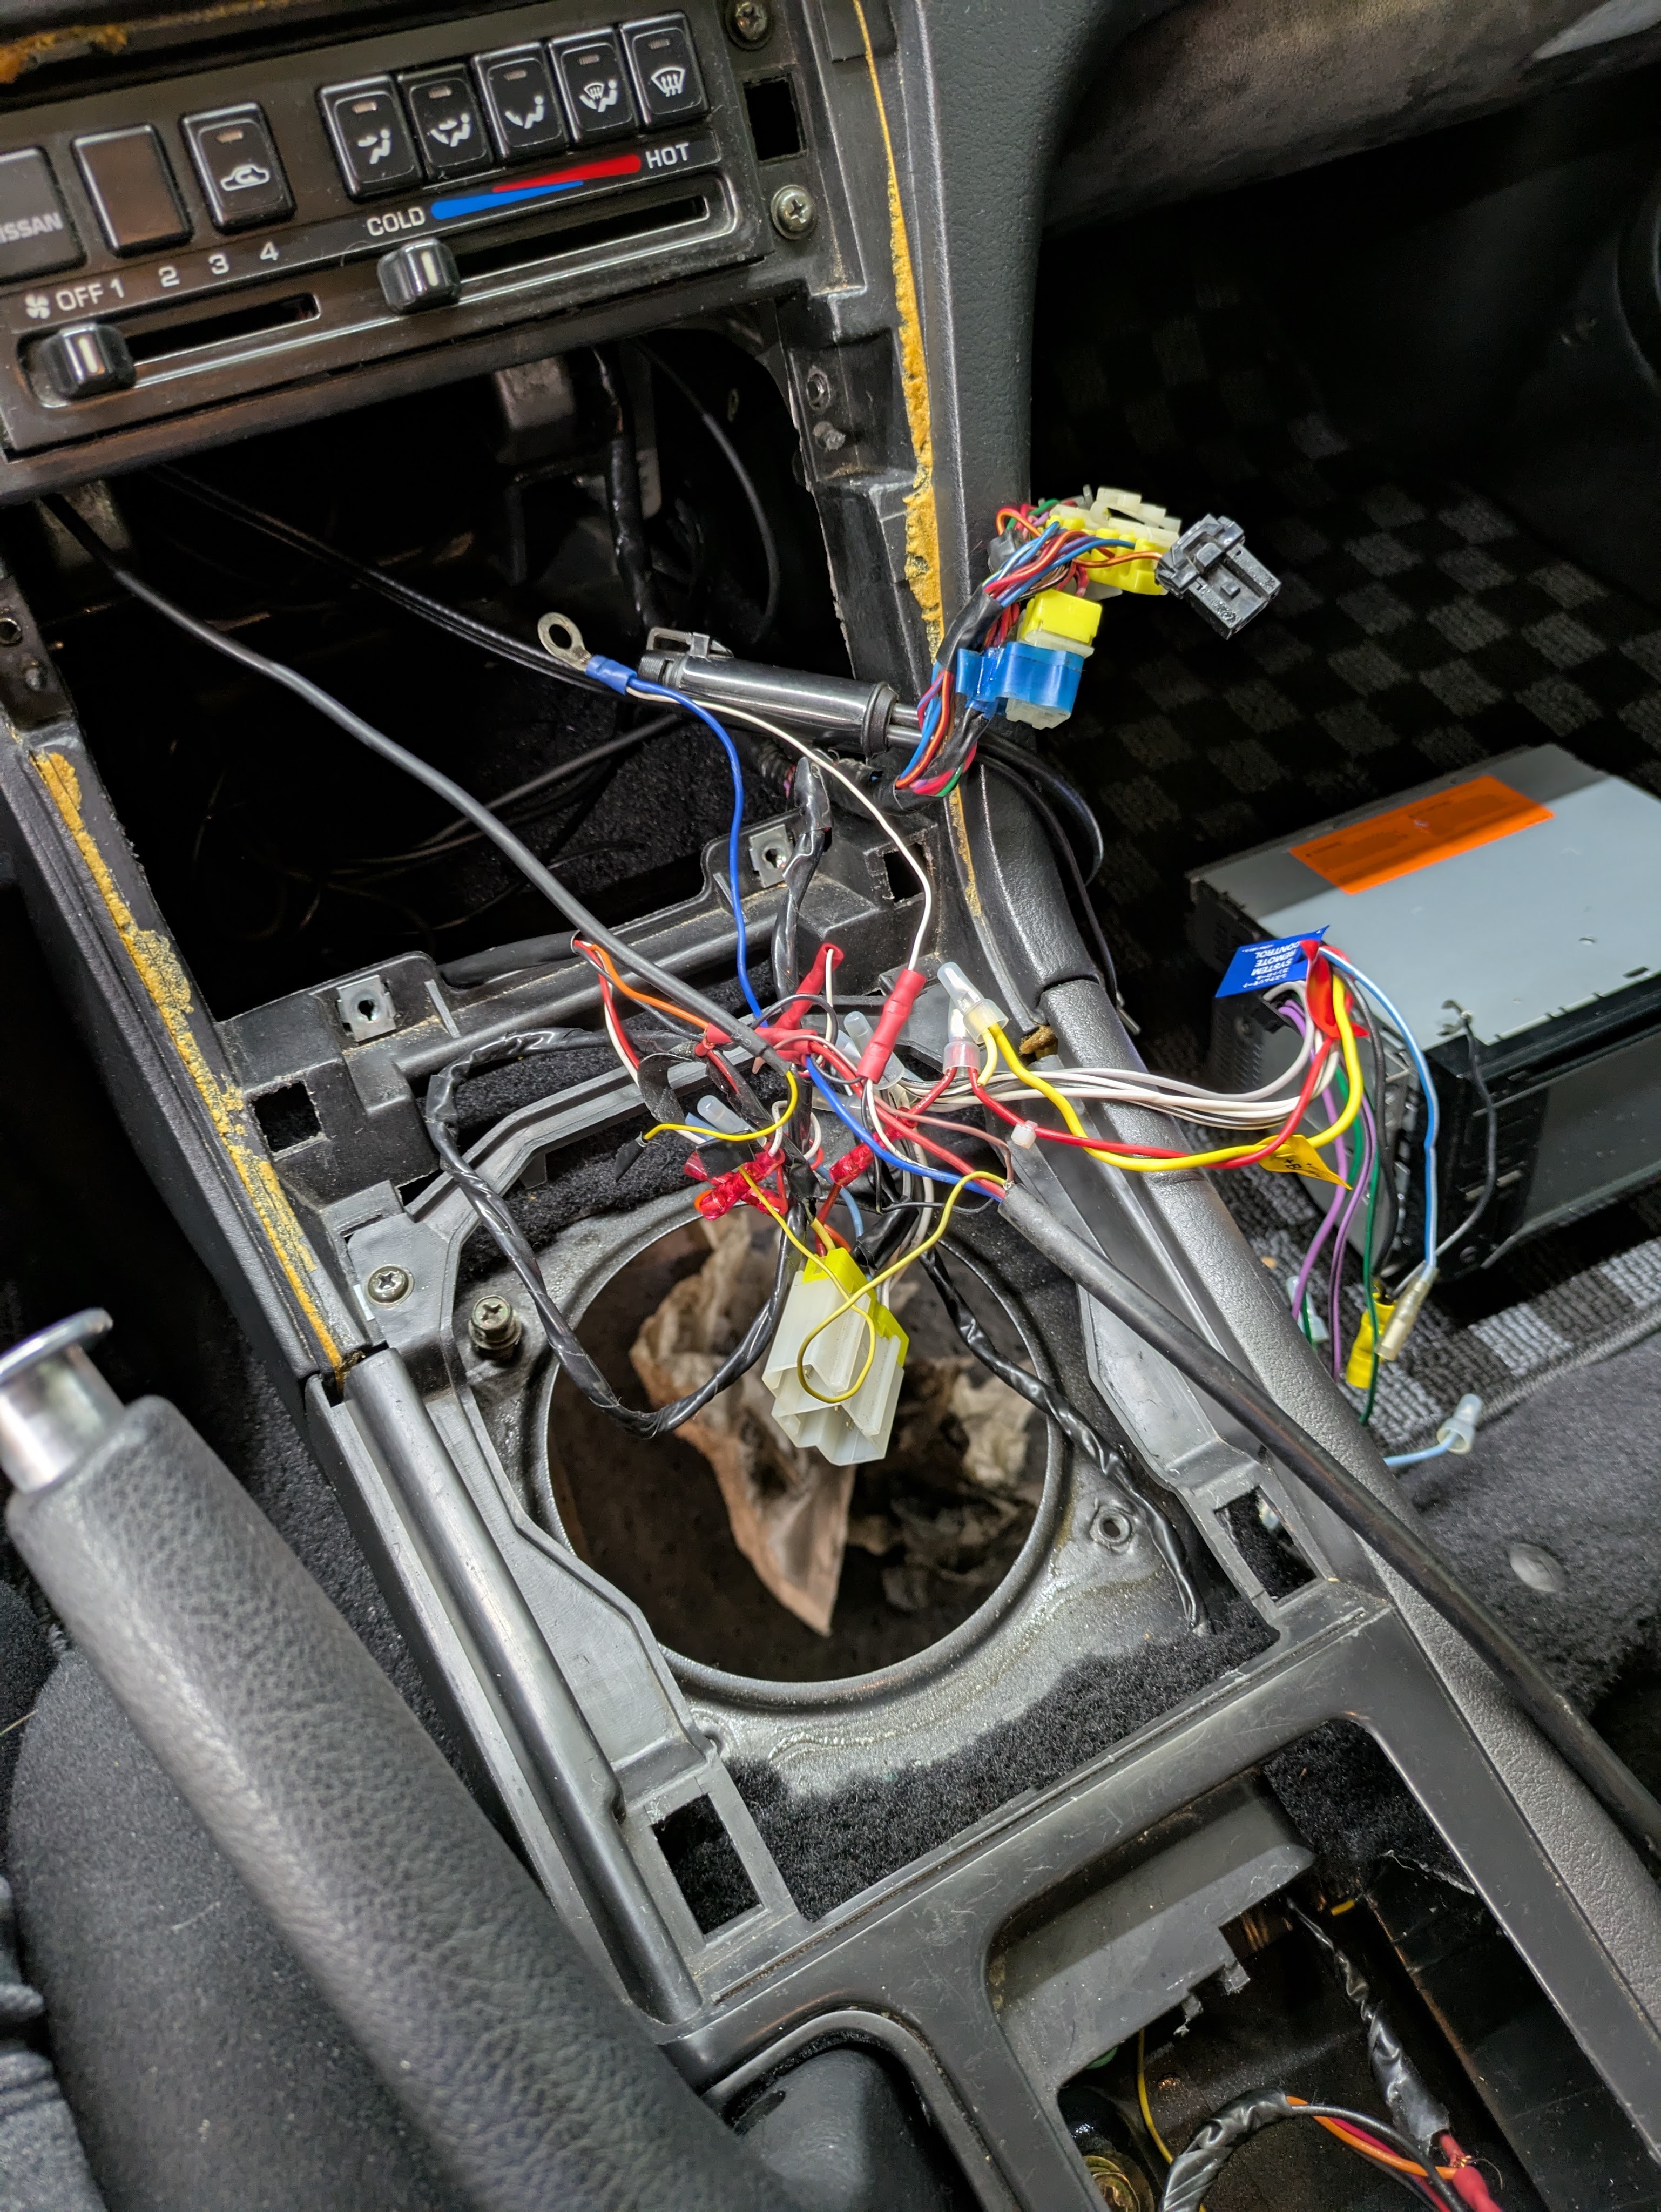
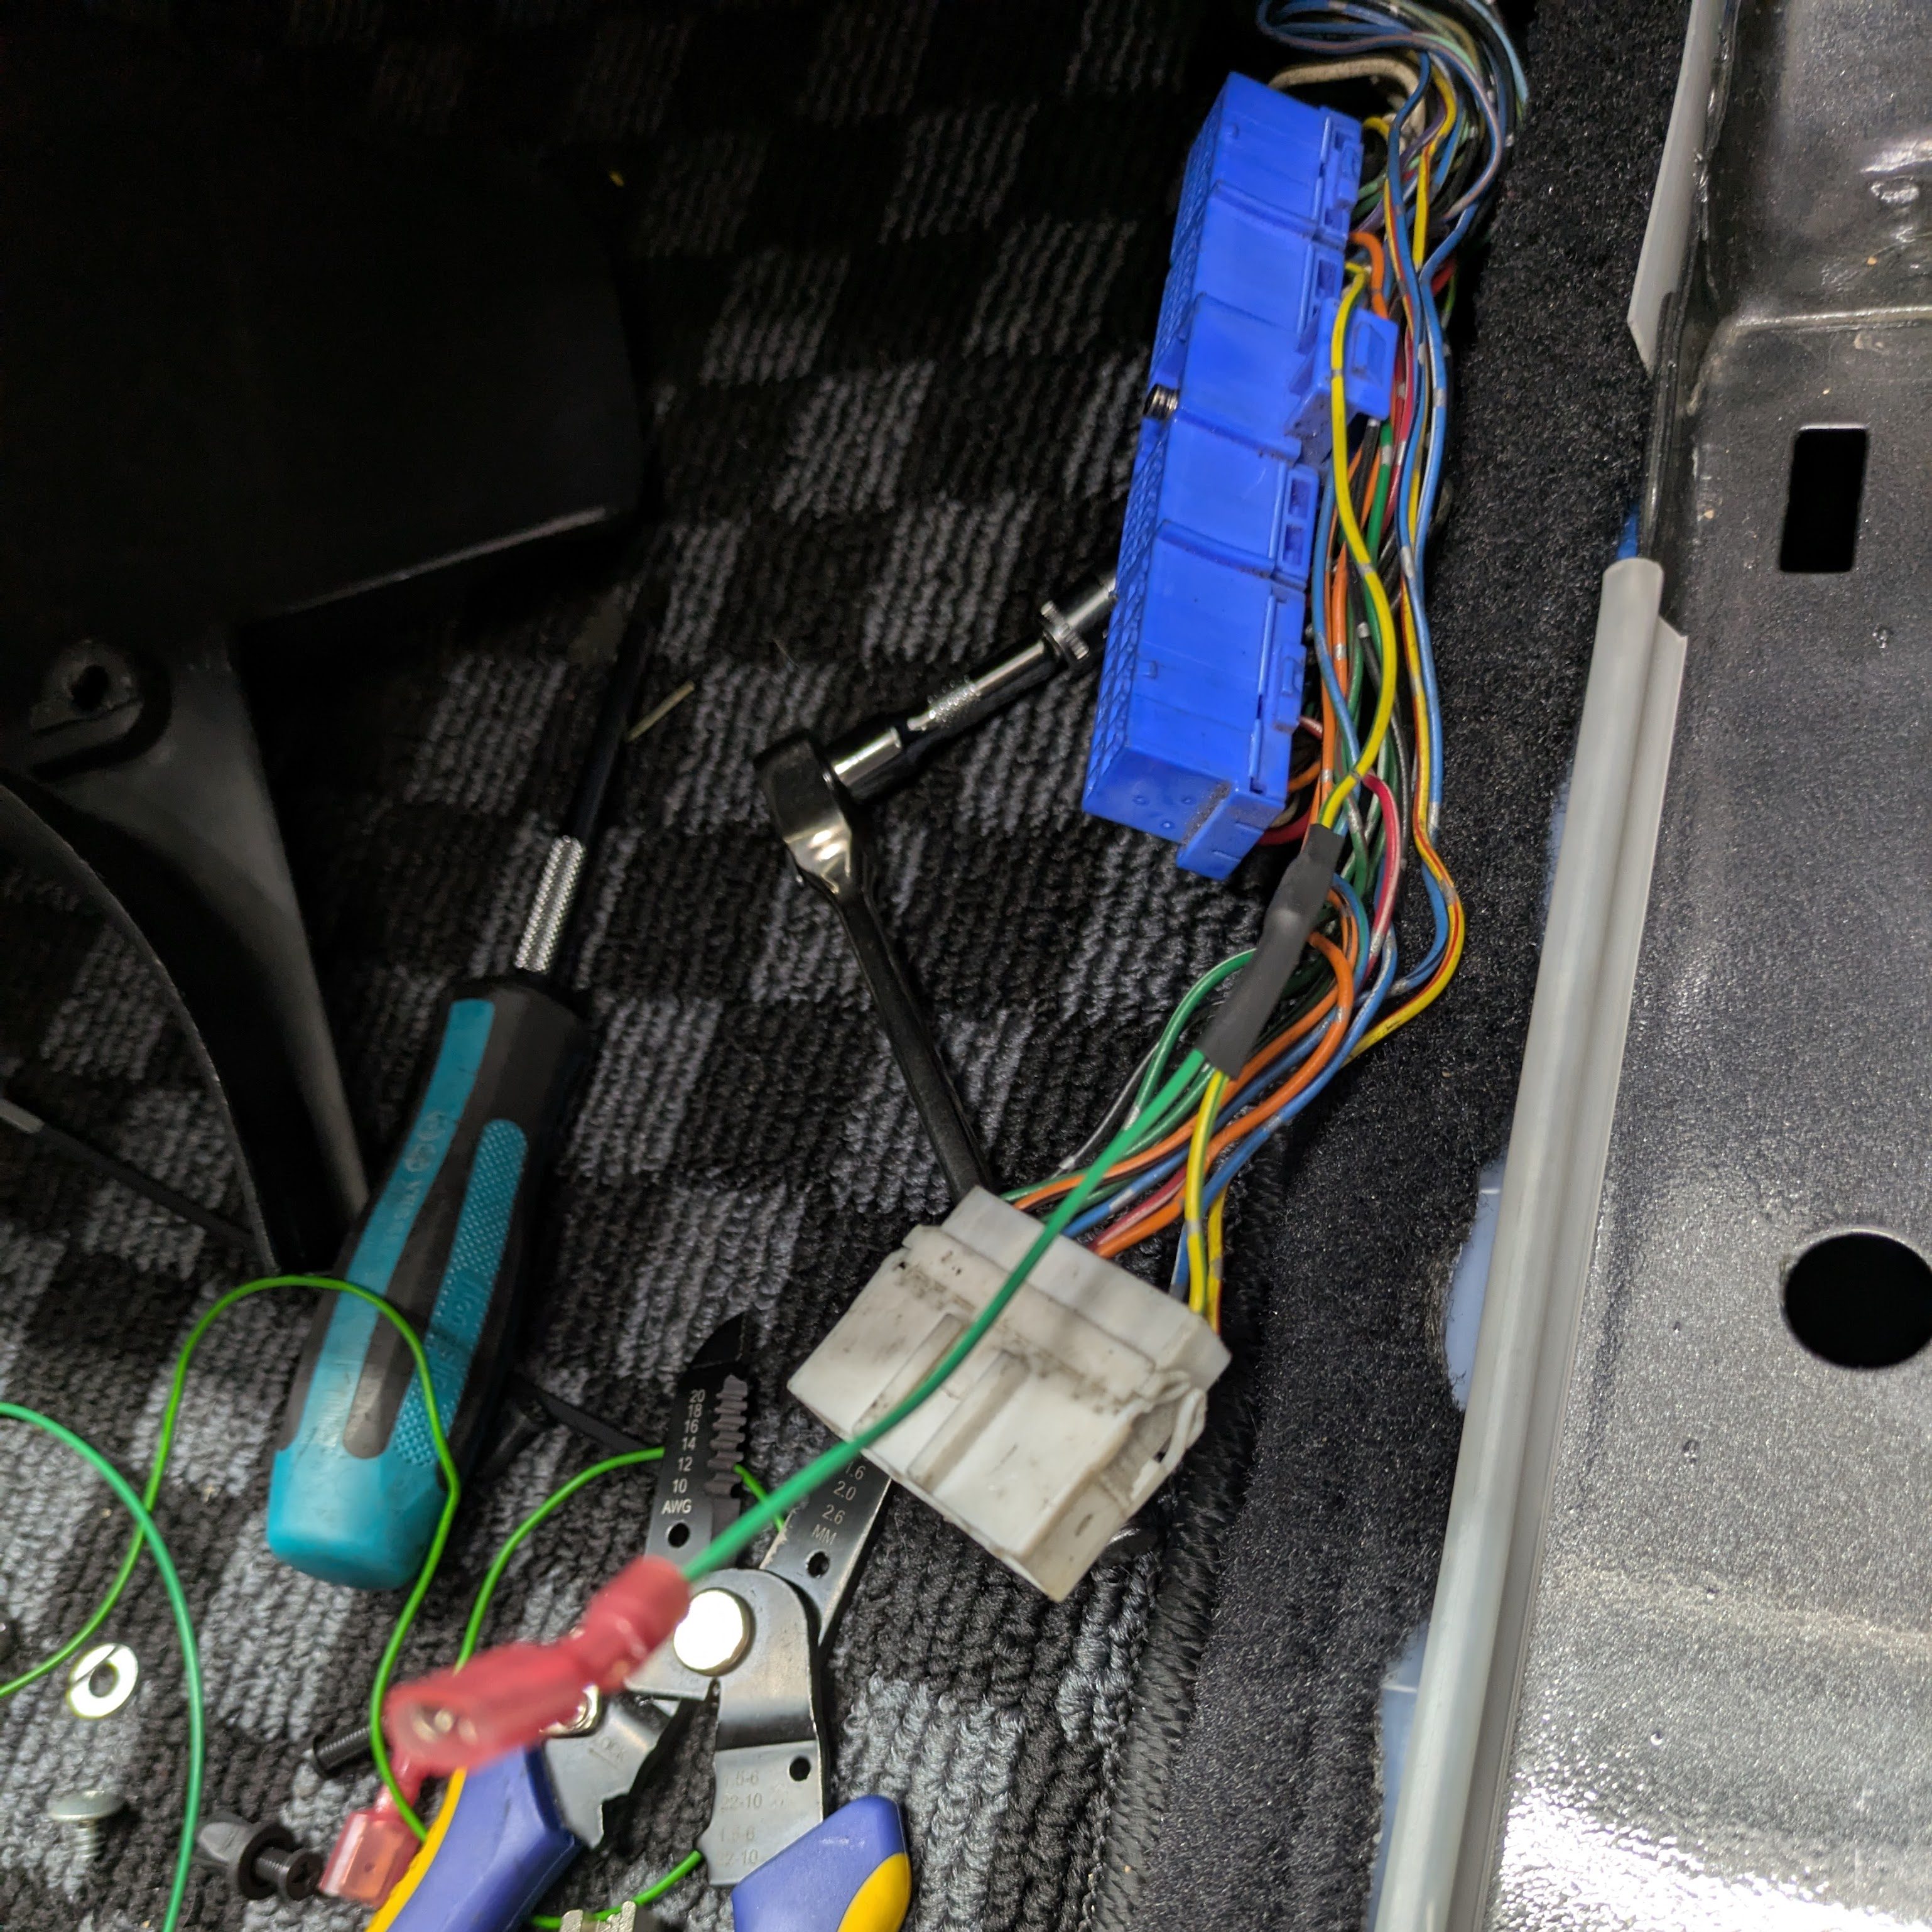
As garbage as this looks, its not as bad as it seems. There were very non-intrusive splices into the chassis harness, and the factory radio harness was entirely uncut. The only thing that was cut-cut was a wire to power the Defi gauges and Innovate wideband from the power mirror control harness, something that this car does not feature as a base model.
This still took a great deal of effort to overcome. I was attempting to balance retaining current function of all the gauges while planning for the future. The Innovate was really the bear in all of this, because it had by far the worst wiring, and was something I was looking forward to deleting as I already have CAN-Lambda, a CAN gauge, and a Link ECU that will be installed some point in the future.
I elected to build breakoff power harnesses for accessory power and ground to give consistent, reliable places to power non-factory pieces under the dash. These went well, but I’ll still likely redo it in the future. The main goal was to make everything disconnect-able, as the current setup was hardwired and had to be cut out of the car. After a lot of wiring tracing and ghetto diagrams, I was able to get it all working, with a very clear path to the future on what needed to be done once the current wideband is discarded.
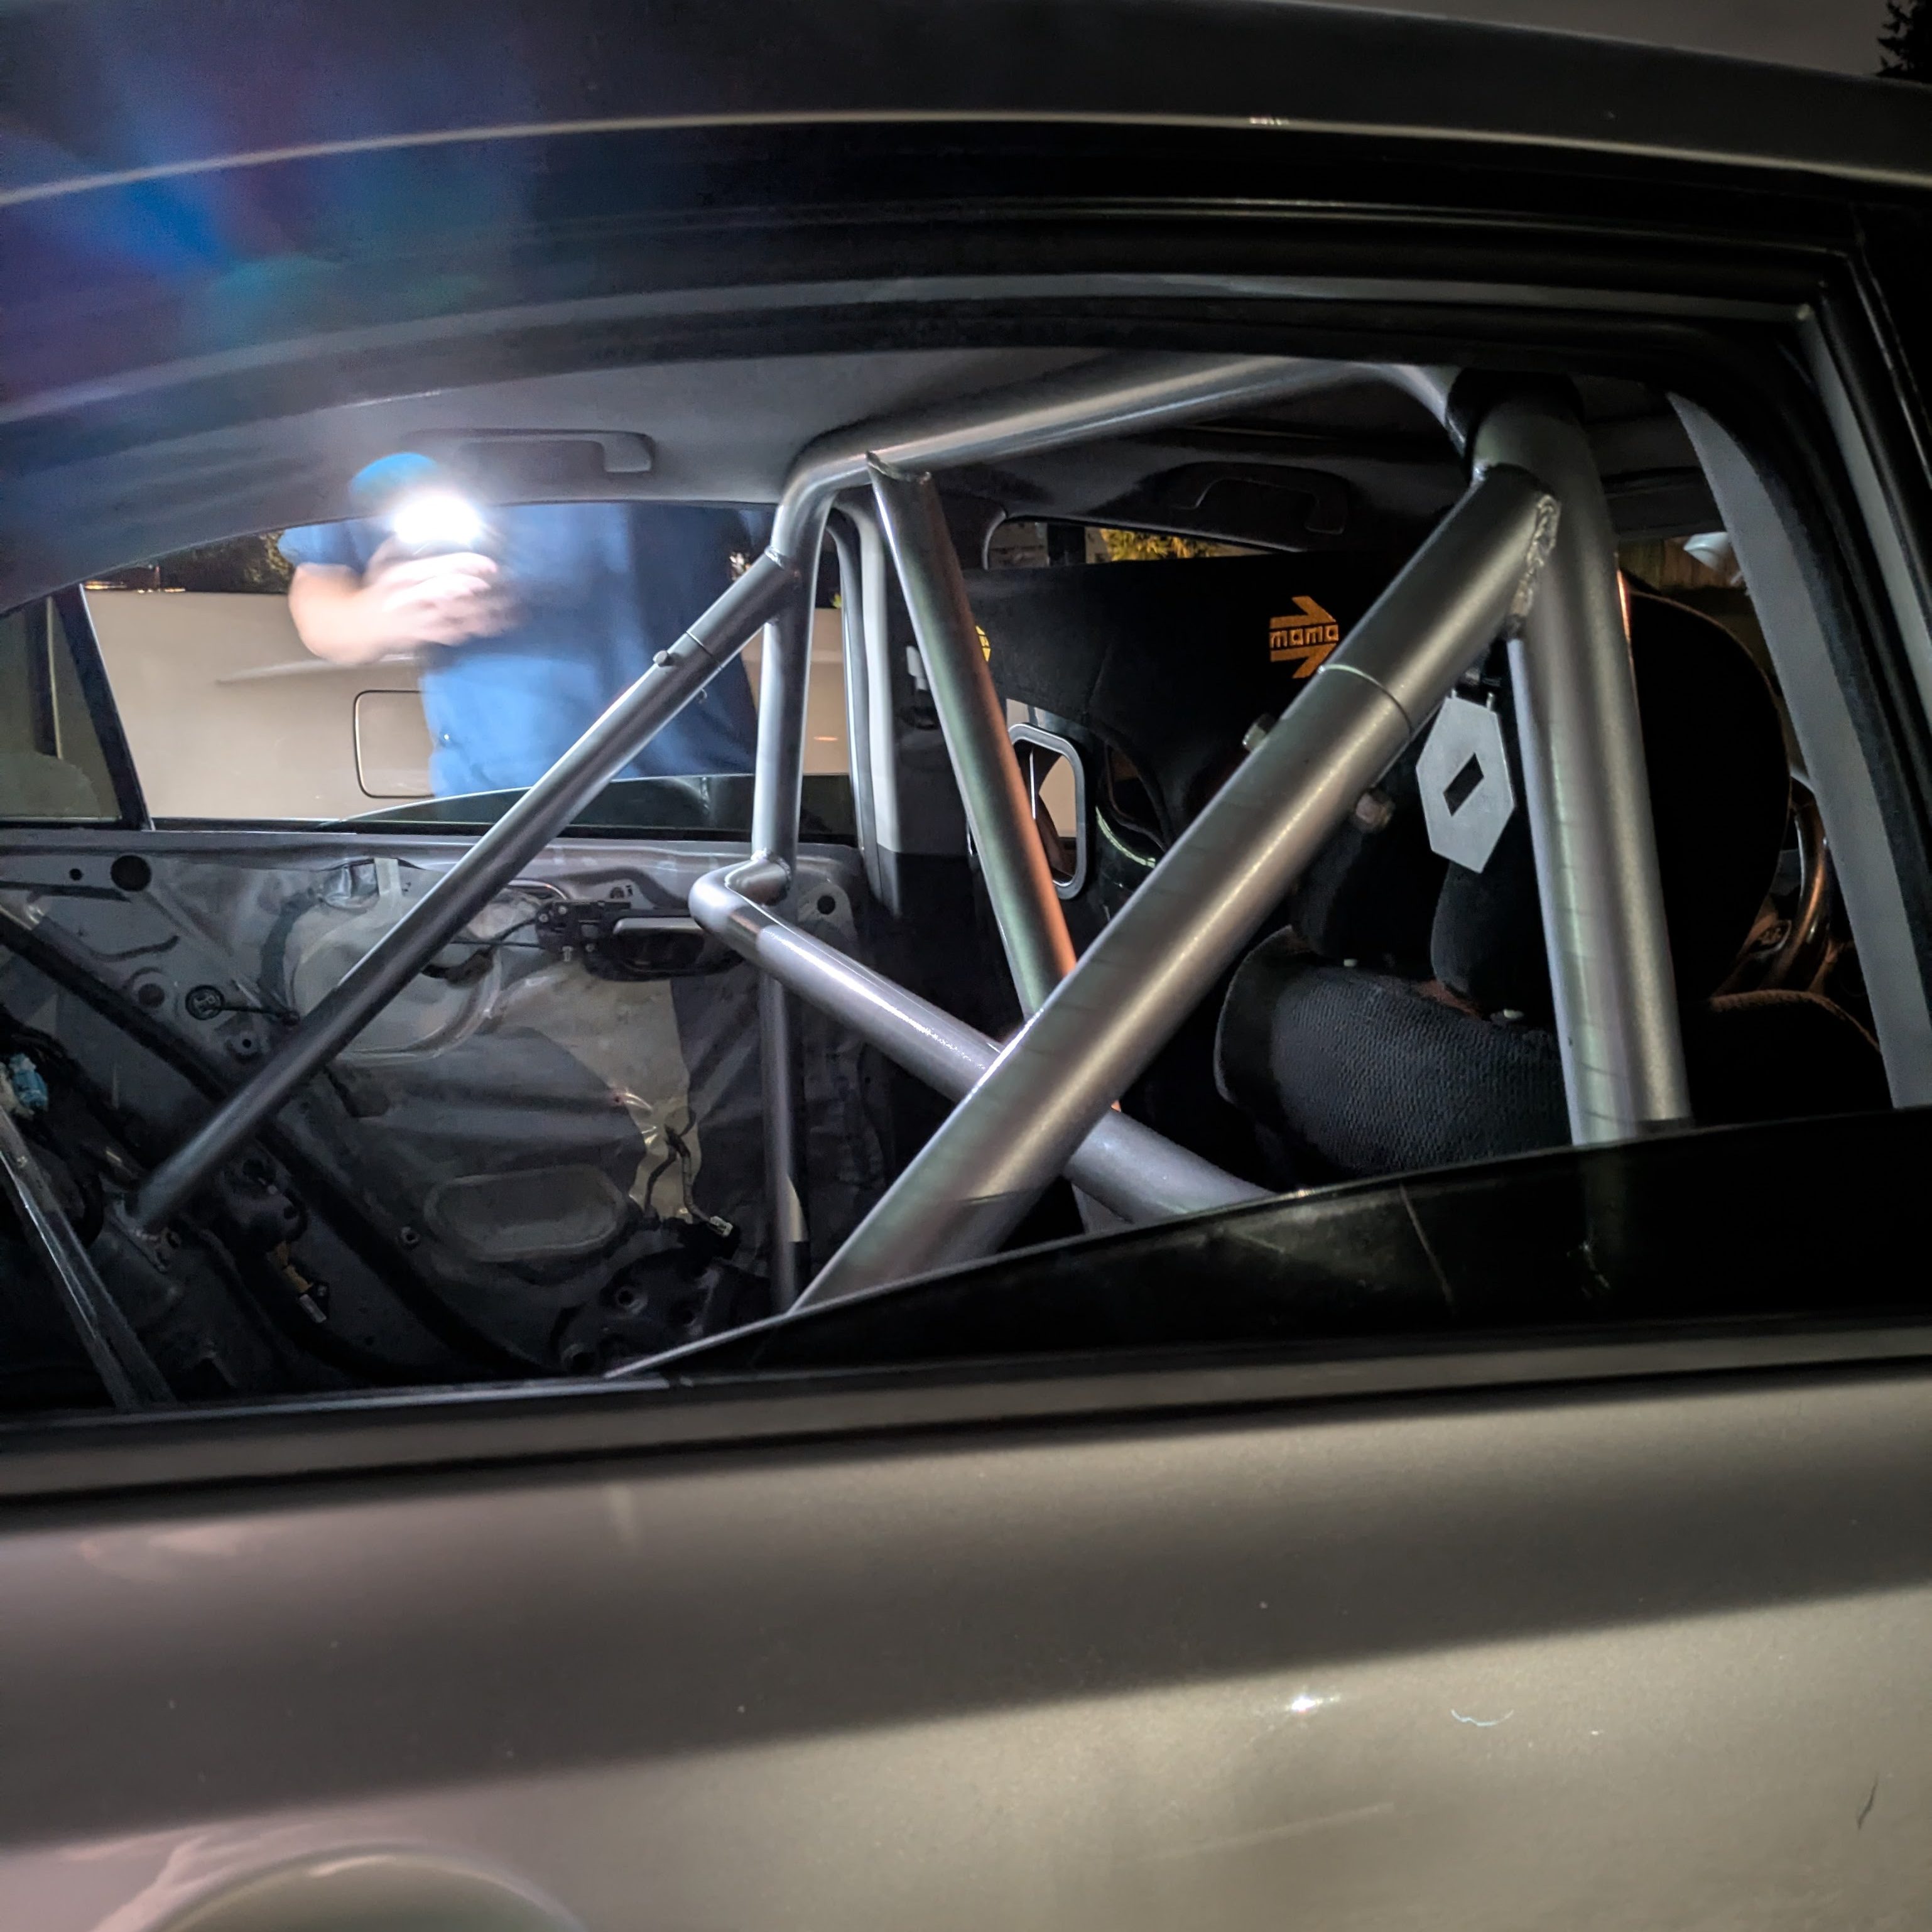
During the same chunk of time as the radio install, Abe swung by, and we eliminated some old subwoofer wiring in his car and threw in a freshly color matched Autopower roll bar into his 8th gen SI. Turned out great. I mostly just wanted to mention this as an excuse to use this photo.
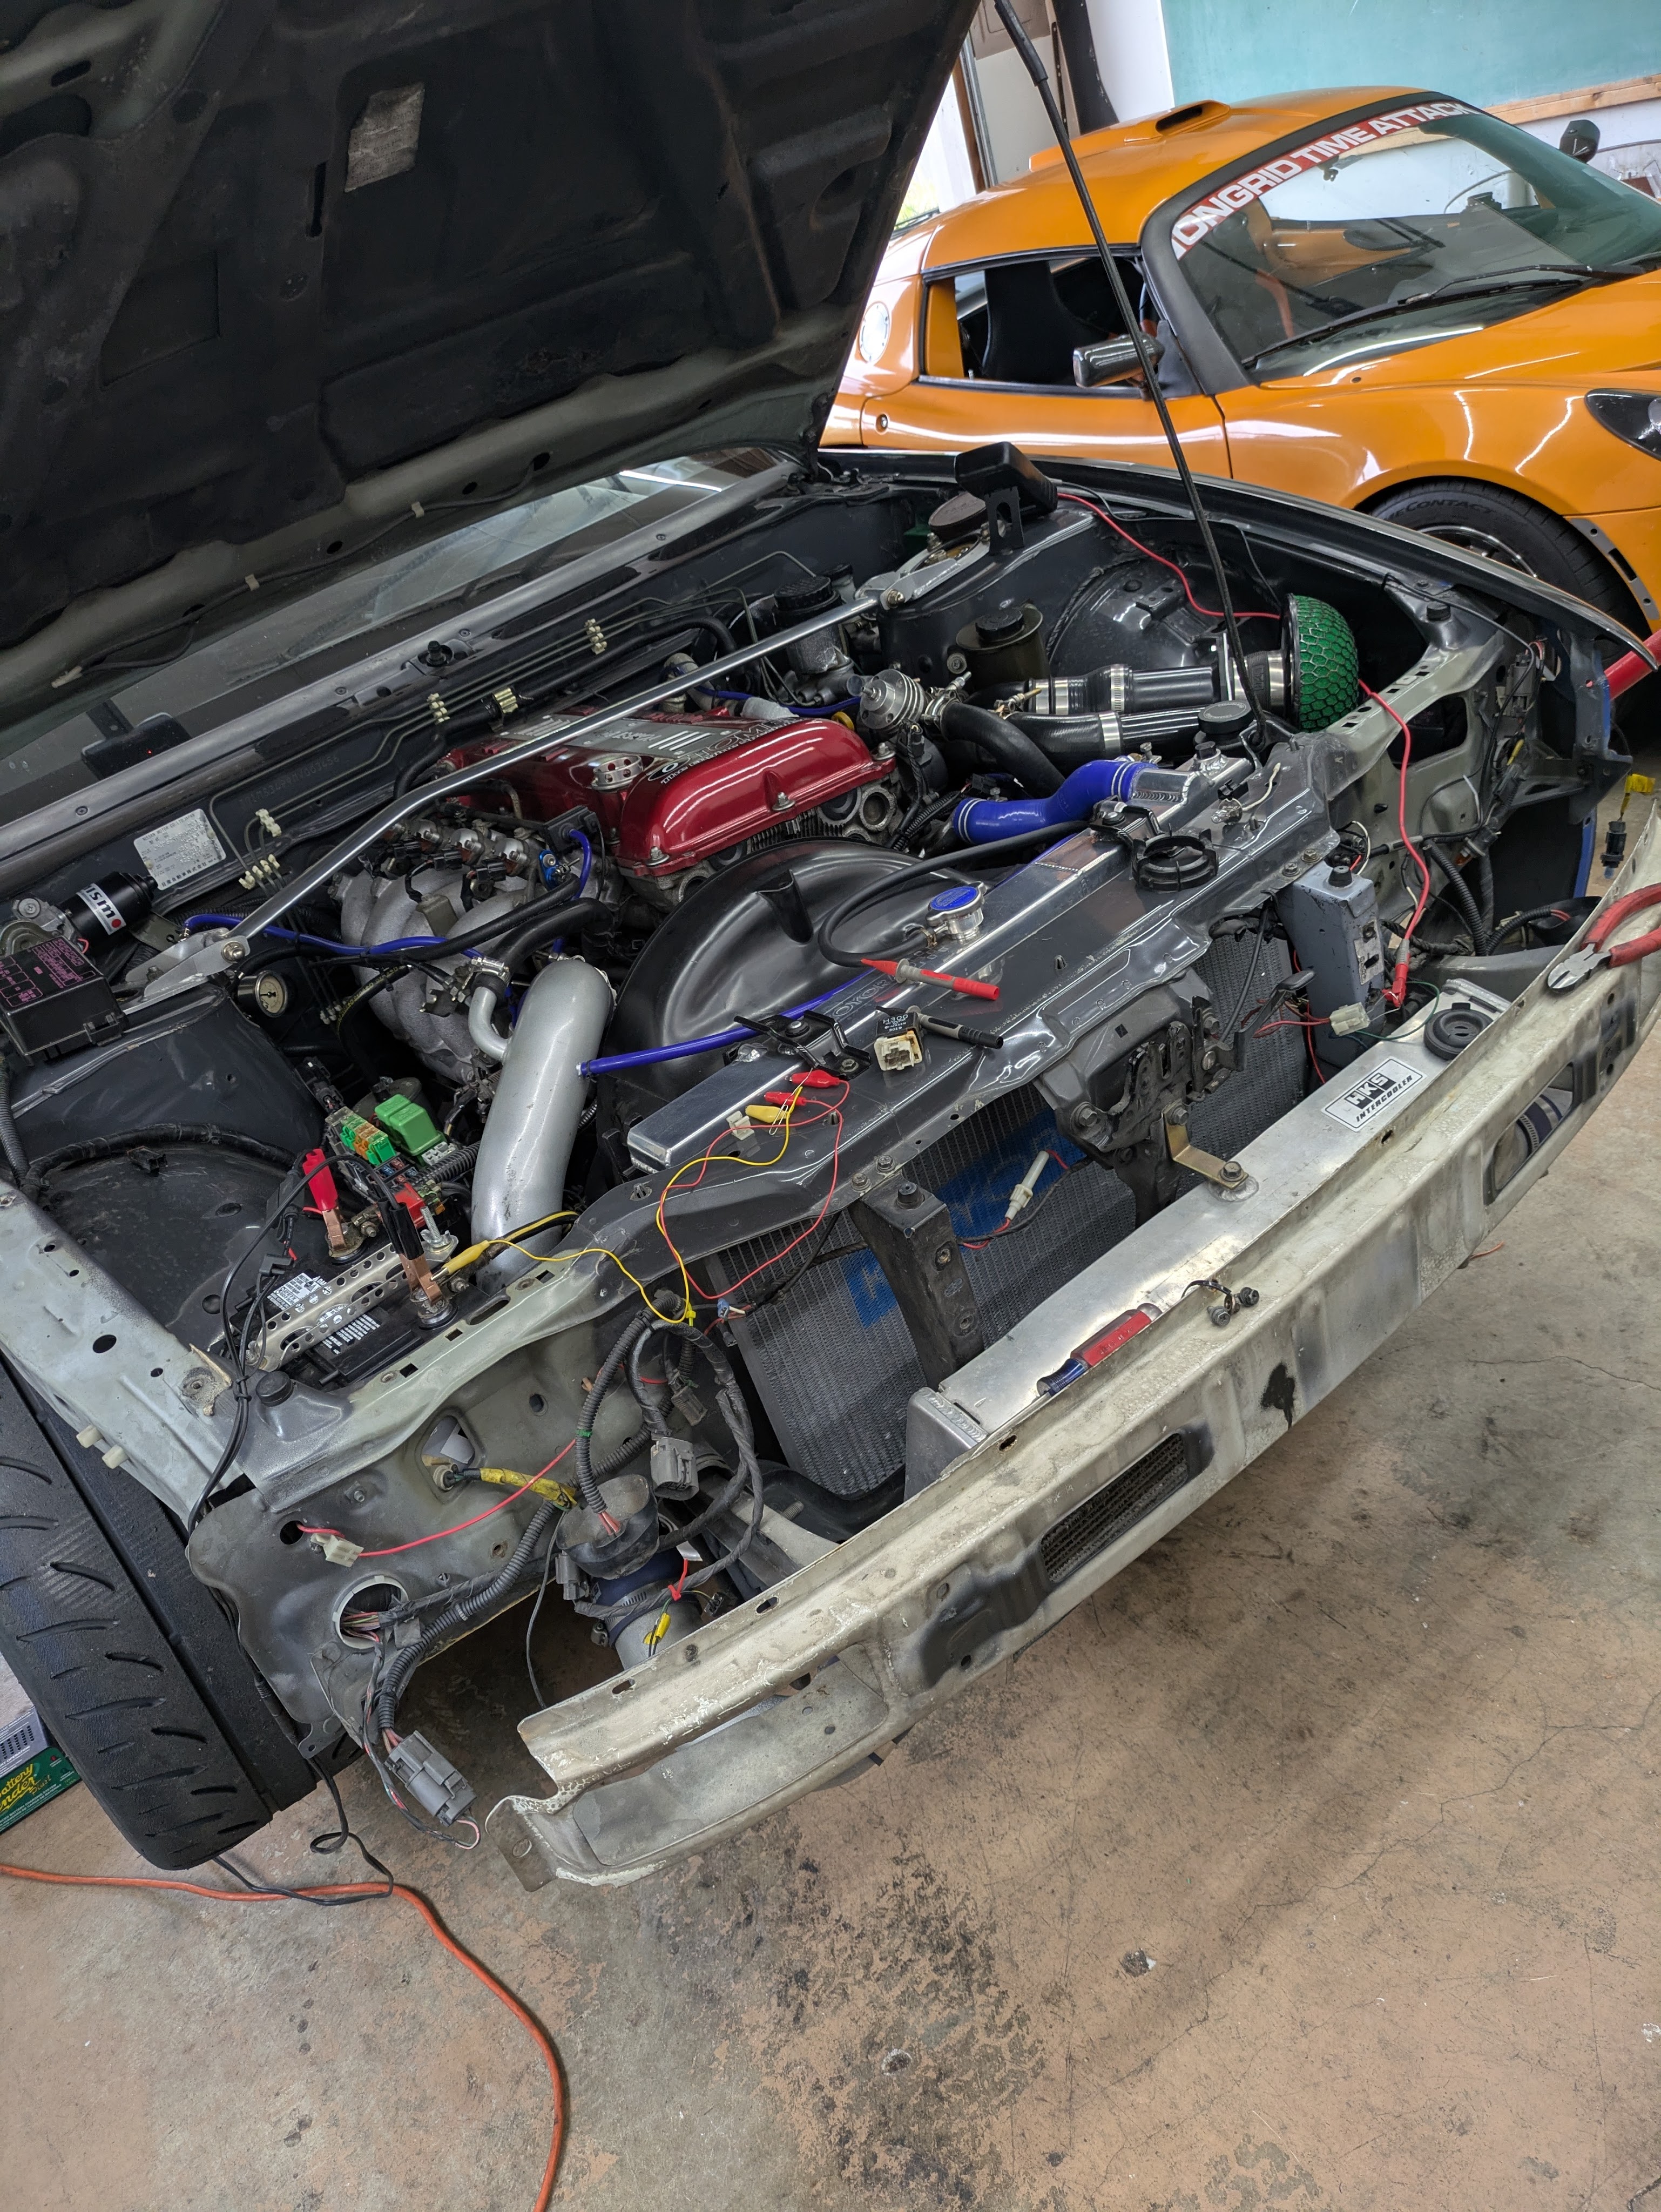
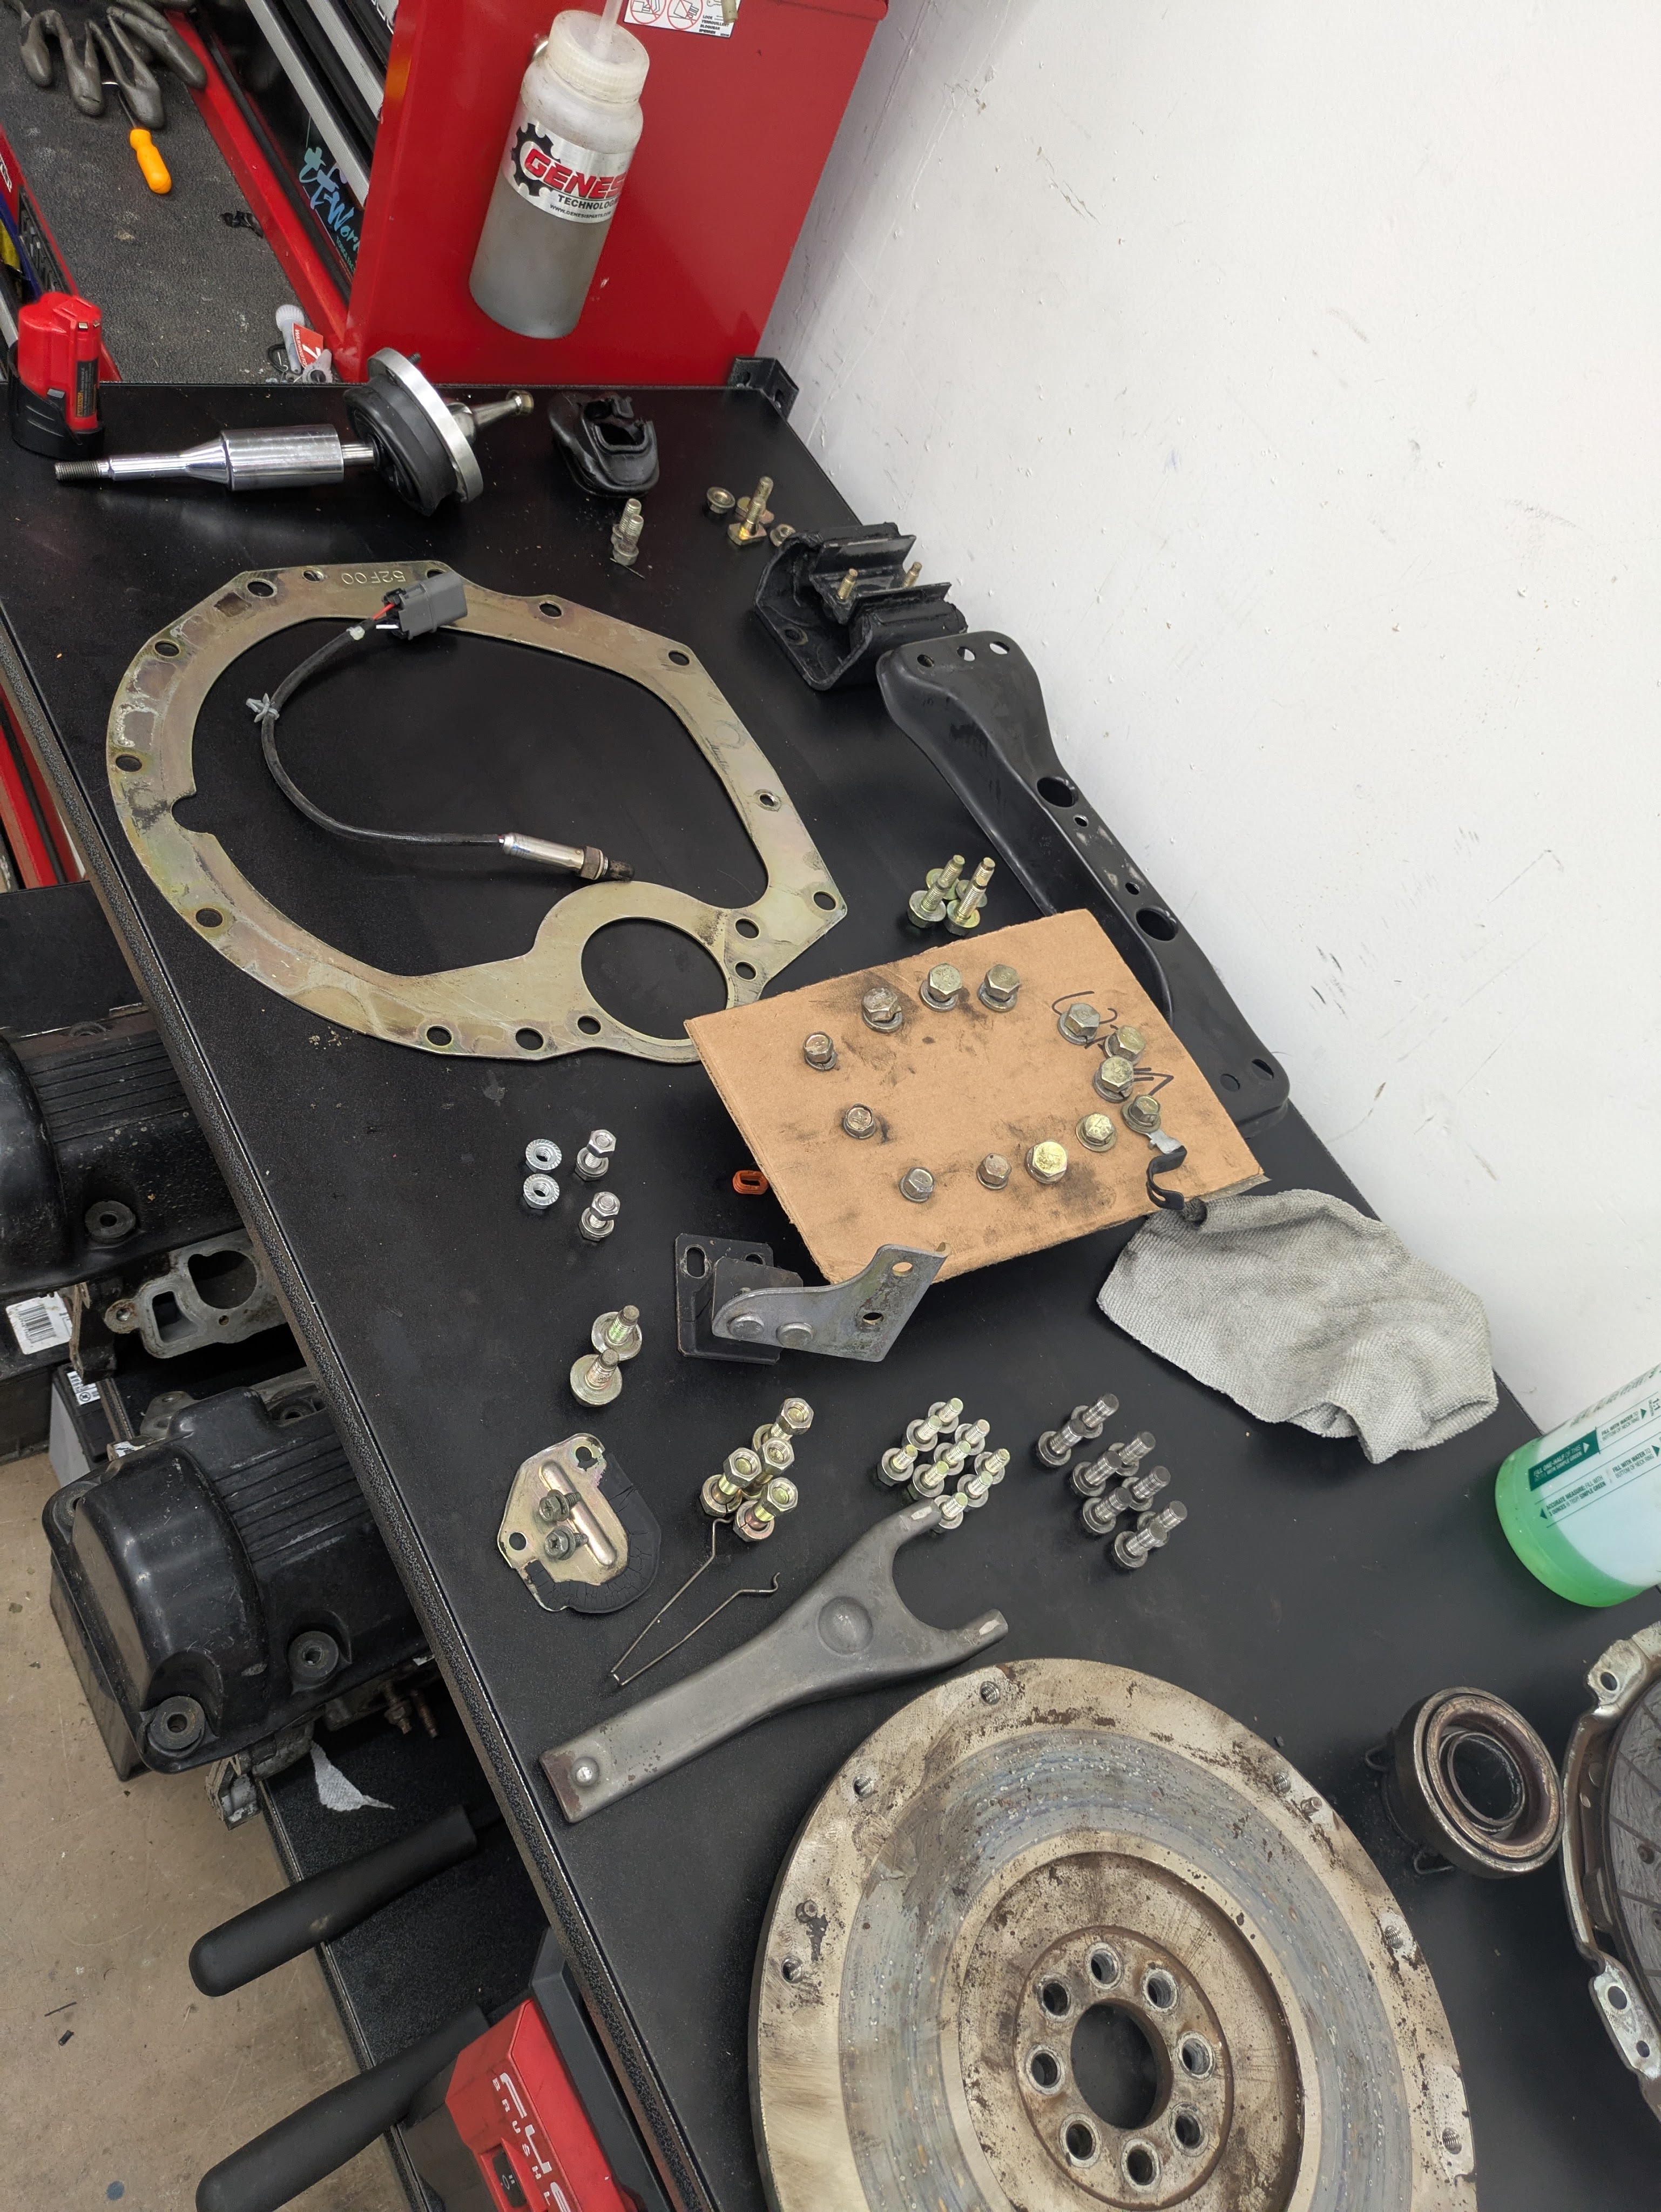
There were only a few more things leading up to the reinstallation of the transmission. One of which was getting it clean to accept some new parts. This small box SR trans has had a thick layer of grease and grime for God knows how long on it, and it was time to make it less gross. I wouldn’t call myself a clean freak, but at the same time, I don’t want to get gross every time I touch the car, and ideally once the leaks are fixed, it’ll stay nice.
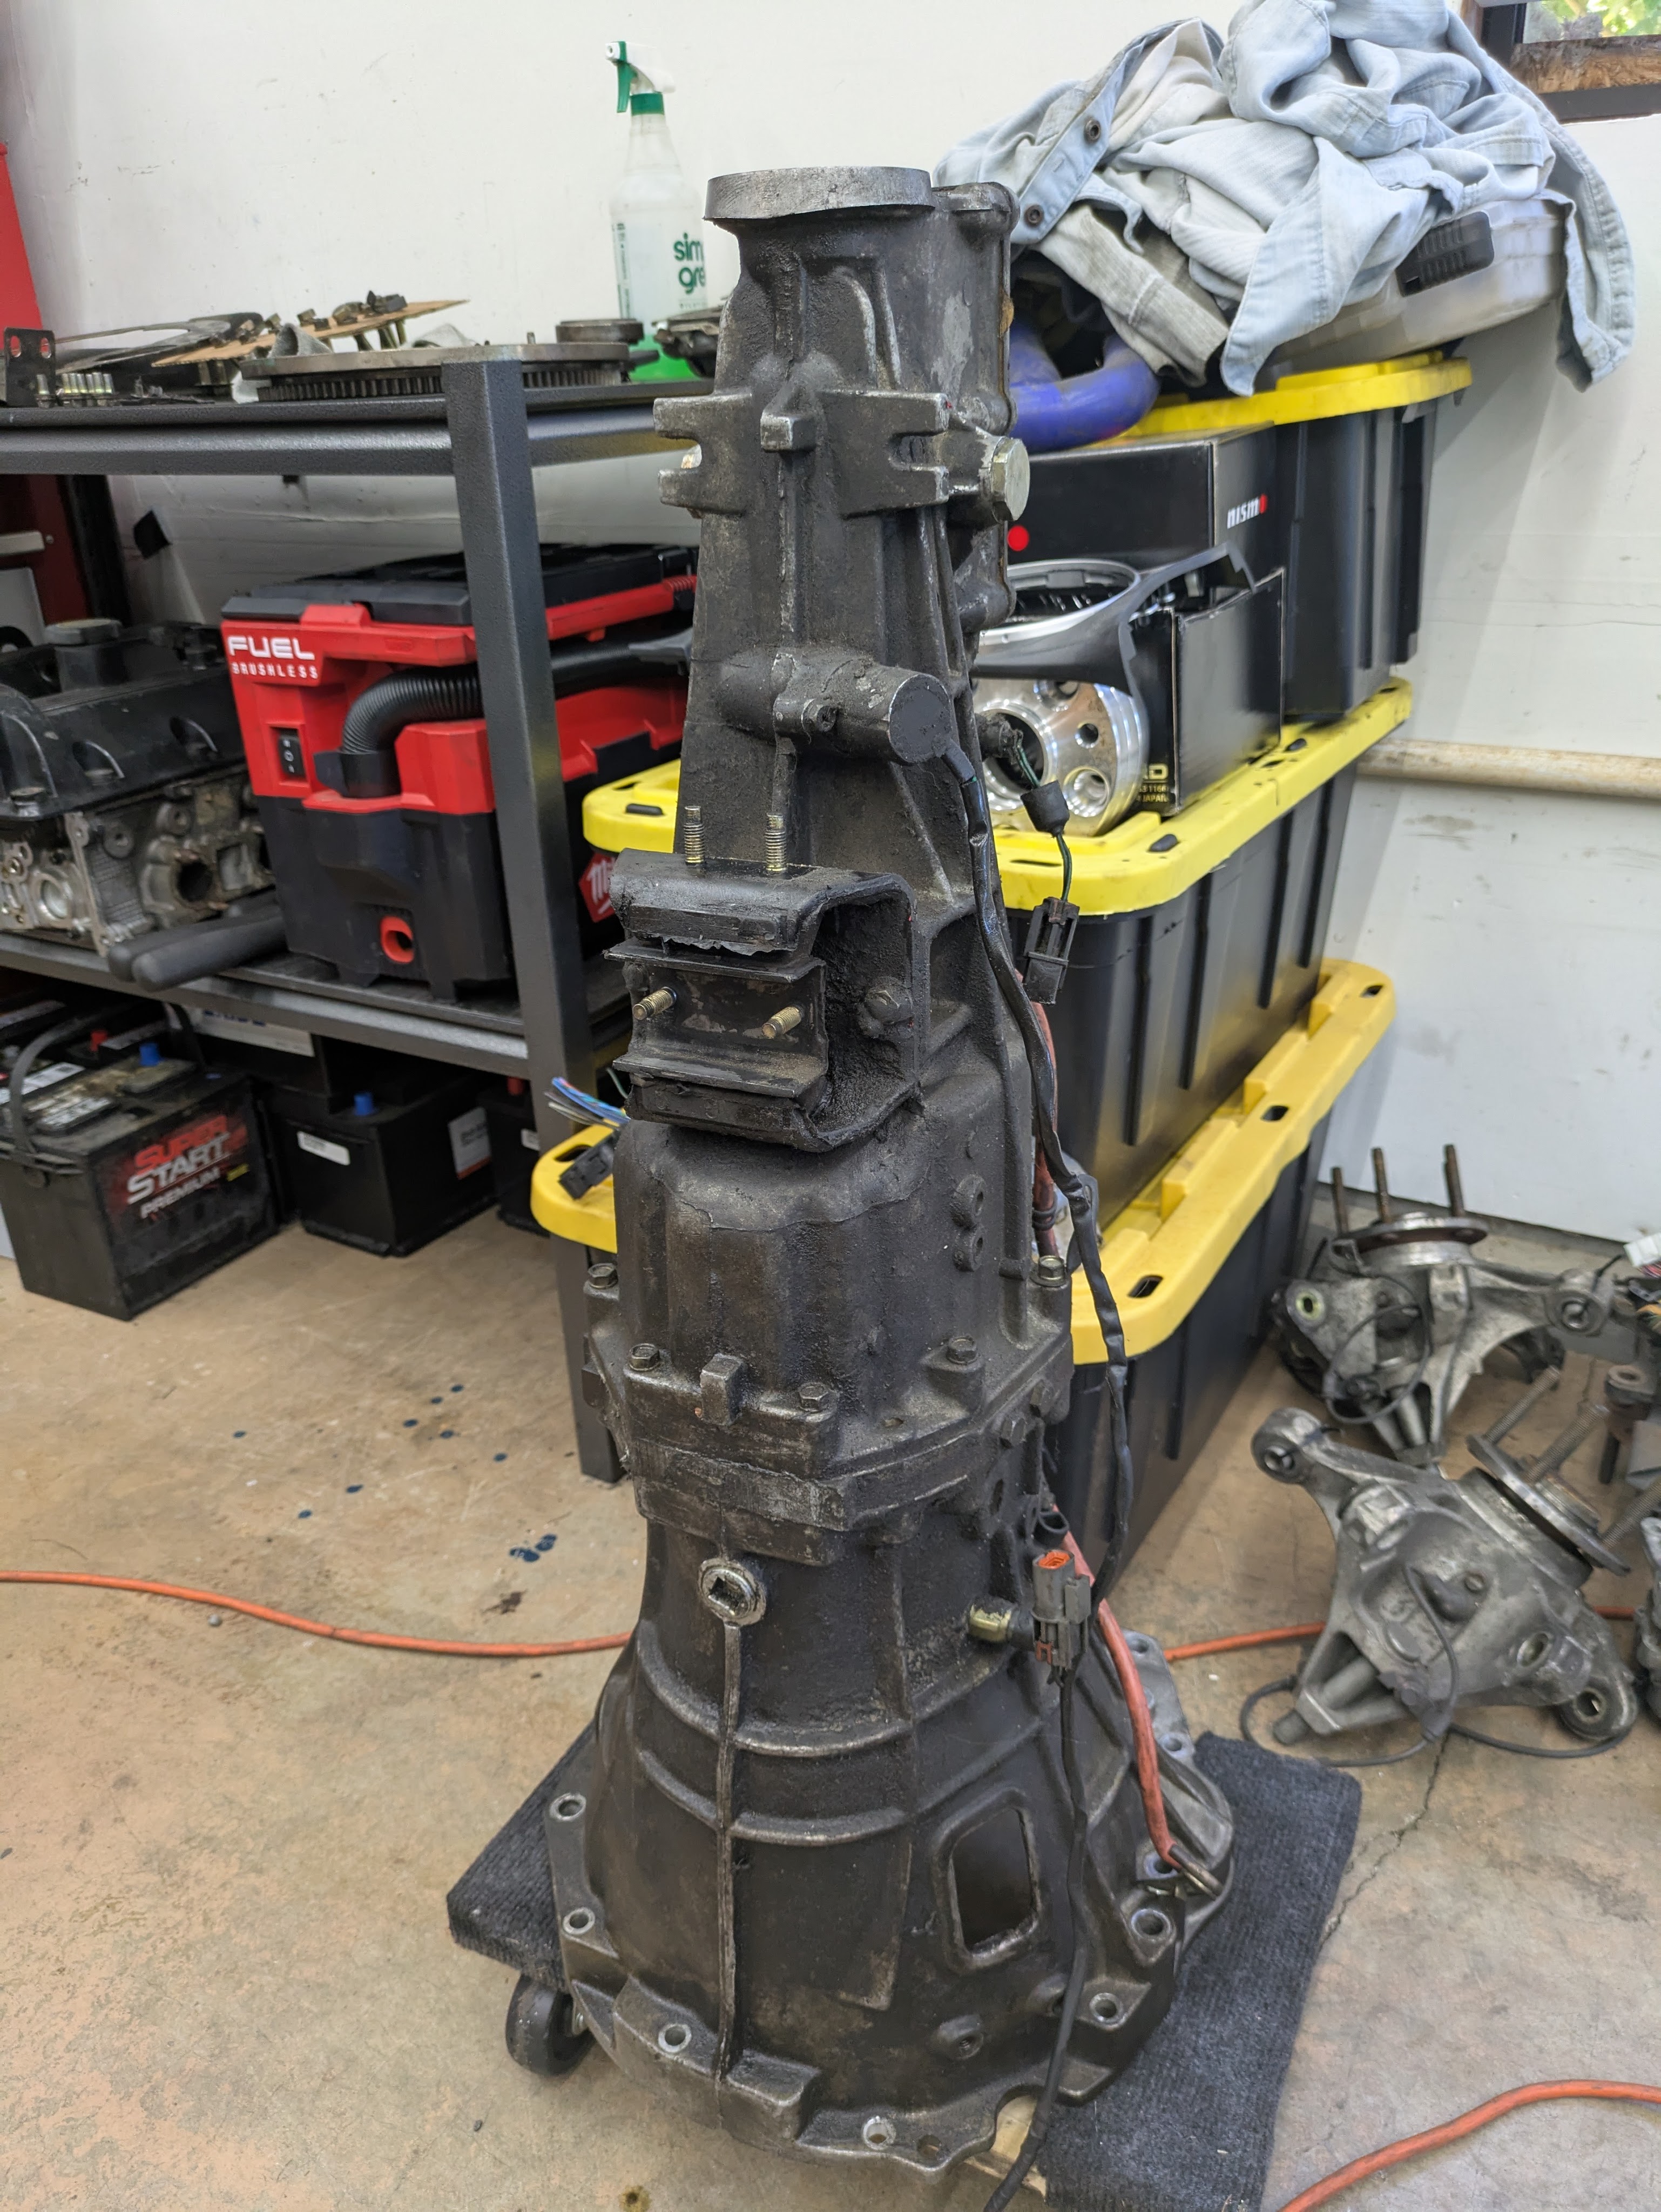
The smaller fasteners and parts got their bath in the ultrasonic cleaner, and they all turned out so nice. Still one of the best tools to have around.
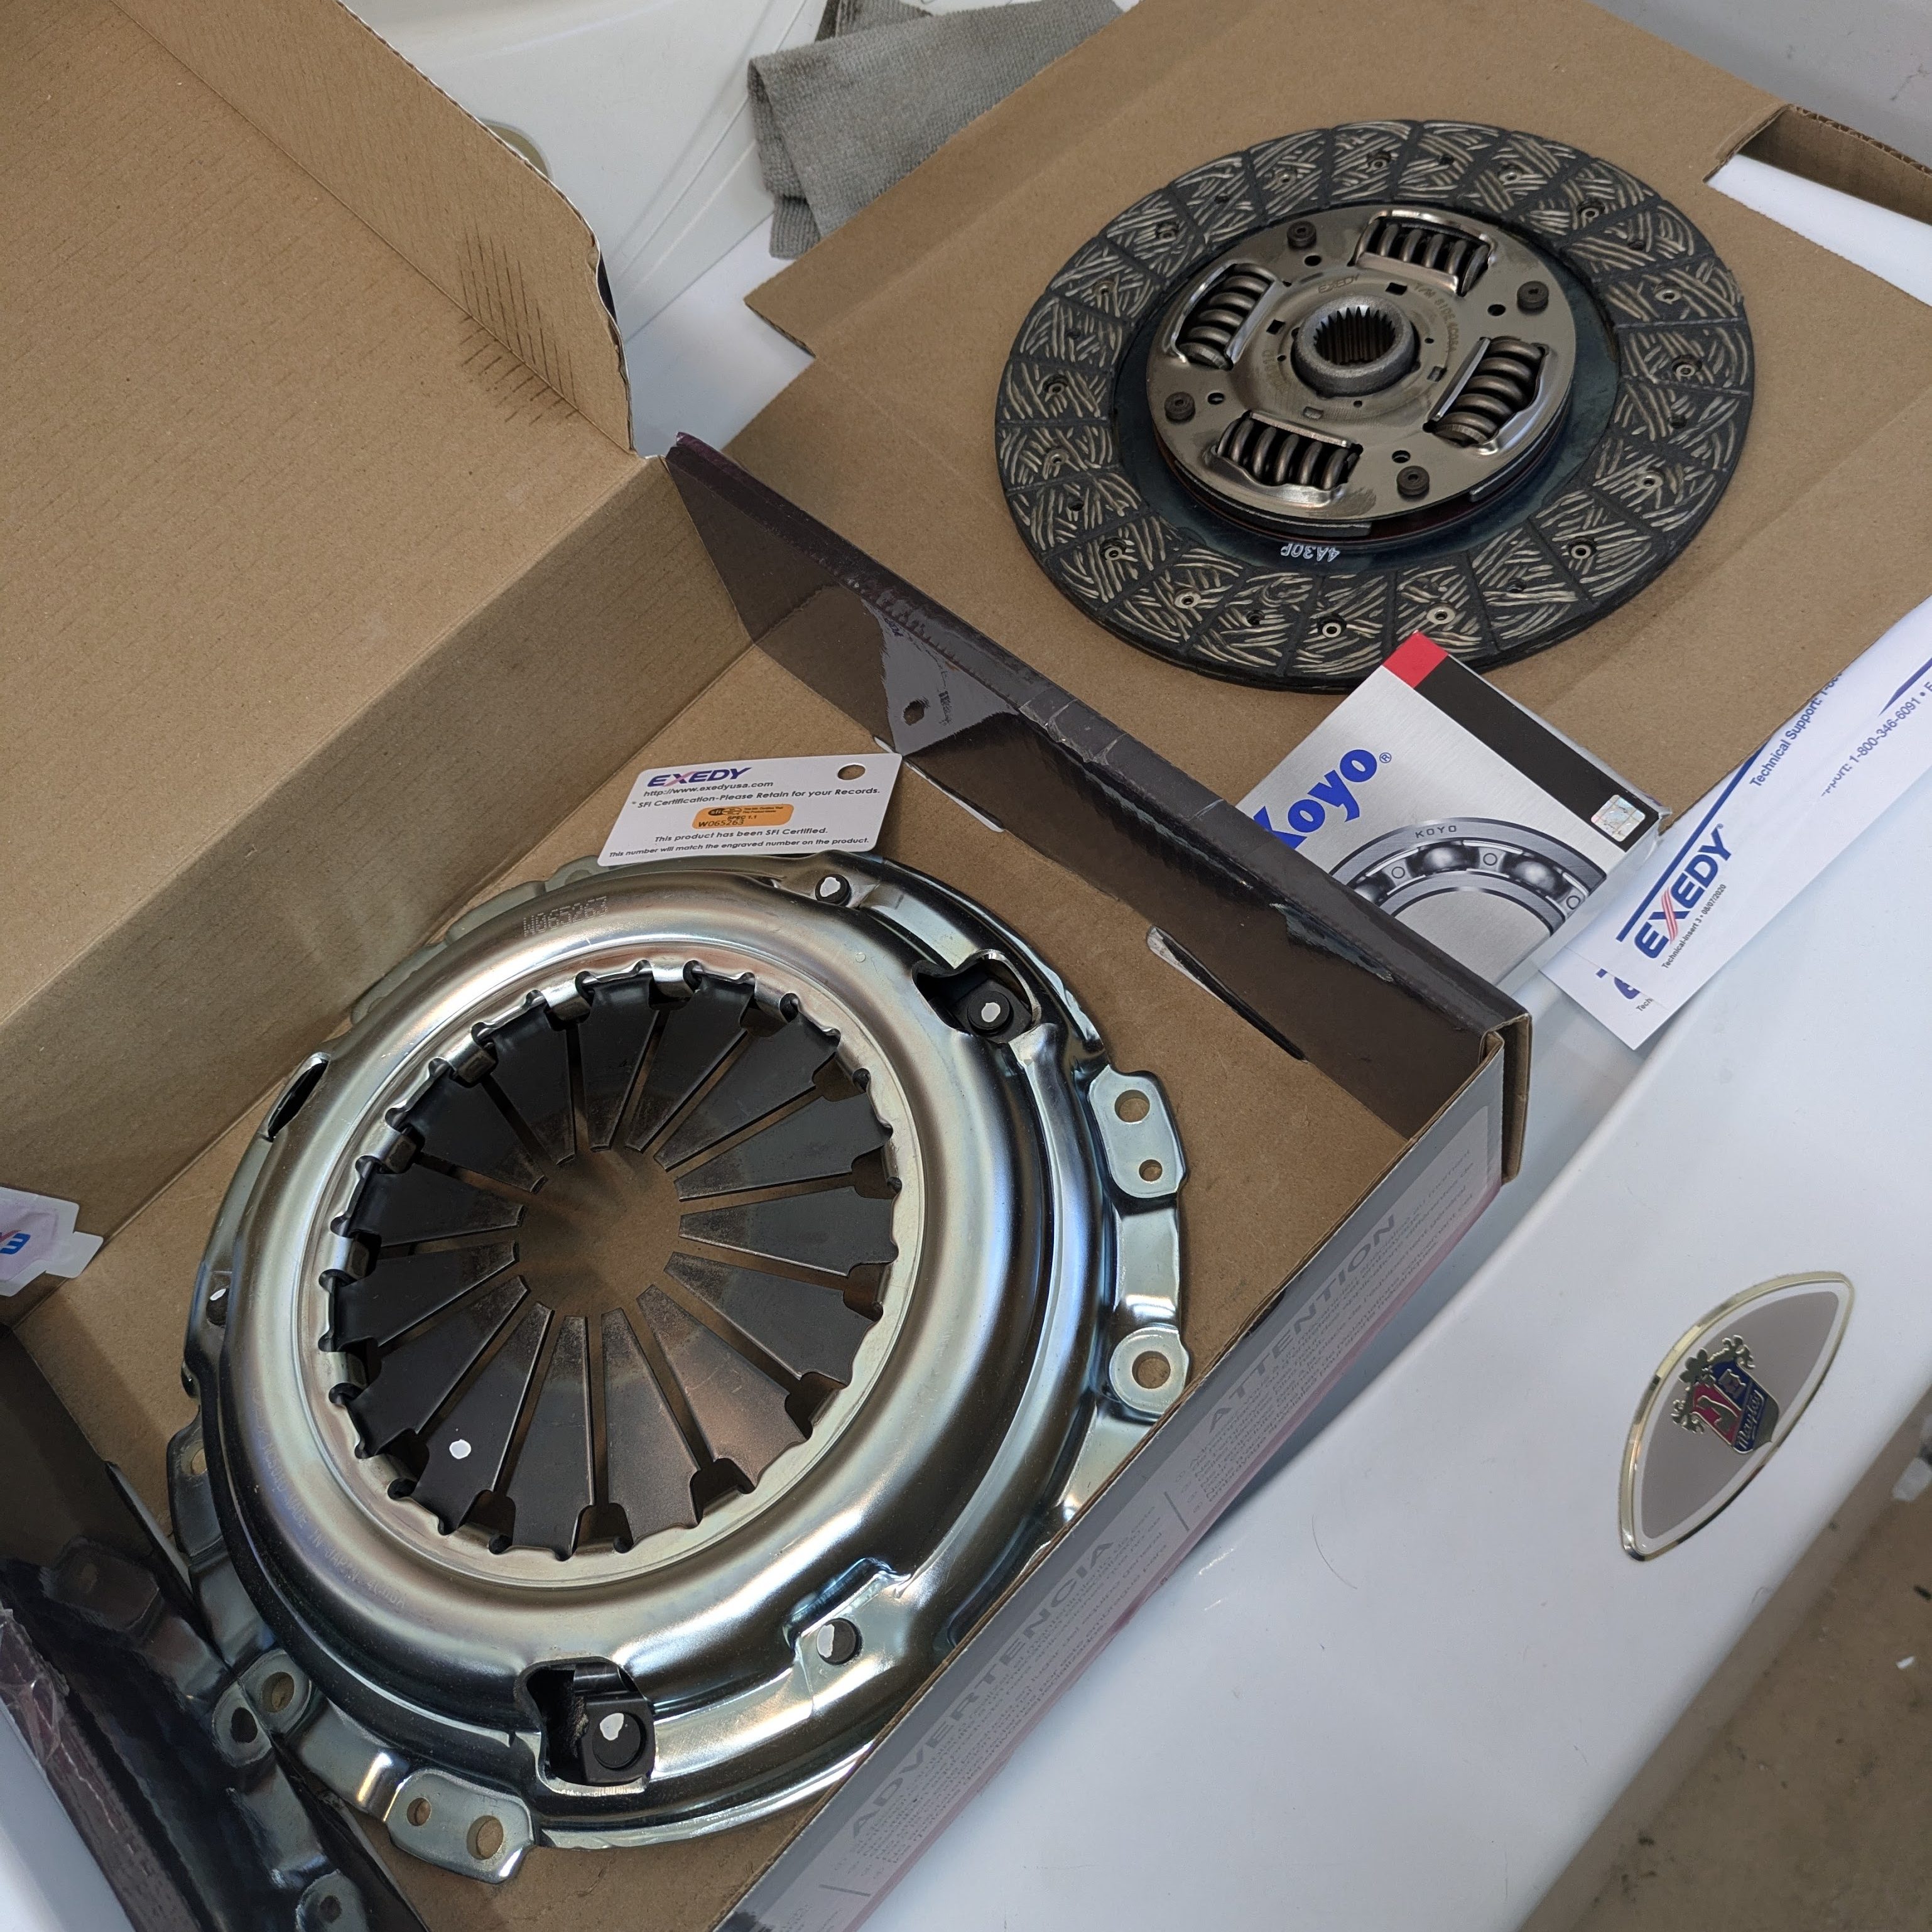
The new clutch had arrived by this point. TBD how long it says in the car, but it’ll work for now.
The final wiring task to complete before street miles was to wire in the VSS tap for the Defi Link Display. It uses vehicle speed to determine display state (goes into sleep mode if you aren’t moving), so with no VSS input, you have to run it in it’s demo mode to get any meaningful information out of it. Is this legacy hardware that is redundant after the Link is installed? For sure. Do I still really like it and want it to be in the car? Absolutely. It’s rad, and with a VSS tap and the proper wave calibration, it can display speed digitally which will be really nice.
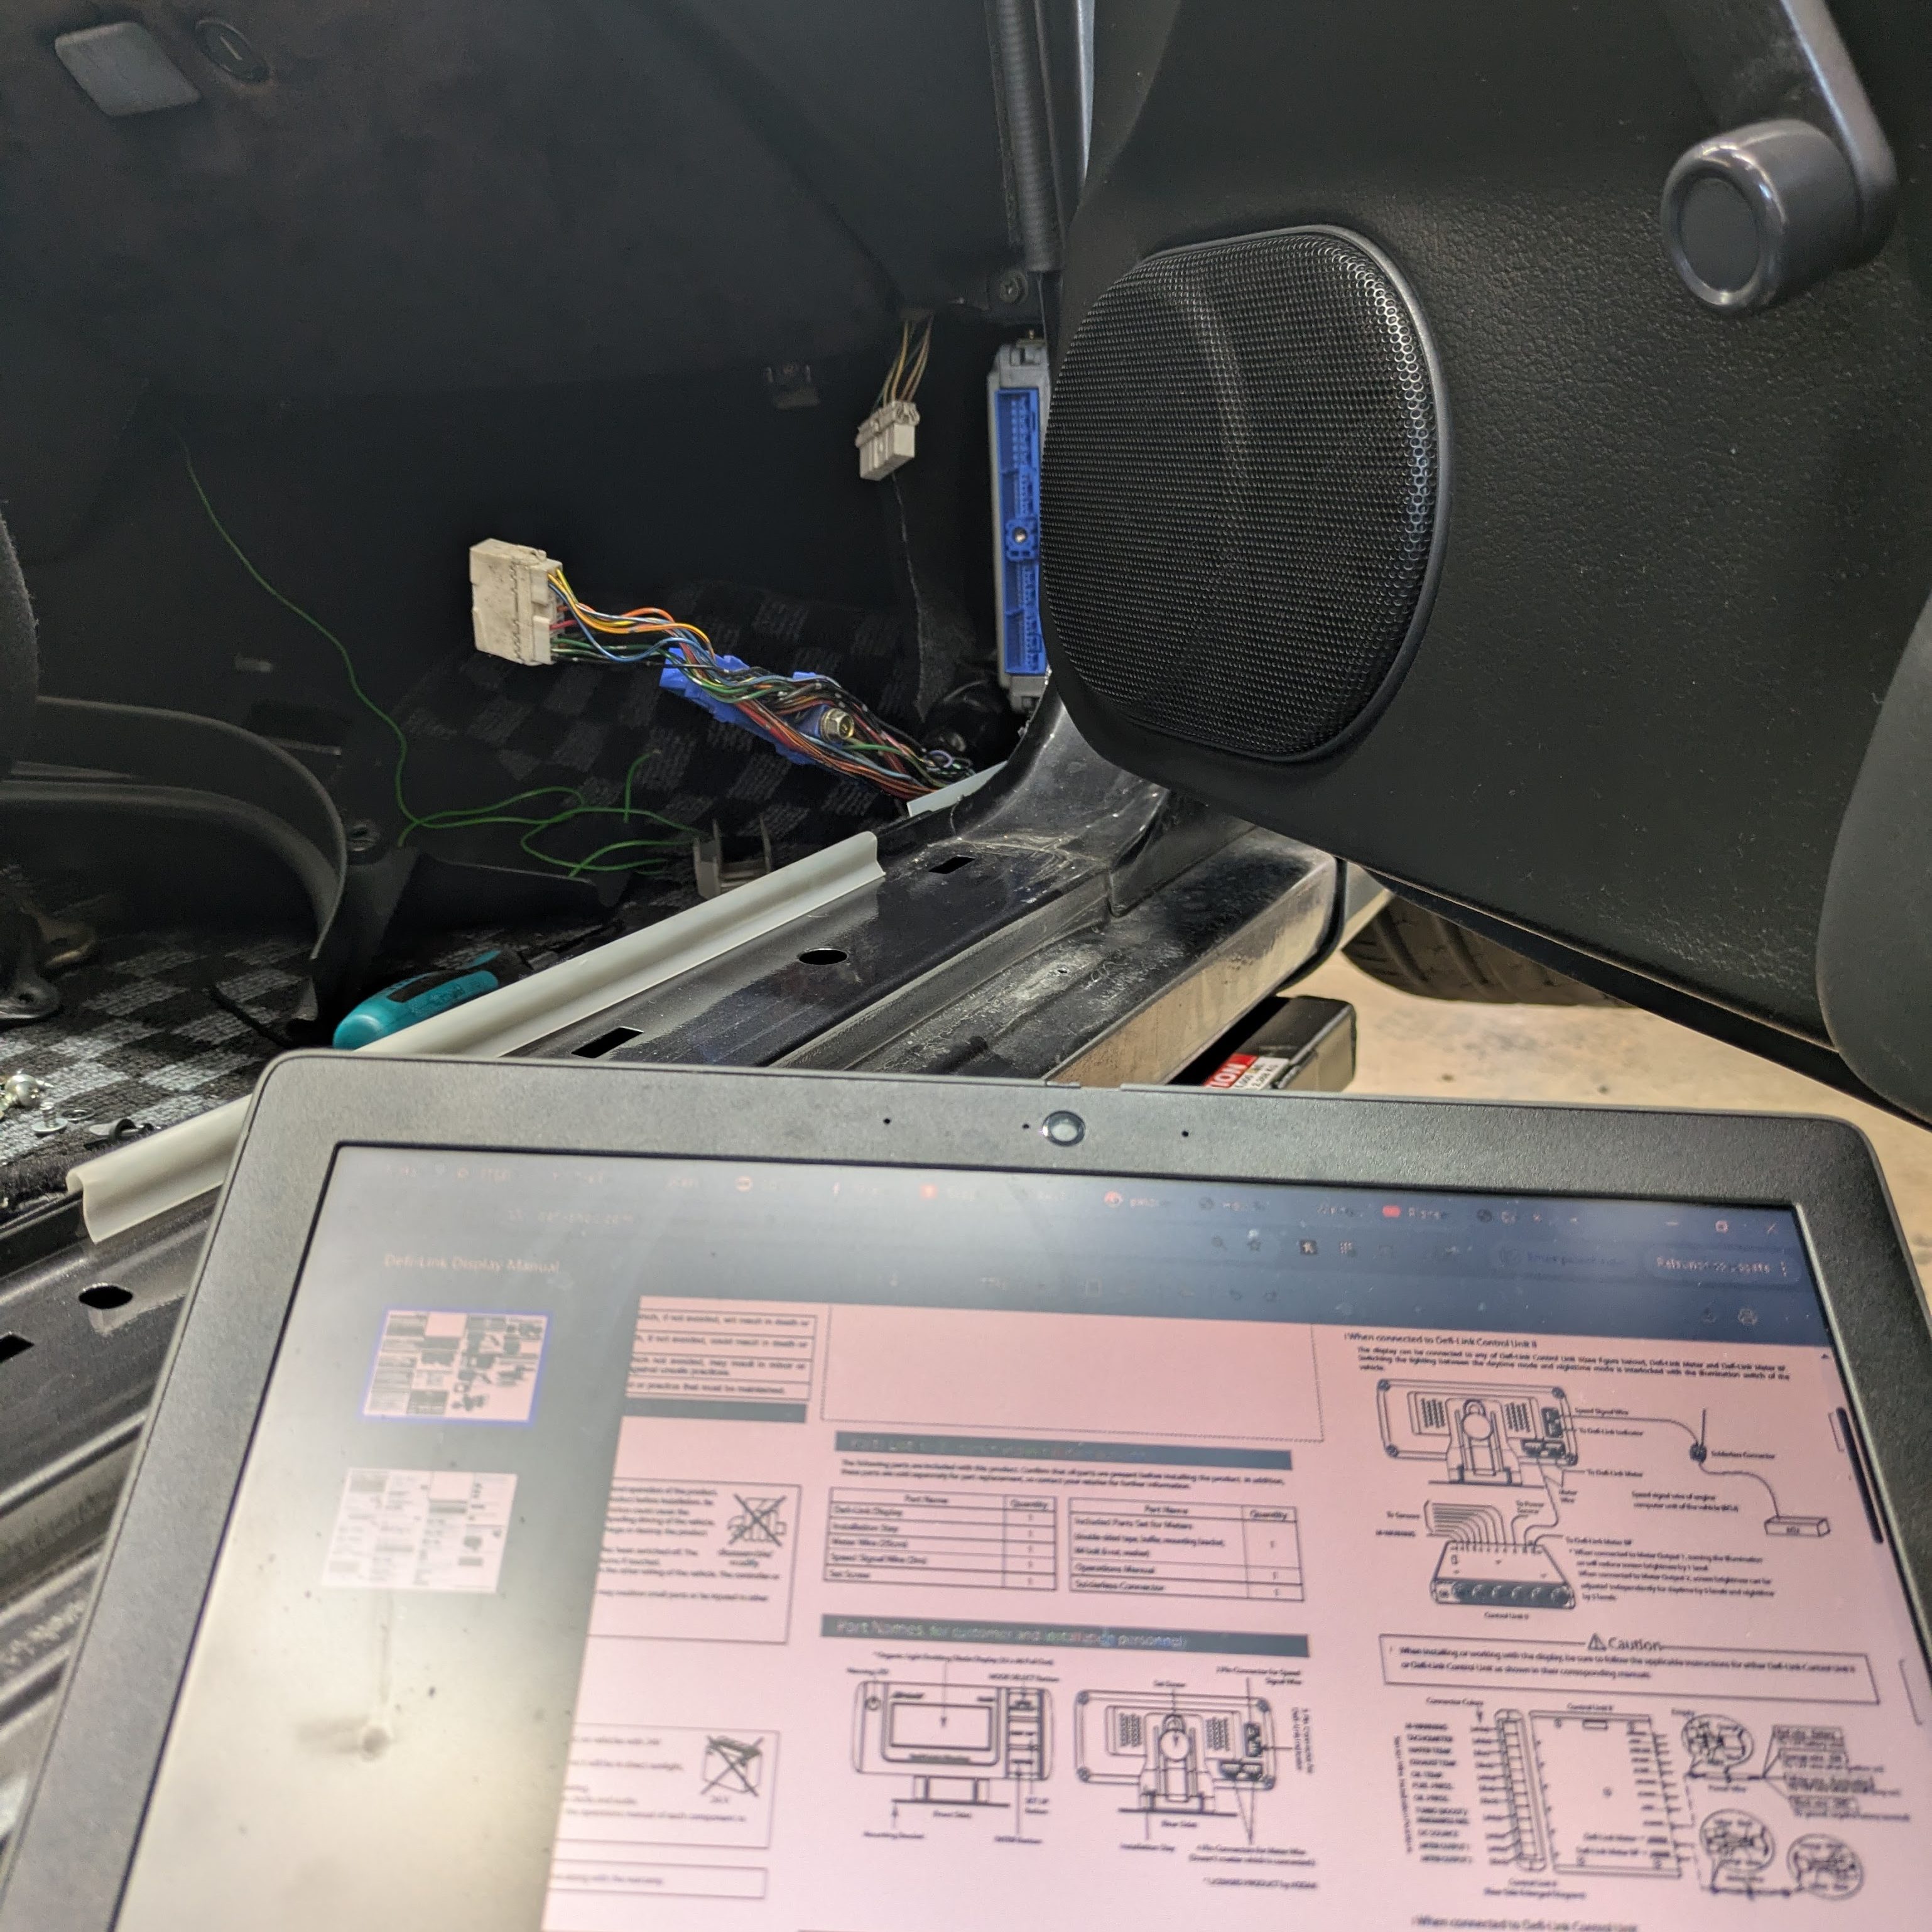
I elected to tap into the engine harness rather than the chassis harness, due to it’s replaceable nature if a Wiring Specialties harness makes it’s way into the car.
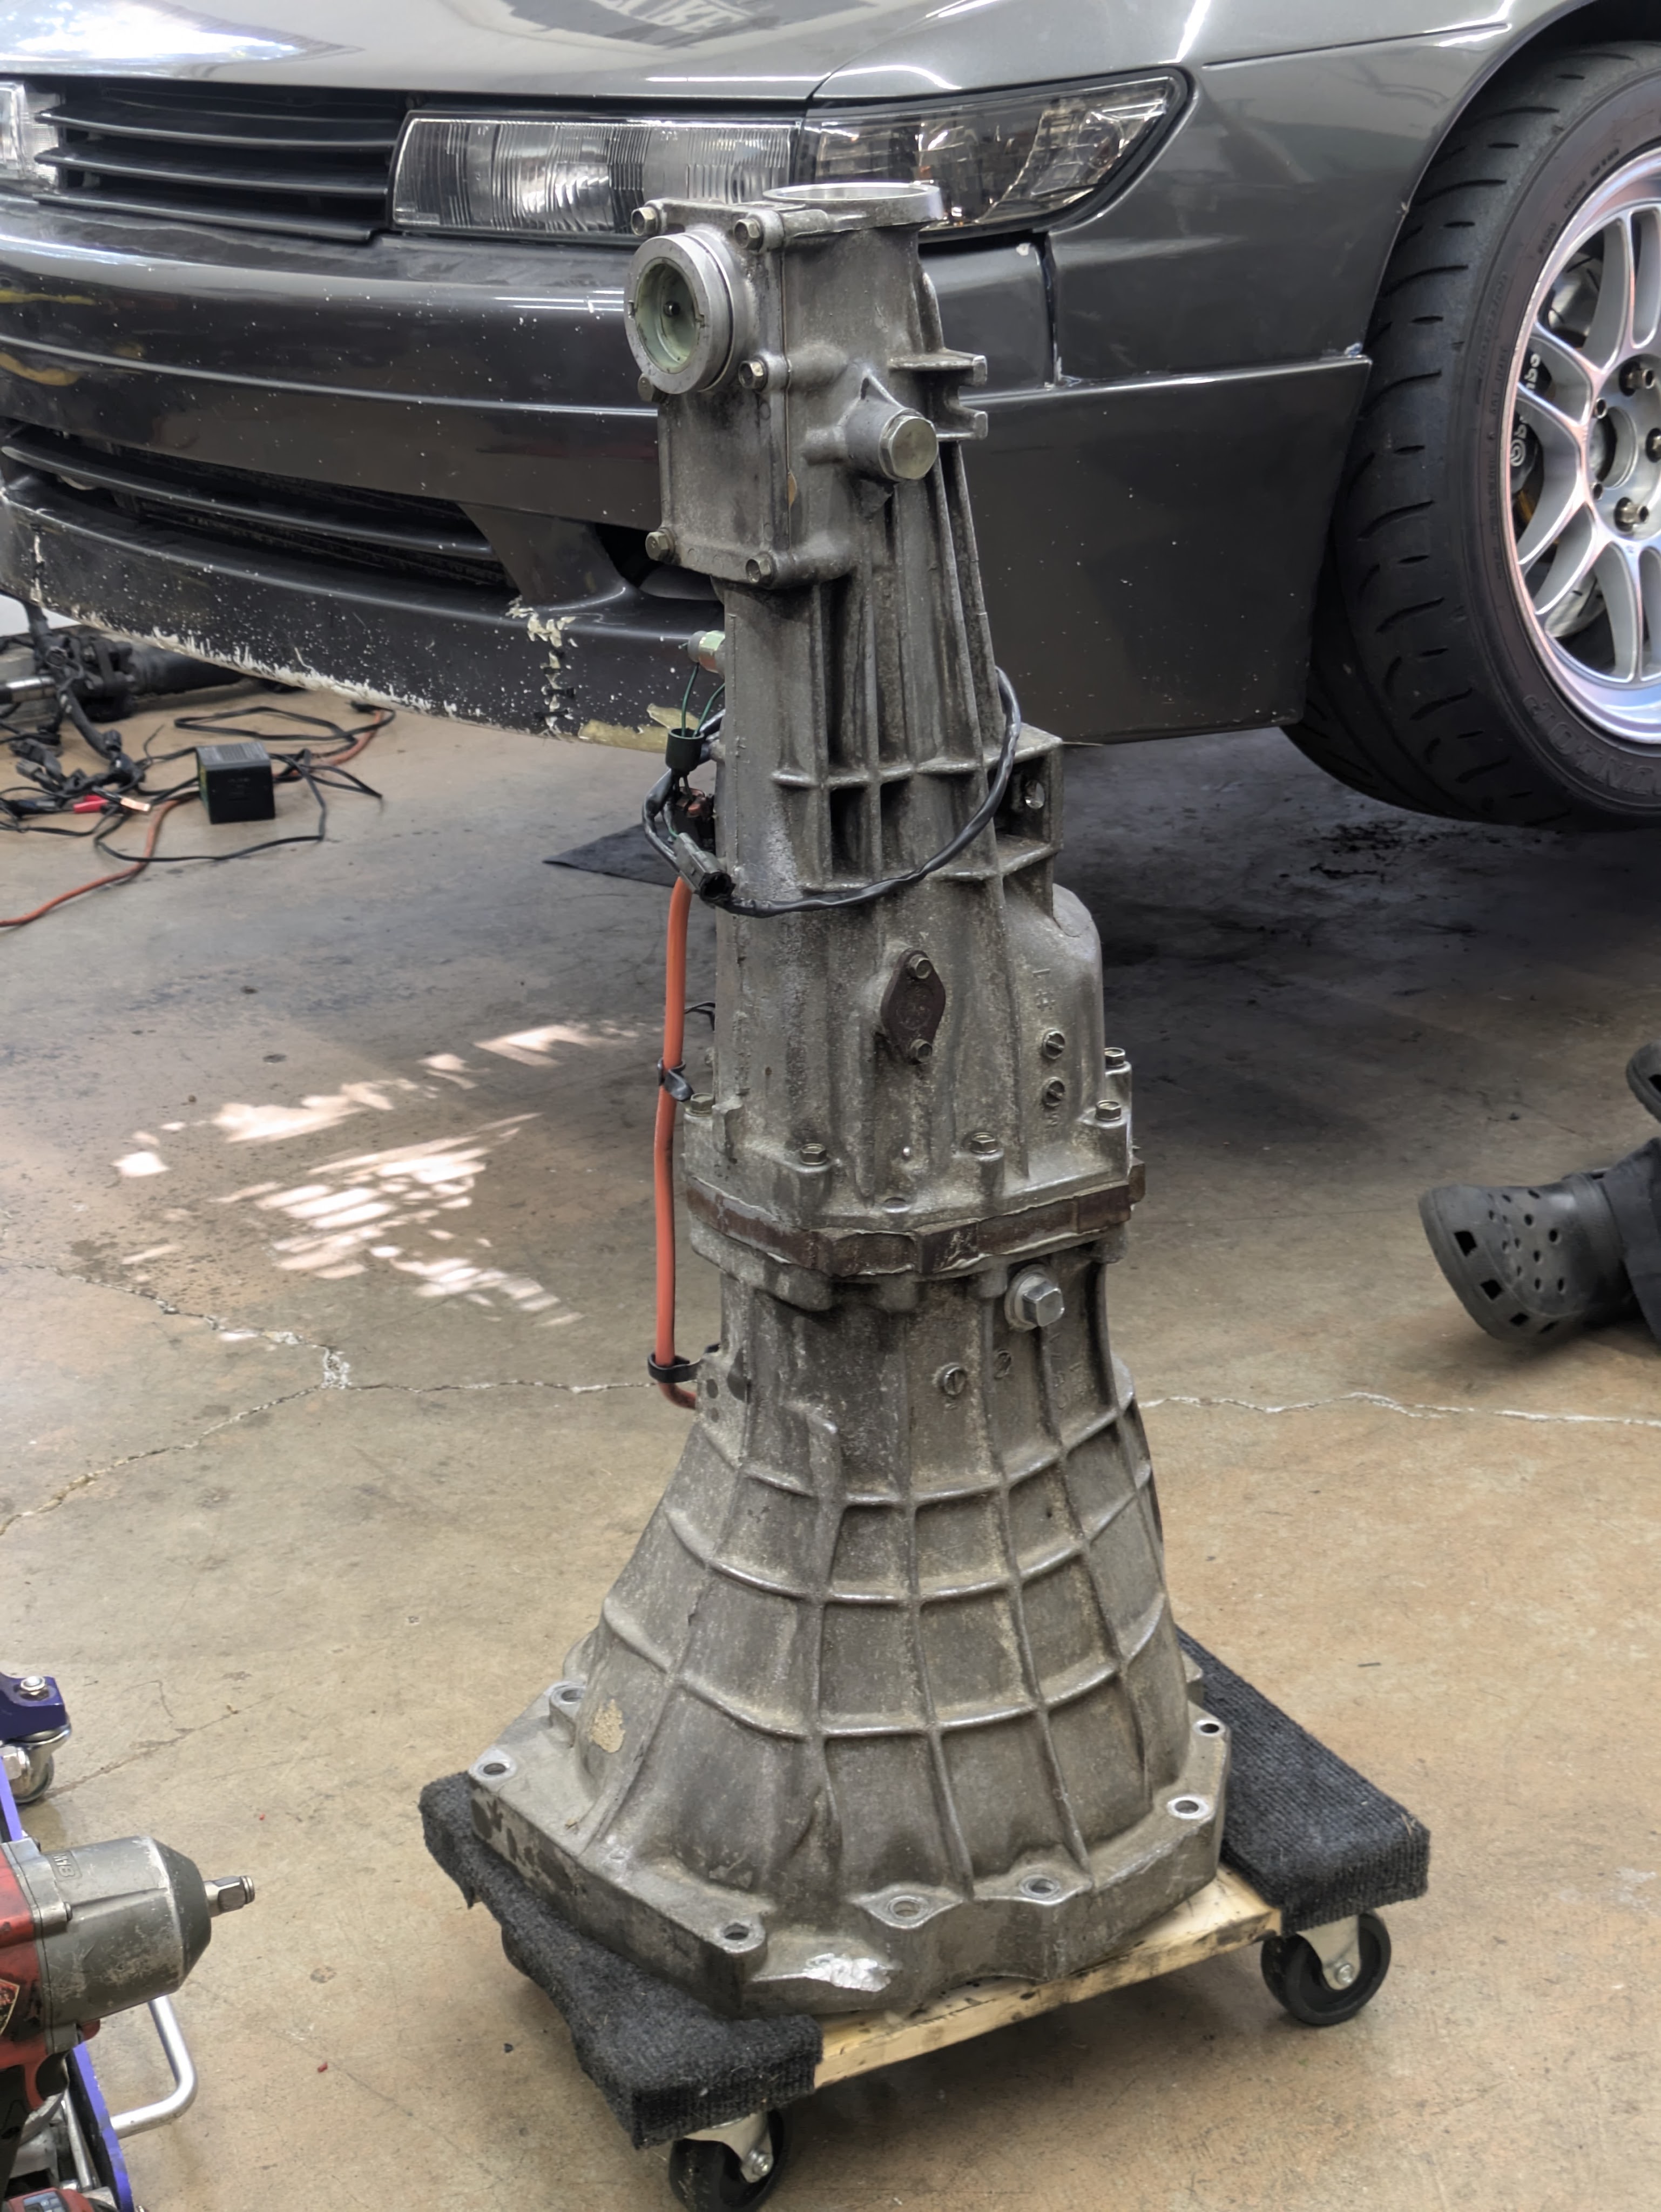
Now it was time for re-install, which went mechanically well. It took a bit of extra time to square away some loose ends, mostly some mildly unhappy chassis threads, as well as some incorrectly positioned hardware. With that all finished, and everything back in it’s home, we were ready for first start.
That part didn’t go to plan. As soon as I hit the starter, something was wrong. I know what an SR starter sounds like, and this was not it. After an inital 10 second run, we could tell something was very wrong. There were 3 clues that we had after a very brief start:
1. The whole thing sounded awful, like there was metal on metal contact somewhere in the bellhousing.
2. There was a thick, white smoke POURING out of the bellhousing.
3. The motor wanted to shut off if left unattended.
Immediately my brain (and everyone that I consulted) thought that the clutch disc was in backwards. A reasonable overall explanation, however given the geometry of the stock clutch and flywheel, you would know that something is heinously wrong just upon bolting it down (hell, the disc might break). I was convinced it wasn’t because that is something I pay a ton of attention to after hearing horror stories.
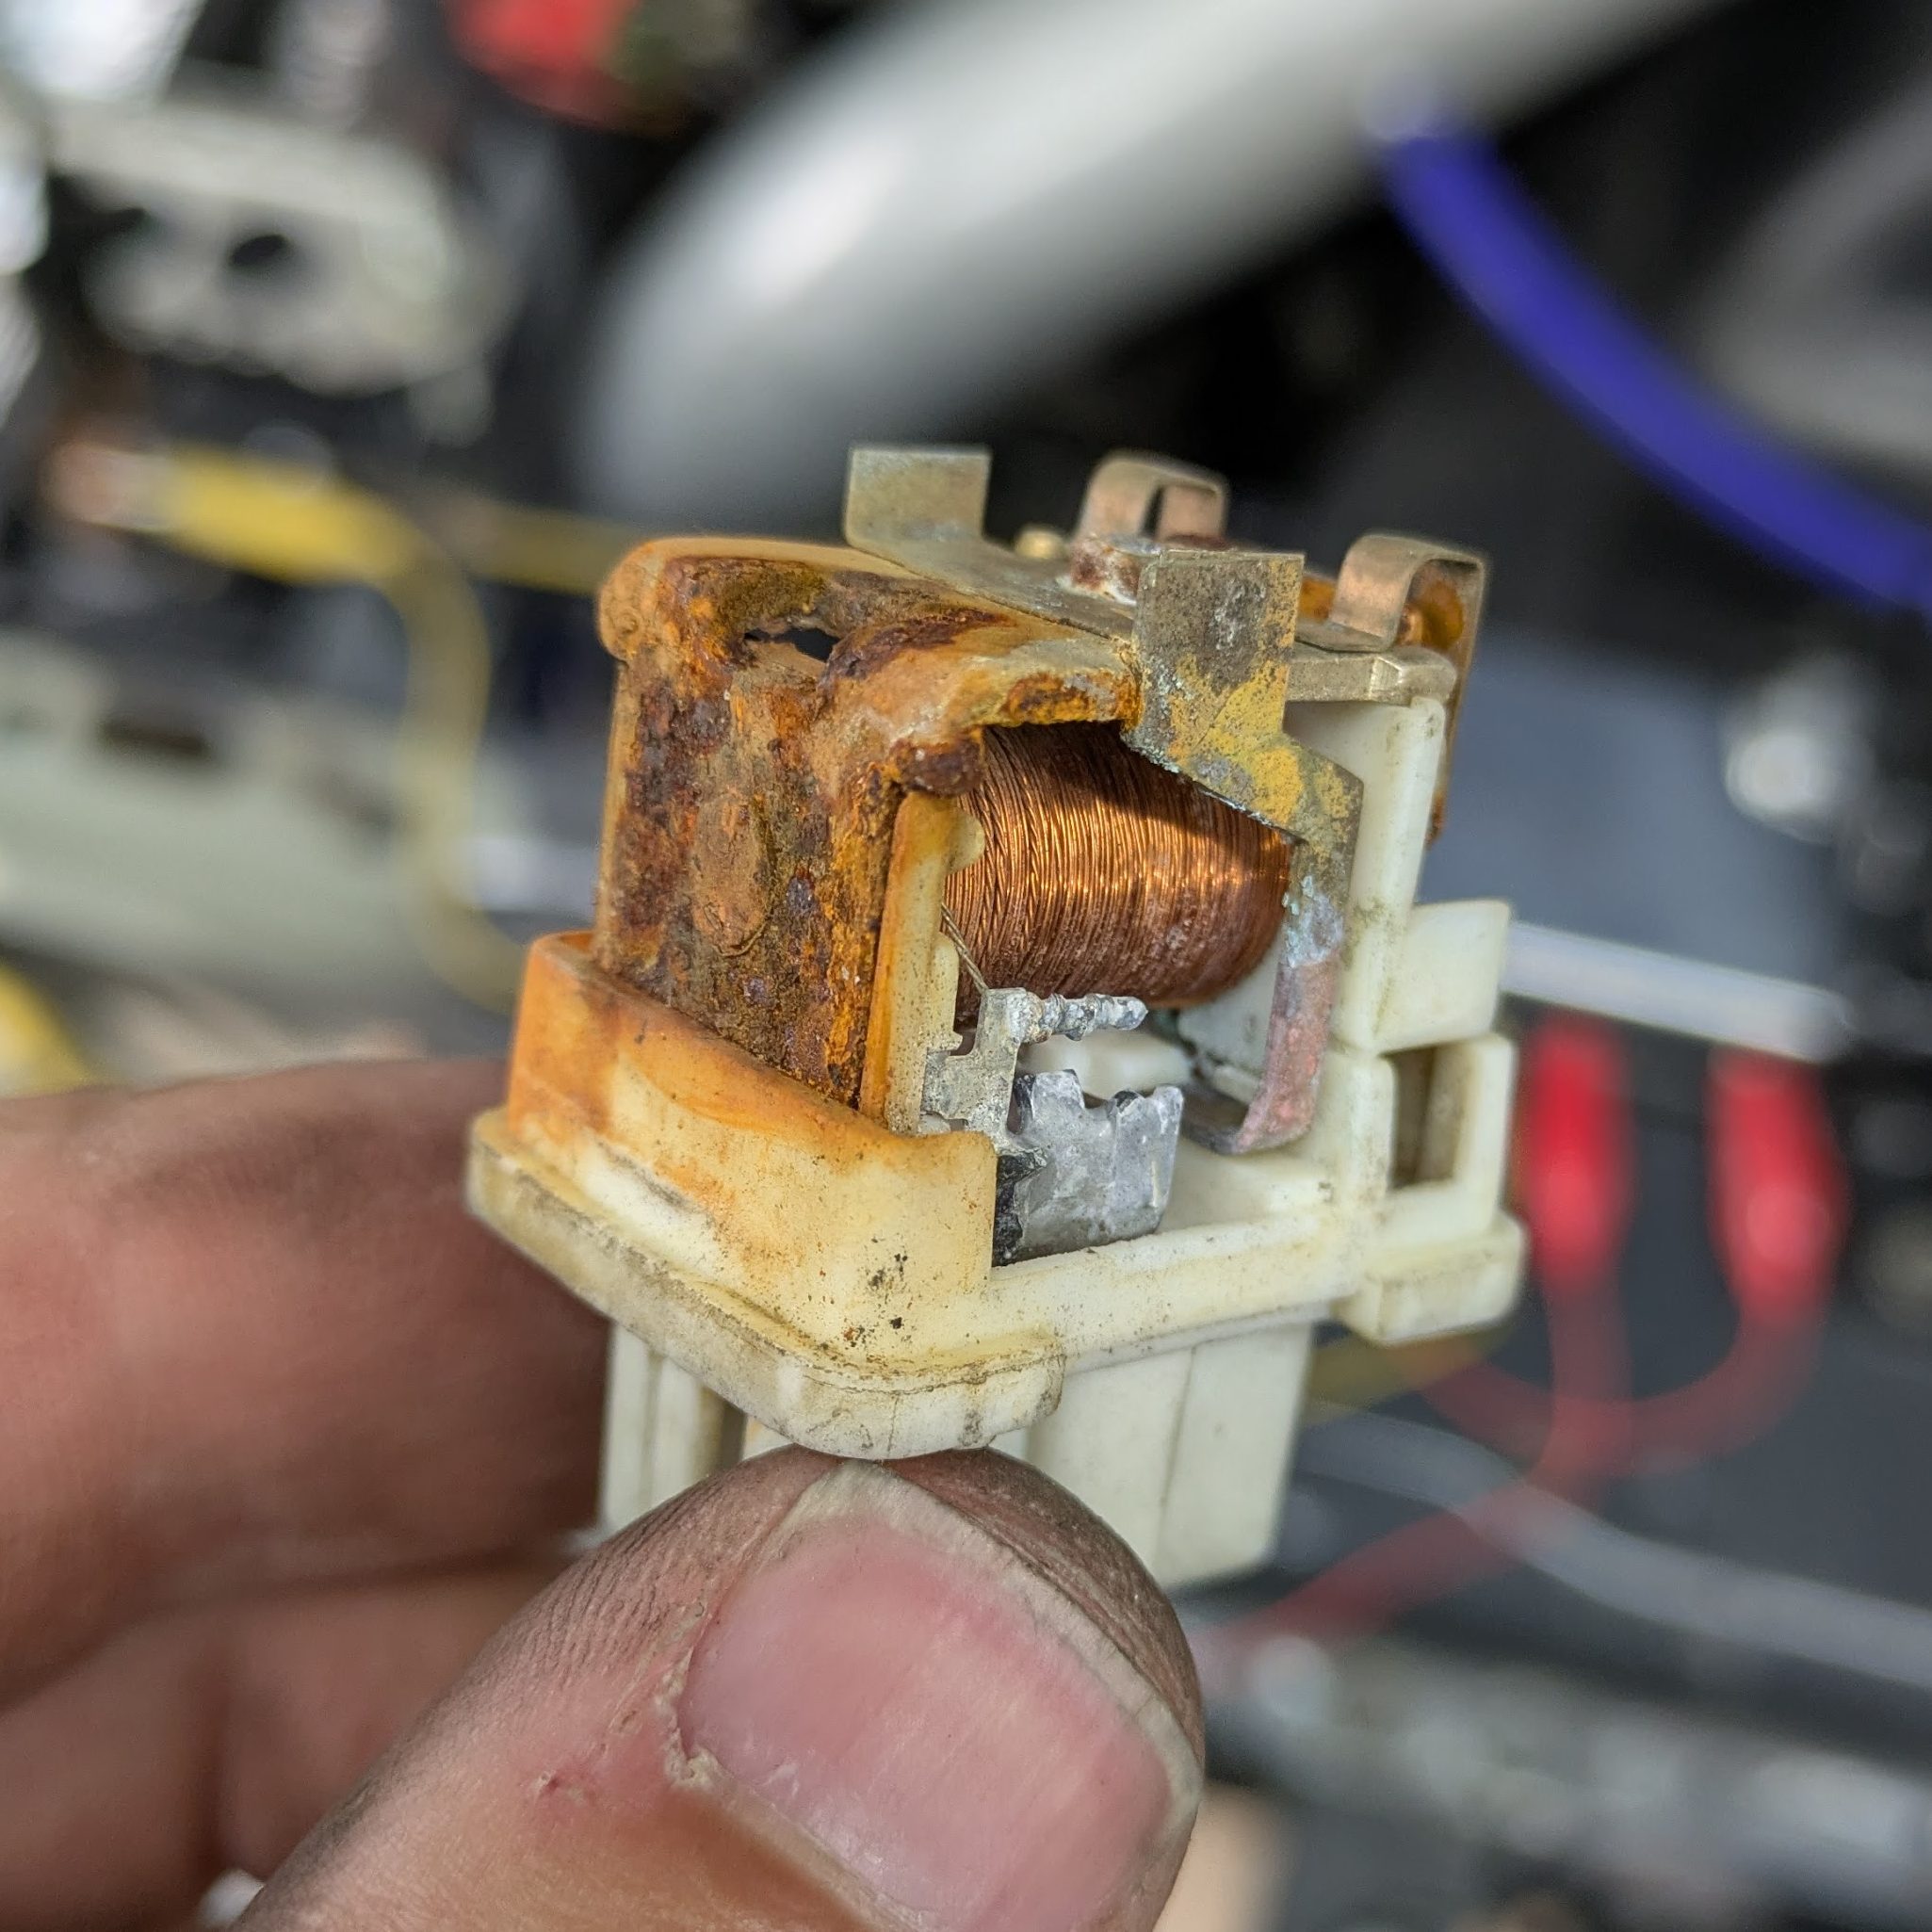
The second theory was that the starter was sticking. This would explain the howling, the dragging down of the motor, and the smoke. If the pinion is sticking out, it is going to radically overdrive the starter beyond its operating window, which would lead it to immediately heat up (which is did) and burn off anything in contact with it.
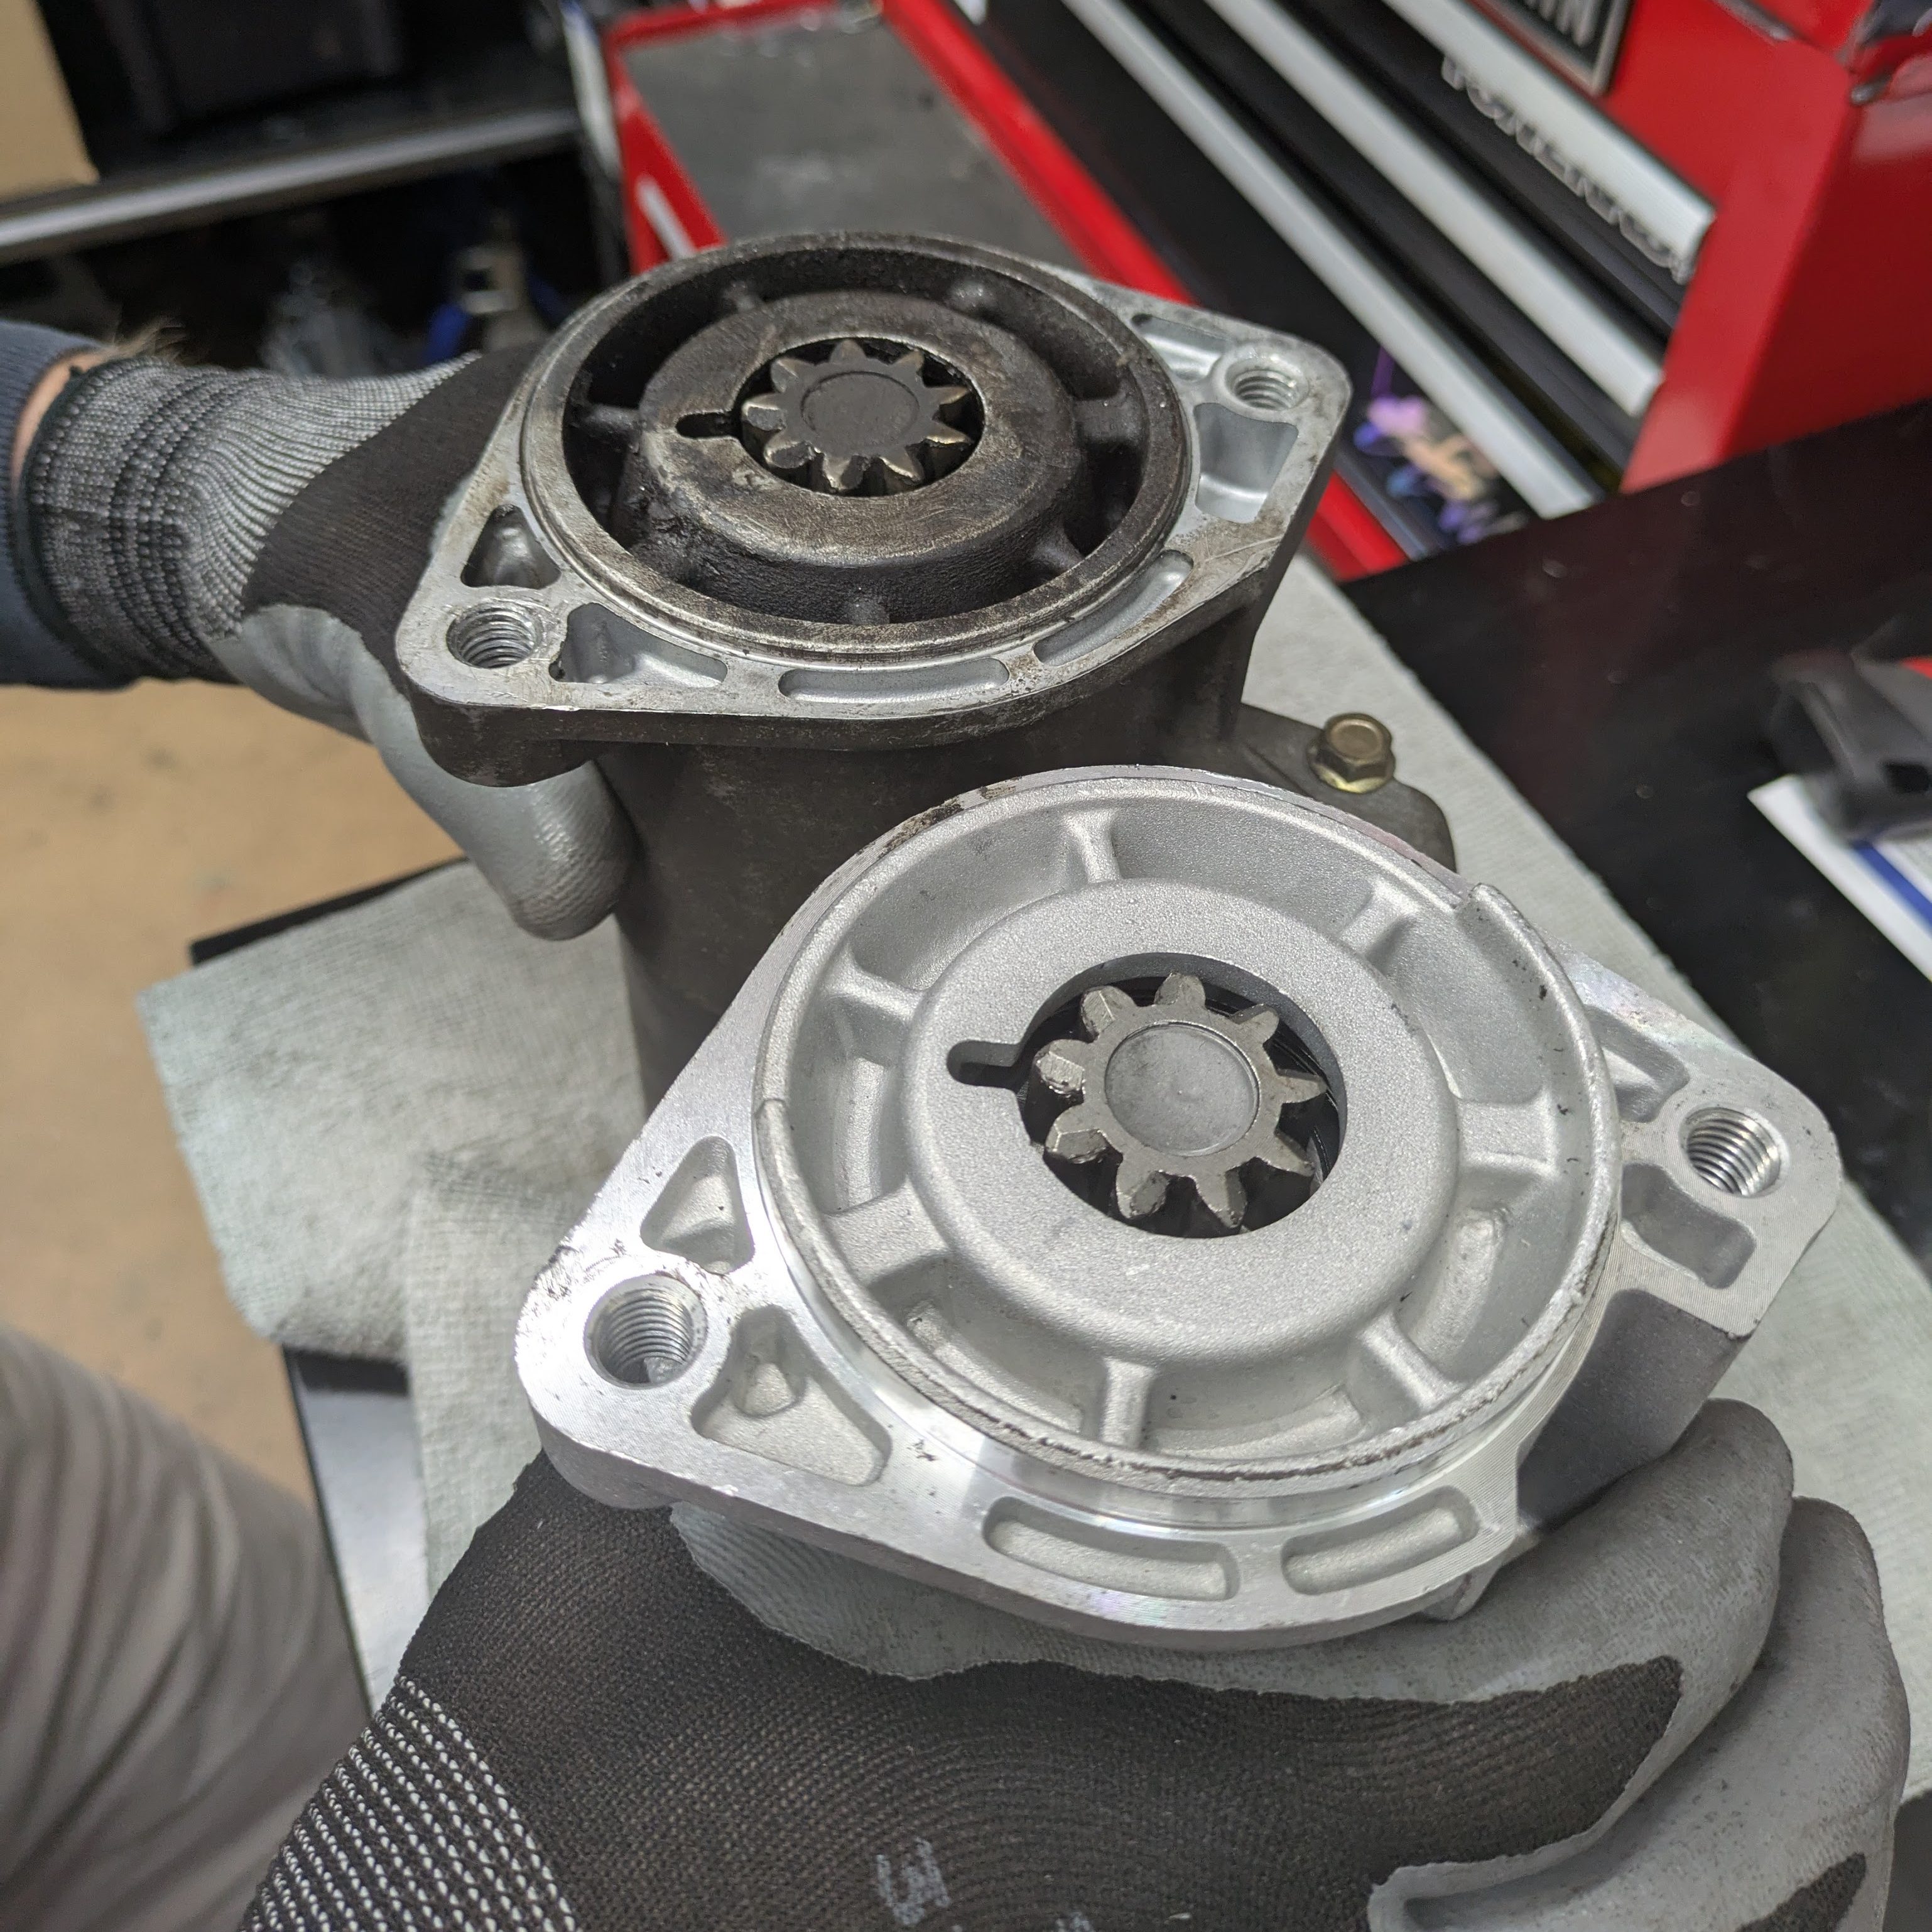
Luckily, due to my hording tendencies, I had purchased a parts lot off of a buddy that included a starter (thanks Garrett!). We bench tested both of them, and much to our dismay, both of them were totally identical in terms of performance. This left us rather defreated, and we called it a night as it was getting very late and I still had work the next morning.
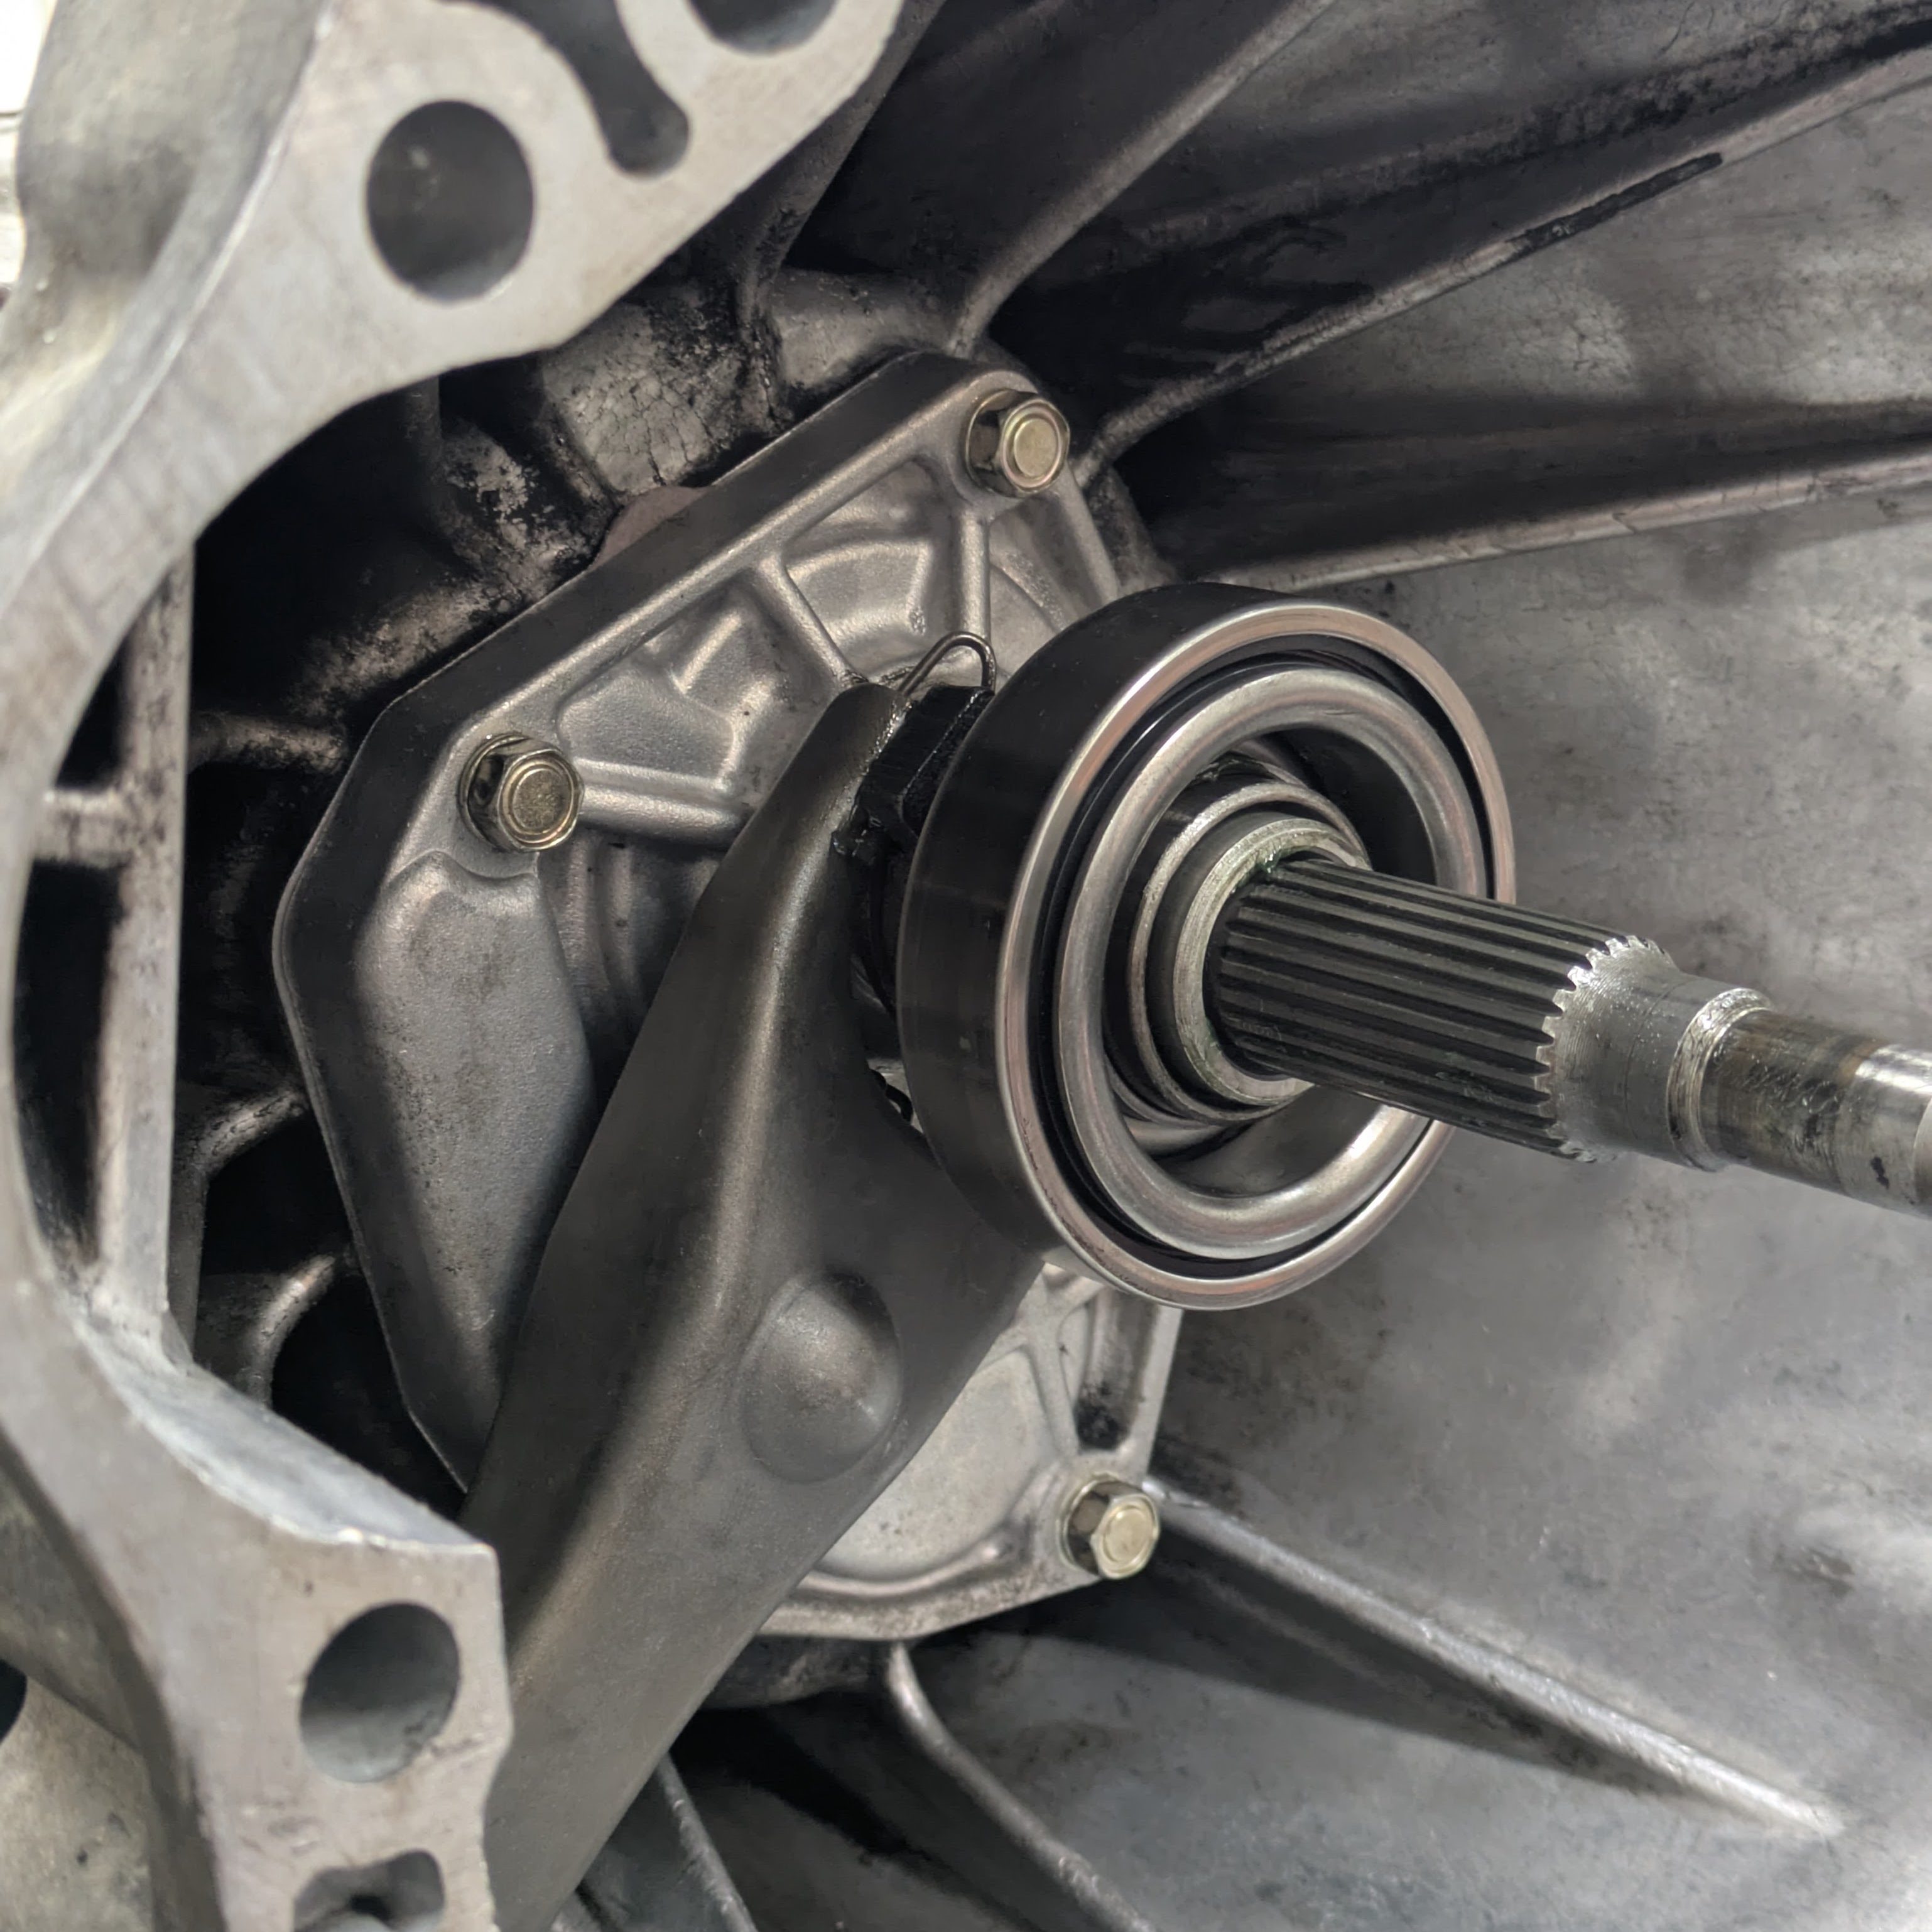
After a few days of pondering, and more collaboration, a new theory was hatched. When the transmission was removed, it pulled both of the dowels out of the motor that control both the transmission concentricity, as well as the dust shield, which is responsible for offsetting the starter. If those dowels weren’t doing much of anything (due to them being in the transmission, rather than on the motor), it is very possible that the starter could be meshed too tightly to the flywheel, causing it to extend but not retract. This theory was further supported as on the night of failure, we noted that the pinion was extended until we pulled the starter off to see what the hell was going on in there, and it promptly snapped back to its retracted position once relieved of the flywheel. There was also evidence of the pinion not meshing with the whole width of the flywheel.
The following week, we had refreshed confidence and a plan. The first course of action was to make sure the disc wasn’t in backwards, as there would be no point in fucking about with the starter if that was the case. After some careful borescope work, and having the old identical Exedy clutch to compare it to, we confirmed that the disc was in fact installed in the correct orientation, so we proceeded to our starter theory. This involved removing the trans mount, and cracking loose all the bellhousing bolts in order to un-sandwich the dust plate. We then were able to lever the whole assembly over using the starter. While it didn’t feel like it moved a lot, our hopes were high, so we put it all back together. We were able to confirm that the starter was fully extending and retracting as it should before we tried to fire the car up.
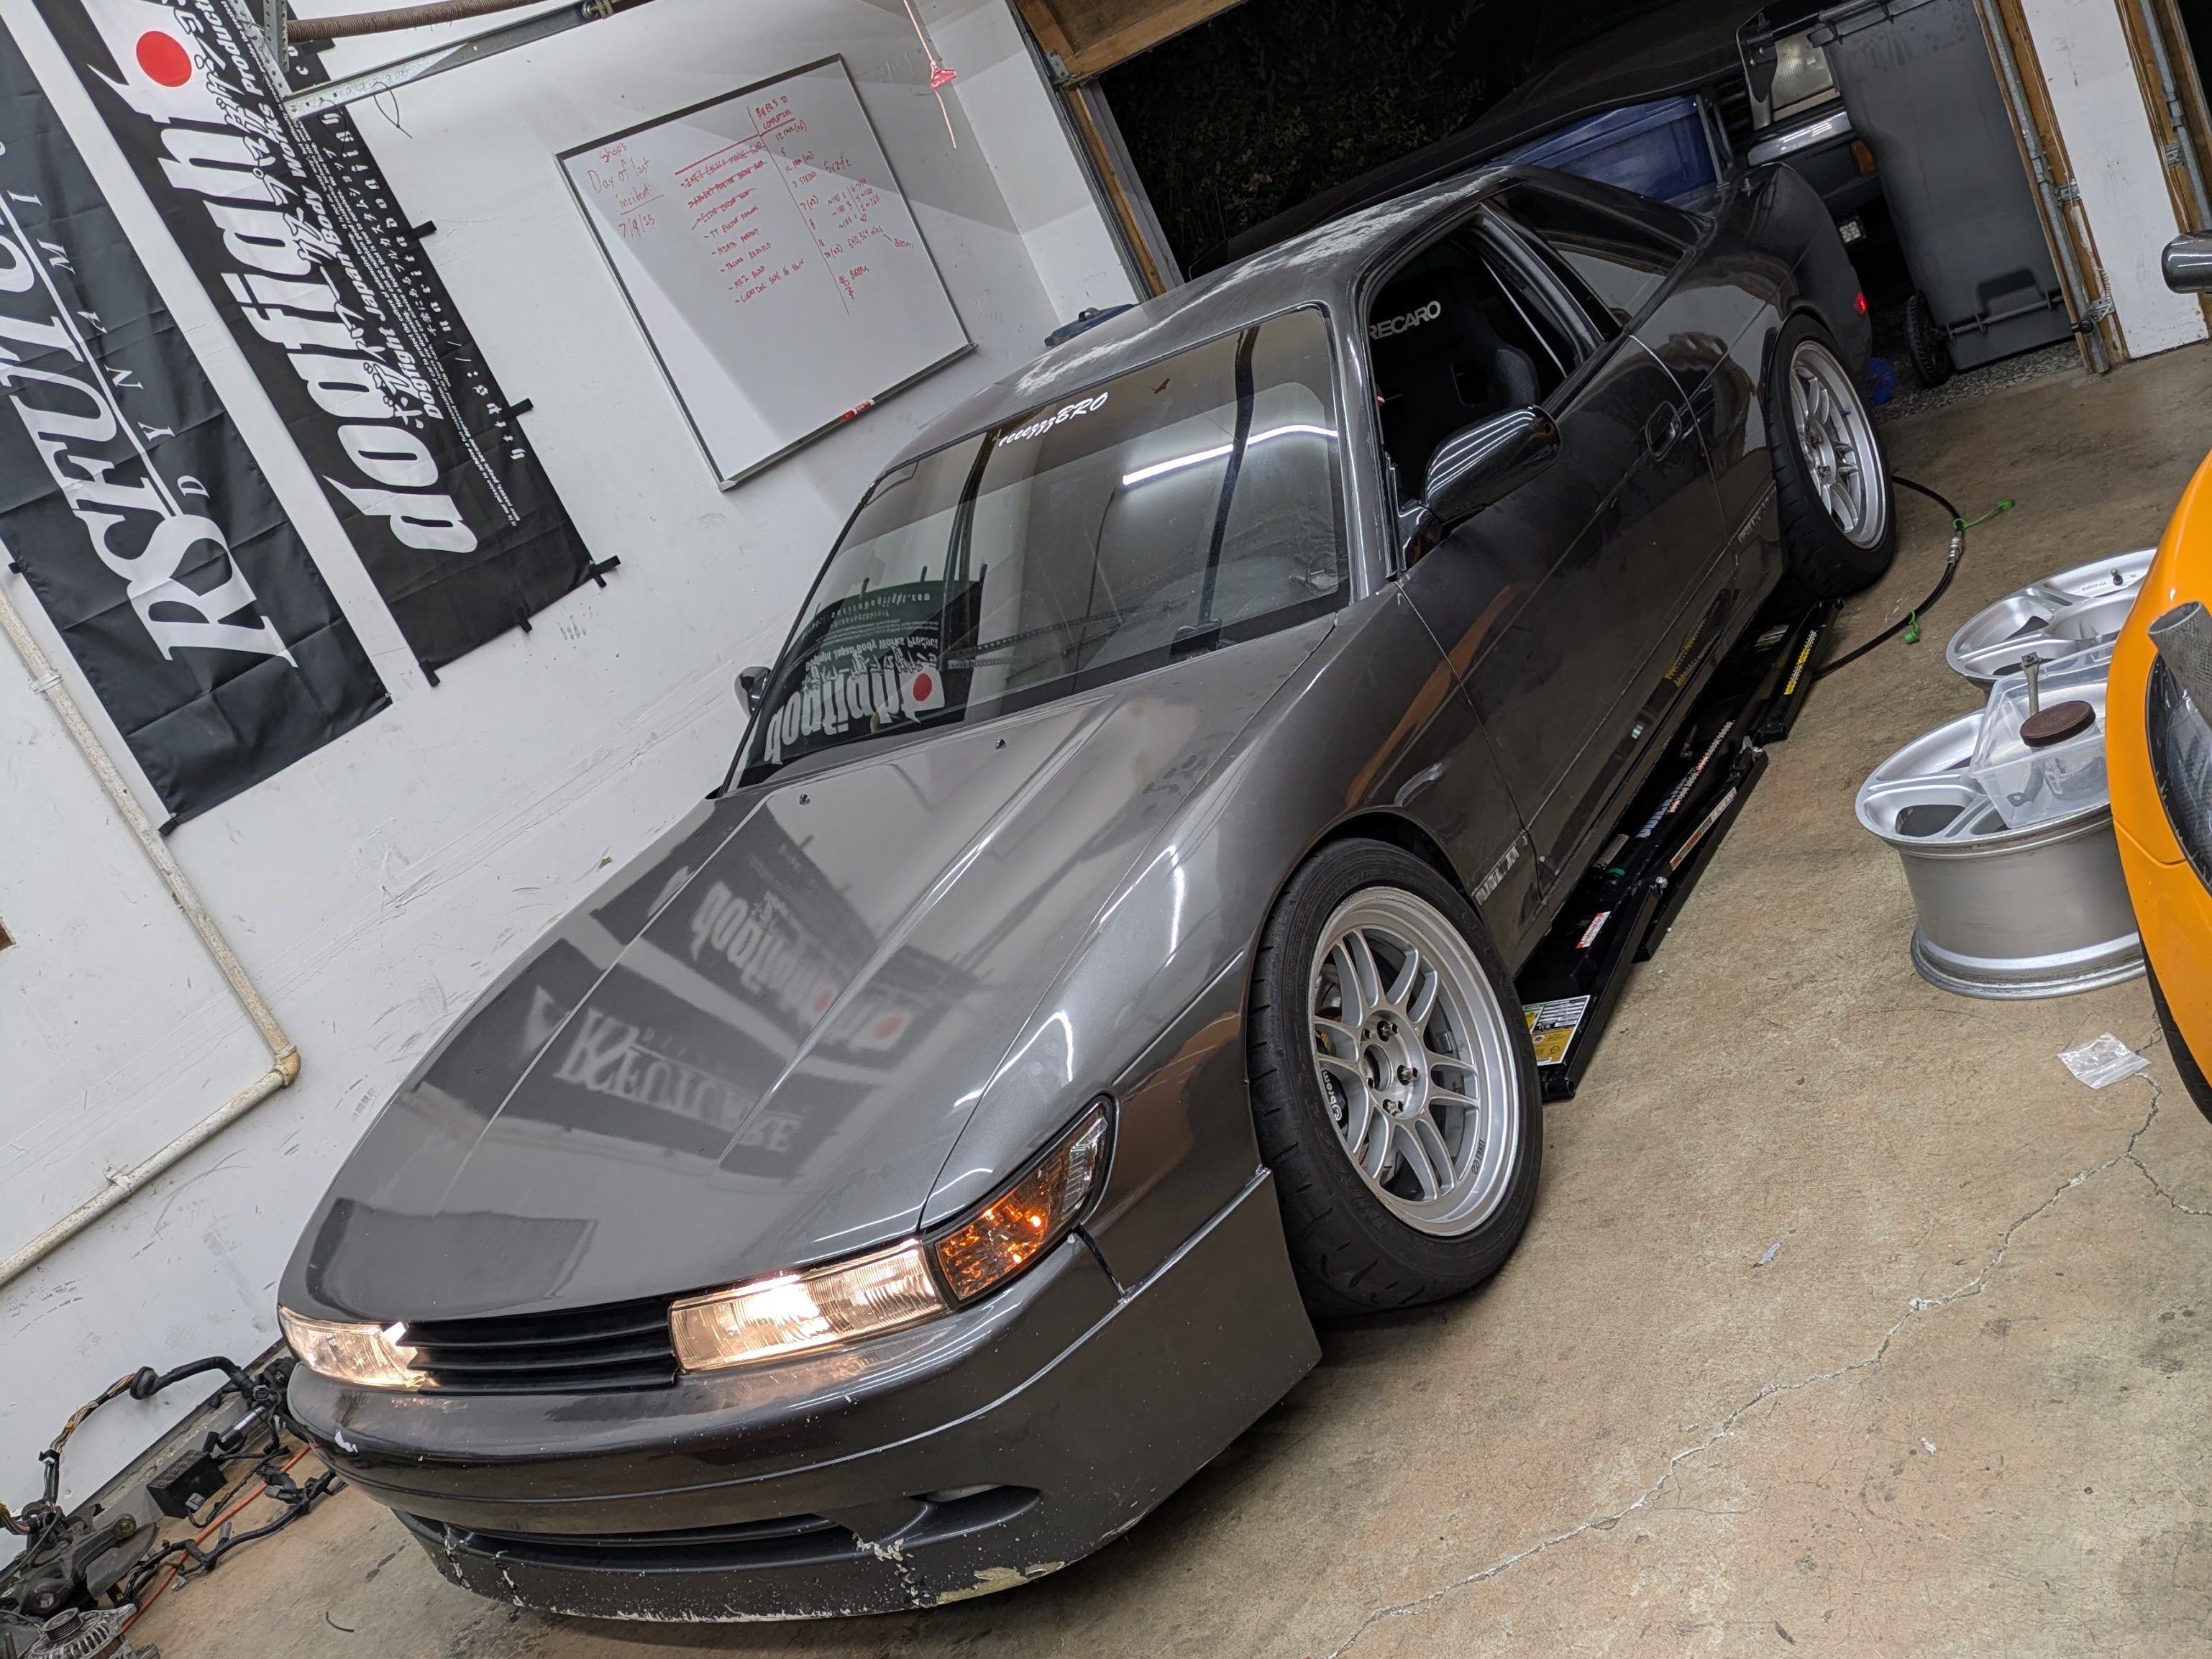
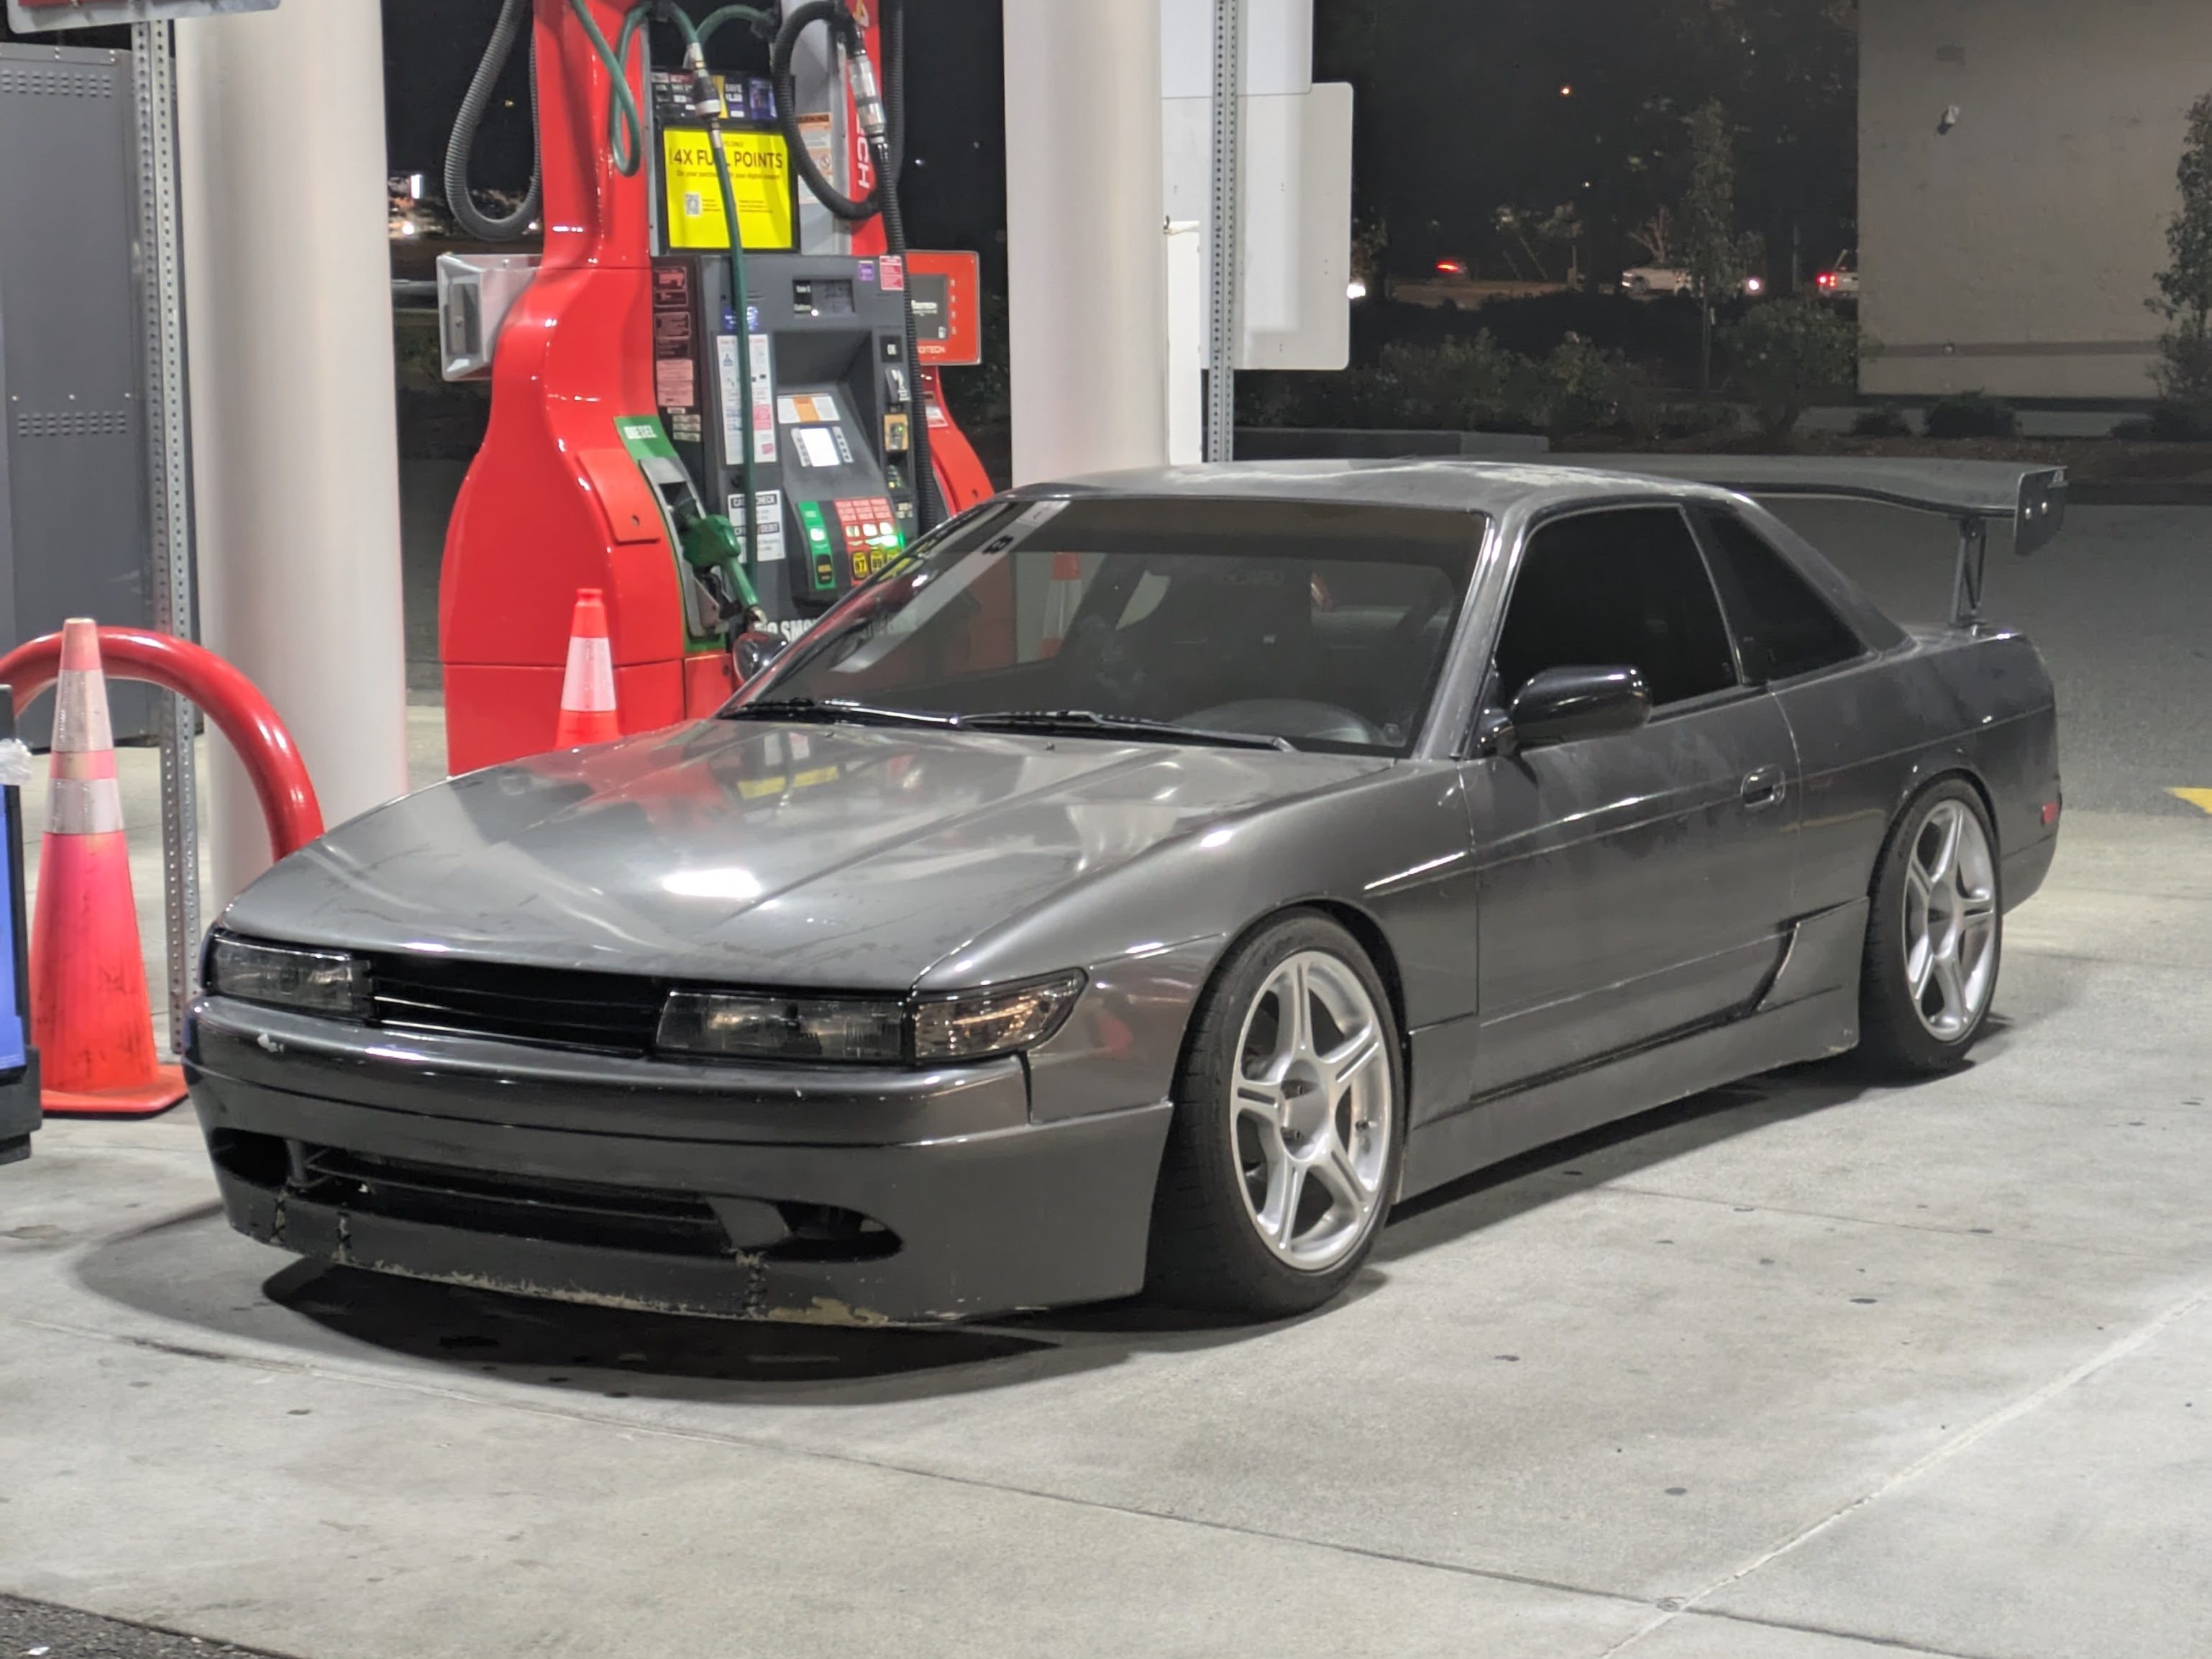
After unplugging the CAS to force a no-start, the starter actually sounded like the distinct SR20 low thumping lope! We quickly got the car on the ground and took it for a spin around the block. Everything felt and sounded really good, so the sideskirts went on, and the car was deemed street-worthy. After a few heat cycles, it is not leaking any gear oil, which is a godsend considering how much it was puking before.
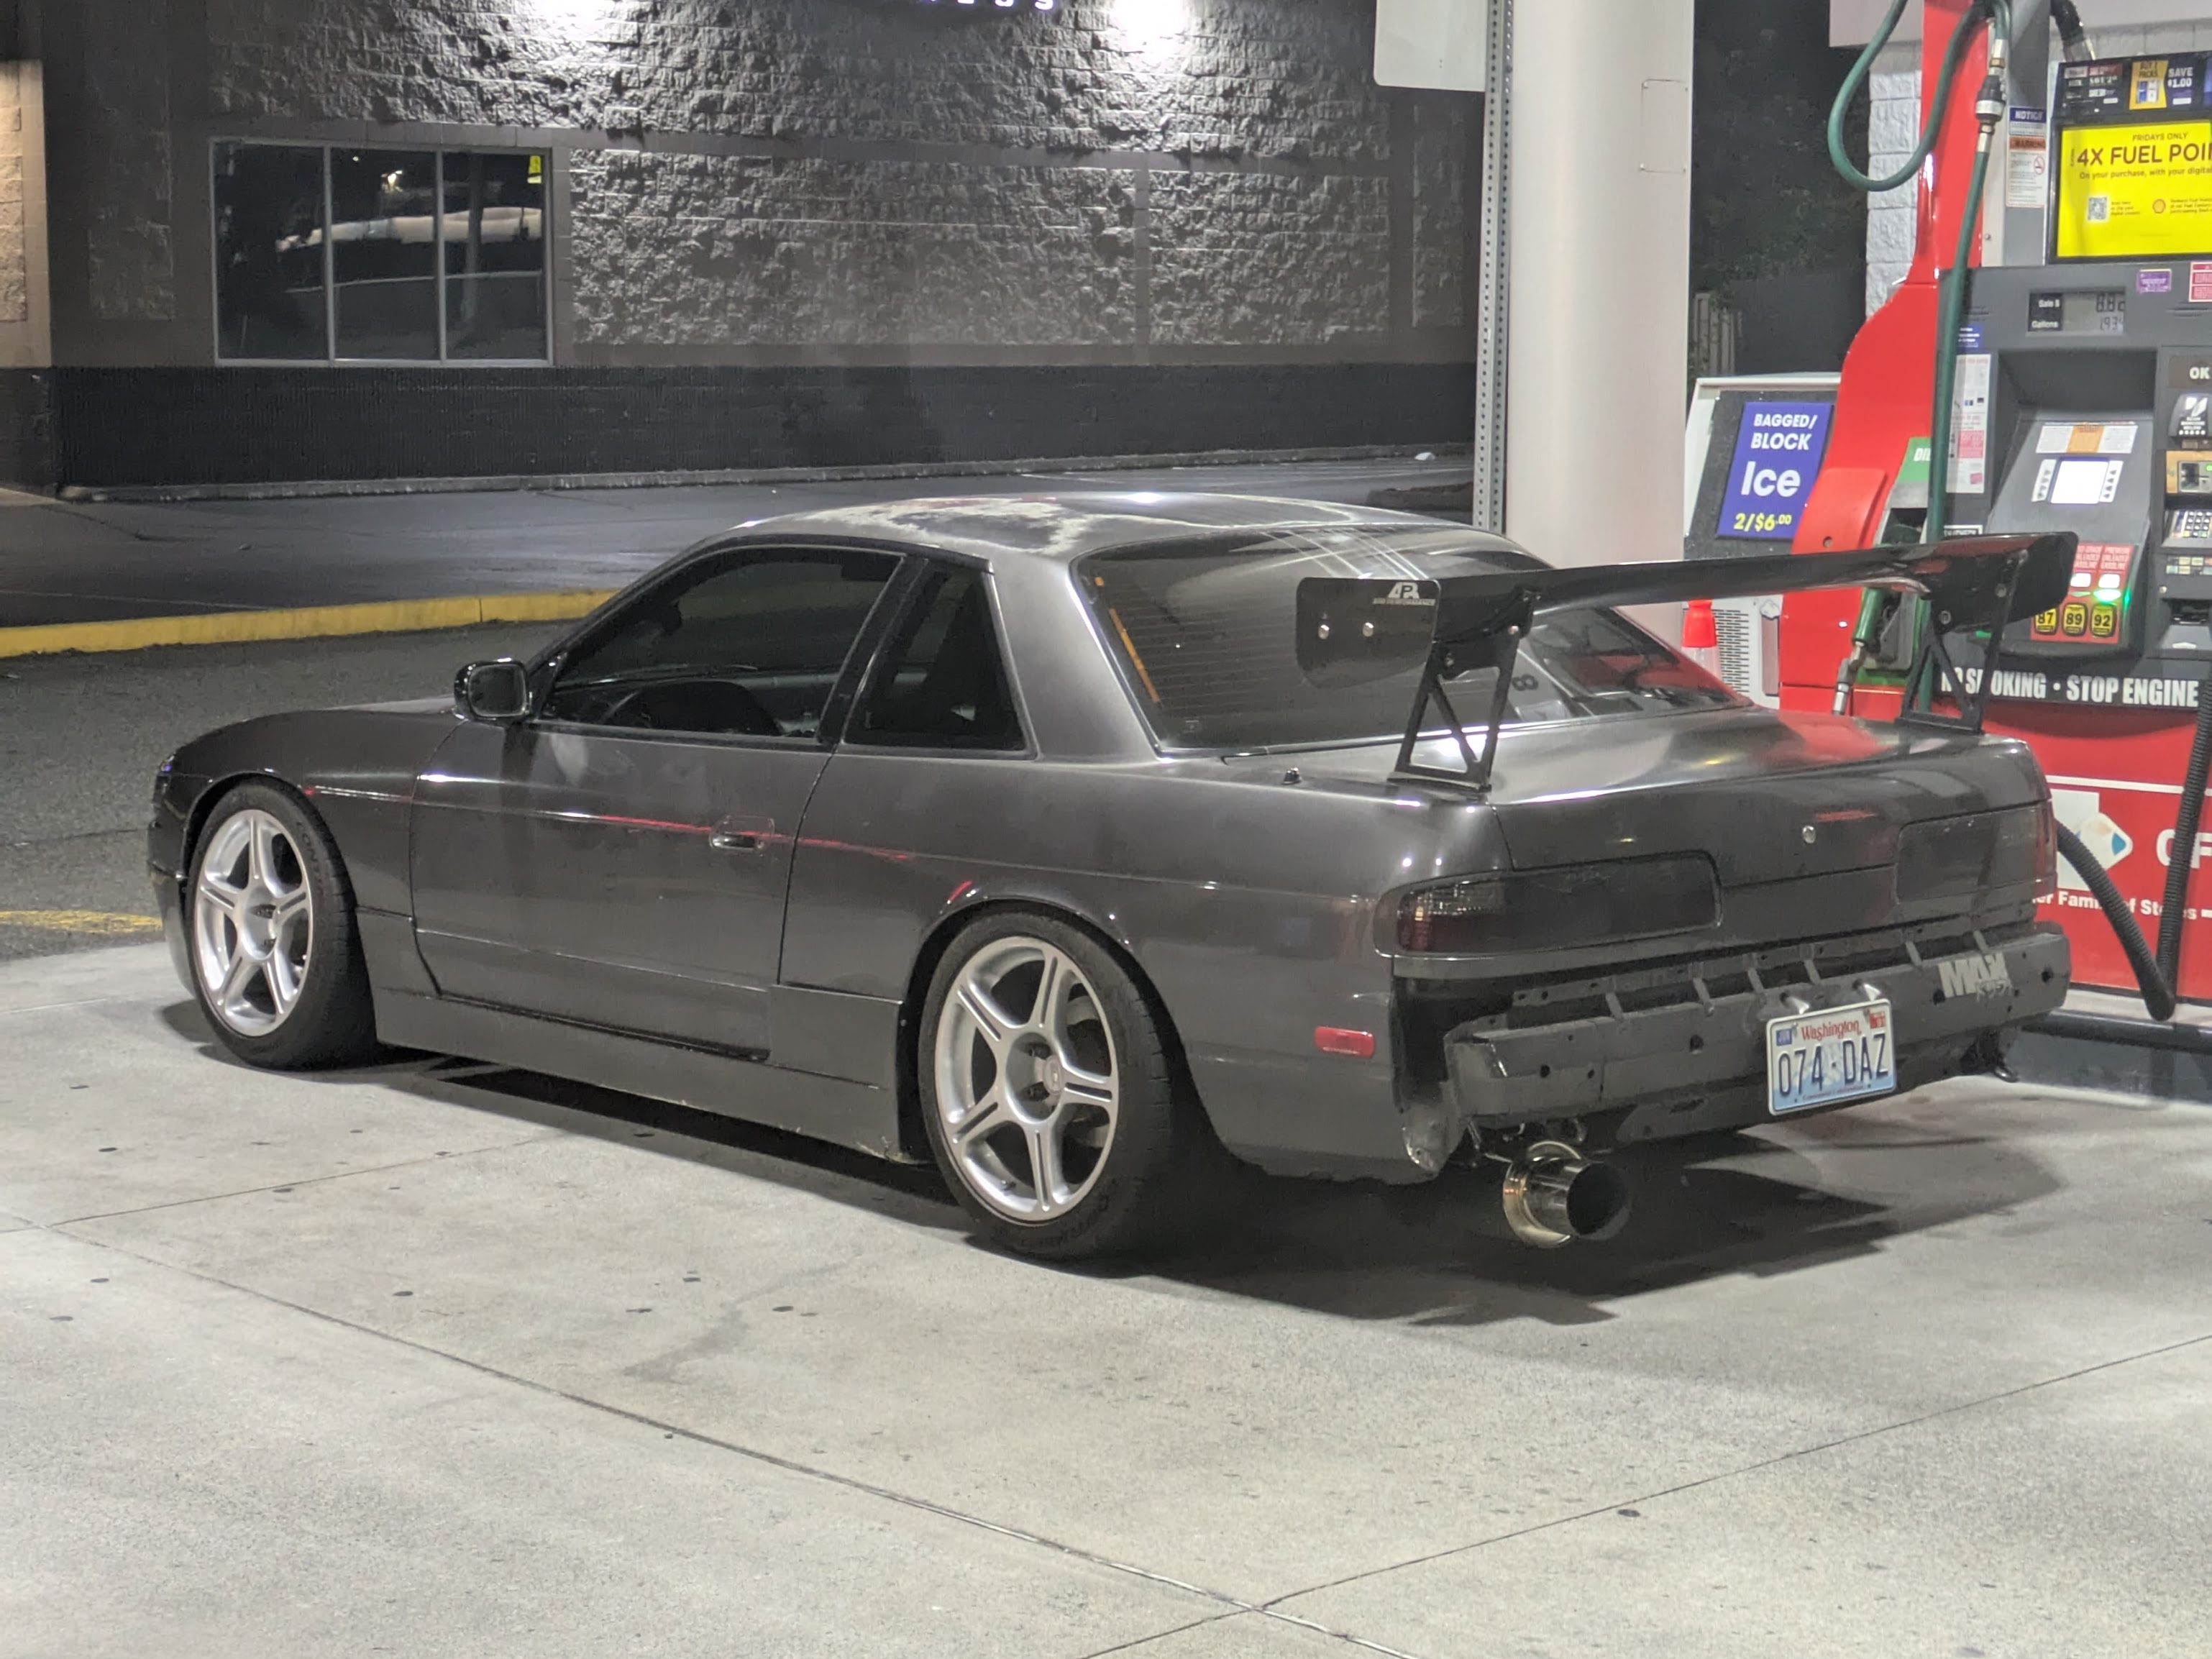
The last notable change to the car is the current street wheel/tire package. The car had been sitting on either the CE28Ns (which I sold, track pads + OG Bronze doesn’t go together for someone as anal as I am), or a set of 17×9 +22 RPF1s that I bought off of a Lucky Dog team who was campaigning an SN95. They are rough, but the price was right, and I’ll have absolutely zero thoughts strapping the car down with them. I would just be running those (the car looks AMAZING on them), but the poor backpad clearance in the front meant that I had to add a significant amount of spacer to clear both the caliper and the coilover, enough that I was not satisfied with the amount of lug nut thread engagement, certainly not enough to drive the car. This will be resolved with MSI extended studs at some point, but that’s a later, pre track day problem.
I scored this set of Enkei Altia N1s off Marketplace shortly after I purchased the car. These were a dealer option wheel from Altia (the Nissan equivalent of TRD or Ralliart), concurrent with the era when Nissan was campaigning the R33 in the N1 Endurance series. They were a part of a bigger “N1” package that Altia was offering for the R33, seen in the ads below.


The set I ended up with was the second most aggressive spec, which is a 17×9 +20 (they made a 9 +15 version, as well as smaller diameters and narrower widths). This is a pretty great overall fitment for the car, and while they are by no means mint (lots of restorable curb rash), I didn’t pay mint wheel money for them, and I’m just happy all the center caps are accounted for as they are unobtanium. I still do think the RPF1s look better overall, but I will rock these on the street for a while until I get the footwork of the car sorted out so a greater selection of wheels will actually fit. I wrapped them in a set of 245/40/17 Conti ECSs (not 02s, they are a bit old) that I snagged from a buddy as something decent to drive around on.
I’ve put a full tank of fuel though it since it’s been apart, and has done the “drive it to work in heavy traffic” test once with no hiccups. The car drives great (for what it is), and everything has been flawless other than a IP-BUS Bluetooth module dying (glad I bought 2). The other funny finding about the radio is that as it was a Japan only (read: RHD only) product, the volume knob is as far away from the LHD driver as it could be. Gotta pay the cost to be the boss I guess.
I’m stoked to have something cool to drive for the rest of the season, and it’ll be nice to get some S-chassis miles under my belt before I inevitably go tearing this thing apart to make it drive better. Separate problems for a later date.
Street sharkin’ is back on ladies and gentlemen.
Until next time.
