
While I’ve enjoyed living in an ignorant bliss (for all 2 weeks of ownership, and 4 or 5 bouncy drives), it was time to go below skin layer on a 34 year old modified economy car. I still am not physically cut out for heavy line work as I am still recovering from a broken collarbone, but I have a mostly functional limb, and a desire to not burn any more time than I have to. While there are many small problems and preferences to chase before driving season starts, I wanted to start off with the glaring issues.
This chassis has been a dry climate enjoyer for its entire life, starting in California and later moving to Boise where I purchased it. This has left it with a minimal regard for the moisture that us coastal folk know all too well. While I don’t intend this car to see much weather, sometimes the meteorologists shake the magic 8 ball wrong and we get to deal with it.
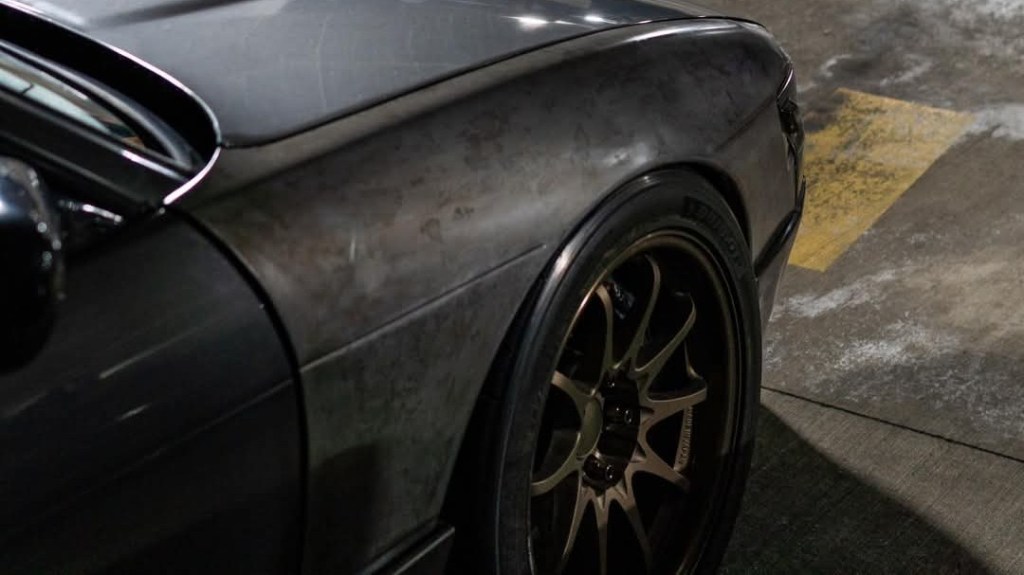
The two things non-kosher with this climate are the bare steel passenger side Silvia fender, and non functional wipers. Both of these issues were disclosed by the PO. The passenger side fender was rattle canned when he got the car over 12 years ago, and 2 years ago, he stripped the paint and never did anything past that. The wipers were a similar story. He got the car with the motor unplugged and never bothered to figure out the issue, since it was a fair weather car for him.
This DeLorean aesthetic, while very hot rod, wasn’t what I was looking for both in terms of looks or function. Luckily the fender was a simple matter of ordering some KG2 and getting it sprayed. We’ll circle back around to that. The wipers were where the digging went deeper and issues were found.
I started with my normal diagnostics. The plug was no where to be found, at least near the wiper motor, so after removing the fender for paint, a few seconds of digging near the battery found the pigtail for the motor:
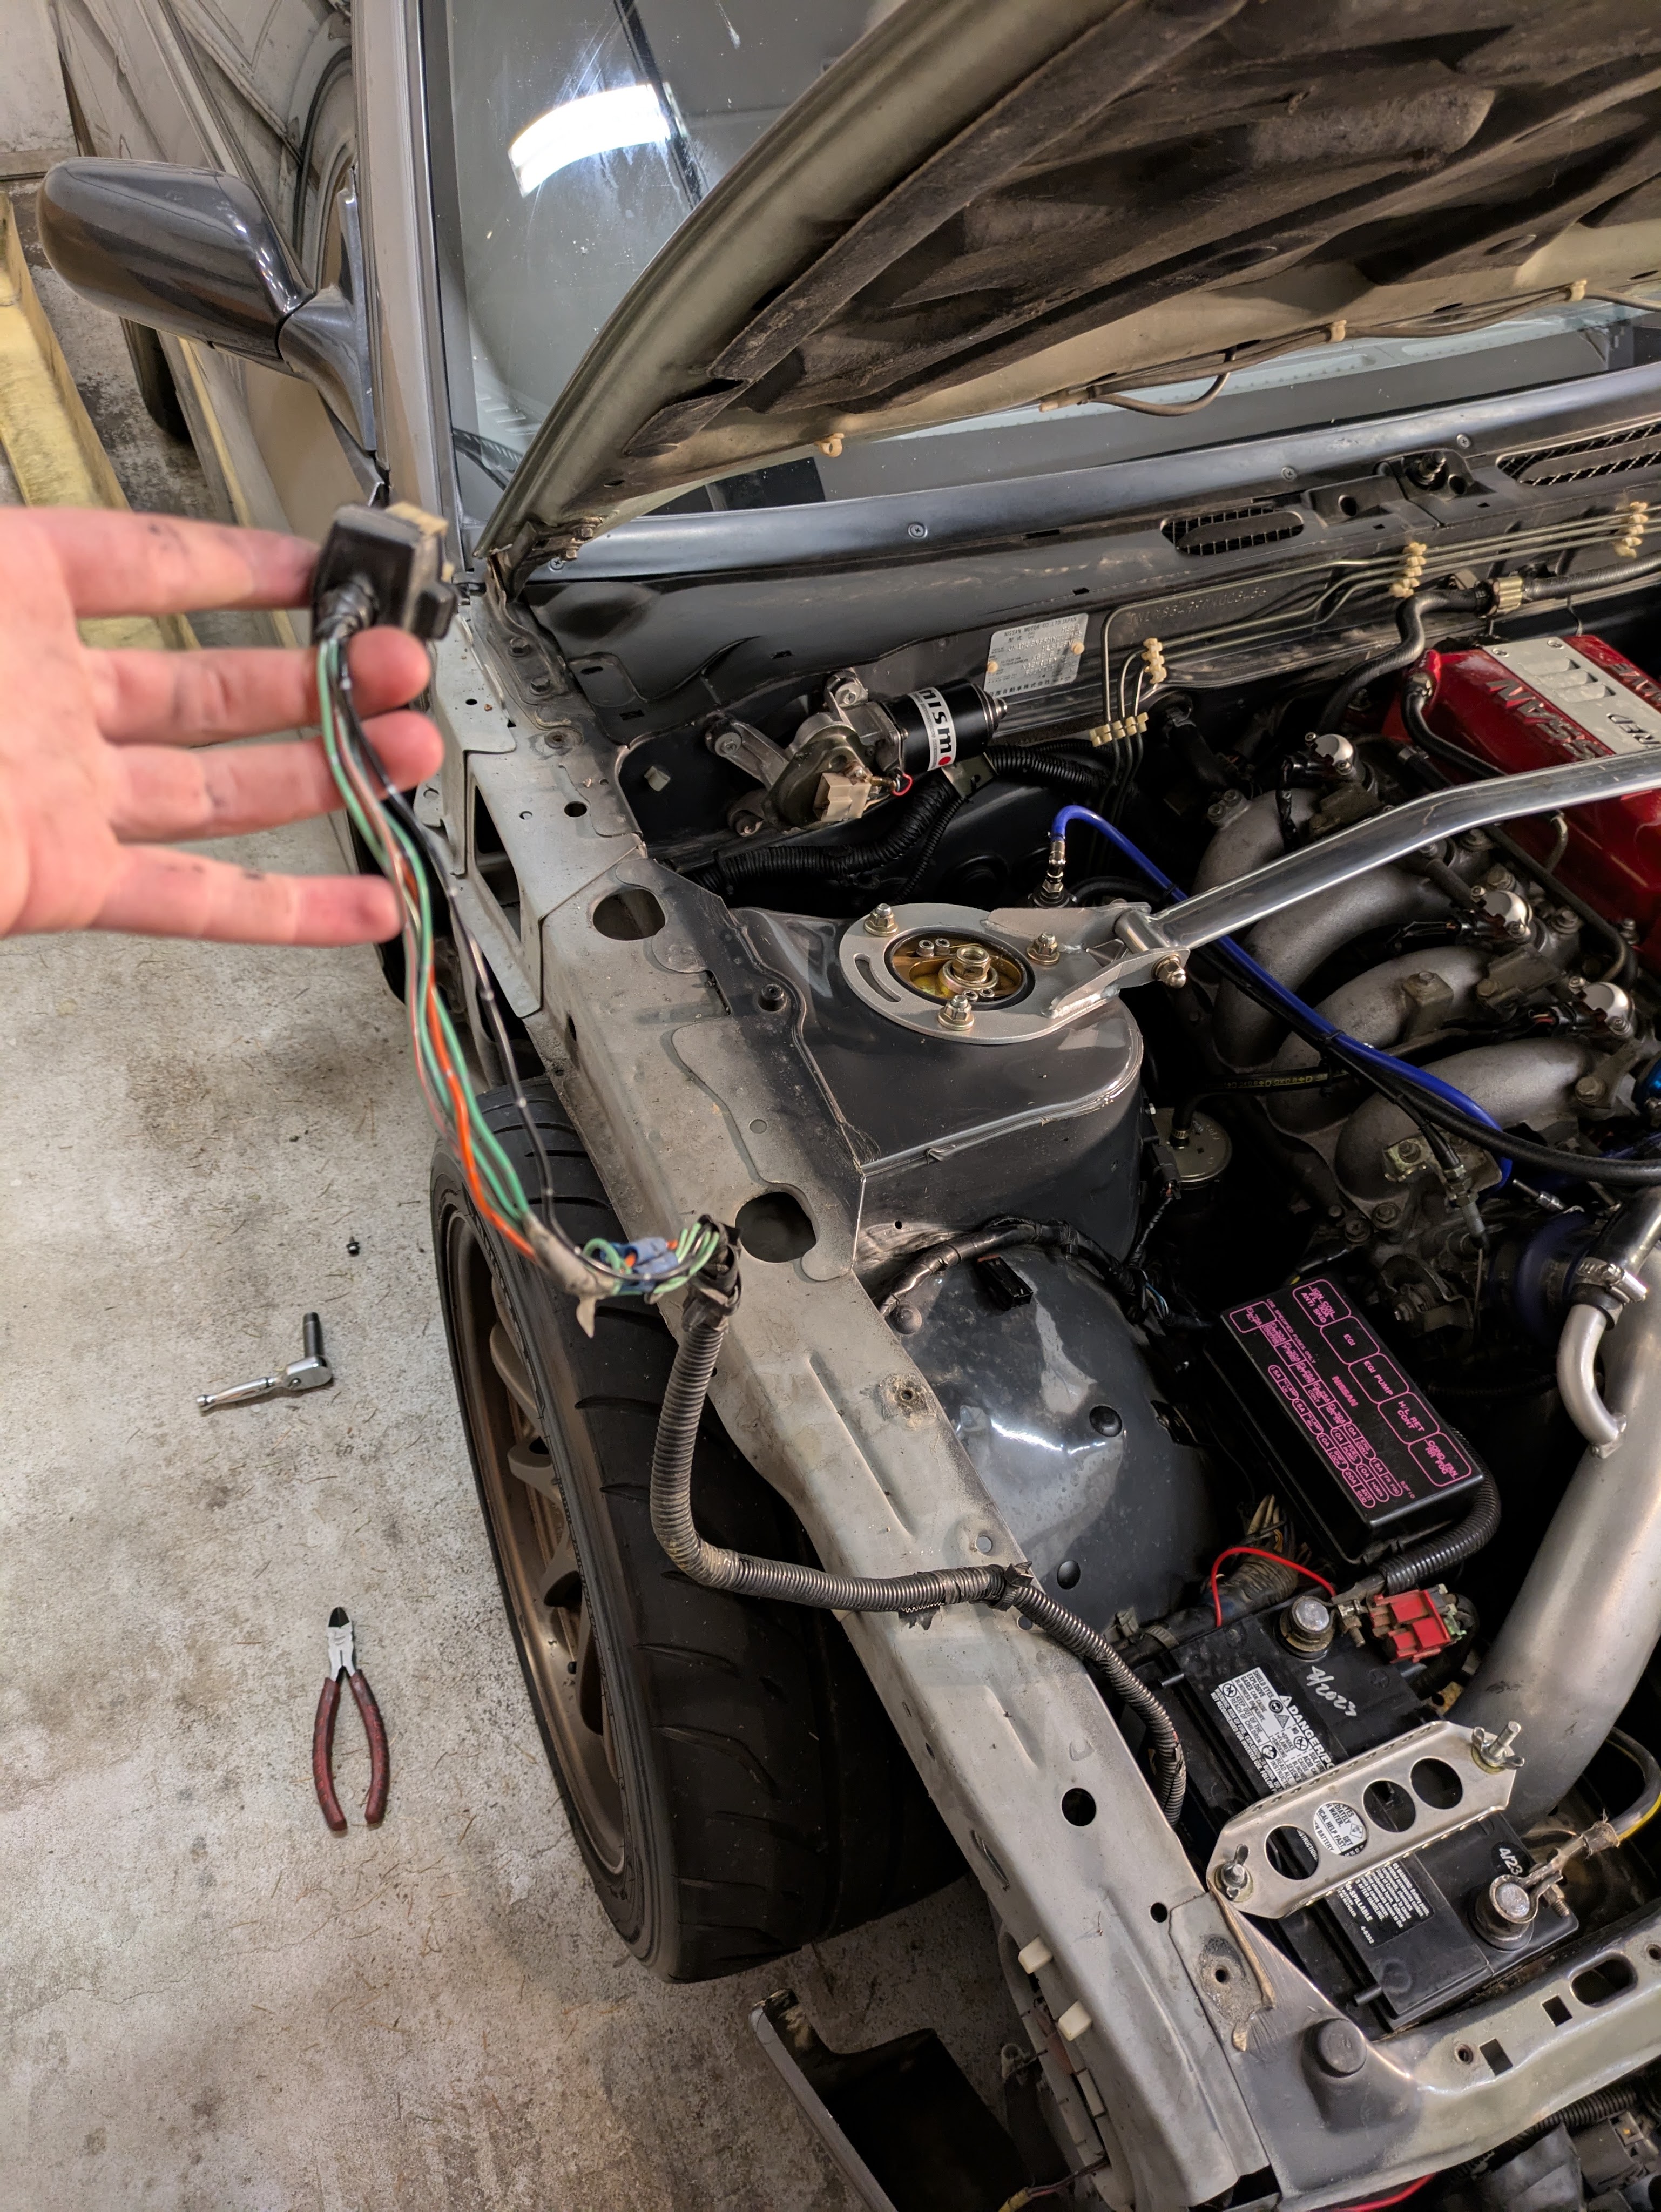
I plugged it back in, and it didn’t work. Damnit, not that simple. I attempted to get a wiper motor and wiper control box from a partout the day before, but struck out on both. (in hindsight, glad my attempt to parts darts this problem was unsuccessful) I start probing with 12V and a multimeter in an attempt to figure out the root cause.

Everything functioned as it should. The wiper stalk was controlling voltage to the various pins in the pigtail, and the wiper motor with direct power functioned perfectly. The only culprit was the green wiper interval control box next to the BMC. Even that seemed to be ok. An underdash investigation netted a clue:
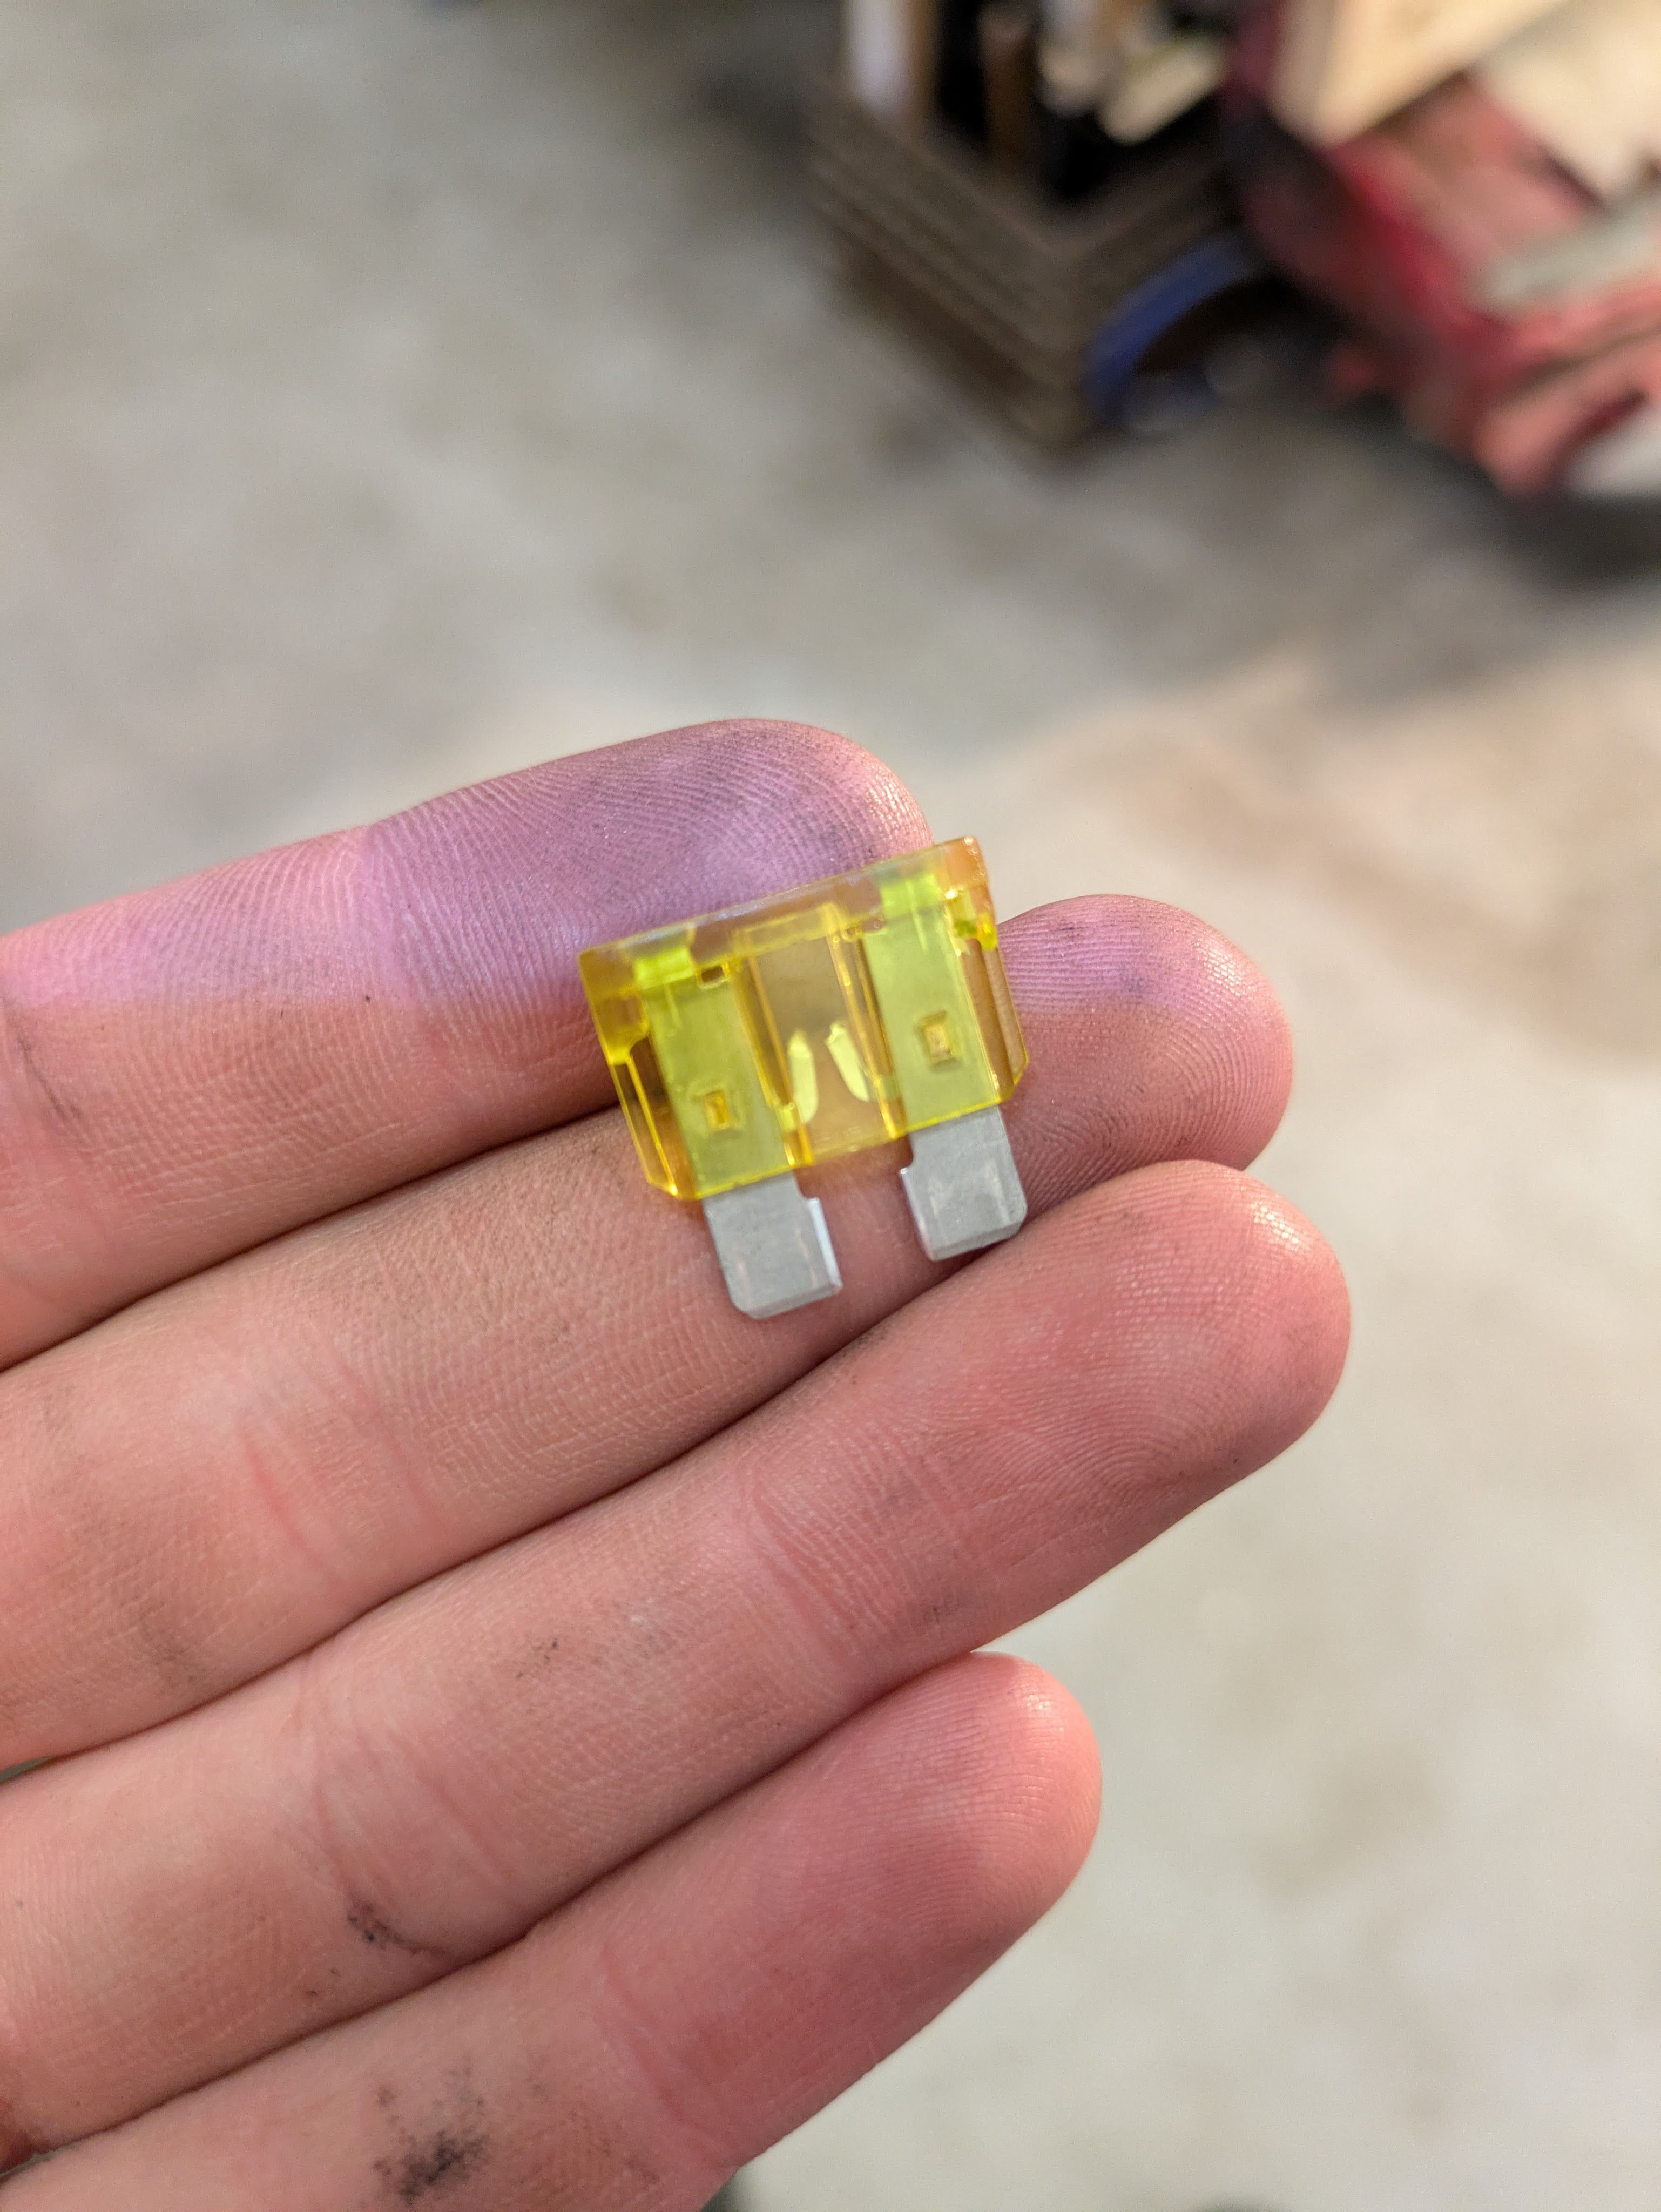
Uh oh.
Popped fuses are always a scary finding. Because its now not a question of what, its a question of why. I robbed a fuse from a nearby function, and the wipers worked flawlessly after I racked the stalk around for a minute to clean the contacts.
Ok sweet it works, but now why did it blow the fuse? A few minutes later I found why.
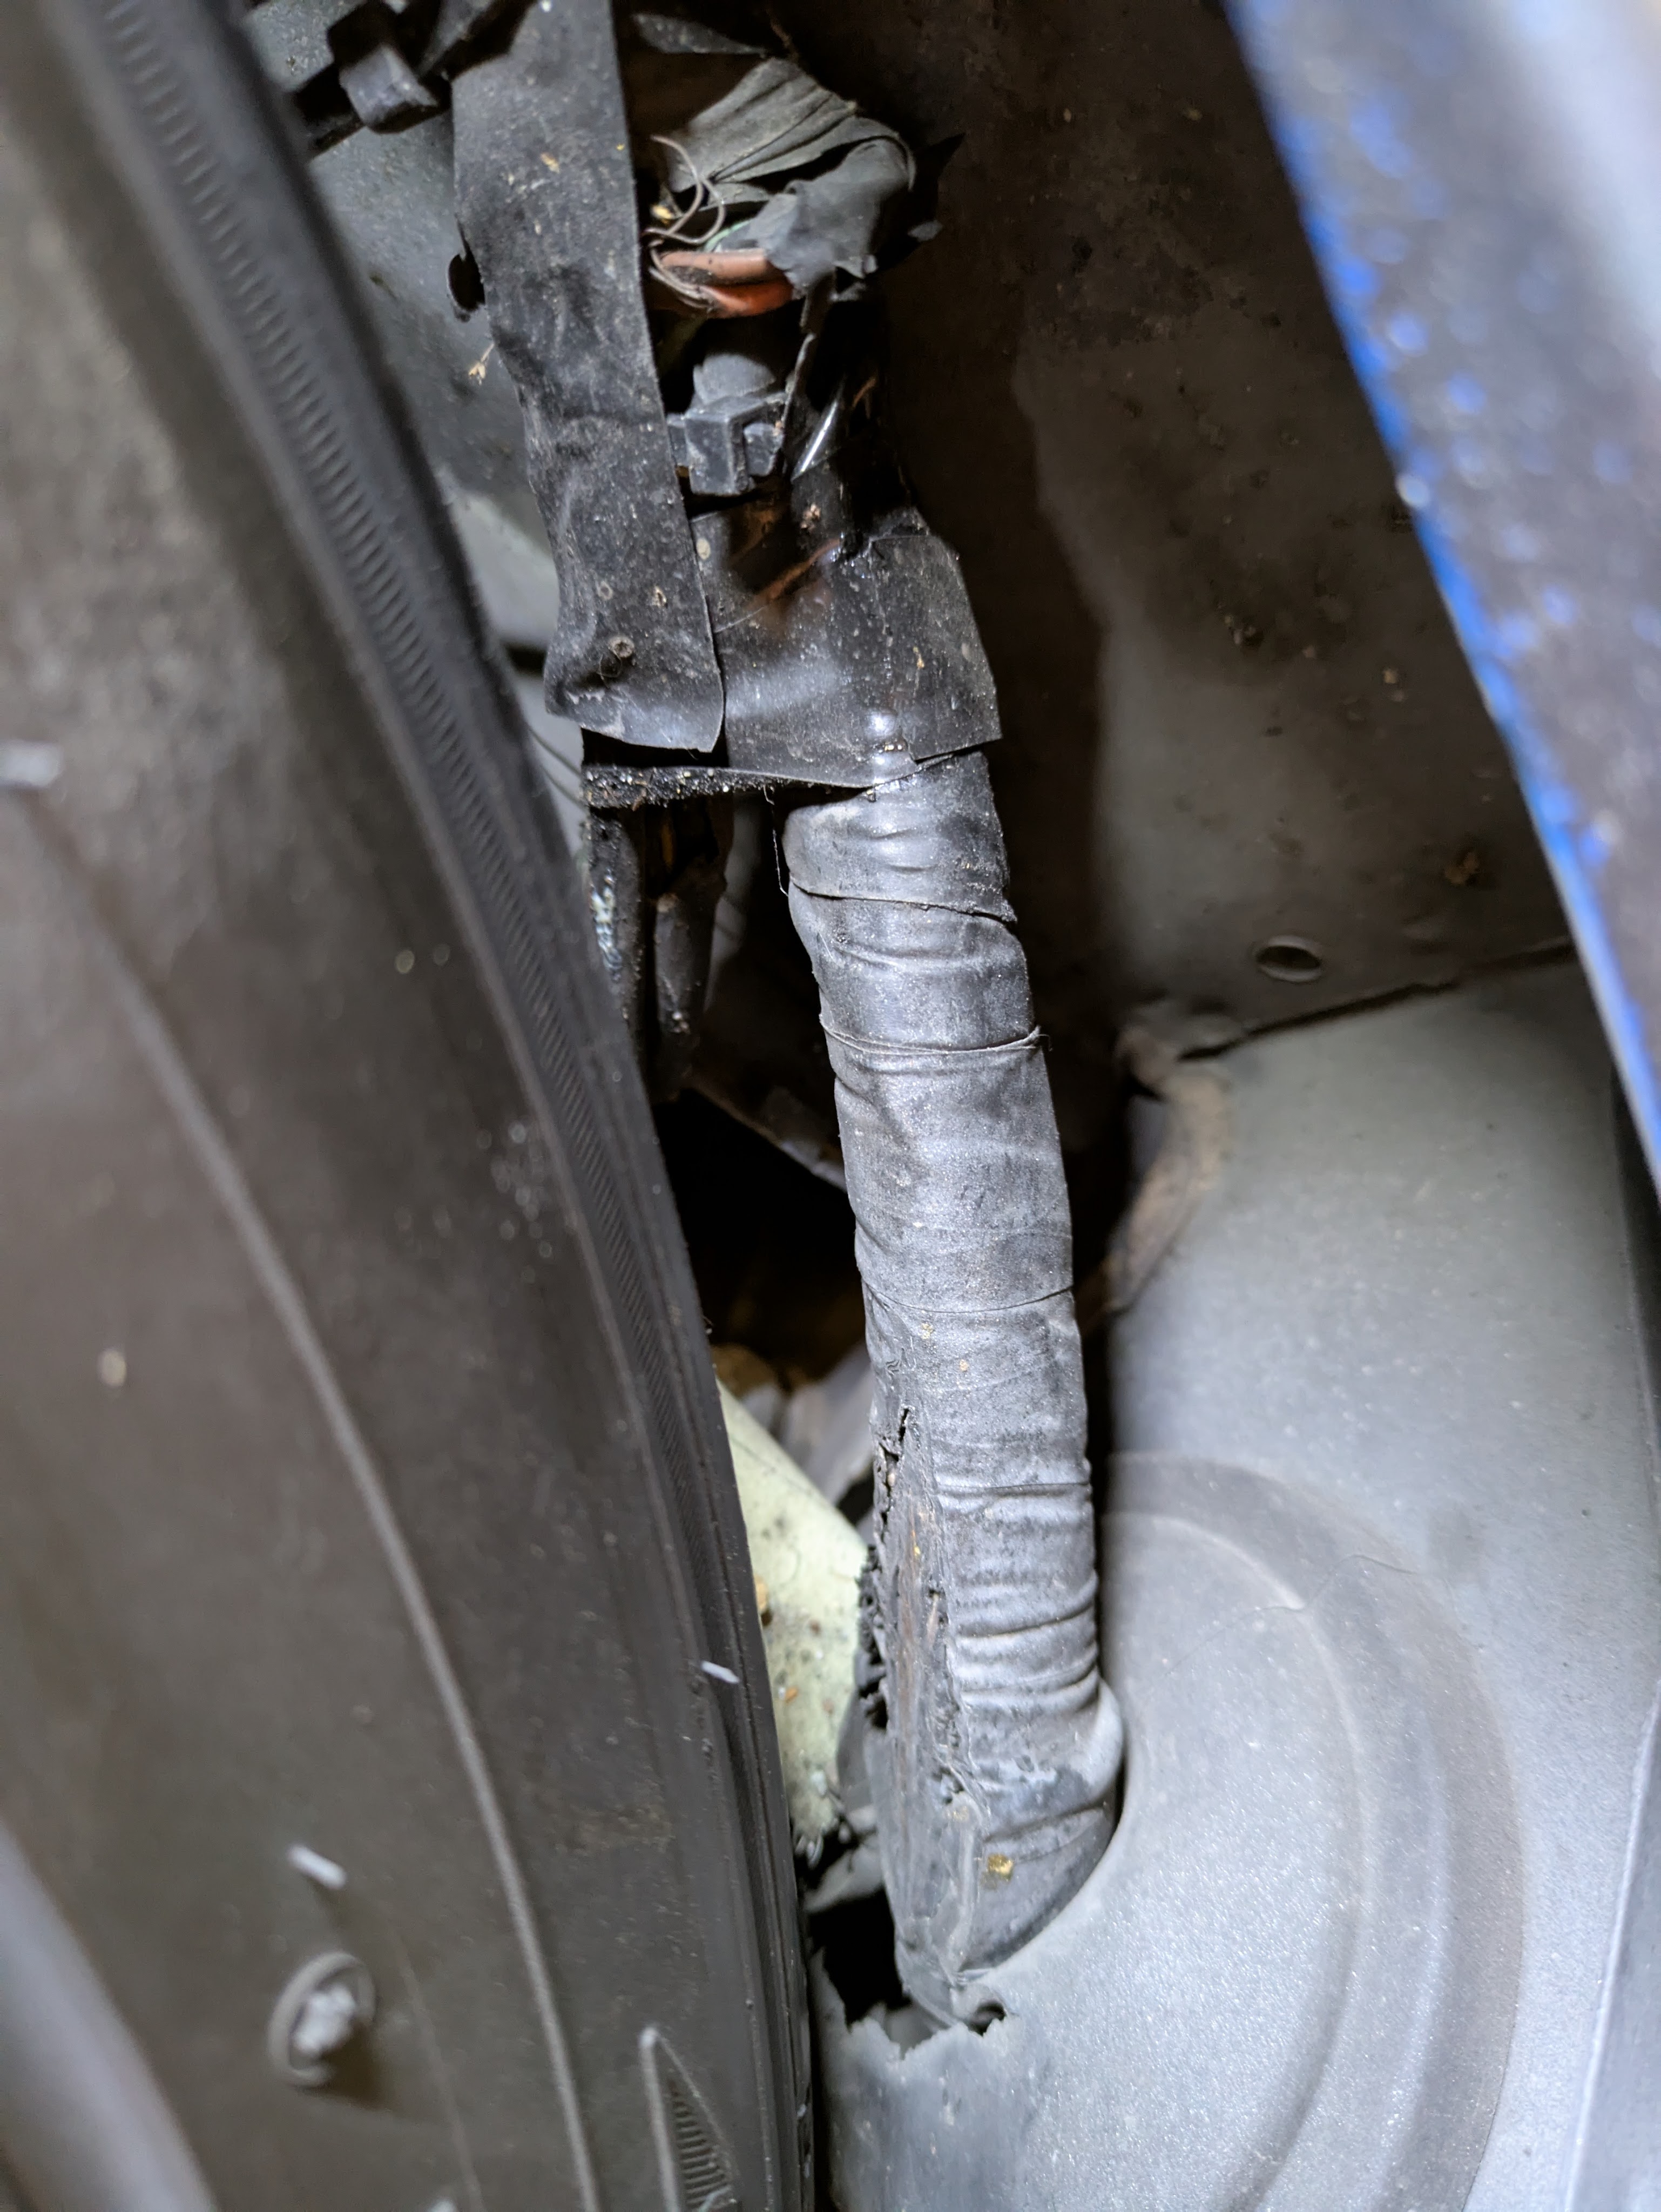
Fuck. Me.

Obviously, given this car’s history of brilliant fitment, the chassis harness has been tucked longer than it was in its factory position. However, the extremely low ride height combined with 255/40/17 front tires on stockish front geometry highlighted a radial issue with the way that the harness was tucked. Great, now its going to be a fuse box out operation because this is way too close to the firewall to repair strand for strand.
Upon further investigation, I got really lucky. It only had cut into 1 wire in the main harness, and only through the insulation of said wire. A combination of some liquid electrical tape, self vulcanizing tape, and one of those wiring protector plates, along with the imminent raising of the car and re-tucking the harness should solve my issue going forward. I’ve already confirmed some slight reorientation and a new notch in the upper strut tower rail should alleviate any future concerns.
The wiper subharness was not so fortunate.
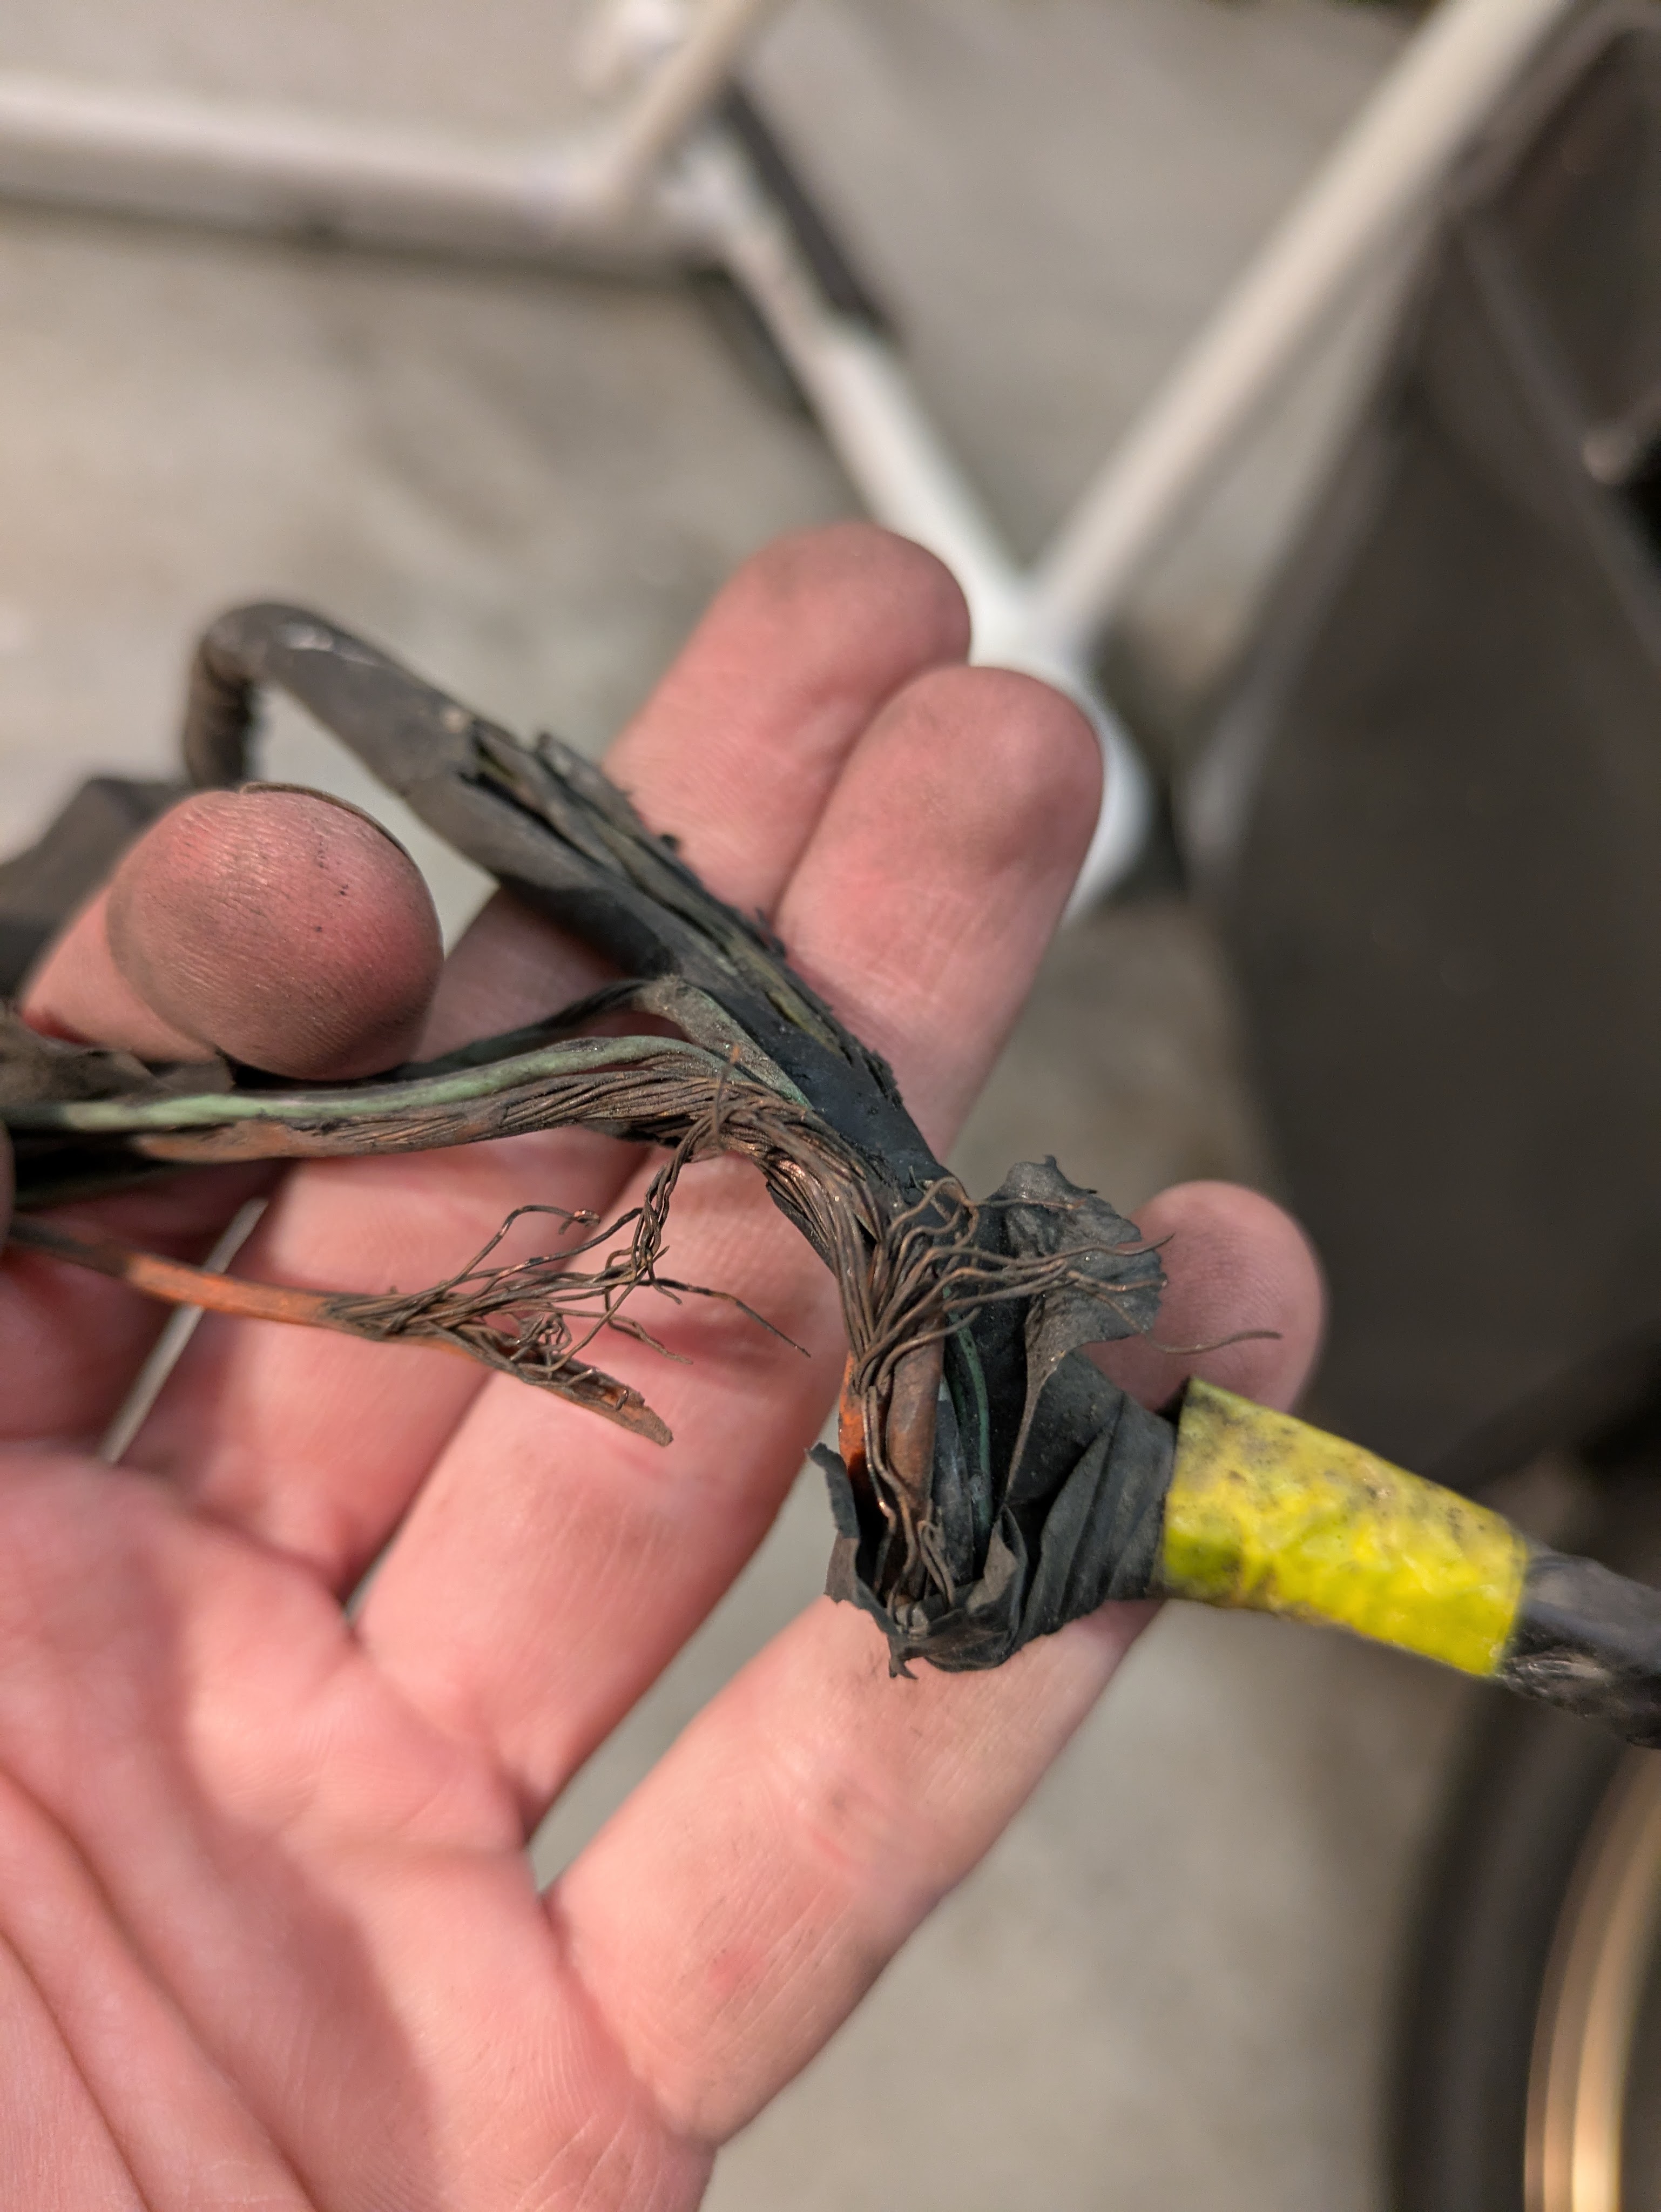
This was clearly the issue. At least this is a VERY simple repair, and an excuse to utilize some of the big OEM wiring harnesses I have for the right color and gage of wire, as well as justifying investment in the equipment and consumables for parallel splices. This job, as well as the beautification of the wiper motor pigtail and chassis harness reroute, will take place when the car returns to my house in a few weeks. (basically waiting for my surgeon to say I’m ok to return to normal operation)
As another slight wiring tangent, I wanted to see if the radio harness had been cut to install the double DIN headunit that was currently in the car, as I had ambitions to change it before I put any more serious miles on it.
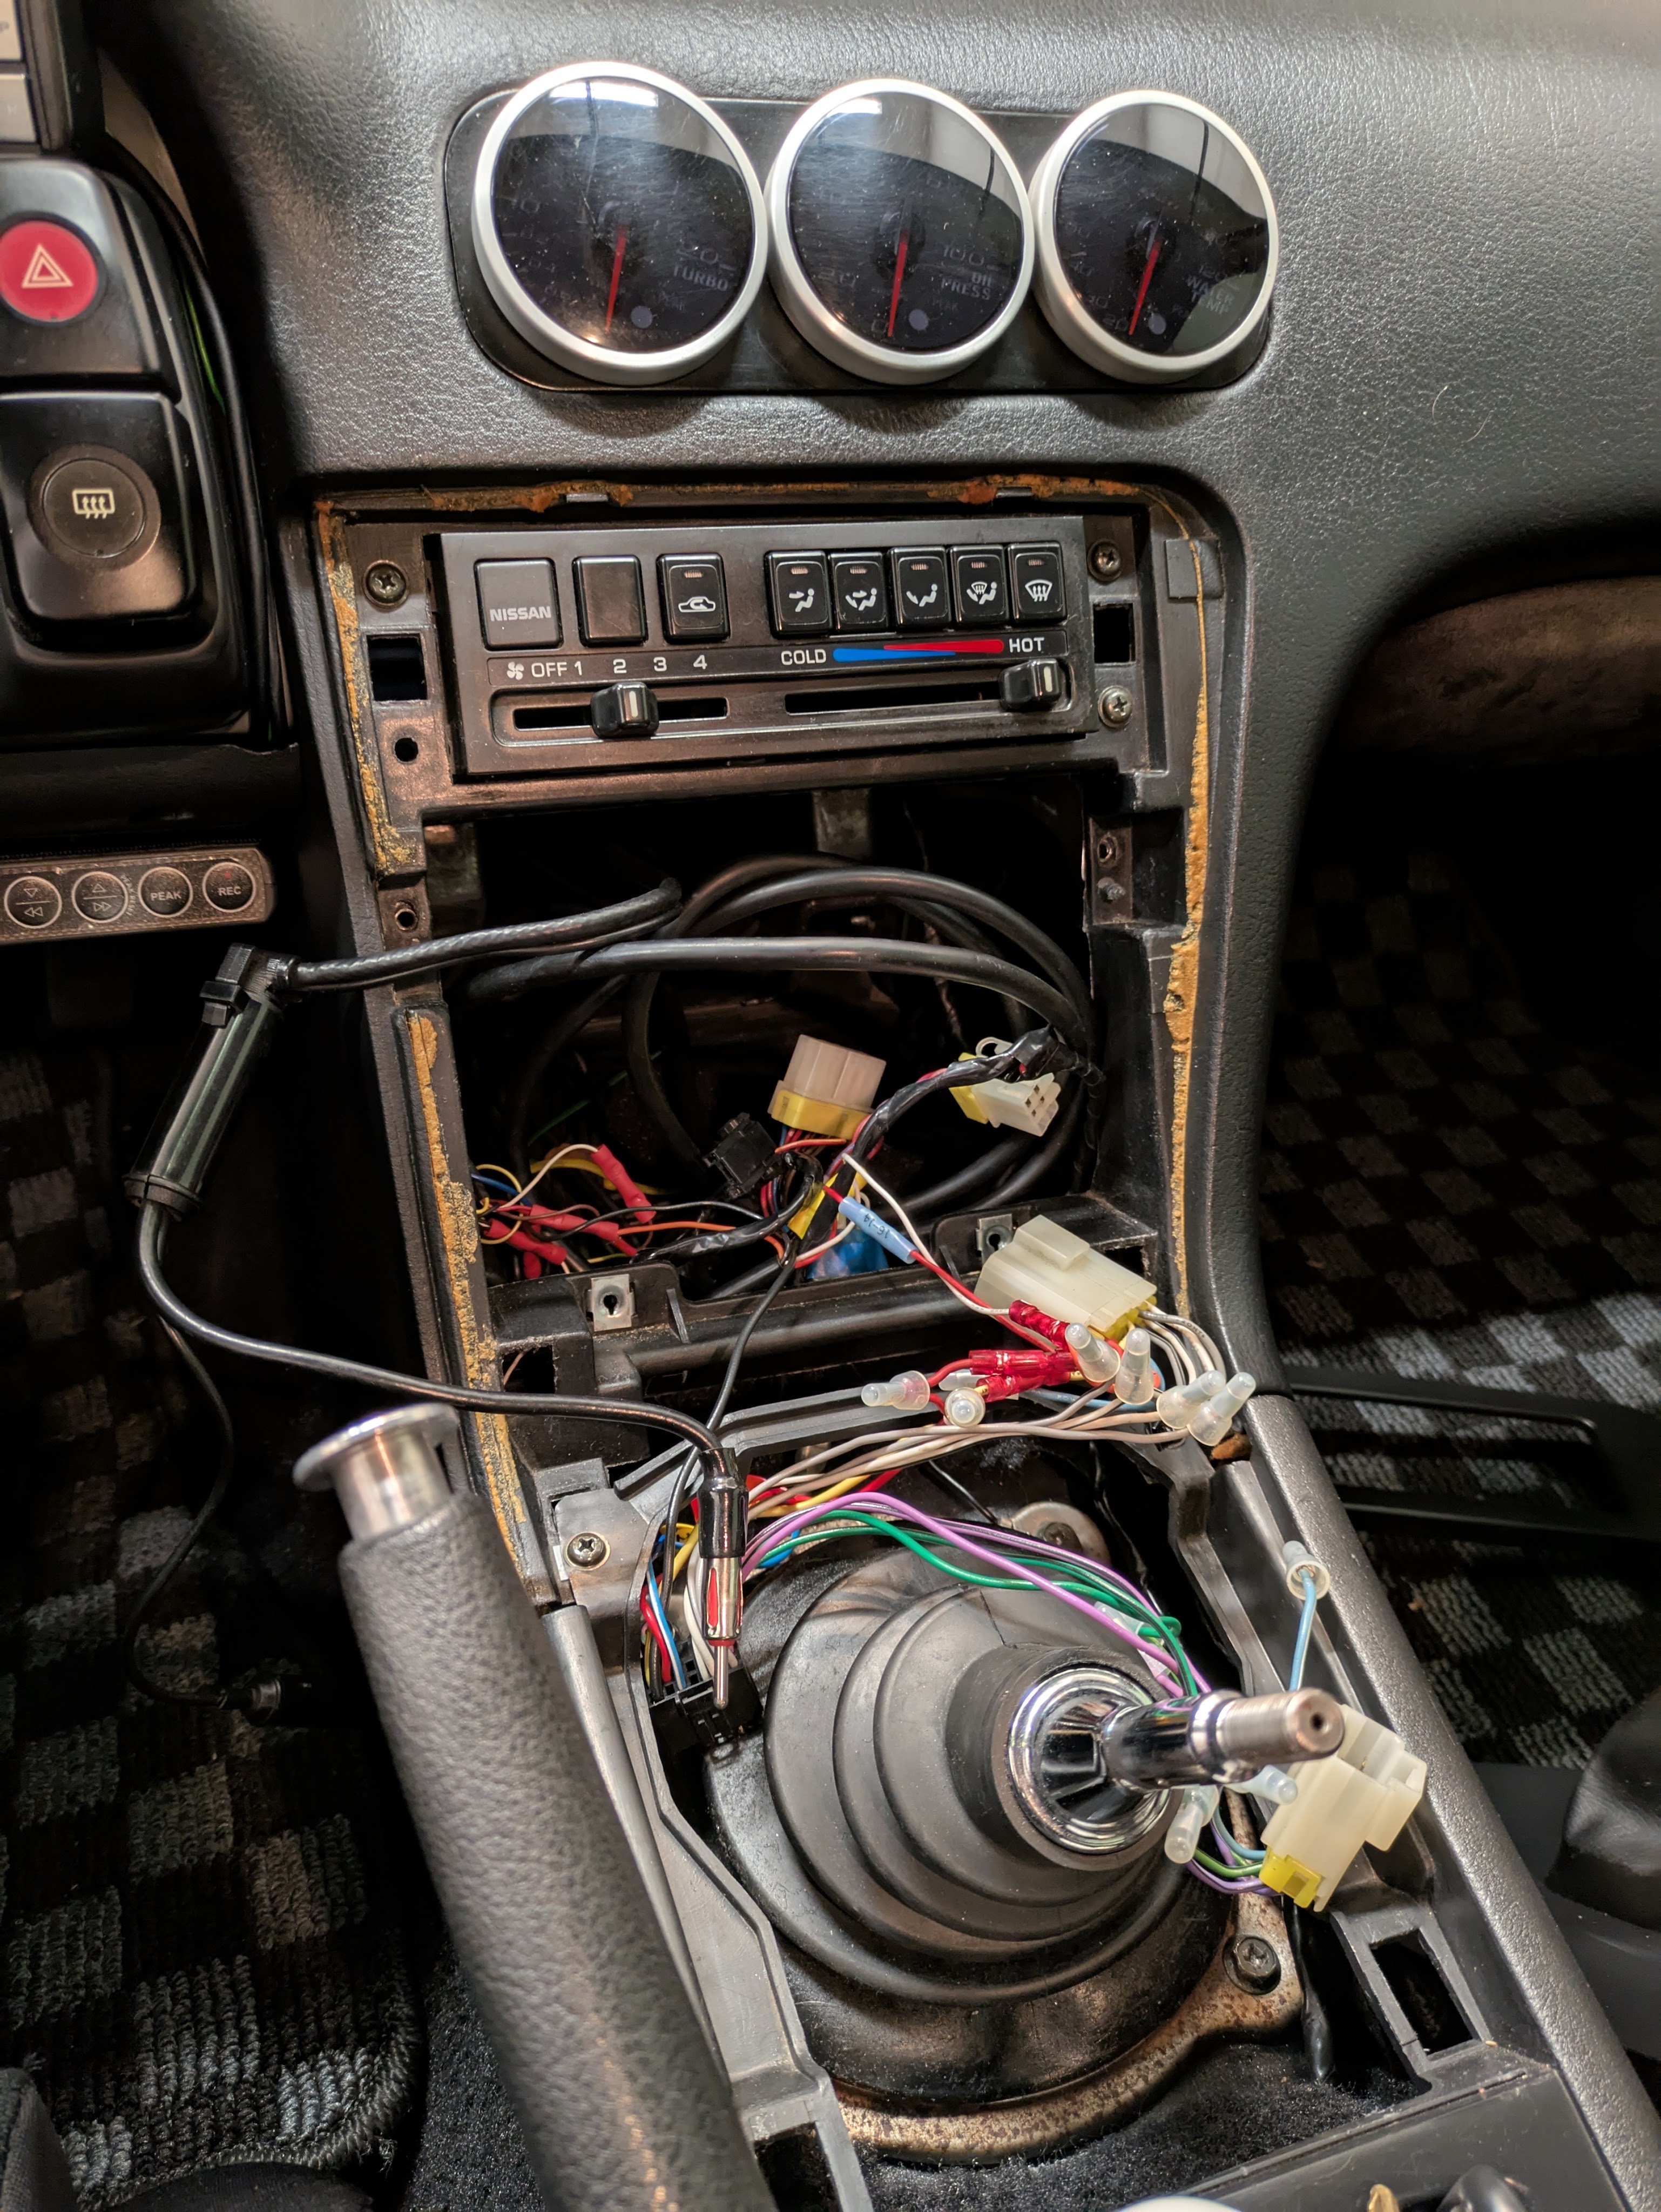
While visually chaotic, it did confirm that my radio harness was uncut, and there were only two taps from the Defi gauges into the radio adapter harness, an easy thing to replicate come time for the new radio install. Overall, very happy with everything under here. The Defi gauges were adding far less complexity than expected, and were actually wired quite well.

While all of this electrical investigation was occurring, my sister had showed up and was doing some panel beating and smoothing on the fender she had just sanded. One of the advantages of having a sibling that worked at the highest end collision repair center in the PNW is the access to very high quality body and paintwork, at a reasonable price. (I bought dinner and provided materials) Very happy with that deal.
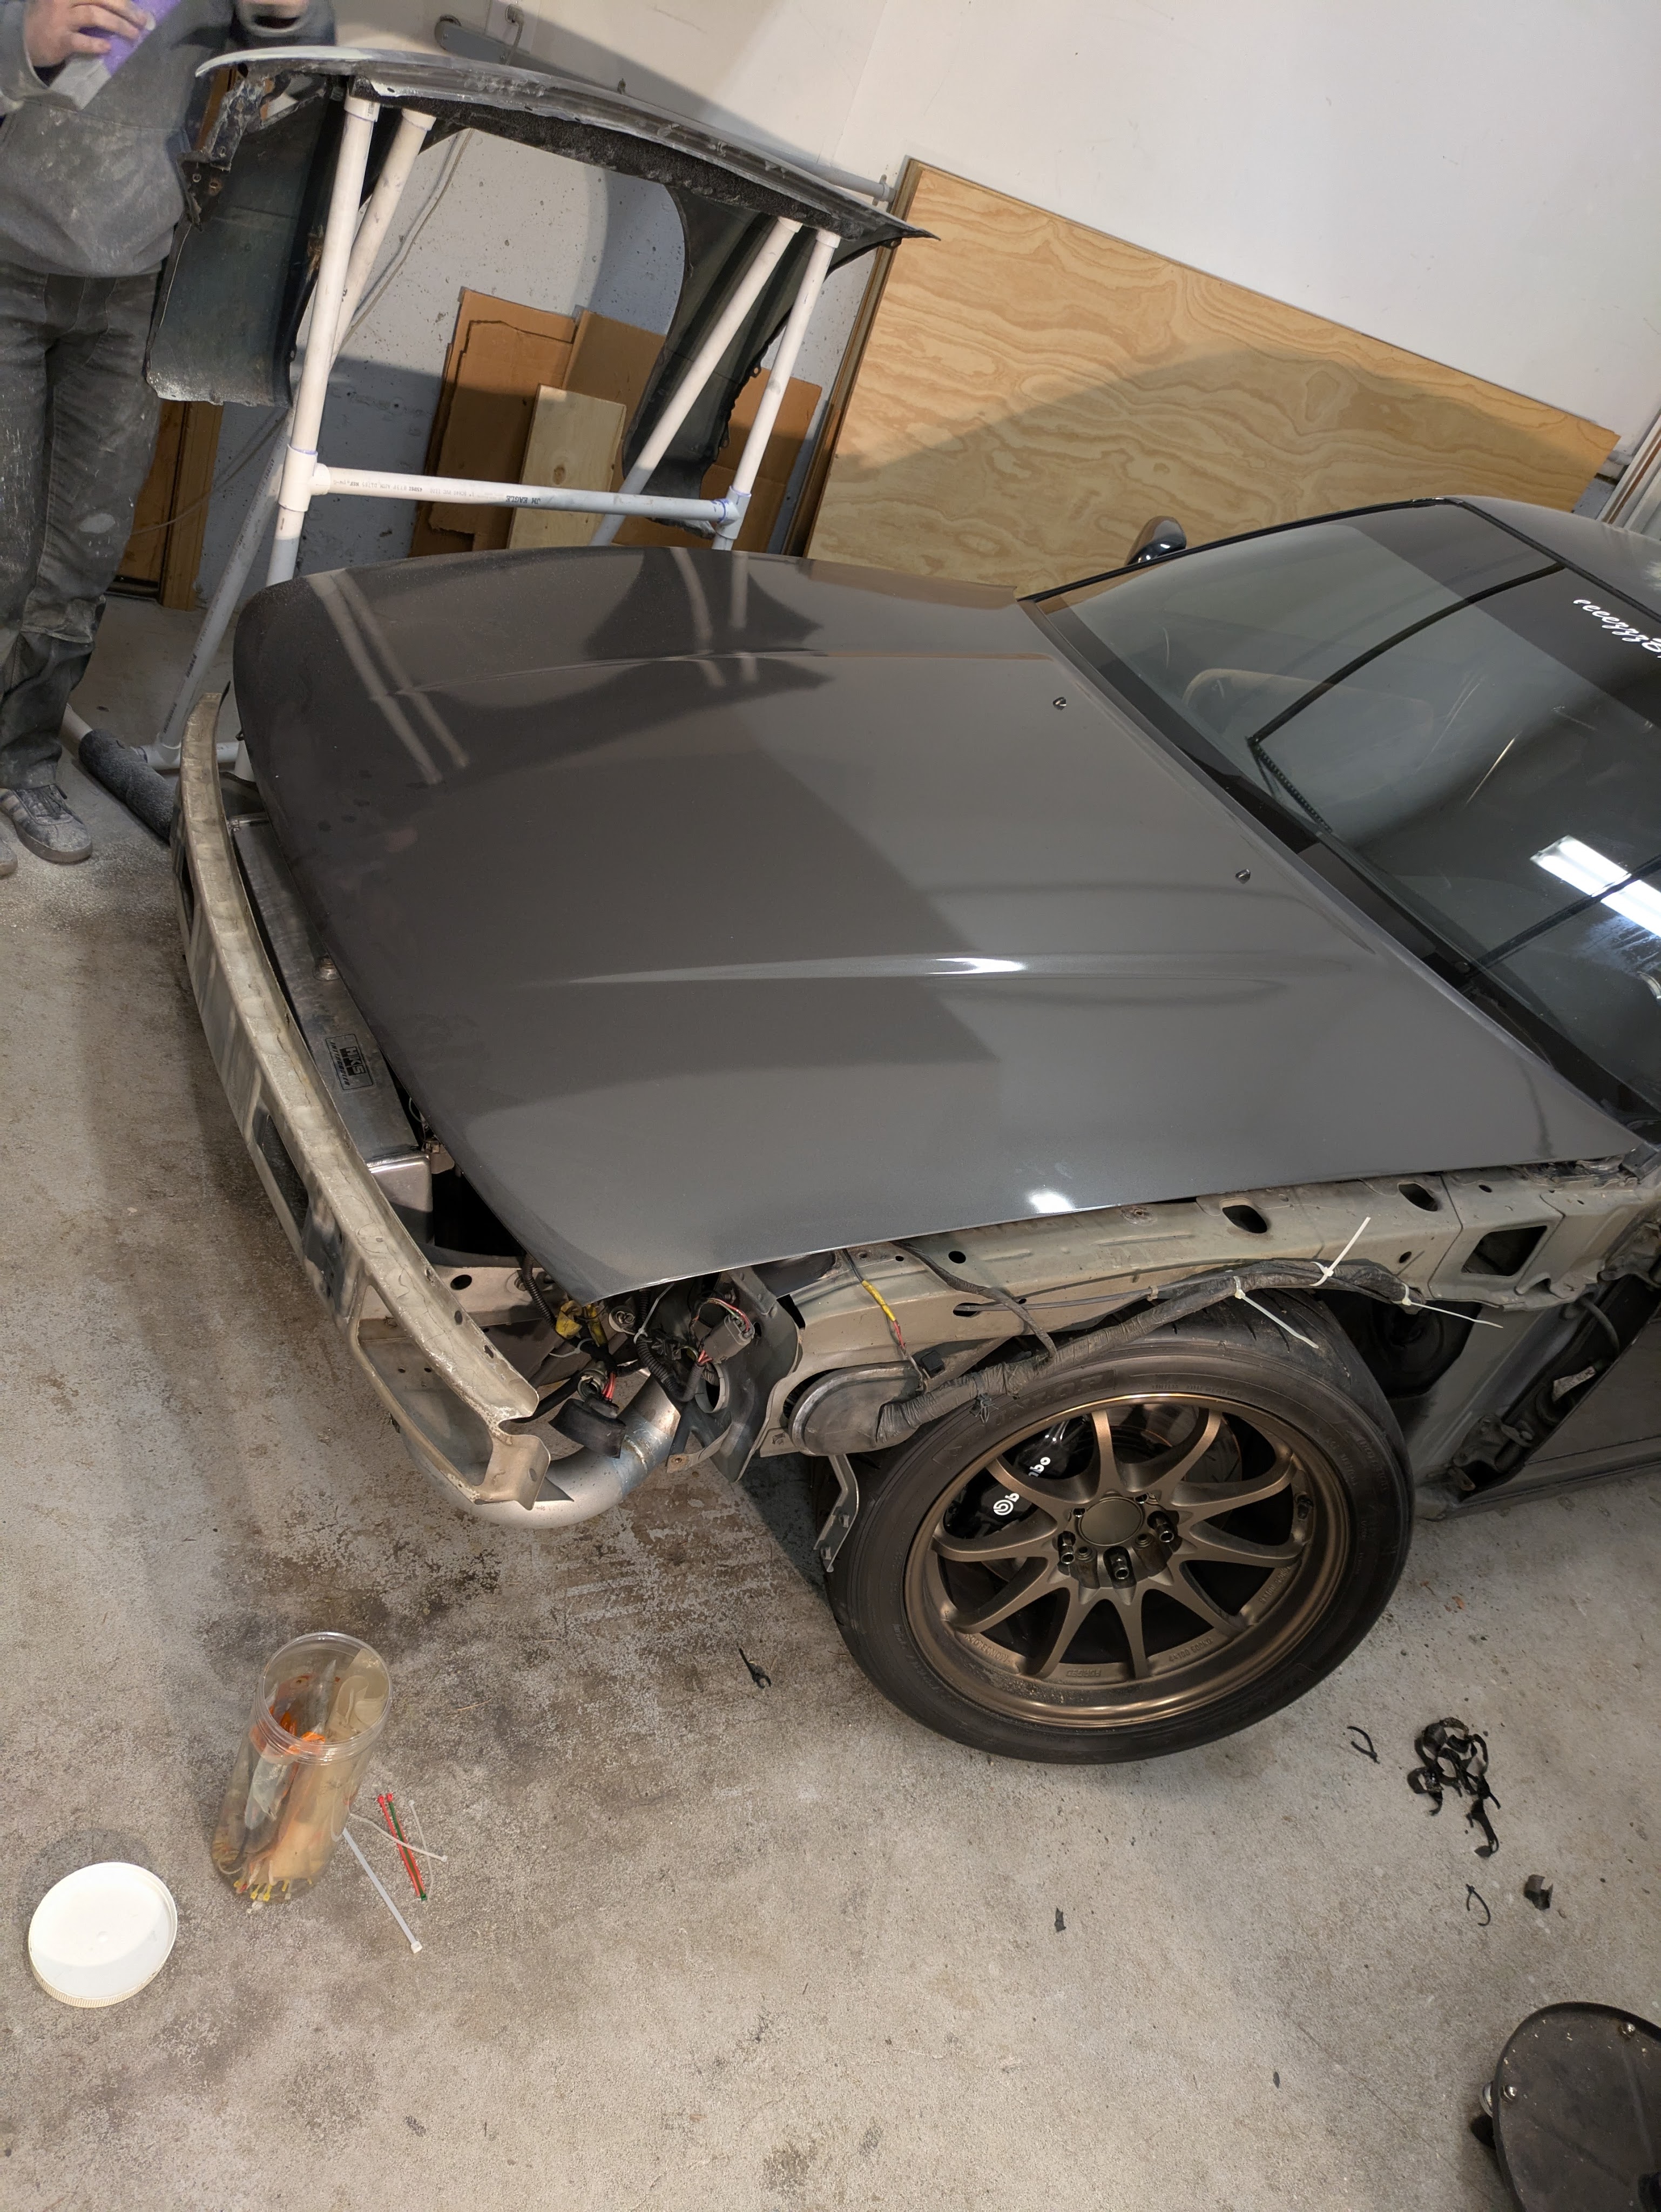
After finishing with my investigating for the day, it didn’t make sense to have the car itself at the house, I took it back to offsite storage after stripping the headlights, grill, and bumper off the car to make it drivable without risk of ejecting a headlight on the way there.
I was trying to reject the Mad Max aesthetic by painting the fender. But for now, I’ve made it worse.
I returned home to the makeshift paint booth that my father and sister had concocted within the family 2 car garage. An interesting deployment of large cardboard boxes and drop clothes netted the overspray containment structure shown below:
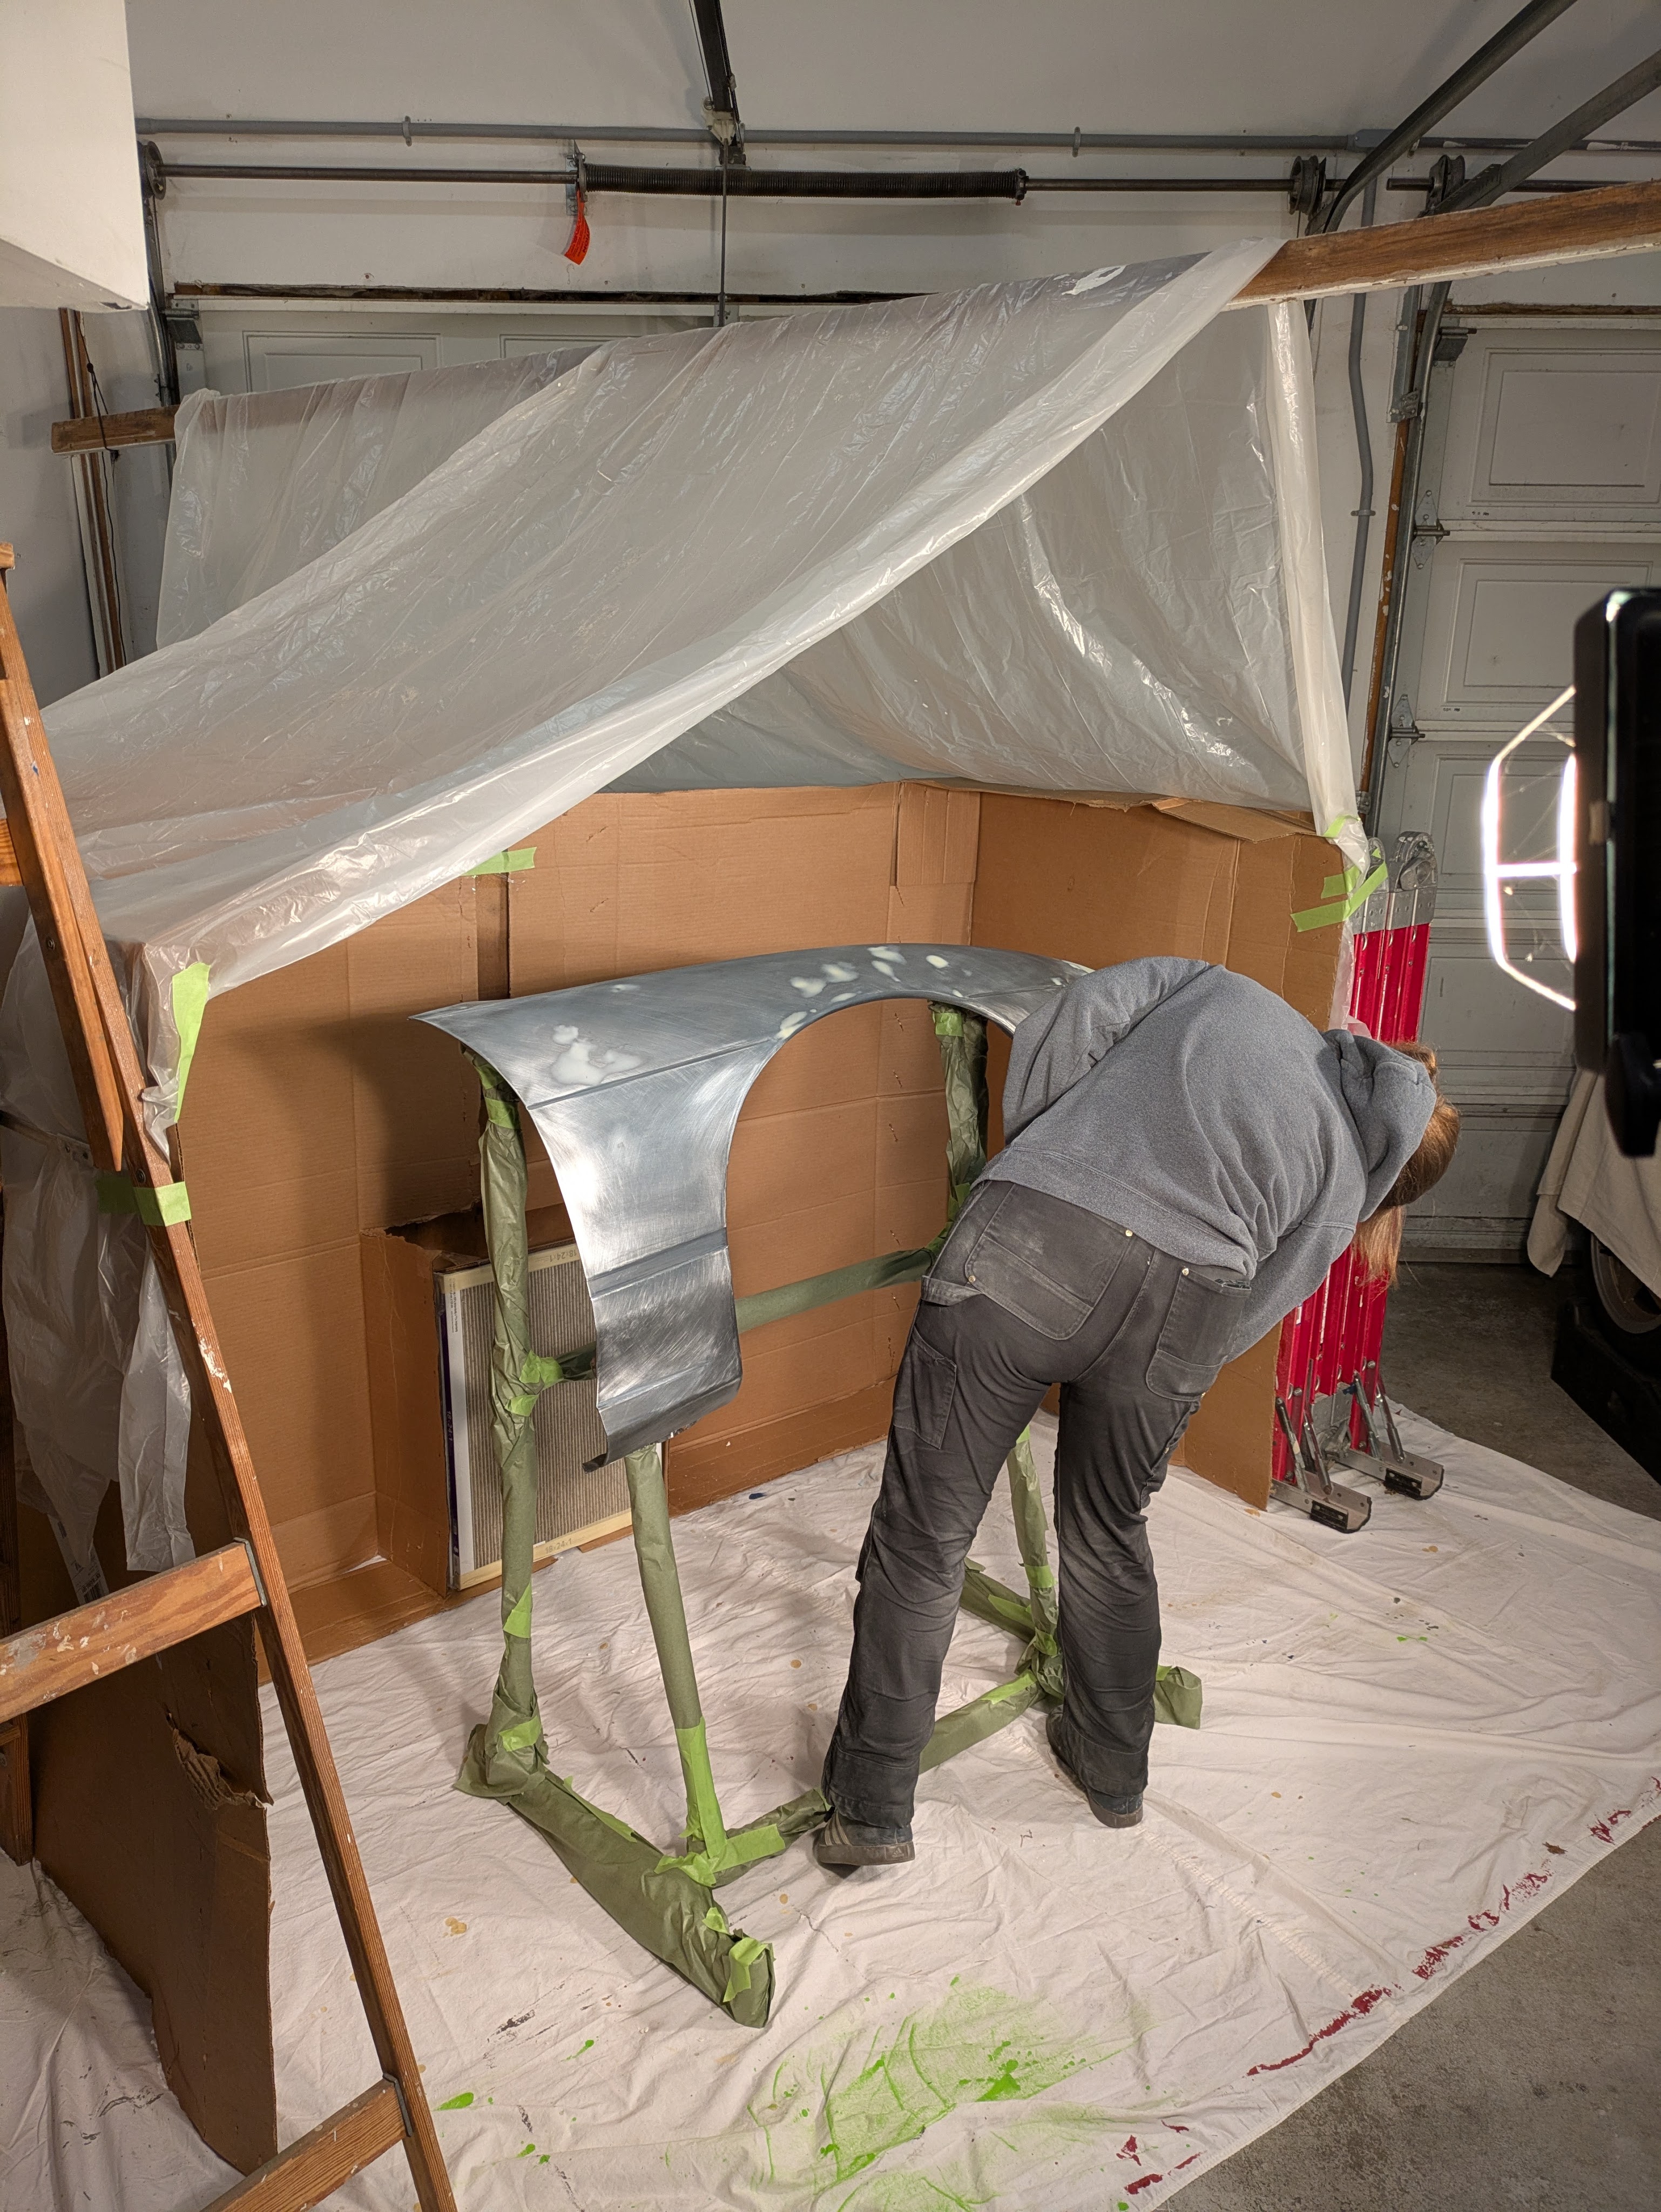
The filter in the back is for a box fan hidden behind the cardboard, making it a negative pressure “enclosure” in an attempt to stop overspray from going everywhere. The stand is the hardtop stand for my Miata, and with some clever use of rope, boards, and ladders, it actually netted a workable setup.
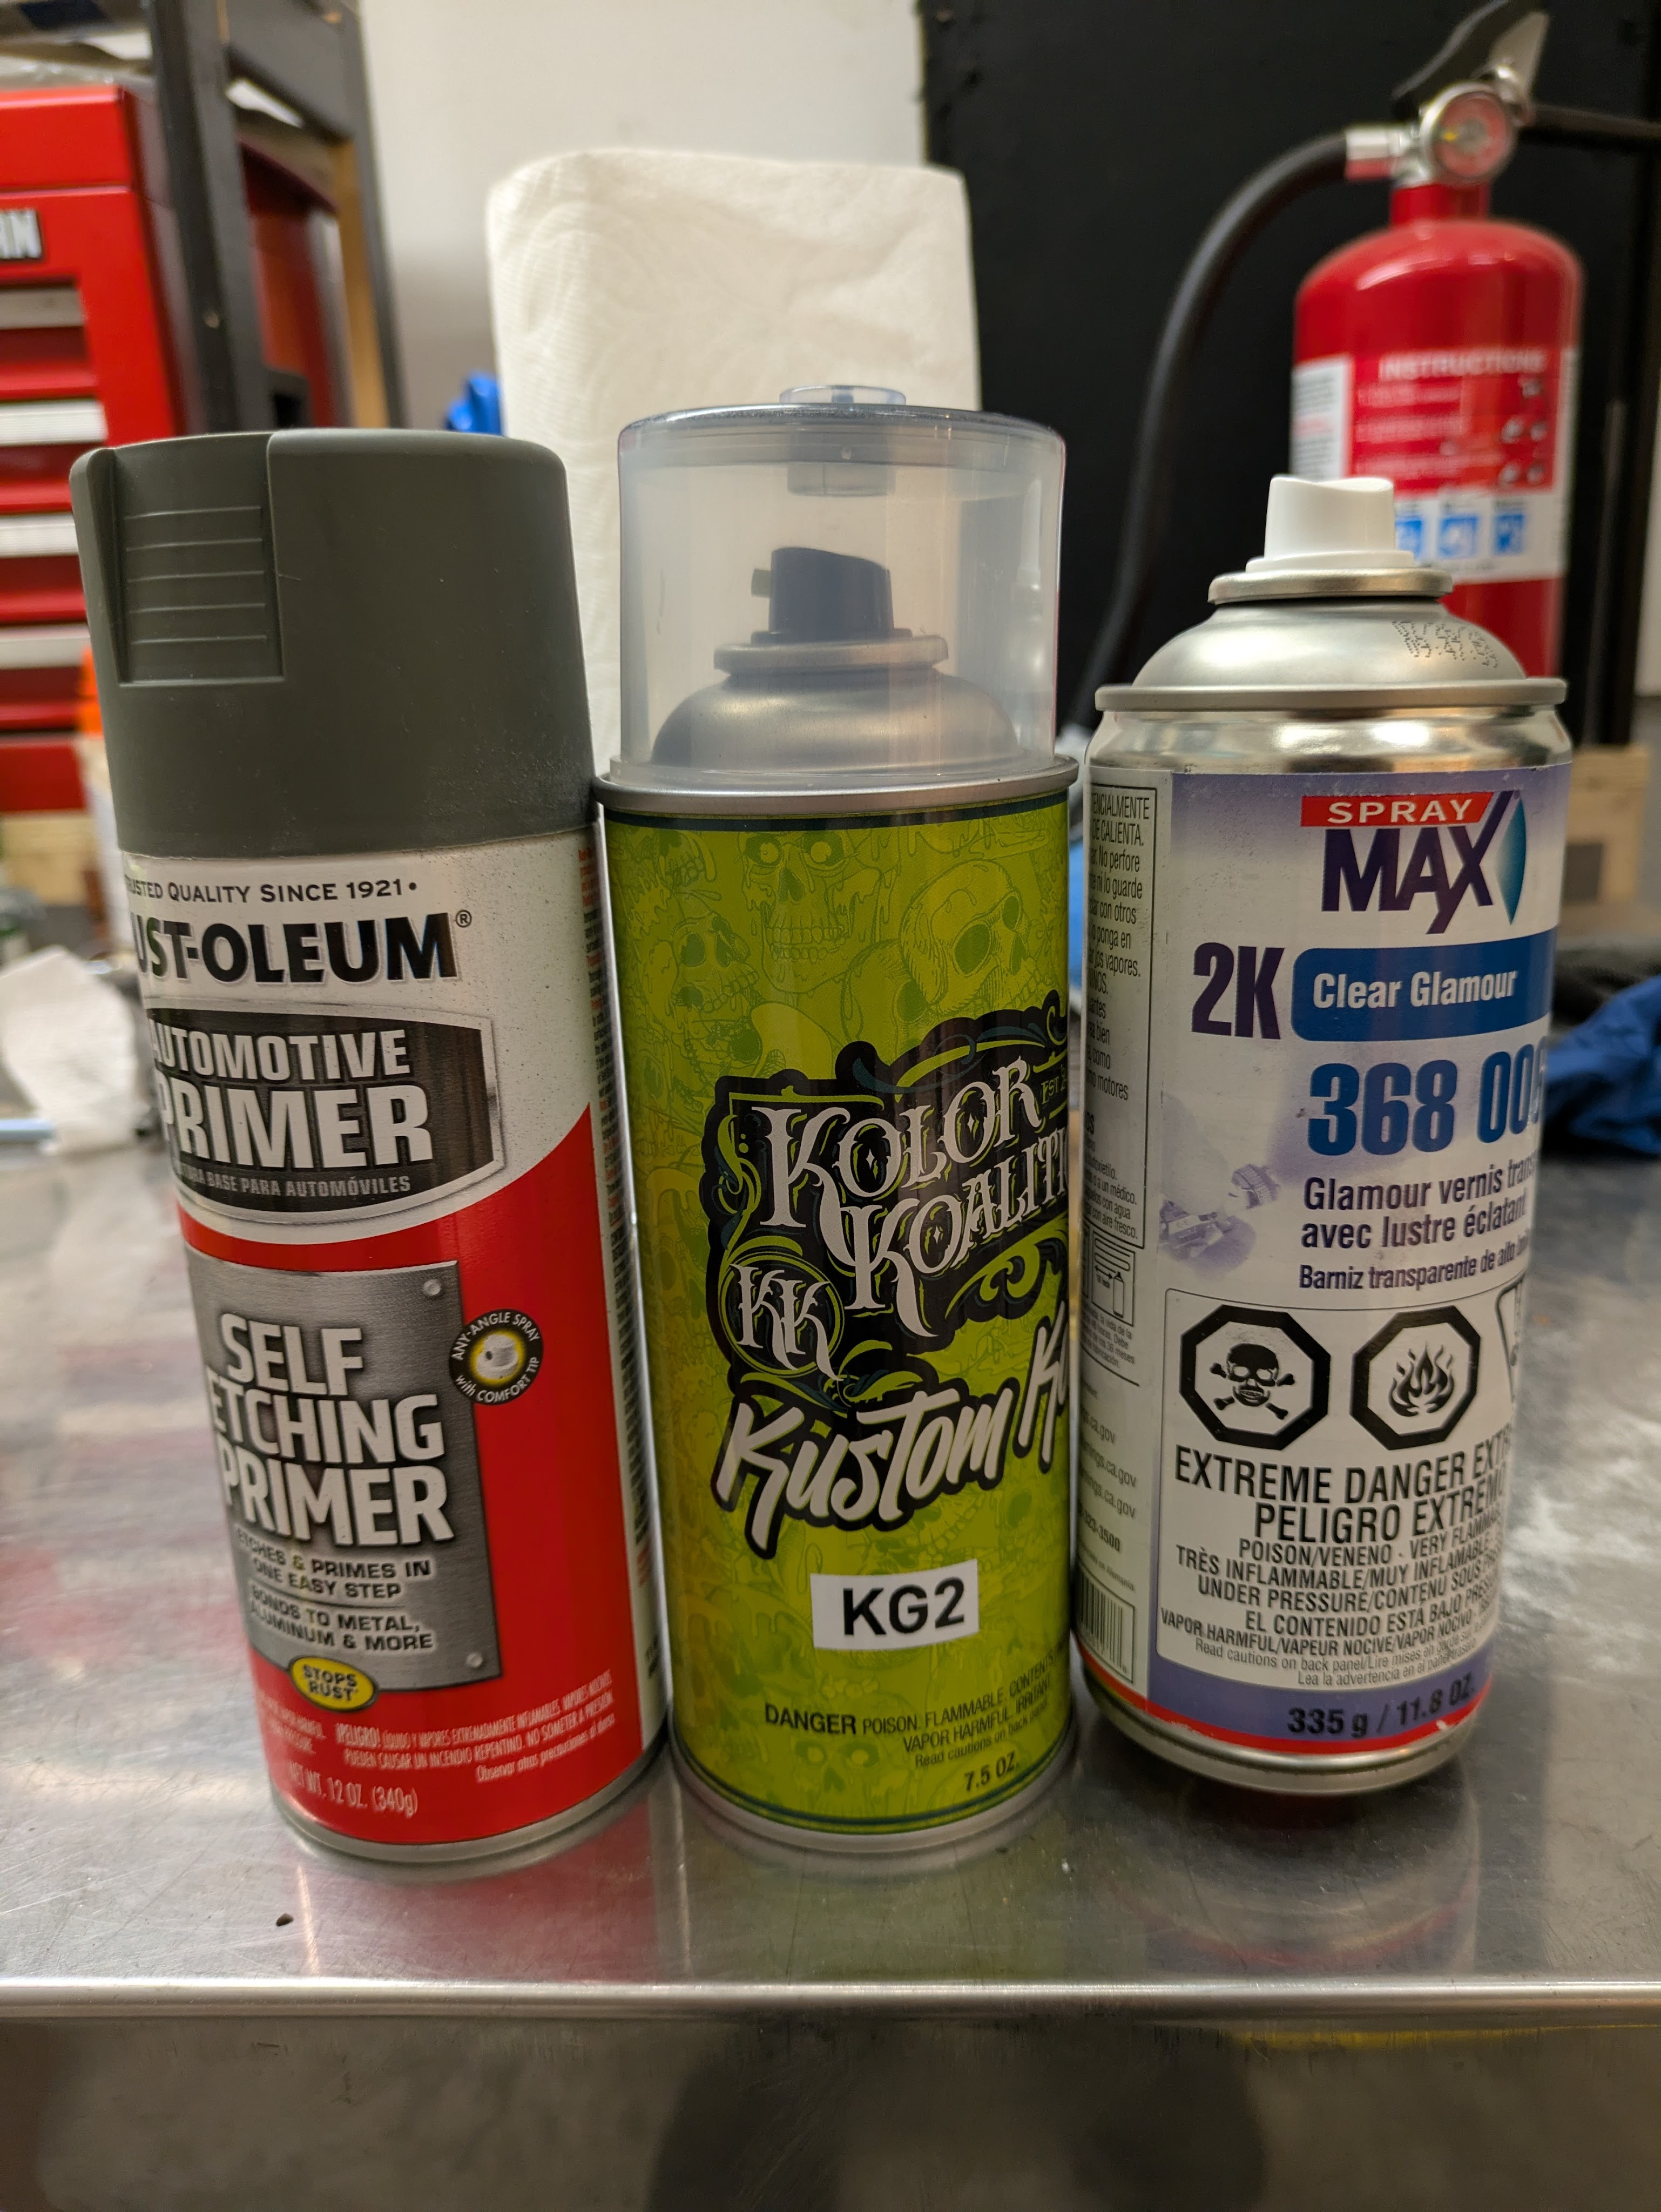
This is the stack of products we ended up with. The Rust-Oleum was purchased by my sister day of, just because I wanted her to get what she wanted for the situation. The Kolor Koalition and SprayMAX, as well as a kit of supplies not shown, was purchased from thetouchupshop.com. Fairly established outfit out of Vegas that had a very easy to navigate site with well considered kits and a really simple colormatch tool by year/make/model. If I have my pick of companies for a certain product, I’ll usually go for a combination of reviews and how fleshed out their “About Us” page is. They also gave great directions for flash times of the aerosol products they provide. Quick shipping and fair prices sealed the deal, and I also ordered touch up paint for every vehicle I own from them. Might as well.
My only regret was that I didn’t order primer from them. They offer some very nice SEM and Transtar primers, and while nothing went wrong with the stuff I had, I like using the nice stuff when possible. That’s on me, and I know for next time.
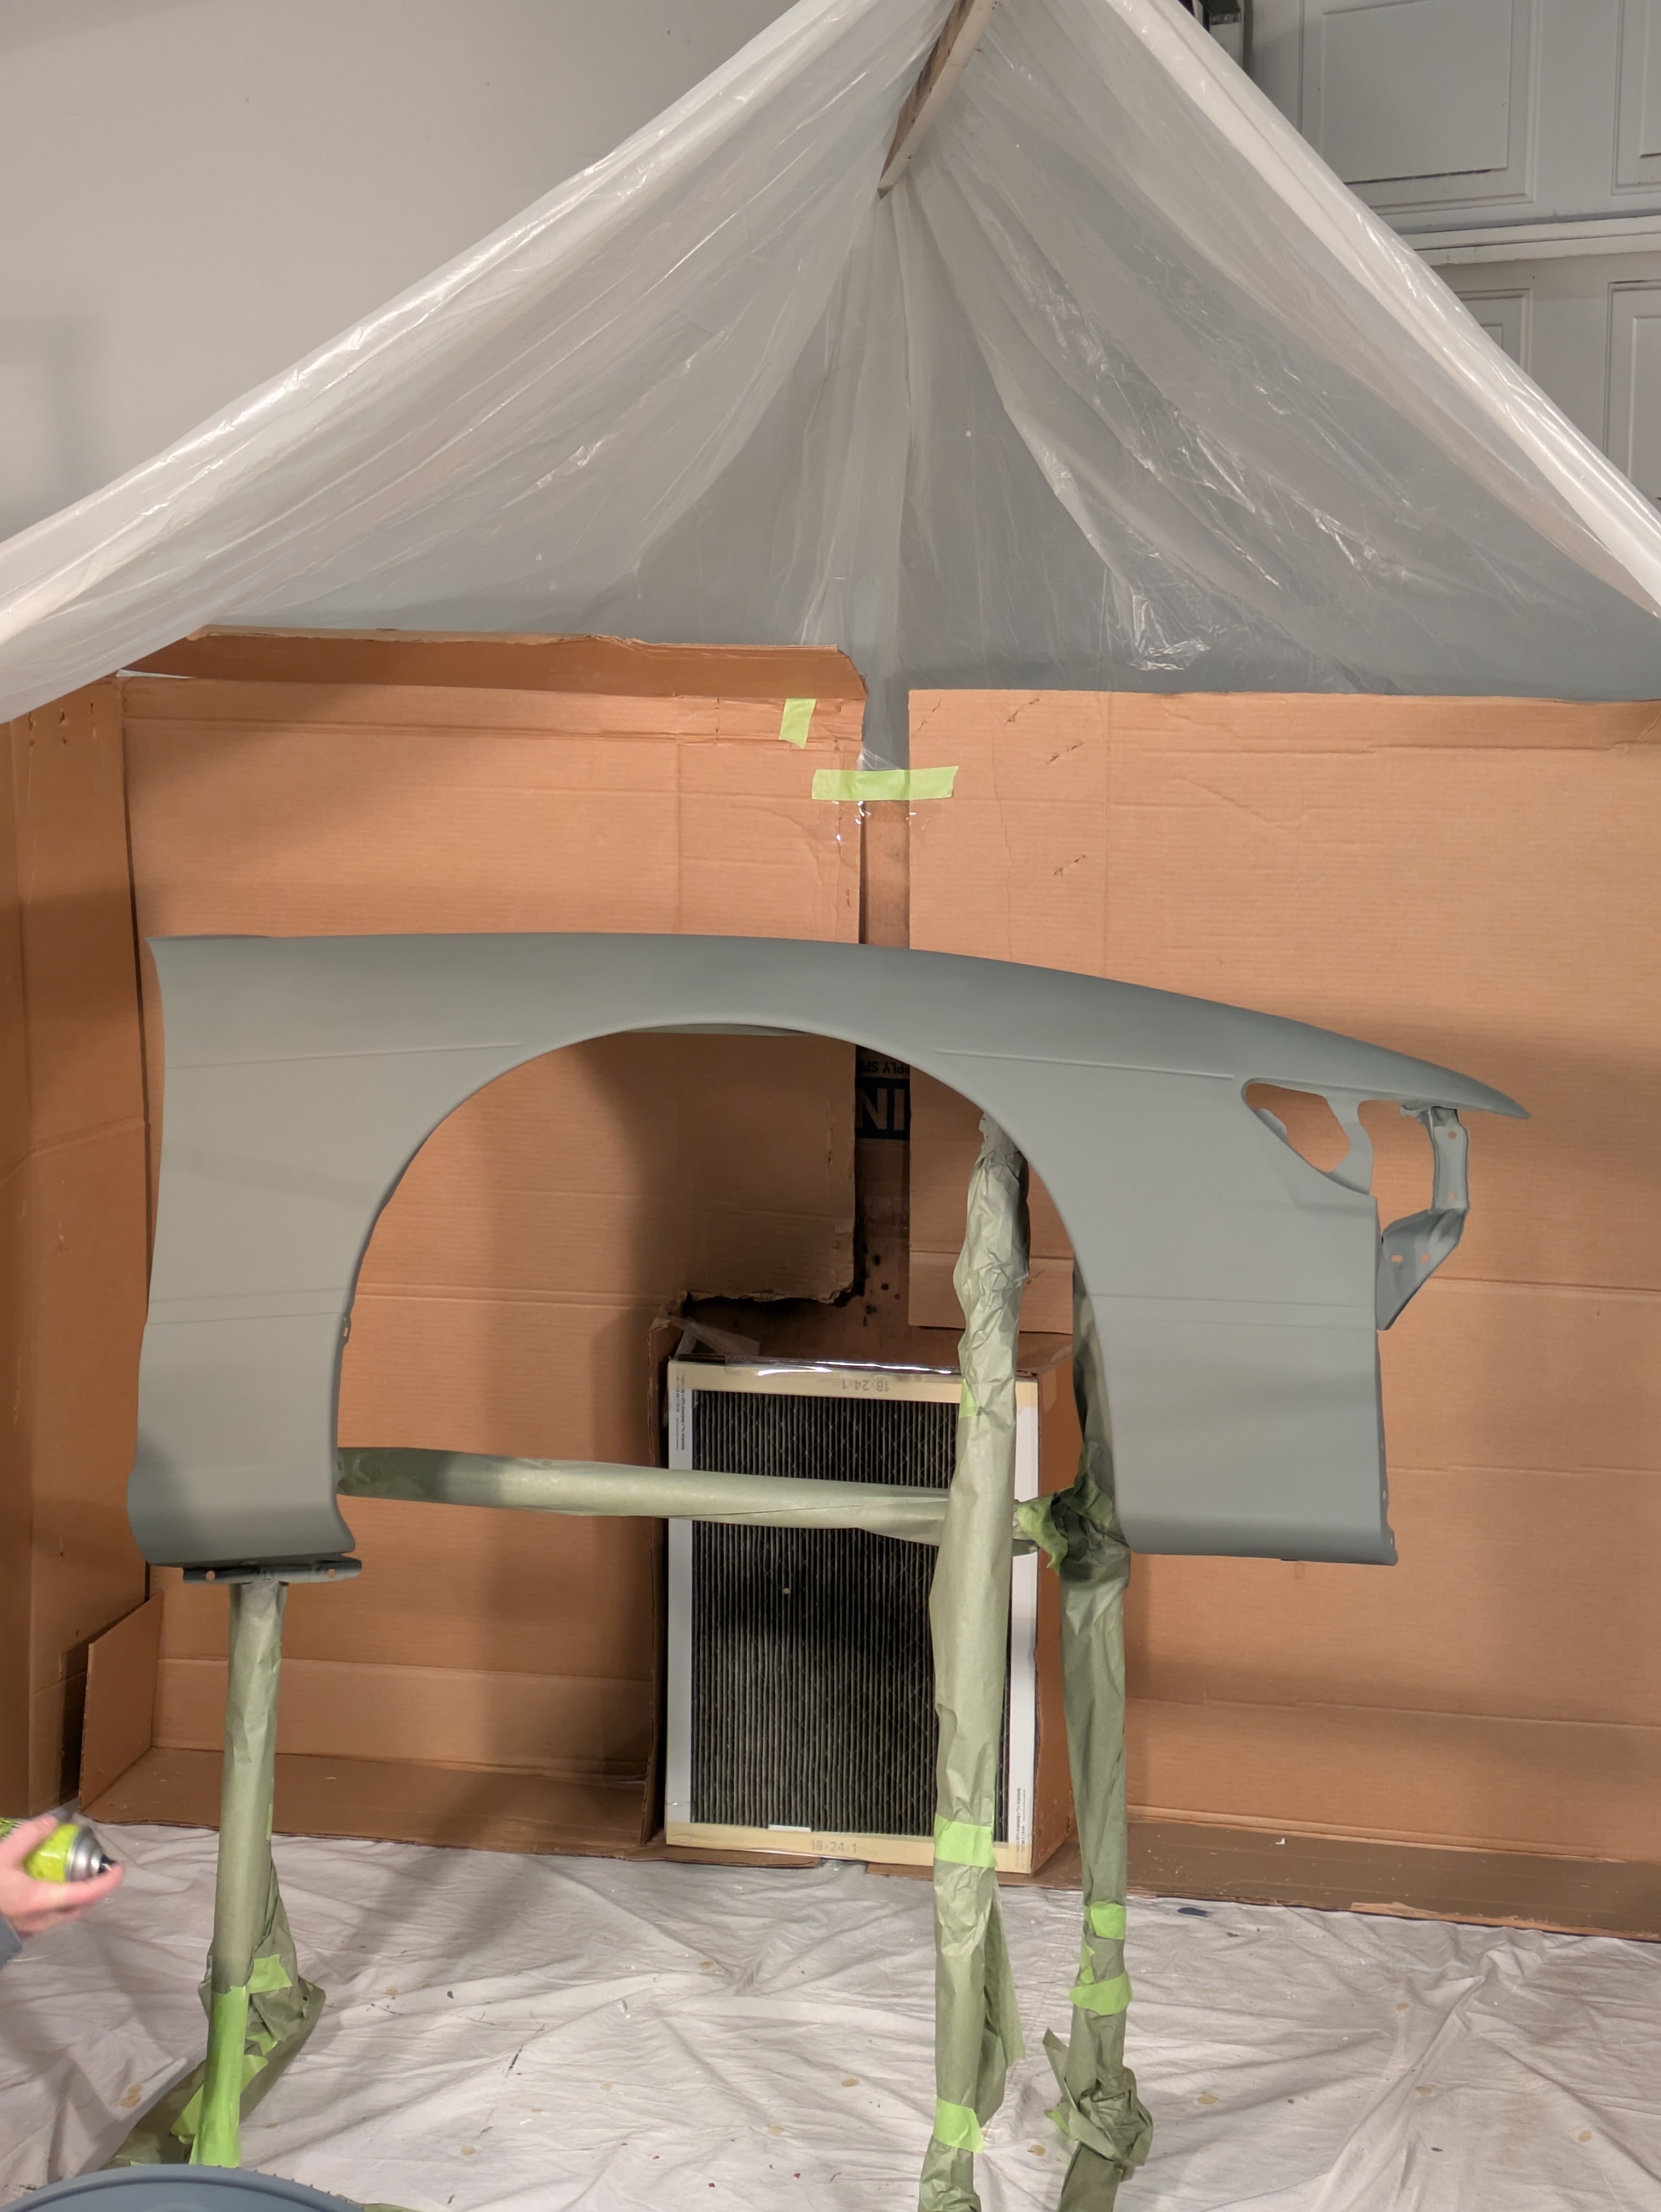
Primer laid out nice.
My sister also brought a gambit of her favorite products along, which filled in the rest of the process, mostly blocks, sanding paper, and a couple of high end solvents. (love me some Spies Hecker Permahyd) The kit from the touchupshop included most of those things, but she had her preferences for grits and brought her own tools, so I was not going to object to any of it. We ended up using basically everything in the “everything you need” kit, living up to it’s name. Would buy again if needed. Would recommend.
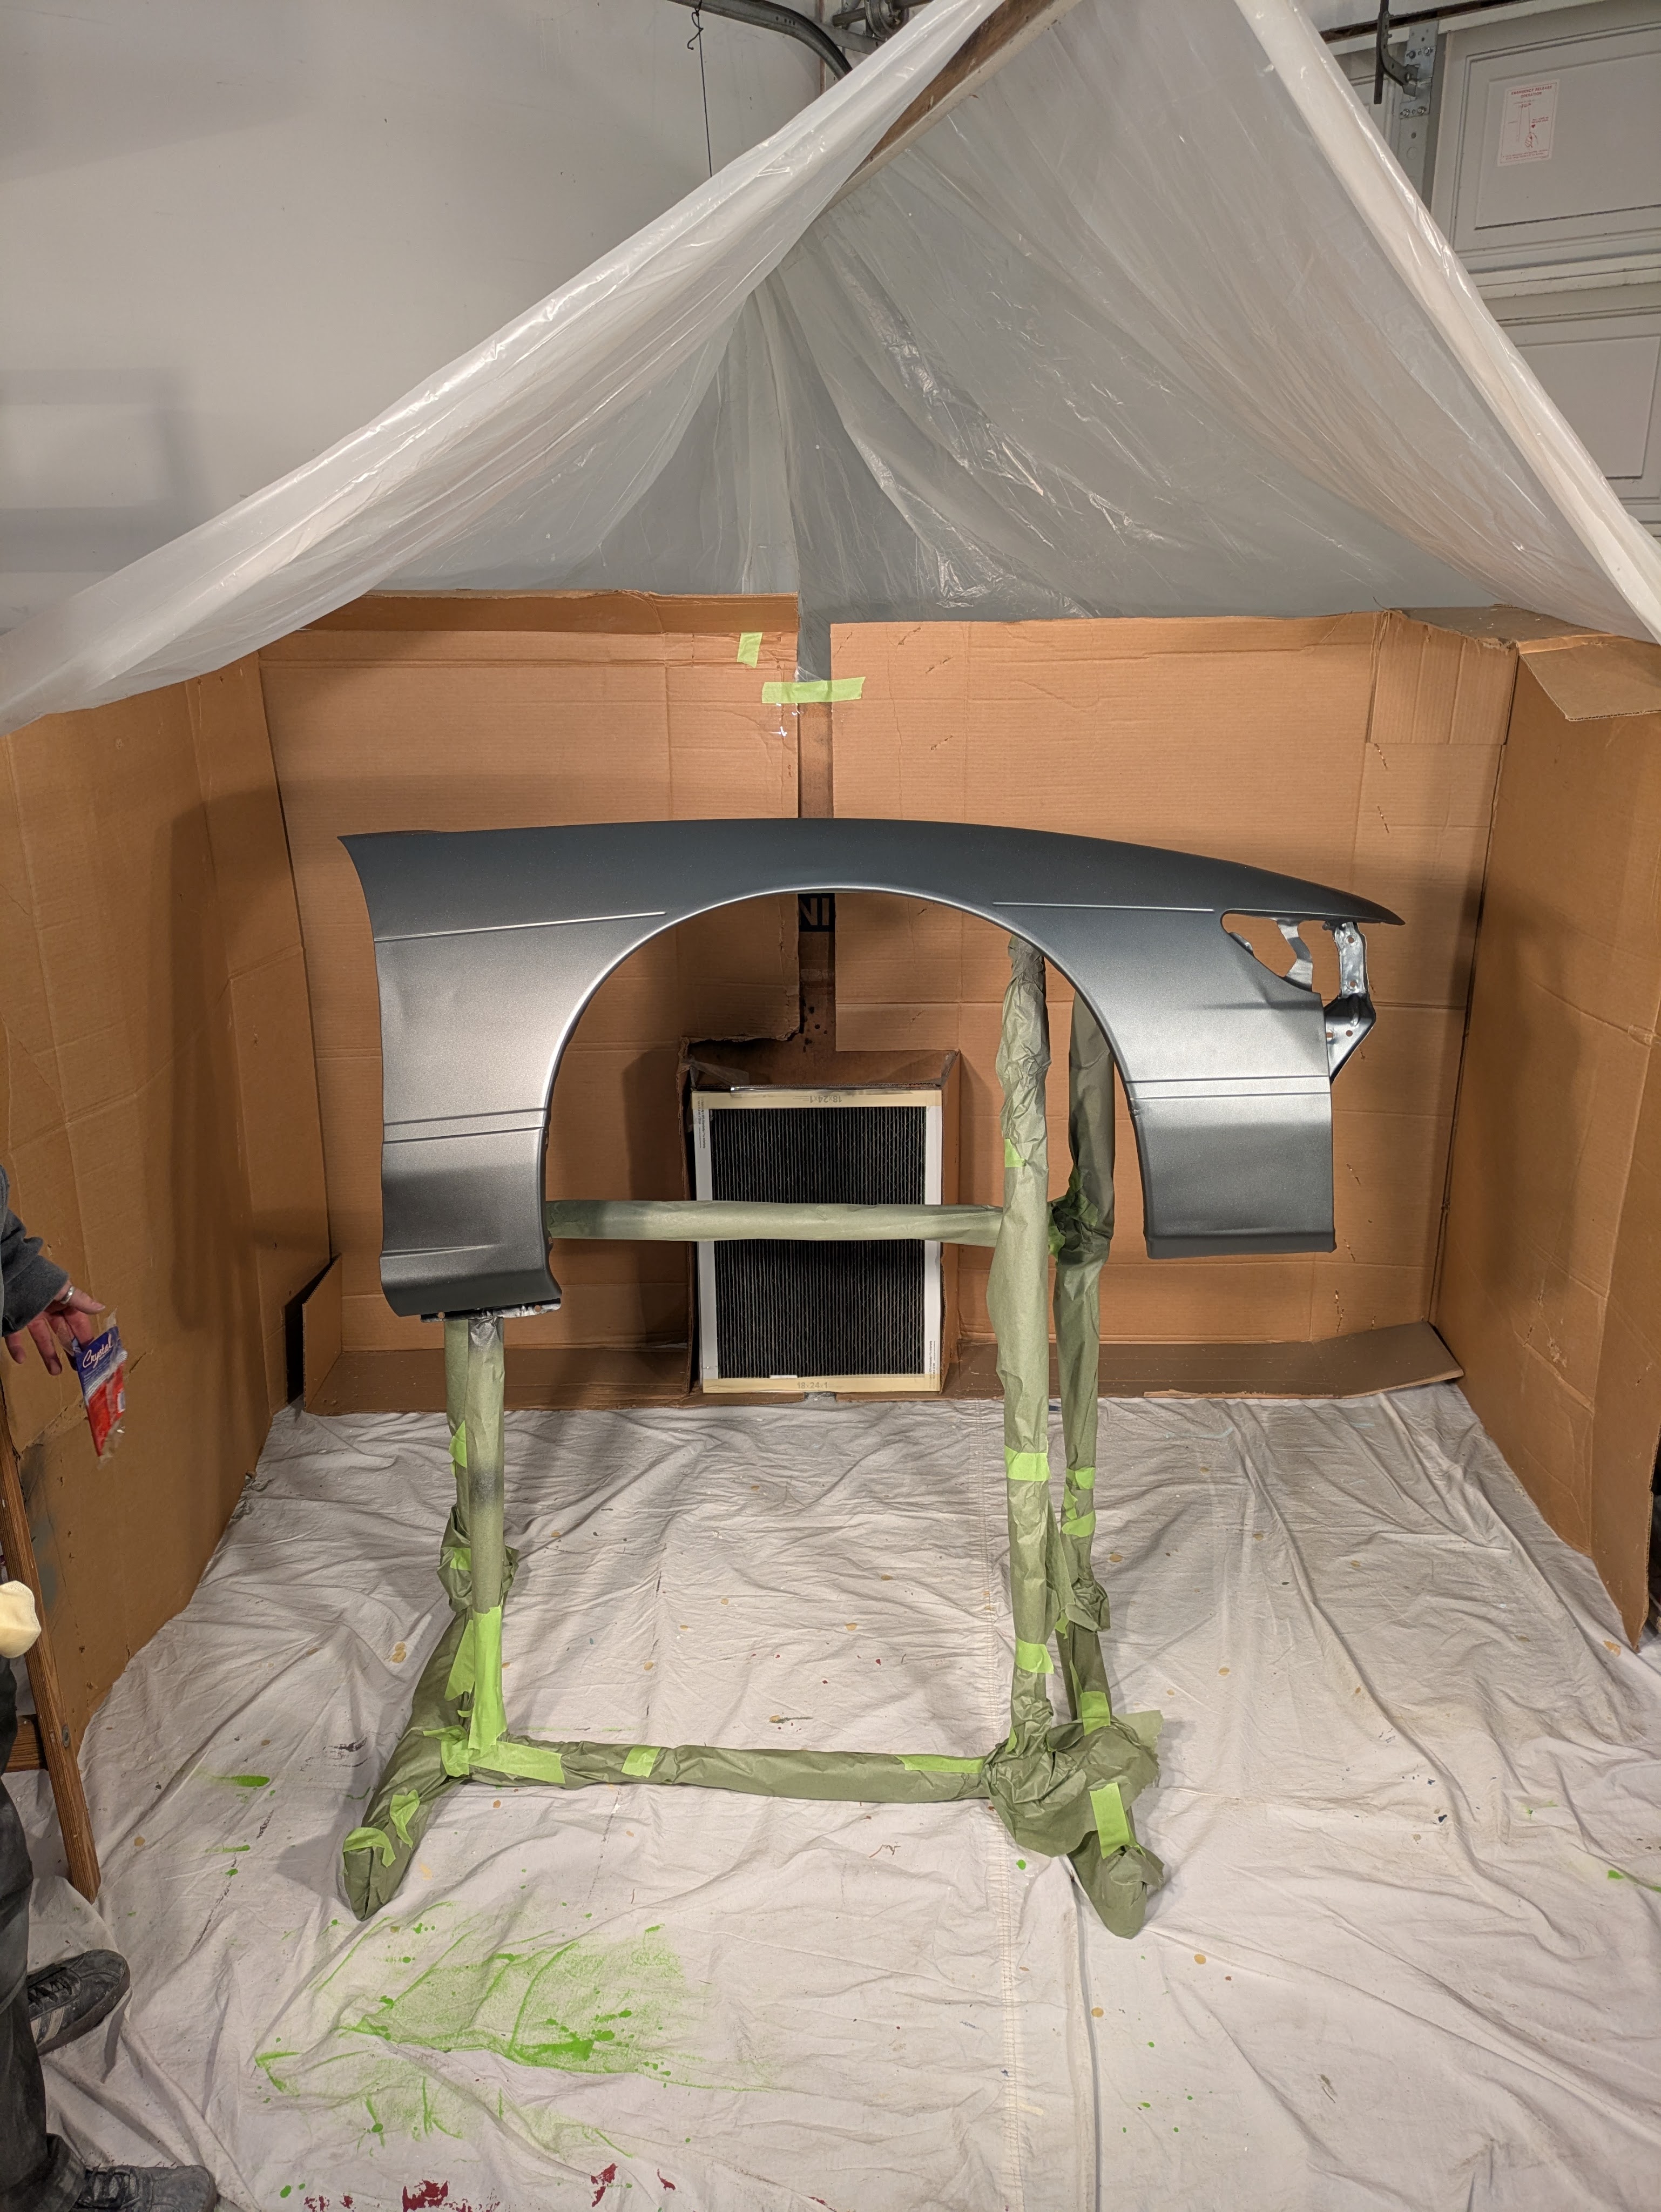
The color laid out very nice, and didn’t react to the primer below it, which was a concern of mine. I’d used a different site’s paint match service many years ago for a Volvo bumper, and their paint reacted horribly with the store-bought primer that I had used. From my understanding from my sister’s experience, spray paint is a very fickle process because you either lay it down all back to back, or you have to wait days for it to cure before you can layer it. Its very easy to fish eye or solvent pop if you aren’t careful, or in my experience straight up bubble and crack off. Luckily the flash time of each product was compatible with what we were looking to achieve, and the layers laid out really well. Another thing worth noting is it was March, and we had 3 heat sources, combining to roughly 2400W of heat blasting straight at the “pant boof” in order to maintain some reasonable level of temperature on the substrate.
Now that color is laid down, the remaining imperfections with the panel are obvious. The massive crease in the front and the dings in the back were something that was discussed, but the council determined weren’t worth chasing. This is a track car that’s going to see abuse, and realistically, this whole car will get painted at some point. Its really easy to scrutinize flaws like that in harsh lighting at eye level, however on the car in-situ, it’ll still be the shiniest panel on the car. The imperfections in the top are now mitigated, which is the region that matters, and now it won’t rust. Overall win.
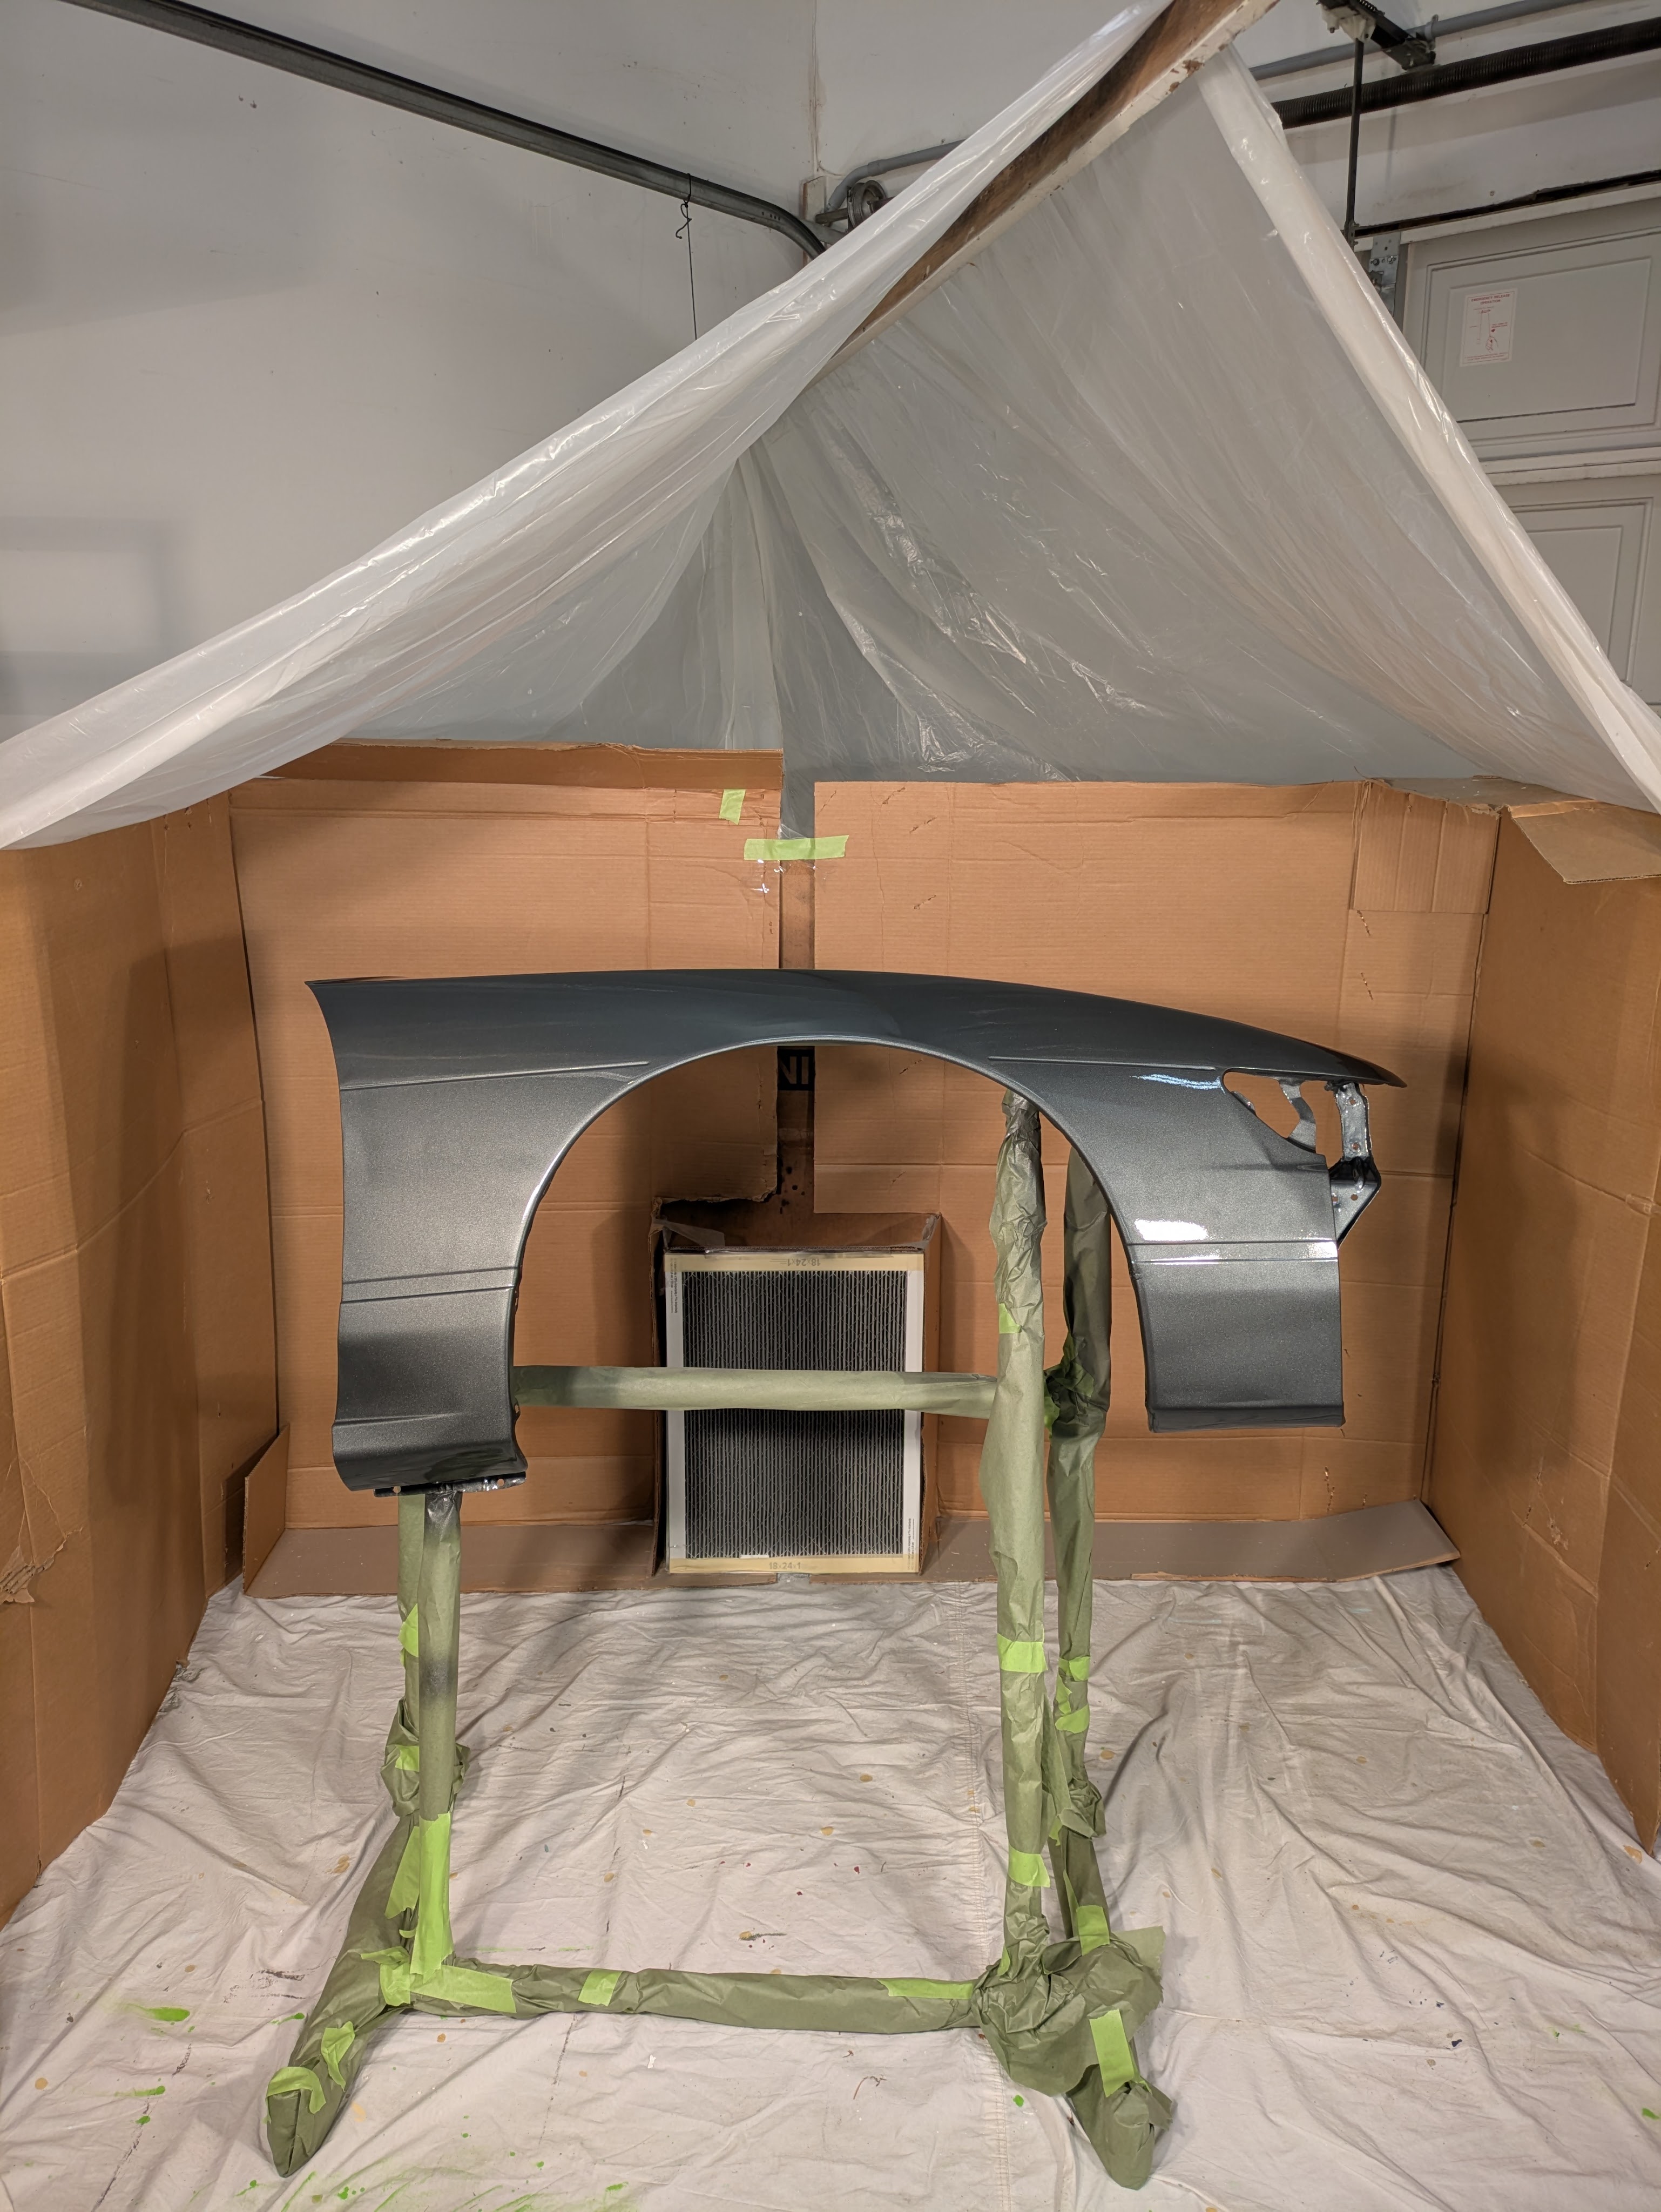
The clear went on as good as a can of clear can lay down. My sister and I have experience with the SprayMAX 2k from past projects, and if you lay it on right, it turns out pretty great. It has texture, but again, track car. I can wet sand and polish that out if it really bothers me, but it won’t.
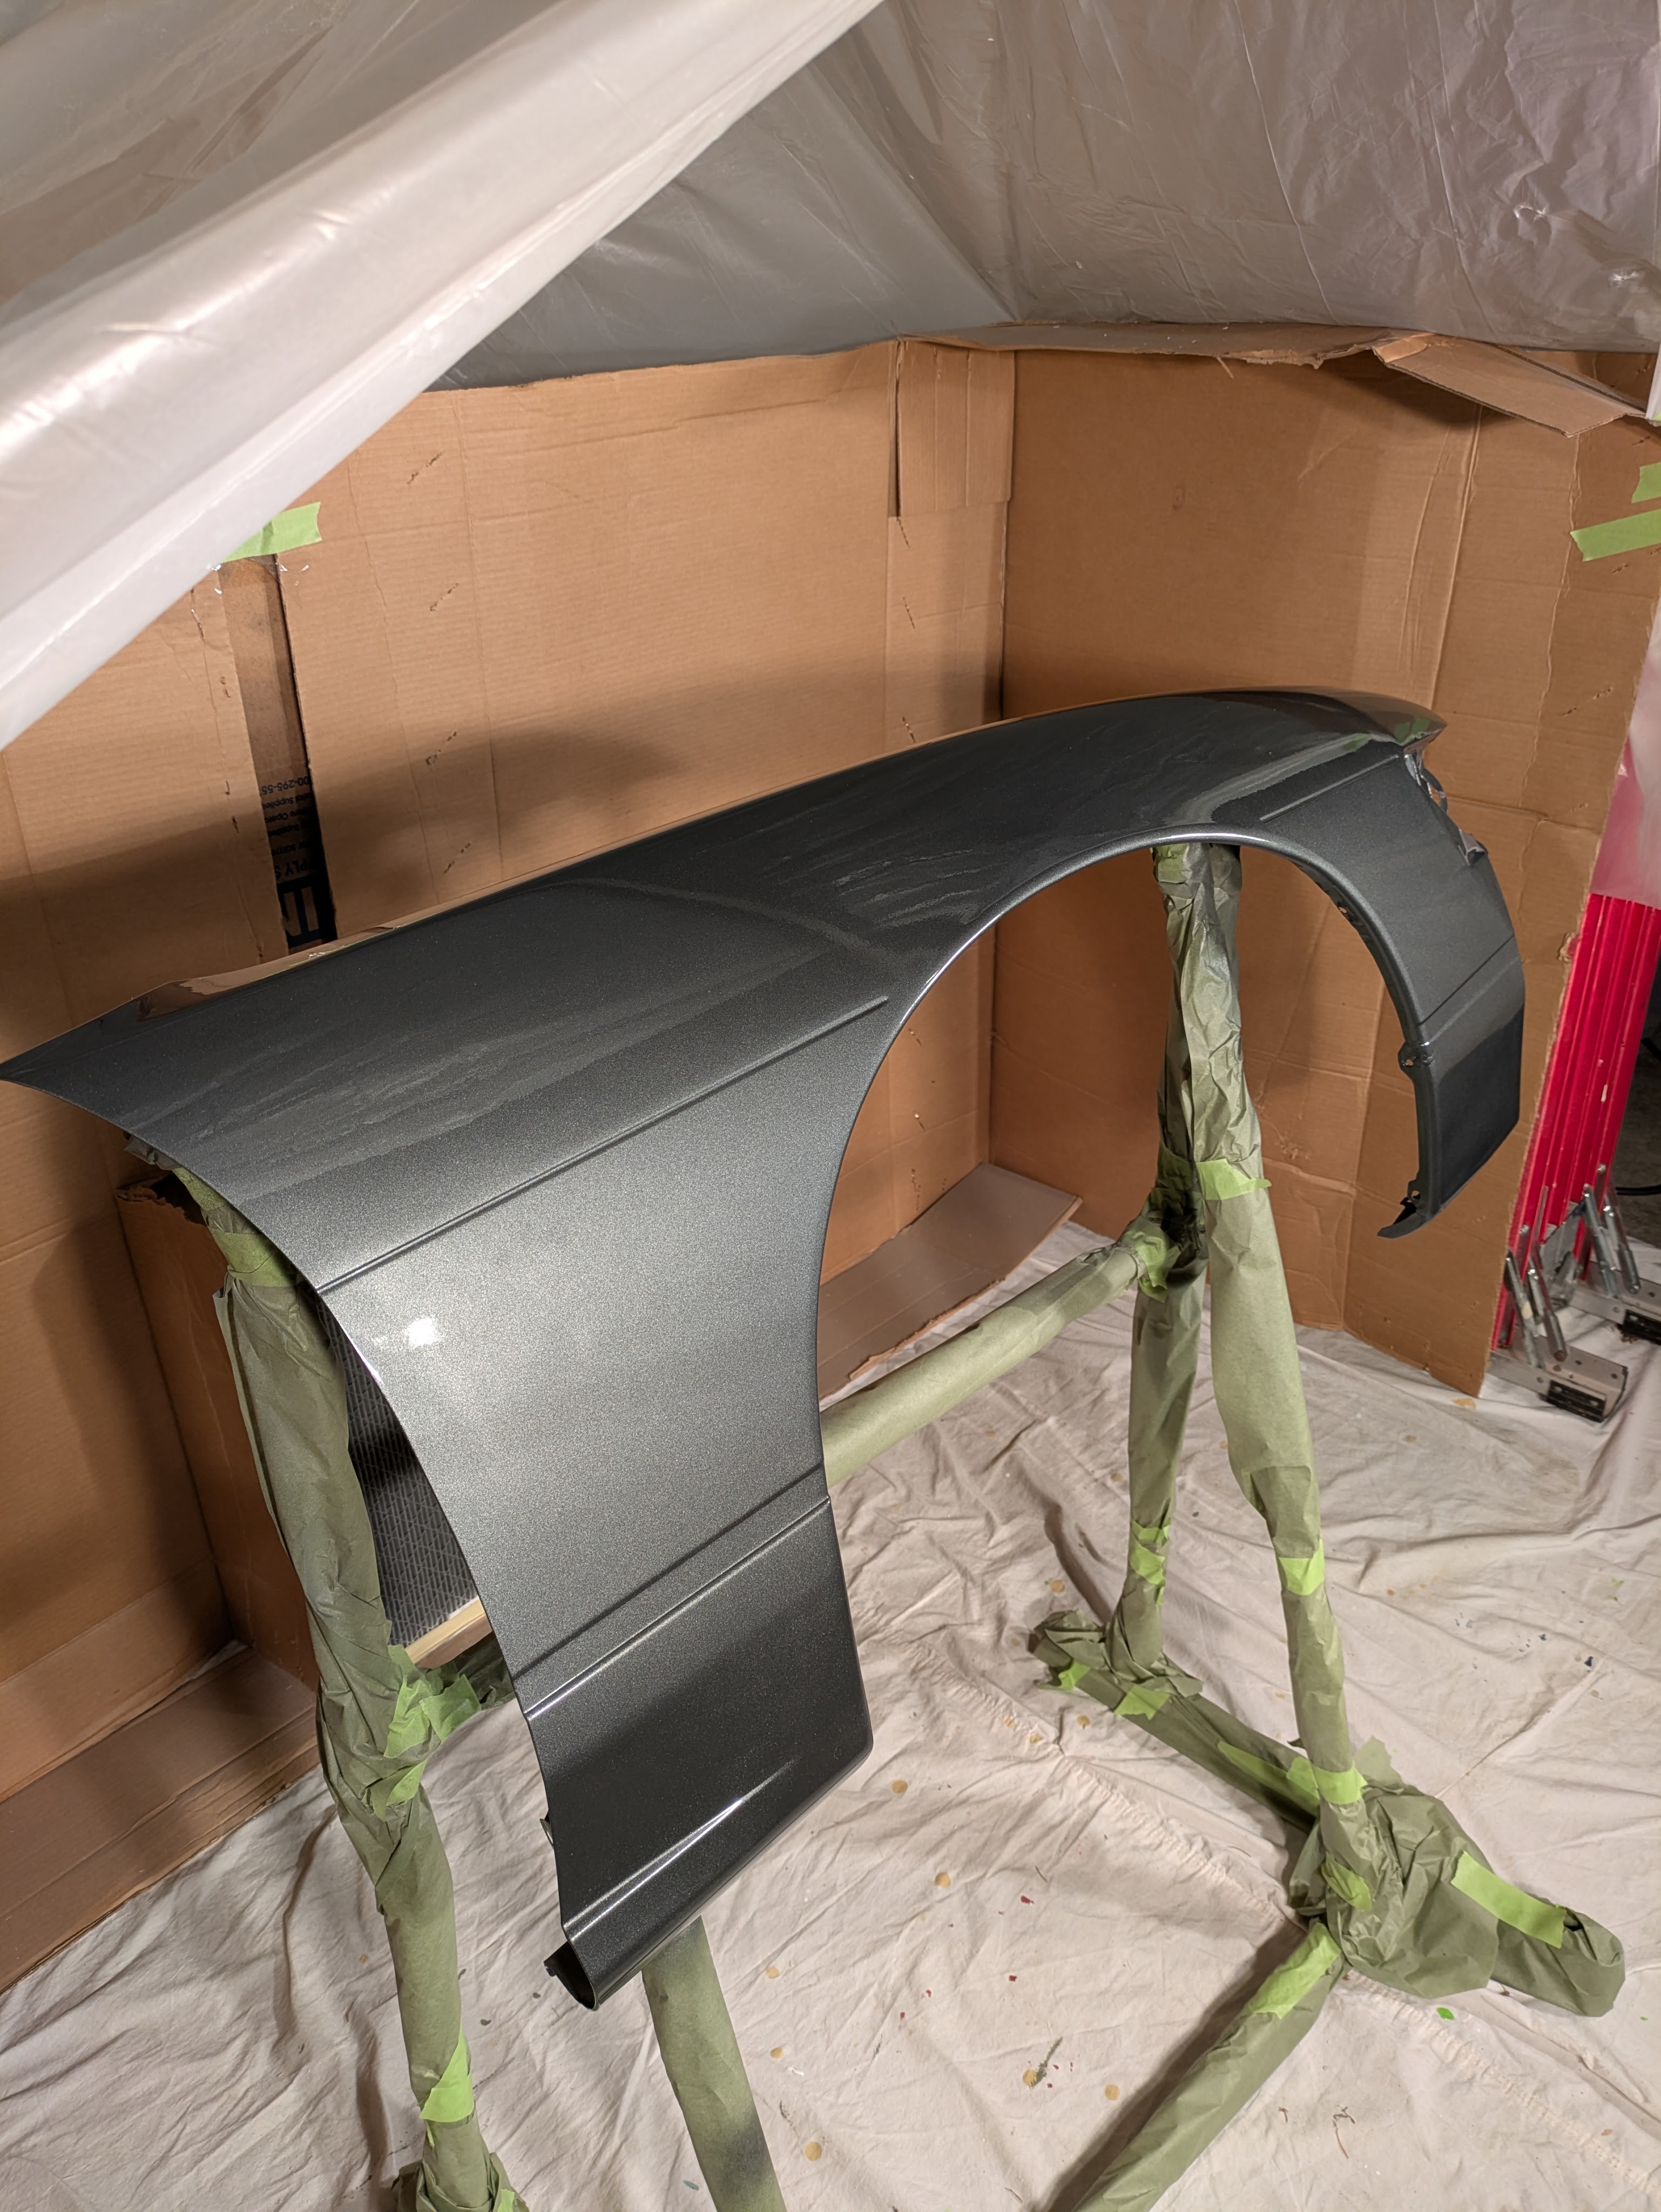
Daaaaaaaaannnnnngggggg.
No runs, minimal dirt, consistent finish with no striping. I’m a happy customer. She earned that meal for sure.

This is the next day, with the other fender for comparison. The difference in color match is there, but not extreme. I am now wondering if the color of primer was the influence in that, as a darker primer may have been able to knock back the brightness a bit, but I really can’t complain. For a whole process that was about 8 hours start to finish (helped that the fender was already bare metal), it turned out super well. Fitted on to the car, in the sunlight will be the true test, but I’m happy with it.
That was the first big day of work on the car. Still haven’t been under it, still haven’t poked at the engine at all, but I’m excited to do all of that. Looking forward to many more of these productive days, especially with my family involved.
Until next time.
